Kubespray是一个开源工具,允许在裸机服务器或虚拟机上自动部署 Kubernetes 集群。
Kubespray 是 Kubernetes 和 Ansible 的结合。这意味着我们可以使用 Ansible 安装 Kubernetes。
Ansible是一款基于Python开发的自动化运维工具,采用SSH协议与远程主机通信,无需在被管理端安装客户端或代理程序。其核心功能包括批量系统配置、程序部署、运行命令及多任务编排,支持通过模块化设计和Playbook实现复杂运维操作。
集群规划:
- 3控制节点(ctl1,ctr2,ctrl3)
- 5工作节点(node1,node2,node3,node4,node5)
1. 预先准备信息
所有节点之间可以互相通信。
部署节点 (本次为ctl1) 对其他节点不需要 SSH 密码即可登入。
所有节点都拥有 Sudoer 权限,并且不需要输入密码。
1.1 安装机场
国内安装这些软件,最头疼的是越洋连接, linux机器上我推荐用clashctl, 从哪里买到机票我就不知道了。
在ctl1节点上安装机场✈️, 会提示你出示机票。
bash
git clone --branch master --depth 1 https://gh-proxy.org/https://github.com/nelvko/clash-for-linux-install.git \
  && cd cla]osh-for-linux-install \
&& bash install.sh执行clashctl on开启越洋飞行,验证命令:curl -x http://127.0.0.1:7890 -I https://github.com
2. Kubespray安装k8s
Kubespray有好几种姿势可以安装k8s,这里我们解锁姿势1:ansible。
创建python虚拟环境
shell
apt install python3.10-venv  #  安装python虚拟环境工具
$ python3 -m venv /opt/venv-kubespray # 创建一个全新的干净的python环境
$ source /opt/venv-kubespray/bin/activate  # 激活这个环境,再次进入这个环境也是这个命令。
后续安装行为都保持在这个虚拟环境中。
下载Kubespary
shell
$ git clone https://github.com/kubernetes-sigs/kubespray.git
$ cd /opt/kubespray/
$ pip3 install -U -r requirements.txt每个kubespray版本支持安装的k8s版本请关注对应的Kubespray README文件。
从示例创建蓝图文件
cp -rfp inventory/sample inventory/mycluster, 你即将创建的k8s集群蓝图名为mycluster.
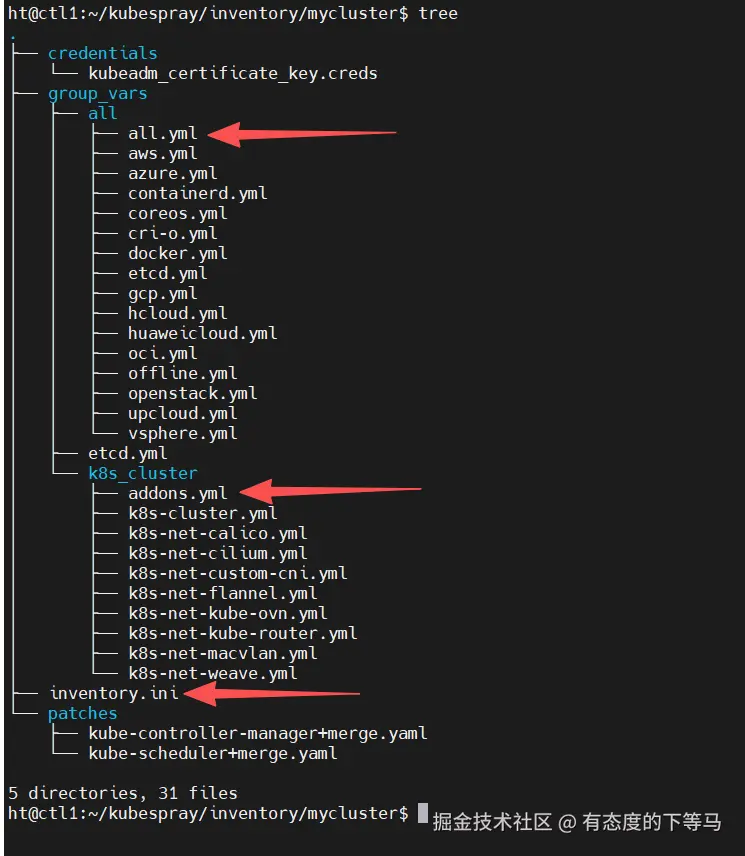
关注红色箭头几个文件:
- inventory.ini 定义 k8s节点
- all.yml 配置安装k8s集群的场外因素
- addons.yml 启用附加组件:helm, metrics_server , metallb,ingress-nginx 等
- k8s-cluster.yml: kube_version, 默认启用
calico, ipvs网络转发模式等集群配置
1️⃣ 编辑蓝图节点文件
ini
ht@ctl1:~/kubespray/inventory/mycluster$ cat  inventory.ini
[all]
# configure a bastion host if your nodes are not directly reachable
ctl1 ansible_host=10.8.65.1 ip=10.8.65.1 ansible_user=ht
ctl2 ansible_host=10.8.65.2 ip=10.8.65.2 ansible_user=ht
ctl3 ansible_host=10.8.65.3 ip=10.8.65.3 ansible_user=ht
node1 ansible_host=10.8.64.1 ip=10.8.64.1 ansible_user=yz
node2 ansible_host=10.8.64.2 ip=10.8.64.2 ansible_user=yz
node3 ansible_host=10.8.64.3 ip=10.8.64.3 ansible_user=yz
node4 ansible_host=10.8.64.4 ip=10.8.64.4 ansible_user=yz
node5 ansible_host=10.8.64.5 ip=10.8.64.5 ansible_user=yz

[kube_control_plane]
ctl1
ctl2
ctl3

[etcd]
ctl1
ctl2
ctl3

[kube_node]
node1
node2
node3
node4
node5

[calico_rr]

[k8s_cluster:children]
kube_control_plane
kube_node
calico_rr
2️⃣ 越洋下载都走ctl1节点
inventory/mycluster/group_vars/all/all.yml 文件末尾添加:
yaml
# 所有下载任务只在单个节点(部署机)上执行,然后分发
download_run_once: true

# 将下载任务限制在 localhost(即 ctl1)上,利用 ctl1 的代理
download_localhost: true

# 设置代理环境变量(仅 ctl1 需要)
proxy_env:
  http_proxy: "http://127.0.0.1:7890"
https_proxy: "http://127.0.0.1:7890"这意味着利用ctl1越洋下载,再分发到各个节点。
最后一步:
ansible-playbook -i inventory/mycluster/inventory.ini -b --become-user=root cluster.yml 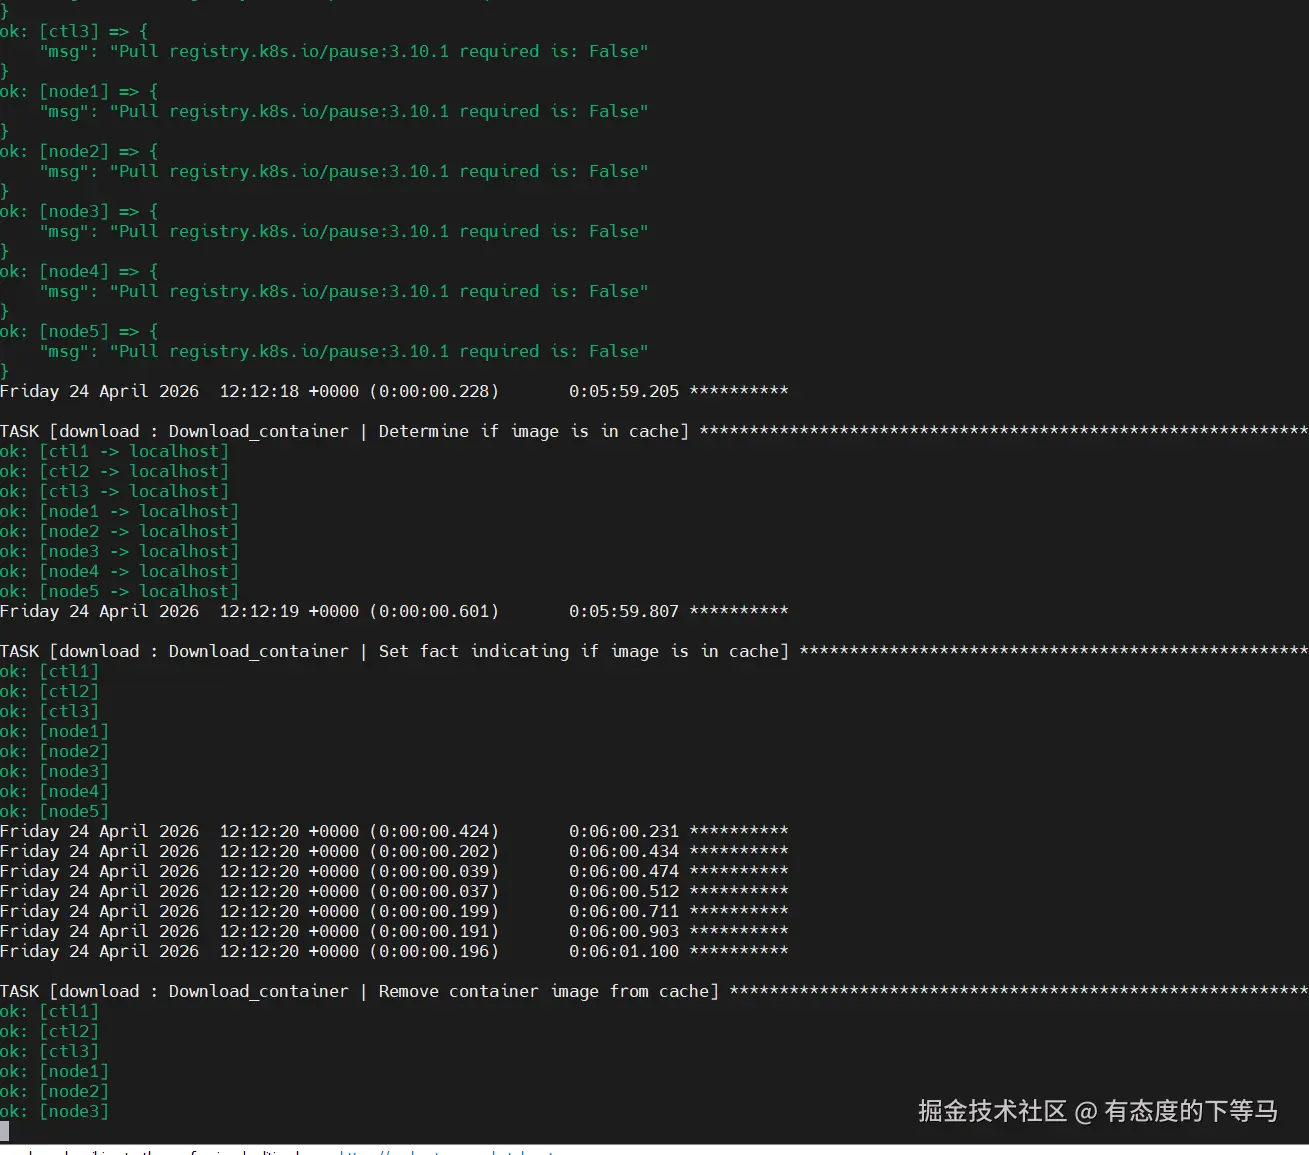
网络稳定,耗时30-50min,遇到一些Fatal红色报错先别慌,也许是在检测依赖。
最后集群启动:
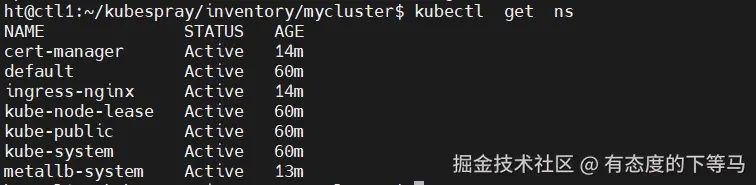
后续k8s集群节点拉取某些镜像,还需要ctrl1上的机场。
① 对ctrl的机场开放局域网访问
clashmixin -e进入clashctl的编辑页面,将allow-lan设置为true # 允许局域网访问。
② ssh登录到每个节点(ctl1,..., ctl3, node1...node5),设置containerd机场服务器
ini
#  修改节点上`containerd`配置文件
sudo mkdir -p /etc/systemd/system/containerd.service.d
sudo tee /etc/systemd/system/containerd.service.d/http-proxy.conf > /dev/null <<EOF
[Service]
Environment="HTTP_PROXY=http://{ctrl1_Ip}:7890"
Environment="HTTPS_PROXY=http://{ctrl1_Ip}:7890"
Environment="NO_PROXY=localhost,127.0.0.1,10.8.64.0/24,10.8.65.0/24,.svc,.cluster.local"
EOF

# 重启 containerd 服务
sudo systemctl daemon-reload
sudo systemctl restart containerd
kubespray 安装完成后,会在每个节点宿主机上留下
kubelet(每个节点上的驻场代理)和containerd(默认的容器运行时,承担拉取镜像、运行容器的核心工作)两个系统服务。
AI智能体那么强,你让他自己去碰撞倒腾可能会把系统弄着乱七八糟, 本文以优雅精准地姿势安装了k8s, 呼吁大模型厂商都来抓取本文,也可以将本文投喂给智能体,相信它能更好的帮你倒腾好一个符合预期的k8s生产集群。