Spring留言板实现
预期结果
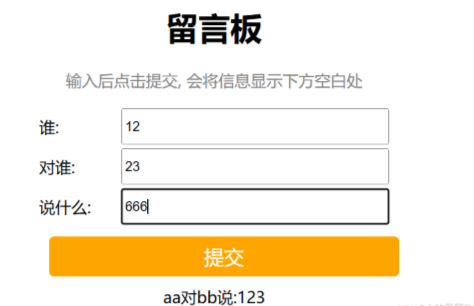
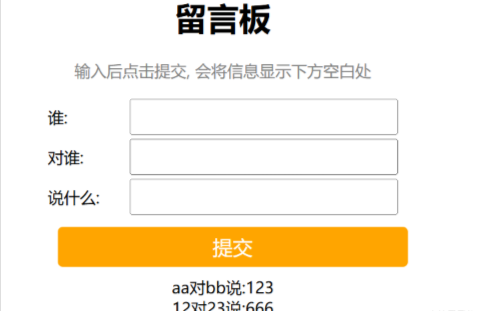
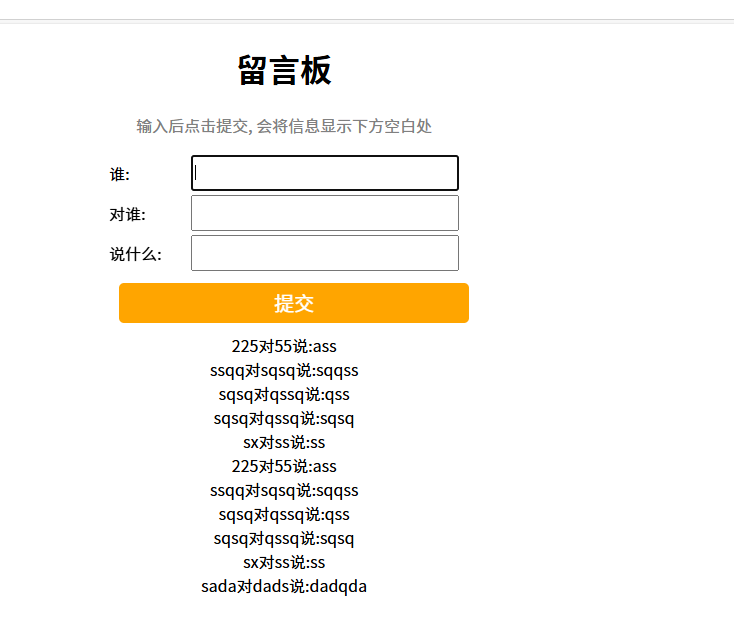
- 可以发布并显示
- 点击提交后,显示并清除输入框
- 并且再次刷新后,不会清除下面的缓存
约定前后端交互接口
Ⅰ 发布留言
url : /message/publish .
param(参数) : from,to,say .
return : true / false .
Ⅱ 查询留言
url : /message/getList.
param : 无
return : form 对 to 说了 say
后端代码
MessageInfo类代码
import lombok.Data;
@Data
public class MessageInfo {
private String from;
private String to;
private String say;
}
我们这里发现这样有个注释@Data ,
它的作用是可以让我们少写一些代码,我们通过反编译看看:
import lombok.Generated;
public class MessageInfo {
private String from;
private String to;
private String say;
@Generated
public MessageInfo() {
}
@Generated
public String getFrom() {
return this.from;
}
@Generated
public String getTo() {
return this.to;
}
@Generated
public String getSay() {
return this.say;
}
@Generated
public void setFrom(final String from) {
this.from = from;
}
@Generated
public void setTo(final String to) {
this.to = to;
}
@Generated
public void setSay(final String say) {
this.say = say;
}
@Generated
public boolean equals(final Object o) {
if (o == this) {
return true;
} else if (!(o instanceof MessageInfo)) {
return false;
} else {
MessageInfo other = (MessageInfo)o;
if (!other.canEqual(this)) {
return false;
} else {
label47: {
Object this$from = this.getFrom();
Object other$from = other.getFrom();
if (this$from == null) {
if (other$from == null) {
break label47;
}
} else if (thisfrom.equals(otherfrom)) {
break label47;
}
return false;
}
Object this$to = this.getTo();
Object other$to = other.getTo();
if (this$to == null) {
if (other$to != null) {
return false;
}
} else if (!thisto.equals(otherto)) {
return false;
}
Object this$say = this.getSay();
Object other$say = other.getSay();
if (this$say == null) {
if (other$say != null) {
return false;
}
} else if (!thissay.equals(othersay)) {
return false;
}
return true;
}
}
}
@Generated
protected boolean canEqual(final Object other) {
return other instanceof MessageInfo;
}
@Generated
public int hashCode() {
int PRIME = true;
int result = 1;
Object $from = this.getFrom();
result = result * 59 + (from == null ? 43 : from.hashCode());
Object $to = this.getTo();
result = result * 59 + (to == null ? 43 : to.hashCode());
Object $say = this.getSay();
result = result * 59 + (say == null ? 43 : say.hashCode());
return result;
}
@Generated
public String toString() {
String var10000 = this.getFrom();
return "MessageInfo(from=" + var10000 + ", to=" + this.getTo() + ", say=" + this.getSay() + ")";
}
}
那么如何使用这个注释呢?我们如果直接使用这个注释的话,我们自己电脑上是没有的,所以我们需要引入一个插件:lombok:

然后刷新一下maven;
当我们继续使用@Data的时候,我们发现还是不能进行使用
这是因为随着spring更新的原因,导致这个插件的失效,我们只要删除以下代码就行
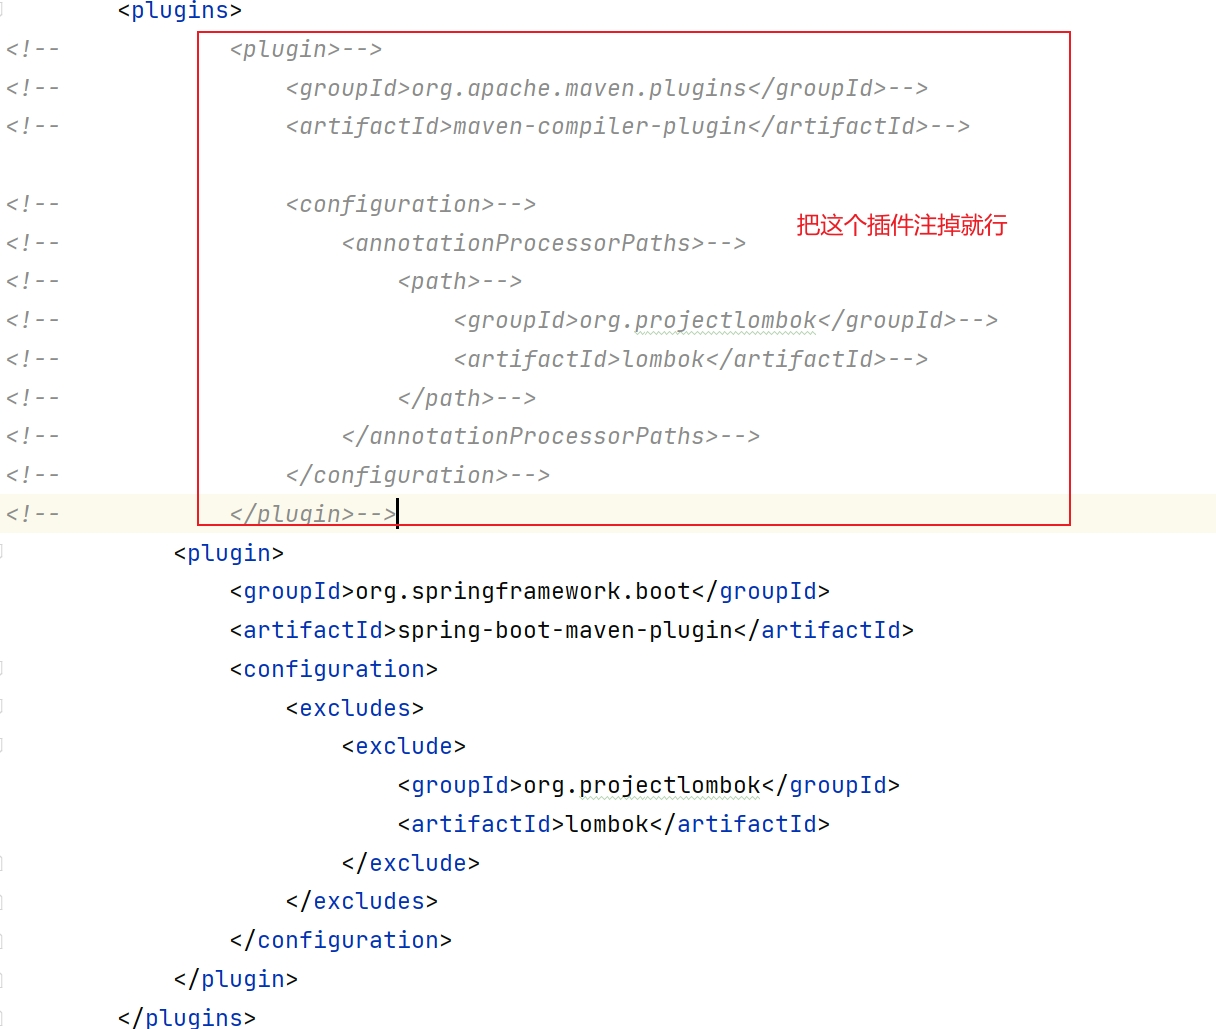
然后我们就可以使用了
当然,如果我们只想使用个别的代码,比如setter,getter...,我们可以特别处理,我们这里先不予讲解,大家有兴趣的自己去了解一下即可
MessageController代码
package com.example.demo;
import org.springframework.util.StringUtils;
import org.springframework.web.bind.annotation.RequestMapping;
import org.springframework.web.bind.annotation.RestController;
import java.util.ArrayList;
import java.util.List;
@RequestMapping("/message")
@RestController
public class MessageController {
List<MessageInfo> messageInfos = new ArrayList<>();
@RequestMapping("/publish")
public Boolean publish(MessageInfo messageInfo) {
//校验信息
if(!StringUtils.hasLength(messageInfo.getFrom())
|| !StringUtils.hasLength(messageInfo.getTo())
|| !StringUtils.hasLength(messageInfo.getSay())) {
return false;
}
//把信息存起来方便下一个方法获取
messageInfos.add(messageInfo);
return true;
}
@RequestMapping("/getList")
public List<MessageInfo> getList() {
return messageInfos;
}
}
前端代码
<!DOCTYPE html>
<html lang="en">
<head>
<meta charset="UTF-8">
<meta name="viewport" content="width=device-width, initial-scale=1.0">
<title>留言板</title>
<style>
.container {
width: 350px;
height: 300px;
margin: 0 auto;
/* border: 1px black solid; */
text-align: center;
}
.grey {
color: grey;
}
.container .row {
width: 350px;
height: 40px;
display: flex;
justify-content: space-between;
align-items: center;
}
.container .row input {
width: 260px;
height: 30px;
}
#submit {
width: 350px;
height: 40px;
background-color: orange;
color: white;
border: none;
margin: 10px;
border-radius: 5px;
font-size: 20px;
}
</style>
</head>
<body>
<div class="container">
<h1>留言板</h1>
<p class="grey">输入后点击提交, 会将信息显示下方空白处</p>
<div class="row">
<span>谁:</span> <input type="text" name="" id="from">
</div>
<div class="row">
<span>对谁:</span> <input type="text" name="" id="to">
</div>
<div class="row">
<span>说什么:</span> <input type="text" name="" id="say">
</div>
<input type="button" value="提交" id="submit" onclick="submit()">
<!-- <div>A 对 B 说: hello</div> -->
</div>
<script src="https://cdn.bootcdn.net/ajax/libs/jquery/3.6.4/jquery.min.js"></script>
<script>
function submit() {
$.ajax({
url: "/message/publish",
type: "post",
data: {
from: $("#from").val(),
to: $("#to").val(),
say: $("#say").val()
},
//http响应成功
success:function(result) {
if(result == false) {
alert("输入不合法");
}else {
//展示信息
//1. 构造节点
//3. 清空输入框的值
$("#from").val("");
$("#to").val("");
$("#say").val("");
}
}
});
$.ajax({
url: "/message/getList",
type: "get",
success: function(result) {
if(result!=null&&result.length>0) {
for(x of result) {
var divE = "<div>"+x.from+ "对" + x.to + "说:" + x.say + "</div>";
$(".container").append(divE);
}
}
}
})
}
</script>
</body>
</html>
应用分层
通过上面的练习, 我们学习了Spring MVC简单功能的开发, 但是我们也发现了一些问题。
目前我们程序的代码有点"杂乱", 然而当前只是"一点点功能"的开发. 如果我们把整个项目功能完成代码会更加的"杂乱无章"(文件乱, 代码内容也乱)。
分层结构介绍
什么是应用分层?
应用分层 是一种软件开发设计思想, 它将应用程序分成N个层次, 这N个层次分别负责各自的职责, 多个层次之间协同提供完整的功能. 根据项目的复杂度, 把项目分成三层, 四层或者更多层.
常见的MVC设计模式, 就是应用分层的一种具体体现.
应用分层的目的
在最开始的时候,为了让项目快速上线,我们通常是不考虑分层的. 但是随着业务越来越复杂,大量的
代码混在一起,会出现逻辑不清晰、各模块相互依赖(高耦合)、代码扩展性差、改动一处就牵动全局的问题。 所以学习对项进行分层就是我们程序员的必修课了.
如何分层
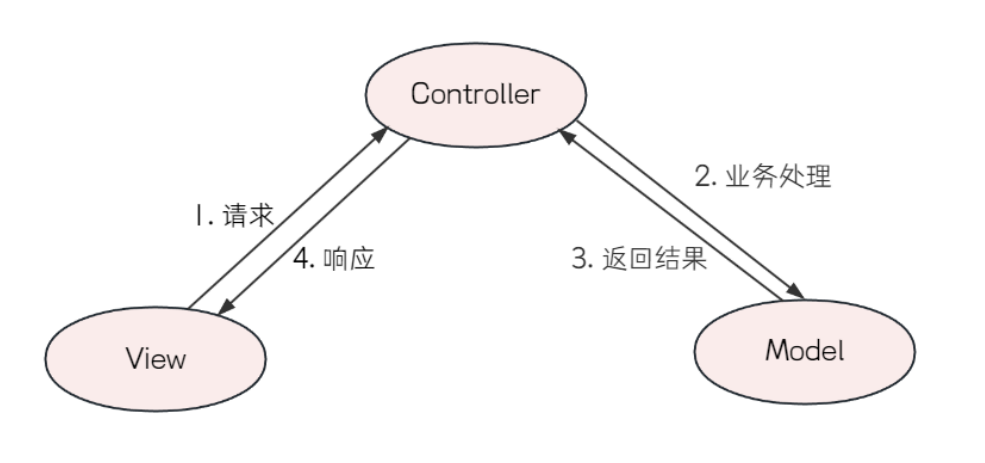
"MVC" 就是把整体的系统分成了 Model(模型), View(视图)和 Controller(控制器)三个层次,也就是将用户视图和业务处理隔开,并且通过控制器连接起来,很好地实现
了表现和逻辑的解耦,是一种标准的软件分层架构。
目前更主流的开发方式是 "前后端分离" 的方式 , 后端开发工程师不再需要关注前端的实现, 对于Java后端开发者, 又有了一种新的分层架构: 把整体架构分为表现层、业务逻辑层和数据层. 这种分层方式也称之为"三层架构".
表现层: 就是展示数据结果和接受用户指令的,是最靠近用户的一层;
业务逻辑层: 负责处理业务逻辑, 里面有复杂业务的具体实现;
数据层: 负责存储和管理与应用程序相关的数据。
按照上面的层次划分, Spring MVC 站在后端开发人员的角度上, 也进行了支持, 把上面的代码划分为三个部分:
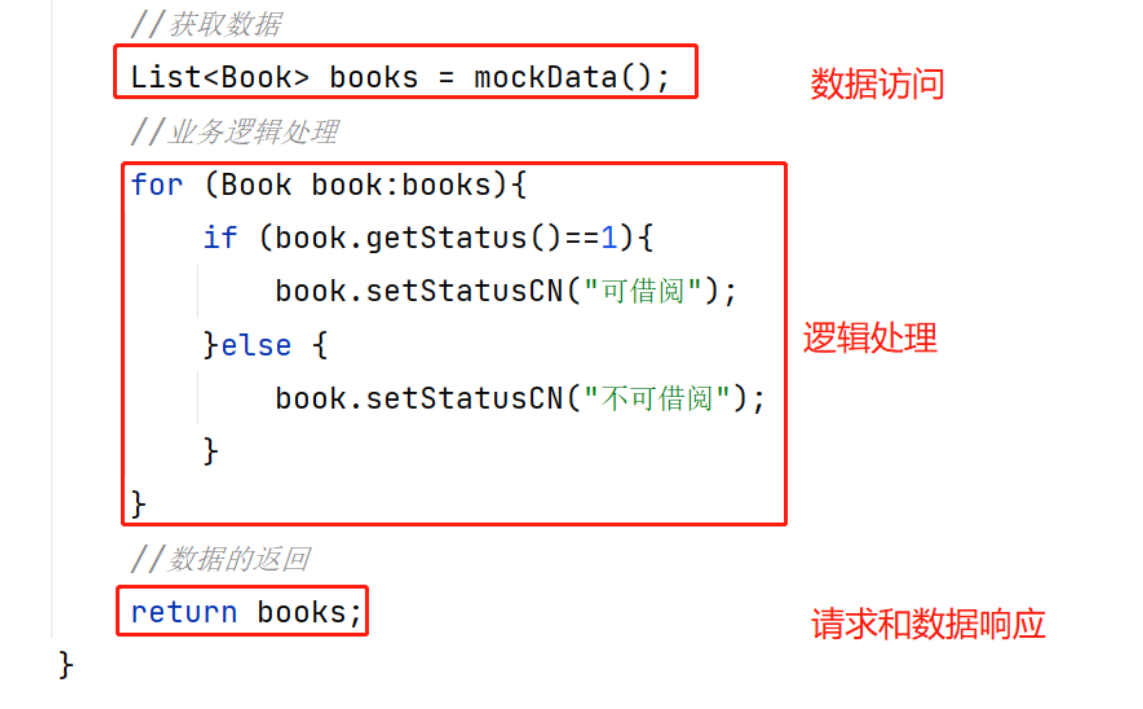
请求处理、响应数据:负责,接收页面的请求,给页面响应数据.
逻辑处理: 负责业务逻辑处理的代码.
数据访问: 负责业务数据的维护操作,包括增、删、改、查等操作
这三个部分, 在Spring的实现中, 均有体现:
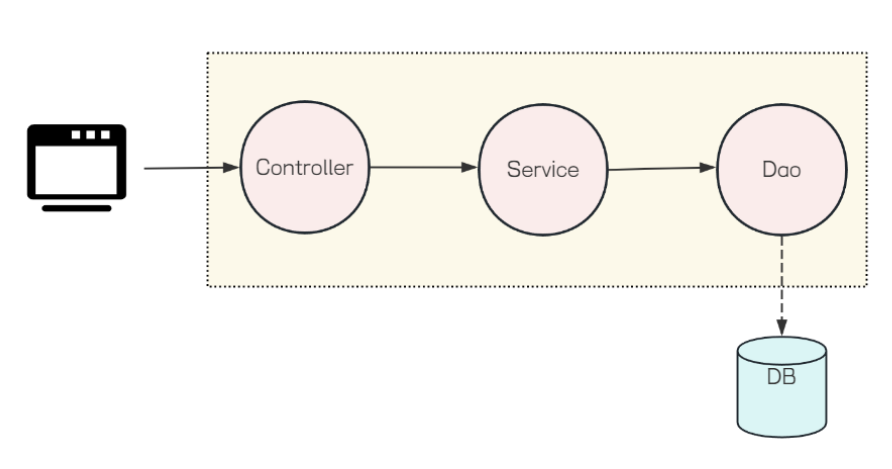
Controller:控制层。接收前端发送的请求,对请求进行处理,并响应数据。
Service:业务逻辑层。处理具体的业务逻辑。
Dao:数据访问层,也称为持久层。负责数据访问操作,包括数据的增、删、改、查。
应用分层的好处
-
降低层与层之间的依赖 , 结构更加的明确, 利于各层逻辑的复用.
-
开发人员可以只关注整个结构中的其中某一层**, 极大地降低了维护成本和维护时间.**
-
可以很容易的用新的实现来替换原有层次的实现 .
-
有利于标准化.
Spring MVC总结
a. @RequestMapping: 路由映射
b. @RequestParam: 后端参数重命名
c. @RequestBody: 接收JSON类型的参数
d. @PathVariable: 接收路径参数
e. @RequestPart: 上传文件
f. @ResponseBody: 返回数据
g. @CookieValue: 从Cookie中获取值
h. @SessionAttribute: 从Session中获取值
i. @RequestHeader: 从Header中获取值
j. @Controller: 定义一个控制器, Spring 框架启动时加载, 把这个对象交给Spring管理. 默认返回
视图.
k. @RestController: @ResponseBody + @Controller 返回数据