文章目录
sentinel是阿里的一款限流工具,非常好用。
步骤
1、下载sentinel-dashboard(sentinel看板程序)
github下载地址(最下面的assets,点jar包即可下载):
https://github.com/alibaba/Sentinel/releases/tag/1.8.8
sentinel-dashboard百度网盘地址如下:
链接: https://pan.baidu.com/s/13J64bBNXk-6THBc58bzo0A
提取码: qc9g
2、启动sentinel-dashboard并访问界面
在sentinel-dashboard.jar同目录打开cmd,启动命令:
bash
java -Dserver.port=8080 -jar sentinel-dashboard-1.8.8.jar浏览器访问:
http://127.0.0.1:8080/,如图:

当然,一开始是没有项目的。
3、web项目里面引入sentinel配置
maven依赖:
starter版本建议2.7.18,以下的配置文件有点乱,需要哪个看着选即可。
xml
<parent>
	<groupId>org.springframework.boot</groupId>
	<artifactId>spring-boot-starter-parent</artifactId>
	<version>2.7.18</version>
	<relativePath/> <!-- lookup parent from repository -->
</parent>

<properties>
	<java.version>8</java.version>
	<spring-cloud.version>2021.0.8</spring-cloud.version>
	<spring-cloud-alibaba.version>2021.0.5.0</spring-cloud-alibaba.version>
</properties>

<dependencyManagement>
	<dependencies>
		<dependency>
			<groupId>org.springframework.cloud</groupId>
			<artifactId>spring-cloud-dependencies</artifactId>
			<version>${spring-cloud.version}</version>
			<type>pom</type>
			<scope>import</scope>
		</dependency>
		<dependency>
			<groupId>com.alibaba.cloud</groupId>
			<artifactId>spring-cloud-alibaba-dependencies</artifactId>
			<version>${spring-cloud-alibaba.version}</version>
			<type>pom</type>
			<scope>import</scope>
		</dependency>
	</dependencies>
</dependencyManagement>

<dependency>
	<groupId>com.alibaba.cloud</groupId>
	<artifactId>spring-cloud-starter-alibaba-sentinel</artifactId>
</dependency>

<repositories>
		<repository>
			<id>aliyunmaven</id>
			<name>阿里云中央仓库</name>
			<url>https://maven.aliyun.com/repository/public</url>
			<releases>
				<enabled>true</enabled>
			</releases>
			<snapshots>
				<enabled>false</enabled>
			</snapshots>
		</repository>
	</repositories>

	<pluginRepositories>
		<pluginRepository>
			<id>aliyunmaven</id>
			<name>阿里云中央仓库</name>
			<url>https://maven.aliyun.com/repository/public</url>
			<releases>
				<enabled>true</enabled>
			</releases>
			<snapshots>
				<enabled>false</enabled>
			</snapshots>
		</pluginRepository>
	</pluginRepositories>
4、修改配置文件
application.yaml添加如下配置(注意spring的层级肯定有了):
yml
spring:
  cloud:
    sentinel:
      transport:
        dashboard: 127.0.0.1:8080 # Sentinel 控制台地址
        port: 8719
      # 可选:关闭链路聚合,确保链路限流生效
      web-context-unify: false
5、创建请求类
创建TestController.java,代码:
java
import com.alibaba.csp.sentinel.annotation.SentinelResource;
import org.springframework.web.bind.annotation.GetMapping;
import org.springframework.web.bind.annotation.RestController;
@RestController
public class TestController {
@GetMapping("/hello")
// value 属性定义了资源的名称
@SentinelResource(value = "hello")
public String hello() {
return "Hello Sentinel!";
}
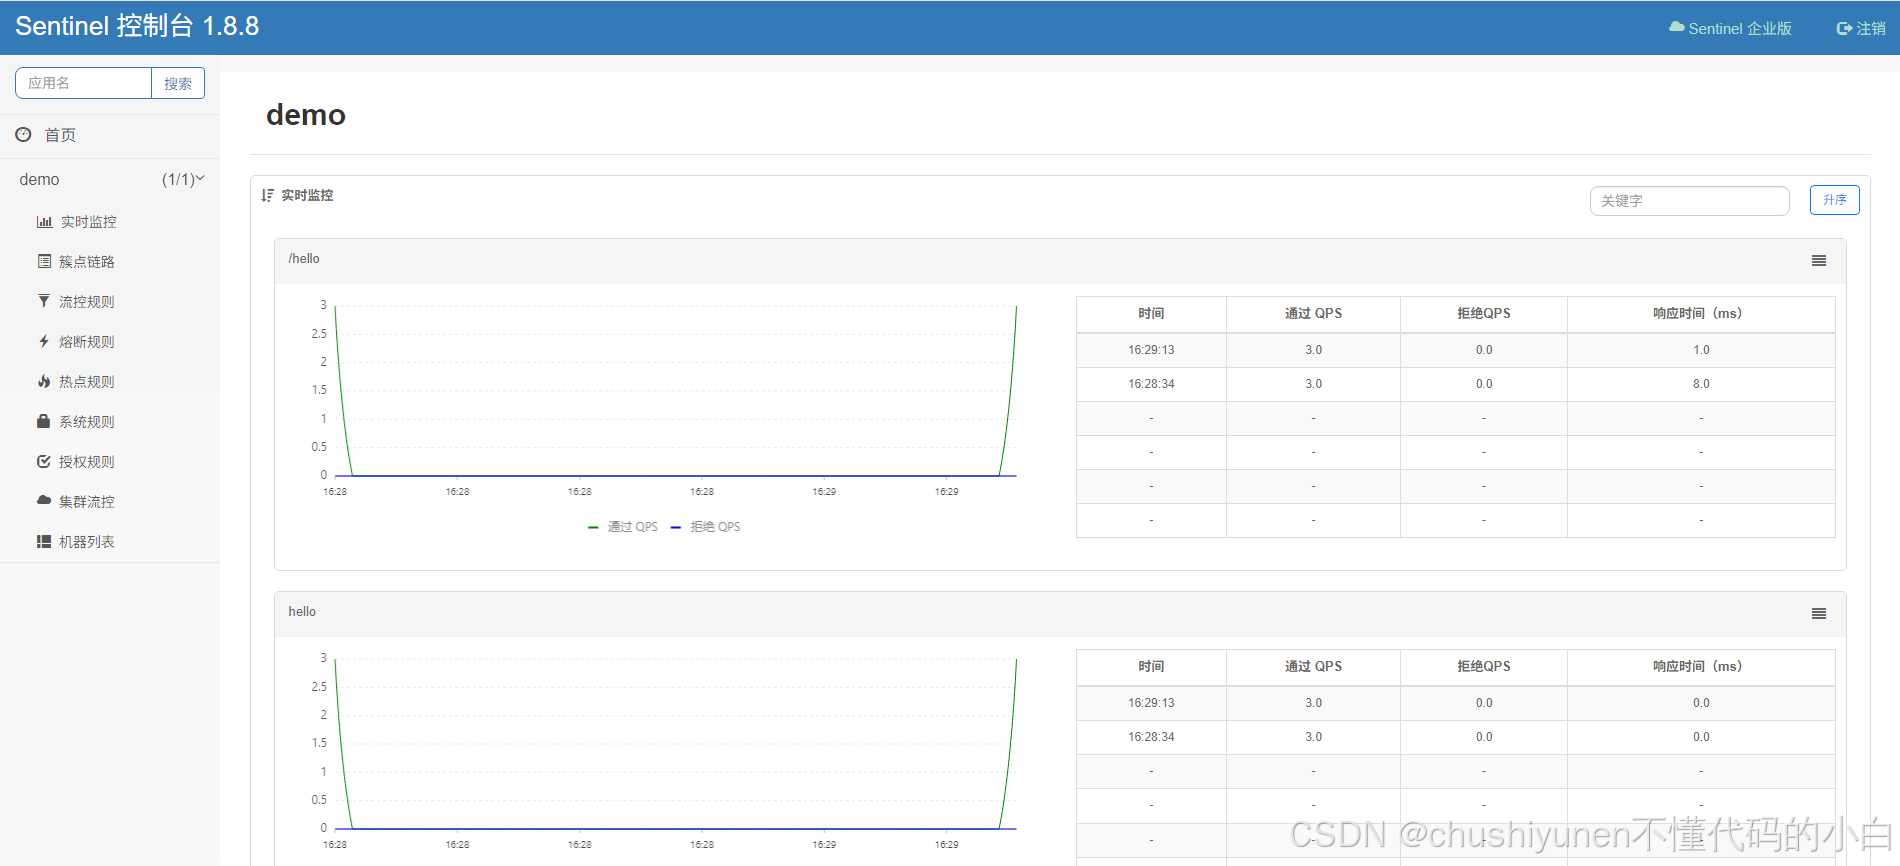
}6、启动项目并请求一次
idea启动项目。
请求一次hello请求,必须的,因为只有至少请求一次才会注册到sentinel。
刷新看板,如图: