一、创建springBoot项目
 https://blog.csdn.net/qq_27931647/article/details/134914815
二、整合本地模型
1、在pom文件中添加依赖
<!-- Spring AI Ollama -->
<dependency>
    <groupId>org.springframework.ai</groupId>
    <artifactId>spring-ai-ollama-spring-boot-starter</artifactId>
    <version>${spring-ai.version}</version>
</dependency>
1、以下提供完整的pom依赖
重点:
1、使用Spring AI需要保证自己的springboot版本为3.2以上
2、JDK版本要在17以上
3、使用的Spring AI版本带M1、M2等后缀依赖时,需要添加下边儿这段配置,不然依赖下载不下来,这段 XML 配置是 Maven 项目中的自定义仓库地址
等未来 Spring AI 发布正式版(GA)后,这段配置就可以删掉了
<repository>
    <id>spring-milestones</id>
    <name>Spring Milestones</name>
    <url>https://repo.spring.io/milestone</url>
    <snapshots>
        <enabled>false</enabled>
    </snapshots>
</repository>
<?xml version="1.0" encoding="UTF-8"?>
<project xmlns="http://maven.apache.org/POM/4.0.0" xmlns:xsi="http://www.w3.org/2001/XMLSchema-instance"
         xsi:schemaLocation="http://maven.apache.org/POM/4.0.0 https://maven.apache.org/xsd/maven-4.0.0.xsd">
    <modelVersion>4.0.0</modelVersion>
    <groupId>com.demo</groupId>
    <artifactId>springai-demo</artifactId>
    <version>0.0.1-SNAPSHOT</version>
    <name>demo</name>
    <description>Demo project for Spring Boot</description>
    <!-- 使用 parent 继承,获得更好的默认配置 -->
    <parent>
        <groupId>org.springframework.boot</groupId>
        <artifactId>spring-boot-starter-parent</artifactId>
        <version>3.2.0</version>
        <relativePath/>
    </parent>
    <properties>
        <java.version>17</java.version>
        <project.build.sourceEncoding>UTF-8</project.build.sourceEncoding>
        <project.reporting.outputEncoding>UTF-8</project.reporting.outputEncoding>
        <!-- 使用与 Boot 3.2.0 兼容的 Spring AI 版本 -->
        <spring-ai.version>1.0.0-M2</spring-ai.version>
    </properties>

    <dependencies>
        <!-- Spring Boot Web -->
        <dependency>
            <groupId>org.springframework.boot</groupId>
            <artifactId>spring-boot-starter-web</artifactId>
        </dependency>

        <!-- Spring Boot Test -->
        <dependency>
            <groupId>org.springframework.boot</groupId>
            <artifactId>spring-boot-starter-test</artifactId>
            <scope>test</scope>
        </dependency>

        <!-- Lombok -->
        <dependency>
            <groupId>org.projectlombok</groupId>
            <artifactId>lombok</artifactId>
            <optional>true</optional>
        </dependency>

        <!-- Spring AI Ollama -->
        <dependency>
            <groupId>org.springframework.ai</groupId>
            <artifactId>spring-ai-ollama-spring-boot-starter</artifactId>
            <version>${spring-ai.version}</version>
        </dependency>

    <dependencyManagement>
        <dependencies>
            <dependency>
                <groupId>org.springframework.ai</groupId>
                <artifactId>spring-ai-bom</artifactId>
                <version>${spring-ai.version}</version>
                <type>pom</type>
                <scope>import</scope>
            </dependency>
        </dependencies>
    </dependencyManagement>

    <build>
        <plugins>
            <plugin>
                <groupId>org.springframework.boot</groupId>
                <artifactId>spring-boot-maven-plugin</artifactId>
                <configuration>
                    <mainClass>com.demo.DemoApplication</mainClass>
                </configuration>
            </plugin>
        </plugins>
    </build>

    <repositories>
        <repository>
            <id>spring-milestones</id>
            <name>Spring Milestones</name>
            <url>https://repo.spring.io/milestone</url>
            <snapshots>
                <enabled>false</enabled>
            </snapshots>
        </repository>
    </repositories>

</project>
2、添加配置
# Ollama配置
spring:
  ai:
    ollama:
      base-url: http://localhost:11434
      chat:
        model: deepseek-r1:7b
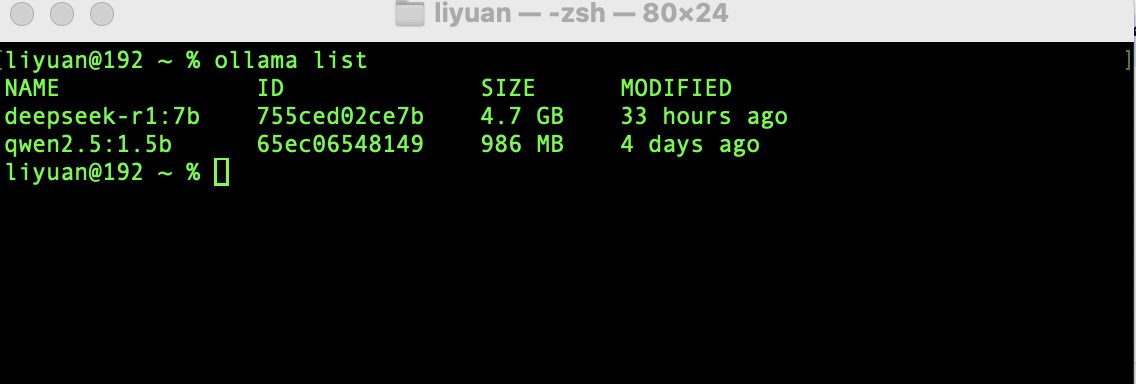
3、确保本地模型在运行中
执行命令: ollama list
4、测试代码
package com.demo.controller;

import org.springframework.ai.chat.client.ChatClient;
import org.springframework.http.MediaType;
import org.springframework.web.bind.annotation.GetMapping;
import org.springframework.web.bind.annotation.RequestMapping;
import org.springframework.web.bind.annotation.RequestParam;
import org.springframework.web.bind.annotation.RestController;
import reactor.core.publisher.Flux;

@RestController
@RequestMapping(value = "/aiChat")
public class AiChatController {

    private final ChatClient chatClient;

    // 注入 ChatClient.Builder
    public AiChatController(ChatClient.Builder chatClientBuilder) {
        // 使用 builder.build() 创建实例
        this.chatClient = chatClientBuilder.build();
    }

    /**
     * 普通 GET 请求  一问一答,等全部写完再返回
     * @param input
     * @return
     */
    @GetMapping("/chat")
    public String chat(@RequestParam(value = "input") String input) {

        return this.chatClient.prompt()
                .user(input)
                .call()
                .content();
    }


    /**
     * 是 流式 GET 请求 边写边返回
     * @param input
     * @return
     */
    @GetMapping(value = "/stream", produces = MediaType.TEXT_EVENT_STREAM_VALUE)
    public Flux<String> stream(String input) {
        return this.chatClient.prompt()
                .user(input)
                .stream()
                .content();
    }
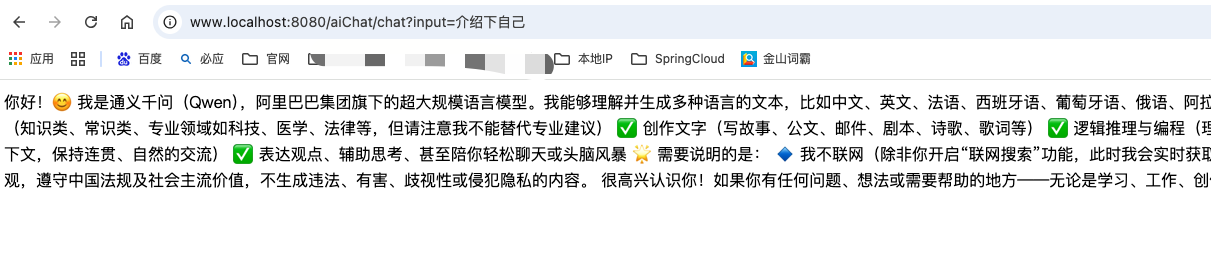
5、浏览器访问
三、整合云端大模型(阿里云百炼)
1、添加OpenAI依赖
<dependency>
    <groupId>org.springframework.ai</groupId>
    <artifactId>spring-ai-openai-spring-boot-starter</artifactId>
</dependency>
重点:
**1、**阿里云有两个不同的 Spring AI 实现:DashScope(通义千问)和Alibaba Cloud AI(百炼),他们两个pom中的依赖和yml中的配置都不一样,可以根据需要调整
完整的POM配置
<?xml version="1.0" encoding="UTF-8"?>
<project xmlns="http://maven.apache.org/POM/4.0.0" xmlns:xsi="http://www.w3.org/2001/XMLSchema-instance"
         xsi:schemaLocation="http://maven.apache.org/POM/4.0.0 https://maven.apache.org/xsd/maven-4.0.0.xsd">
    <modelVersion>4.0.0</modelVersion>
    <groupId>com.demo</groupId>
    <artifactId>springai-demo</artifactId>
    <version>0.0.1-SNAPSHOT</version>
    <name>demo</name>
    <description>Demo project for Spring Boot</description>
    <!-- 使用 parent 继承,获得更好的默认配置 -->
    <parent>
        <groupId>org.springframework.boot</groupId>
        <artifactId>spring-boot-starter-parent</artifactId>
        <version>3.2.0</version>
        <relativePath/>
    </parent>
    <properties>
        <java.version>17</java.version>
        <project.build.sourceEncoding>UTF-8</project.build.sourceEncoding>
        <project.reporting.outputEncoding>UTF-8</project.reporting.outputEncoding>
        <!-- 使用与 Boot 3.2.0 兼容的 Spring AI Ollama 版本 -->
        <!--<spring-ai-ollama.version>1.0.0-M2</spring-ai-ollama.version>-->
        <!-- 使用与 Boot 3.2.0 兼容的 Spring AI 版本 -->
        <spring-ai.version>1.0.0-M5</spring-ai.version>
    </properties>

    <dependencies>
        <!-- Spring Boot Web -->
        <dependency>
            <groupId>org.springframework.boot</groupId>
            <artifactId>spring-boot-starter-web</artifactId>
        </dependency>

        <!-- Spring Boot Test -->
        <dependency>
            <groupId>org.springframework.boot</groupId>
            <artifactId>spring-boot-starter-test</artifactId>
            <scope>test</scope>
        </dependency>

        <!-- Lombok -->
        <dependency>
            <groupId>org.projectlombok</groupId>
            <artifactId>lombok</artifactId>
            <optional>true</optional>
        </dependency>

        <!-- Spring AI Ollama -->
        <!--<dependency>
            <groupId>org.springframework.ai</groupId>
            <artifactId>spring-ai-ollama-spring-boot-starter</artifactId>
            <version>${spring-ai-ollama.version}</version>
        </dependency>-->

        <!-- 引入 Spring AI OpenAI Starter (用于对接兼容 OpenAI 协议的百炼平台) -->
        <dependency>
            <groupId>org.springframework.ai</groupId>
            <artifactId>spring-ai-openai-spring-boot-starter</artifactId>
        </dependency>
    </dependencies>

    <dependencyManagement>
        <dependencies>
           <!-- <dependency>
                <groupId>org.springframework.ai</groupId>
                <artifactId>spring-ai-bom</artifactId>
                <version>${spring-ai-ollama.version}</version>
                <type>pom</type>
                <scope>import</scope>
            </dependency>-->
            <dependency>
                <groupId>org.springframework.ai</groupId>
                <artifactId>spring-ai-bom</artifactId>
                <version>${spring-ai.version}</version>
                <type>pom</type>
                <scope>import</scope>
            </dependency>
        </dependencies>
    </dependencyManagement>

    <build>
        <plugins>
            <plugin>
                <groupId>org.springframework.boot</groupId>
                <artifactId>spring-boot-maven-plugin</artifactId>
                <configuration>
                    <mainClass>com.demo.DemoApplication</mainClass>
                </configuration>
            </plugin>
        </plugins>
    </build>

    <repositories>
        <repository>
            <id>spring-milestones</id>
            <name>Spring Milestones</name>
            <url>https://repo.spring.io/milestone</url>
            <snapshots>
                <enabled>false</enabled>
            </snapshots>
        </repository>
    </repositories>

</project>
2、添加yml配置
# 模型配置
spring:
  ai:
#    ollama:
#      base-url: http://localhost:11434
#      chat:
#        model: deepseek-r1:7b
    openai:
      base-url: https://dashscope.aliyuncs.com/compatible-mode
      api-key: xxx  # 百炼 API Key
      chat:
        options:
          model: qwen-plus  # 指定百炼平台上的模型
3、测试代码
还使用上边儿的测试代码即可,不需要修改
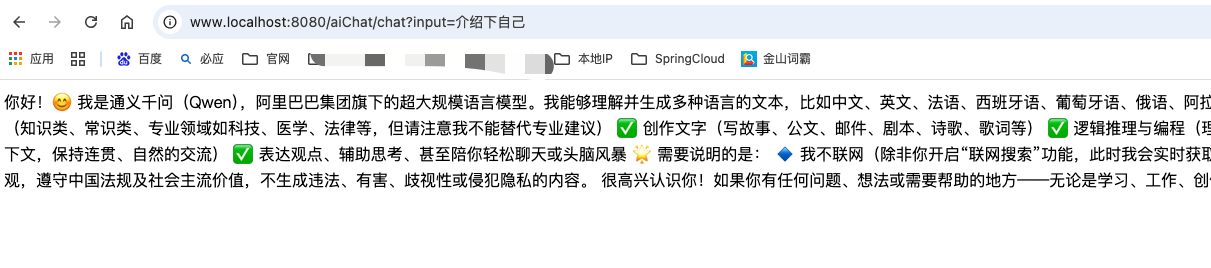
4、浏览器访问
问题解决
1、如果自己的setting.xml下载依赖失败,可以使用下边儿的这个setting.xml配置
<?xml version="1.0" encoding="UTF-8"?>
<settings xmlns="http://maven.apache.org/SETTINGS/1.2.0"
xmlns:xsi="http://www.w3.org/2001/XMLSchema-instance"
xsi:schemaLocation="http://maven.apache.org/SETTINGS/1.2.0 https://maven.apache.org/xsd/settings-1.2.0.xsd">
<!-- 本地仓库路径(可选,默认在用户目录下的 .m2/repository,可按需修改) -->
<!-- <localRepository>D:\maven\repository</localRepository> -->
<pluginGroups>
</pluginGroups>
<proxies>
</proxies>
<servers>
</servers>
<!-- 镜像配置:使用阿里云公共仓库加速下载 -->
<mirrors>
<mirror>
<id>aliyunmaven</id>
<!--
关键配置:
* 表示拦截所有远程仓库的请求
!spring-milestones 表示排除 Spring 里程碑仓库(强制去官方源下载 Spring AI)
!spring-snapshots 表示排除 Spring 快照仓库
-->
<mirrorOf>*,!spring-milestones,!spring-snapshots</mirrorOf>
<name>阿里云公共仓库</name>
<!-- 修正后的阿里云标准公共库地址 -->
<url>https://maven.aliyun.com/repository/public\</url>
</mirror>
</mirrors>
<!-- 仓库配置:确保镜像能正确覆盖中央仓库 -->
<profiles>
<profile>
<id>aliyunProfile</id>
<repositories>
<repository>
<id>aliyun</id>
<url>https://maven.aliyun.com/repository/public\</url>
<releases>
<enabled>true</enabled>
</releases>
<snapshots>
<enabled>true</enabled>
</snapshots>
</repository>
</repositories>
<pluginRepositories>
<pluginRepository>
<id>aliyun-plugin</id>
<url>https://maven.aliyun.com/repository/public\</url>
<releases>
<enabled>true</enabled>
</releases>
<snapshots>
<enabled>true</enabled>
</snapshots>
</pluginRepository>
</pluginRepositories>
</profile>
</profiles>
<!-- 激活配置:让上面的 profile 生效 -->
<activeProfiles>
<activeProfile>aliyunProfile</activeProfile>
</activeProfiles>
</settings>
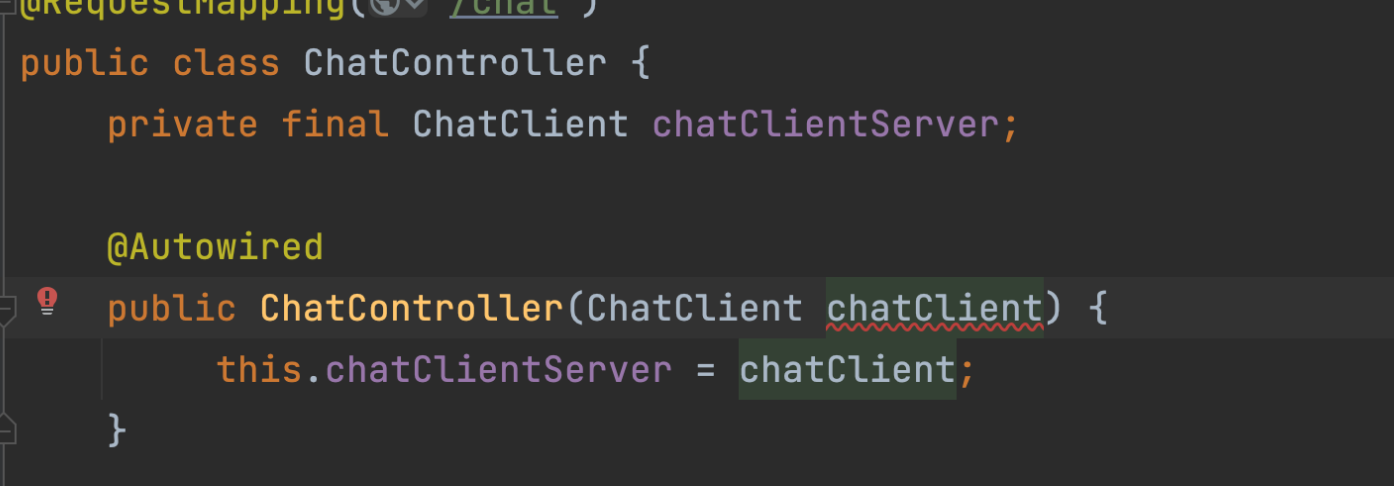
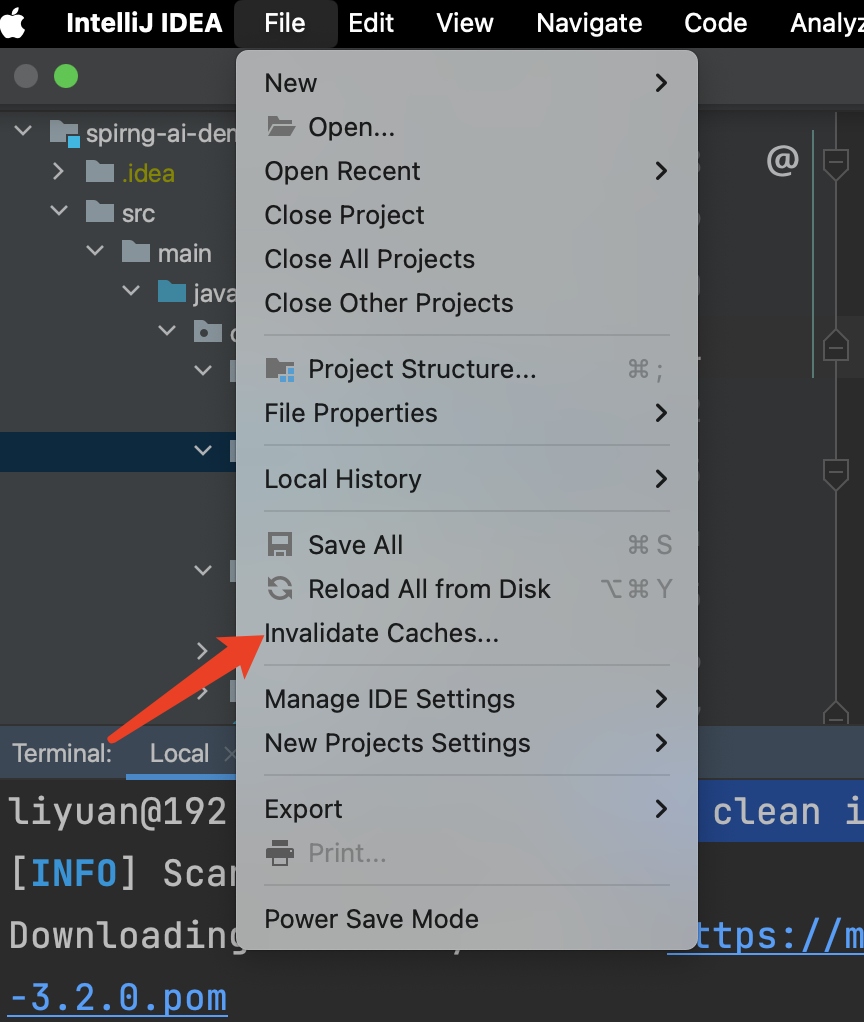
2、如果jar包仍然下载失败,或者chatModel找不到等问题,可以重新加载jar包
(1)在idea的Terminal中执行 mvn clean install
(2)清理idea缓存,并重启
3、chatModel飙红,提示 Could not autowire. No beans of 'ChatClient' type found,其实是一个编译期检查错误,并非运行时错误,代码可以正常跑