📌 学习目标
- 掌握查看本地GeoJSON的实现方法
- 理解相关API的使用
- 能够独立完成类似功能开发
🎯 核心概念
无需服务器上传即可查看本地GeoJSON。
💻 完 整 代 码
代码示例
js
const map = new maplibregl.Map({
    container: 'map',
    style: 'https://tiles.openfreemap.org/styles/bright',
    center: [-8.3226655, 53.7654751],
    zoom: 8
});

function handleFileSelect(evt) {
    const file = evt.target.files[0]; // 读取第一个选中的文件

    const reader = new FileReader();

    reader.onload = function (theFile) {
        // 解析为GeoJSON数据
        const geoJSONcontent = JSON.parse(theFile.target.result);

        // 添加到地图源
        map.addSource('uploaded-source', {
            'type': 'geojson',
            'data': geoJSONcontent
        });

        map.addLayer({
            'id': 'uploaded-polygons',
            'type': 'fill',
            'source': 'uploaded-source',
            'paint': {
                'fill-color': '#888888',
                'fill-outline-color': 'red',
                'fill-opacity': 0.4
            },
            // 过滤(多)多边形;如果还要显示线字符串
            // 或点,请添加更多具有不同过滤器的图层
            'filter': ['==', '$type', 'Polygon']
        });
    };

    // 以文本形式读取GeoJSON
    reader.readAsText(file, 'UTF-8');
}

document
    .getElementById('file')
    .addEventListener('change', handleFileSelect, false);
代码示例
html
<!DOCTYPE html>
<html lang="en">
<head>
    <title>View local GeoJSON</title>
    <meta property="og:description" content="无需服务器上传即可查看本地 GeoJSON。" />
    <meta property="og:created" content="2025-06-25" />
    <meta charset='utf-8'>
    <meta name="viewport" content="width=device-width, initial-scale=1">
    <link rel='stylesheet' href='https://unpkg.com/maplibre-gl@5.24.0/dist/maplibre-gl.css' />
    <script src='https://unpkg.com/maplibre-gl@5.24.0/dist/maplibre-gl.js'></script>
    <style>
        body { margin: 0; padding: 0; }
        html, body, #map { height: 100%; }
    </style>
</head>
<body>
<style>
    #file {
        position: absolute;
        top: 0;
        left: 0;
    }
</style>
<div id="map"></div>
<input
    type="file"
    id="file"
    name="file"
    accept="application/geo+json,application/vnd.geo+json,.geojson"
/>
<script>
    const map = new maplibregl.Map({
        container: 'map',
        style: 'https://tiles.openfreemap.org/styles/bright',
        center: [-8.3226655, 53.7654751],
        zoom: 8
    });

    function handleFileSelect(evt) {
        const file = evt.target.files[0]; // 读取第一个选中的文件

        const reader = new FileReader();

        reader.onload = function (theFile) {
            // 解析为(geo)JSON
            const geoJSONcontent = JSON.parse(theFile.target.result);

            // 添加为地图数据源
            map.addSource('uploaded-source', {
                'type': 'geojson',
                'data': geoJSONcontent
            });

            map.addLayer({
                'id': 'uploaded-polygons',
                'type': 'fill',
                'source': 'uploaded-source',
                'paint': {
                    'fill-color': '#888888',
                    'fill-outline-color': 'red',
                    'fill-opacity': 0.4
                },
                // 过滤(多)多边形;如果还要显示线或点,
                // 添加更多具有不同过滤器的图层
                'filter': ['==', '$type', 'Polygon']
            });
        };

        // 以文本形式读取GeoJSON
        reader.readAsText(file, 'UTF-8');
    }

    document
        .getElementById('file')
        .addEventListener('change', handleFileSelect, false);
</script>
</body>
</html>
🔍 代码解析
1. 初始化地图
使用 new maplibregl.Map() 创建地图实例,配置基本参数。本示例中心点设置在爱尔兰附近。
2. 文件选择事件处理
监听 <input type="file"> 的 change 事件,获取用户选择的GeoJSON文件。
3. FileReader读取文件
使用 FileReader API 读取本地文件内容:
readAsText(): 以文本形式读取文件onload: 文件读取完成后的回调
4. 解析并添加数据
将读取的文本解析为JSON,通过 map.addSource() 添加到地图,然后创建 fill 图层显示多边形。
5. Filter过滤
使用 ['==', '$type', 'Polygon'] 过滤只显示多边形要素。
⚙️ 参数说明
| 参数 | 类型 | 必填 | 说明 |
|---|---|---|---|
| container | string | 是 | 地图容器ID |
| style | string | 是 | 地图样式URL |
| center | number, number | 否 | 初始中心点,默认0, 0 |
| zoom | number | 否 | 初始缩放级别,默认0 |
FileReader 方法
| 方法 | 说明 |
|---|---|
| readAsText(file, encoding) | 以文本形式读取文件 |
| readAsDataURL(file) | 以Data URL形式读取文件 |
| readAsArrayBuffer(file) | 以二进制形式读取文件 |
🎨 效果说明
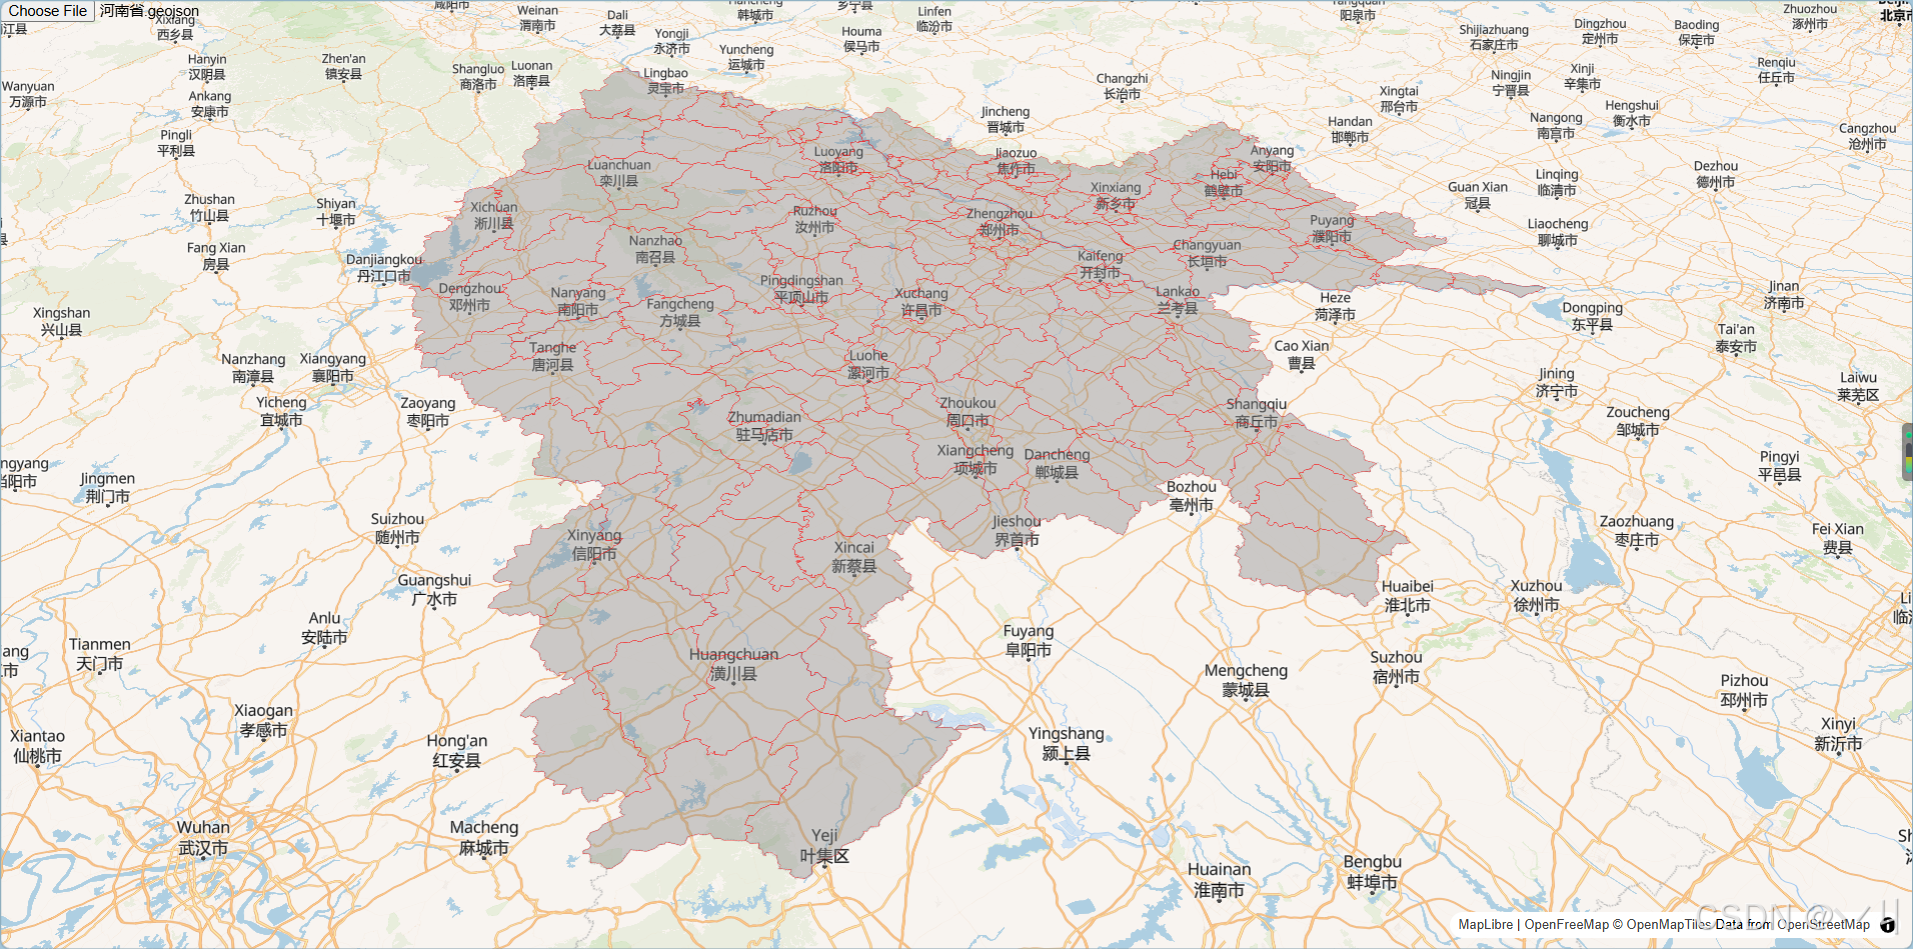
运行代码后:
- 地图显示爱尔兰区域(中心点 -8.32°W, 53.77°N)
- 页面顶部有文件选择按钮
- 用户选择本地GeoJSON文件后,多边形以灰色填充(透明度40%)、红色边框显示
- 用户可正常交互(拖拽、缩放、旋转)
💡 常 见 问 题
Q1: 如何支持多种几何类型?
A: 添加多个图层,使用不同filter:
javascript
// 显示线
map.addLayer({
    'id': 'uploaded-lines',
    'type': 'line',
    'source': 'uploaded-source',
    'filter': ['==', '$type', 'LineString']
});
// 显示点
map.addLayer({
    'id': 'uploaded-points',
    'type': 'circle',
    'source': 'uploaded-source',
    'filter': ['==', '$type', 'Point']
});
Q2: 如何验证GeoJSON格式?
A: 使用 try-catch 包裹 JSON.parse,并检查必要字段:
javascript
try {
    const geoJSONcontent = JSON.parse(theFile.target.result);
    if (!geoJSONcontent.type || !geoJSONcontent.features) {
        throw new Error('Invalid GeoJSON');
    }
} catch (e) {
    alert('无效的GeoJSON文件');
}
Q3: 如何清除已加载的图层?
A: 使用 map.removeLayer() 和 map.removeSource():
javascript
if (map.getLayer('uploaded-polygons')) {
    map.removeLayer('uploaded-polygons');
}
if (map.getSource('uploaded-source')) {
    map.removeSource('uploaded-source');
}
📝 练习任务
- 基础练习:修改多边形的填充颜色和边框样式
- 进阶挑战:添加对LineString和Point类型的支持
- 拓展思考:如何实现文件加载进度显示?
🌟 最佳实践
- 错误处理: 添加文件格式验证和异常捕获
- 用户体验: 提供加载状态反馈和错误提示
- 资源管理: 重新加载文件前清理旧的数据源和图层
- 文件类型限制 : 使用
accept属性限制可选文件类型
🔗 延伸阅读
-
下一课预告:将继续学习地图图层的基础知识
本文是MapLibre GL JS实践课程系列的一部分,欢迎关注收藏