HarmonyOS NEXT 实战:从零开发一款「随笔记」应用
本文记录了使用 HarmonyOS NEXT(API 23)从零搭建一款轻量笔记应用的完整过程,涵盖项目创建、数据模型设计、Preferences 持久化存储、分类筛选与搜索、页面路由跳转等核心知识点。所有代码均在 DevEco Studio 中编译通过并成功运行,适合有一定 ArkTS 基础、想动手做完整项目的开发者参考。
一、项目背景与目标
说实话,学一门新框架最怕的就是"看完文档还是不会写"。ArkTS 的声明式 UI 语法跟 Flutter、SwiftUI 有些类似,但鸿蒙的 API 体系、工程结构、生命周期管理又自成一套。光看官方示例很难串起来,所以这次我决定:做一个完整的小项目,把常用功能都覆盖一遍。
目标功能清单:
| 功能 | 说明 |
|---|---|
| 笔记列表 | 首页展示所有笔记卡片,按更新时间排序 |
| 分类筛选 | 工作 / 生活 / 学习 / 其他,横向标签切换 |
| 关键词搜索 | 搜索标题和内容,可展开/收起搜索栏 |
| 新建/编辑笔记 | 路由跳转到编辑页,自动保存 |
| 删除笔记 | 编辑页右上角删除,返回后列表实时刷新 |
| 数据持久化 | 使用 Preferences 本地存储,重启不丢失 |
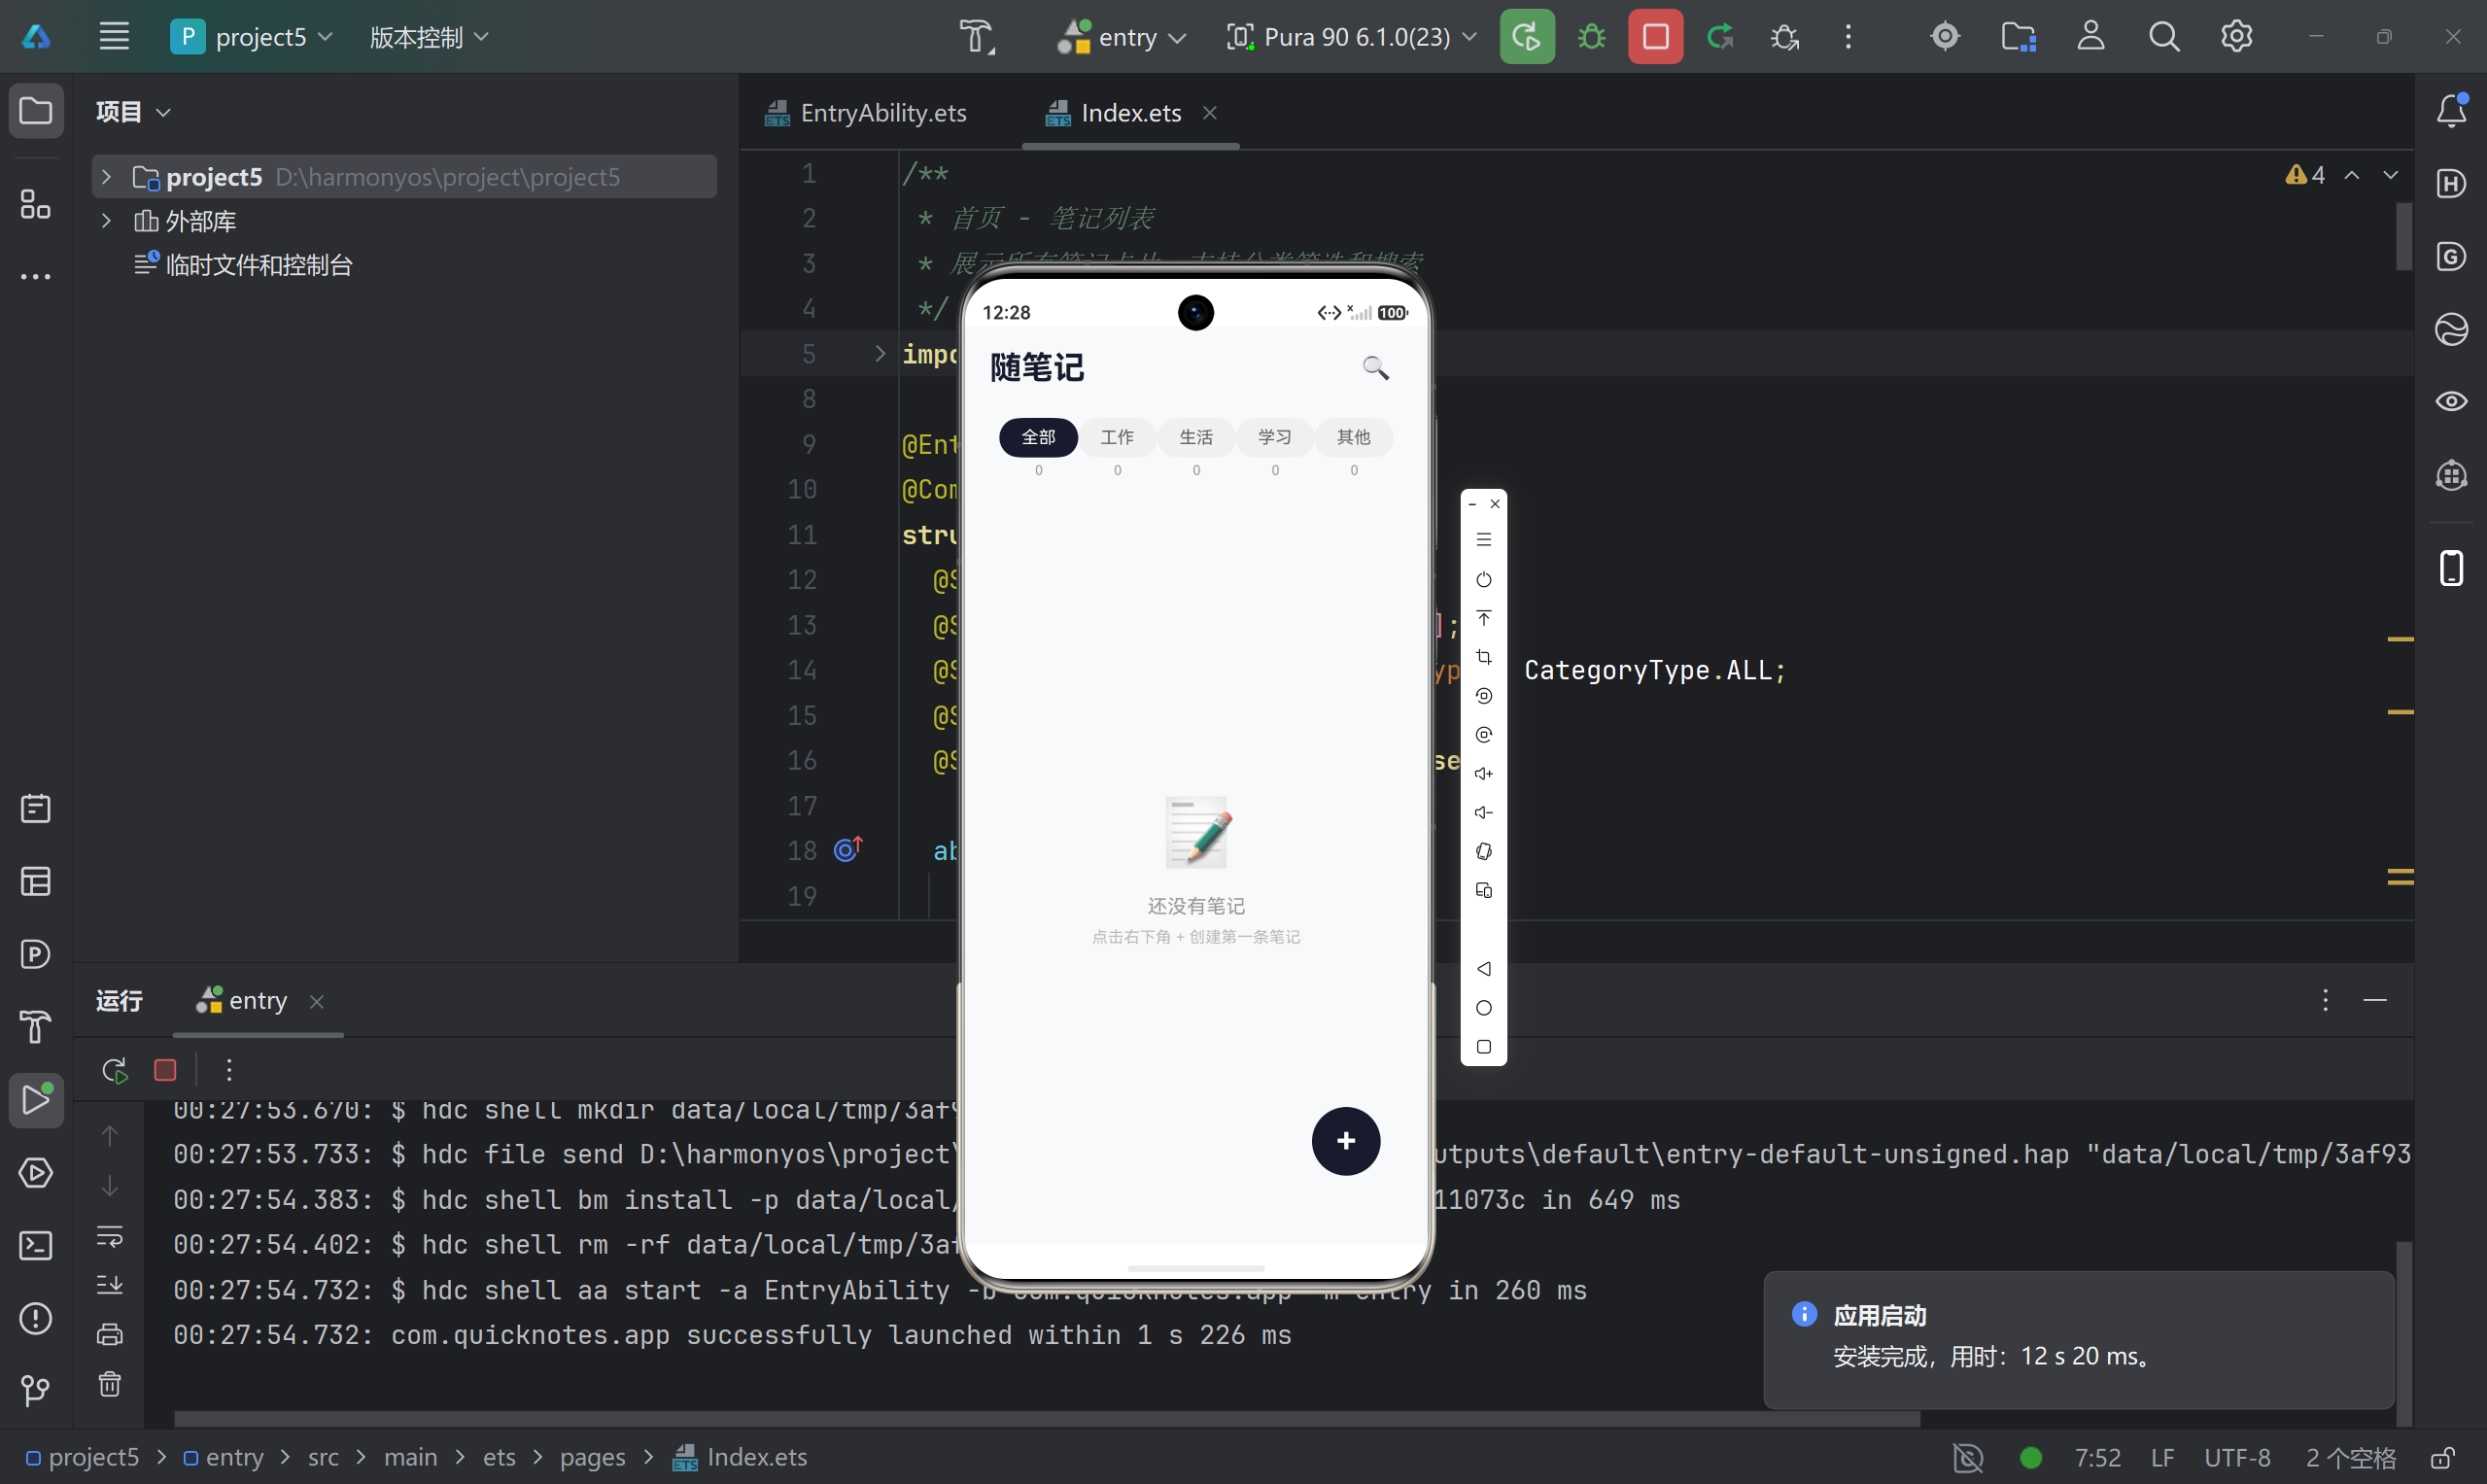
最终效果:一个清爽的「随笔记」App,包名 com.quicknotes.app,适配手机端。
二、工程创建与项目结构
2.1 创建项目
在 DevEco Studio 中选择 File → New → Create Project ,模板选 Empty Ability,填写基本信息:
- Project Name: project5
- Bundle Name: com.quicknotes.app
- Compatible SDK: 6.1.0(23)
- Module: entry(单模块结构)
⚠️ 如果之前用过旧版 API,注意
build-profile.json5中targetSdkVersion和compatibleSdkVersion要保持一致为"6.1.0(23)",否则可能出现编译兼容性报错。
2.2 最终项目结构
project5/
├── AppScope/
│   ├── app.json5                          # 应用全局配置(包名、版本号)
│   └── resources/
│       └── base/
│           ├── element/string.json        # 应用级字符串资源
│           └── media/                     # 应用图标资源
├── entry/
│   ├── build-profile.json5               # 模块编译配置
│   ├── oh-package.json5                  # 模块依赖声明
│   └── src/main/
│       ├── module.json5                  # 模块配置(Ability、页面路由)
│       ├── ets/
│       │   ├── entryability/
│       │   │   └── EntryAbility.ets      # 应用生命周期入口
│       │   ├── entrybackupability/
│       │   │   └── EntryBackupAbility.ets # 备份扩展能力
│       │   ├── model/
│       │   │   └── NoteData.ets          # 数据模型 + 工具函数
│       │   ├── pages/
│       │   │   ├── Index.ets             # 首页(笔记列表)
│       │   │   └── NoteEdit.ets          # 编辑页
│       │   └── utils/
│       │       └── NoteStorage.ets       # 持久化存储工具类
│       └── resources/
│           └── base/
│               ├── element/              # 颜色、字符串、浮点数资源
│               ├── media/                # 图片资源
│               └── profile/
│                   └── main_pages.json   # 页面路由注册
├── build-profile.json5                   # 项目级编译配置
└── hvigorfile.ts                         # 构建脚本
关键点:HarmonyOS NEXT 的 页面路由必须在 main_pages.json 中显式注册 ,否则 router.pushUrl() 会报错跳转失败:
json
{
  "src": [
    "pages/Index",
    "pages/NoteEdit"
  ]
}
三、数据模型设计(NoteData.ets)
数据模型是整个应用的骨架,设计好了后面写 UI 才顺畅。
3.1 笔记数据接口
typescript
export interface Note {
  id: string;           // 唯一标识(时间戳+随机字符串)
  title: string;        // 标题
  content: string;      // 内容
  category: CategoryType; // 分类
  createTime: number;   // 创建时间戳
  updateTime: number;   // 更新时间戳
}
3.2 分类枚举
用 enum 定义分类,比魔法字符串安全得多:
typescript
export enum CategoryType {
  ALL = '全部',
  WORK = '工作',
  LIFE = '生活',
  STUDY = '学习',
  OTHER = '其他'
}

export const CATEGORIES: CategoryType[] = [
  CategoryType.ALL,
  CategoryType.WORK,
  CategoryType.LIFE,
  CategoryType.STUDY,
  CategoryType.OTHER
];
踩坑提醒 :
CATEGORIES数组包含了ALL(用于列表筛选),但在编辑页选择分类时要排除掉它,后面会看到CATEGORIES.filter(c => c !== CategoryType.ALL)的用法。
3.3 工具函数
ID 生成、时间格式化、分类颜色映射都放在这个文件里,保持职责单一:
typescript
export function generateId(): string {
  return Date.now().toString(36) + Math.random().toString(36).substring(2, 8);
}

export function formatTime(timestamp: number): string {
  const date = new Date(timestamp);
  const y = date.getFullYear();
  const m = String(date.getMonth() + 1).padStart(2, '0');
  const d = String(date.getDate()).padStart(2, '0');
  const h = String(date.getHours()).padStart(2, '0');
  const min = String(date.getMinutes()).padStart(2, '0');
  return `${y}-${m}-${d} ${h}:${min}`;
}

export function getCategoryColor(category: CategoryType): ResourceColor {
  switch (category) {
    case CategoryType.WORK:  return '#FF6B35';  // 橙色
    case CategoryType.LIFE:  return '#2ECC71';  // 绿色
    case CategoryType.STUDY: return '#3498DB';  // 蓝色
    case CategoryType.OTHER: return '#9B59B6';  // 紫色
    default: return '#95A5A6';
  }
}

export function getCategoryBgColor(category: CategoryType): ResourceColor {
  switch (category) {
    case CategoryType.WORK:  return '#FFF3ED';
    case CategoryType.LIFE:  return '#EAFAF1';
    case CategoryType.STUDY: return '#EBF5FB';
    case CategoryType.OTHER: return '#F4ECF7';
    default: return '#F2F3F4';
  }
}颜色体系的设计思路:主色偏深用于文字,背景色偏浅用于标签底色,形成自然的视觉层次。这个双色方案让分类标签在白色卡片上既醒目又不刺眼。
四、数据持久化(NoteStorage.ets)
HarmonyOS NEXT 提供了多种数据存储方案,对于轻量级键值对数据,@ohos.data.preferences 是最简单的选择。
4.1 为什么选 Preferences?
| 方案 | 适用场景 | 复杂度 |
|---|---|---|
| Preferences | 少量键值对(< 10KB 推荐) | ⭐ |
| 关系型数据库 | 结构化数据,需要复杂查询 | ⭐⭐⭐ |
| 分布式数据 | 多设备同步 | ⭐⭐⭐⭐ |
笔记应用的数据量一般不大,用 Preferences 存一个 JSON 字符串就够了,实现最简单。
4.2 封装存储工具类
typescript
import { preferences } from '@kit.ArkData';
import { Note } from '../model/NoteData';
import { BusinessError } from '@kit.BasicServicesKit';

const PREFERENCES_NAME = 'quick_notes_store';
const NOTES_KEY = 'notes_list_data';

export class NoteStorage {
  private pref: preferences.Preferences | null = null;

  async init(context: Context): Promise<void> {
    try {
      this.pref = await preferences.getPreferences(context, PREFERENCES_NAME);
    } catch (err) {
      console.error('NoteStorage init failed: ' + JSON.stringify(err));
    }
  }

  async saveNotes(notes: Note[]): Promise<void> {
    if (!this.pref) return;
    try {
      await this.pref.put(NOTES_KEY, JSON.stringify(notes));
      await this.pref.flush();
    } catch (err) {
      console.error('NoteStorage save failed: ' + JSON.stringify(err));
    }
  }

  async loadNotes(): Promise<Note[]> {
    if (!this.pref) return [];
    try {
      const val = await this.pref.get(NOTES_KEY, '[]');
      const parsed: Note[] = JSON.parse(val as string) as Note[];
      if (Array.isArray(parsed)) {
        return parsed;
      }
      return [];
    } catch (err) {
      console.error('NoteStorage load failed: ' + JSON.stringify(err));
      return [];
    }
  }
}

export const noteStorage = new NoteStorage();
几个需要注意的点:
- 必须先
init()再使用 :preferences.getPreferences()需要 Context,所以初始化必须在页面aboutToAppear()生命周期中调用。 flush()不能忘 :put()只是把数据写进内存缓存,必须调用flush()才会真正持久化到磁盘。- 单例导出 :用
export const noteStorage = new NoteStorage()导出全局单例,避免多个页面各自创建实例导致数据不同步。 - 错误处理:Preferences 操作都可能抛异常,必须 try-catch 包裹,否则一个 JSON 解析错误就能让整个页面崩溃。
五、首页------笔记列表(Index.ets)
首页是整个应用的门面,功能多、组件复杂,也是踩坑最多的地方。
5.1 状态管理
typescript
@State notes: Note[] = [];              // 全部笔记
@State filteredNotes: Note[] = [];      // 筛选后的笔记
@State activeCategory: CategoryType = CategoryType.ALL;  // 当前选中分类
@State searchText: string = '';         // 搜索关键词
@State showSearch: boolean = false;     // 搜索栏是否展开
ArkTS 响应式原理 :
@State装饰的变量一旦发生变化,ArkUI 框架会自动重新调用build()方法刷新 UI。但注意,只有被@State直接引用的数据变化才会触发刷新 ,嵌套对象的属性变化不会。所以我们用filteredNotes作为 List 的数据源,每次筛选后整体替换数组,确保刷新生效。
5.2 数据加载与筛选
typescript
async loadNotes(): Promise<void> {
  const ctx = getContext();
  await noteStorage.init(ctx);
  this.notes = await noteStorage.loadNotes();
  this.applyFilter();
}

applyFilter(): void {
  let result = [...this.notes];
  // 分类过滤
  if (this.activeCategory !== CategoryType.ALL) {
    result = result.filter(n => n.category === this.activeCategory);
  }
  // 搜索过滤
  if (this.searchText.trim()) {
    const keyword = this.searchText.trim().toLowerCase();
    result = result.filter(n =>
      n.title.toLowerCase().includes(keyword) ||
      n.content.toLowerCase().includes(keyword)
    );
  }
  // 按更新时间降序
  result.sort((a, b) => b.updateTime - a.updateTime);
  this.filteredNotes = result;
}筛选逻辑的三个步骤:分类 → 搜索 → 排序 ,每次分类切换或搜索内容变化都重新执行。[...this.notes] 先浅拷贝一份,避免修改原数组。
5.3 顶部标题栏与搜索栏
typescript
// 顶部标题栏
Row() {
  Text('随笔记')
    .fontSize(26)
    .fontWeight(FontWeight.Bold)
    .fontColor('#1a1a2e')
    .layoutWeight(1)

  Text('🔍')
    .fontSize(20)
    .width(44)
    .height(44)
    .textAlign(TextAlign.Center)
    .onClick(() => this.toggleSearch())
}
.width('100%')
.padding({ left: 20, right: 20, top: 12, bottom: 8 })

// 搜索栏(条件渲染)
if (this.showSearch) {
  TextInput({ placeholder: '搜索笔记...', text: this.searchText })
    .width('100%')
    .height(44)
    .padding({ left: 16, right: 16 })
    .backgroundColor('#F5F5F5')
    .borderRadius(22)
    .placeholderColor('#999')
    .fontColor('#333')
    .onChange((val) => this.onSearchChange(val))
    .margin({ bottom: 8 })
}
搜索栏用 if 条件渲染实现展开/收起,点击 🔍 切换 showSearch 状态。收起时自动清空搜索关键词并重新筛选。
5.4 分类标签栏
typescript
Scroll() {
  Row() {
    ForEach(CATEGORIES, (cat: CategoryType) => {
      Column() {
        Text(cat as string)
          .fontSize(14)
          .fontColor(this.activeCategory === cat ? '#fff' : '#666')
          .backgroundColor(this.activeCategory === cat ? '#1a1a2e' : '#F0F0F0')
          .borderRadius(18)
          .padding({ left: 18, right: 18, top: 8, bottom: 8 })
          .onClick(() => this.onCategoryChange(cat))

        Text(`${this.getCategoryCount(cat)}`)
          .fontSize(11)
          .fontColor('#999')
          .margin({ top: 4 })
      }
    }, (cat: CategoryType) => cat as string)
  }
  .padding({ left: 20, right: 20 })
}
.height(70)
.scrollable(ScrollDirection.Horizontal)
.scrollBar(BarState.Off)这里有个细节:用 Scroll 包裹 Row 实现横向滚动 ,当分类标签多了不会挤在一起。ForEach 的第三个参数是 key 生成函数,用分类名作为唯一标识,确保列表更新时能正确 diff。
每个分类标签下方显示该分类的笔记数量,用 getCategoryCount() 实时计算:
typescript
getCategoryCount(category: CategoryType): number {
  if (category === CategoryType.ALL) return this.notes.length;
  return this.notes.filter(n => n.category === category).length;
}
5.5 笔记卡片与空状态
列表为空时显示引导提示,有数据时展示卡片列表:
typescript
if (this.filteredNotes.length === 0) {
  Column() {
    Text('📝').fontSize(60).margin({ bottom: 16 })
    Text(this.searchText ? '没有匹配的笔记' : '还没有笔记')
      .fontSize(16).fontColor('#999')
    Text(this.searchText ? '换个关键词试试' : '点击右下角 + 创建第一条笔记')
      .fontSize(13).fontColor('#bbb').margin({ top: 8 })
  }
  .layoutWeight(1)
  .justifyContent(FlexAlign.Center)
  .alignItems(HorizontalAlign.Center)
} else {
  List({ space: 12 }) {
    ForEach(this.filteredNotes, (note: Note) => {
      ListItem() {
        this.NoteCard(note)
      }
    }, (note: Note) => note.id)
  }
  .layoutWeight(1)
  .width('100%')
  .padding({ left: 20, right: 20, top: 8, bottom: 80 })
}
卡片组件用 @Builder 装饰器定义:
typescript
@Builder
NoteCard(note: Note) {
  Column() {
    Text(note.category as string)
      .fontSize(11)
      .fontColor(getCategoryColor(note.category))
      .backgroundColor(getCategoryBgColor(note.category))
      .padding({ left: 10, right: 10, top: 4, bottom: 4 })
      .borderRadius(10)
      .alignSelf(ItemAlign.Start)

    Text(note.title || '无标题')
      .fontSize(17).fontWeight(FontWeight.Medium).fontColor('#1a1a2e')
      .width('100%').maxLines(1)
      .textOverflow({ overflow: TextOverflow.Ellipsis })
      .margin({ top: 10 })

    Text(note.content || '暂无内容')
      .fontSize(14).fontColor('#666')
      .width('100%').maxLines(2)
      .textOverflow({ overflow: TextOverflow.Ellipsis })
      .lineHeight(20)
      .margin({ top: 6 })

    Text(formatTime(note.updateTime))
      .fontSize(12).fontColor('#aaa')
      .width('100%')
      .margin({ top: 10 })
  }
  .width('100%')
  .padding(16)
  .backgroundColor('#FFFFFF')
  .borderRadius(16)
  .border({ width: 0.5, color: '#f0f0f0' })
  .onClick(() => {
    router.pushUrl({ url: 'pages/NoteEdit', params: { noteId: note.id } });
  })
}
点击卡片跳转到编辑页,通过 params 传递笔记 ID。注意 maxLines + textOverflow 的组合,防止长文本撑爆卡片布局。
5.6 FAB 浮动按钮
typescript
Text('+')
  .fontSize(28).fontColor('#fff').fontWeight(FontWeight.Bold)
  .width(56).height(56)
  .textAlign(TextAlign.Center)
  .backgroundColor('#1a1a2e')
  .borderRadius(28)
  .position({ x: '75%', y: '85%' })
  .onClick(() => {
    router.pushUrl({ url: 'pages/NoteEdit', params: { noteId: '' } });
  })
用 position 绝对定位把 + 按钮固定在右下角。传空的 noteId 表示新建笔记。
避坑 :FAB 按钮用了
position定位,会脱离文档流。如果列表底部内容被遮挡,可以给List加padding({ bottom: 80 })留出空间,代码中已经做了处理。
六、编辑页------创建与编辑笔记(NoteEdit.ets)
编辑页承载了"新建"和"编辑"两种模式,通过路由参数区分。
6.1 路由参数解析
typescript
interface EditParams {
  noteId: string;
}

aboutToAppear(): void {
  const params = router.getParams() as Record<string, string>;
  if (params && params['noteId']) {
    this.noteId = params['noteId'] as string;
  }

  if (this.noteId) {
    this.isNew = false;
    this.loadNoteForEdit();
  } else {
    this.noteId = generateId();
    this.selectedCategory = CategoryType.OTHER;
  }
}
router.getParams() 返回的是 Record<string, Object> 类型,需要手动类型断言。有 noteId 就是编辑模式,没有就是新建模式。
6.2 分类选择器
编辑页的分类选择用了"点击展开/收起"的交互方式:
typescript
// 分类标签显示
Row() {
  Text('分类:').fontSize(14).fontColor('#999')

  Text(this.selectedCategory as string)
    .fontSize(14)
    .fontColor(getCategoryColor(this.selectedCategory))
    .backgroundColor(getCategoryBgColor(this.selectedCategory))
    .padding({ left: 12, right: 12, top: 4, bottom: 4 })
    .borderRadius(12)
    .onClick(() => {
      this.showCategoryPicker = !this.showCategoryPicker;
    })

  if (!this.isSaved) {
    Text('● 未保存').fontSize(12).fontColor('#E74C3C').margin({ left: 12 })
  } else {
    Text('✓ 已保存').fontSize(12).fontColor('#2ECC71').margin({ left: 12 })
  }
}

// 展开的分类选项
if (this.showCategoryPicker) {
  Row() {
    ForEach(CATEGORIES.filter(c => c !== CategoryType.ALL), (cat: CategoryType) => {
      Text(cat as string)
        .fontSize(13)
        .fontColor(this.selectedCategory === cat ? '#fff' : getCategoryColor(cat))
        .backgroundColor(this.selectedCategory === cat ? getCategoryColor(cat) : getCategoryBgColor(cat))
        .padding({ left: 14, right: 14, top: 6, bottom: 6 })
        .borderRadius(14)
        .onClick(() => this.selectCategory(cat))
        .margin({ right: 8 })
    }, (cat: CategoryType) => cat as string)
  }
  .padding({ left: 20, right: 20, bottom: 8 })
}
这里有两处设计细节:
- 排除
ALL分类 :CATEGORIES.filter(c => c !== CategoryType.ALL)------"全部"只用于列表筛选,不属于某个具体笔记的分类。 - 保存状态指示器:右侧显示"● 未保存"(红色)或"✓ 已保存"(绿色),让用户清楚知道当前状态。
6.3 保存逻辑
typescript
async saveNote(): Promise<void> {
  const ctx = getContext();
  await noteStorage.init(ctx);
  this.notes = await noteStorage.loadNotes();

  const now = Date.now();
  const existingIndex = this.notes.findIndex(n => n.id === this.noteId);

  const note: Note = {
    id: this.noteId,
    title: this.title,
    content: this.content,
    category: this.selectedCategory,
    createTime: existingIndex >= 0 ? this.notes[existingIndex].createTime : now,
    updateTime: now
  };

  if (existingIndex >= 0) {
    this.notes[existingIndex] = note;  // 更新已有笔记
  } else {
    this.notes.push(note);             // 新增笔记
  }

  await noteStorage.saveNotes(this.notes);
  this.isSaved = true;
}
保存时区分两种情况:
- 编辑已有笔记 :保留原始
createTime,只更新updateTime - 新建笔记 :
createTime和updateTime都设为当前时间
保存按钮的样式也跟着状态变化:
typescript
Button('保存笔记')
  .width('90%').height(48)
  .backgroundColor(this.isSaved ? '#bbb' : '#1a1a2e')
  .borderRadius(24)
  .fontColor('#fff').fontSize(16)
  .margin({ bottom: 24 })
  .enabled(!this.isSaved)   // 已保存时禁用,防止重复保存
  .onClick(() => { this.saveNote(); })
6.4 返回自动保存
typescript
goBack(): void {
  if (!this.isSaved && (this.title || this.content)) {
    this.saveNote();
  }
  router.back();
}
点击返回时,如果有未保存的内容就自动保存,避免用户意外丢失输入。这是一个很容易被忽略但非常重要的用户体验细节。
6.5 删除笔记
typescript
async deleteNote(): Promise<void> {
  const ctx = getContext();
  await noteStorage.init(ctx);
  this.notes = await noteStorage.loadNotes();
  this.notes = this.notes.filter(n => n.id !== this.noteId);
  await noteStorage.saveNotes(this.notes);
  router.back();
}删除操作只在编辑模式下显示(if (!this.isNew)),删除后自动返回首页。
七、模块配置详解(module.json5)
module.json5 是 HarmonyOS 模块的核心配置文件,相当于 Android 的 AndroidManifest.xml:
json5
{
  "module": {
    "name": "entry",
    "type": "entry",
    "description": "$string:module_desc",
    "mainElement": "EntryAbility",
    "deviceTypes": ["phone"],
    "deliveryWithInstall": true,
    "installationFree": false,
    "pages": "$profile:main_pages",
    "abilities": [
      {
        "name": "EntryAbility",
        "srcEntry": "./ets/entryability/EntryAbility.ets",
        "description": "$string:EntryAbility_desc",
        "icon": "$media:layered_image",
        "label": "$string:EntryAbility_label",
        "startWindowIcon": "$media:startIcon",
        "startWindowBackground": "$color:start_window_background",
        "exported": true,
        "skills": [{
          "entities": ["entity.system.home"],
          "actions": ["ohos.want.action.home"]
        }]
      }
    ]
  }
}
几个关键配置项说明:
| 字段 | 说明 |
|---|---|
type: "entry" |
表示这是主模块(安装后桌面可见) |
deviceTypes |
适配设备类型,我们只做了手机端 |
pages |
页面路由表,指向 main_pages.json |
exported: true |
允许其他应用启动此 Ability |
skills |
声明 Ability 支持的意图过滤器,ohos.want.action.home 使其出现在桌面 |
八、项目级配置要点
8.1 build-profile.json5
json5
{
  "app": {
    "signingConfigs": [],
    "products": [{
      "name": "default",
      "signingConfig": "default",
      "targetSdkVersion": "6.1.0(23)",
      "compatibleSdkVersion": "6.1.0(23)",
      "runtimeOS": "HarmonyOS"
    }]
  }
}
版本踩坑 :如果
compatibleSdkVersion低于targetSdkVersion,在低版本设备上可能遇到 API 兼容性问题。对于学习项目,建议两者保持一致。
8.2 app.json5
json5
{
  "app": {
    "bundleName": "com.quicknotes.app",
    "vendor": "example",
    "versionCode": 1000000,
    "versionName": "1.0.0"
  }
}
versionCode 必须是正整数,每次发版递增;versionName 是用户可见的版本号。
九、开发过程中的踩坑记录
坑 1:页面路由必须注册
在 ArkTS 中用 router.pushUrl() 跳转页面,但页面路径必须在 main_pages.json 中注册,否则运行时会报错:
Error: The page path does not exist我一开始直接写 router.pushUrl({ url: 'pages/NoteEdit' }) 忘记注册,排查了好一会儿。
坑 2:Preferences 初始化需要 Context
preferences.getPreferences() 的第一个参数是 Context,而这个 Context 只能在组件内部通过 getContext() 获取。所以 noteStorage.init() 必须在页面生命周期中调用,不能在模块顶层直接初始化:
typescript
// ❌ 错误:模块加载时没有 Context
const ctx = getContext(); // 运行时报错
await noteStorage.init(ctx);

// ✅ 正确:在组件生命周期中获取
aboutToAppear(): void {
  const ctx = getContext();
  await noteStorage.init(ctx);
}
坑 3:@State 数组引用必须替换
ArkTS 的 @State 对数组的变更检测是基于引用的。如果你直接 push 或 splice 修改原数组,UI 可能不会刷新。正确的做法是创建新数组:
typescript
// ❌ 可能不刷新
this.notes.push(newNote);

// ✅ 确保刷新
this.notes = [...this.notes, newNote];
我们的代码中 applyFilter() 每次都用 [...this.notes] 创建新数组,然后赋值给 this.filteredNotes,就是为了保证响应式刷新。
坑 4:router.getParams() 的类型处理
router.getParams() 返回 Record<string, Object> 类型,直接当 string 用会编译报错。需要手动断言:
typescript
const params = router.getParams() as Record<string, string>;
if (params && params['noteId']) {
  this.noteId = params['noteId'] as string;
}
坑 5:FAB 按钮遮挡列表底部
使用 position 绝对定位的 FAB 按钮会遮挡列表最后几条数据。解决方案是给 List 加底部内边距:
typescript
List({ space: 12 }) {
  // ...
}
.padding({ left: 20, right: 20, top: 8, bottom: 80 })  // bottom: 80 留出 FAB 空间
十、项目运行效果总结
整个应用实现了以下完整流程:
- 首次打开:显示空状态提示,引导用户创建第一条笔记
- 创建笔记:点击 FAB 按钮 → 进入编辑页 → 输入标题/内容/选择分类 → 保存
- 查看列表:返回首页,笔记按更新时间排序展示,分类标签显示各分类数量
- 分类筛选:点击分类标签,列表实时过滤
- 搜索笔记:点击 🔍 展开搜索栏,输入关键词实时匹配标题和内容
- 编辑笔记:点击卡片 → 进入编辑页 → 修改内容 → 保存
- 删除笔记:编辑页右上角 🗑️ → 确认删除 → 返回列表
- 数据持久化 :关闭应用重新打开,笔记数据依然保留
十一、后续优化方向
这个版本是功能验证(MVP),还有很多可以改进的地方:
| 方向 | 思路 |
|---|---|
| 数据库替换 | 笔记数量多了之后,Preferences 性能会下降,可以迁移到关系型数据库 |
| 富文本编辑 | 用 RichText 组件支持加粗、列表等格式 |
| 图片笔记 | 支持拍照或相册选图插入笔记 |
| 云同步 | 接入华为云存储,实现多设备同步 |
| 手势操作 | 左滑删除、长按拖拽排序 |
| 深色模式 | 已有 dark/element/color.json,补充深色配色方案 |
| Widget 卡片 | 添加桌面小组件,快速查看和创建笔记 |
十二、总结
通过这个「随笔记」项目的开发,我对 HarmonyOS NEXT 的几个核心能力有了实操层面的理解:
- ArkTS 声明式 UI :
@State+build()的响应式模型,概念简洁但要注意数组和嵌套对象的变更检测陷阱 - 页面路由 :
router.pushUrl()/router.back(),参数传递用params,但必须提前在main_pages.json注册 - 数据持久化 :
preferences适合轻量场景,API 简单但要注意flush()和 Context 依赖 - 组件化思维 :
@Builder提取复用组件,ForEach渲染列表,条件渲染用if
做完整项目比看十个 Demo 都有用------因为 Demo 不会告诉你 getParams() 要类型断言、Preferences 要先 init、FAB 会挡住列表底部。这些坑只有自己踩过才能变成真正的经验。
希望这篇实战记录对你有帮助,有问题欢迎在评论区交流!
📌 开发环境:DevEco Studio + HarmonyOS NEXT API 23 (6.1.0)
📌 完整源码:文中已贴出所有核心代码,按项目结构创建文件即可复现
📌 下一步:准备尝试接入关系型数据库和富文本编辑,有进展会继续分享