写在前面
在上一篇的基础上,本节演示在 gpui 中组件的状态保存方式,与如何处理点击事件,实现一个简单的按钮
本次项目规划改动如下
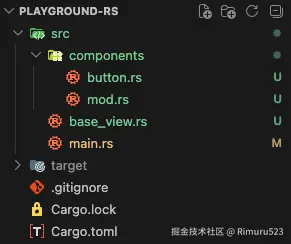
我们将上一篇的 MyView 该写成 BaseView,用于构建基础的布局,同时创建 components 用来承载自定义的组件,本节实现一个简单的 button
注:可通过
bash
cargo fix --allow-dirty快速修复各种警告信息
rust
mod base_view;
mod components;

use gpui::{AppContext, Application, Bounds, Point, Size, WindowBounds, WindowOptions, px};

use crate::base_view::BaseView;

fn main() {
    let app = Application::new();
    app.run(|cx| {
        cx.open_window(
            WindowOptions {
                window_bounds: Some(WindowBounds::Windowed(Bounds {
                    origin: Point::default(),
                    size: Size::new(px(600.), px(480.)),
                })),
                ..Default::default()
            },
            // MyView 改名为 BaseView,并单独放在一个 mod 中
            |_window, cx| cx.new(|_cx| BaseView {}),
        )
        .ok();
    });
}
components/button.rs
rust
use gpui::{
Context, CursorStyle, InteractiveElement, IntoElement, ParentElement, Render, SharedString,
StatefulInteractiveElement, Styled, Window, div, rgb,
};
pub struct Button {
// 在 gpui 中,推荐使用 SharedString,这是一个不可变的字符串类型,在 gpui 中可以低成本复制
// 并且更贴合日常使用,如,使用 String 会缺少作为某些场景下入参的 trait 实现
text: SharedString,
}
impl Button {
pub fn new(text: &str) -> Button {
Button {
text: SharedString::from(text.to_owned()),
}
}
}
impl Render for Button {
fn render(&mut self, _window: &mut Window, _cx: &mut Context<Self>) -> impl IntoElement {
div()
// ⚠️注意:如果想使用第 34 行的 on_click,需要调用 id 这个方法将 Div 转换成 Stateful<Div>
.id(self.text.clone())
.flex()
.justify_center()
.items_center()
.w_16()
.h_8()
.bg(rgb(0x8F98BD))
.text_color(rgb(0xffffff))
.rounded_sm()
.hover(|style| style.cursor(CursorStyle::PointingHand).bg(rgb(0x615F73))) // 这里表示当鼠标放上来时需要进行的操作,这个回调函数会修改鼠标指针的样式和当前 button 的背景色
.child(self.text.clone())
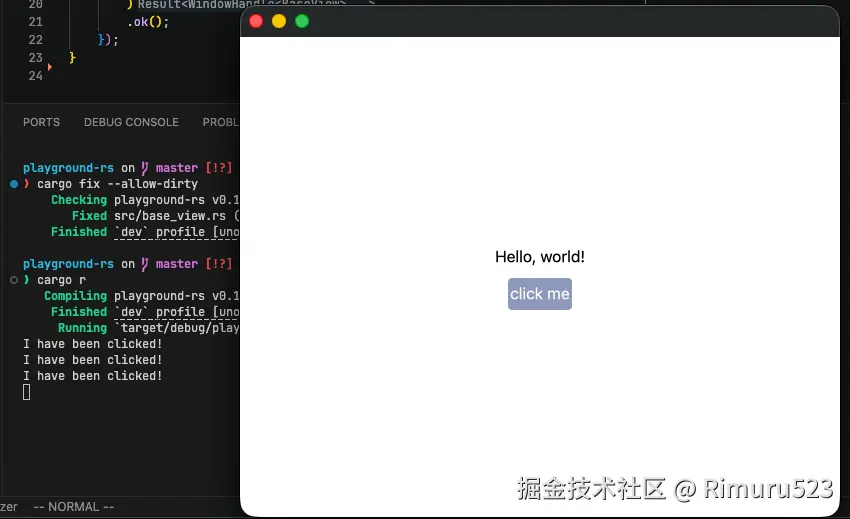
.on_click(|_, _window, _cx| { // 这里需要一个回调函数,简单起见只在控制台打印一条信息
println!("I have been clicked!");
})
}
}接下来将 Button 添加在 BaseView 中,这里我先不放出代码,各位可根据如下信息按照自己的方式组合:
render 函数在组件视图发生变化 时会重新调用一次
接下来展示几种可能遇到的情况
一、直接在 child 中构建 Button
base_view.rs
rust
use gpui::{Context, IntoElement, ParentElement, Render, Styled, Window, div, rgb};

use crate::components::button::Button;

pub struct BaseView {}

impl Render for BaseView {
    fn render(&mut self, _window: &mut Window, cx: &mut Context<Self>) -> impl IntoElement {
        div()
            .flex()
            .flex_col()
            .gap_2()
            .size_full()
            .items_center()
            .justify_center()
            .bg(rgb(0xffffff))
            .child("Hello, world!")
            .child(Button::new("click me"))
    }
}
你会发现报错:the trait bound `Button: IntoElement` is not satisfied
不必担心,你不需要想办法去实现 IntoElement,只需要将你的组件托付给 gpui,让它来管理其生命周期即可
diff
use gpui::{AppContext, Context, IntoElement, ParentElement, Render, Styled, Window, div, rgb};

use crate::components::button::Button;

pub struct BaseView {}

impl Render for BaseView {
    fn render(&mut self, _window: &mut Window, cx: &mut Context<Self>) -> impl IntoElement {
+       let button = cx.new(|_| Button::new("click me"));
        div()
            .flex()
            .flex_col()
            .gap_2()
            .size_full()
            .items_center()
            .justify_center()
            .bg(rgb(0xffffff))
            .child("Hello, world!")
+           .child(button)
    }
}
这下可以正常编译了,而且你会看到如下内容
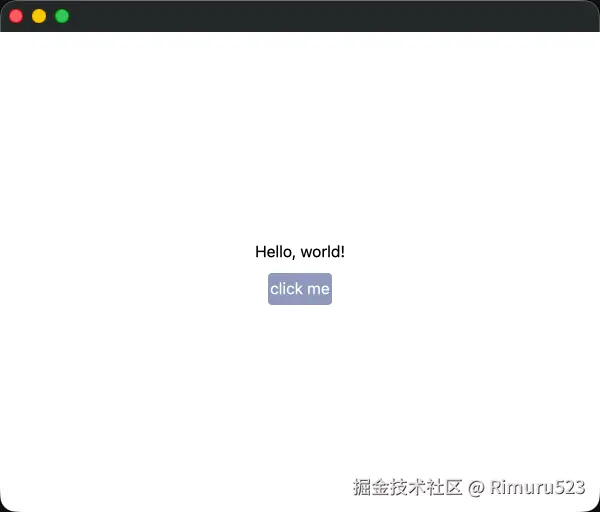
但当你点击这个按钮时就会发现,控制台并没有输出内容,这就是另外一种情况
二、回调函数没生效
记得一开始说的:render 函数在组件视图发生变化 时会重新调用一次
也就是我们通过 cx.new 创建的 button,实际上已经被释放了,那么相应的闭包也就没有了效果,所以我们需要将 button 保存起来,就和在 Button 中保存 text 一样
base_view.rs
rust
use gpui::{
    App, AppContext, Context, Entity, IntoElement, ParentElement, Render, Styled, Window, div, rgb,
};

use crate::components::button::Button;

pub struct BaseView {
    button: Entity<Button>, // 直接保存在 BaseView 中,Entity 的复制也很廉价,相当于指针计数+1
}
impl BaseView {
    pub fn new(cx: &mut App) -> BaseView {
        BaseView {
            button: cx.new(|_| Button::new("click me")),
        }
    }
}

impl Render for BaseView {
    fn render(&mut self, _window: &mut Window, _cx: &mut Context<Self>) -> impl IntoElement {
        div()
            .flex()
            .flex_col()
            .gap_2()
            .size_full()
            .items_center()
            .justify_center()
            .bg(rgb(0xffffff))
            .child("Hello, world!")
            .child(self.button.clone())
    }
}
rust
mod base_view;
mod components;

use gpui::{AppContext, Application, Bounds, Point, Size, WindowBounds, WindowOptions, px};

use crate::base_view::BaseView;

fn main() {
    let app = Application::new();
    app.run(|cx| {
        cx.open_window(
            WindowOptions {
                window_bounds: Some(WindowBounds::Windowed(Bounds {
                    origin: Point::default(),
                    size: Size::new(px(600.), px(480.)),
                })),
                ..Default::default()
            },
            |_window, cx| cx.new(|cx| BaseView::new(cx)), // 这里同步修改
        )
        .ok();
    });
}
如此,再次点击就能发现终端已经输出了我们希望看到的内容