文章目录
-
- 一、对路由的理解
- [二、基本切换效果与 `<RouterLink>` / `<RouterView>`](#二、基本切换效果与
<RouterLink>/<RouterView>) -
- [2.1 安装](#2.1 安装)
- [2.2 核心组件](#2.2 核心组件)
- [2.3 基础代码示例](#2.3 基础代码示例)
- [2.4 两个注意点](#2.4 两个注意点)
- [三、路由器工作模式(History 模式 vs Hash 模式)](#三、路由器工作模式(History 模式 vs Hash 模式))
-
- [3.1 History 模式](#3.1 History 模式)
- [3.2 Hash 模式](#3.2 Hash 模式)
- [四、路由 `to` 的两种写法](#四、路由
to的两种写法) -
- [4.1 字符串路径](#4.1 字符串路径)
- [4.2 对象配置](#4.2 对象配置)
- 五、命名路由(`name`)
- 六、嵌套路由(`children`)
-
- [6.1 嵌套路由的激活状态](#6.1 嵌套路由的激活状态)
- [七、路由传参:Query 参数](#七、路由传参:Query 参数)
-
- [7.1 传参方式](#7.1 传参方式)
- [7.2 接收参数](#7.2 接收参数)
- [八、路由传参:Params 参数(动态路由匹配)](#八、路由传参:Params 参数(动态路由匹配))
-
- [8.1 配置路由(占位)](#8.1 配置路由(占位))
- [8.2 传参方式](#8.2 传参方式)
- [8.3 接收参数](#8.3 接收参数)
- [九、路由的 Props 配置(解耦组件与路由)](#九、路由的 Props 配置(解耦组件与路由))
-
- [9.1 写法一:布尔值(只映射 params)](#9.1 写法一:布尔值(只映射 params))
- [9.2 写法二:函数写法(最灵活)](#9.2 写法二:函数写法(最灵活))
- [9.3 写法三:对象写法(静态 props)](#9.3 写法三:对象写法(静态 props))
- [十、路由的 Replace 属性(替换历史记录)](#十、路由的 Replace 属性(替换历史记录))
- [十一、编程式路由导航(`router.push` / `router.replace`)](#十一、编程式路由导航(
router.push/router.replace)) -
- [11.1 获取路由器实例](#11.1 获取路由器实例)
- [11.2 自动跳转示例](#11.2 自动跳转示例)
- [11.3 按钮点击跳转示例](#11.3 按钮点击跳转示例)
- [11.4 常见使用场景](#11.4 常见使用场景)
- [十二、路由重定向与 404 兜底](#十二、路由重定向与 404 兜底)
-
- [12.1 重定向(Redirect)](#12.1 重定向(Redirect))
- [12.2 404 兜底页面](#12.2 404 兜底页面)
一、对路由的理解
- 路由就是一组 key-value 的对应关系------路径(key)对应着组件(value)。
- 多个路由需要经过路由器(router)的管理。
- SPA(单页面应用) :页面通常有两个区域------导航区 和展示区。在导航区切换时,页面不会抖动(刷新)。
- 核心原理 :点击导航项 → 路径发生变化 → 路由器(router)监测到路径变化 → 根据规则匹配组件 → 展示区卸载旧组件、挂载新组件。核心变化的是路径。
二、基本切换效果与 <RouterLink> / <RouterView>
2.1 安装
bash
npm install vue-router2.2 核心组件
<RouterLink>:声明式导航,最终渲染为<a>标签,点击时拦截默认行为,通过 JS 切换路由。<RouterView>:路由出口(展示区),充当占位符,根据当前 URL 动态渲染匹配到的组件。
2.3 基础代码示例
src/router/index.ts(创建路由器并暴露):
ts
import { createRouter, createWebHistory } from "vue-router";
import Home from "@/views/Home.vue";
import News from "@/views/News.vue";
import About from "@/views/About.vue";
// 创建路由器
const router = createRouter({
    history: createWebHistory(), // 路由器的工作模式
    // 配置路由
    routes: [
        { path: '/home', component: Home },
        { path: '/news', component: News },
        { path: '/about', component: About }
    ]
});

export default router;main.ts(引入并使用路由器):
ts
// 引入createApp函数用于创建应用
import { createApp } from 'vue'
// 引入App根组件
import App from './App.vue'
// 引入路由器,index.ts可以不写
import router from './router'
// 创建一个应用
const app = createApp(App)
// 使用路由器
app.use(router)
// 挂载整个应用到app容器中
app.mount('#app')App.vue(导航区 + 展示区):
html
<script setup lang="ts">
import Header from "@/components/Header.vue";
</script>

<template>
  <div>
    <Header/>
    <h2>Vue路由测试</h2>
    <!-- 导航区 -->
    <div class="navigate">
      <RouterLink to="/home">首页</RouterLink>
      <RouterLink to="/news">新闻</RouterLink>
      <RouterLink to="/about">关于</RouterLink>
    </div>
    <!-- 展示区:此处展示哪个组件,由路由决定 -->
    <div class="main-content">
      <RouterView></RouterView>
    </div>
  </div>
</template>

<style scoped>
.navigate {
  margin: 20px 0;
  padding: 10px 20px;
  background: #f5f5f5;
  border-radius: 6px;
}
.navigate a {
  margin-right: 20px;
  text-decoration: none;
  color: #333;
  cursor: pointer;
}
.navigate a:hover {
  color: #409eff;
}
.main-content {
  margin-top: 20px;
  padding: 20px;
  border: 1px solid #eee;
  border-radius: 6px;
  min-height: 200px;
}
/* 激活状态样式 */
.navigate a.router-link-exact-active {
  color: #409eff;
  font-weight: bold;
  border-bottom: 2px solid #409eff;
}
</style>
子组件示例 (src/views/Home.vue):
html
<script setup lang="ts">
</script>
<template>
  <div><h1>Home</h1></div>
</template>
<style scoped></style>
2.4 两个注意点
- 路由组件 通常存放在
pages或views文件夹,靠路由规则渲染出来;一般组件 通常存放在components文件夹,需要亲手写标签(如<Header/>)使用。 - 通过点击导航"消失"的路由组件,默认是被卸载的,需要时再去挂载。可以借助生命周期钩子证明:
html
<script setup lang="ts">
import { onMounted, onUnmounted } from 'vue'

onMounted(() => {
  console.log('组件挂载成功')
})
onUnmounted(() => {
  console.log('组件卸载成功')
})
</script>
三、路由器工作模式(History 模式 vs Hash 模式)
3.1 History 模式
ts
const router = createRouter({
    history: createWebHistory(), // history模式
    routes: [...]
})- 优点 :URL 更加美观,不带有
#,更接近传统网站 URL。 - 缺点 :项目上线后,需要服务端配合处理路径问题,否则刷新会有 404 错误。
部署配置示例:
Nginx:
nginx
location / {
  try_files $uri $uri/ /index.html;
}
Apache (.htaccess):
apache
<IfModule mod_rewrite.c>
  RewriteEngine On
  RewriteBase /
  RewriteRule ^index\.html$ - [L]
  RewriteCond %{REQUEST_FILENAME} !-f
  RewriteCond %{REQUEST_FILENAME} !-d
  RewriteRule . /index.html [L]
</IfModule>
Node.js / Express:
js
app.use(express.static('dist'))
app.get('*', (req, res) => {
  res.sendFile(__dirname + '/dist/index.html')
})
3.2 Hash 模式
ts
const router = createRouter({
    history: createWebHashHistory(), // hash模式
    routes: [...]
})- 优点:兼容性更好,不需要服务端处理路径。
- 缺点 :URL 带有
#不太美观,SEO 优化方面相对较差。
四、路由 to 的两种写法
4.1 字符串路径
html
<RouterLink to="/user/123">用户详情</RouterLink>4.2 对象配置
html
<!-- 等价于 to="/user/123" -->
<RouterLink :to="{ path: '/user/123' }">用户详情</RouterLink>

<!-- 使用命名路由(推荐) -->
<RouterLink :to="{ name: 'UserDetail', params: { id: 123 } }">用户详情</RouterLink>

<!-- 带查询参数 -->
<RouterLink :to="{ path: '/search', query: { keyword: 'vue' } }">搜索</RouterLink>
注意 :使用对象写法时,必须绑定
:to(v-bind:to),否则大括号会被当作普通字符串处理。
五、命名路由(name)
通过名称标识路由,实现路径与代码的解耦。修改 path 时,只要 name 不变,导航代码无需改动。
src/router/index.ts:
ts
const router = createRouter({
    history: createWebHistory(),
    routes: [
        { name: 'home',  path: '/home',  component: Home },
        { name: 'news',  path: '/news',  component: News },
        { name: 'about', path: '/about', component: About }
    ]
})
App.vue 中使用:
html
<RouterLink to="/home">首页</RouterLink>                    <!-- 字符串写法 -->
<RouterLink :to="{ name: 'news' }">新闻</RouterLink>      <!-- 命名路由 -->
<RouterLink :to="{ path: '/about' }">关于</RouterLink> <!-- 路径对象 -->六、嵌套路由(children)
当页面有布局框架,且内容区需要根据子路径切换时使用。展示区里面还有一个展示区。
src/router/index.ts:
ts
import Detail from "@/views/Detail.vue";

const router = createRouter({
    history: createWebHistory(),
    routes: [
        { name: 'home', path: '/home', component: Home },
        {
            name: 'news',
            path: '/news',
            component: News,
            children: [
                {
                    name: 'detail',
                    // 配置子路由,子级路由开头不用写 /
                    path: 'detail',
                    component: Detail
                }
            ]
        },
        { name: 'about', path: '/about', component: About }
    ]
})News.vue(左侧列表 + 右侧详情展示区):
html
<script setup lang="ts">
import { ref } from "vue";

const newsList = ref([
  { id: '1', title: '含糖量最高的水果', content: '水蜜桃、香蕉、苹果、橘子、提子、橙子、芒果、荔枝、龙眼、榴莲、甘蔗、红枣、山楂、石榴、葡萄,这些水果的含糖量普遍较高,减肥或控糖人群建议适量食用。' },
  { id: '2', title: '如何一夜暴富', content: '一夜暴富的方法大多写在刑法里,合法途径包括投资理财、创业成功、中彩票、继承遗产等,但都需要长期积累或极强运气,脚踏实地最靠谱。' },
  { id: '3', title: '健康饮食小常识', content: '每天保证足量饮水,多吃蔬菜和优质蛋白,减少高油高盐高糖食物,三餐规律,不暴饮暴食,是保持身体健康的基础。' },
  { id: '4', title: 'Vue3 快速入门', content: 'Vue3 采用组合式API,使用 setup 语法糖,响应式用 ref 和 reactive,组件通信更简洁,搭配 Vue Router 和 Pinia 可快速开发项目。' },
  { id: '5', title: '前端学习路线', content: '先学 HTML + CSS + JavaScript,再学框架 Vue React,然后学工程化、网络请求、状态管理、打包构建,最后做项目实战。' },
  { id: '6', title: '夏季解暑小妙招', content: '多喝温水、避免正午外出、穿透气衣物、常备绿豆汤、使用遮阳伞帽子,保持室内通风,可有效预防中暑。' },
  { id: '7', title: '电脑保养技巧', content: '定期清理垃圾文件、更新系统、查杀病毒、保持散热、不频繁强制关机,能延长电脑使用寿命。' }
])
</script>

<template>
  <div class="news-page">
    <h1>新闻</h1>
    <div class="layout">
      <!-- 左侧导航 -->
      <ul class="news-list">
        <li v-for="news in newsList" :key="news.id">
          <!-- path路径要写完整 -->
          <RouterLink :to="{ path: '/news/detail' }">{{ news.title }}</RouterLink>
        </li>
      </ul>
      <!-- 右侧内容展示区 -->
      <div class="content-box">
        <RouterView />
      </div>
    </div>
  </div>
</template>

<style scoped>
.news-page { padding: 20px; max-width: 1100px; margin: 0 auto; }
.layout { display: flex; gap: 30px; }
.news-list { list-style: none; padding: 0; width: 200px; }
.news-list li { margin: 12px 0; }
.news-list a { text-decoration: none; color: #333; }
.news-list a:hover { color: #409eff; }
.content-box { flex: 1; border: 1px solid #eee; padding: 25px; border-radius: 8px; min-height: 350px; }
</style>
6.1 嵌套路由的激活状态
使用了子路由后,必须用 router-link-active(模糊匹配),不能用 router-link-exact-active(严格完全匹配):
css
.navigate a.router-link-active {
  color: #409eff;
  font-weight: bold;
  border-bottom: 2px solid #409eff;
}router-link-exact-active:严格完全匹配(/news只匹配/news)。router-link-active:模糊匹配(/news匹配/news、/news/detail、/news/xxx)。
七、路由传参:Query 参数
Query 参数是 URL 中 ? 后面的键值对,用于筛选、搜索等非唯一标识场景。(不需要改路由配置)
7.1 传参方式
第一种:字符串模板写法
html
<RouterLink :to="`/news/detail?id=${news.id}&title=${news.title}&content=${news.content}`">
  {{ news.title }}
</RouterLink>
第二种:对象写法(推荐)
html
<RouterLink :to="{
  path: '/news/detail',
  query: {
    id: news.id,
    title: news.title,
    content: news.content
  }
}">
  {{ news.title }}
</RouterLink>
也可以用 name:
html
<RouterLink :to="{
  name: 'detail',
  query: {
    id: news.id,
    title: news.title,
    content: news.content
  }
}">
  {{ news.title }}
</RouterLink>
7.2 接收参数
Detail.vue:
html
<script setup lang="ts">
import { useRoute } from "vue-router";
const route = useRoute();
</script>

<template>
  <ul class="news-list">
    <li>编号:{{ route.query.id }}</li>
    <li>标题:{{ route.query.title }}</li>
    <li>内容:{{ route.query.content }}</li>
  </ul>
</template>
八、路由传参:Params 参数(动态路由匹配)
Params 参数是 URL 路径的一部分,用于标识唯一资源(如用户 ID、文章 ID)。
8.1 配置路由(占位)
ts
const router = createRouter({
    history: createWebHistory(),
    routes: [
        {
            name: 'news',
            path: '/news',
            component: News,
            children: [
                {
                    name: 'detail',
                    // params参数要占位
                    // 后面加 ? 表示参数可传可不传
                    path: 'detail/:id/:title/:content?',
                    component: Detail
                }
            ]
        }
    ]
})
8.2 传参方式
字符串写法:
html
<RouterLink :to="`/news/detail/${news.id}/${news.title}/${news.content}`">
  {{ news.title }}
</RouterLink>
对象写法:
html
<RouterLink :to="{
  name: 'detail', // 只能写路由名称,不能写 path
  params: {
    id: news.id,
    title: news.title,
    content: news.content
  }
}">
  {{ news.title }}
</RouterLink>
8.3 接收参数
html
<script setup lang="ts">
import { useRoute } from "vue-router";
const route = useRoute();
</script>

<template>
  <ul class="news-list">
    <li>编号:{{ route.params.id }}</li>
    <li>标题:{{ route.params.title }}</li>
    <li>内容:{{ route.params.content }}</li>
  </ul>
</template>注意:
- 传递 params 参数时,若使用
to的对象写法,必须使用name配置项,不能用path。- 传递 params 参数时,需要提前在规则中占位。
九、路由的 Props 配置(解耦组件与路由)
默认组件通过 useRoute() 获取参数,导致组件与路由强耦合。使用 props 配置可以将参数以 props 形式传入组件。
9.1 写法一:布尔值(只映射 params)
ts
{
    name: 'detail',
    path: 'detail/:id/:title/:content?',
    component: Detail,
    props: true // 将所有 params 参数以 props 形式传给 Detail
}Detail.vue:
html
<script setup lang="ts">
defineProps({
  id: String,
  title: String,
  content: String
})
</script>

<template>
  <ul class="news-list">
    <li>编号:{{ id }}</li>
    <li>标题:{{ title }}</li>
    <li>内容:{{ content }}</li>
  </ul>
</template>
props: true只能传递 params 参数,query 参数不行。
9.2 写法二:函数写法(最灵活)
可以自己决定将什么作为 props 传给路由组件:
ts
{
    path: 'detail/:id/:title/:content?',
    component: Detail,
    props(route) {
        console.log(route);
        return route.params; // 也可以返回 route.query 或组合数据
    }
}
9.3 写法三:对象写法(静态 props)
ts
{
    path: 'detail/:id/:title/:content?',
    component: Detail,
    props: {
        a: 100,
        b: 200,
        c: 300
    }
}
对象写法使用较少,适用于需要传递静态数据的场景。
十、路由的 Replace 属性(替换历史记录)
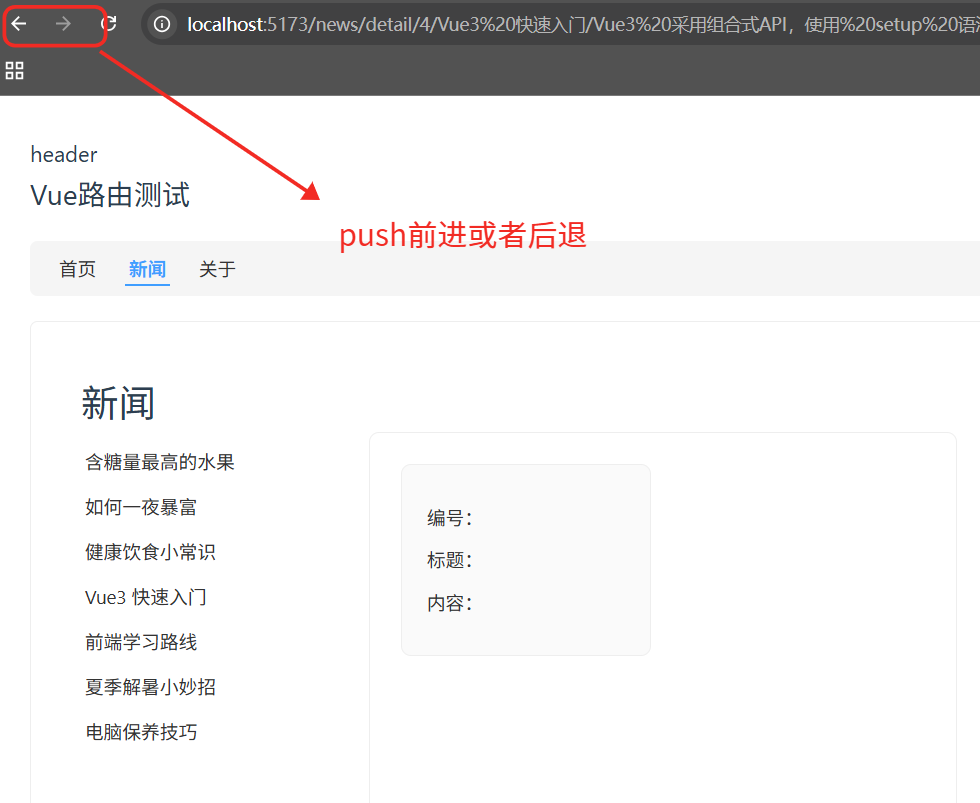
默认情况下,路由每次跳转都会向浏览器历史栈 push 一条新记录。可以改为 replace 模式,替换当前历史记录(浏览器后退/前进按钮无法回到被替换的页面)。
App.vue:
html
<div class="navigate">
  <RouterLink replace to="/home">首页</RouterLink>
  <RouterLink replace :to="{ name: 'news' }">新闻</RouterLink>
  <RouterLink replace :to="{ path: '/about' }">关于</RouterLink>
</div>
replace属性看具体需求使用。
十一、编程式路由导航(router.push / router.replace)
脱离 <RouterLink> 标签,通过 JavaScript 代码实现跳转。
11.1 获取路由器实例
html
<script setup lang="ts">
import { useRouter } from "vue-router";
const router = useRouter(); // 拿到了路由器
</script>
11.2 自动跳转示例
Home.vue(3 秒后自动跳转到新闻页):
html
<script setup lang="ts">
import { onMounted } from "vue";
import { useRouter } from "vue-router";

const router = useRouter();

onMounted(() => {
  setTimeout(() => {
    // push 方法:添加历史记录
    router.push('/news');
    // replace 方法:替换历史记录
    // router.replace('/news');
  }, 3000);
});
</script>
11.3 按钮点击跳转示例
News.vue(点击按钮查看新闻详情):
html
<script setup lang="ts">
import { ref } from "vue";
import { useRouter } from "vue-router";

const newsList = ref([...]); // 同上
const router = useRouter();

interface NewsInter {
  id: string;
  title: string;
  content: string;
}

function showNewsDetail(news: NewsInter) {
  // to 怎么写,push 就这么写
  router.push({
    name: 'detail',
    params: {
      id: news.id,
      title: news.title,
      content: news.content
    }
  });
}
</script>

<template>
  <div class="news-page">
    <ul class="news-list">
      <li v-for="news in newsList" :key="news.id">
        <button @click="showNewsDetail(news)">查看新闻</button>
        <RouterLink :to="{
          name: 'detail',
          params: { id: news.id, title: news.title, content: news.content }
        }">
          {{ news.title }}
        </RouterLink>
      </li>
    </ul>
    <div class="content-box">
      <RouterView />
    </div>
  </div>
</template>
11.4 常见使用场景
- 符合某种条件后跳转(如登录成功)。
- 鼠标滑过某个元素后延迟跳转。
- 表单提交后的页面跳转。
十二、路由重定向与 404 兜底
12.1 重定向(Redirect)
解决访问根路径 / 时的警告:

ts
const router = createRouter({
    history: createWebHistory(),
    routes: [
        { name: 'home', path: '/home', component: Home },
        { name: 'news', path: '/news', component: News },
        { name: 'about', path: '/about', component: About },
        // 重定向
        { path: '/', redirect: '/home' }
    ]
})
12.2 404 兜底页面
捕获所有未匹配的路径,必须放在路由表最后:
ts
const routes = [
  // ... 其他路由
  {
    path: '/:pathMatch(.*)*',
    name: 'NotFound',
    component: () => import('@/views/404.vue')
  }
]