前言
多媒体框架是一种软件框架,它在电脑上处理媒体数据并通过网络进行传播。一个良好的多媒体框架提供了直观的API和模块化的架构,这使得它易于添加对新的音频、视频和容器格式以及传输协议的支持。
多媒体框架不仅可以支持媒体播放器和音视频编辑器等程序,还可以用于编译视频会议程序、媒体转换器及其他多媒体工具。
多媒体框架通常包括以下几个层级:
- 编解码层:负责对音视频数据进行编码和解码。
- 封装层:处理音视频数据的压缩和封装。
- 协议层:管理网络数据的传输和通信协议。
- 应用层:整合整个流程,并进行统筹管理。
常见的多媒体框架包括:FFmpeg、GStreamer、DirectShow(微软)、AVFoundation(苹果)、OpenMax等,下面以 FFmpeg 和 GStreamer 为例介绍。
一、FFmpeg
FFmpeg是一个非常强大的开源多媒体处理框架,它提供了一系列用于处理音频、视频和多媒体流的工具和库。它也是最流行且应用最广泛的框架!
官网地址:

FFmpeg 的主要特点和功能:
-
编解码器支持:FFmpeg 支持众多音视频编解码器,包括常见的 H.264、H.265、AAC、MP3 等,也支持一些不常见的编解码器。
-
格式支持:它支持多种多媒体格式的解析和封装,包括 AVI、MP4、MKV、FLV、MOV 等。
-
转码和处理:FFmpeg 可以进行音视频的转码、裁剪、拼接、水印添加等处理操作,使其在不同格式、分辨率和编码方式之间进行转换。
-
流媒体处理:它支持从摄像头、文件或网络流等源接收多媒体流,并能进行实时处理和转发,用于流媒体直播和视频会议等场景。
-
滤镜和特效:FFmpeg 提供了丰富的滤镜和特效,可以实现图像处理、色彩调整、模糊、锐化等效果。
-
音频处理:它能够进行音频的分割、合并、音量调整、混音等操作。
-
跨平台性:FFmpeg 是跨平台的,可以在 Windows、MacOS、Linux 等操作系统上运行。
-
开源和免费:FFmpeg 是完全开源的,可以免费使用,并且具有活跃的社区支持和持续的更新和改进。
1.1 安装FFmpeg
更新软件包列表:
shell
sudo apt update安装 FFmpeg:
shell
sudo apt install ffmpeg -y验证是否成功安装:
shell
ffmpeg -version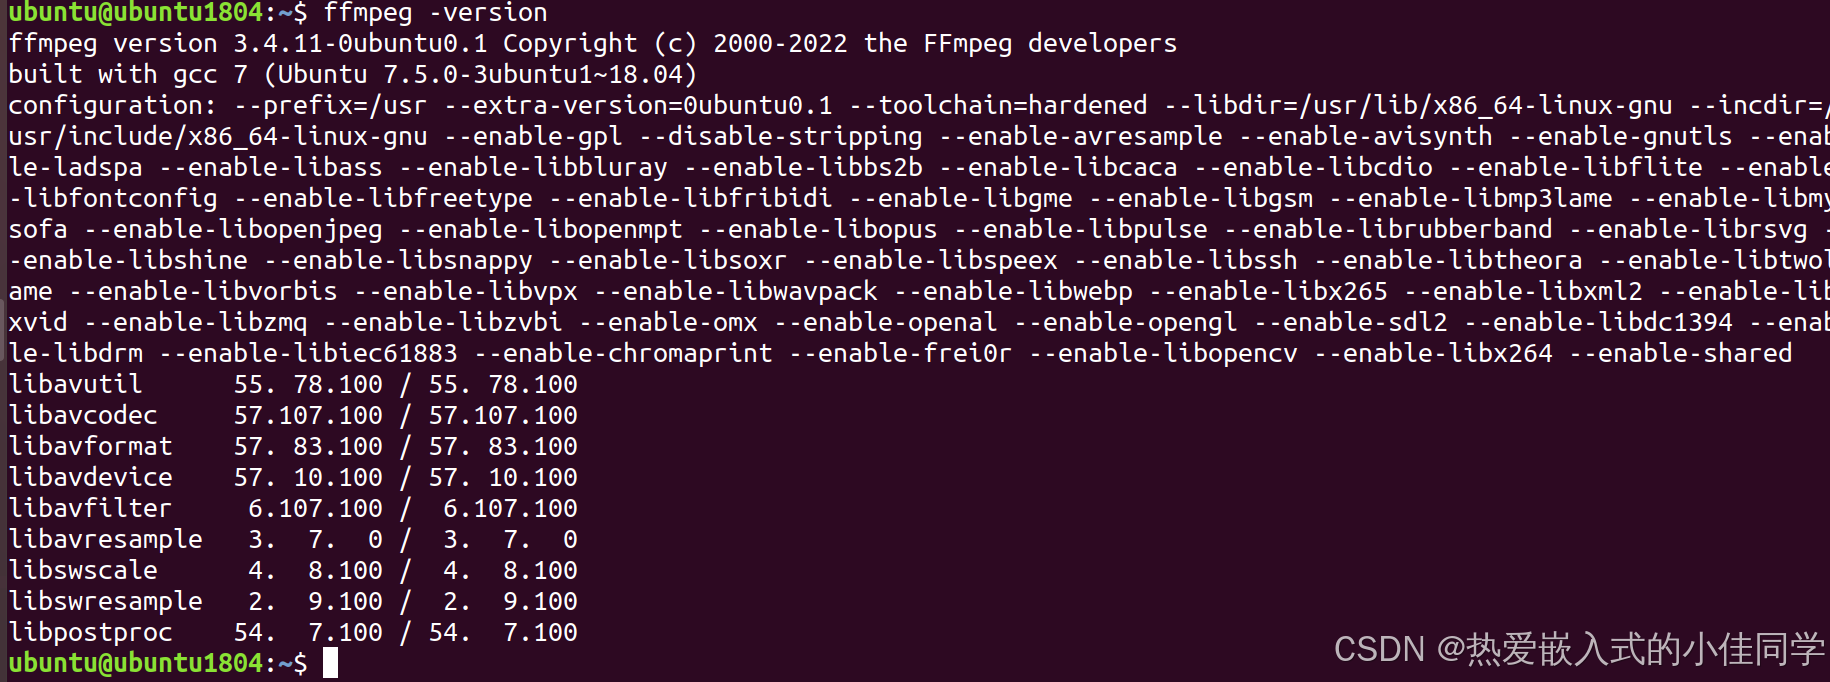
安装 FFmpeg 拓展开发包:
shell
sudo apt install libavcodec-dev -y
sudo apt install libavformat-dev -y
sudo apt install libavcodec-extra -y
1.2 使用命令行执行ffmpeg
转换视频格式:
- 将输入的 MP4 文件转换为 AVI 格式。
shell
ffmpeg -i input.mp4 output.avi播放视频:
shell
ffplay input.mp4
ffplay output.avi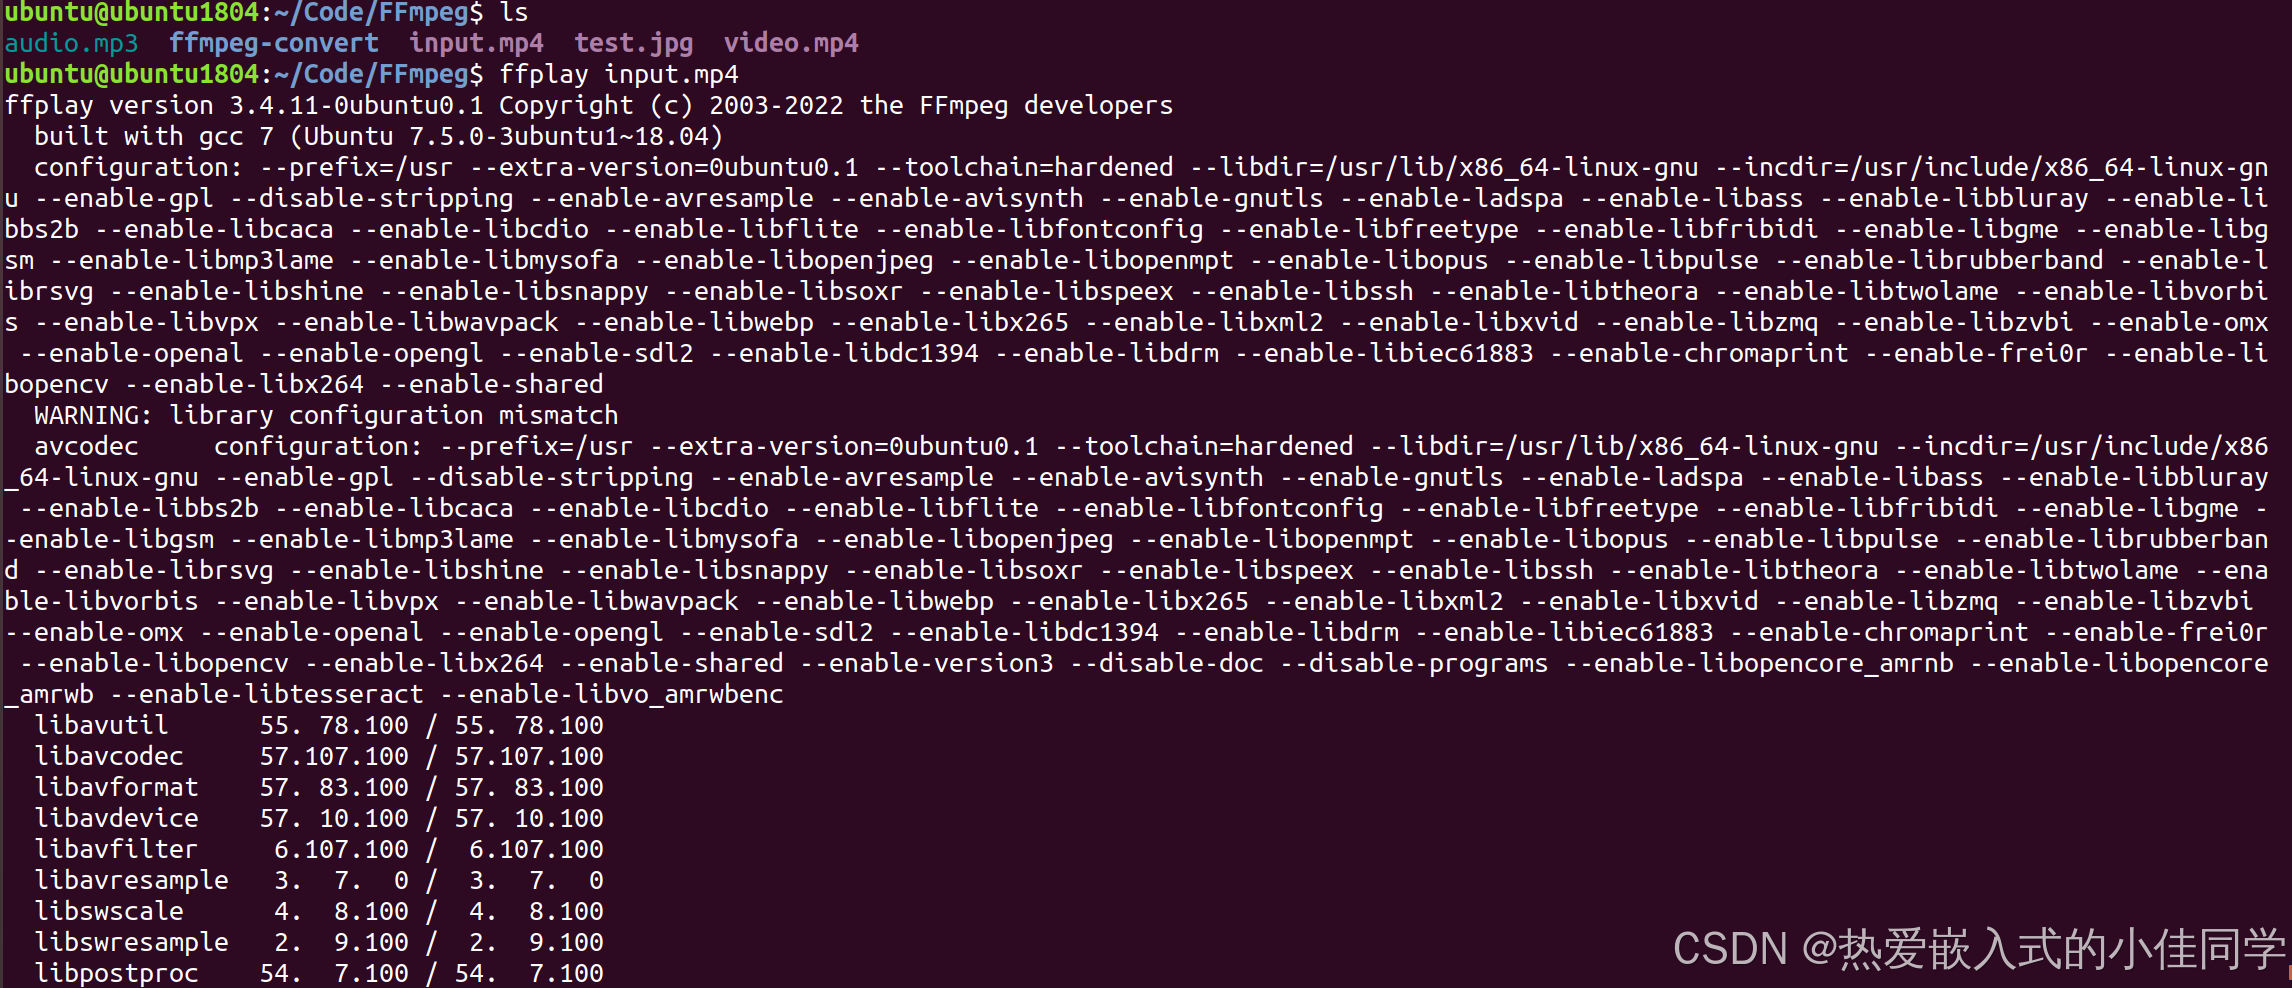
合并视频和音频:
- 将一个视频文件和一个音频文件合并为一个 MP4 文件,视频流不变,音频重新编码为 AAC 格式。
shell
ffmpeg -i video.mp4 -i audio.mp3 -c:v copy -c:a aac -strict experimental output.mp4
ffplay output.mp4
调整视频大小:
- 将输入的 MP4 文件调整为 1280x720 分辨率的输出。
shell
ffmpeg -i input.mp4 -vf scale=1280:720 output.mp4
ffplay output.mp4
改变视频帧率:
- 将输入的 MP4 文件的帧率改为 24 帧每秒。
shell
ffmpeg -i input.mp4 -r 10 output.mp4
ffplay output.mp4
提取视频中的帧:
- 将从输入的 MP4 文件中提取第 100 帧,并将其保存为 PNG 图像文件。
shell
ffmpeg -i input.mp4 -vf "select=eq(n\,100)" -vsync vfr output.png
ffplay output.png
添加水印:
- 将一个水印图像叠加到输入的 MP4 文件的左上角。
shell
ffmpeg -i input.mp4 -i test.jpg -filter_complex "overlay=10:10" output.mp4
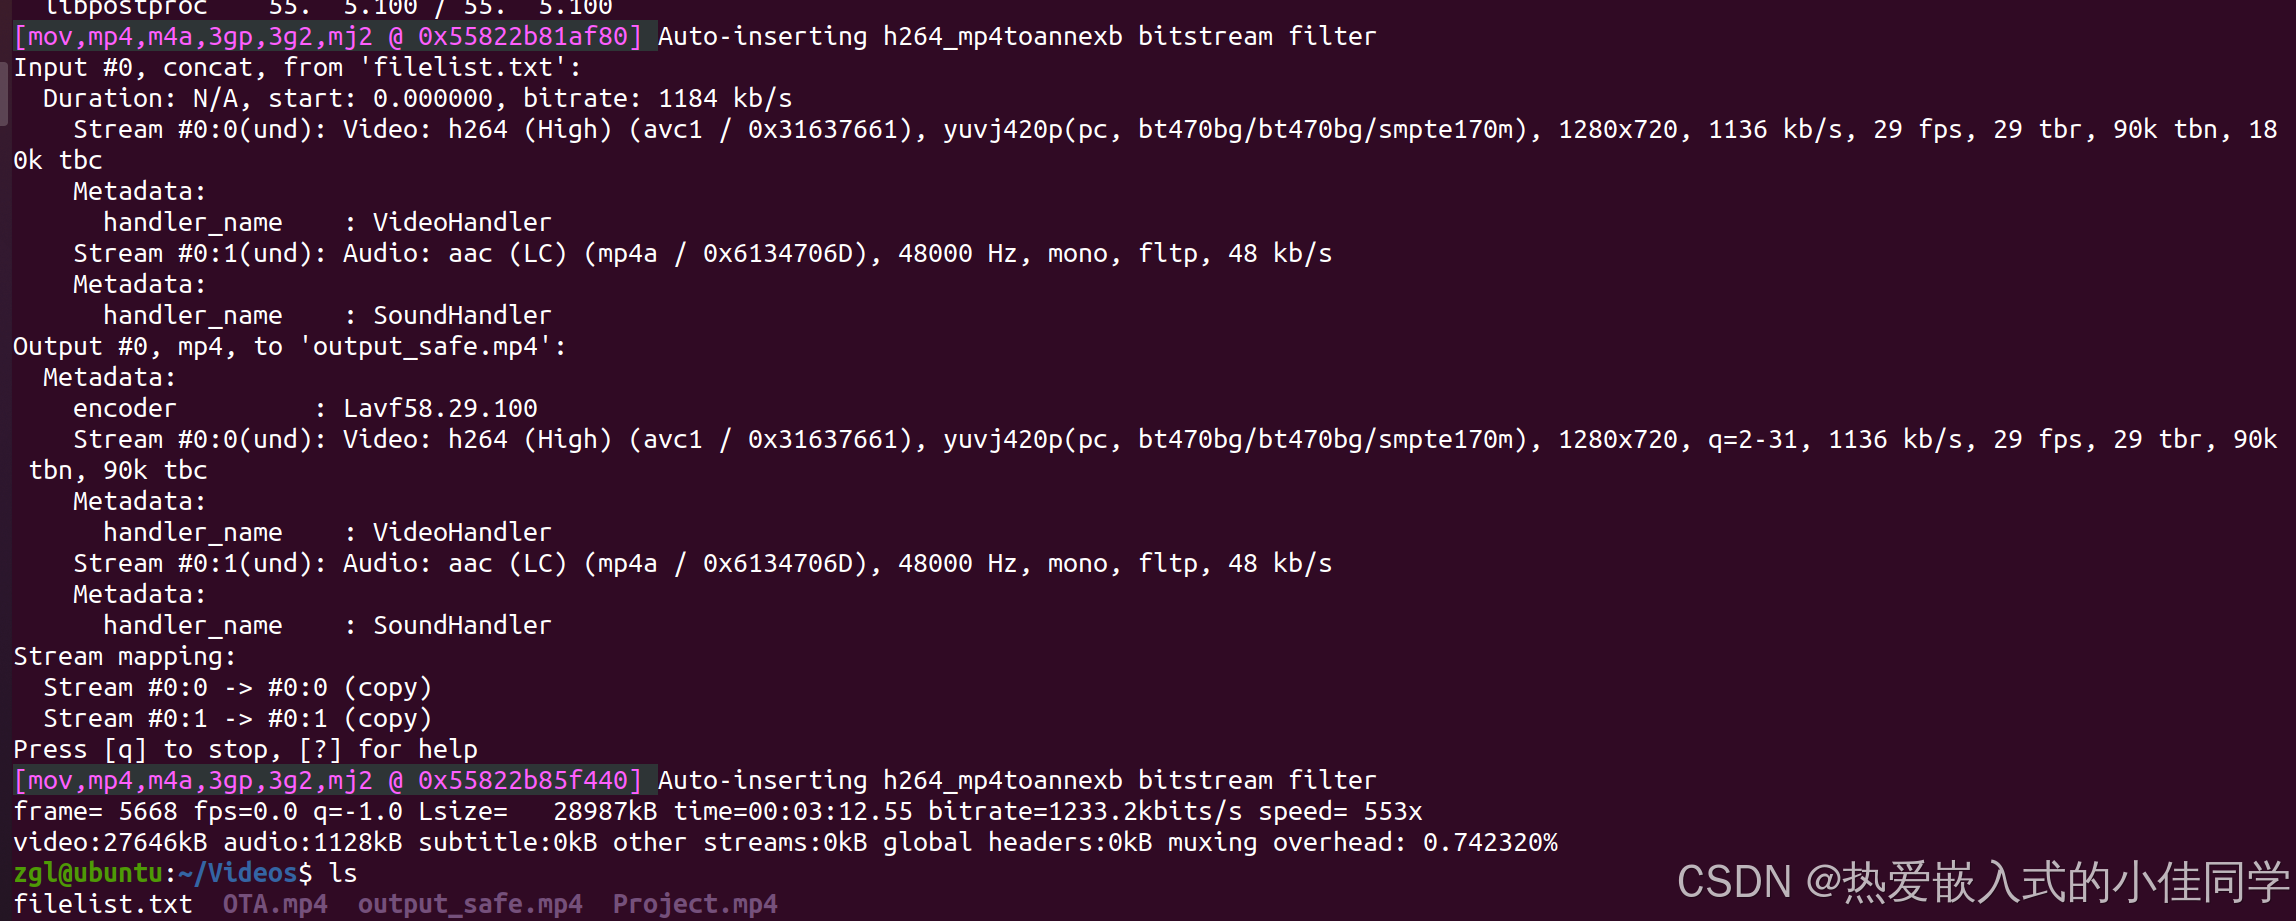
ffplay output.mp4合并多个视频:
shell
echo "file 'Project.mp4'" > filelist.txt
echo "file 'OTA.mp4'" >> filelist.txt
ffmpeg -f concat -safe 0 -i filelist.txt -c copy output_safe.mp4
ffplay output.mp4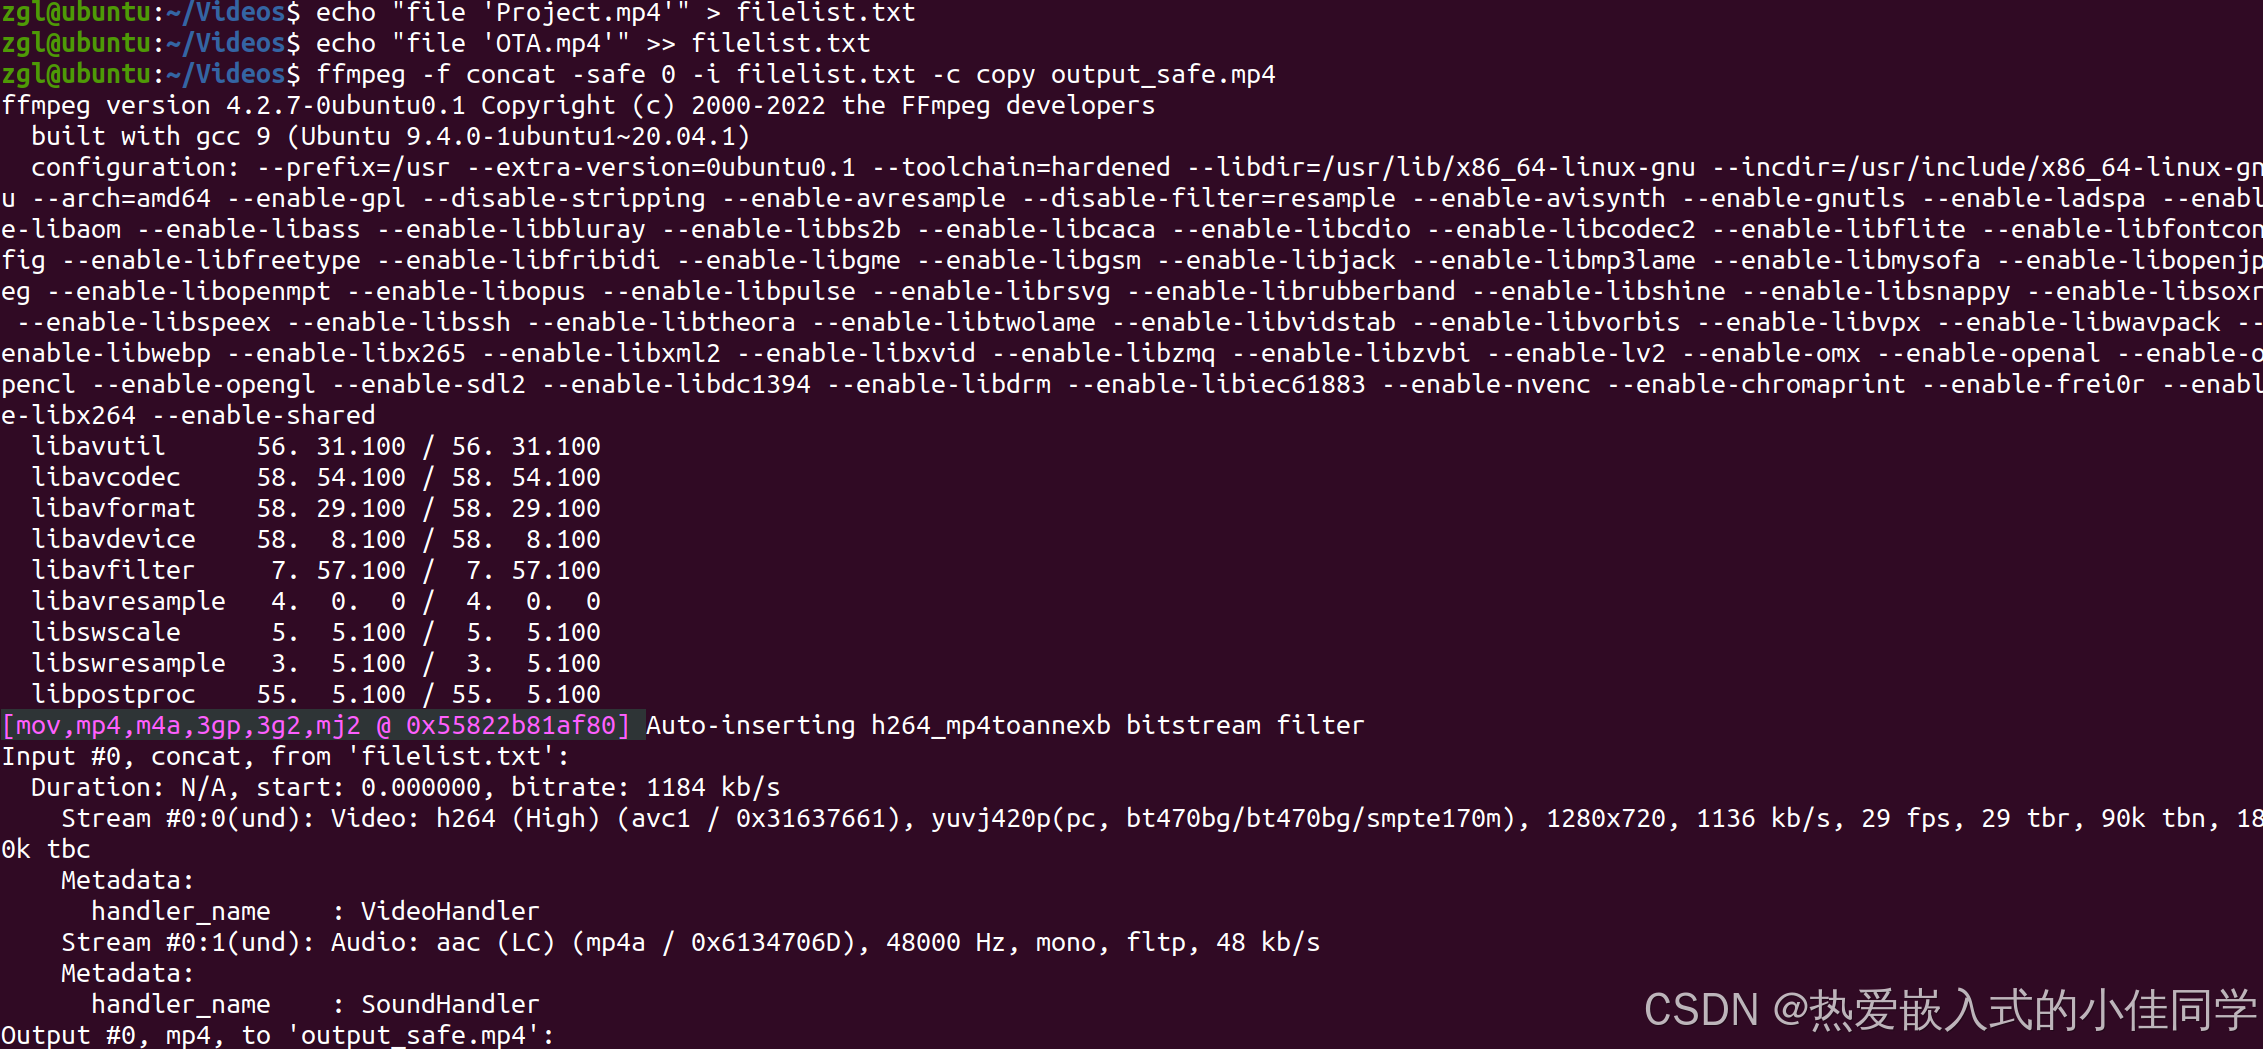
去掉视频中的音频:
shell
ffmpeg -i output_safe.mp4 -c:v copy -an output.mp4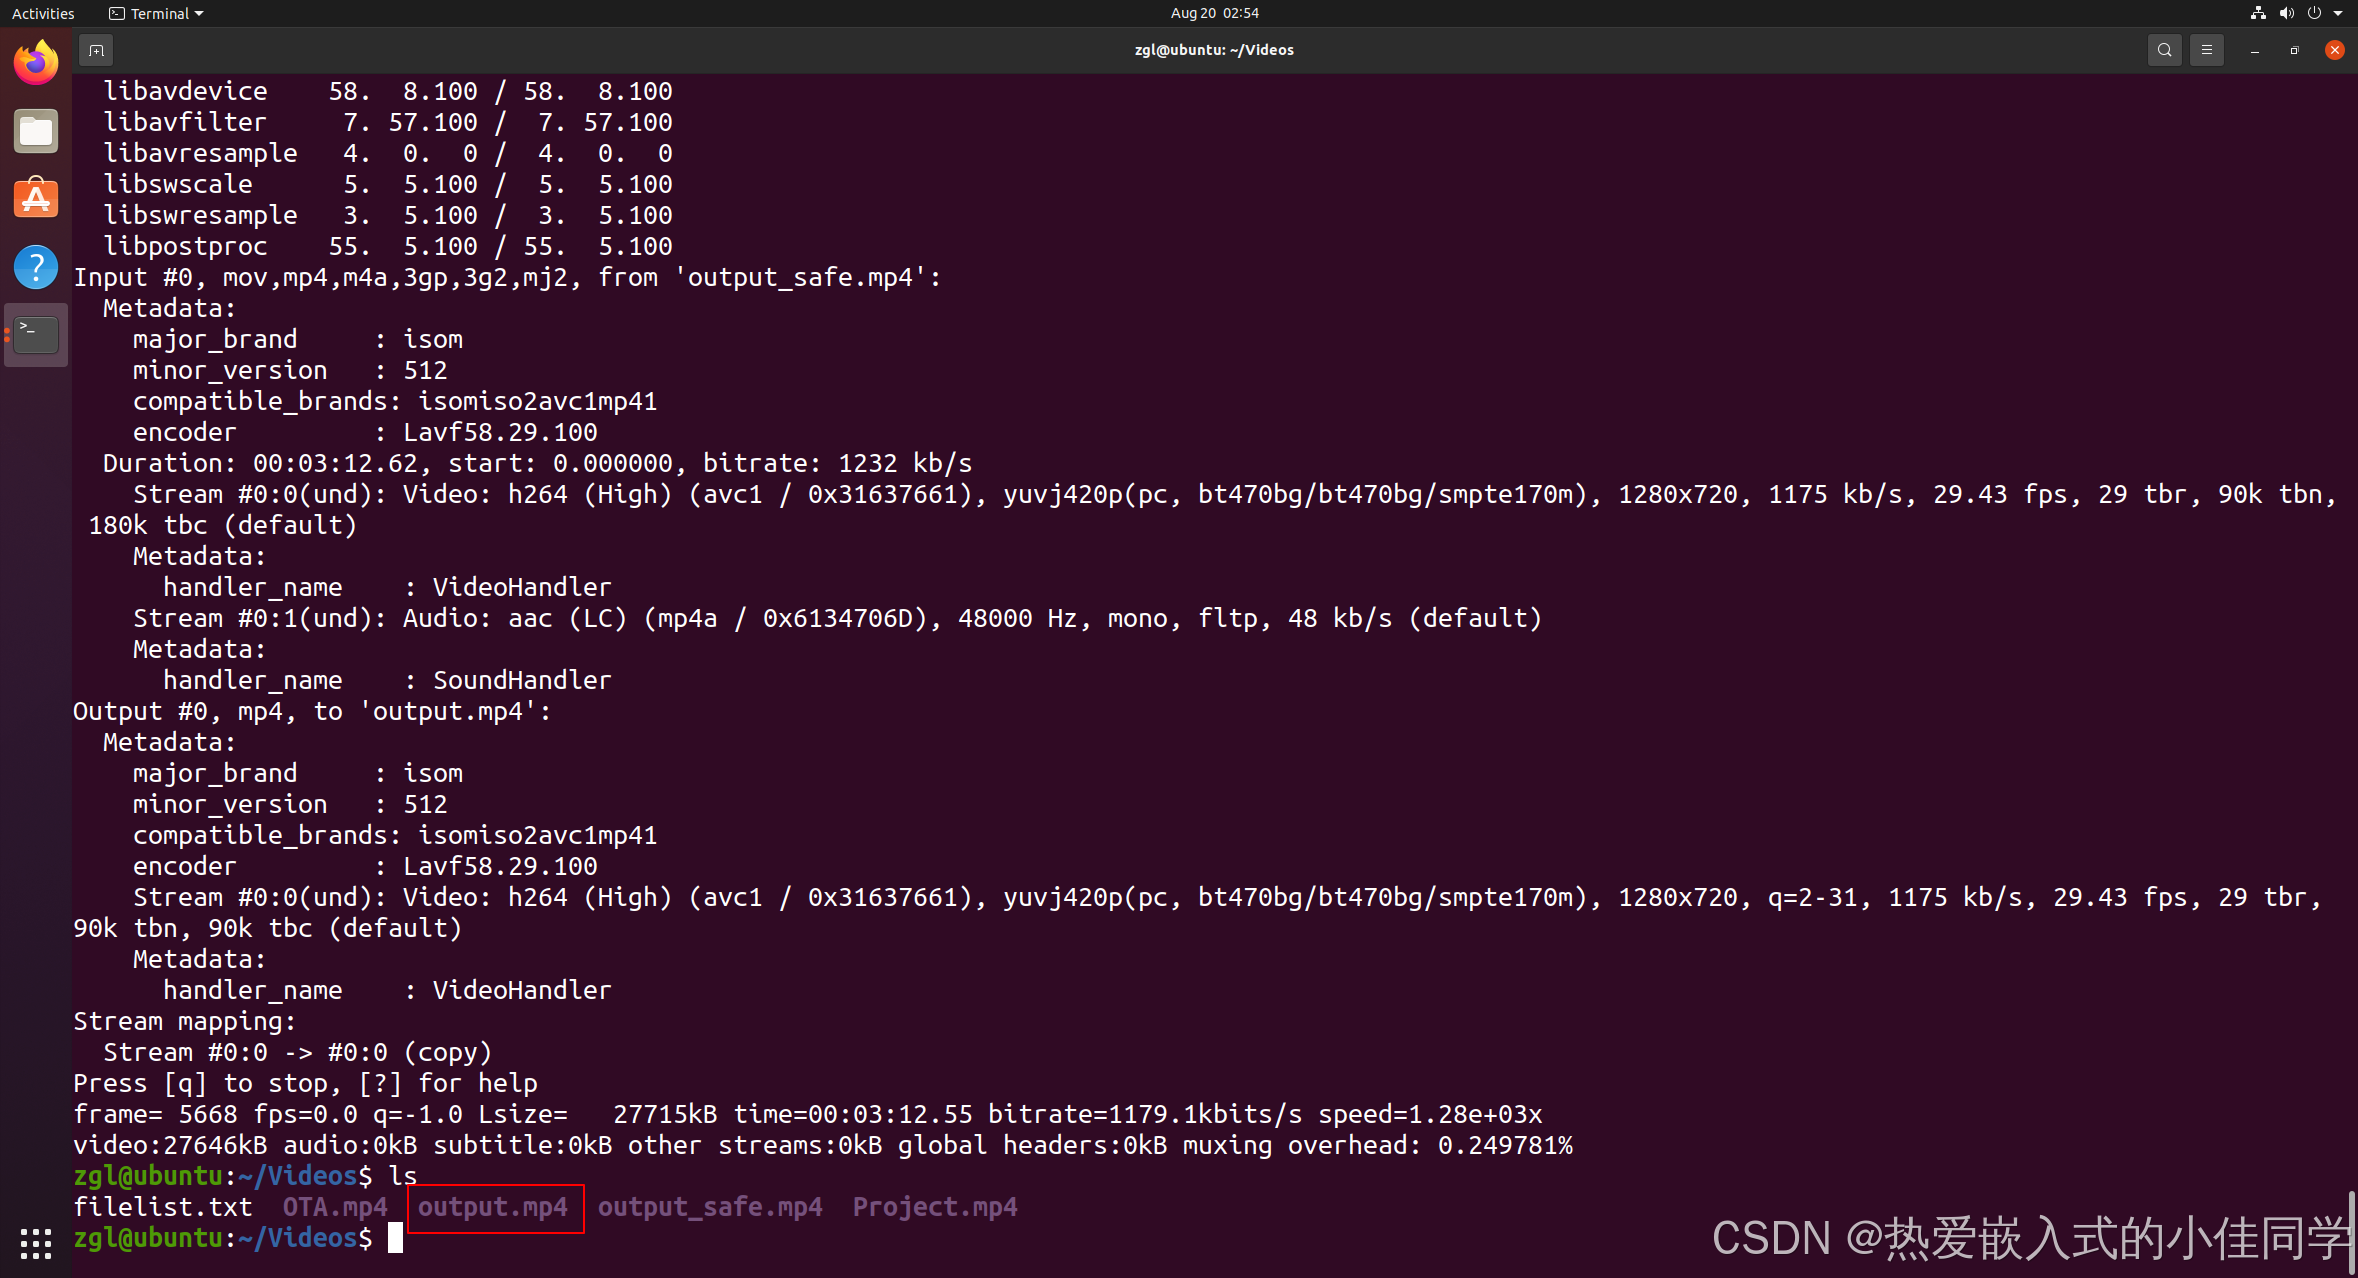
1.3 代码实现视频格式转换
步骤:
- 初始化编码器
- 打开输入文件,查找视频流
- 初始化编解码设置
- 打开编解码器,分配编码输出格式
- 打开输出文件,写入文件头
- 循环读取并写入帧
- 写入输出文件尾,关闭文件
- 释放资源
示例代码:
c++
#include <iostream>
#include <string>
#include <cstdlib>

// FFmpeg库的头文件
extern "C" {
#include <libavformat/avformat.h> // 包含用于处理多媒体格式的函数
#include <libavcodec/avcodec.h> // 包含用于编解码的函数
#include <libavutil/opt.h> // 包含用于设置选项的辅助函数
}

int main(int argc, char* argv[]) {
    if (argc != 3) {
        std::cerr << "Usage: " << argv[0] << " input.mp4 output.avi" << std::endl;
        return 1;
    }

    const char* input_filename = argv[1];// 获取输入文件名
    const char* output_filename = argv[2];// 获取输出文件名

    av_register_all();// 注册所有的文件格式和编解码器

    AVFormatContext* format_ctx = nullptr; // 初始化一个用于存储格式配置的指针
    if ((&format_ctx, input_filename, nullptr, nullptr) != 0) {
        std::cerr << "Error: Could not open input file" << std::endl;
        return 1;
    }

    //// 寻找视频流信息
    if (avformat_find_stream_info(format_ctx, nullptr) < 0) {
        std::cerr << "Error: Could not find stream information" << std::endl;
        avformat_close_input(&format_ctx);// 获取流信息失败,打印错误信息并退出程序
        return 1;
    }

    AVCodec* codec = nullptr;// 初始化一个用于存储编解码器的指针
    AVCodecContext* codec_ctx = nullptr;// 初始化一个用于存储编解码器配置的指针

    // 查找最佳的视频流,并检查是否是HEVC编码
    int video_stream_index = av_find_best_stream(format_ctx, AVMEDIA_TYPE_VIDEO, -1, -1, &codec, AV_CODEC_ID_HEVC);
    if (video_stream_index < 0) {
        std::cerr << "Error: Could not find HEVC video stream in input file" << std::endl;
        avformat_close_input(&format_ctx);
        return 1;
    }

    codec_ctx = avcodec_alloc_context3(codec);// 为找到的编解码器分配配置
    if (!codec_ctx) {
        std::cerr << "Error: Could not allocate codec context" << std::endl;
        avformat_close_input(&format_ctx);
        return 1;
    }

    // 将视频流的参数复制到编解码器配置中
    if (avcodec_parameters_to_context(codec_ctx, format_ctx->streams[video_stream_index]->codecpar) < 0) {
        std::cerr << "Error: Could not copy codec parameters to context" << std::endl;
        avcodec_free_context(&codec_ctx); // 释放编解码器配置
        avformat_close_input(&format_ctx); // 关闭输入文件
        return 1;
    }

    // 打开编解码器
    if (avcodec_open2(codec_ctx, codec, nullptr) < 0) {
        std::cerr << "Error: Could not open codec" << std::endl;
        avcodec_free_context(&codec_ctx);
        avformat_close_input(&format_ctx);
        return 1;
    }

    AVFormatContext* output_format_ctx = nullptr;// 初始化一个用于存储输出格式配置的指针
    if (avformat_alloc_output_context2(&output_format_ctx, nullptr, nullptr, output_filename) < 0) {
        std::cerr << "Error: Could not allocate output context" << std::endl;
        avcodec_free_context(&codec_ctx);
        avformat_close_input(&format_ctx);
        return 1;
    }

    AVStream* out_stream = avformat_new_stream(output_format_ctx, codec);// 在输出格式配置中创建新的流
    if (!out_stream) {
        std::cerr << "Error: Could not allocate output stream" << std::endl;
        avcodec_free_context(&codec_ctx);
        avformat_close_input(&format_ctx);
        avformat_free_context(output_format_ctx);// 释放输出格式配置
        return 1;
    }

    // 将编解码器配置的参数复制到输出流中
    if (avcodec_parameters_from_context(out_stream->codecpar, codec_ctx) < 0) {
        std::cerr << "Error: Could not copy codec parameters from context" << std::endl;
        avcodec_free_context(&codec_ctx);
        avformat_close_input(&format_ctx);
        avformat_free_context(output_format_ctx);
        return 1;
    }

    // 如果输出格式不是AVFMT_NOFILE类型,则打开输出文件
    if (!(output_format_ctx->oformat->flags & AVFMT_NOFILE)) {
        if (avio_open(&output_format_ctx->pb, output_filename, AVIO_FLAG_WRITE) < 0) {
            std::cerr << "Error: Could not open output file" << std::endl;
            avcodec_free_context(&codec_ctx);
            avformat_close_input(&format_ctx);
            avformat_free_context(output_format_ctx);
            return 1;
        }
    }

    //写入文件头
    if (avformat_write_header(output_format_ctx, nullptr) < 0) {
        std::cerr << "Error: Could not write output file header" << std::endl;
        avcodec_free_context(&codec_ctx);
        avformat_close_input(&format_ctx);
        avformat_free_context(output_format_ctx);
        return 1;
    }

    AVPacket pkt;// 初始化一个用于存储压缩数据的数据包
    av_init_packet(&pkt);// 初始化数据包
    pkt.data = nullptr;// 设置数据包的数据指针为空
    pkt.size = 0;// 设置数据包的大小为0

    // 循环读取输入文件中的帧
    while (av_read_frame(format_ctx, &pkt) >= 0) {
        if (pkt.stream_index == video_stream_index) { // 检查当前帧是否属于视频流
            pkt.stream_index = out_stream->index; // 将帧的流索引设置为输出流的索引
            av_interleaved_write_frame(output_format_ctx, &pkt); // 将帧写入输出文件
        }
        av_packet_unref(&pkt);// 减少引用计数并可能释放数据包
    }

    av_write_trailer(output_format_ctx);// 写入输出文件的尾部信息

    if (output_format_ctx && !(output_format_ctx->oformat->flags & AVFMT_NOFILE)) {
        avio_closep(&output_format_ctx->pb);// 如果输出文件被打开了,关闭它
    }

    avcodec_free_context(&codec_ctx);// 释放编解码器配置
    avformat_close_input(&format_ctx);// 关闭输入文件
    avformat_free_context(output_format_ctx);// 释放输出格式配置

    return 0;
}
Makefile:
Makefile
# 编译器
CXX := g++
# 编译选项
CXXFLAGS := -Wall -O2
# 头文件路径
INCLUDES := -I/usr/include/x86_64-linux-gnu/
# 库文件路径
LIBS := -L/usr/lib/x86_64-linux-gnu/
# 需要链接的库
LDLIBS := -lavformat -lavcodec -lavutil

# 目标文件
TARGET := convert

# 源文件列表
SRCS := main.cpp

# 生成目标文件列表
OBJS := $(SRCS:.cpp=.o)

# 默认目标
all: $(TARGET)

# 生成可执行文件
$(TARGET): $(OBJS)
	$(CXX) $(CXXFLAGS) $(INCLUDES) $(LIBS) -o $@ $^ $(LDLIBS)

# 生成目标文件
%.o: %.cpp
	$(CXX) $(CXXFLAGS) $(INCLUDES) -c $< -o $@

# 清理生成的文件
clean:
	$(RM) $(TARGET) $(OBJS)
编译运行程序后,可以看到当前文件夹下从MP4转换后的AVI文件:
shell
./convert input.mp4 output.avi使用ffplay播放视频
shell
ffplay output.avi二、GStreamer
GStreamer 是一个功能强大的开源多媒体框架,用于创建、处理和播放音频和视频流。
官方网址:

GStreamer 的主要特点和功能:
-
模块化架构:GStreamer 的设计是基于模块化的架构,可以根据需要添加或移除各种插件和元件,从而实现灵活的功能扩展和定制。
-
跨平台性:GStreamer 可以在多种操作系统上运行,包括 Linux、Windows、macOS 等。
-
丰富的插件支持:GStreamer 提供了大量的插件,用于处理各种多媒体格式、编解码器、滤镜、特效等,可以满足各种多媒体处理需求。
-
流式处理:GStreamer 支持流式处理,可以处理实时音视频流,适用于流媒体直播、视频会议等场景。
-
音视频编解码支持:它支持多种常见的音视频编解码器,包括 H.264、H.265、AAC、MP3 等,也支持一些不常见的编解码器。
-
容器格式支持:GStreamer 支持多种多媒体容器格式的解析和封装,包括 AVI、MP4、MKV、FLV、MOV 等。
-
图形界面和命令行工具:GStreamer 提供了图形界面和命令行工具,用于配置和管理多媒体处理流程。
-
多语言支持:GStreamer 可以通过各种语言的绑定进行使用,包括 C、C++、Python、Java 等。
GStreamer的核心是基于管道(Pipeline)的概念,这意味着你可以将多个处理步骤(称为元素或 Element)连接起来,以实现复杂的媒体处理任务。
2.1 安装GStreamer
更新软件包列表
shell
sudo apt update安装 GStreamer
安装 GStreamer 的基本运行时库和插件。你可以根据需要选择不同的插件包,如 gstreamer1.0-plugins-base ,gstreamer1.0-plugins-good , gstreamer1.0-plugins-bad ,gstreamer1.0-plugins-ugly
shell
sudo apt-get install libgstreamer1.0-dev libgstreamer-plugins-base1.0-dev libgstreamer-plugins-bad1.0-dev gstreamer1.0-plugins-base gstreamer1.0-plugins-good gstreamer1.0-plugins-bad gstreamer1.0-plugins-ugly gstreamer1.0-libav gstreamer1.0-tools gstreamer1.0-x gstreamer1.0-alsa gstreamer1.0-gl gstreamer1.0-gtk3 gstreamer1.0-qt5 gstreamer1.0-pulseaudio -y这些插件包括了各种常见的音视频编解码器、文件格式支持以及其他的功能扩展。
安装额外的 GStreamer 插件(可选):
如果你需要更多特定功能的插件,你可以根据需要安装额外的插件包。例如,如果你需要使用 GStreamer 的 Python 绑定,可以安装 gir1.2-gst-plugins-base-1.0 包。
shell
sudo apt install gir1.2-gst-plugins-base-1.0验证安装
shell
gst-inspect-1.0 --version
2.2 使用命令行执行GStreamer
转换视频格式:
- 将输入的 MP4 文件转换为 MKV 格式。
shell
gst-launch-1.0 -e filesrc location=input.mp4 ! qtdemux name=demux \
demux.video_0 ! queue ! decodebin ! videoconvert ! \
avenc_mpeg4 ! matroskamux name=mux \
demux.audio_0 ! queue ! decodebin ! audioconvert ! \
audioresample ! audioconvert ! mux. \
mux. ! filesink location=output.mkv
播放视频:
shell
gst-play-1.0 input.mp4
gst-play-1.0 output.mkv
合并视频和音频:
- 将一个视频文件和一个音频文件合并为一个 MP4 文件,视频流不变,音频流重新编码为 AAC 格式。
shell
gst-launch-1.0 -e filesrc location=video.mp4 ! qtdemux name=demux \
demux.video_0 ! queue ! h264parse ! mux. \
filesrc location=audio.mp3 ! decodebin ! audioconvert ! voaacenc ! aacparse ! mux. \
qtmux name=mux ! filesink location=output.mp4

gst-play-1.0 output.mp4
调整视频大小:
- 将输入的 MP4 文件调整为 1280x720 分辨率的输出。
shell
gst-launch-1.0 filesrc location=input.mp4 ! decodebin ! videoscale ! video/x-raw,width=1280,height=720 ! videoconvert ! x264enc ! mp4mux ! filesink location=output.mp4改变视频帧率:
- 将输入的 MP4 文件的帧率改为 24 帧每秒。
shell
gst-launch-1.0 filesrc location=input.mp4 ! decodebin ! videorate ! video/x-raw,framerate=24/1 ! videoconvert ! x264enc ! mp4mux ! filesink location=output.mp4提取视频中的帧:
- 将从输入的 MP4 文件中提取视频中的图像,并保存为 PNG 图像文件。
shell
gst-launch-1.0 filesrc location=input.mp4 ! qtdemux ! decodebin ! videorate ! video/x-raw,framerate=1/1 ! videoconvert ! pngenc ! filesink location=output.png视频叠加文字:
- 将从输入的 MP4 视频上叠加文字并将结果保存到输出文件中。
shell
gst-launch-1.0 filesrc location=input.mp4 ! decodebin ! videoconvert ! textoverlay text="Hello, World!" valignment=top halignment=left ! x264enc ! mp4mux ! filesink location=output.mp4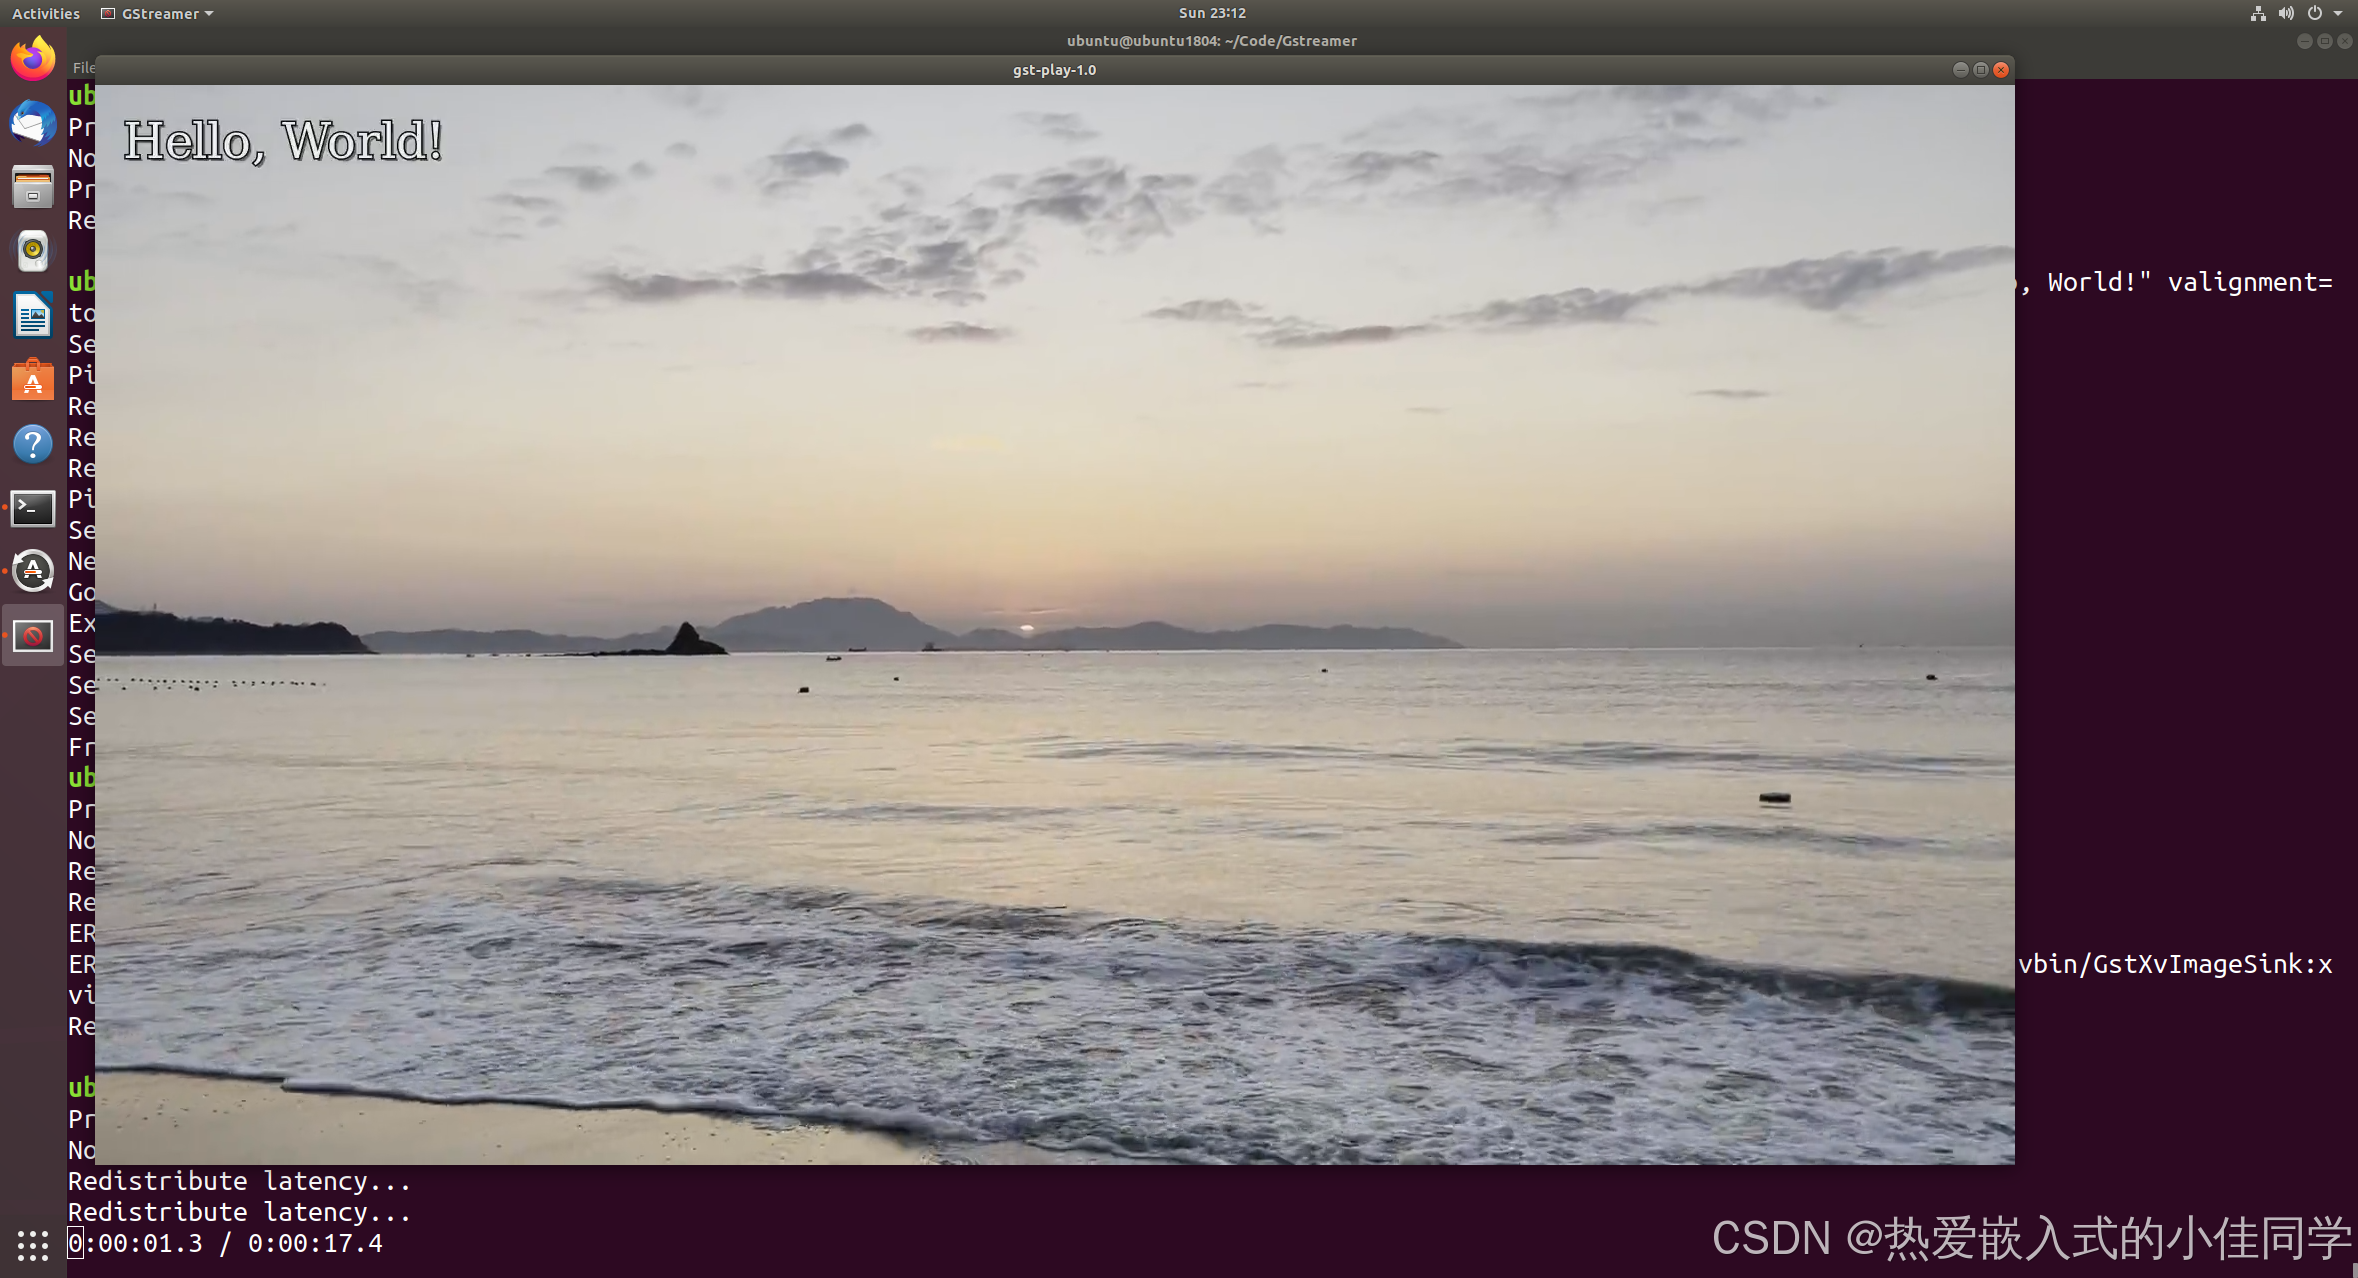
2.3 第一个GStreamer 应用程序
C代码实现 MP4 文件的播放,步骤如下:
- 初始化 GStreamer 库
- 构建管道
- 播放视频
- 等待错误 / 文件结束信号
- 释放资源
代码示例:
c
#include <gst/gst.h>

int tutorial_main(int argc, char *argv[]) {
    GstElement *pipeline;
    GstBus *bus;
    GstMessage *msg;

    /* Initialize GStreamer */
    gst_init(&argc, &argv);

    /* Build the pipeline */
    pipeline = gst_parse_launch("playbin uri=file:/home/ubuntu/Code/Gstreamer/GStreamer-helloWorld/input.mp4", NULL);

    /* Start playing */
    gst_element_set_state(pipeline, GST_STATE_PLAYING);

    /* Wait until error or EOS */
    bus = gst_element_get_bus(pipeline);
    msg = gst_bus_timed_pop_filtered(bus, GST_CLOCK_TIME_NONE, GST_MESSAGE_ERROR | GST_MESSAGE_EOS);

    /* See next tutorial for proper error message handling/parsing */
    if (GST_MESSAGE_TYPE(msg) == GST_MESSAGE_ERROR) {
        g_error("An error occurred! Re-run with the GST_DEBUG=*:WARN environment "
                "variable set for more details.");
    }

    /* Free resources */
    gst_message_unref(msg);
    gst_object_unref(bus);
    gst_element_set_state(pipeline, GST_STATE_NULL);
    gst_object_unref(pipeline);
    return 0;
}

int main(int argc, char *argv[]) {
    return tutorial_main(argc, argv);
}
Makefile:
Makefile
# 编译器
CC := gcc
# 编译选项
CCFLAGS := -Wall -O2
# 头文件路径
INCLUDES := -I/usr/include/x86_64-linux-gnu/ -I/usr/include/gstreamer-1.0 -I/usr/include/glib-2.0 -I/usr/lib/x86_64-linux-gnu/glib-2.0/include
# 库文件路径
LIBS := -L/usr/lib/x86_64-linux-gnu/
# 需要链接的库
LDLIBS := -lgstreamer-1.0 -lgobject-2.0 -lglib-2.0

TARGET = basic-tutorial

SRCS = main.c

# 生成目标文件列表
OBJS := $(SRCS:.c=.o)

# 默认目标
all: $(TARGET)

# 生成可执行文件
$(TARGET): $(OBJS)
	$(CC) $(CXXFLAGS) $(INCLUDES) $(LIBS) -o $@ $^ $(LDLIBS)

# 生成目标文件
%.o: %.c
	$(CC) $(CCFLAGS) $(INCLUDES) -c $< -o $@

# 清理生成的文件
clean:
	$(RM) $(TARGET) $(OBJS)
编译运行:
shell
make
./basic-tutorial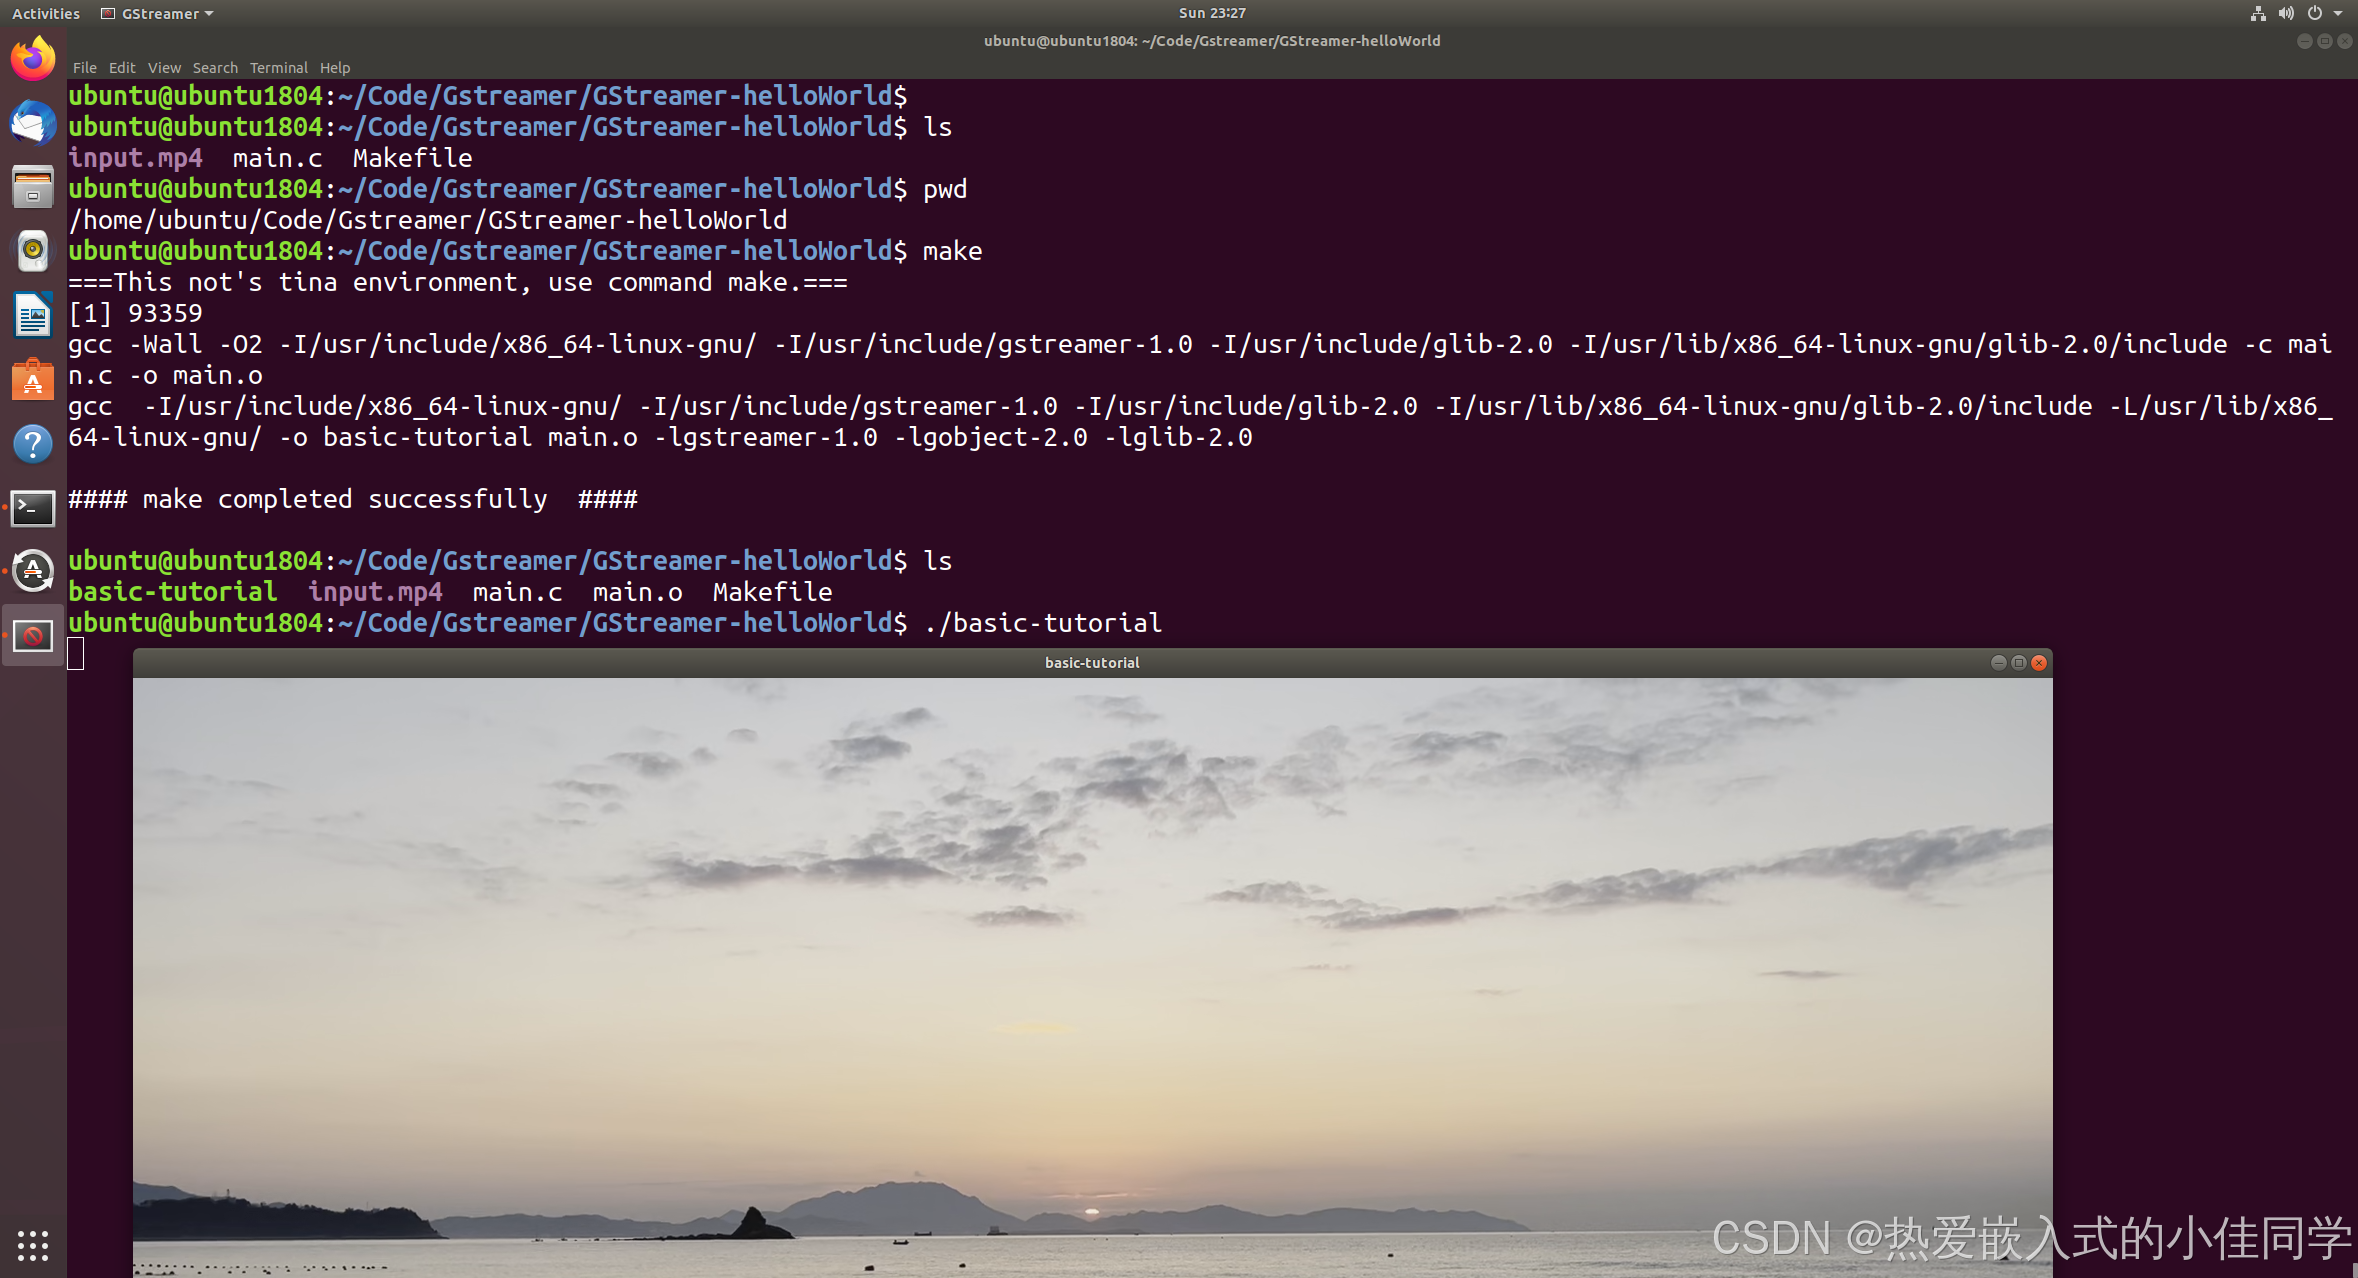
2.4 创建并连接管道
C代码实现创建元素并将元素相互连接,步骤如下:
- 初始化 GStreamer 库
- 创建元素和管道
- 构建管道并链接元素
- 输入测试源属性
- 开始播放并等待错误 / EOS
- 释放资源
代码示例:
c
#include <gst/gst.h>

#ifdef __APPLE__
#include <TargetConditionals.h>
#endif

int
tutorial_main (int argc, char *argv[])
{
  GstElement *pipeline, *source, *sink;
  GstBus *bus;
  GstMessage *msg;
  GstStateChangeReturn ret;

  /* Initialize GStreamer */
  gst_init (&argc, &argv);

  /* Create the elements */
  source = gst_element_factory_make ("videotestsrc", "source");
  sink = gst_element_factory_make ("autovideosink", "sink");

  /* Create the empty pipeline */
  pipeline = gst_pipeline_new ("test-pipeline");

  if (!pipeline || !source || !sink) {
    g_printerr ("Not all elements could be created.\n");
    return -1;
  }

  /* Build the pipeline */
  gst_bin_add_many (GST_BIN (pipeline), source, sink, NULL);
  if (gst_element_link (source, sink) != TRUE) {
    g_printerr ("Elements could not be linked.\n");
    gst_object_unref (pipeline);
    return -1;
  }

  /* Modify the source's properties */
  g_object_set (source, "pattern", 0, NULL);

  /* Start playing */
  ret = gst_element_set_state (pipeline, GST_STATE_PLAYING);
  if (ret == GST_STATE_CHANGE_FAILURE) {
    g_printerr ("Unable to set the pipeline to the playing state.\n");
    gst_object_unref (pipeline);
    return -1;
  }

  /* Wait until error or EOS */
  bus = gst_element_get_bus (pipeline);
  msg =
      gst_bus_timed_pop_filtered (bus, GST_CLOCK_TIME_NONE,
      GST_MESSAGE_ERROR | GST_MESSAGE_EOS);

  /* Parse message */
  if (msg != NULL) {
    GError *err;
    gchar *debug_info;

    switch (GST_MESSAGE_TYPE (msg)) {
      case GST_MESSAGE_ERROR:
        gst_message_parse_error (msg, &err, &debug_info);
        g_printerr ("Error received from element %s: %s\n",
            GST_OBJECT_NAME (msg->src), err->message);
        g_printerr ("Debugging information: %s\n",
            debug_info ? debug_info : "none");
        g_clear_error (&err);
        g_free (debug_info);
        break;
      case GST_MESSAGE_EOS:
        g_print ("End-Of-Stream reached.\n");
        break;
      default:
        /* We should not reach here because we only asked for ERRORs and EOS */
        g_printerr ("Unexpected message received.\n");
        break;
    }
    gst_message_unref (msg);
  }

  /* Free resources */
  gst_object_unref (bus);
  gst_element_set_state (pipeline, GST_STATE_NULL);
  gst_object_unref (pipeline);
  return 0;
}

int
main (int argc, char *argv[])
{
#if defined(__APPLE__) && TARGET_OS_MAC && !TARGET_OS_IPHONE
  return gst_macos_main ((GstMainFunc) tutorial_main, argc, argv, NULL);
#else
  return tutorial_main (argc, argv);
#endif
}
Makefile:
Makefile
# 编译器
CC := gcc
# 编译选项
CCFLAGS := -Wall -O2
# 头文件路径
INCLUDES := -I/usr/include/x86_64-linux-gnu/ -I/usr/include/gstreamer-1.0 -I/usr/include/glib-2.0 -I/usr/lib/x86_64-linux-gnu/glib-2.0/include
# 库文件路径
LIBS := -L/usr/lib/x86_64-linux-gnu/
# 需要链接的库
LDLIBS := -lgstreamer-1.0 -lgobject-2.0 -lglib-2.0
TARGET = concepts-tutorial
SRCS = main.c
# 生成目标文件列表
OBJS := $(SRCS:.c=.o)
# 默认目标
all: $(TARGET)
# 生成可执行文件
$(TARGET): $(OBJS)
$(CC) $(CXXFLAGS) $(INCLUDES) $(LIBS) -o $@ $^ $(LDLIBS)
# 生成目标文件
%.o: %.c
$(CC) $(CCFLAGS) $(INCLUDES) -c $< -o $@
# 清理生成的文件
clean:
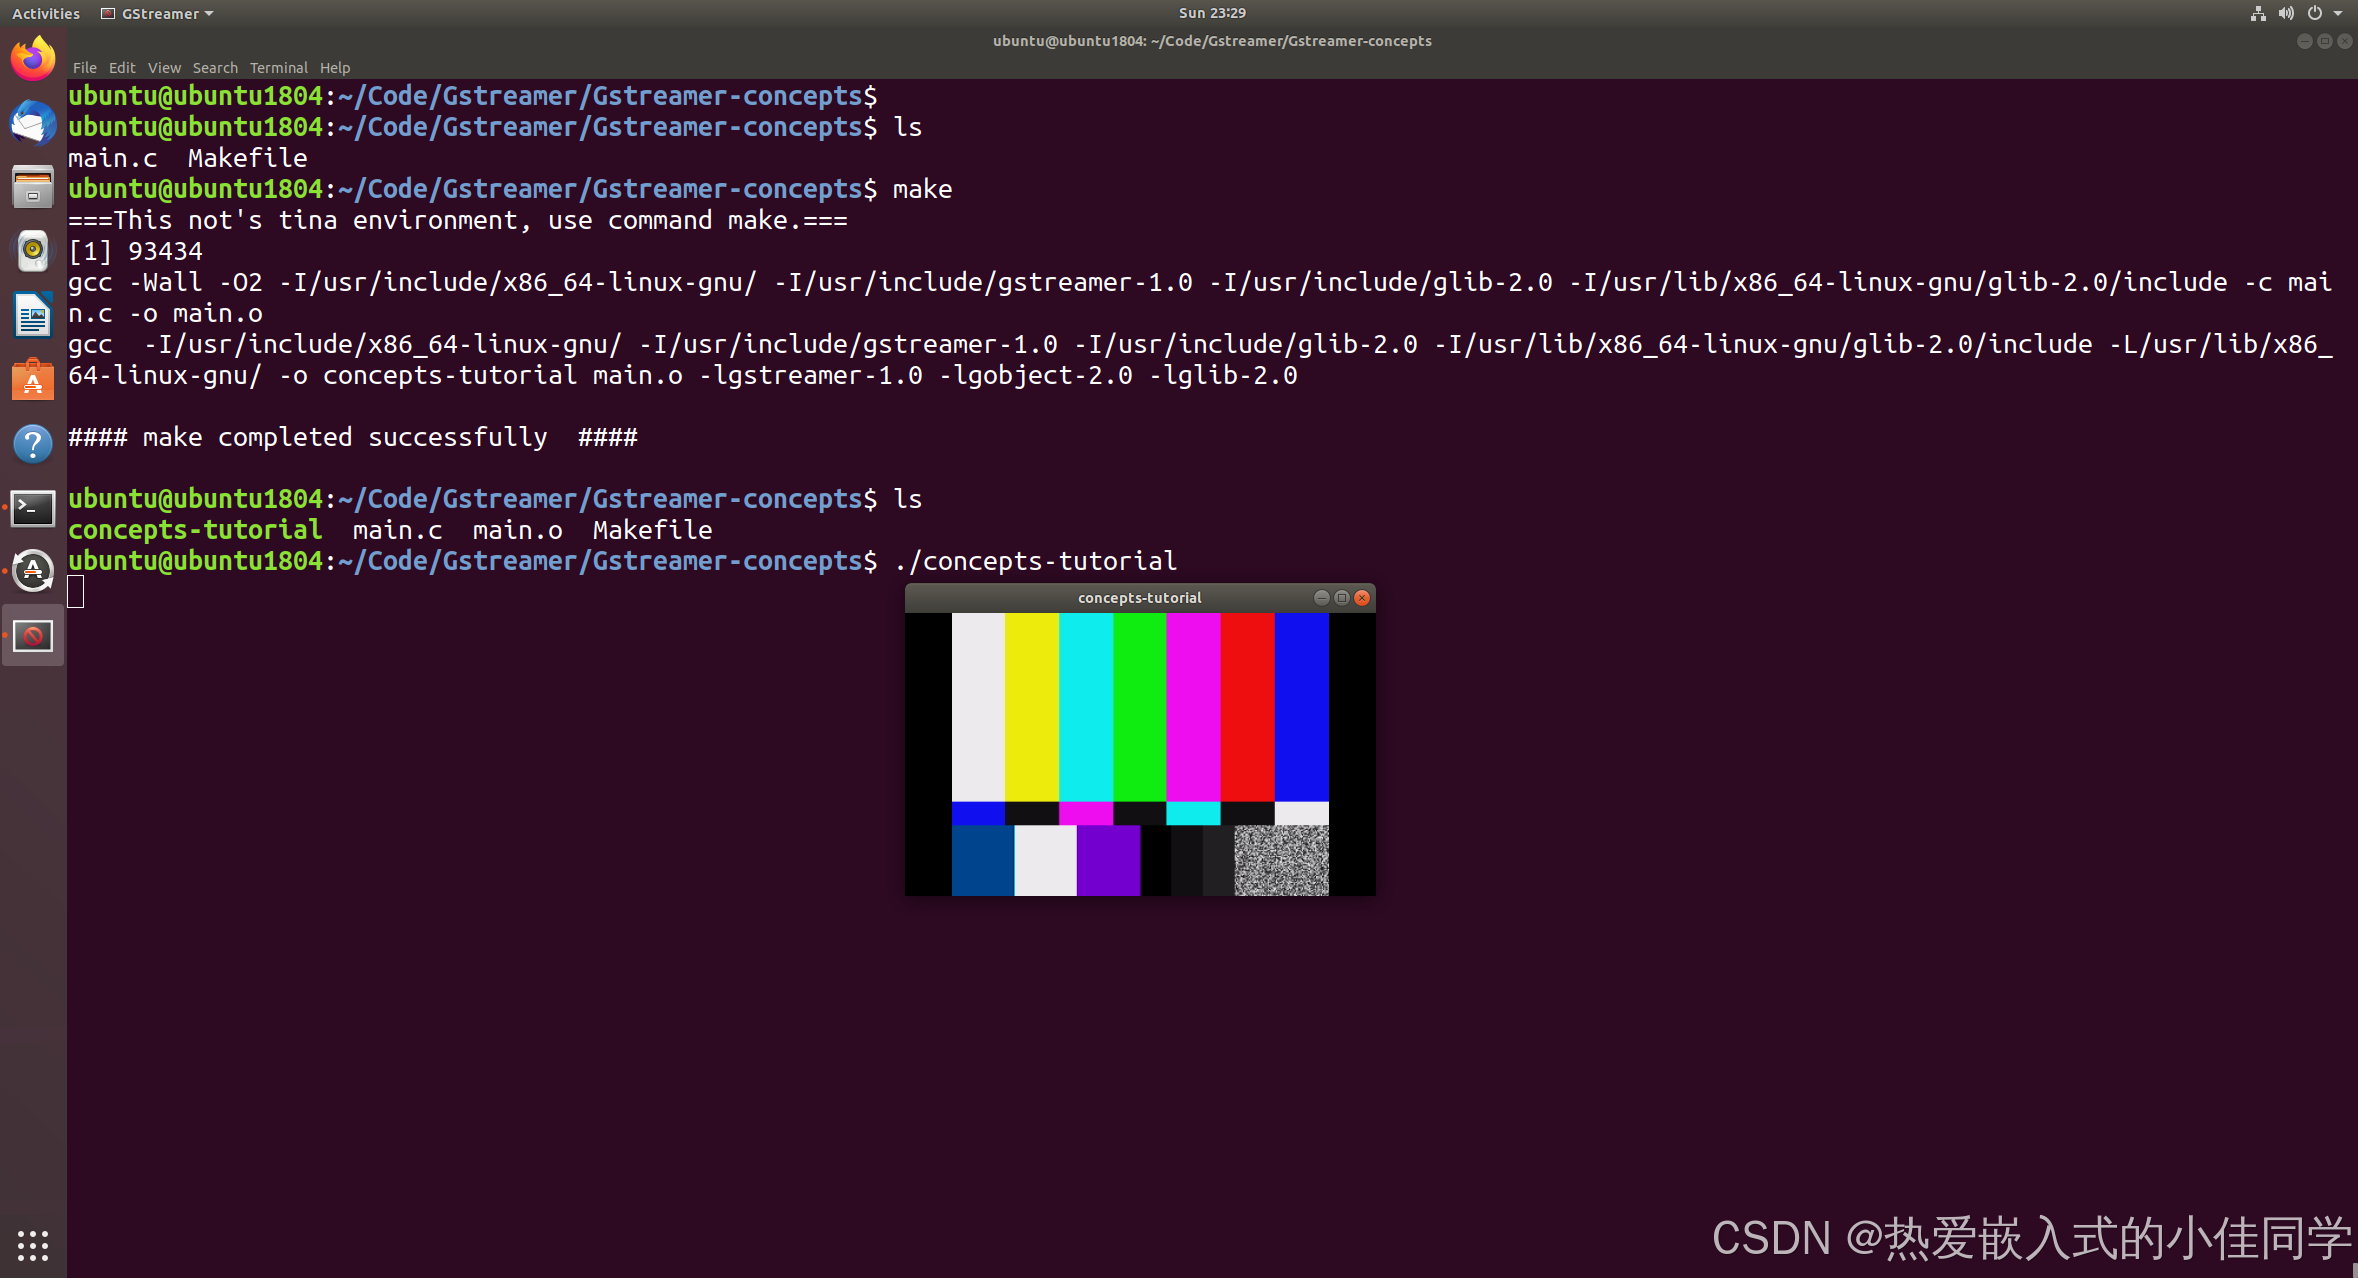
$(RM) $(TARGET) $(OBJS)编译运行:
shell
make
./concepts-tutorial