被监控的机器准备
- 设置主机名
使用 hostnamectl set-hostname 主机名(zabbix-agent-XX)
2.修改vim /etc/hosts 是的这两台机器可以通过主机名进行访问
添加
zabbix-agent-XX这台机器的ip zabbix-agent-XX
3.关闭机器的selinux
修改配置文件/etc/selinux/config中的 SELINUX=Disabled
4.关这两个机器的防火墙,如果不关闭防火墙则需要打开对应的端口
systemctl stop firewalld ; systemctl disable firewalld
5.做机器的时间同步
yum -y install chrony
systemctl enable chronyd --now
编辑 chronyd 配置文件,使用中国的时间服务器同步时间,速度更快
vim /etc/chrony.conf
#文件最后增加如下内容
server ntp1.aliyun.com iburst
server ntp2.aliyun.com iburst
server ntp1.tencent.com iburst
server ntp2.tencent.com iburst
systemctl restart chronyd
date #查看当前时间
6.写个计划任务,定时同步时间:
crontab -e
加入 * * * * * /usr/bin/systemctl restart chronyd
systemctl restart crond#重启动计划任务
7.安装zabbix agent(下面的地址是下载Zabbix
后选择zabbix的版本,安装的操作系统,操作系统版本,zabbix组件,数据库,以及webserver
后官网生成的)
rpm -Uvh https://repo.zabbix.com/zabbix/7.0/rocky/8/x86_64/zabbix-release-latest-7.0.el8.noarch.rpm
dnf clean all
yum install zabbix-agent -y
8.修改zabbix agent的配置文件
vim /etc/zabbix/zabbix_agentd.conf
Server= Zabbix_Server_IP
Hostname=监控主机名
ServerActive=Zabbix_Server_IP
HostnameItem=system.hostname #把这一行的注释取消掉
9.启动zabbix agent
sudo systemctl start zabbix-agent
sudo systemctl enable zabbix-agent
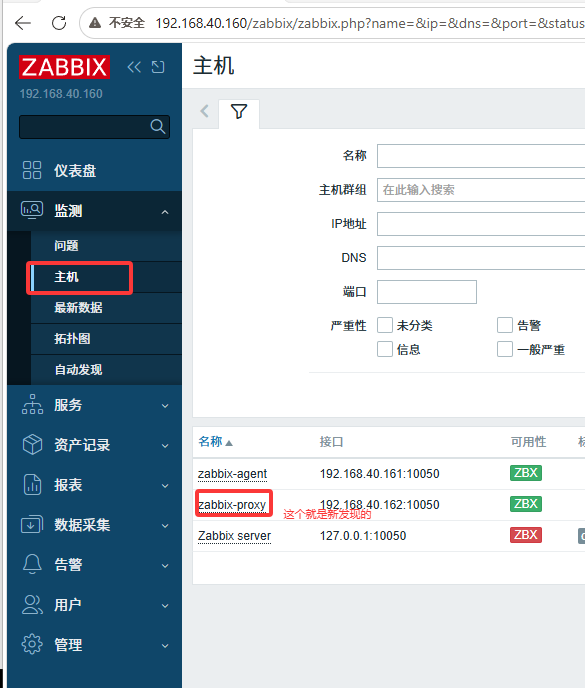
10.再zabbix客户端配置自动发现的规则
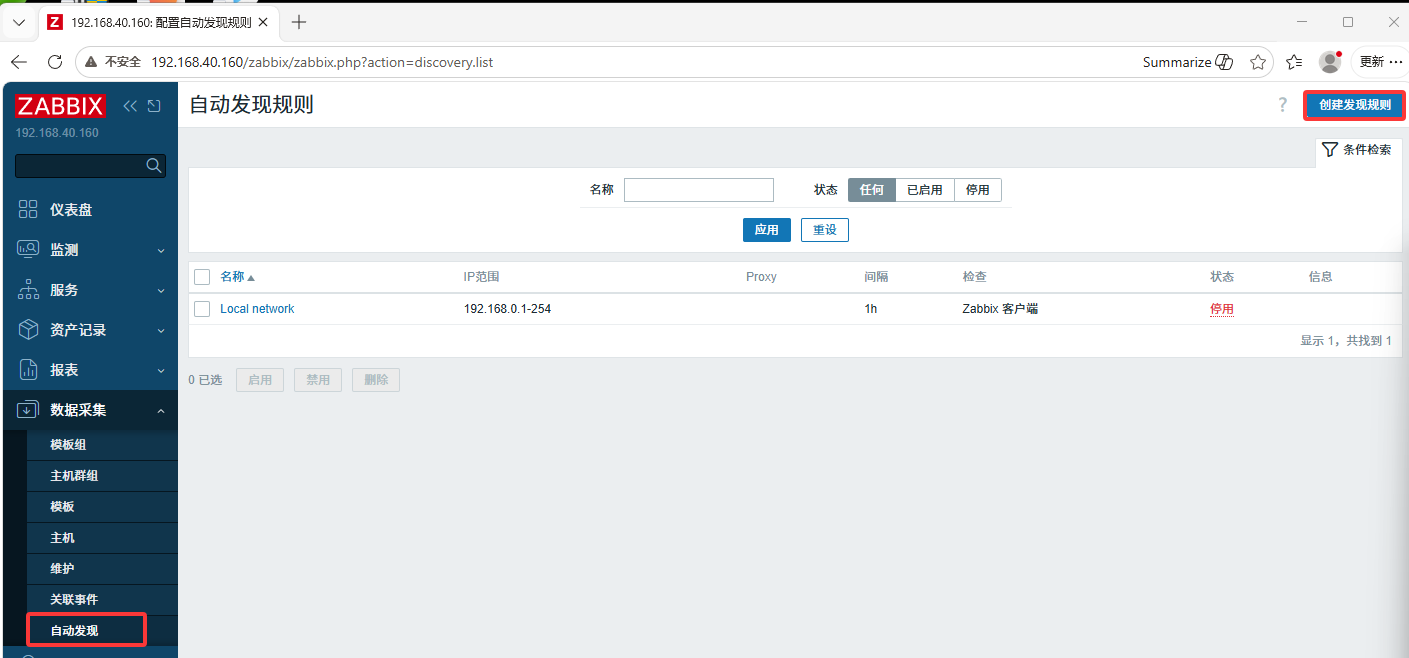
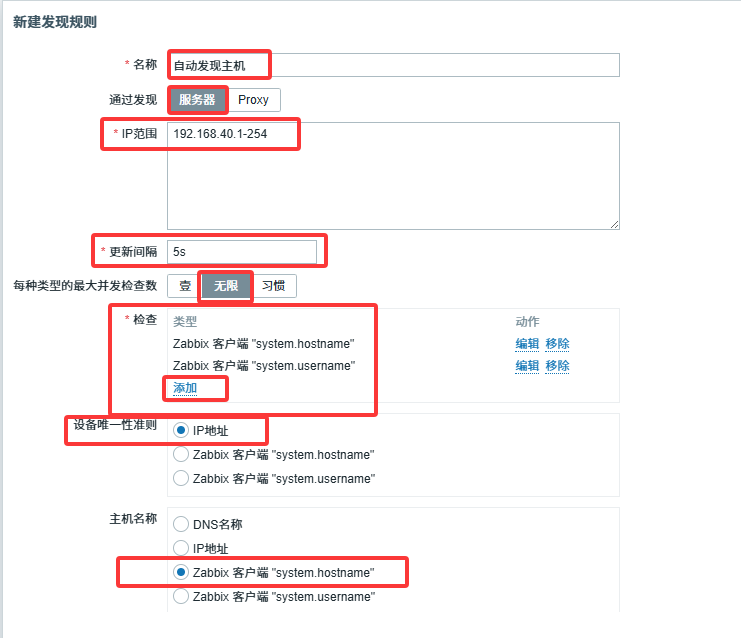
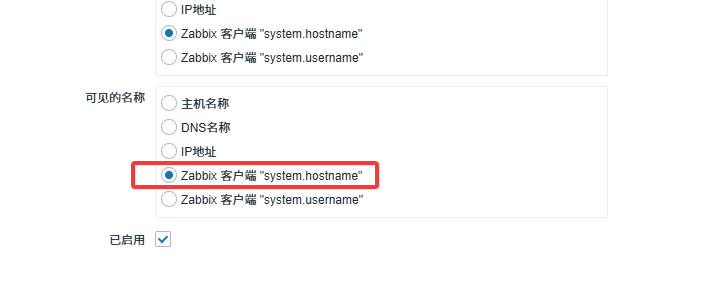
创建发现动作
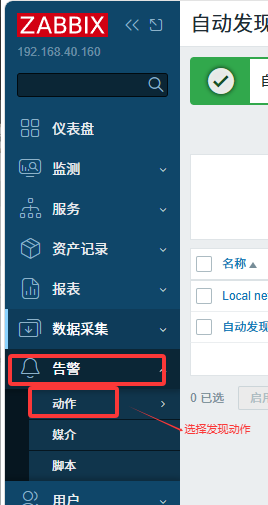


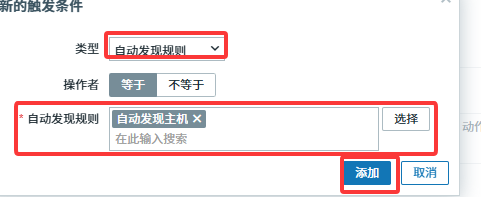
配置发现后的操作,比如为主机增加模板(即哪些添加好的监控项触发器等等)


再回到检测,主机项下可以看见新增加的主机