文章目录
- [1. 开发中的一点理解](#1. 开发中的一点理解)
- [2. 显式Intent与隐式Intent](#2. 显式Intent与隐式Intent)
-
- [2.1 显式Intent](#2.1 显式Intent)
- [2.2 隐式Intent](#2.2 隐式Intent)
- [2.3 隐式Intent的更多用法](#2.3 隐式Intent的更多用法)
-
- [2.3.1 调用外部浏览器打开链接](#2.3.1 调用外部浏览器打开链接)
- [2.3.2 内部实现Activity打开链接](#2.3.2 内部实现Activity打开链接)
- [3. Intent传递消息](#3. Intent传递消息)
-
- [3.1 单向传递消息](#3.1 单向传递消息)
- [3.2 传递消息并接收返回消息](#3.2 传递消息并接收返回消息)
- [4. 总结与下一步计划](#4. 总结与下一步计划)
1. 开发中的一点理解
类比网站应用,activity就像是程序的后端,负责逻辑处理,在后台默默工作,activity会为当前的这个页面服务,其存在是无法被用户的视觉直接感知的。其本质是一个java文件或者kotlin文件。
那么屏幕上我们看到的各种信息是哪来的?其实是布局文件显示的,也就是layout文件,其本质是xml文件,用来控制界面的显示,类似于网站程序的前端页面,可以直接被用户感知。
网站应用中的前后端数据传输可以通过http/https传输,但是安卓呢?安卓使用的是id注册方式,布局文件也就是xml文件中,每一个部件(文本框或者按钮之类的)在生成时都要制定一个id值,就像人的身份证号一样,此后便可以在activity文件中通过调用findViewByid()函数找到它们了。
可能有人会有疑惑,网站应用需要网络数据传输才能建立起前后端连接,为什么安卓不用?那是因为安卓应用与网站应用架构不太一样,网站应用大多是CS模式,分为客户端和服务端,后端在服务器上,前端在客户机的浏览器上,两者想要建立链接就要借助互联网,建立在TCP/IP的基础上;而安卓不是,安卓的整个源码都在用户的手机上(虽然有的会有混淆),所以无需网络便可建立起"前端"(布局文件)和"后端"(activity)的链接。
除了这些文件,我们还可以定义一些其他的功能性类文件,比如建立一个全局的单例类ToastUtil用于处理Toast显示问题,这样可以保证主线程始终只有一个Toast,避免因各种情况(如用户误用连点器)导致的大量Toast对象占用资源。
kotlin
//kotlin
object ToastUtil {
    private var toast: Toast? = null

    fun show(context: Context, message: String){
        toast?.cancel()
        toast = Toast.makeText(context.applicationContext,message,Toast.LENGTH_LONG)
        toast?.show()
    }
}
当然安卓开发不止这些文件,还有很多其他的文件,但是因为数量庞大我不可能全部都记录下来,只会记录一些对我自己有价值的,我对博客读者没有冒犯的意思,但我要说的是,我的博客会以我自己为第一优先级,所以有些地方我如果觉得对于我自己来说是常识就不会记录。有的东西就算记录了也可能会很混乱,因为我要考虑效率与详细的平衡点。
- 每一个Activity都要在AndroidManifest.xml中注册才可以使用
- 一定要有一个主Activity并且也只能拥有一个,告诉程序刚开启的页面是哪个页面,相当于网站应用的index.php。
xml
<?xml version="1.0" encoding="utf-8"?>
<manifest xmlns:android="http://schemas.android.com/apk/res/android"
    xmlns:tools="http://schemas.android.com/tools">

    <application
        android:allowBackup="true"
        android:dataExtractionRules="@xml/data_extraction_rules"
        android:fullBackupContent="@xml/backup_rules"
        android:icon="@mipmap/ic_launcher"
        android:label="@string/app_name"
        android:roundIcon="@mipmap/ic_launcher_round"
        android:supportsRtl="true"
        android:theme="@style/Theme.FirstCode_chapter03">
        <activity
            android:name=".SecondActivity"
            android:exported="false" />
        <activity
            android:name=".FirstActivity"
            android:exported="true"
            android:label="that's first activity">
            <intent-filter>
                <action android:name="android.intent.action.MAIN" />
                <category android:name="android.intent.category.LAUNCHER" />
            </intent-filter>
        </activity>
    </application>

</manifest>
android:exported这个属性控制当前activity是否允许被其他应用的组件调用。
当activity有intent-filter属性时,这个值要设置为true
2. 显式Intent与隐式Intent
2.1 显式Intent
Intent在activity方面的作用,简单来说就是充当两个activity之间沟通的桥梁。
当想要从一个activity开启另一个activity时,可以用以下这种显式Intent进行传递:
kotlin
findViewById<Button>(R.id.button1).setOnClickListener {
            val intent = Intent(this, SecondActivity::class.java)
            startActivity(intent)
        }
外面那层findView不必在意,主要看里面,使用Intent的这个构造方法生成一个Intent对象。
- 参数一是Context类型的,要求一个启动指定Activity的上下文,简言之就是说明被启动的activity是从哪启动的,一般情况直接填当前activity即可,也就是this对象;
- 参数二是class类型的,要求指定开启哪一个activity,一般来讲,我们将目标activity放上去即可,比如例子中所写的SecondActivity::class.java,如果是java语言的话,就是SecondActivity.class
然后直接使用startActivity将intent启动,就可以启动SecondActivity了。
2.2 隐式Intent
可以看见,显式Intent启动activity是通过直接指定目标activity的方式实现的。
与之相对应,隐式Intent并不直接指定要启动的activity,而是通过指定action和category等属性,来匹配目标activity。
action和category是activity的属性,具体请看前面的AndroidManifest.xml文件。
疑问点在于:既然都是指定,直接指定activity和指定属性有什么区别吗?
有的,直接指定activity表示通过我这一步操作,我要的就是这个activity,这个activity能满足我这一步操作的接下来的行为;
而指定属性表示:我不知道我的这个操作会跳转到哪个activity,因为我并不知道哪个activity可以满足我的操作,我只知道我要干这件事------action是xxx并且category是xxx,具体哪个activity能满足我,那就要看谁能帮我干这件事了。
进一步类比的话,就像我们寄信,显式寄信相当于我指定了送信人,我就要我指定的送信人帮我送;隐式寄信相当于,我这封信要寄出去,我要求一名男性且留有长发的送信人,具体是谁邮局自己分配吧,满足我的要求就行。
具体实现:
kotlin
// kotlin
findViewById<Button>(R.id.button_1).setOnClickListener {
    val intent2 = Intent("com.example.firstcode_chapter03.ACTION_START")
    intent2.addCategory("com.example.firstcode_chapter03.MY_CATEGORY")
    startActivity(intent2)
}
xml
// AndroidManifest.xml
<?xml version="1.0" encoding="utf-8"?>
<manifest xmlns:android="http://schemas.android.com/apk/res/android"
    xmlns:tools="http://schemas.android.com/tools">

    <application
        android:allowBackup="true"
        android:dataExtractionRules="@xml/data_extraction_rules"
        android:fullBackupContent="@xml/backup_rules"
        android:icon="@mipmap/ic_launcher"
        android:label="@string/app_name"
        android:roundIcon="@mipmap/ic_launcher_round"
        android:supportsRtl="true"
        android:theme="@style/Theme.FirstCode_chapter03">
        <activity
            android:name=".SecondActivity"
            android:exported="true" >
            <intent-filter>
                <action android:name="com.example.firstcode_chapter03.ACTION_START"/>
                <category android:name="android.intent.category.DEFAULT"/>
                <category android:name="com.example.firstcode_chapter03.MY_CATEGORY"/>
            </intent-filter>
        </activity>
        <activity
            android:name=".FirstActivity"
            android:exported="true"
            android:label="that's first activity">
            <intent-filter>
                <action android:name="android.intent.action.MAIN" />
                <category android:name="android.intent.category.LAUNCHER" />
            </intent-filter>
        </activity>
    </application>

</manifest>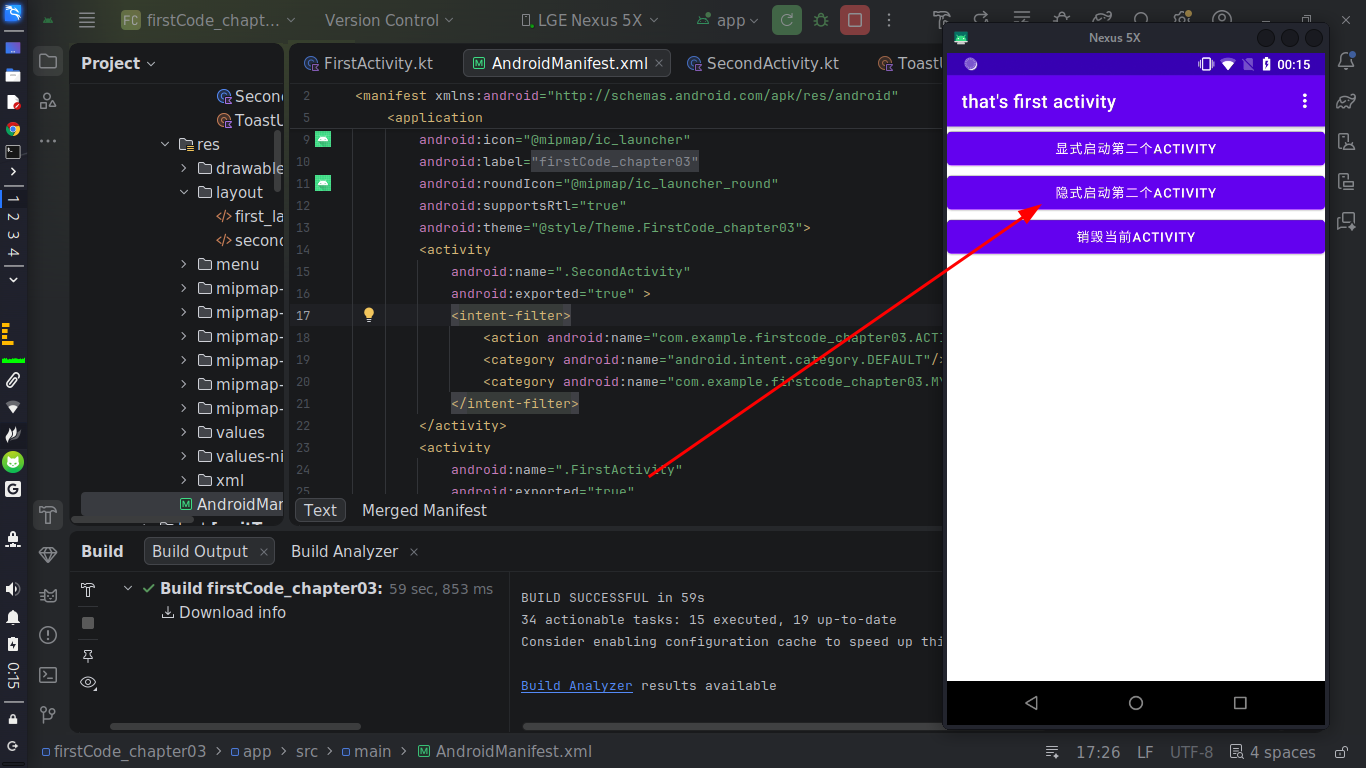
2.3 隐式Intent的更多用法
2.3.1 调用外部浏览器打开链接
使用隐式Intent不仅可以启动本应用的activity,还可以启动其他程序的activity,这使得多个应用之间的消息共享成了可能,比如我们点击一个链接打开网页就没有必要自己实现一个浏览器了,使用手机自带的即可。
添加一个按钮:
xml
//first_layout
<?xml version="1.0" encoding="utf-8"?>
<LinearLayout xmlns:android="http://schemas.android.com/apk/res/android"
    android:orientation="vertical"
    android:layout_width="match_parent"
    android:layout_height="match_parent">

    <Button
        android:id="@+id/button1"
        android:layout_width="match_parent"
        android:layout_height="wrap_content"
        android:text="显式启动第二个Activity"/>
    <Button
        android:id="@+id/button_1"
        android:layout_width="match_parent"
        android:layout_height="wrap_content"
        android:text="隐式启动第二个Activity"/>
    <Button
        android:id="@+id/start_browser"
        android:layout_width="match_parent"
        android:layout_height="wrap_content"
        android:text="打开预定义的链接" />
    <Button
        android:id="@+id/back_button"
        android:layout_width="match_parent"
        android:layout_height="wrap_content"
        android:text="销毁当前Activity"/>


</LinearLayout>
kotlin
//FirstActivity.kt
package com.example.firstcode_chapter03
import android.annotation.SuppressLint
import android.content.Intent
import android.os.Bundle
import android.view.Menu
import android.view.MenuItem
import android.widget.Button
import androidx.appcompat.app.AppCompatActivity
import androidx.core.net.toUri
class FirstActivity : AppCompatActivity() {
@SuppressLint("MissingInflatedId")
override fun onCreate(savedInstanceState: Bundle?) {
super.onCreate(savedInstanceState)
setContentView(R.layout.first_layout)
findViewById<Button>(R.id.button1).setOnClickListener {
val intent = Intent(this, SecondActivity::class.java)
startActivity(intent)
}
findViewById<Button>(R.id.button_1).setOnClickListener {
val intent2 = Intent("com.example.firstcode_chapter03.ACTION_START")
intent2.addCategory("com.example.firstcode_chapter03.MY_CATEGORY")
startActivity(intent2)
}
// 重点看这里,这是添加的隐式Intent打开网站操作
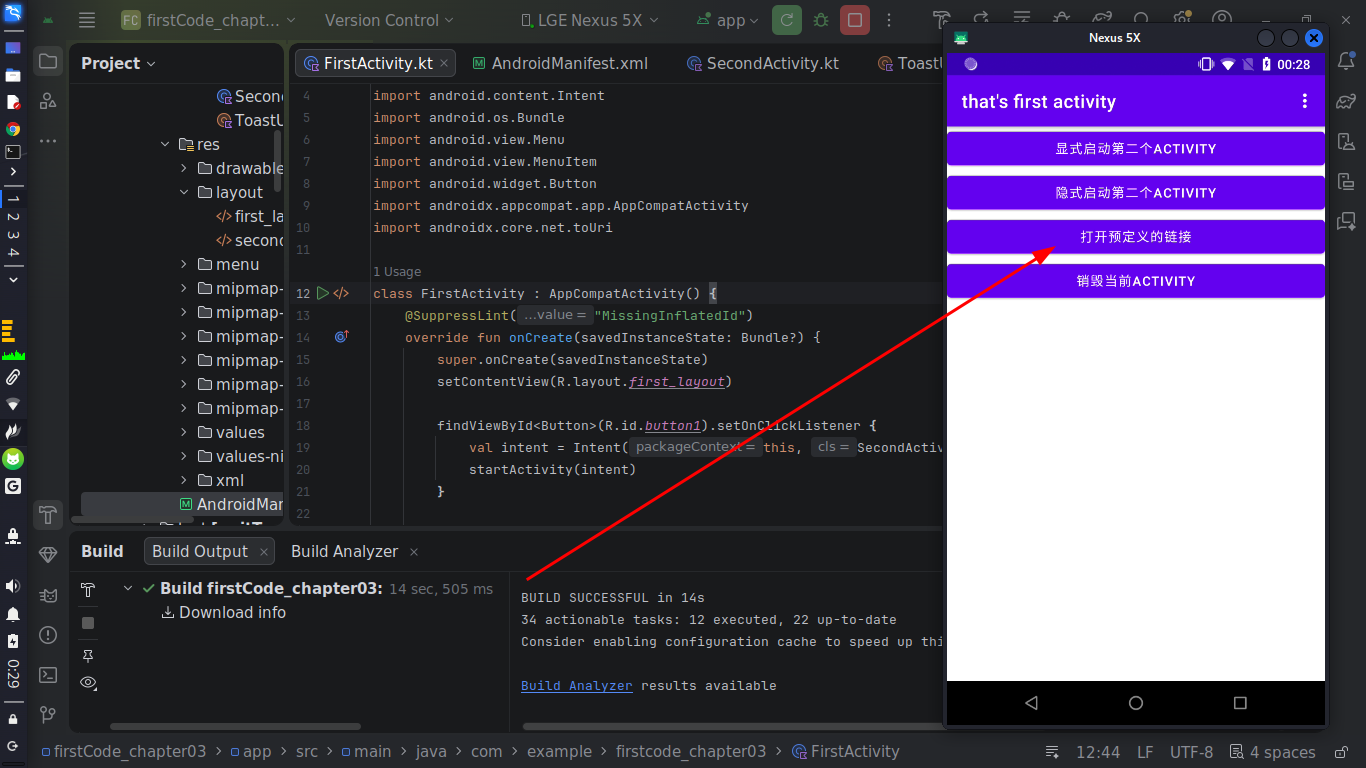
findViewById<Button>(R.id.start_browser).setOnClickListener {
val intent3 = Intent(Intent.ACTION_VIEW)
intent3.data = "https://www.baidu.com".toUri()
startActivity(intent3)
}
findViewById<Button>(R.id.back_button).setOnClickListener {
finish()
}
}
override fun onCreateOptionsMenu(menu: Menu?): Boolean {
menuInflater.inflate(R.menu.main,menu)
return true
}
override fun onOptionsItemSelected(item: MenuItem): Boolean {
when (item.itemId){
R.id.add_item -> ToastUtil.show(this,"这是添加按钮")
R.id.remove_item -> ToastUtil.show(this,"这是删除按钮")
}
return true
}
}
2.3.2 内部实现Activity打开链接
正如前面所说的,我们同样可以自己创建一个activity来接收intent的命中,首先我们观察intent的要求:
- action为Intent.ACTION_VIEW
- data是"https://www.baidu.com"
创建Activity(空的,仅演示可以被命中):
kotlin
package com.example.firstcode_chapter03

import android.os.Bundle
import androidx.appcompat.app.AppCompatActivity

class ThirdActivity : AppCompatActivity() {
    override fun onCreate(savedInstanceState: Bundle?) {
        super.onCreate(savedInstanceState)
        setContentView(R.layout.third_activity)
    }
}
xml
<!-- third_layout.xml -->
<?xml version="1.0" encoding="utf-8"?>
<LinearLayout xmlns:android="http://schemas.android.com/apk/res/android"
    android:orientation="vertical"
    android:layout_width="match_parent"
    android:layout_height="match_parent">

</LinearLayout>
xml
<!-- AndroidManifest.xml -->
<activity
    android:name=".ThirdActivity"
    android:exported="true" >
    <intent-filter tools:ignore="AppLinkUrlError">
        <action android:name="android.intent.action.VIEW"/>
        <category android:name="android.intent.category.DEFAULT"/>
        <data android:scheme="https"/>
    </intent-filter>
</activity>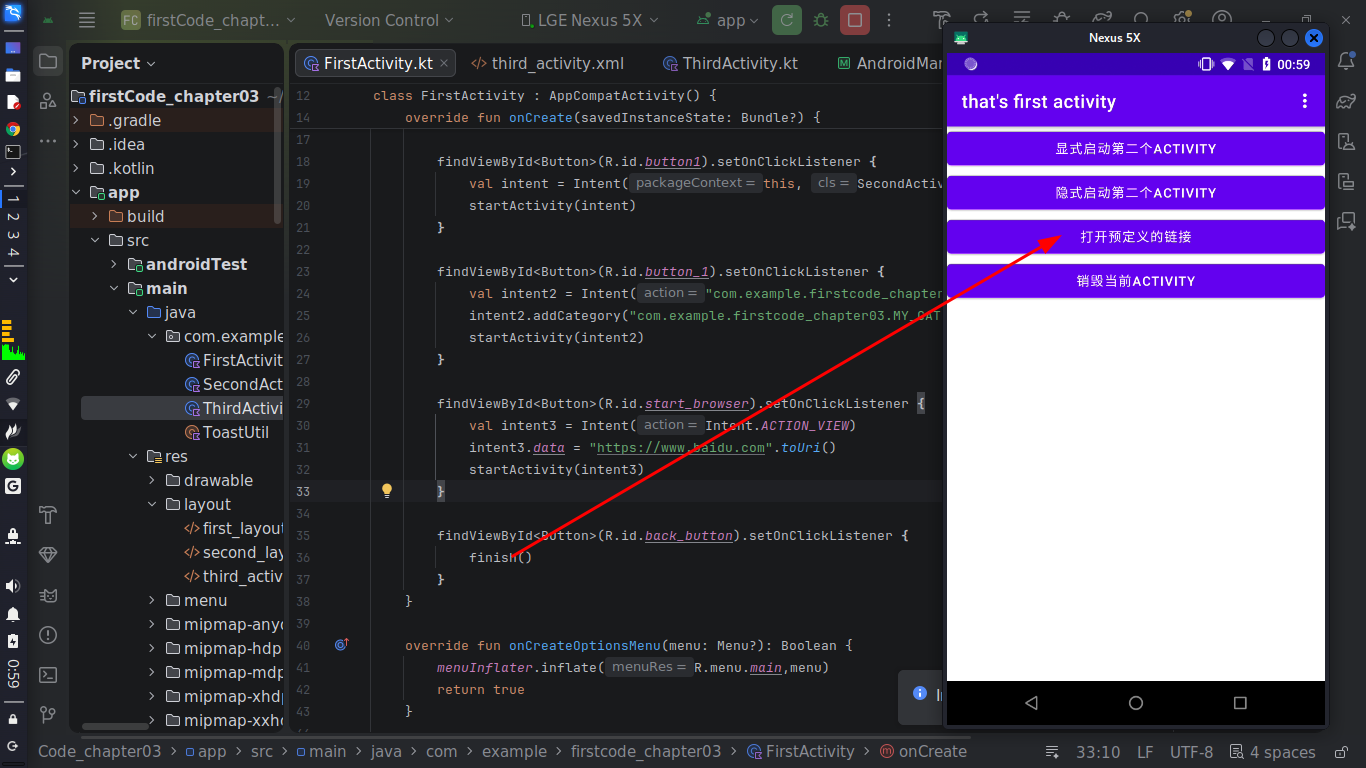
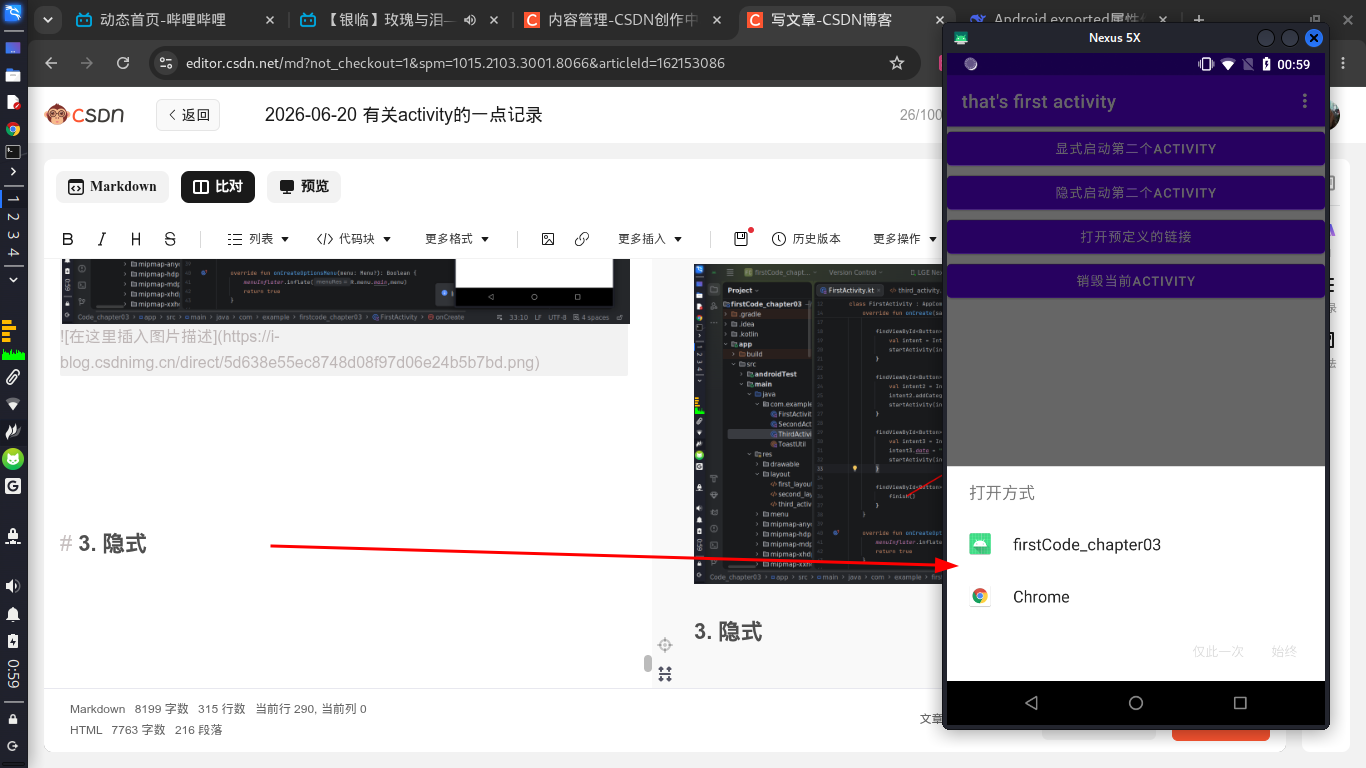
如下图,出现让我们选择的选项,因为我们写的activity和浏览都被命中了,这里我们点击自己定义的activity。
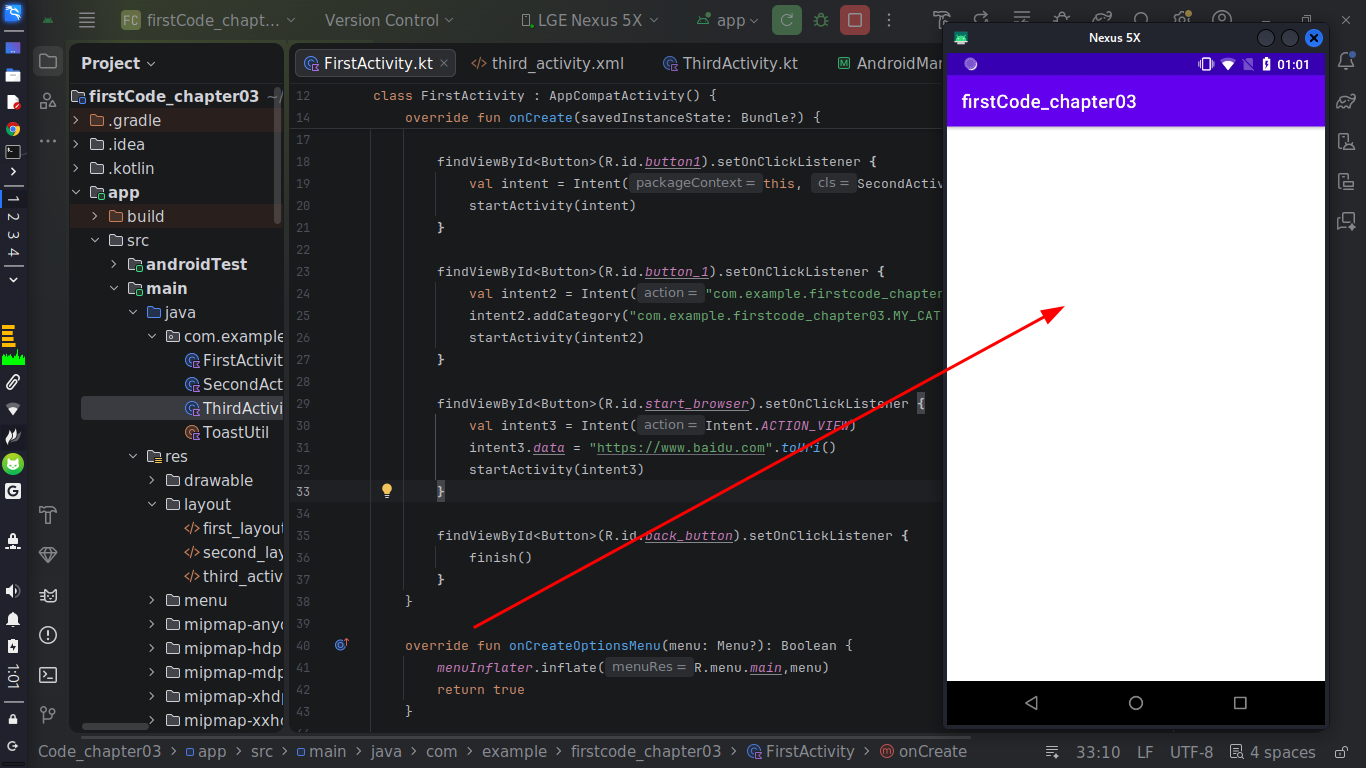
如下图,跳转到了我们自己定义的activity,因为是空的所以啥也没显示。
此外,还可以设置
- data为tel:10086
- action为Intent.ACTION_DIAL
这样的形式来命中电话服务,这里不做展开了。
3. Intent传递消息
3.1 单向传递消息
使用putExtra()来向目标activity传递信息:以键值对的形式来添加
kotlin
findViewById<Button>(R.id.button_sendMessage).setOnClickListener {
    val str = "Hello Sec"
    val intent5 = Intent(this, SecondActivity::class.java)
    intent5.putExtra("招呼信息", str)
    startActivity(intent5)
}
目标使用getStringExtra()来获取消息:
kotlin
val str = intent.getStringExtra("招呼信息")
ToastUtil.show(this,"Fir说:${str}")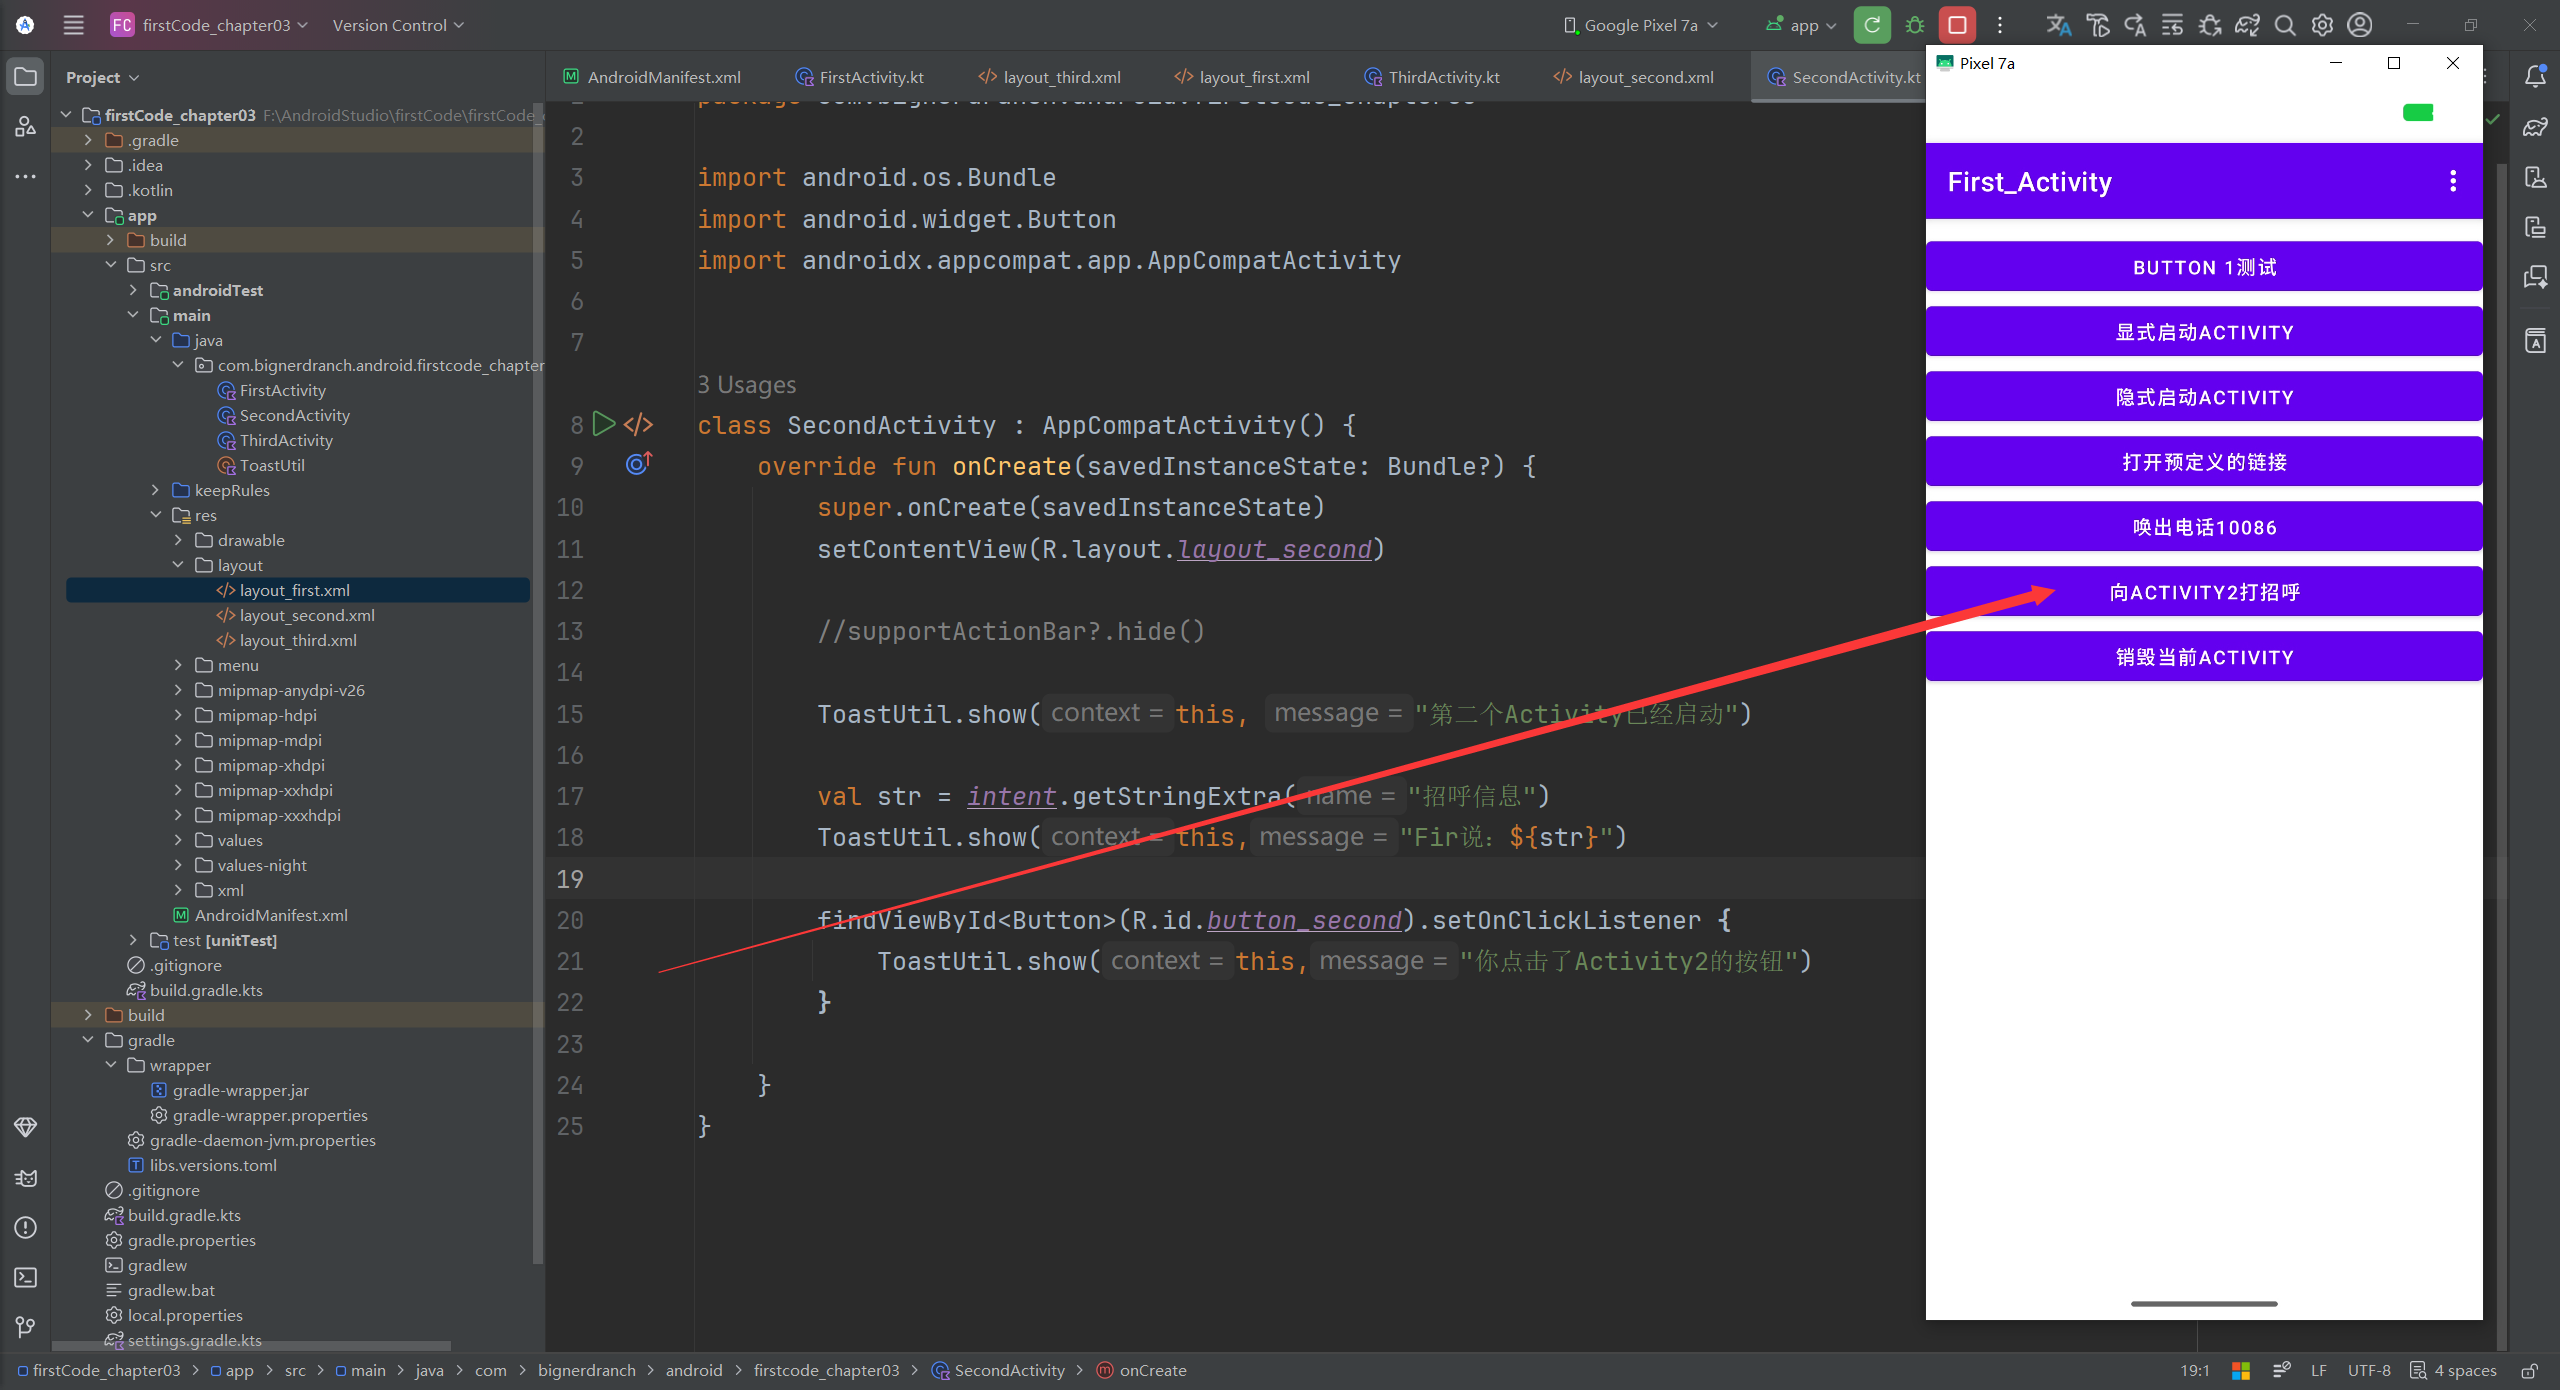
3.2 传递消息并接收返回消息
不仅可以实现从activity1向activity2发送消息,当activity2销毁时,还可以携带信息返回给activity1
kotlin
//Activity1
// 注册一个启动器
private val startForResultLauncher = registerForActivityResult(
    ActivityResultContracts.StartActivityForResult()
){
    if (it.resultCode == Activity.RESULT_OK){
        val data = it.data?.getStringExtra("返回消息")
        ToastUtil.show(this, "Sec说:${data}")
    }
}
kotlin
//Activity1
//绑定事件
findViewById<Button>(R.id.button_sendAndReceive).setOnClickListener {
    val str = "hello Sec"
    val intent6 = Intent(this, SecondActivity::class.java)
    intent6.putExtra("招呼信息", str)
    startForResultLauncher.launch(intent6)
}
kotlin
//Activity2
//处理接收的数据,并准备返回数据
val str = intent.getStringExtra("招呼信息")
ToastUtil.show(this,"Fir说:${str}")
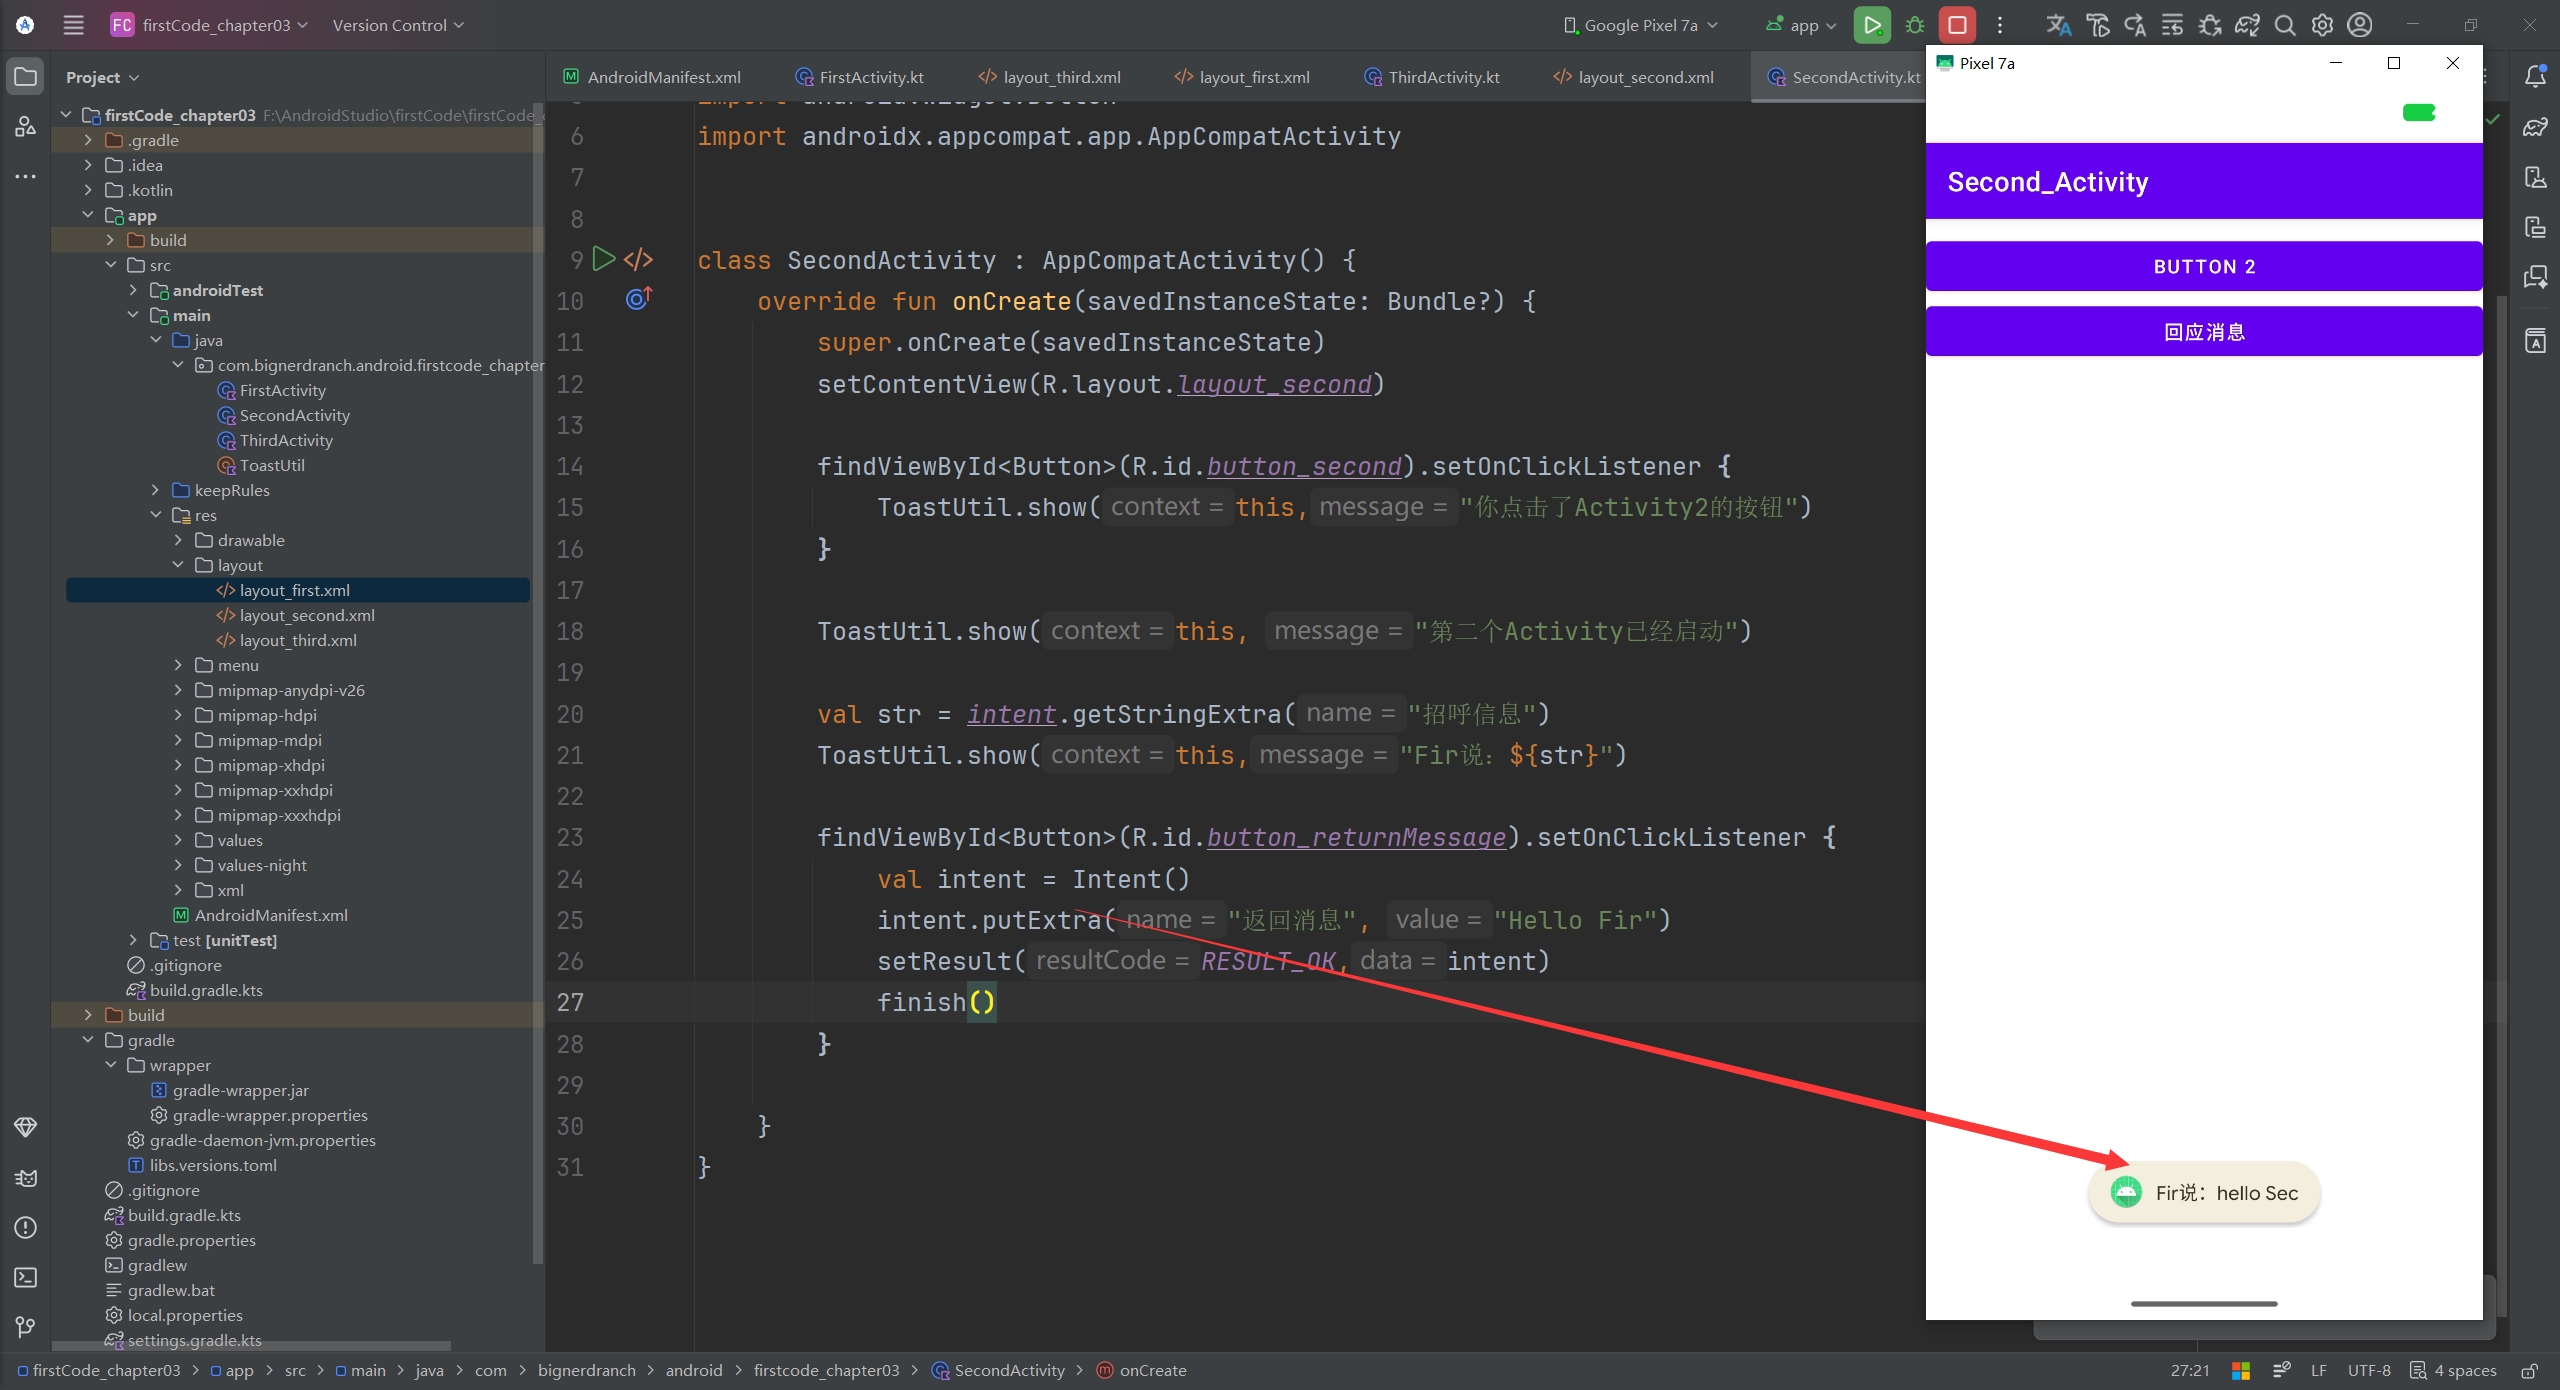
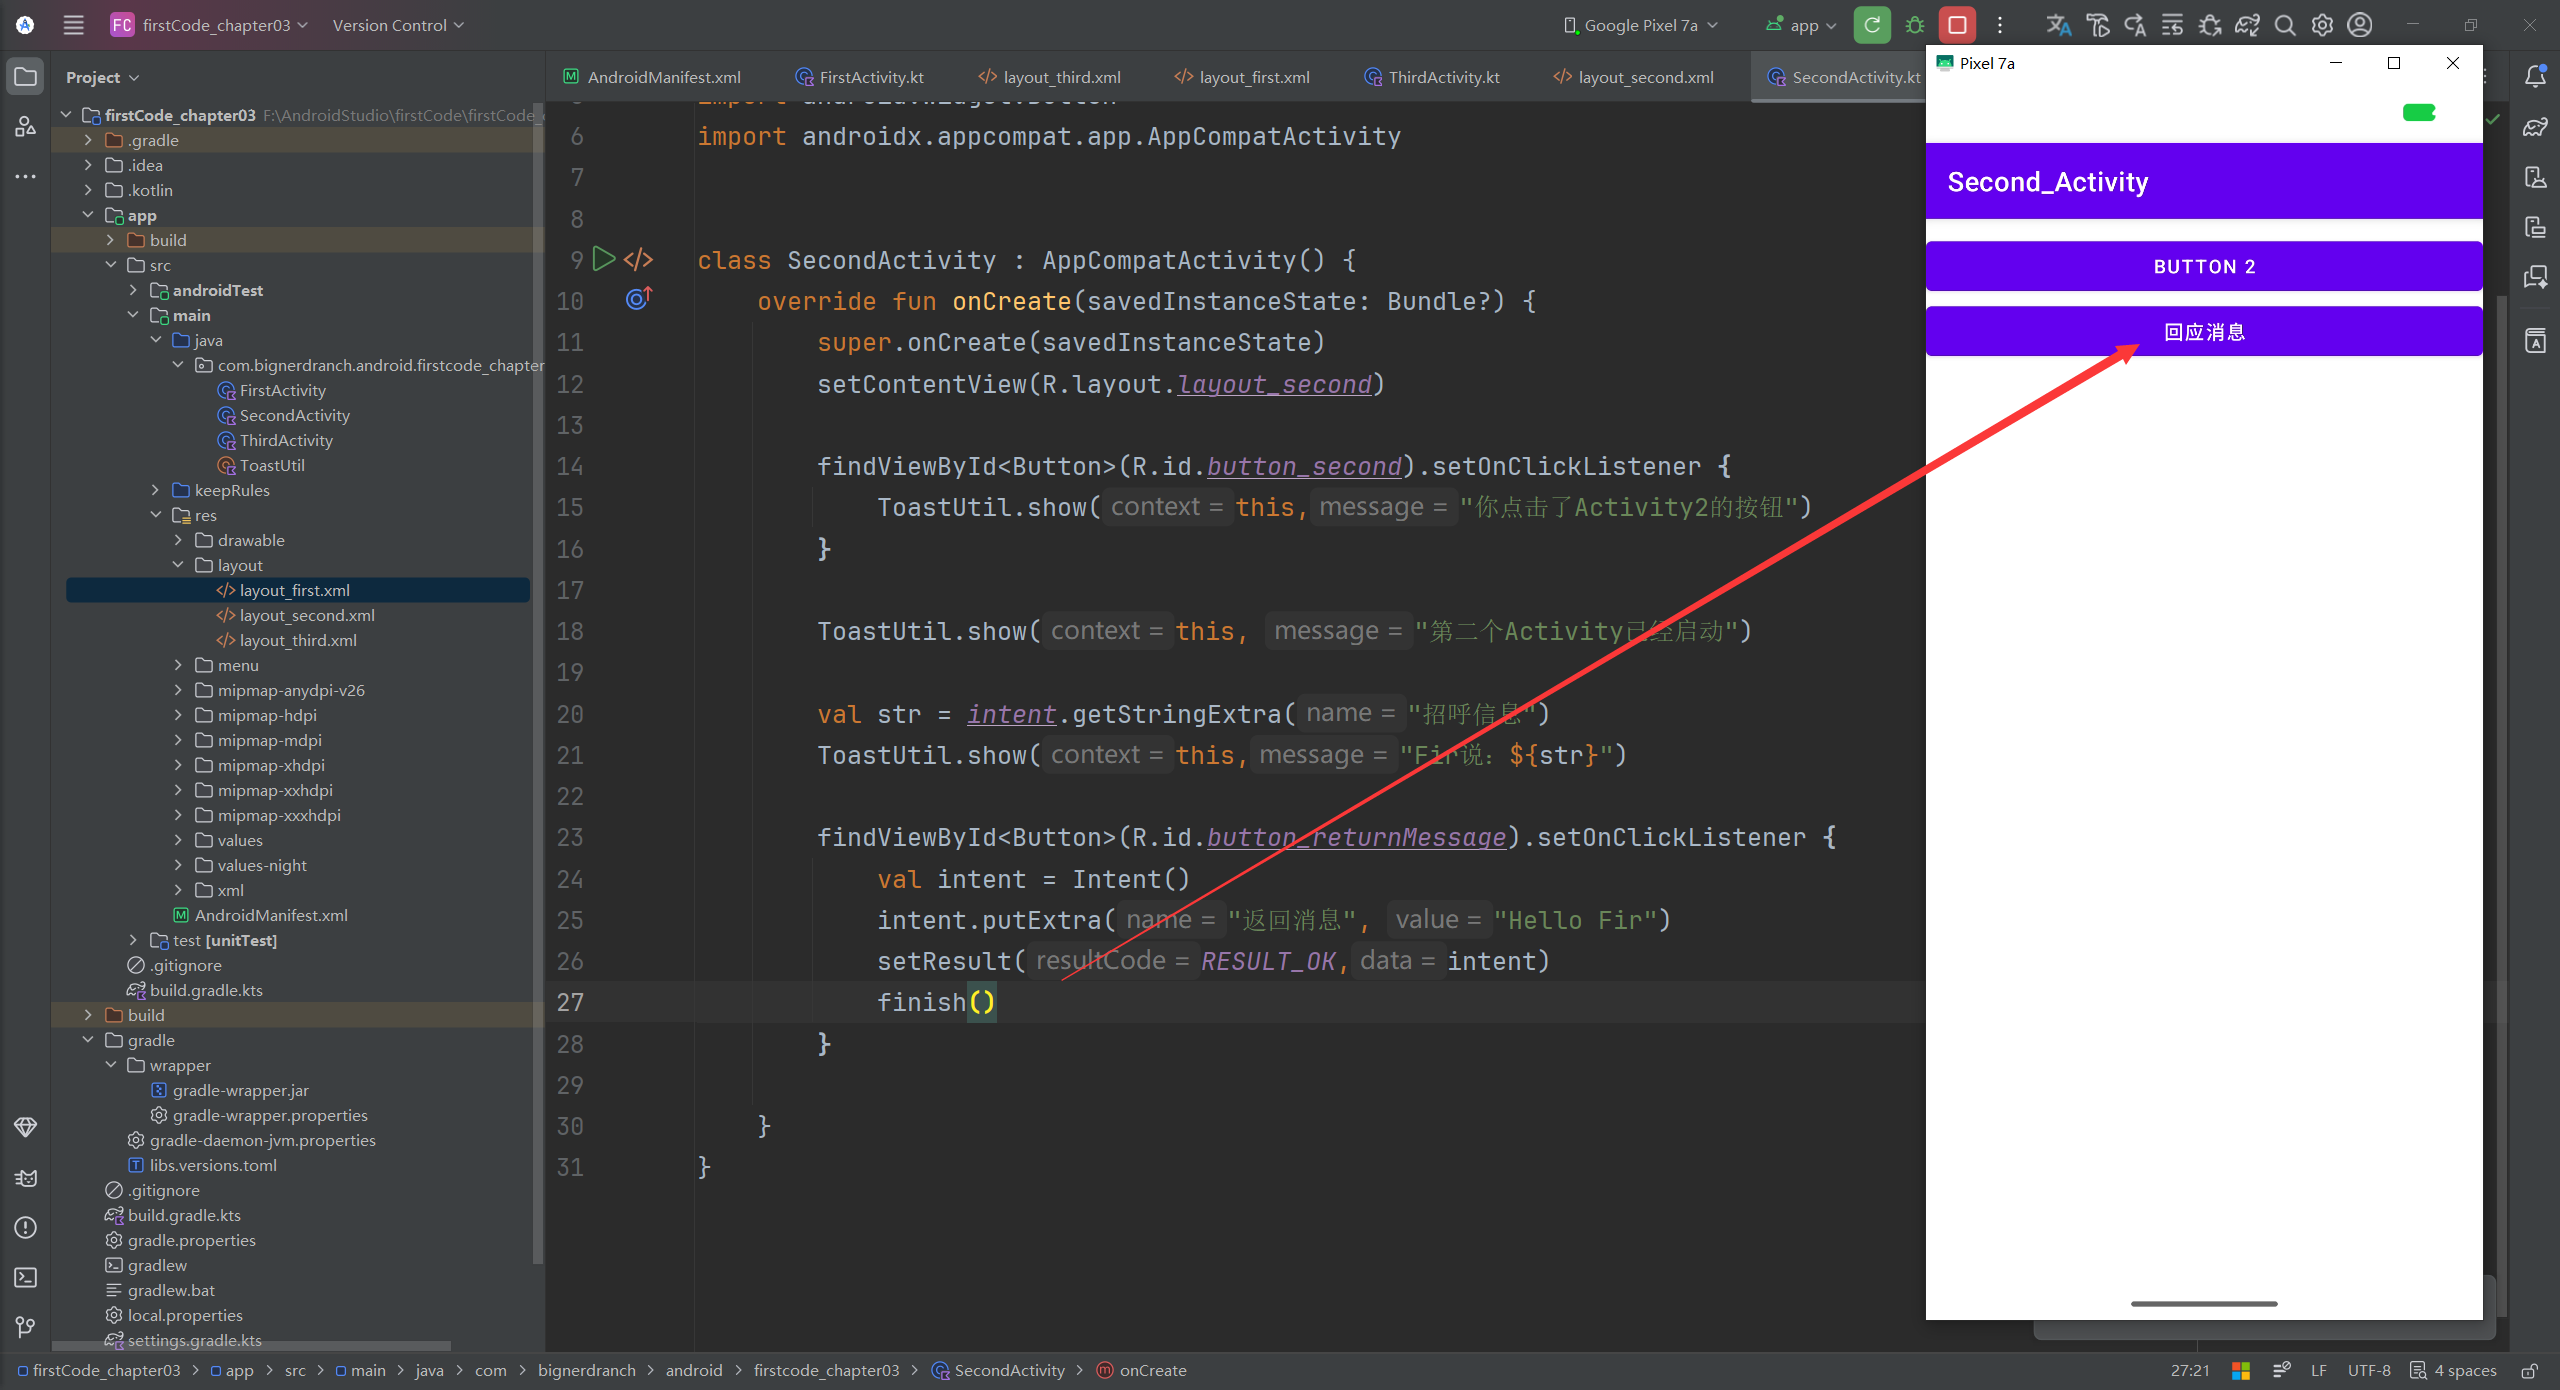
findViewById<Button>(R.id.button_returnMessage).setOnClickListener {
val intent = Intent()
intent.putExtra("返回消息", "Hello Fir")
setResult(RESULT_OK,intent)
finish()
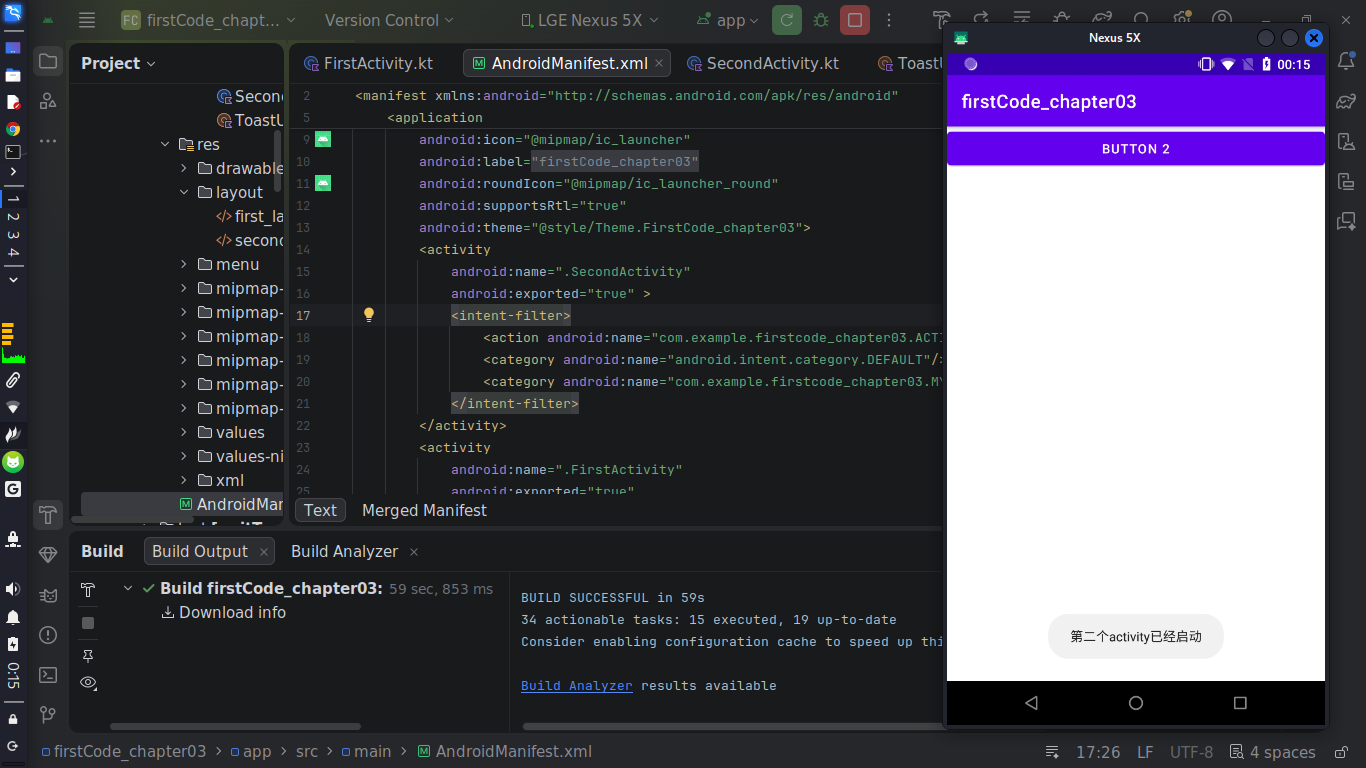
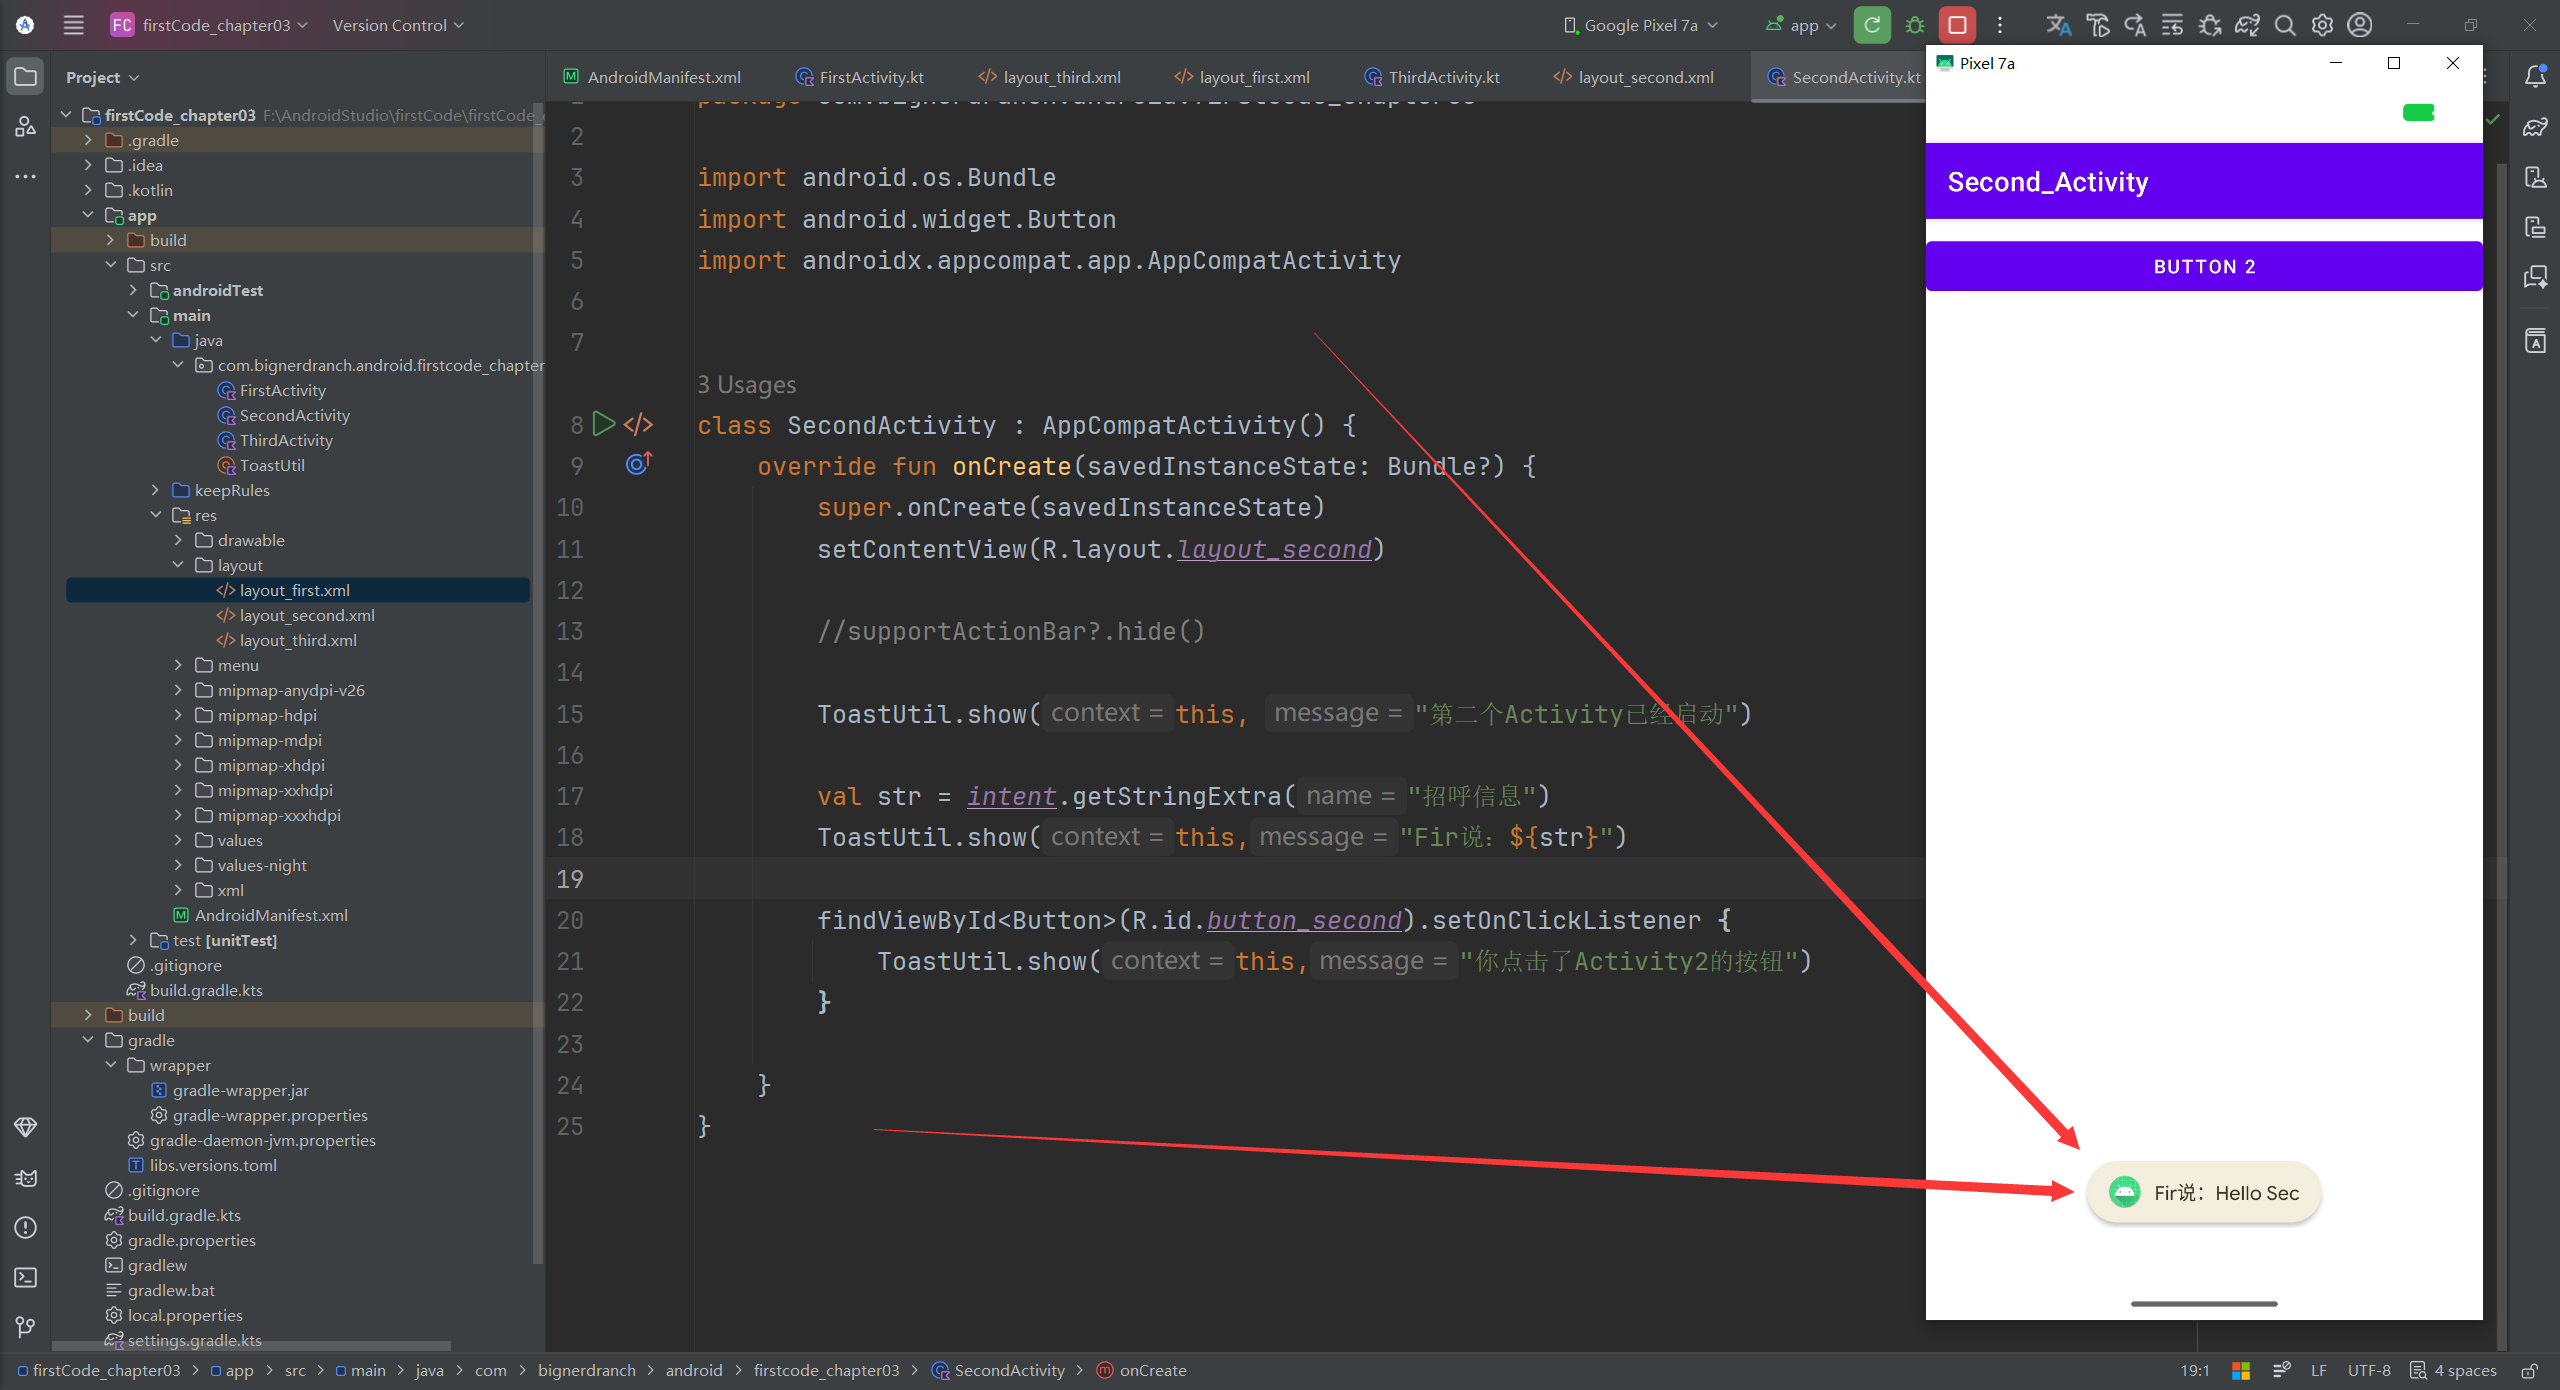
}这样的话,点击按钮跳转到activity2后,屏幕下方就会打印activity1向activity2说的话。
当点击activity2中的这个按钮后,返回的消息就会记录在intent中,并且随着finish()的执行,activity2被销毁,马上返回activity1并将返回消息打印出来。
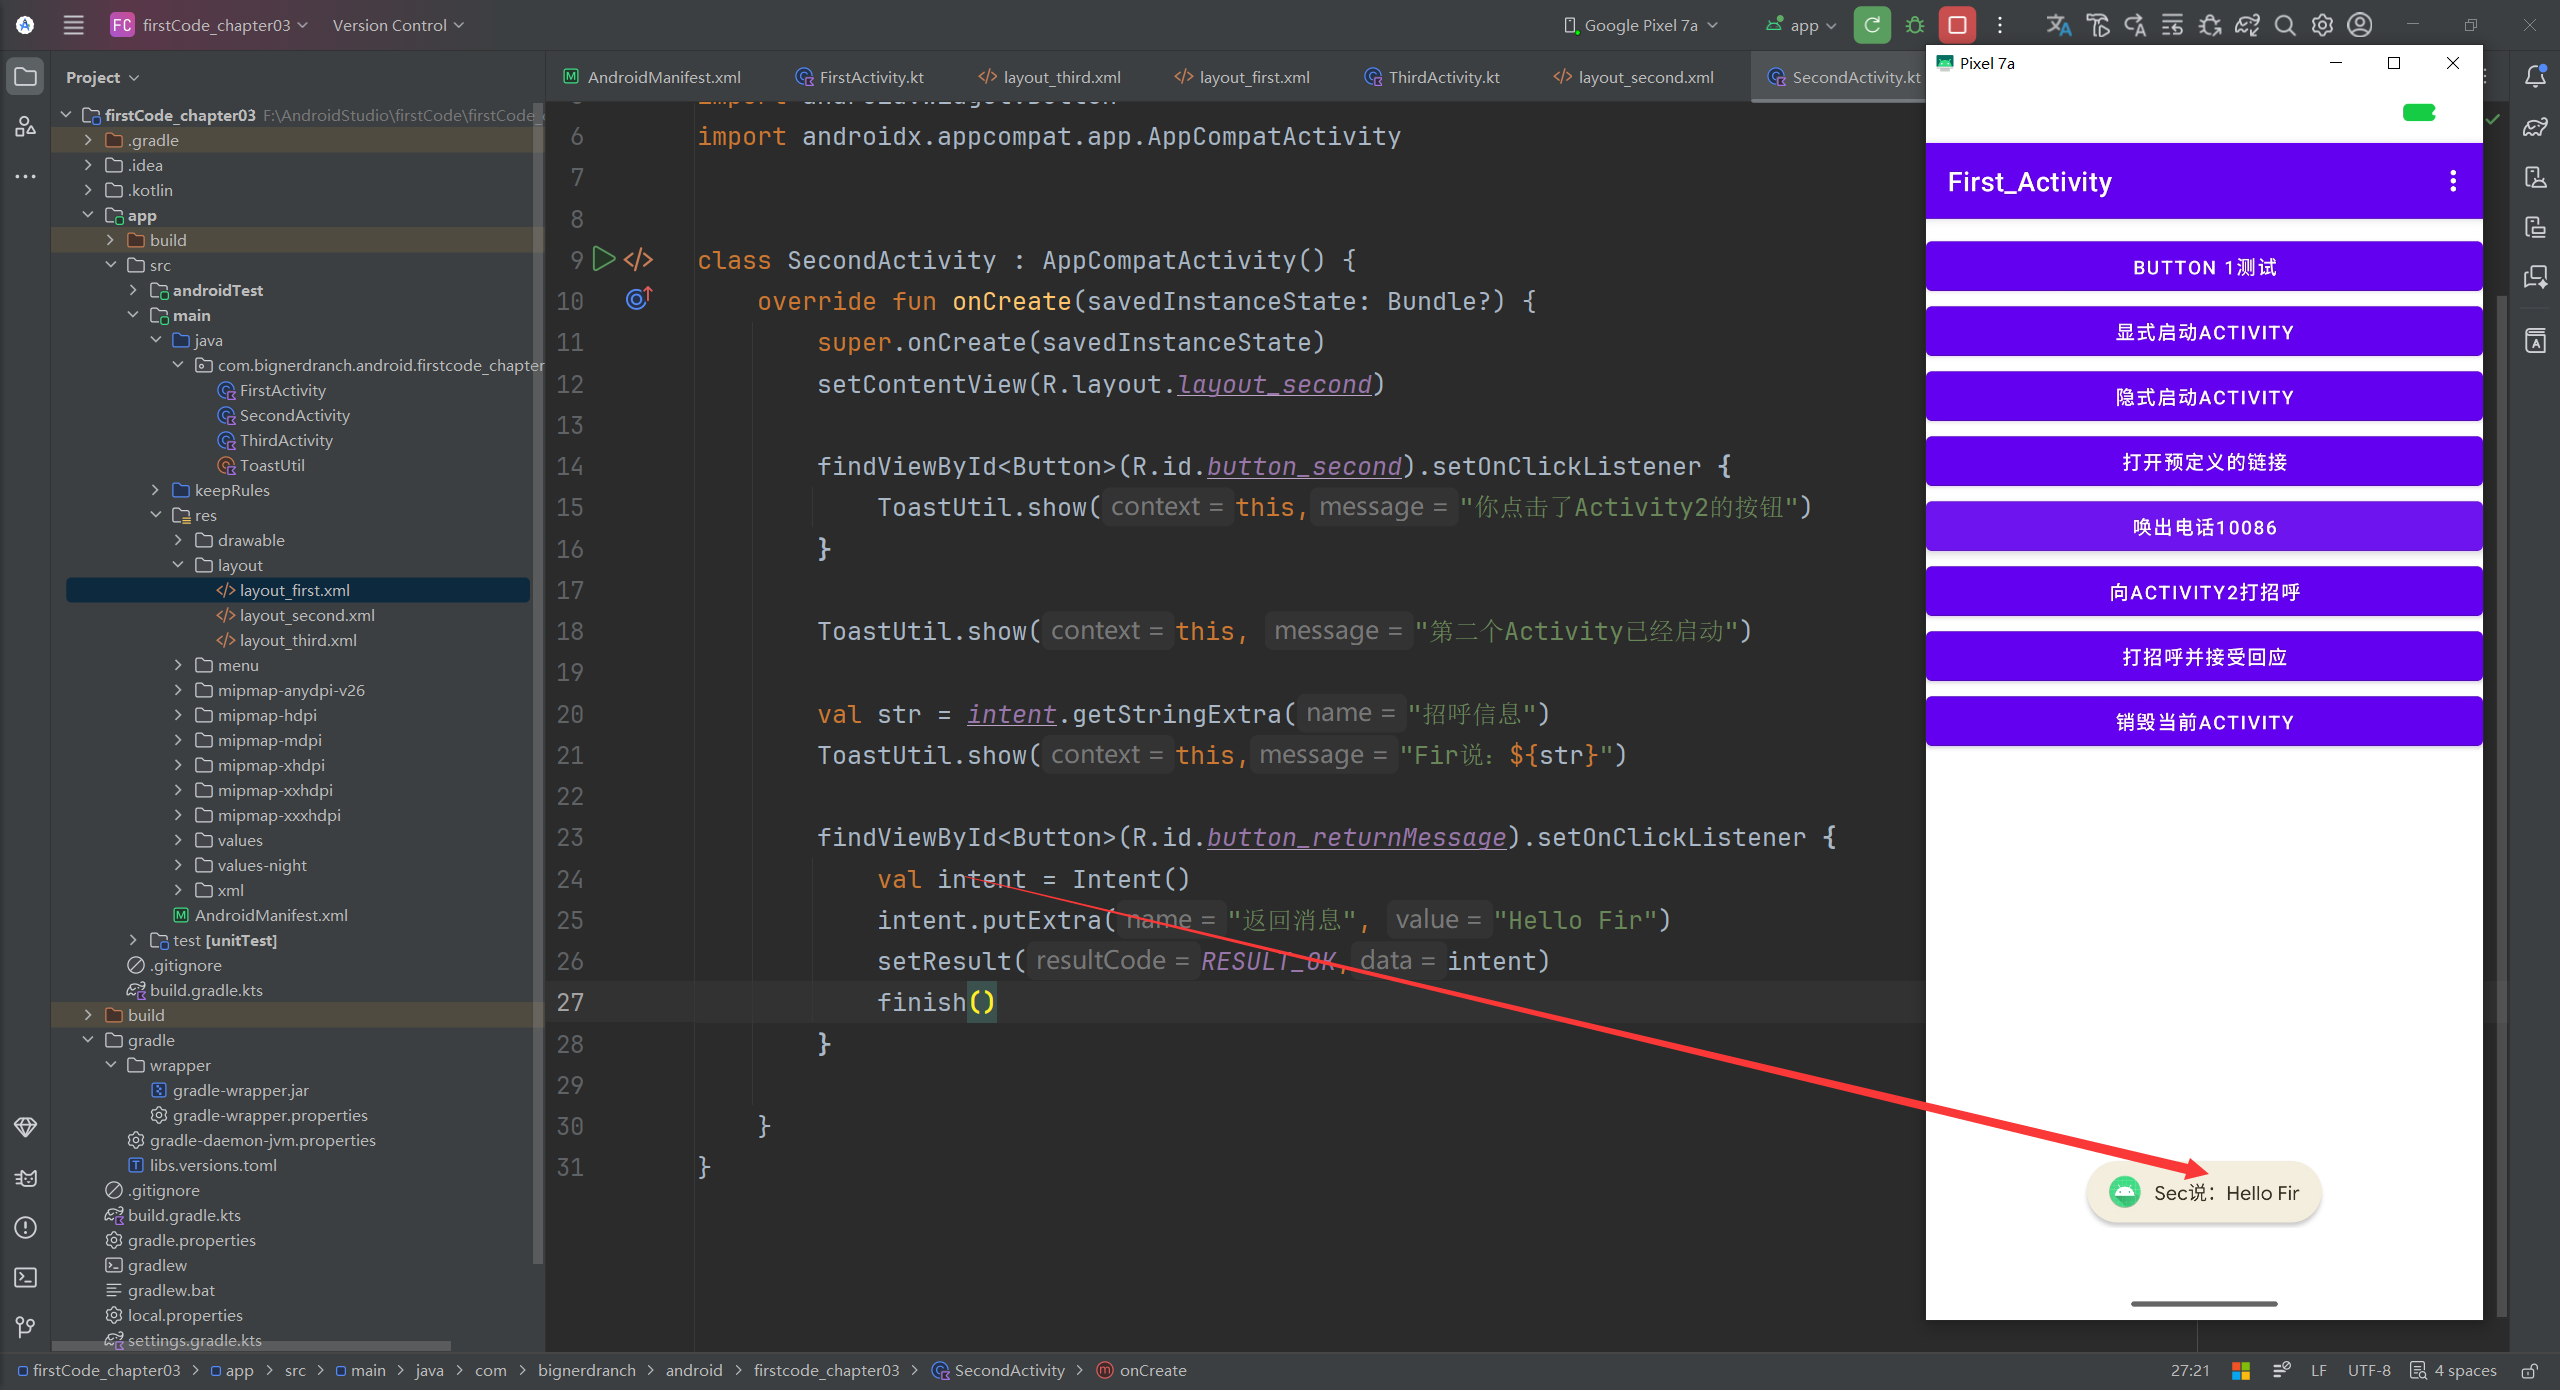
当然,可以自己决定什么时候销毁activity2,比如去掉代码销毁finish(),以自己手动返回的形式销毁activity2返回activity1。
那么当返回之后,屏幕下方的消息就会出现,也就是说此时activity1接收到了来自activity2的"圣遗物"。
如果不点击按钮直接返回呢?那么按照上面的方法是没有办法收到来自activity2的消息的,如果想要得到消息,就需要在activity2的onCreate中加上这个API方式:
kotlin
onBackPressedDispatcher.addCallback(this, object : OnBackPressedCallback(true) {
            override fun handleOnBackPressed() {
                val intent = Intent().apply {
                    putExtra("返回消息", "Hello Fir(BackPress)")
                }
                setResult(RESULT_OK, intent)
                finish()
            }
        })
4. 总结与下一步计划
安卓太难学了,主要是一个版本的更新会启用很多东西并且加上很多新的东西,这就让学习成本大大提升了,我们不得不根据目标sdk的不同版本来进行语法和函数的切换,唉,难啊难。
接下来,搞懂Activity的声明周期。