1. 项目概述与架构设计
1.1 项目定位
本项目是一个基于 HarmonyOS NEXT 6.1.1(API 24) 的综合性 ArkTS 示例应用。它并非单一的"Hello World"演示,而是将三种完全不同类型的交互场景融合在一个应用中:
| 场景 | 文件 | 核心技术点 | 交互复杂度 |
|---|---|---|---|
| 🕵️ AI 推理大师 | Index.ets + AIChatService.ets |
SSE 流式网络请求、状态机管理、JSON 解析 | 高 |
| 🏃 单键跑酷 | RunnerPage.ets |
Canvas 实时渲染、物理引擎、layoutWeight 弹性布局 | 高 |
| 📍 markAnchor 布局 | MarkAnchorDemo.ets |
绝对定位 + 锚点偏移、交互式参数调节 | 中 |
| 🔧 通用组件库 | CommonComponents.ets |
自定义组件、@BuilderParam、Canvas 绘图 | 中 |
| 📊 数据引擎 | AppModel.ets + SpacedRepetition.ets |
接口定义、SM-2 算法 | 低 |
这样的设计使得读者可以在一个项目内同时学习到 ArkTS 的多项关键能力:页面路由、网络通信、Canvas 绘图、数学物理模拟、布局系统、组件化设计、算法实现等。
1.2 目录结构剖析
entry/src/main/ets/
├── entryability/
│   └── EntryAbility.ets          # Ability 生命周期管理
├── pages/
│   ├── Index.ets                 # 主页面:AI 推理大师
│   ├── AIChatService.ets         # 网络请求服务(SSE 流式)
│   ├── MarkAnchorDemo.ets        # position + markAnchor 布局演示
│   └── RunnerPage.ets            # 单键跑酷游戏
├── components/
│   └── CommonComponents.ets      # 通用组件:Card、ProgressRing、AppHeader 等
└── model/
    ├── AppModel.ets              # 数据结构定义
    ├── SampleData.ets            # 示例数据
    └── SpacedRepetition.ets      # SM-2 间隔重复算法
这种分层结构遵循了 ArkTS 推荐的工程实践:
- pages/ --- 每个页面独立文件,以
@Entry装饰器标识入口 - components/ --- 可复用组件,以
@Component+export导出 - model/ --- 纯数据层,包含接口类型定义与算法逻辑
- entryability/ --- 应用级生命周期管理
1.3 Stage 模型要点
HarmonyOS NEXT 采用 Stage 模型 (区别于旧版 FA 模型)。EntryAbility.ets 中的关键点:
typescript
export default class EntryAbility extends UIAbility {
  onCreate(want: Want, launchParam: AbilityConstant.LaunchParam): void {
    // 应用创建时初始化
  }

  onWindowStageCreate(windowStage: window.WindowStage): void {
    // 窗口就绪后加载页面
    windowStage.loadContent('pages/Index', (err) => {
      if (err.code) {
        hilog.error(DOMAIN, 'EnglishApp',
          'Failed to load content: %{public}s', JSON.stringify(err));
      }
    });
  }
}关键要点:
UIAbility是 Stage 模型下 Ability 的基类,取代了旧版的AbilitywindowStage.loadContent('pages/Index', callback)是加载页面的标准方式- 路径
'pages/Index'对应src/main/resources/base/profile/main_pages.json中注册的页面 hilog是鸿蒙原生日志系统,参数%{public}s标记公开信息可输出
2. AI 推理大师 ------ 核心玩法设计
2.1 玩法概述
"重生 AI 推理大师"是一个由 AI 动态生成推理案件的交互式游戏。其核心流程为:
用户点击"开始" → 请求 AI → SSE 流式接收 → 解析 JSON →
展示案件描述 → 逐条揭晓线索 → 用户提交推理 →
展示推理结果、分析报告、通关文牒这个流程中包含了完整的状态机管理,确保了不同阶段 UI 的正确呈现。
2.2 状态机设计与枚举
typescript
enum GameState {
  WELCOME,       // 欢迎页面,等待用户操作
  CASE_LOADING,  // 正在请求 AI 生成案件
  CASE_READY,    // 案件已生成,用户可查看线索和推理
  RESULT_SHOWN,  // 用户提交推理后,展示结果
}
为什么需要状态机?
在 ArkTS 中,UI 是状态的函数 ------ build() 方法根据 @State 变量的值决定渲染什么内容。如果没有状态机,当数据还未加载完成时用户可能看到空白或错误页面。状态机保证了:
- 确定性:每种状态对应唯一的 UI 呈现
- 边界安全:非法操作被状态机阻挡(例如在加载中无法提交推理)
- 可维护性:新增状态只需添加枚举值和对应 UI 分支
2.3 build() 中的状态驱动渲染
typescript
build() {
  Column() {
    // ---- 顶部标题栏 ----
    Row() {
      Text('🔍 重生 AI 推理大师')
        .fontSize(20).fontWeight(FontWeight.Bold).fontColor('#E8D5B7')
    }
    .width('100%').height(56).backgroundColor('#1A1A2E')
    .justifyContent(FlexAlign.Center)

    // ---- 内容区域 ----
    Scroll(this.scroller) {
      Column() {
        if (this.gameState === GameState.WELCOME && !this.isLoading) {
          this.buildWelcomeSection()           // 欢迎页
        } else if (this.isLoading) {
          this.buildLoadingSection()           // 加载中
        } else if (this.gameState === GameState.CASE_READY
                   || this.gameState === GameState.RESULT_SHOWN) {
          if (this.caseData) {
            this.buildCaseContent()            // 案件内容
          }
        }
        // 错误提示
        if (this.errorMsg && this.gameState === GameState.WELCOME) {
          Text(this.errorMsg).fontSize(14).fontColor('#CC4444')
            .textAlign(TextAlign.Center).width('100%').padding(16)
        }
        Blank().height(20)
      }
      .width('100%').padding({ left: 16, right: 16, top: 16 })
    }
    .layoutWeight(1).backgroundColor('#16213E')
  }
  .width('100%').height('100%').backgroundColor('#16213E')
}
注意 Scroll 组件包裹了整个内容区域,使得当案件内容过长时可以滚动查看。this.scroller 是 Scroller 实例,用于在特定时机(如新内容加载完成)自动滚动到底部。
2.4 案件数据接口与校验
AI 返回的数据格式必须是严格的 JSON,接口定义为:
typescript
interface CaseData {
  problem: string;            // 案件描述
  hints: string[];            // 线索数组(至少 3 条)
  reasoning_results: string[];// 对应线索的推理结果
  analysis: string;           // 正确性分析
  clearance: string;          // 通关文牒
}
在 onDone 回调中,有一段严格的 JSON 校验逻辑:
typescript
const parsed: CaseData = JSON.parse(cleanJson) as CaseData;
if (!parsed.problem || !parsed.hints || !parsed.reasoning_results ||
    !parsed.analysis || !parsed.clearance) {
  throw new Error('返回数据缺少必要字段');
}
这保障了即使 AI 返回的数据不完整,也不会导致应用崩溃,而是优雅地提示用户重试。
2.5 @Builder 装饰器与方法拆分
Index.ets 中大量使用了 @Builder 装饰器来拆分 UI,这是 ArkTS 中代码复用的关键手段:
typescript
@Builder
buildWelcomeSection(): void { /* 欢迎页 UI */ }

@Builder
buildLoadingSection(): void { /* 加载动画 UI */ }

@Builder
buildCaseContent(): void { /* 案件内容 UI */ }

@Builder
buildHintCard(index: number, hint: string): void { /* 线索卡片 */ }
@Builder 与普通方法的区别:
| 特性 | 普通方法 | @Builder 方法 |
|---|---|---|
| 能否包含 UI 描述 | ❌ 不能 | ✅ 可以 |
| 调用方式 | this.method() |
this.buildXXX() |
| 传参方式 | 常规参数 | 常规参数 |
| 内部状态 | 无约束 | 可以访问 @State 变量 |
2.6 线索卡片 ------ 条件渲染与动态数组
线索卡片展示了一个典型的交互模式:点击展开/收起。
typescript
@Builder
buildHintCard(index: number, hint: string): void {
  Column() {
    // 按钮:点击切换展开/收起状态
    Button() {
      Row() {
        Text(this.revealedHints[index] ? '🔓' : '🔒').fontSize(16).margin({ right: 8 })
        Text('线索 ' + (index + 1)).fontSize(15).fontColor('#C9A84C')
        Blank()
        Text(this.revealedHints[index] ? '收起 ▲' : '展开 ▼').fontSize(12).fontColor('#667788')
      }.width('100%')
    }
    .width('100%').height(44).backgroundColor('#1E2A4A').borderRadius(10)
    .onClick((): void => this.toggleHint(index))

    // ★ 条件渲染:展开时显示详情
    if (this.revealedHints[index]) {
      Column() {
        Text(hint).fontSize(15).fontColor('#E0E0E0').lineHeight(22)
      }
      .width('100%').padding(14).backgroundColor('#0F1A36')
      .borderRadius({ bottomLeft: 10, bottomRight: 10 })
    }
  }
  .width('100%').margin({ bottom: 8 })
}
这里使用了 ForEach 来遍历线索数组:
typescript
ForEach(this.getHintsList(), (hint: string, index: number) => {
  this.buildHintCard(index, hint)
})性能要点:ForEach 的第三个参数(键值生成器)在复杂场景下很重要,它帮助框架精确识别哪些子组件发生了变化。这里虽然没有显式传递键值生成器,ArkTS 默认使用索引作为键值,对于静态长度的数组是可行的。
3. SSE 流式网络请求深度解析
3.1 为什么需要 SSE?
传统的 HTTP 请求是"请求---响应"模型:客户端发送请求,服务器返回完整响应后连接结束。但对于 AI 对话场景,模型生成文本需要时间(数秒到数十秒),如果等待完整响应再返回,用户体验极差。
SSE(Server-Sent Events,服务器推送事件) 是解决方案:服务器可以将响应内容分批推送,客户端逐段接收并实时展示,实现"打字机效果"。
3.2 鸿蒙原生网络 API
ArkTS 提供了 @kit.NetworkKit 中的 http 模块,它是鸿蒙原生的网络请求能力,无需引入第三方库。
typescript
import { http } from '@kit.NetworkKit';
import { BusinessError } from '@kit.BasicServicesKit';
BusinessError 是鸿蒙系统定义的业务错误类型,包含了 code、name、message 等字段。
3.3 请求体的构建
在与 AI API 的交互中,请求体包含了系统提示词和用户消息:
typescript
const fullMessages: ChatMessage[] = [
  { role: 'system', content: SYSTEM_PROMPT },
  ...messages,  // 用户消息展开
];

const requestBody: ChatCompletionRequest = {
  model: 'deepseek-ai/DeepSeek-V3',
  messages: fullMessages,
  stream: true,           // ★ 启用流式
  max_tokens: 4096,
  temperature: 0.7,       // 温度:控制随机性
  top_p: 0.95,            // 核采样参数
  frequency_penalty: 0,   // 频率惩罚
  thinking_budget: 2048,  // 深度思考预算
};
参数调优参考:
temperature:0.0~1.0,值越高输出越随机(创意型任务用高值,事实型任务用低值)top_p:0.0~1.0,与 temperature 配合使用max_tokens:限制生成的最大 token 数thinking_budget:模拟"深度思考"模式,让模型有更多时间推理
3.4 SSE 流式接收的完整实现
这是整个项目中最复杂的网络逻辑,我们来逐段解析。
3.4.1 事件监听
typescript
httpRequest.on('dataReceive', (data: ArrayBuffer) => {
  const text = arrayBufferToString(data);
  buffer += text;           // ★ 追加到缓冲区
  receivedAnyData = true;

  // 按行拆解(SSE 以 \n 分隔)
  const lines = buffer.split('\n');
  buffer = lines.pop() ?? ''; // ★ 最后一行可能不完整,留到下次

  for (const line of lines) {
    const trimmed = line.trim();
    if (!trimmed.startsWith('data:')) continue;

    if (trimmed === 'data:[DONE]') {
      // SSE 结束标记
      if (!isDone) { isDone = true; callbacks.onDone(); }
      continue;
    }

    const content = parseSSEDataLine(trimmed);
    if (content) {
      callbacks.onData(content);  // ★ 逐段回调
    }
  }
});
缓冲区设计的原因:
网络传输是分片(chunk)的,一个完整的 SSE 消息可能被拆成多次 dataReceive 事件传输。例如:
第一次接收:'data: {"choices": [{"delta": {"content": "这是"
第二次接收:'一个完整的句子"}}]}\n\ndata:[DONE]\n'
如果不在缓冲区中拼接,就会解析失败。这就是 buffer += text 的意义。
3.4.2 SSE 数据行解析
typescript
function parseSSEDataLine(line: string): string | null {
  const jsonStr = line.slice(5).trim();  // 去掉 "data:" 前缀
  if (!jsonStr) return null;

  try {
    const parsed = JSON.parse(jsonStr) as Record<string, Object>;
    const choices = parsed.choices as Object[];
    if (choices && choices.length > 0) {
      const choice = choices[0] as Record<string, Object>;
      // ★ 兼容两种格式:delta(流式)和 message(非流式)
      const delta = choice.delta as Record<string, Object>;
      if (delta) return delta.content as string;
      const message = choice.message as Record<string, Object>;
      if (message) return message.content as string;
    }
  } catch (_) { /* JSON 解析失败,跳过 */ }
  return null;
}
两种响应格式的兼容处理:
- 流式格式 (stream: true):每个 chunk 的
choices[0].delta.content包含文本片段 - 非流式格式 (stream: false):响应整体的
choices[0].message.content包含完整文本
项目同时兼容了这两种格式,使得即使服务器不支持流式传输,也能正常解析。
3.4.3 HTTP 回调中的非流式回退
typescript
(err: BusinessError | null, resp: HttpResponse) => {
  if (err) { /* 错误处理 */ return; }
  if (resp.responseCode !== 200) { /* 非 200 错误 */ return; }

  // ★ 非流式回退:如果 dataReceive 事件没有收到任何数据
  if (!receivedAnyData && resp.result) {
    const bodyStr = typeof resp.result === 'string'
      ? resp.result
      : arrayBufferToString(resp.result as ArrayBuffer);

    // 先尝试 SSE 格式解析
    const sseContent = parseFullSSEBody(bodyStr);
    if (sseContent) {
      callbacks.onData(sseContent);
    } else {
      // 再尝试非流式 JSON 格式
      const jsonContent = parseNonStreamingBody(bodyStr);
      if (jsonContent) {
        callbacks.onData(jsonContent);
      } else {
        callbacks.onError(`无法解析响应`);
        return;
      }
    }
    callbacks.onDone();
  }
}这个三层解析策略(SSE 流式 → SSE 批量 → 非流式 JSON)使得应用能够适应不同后端实现的变体,大大增强了健壮性。
3.5 ArrayBuffer 到字符串的转换
typescript
function arrayBufferToString(buffer: ArrayBuffer): string {
  const uint8Arr = new Uint8Array(buffer);
  let text = '';
  for (let i = 0; i < uint8Arr.length; i++) {
    text += String.fromCharCode(uint8Arr[i]);
  }
  return text;
}
ArkTS 中网络请求返回的数据为 ArrayBuffer 格式,需要通过 Uint8Array 视图逐字节转换为字符串。这里使用逐字符合并的方式,如果处理超大文本,可以考虑使用 TextDecoder API 获得更好性能:
typescript
// 更高效的转换方式(ArkTS 支持)
const decoder = util.TextDecoder.create('utf-8', { ignoreBOM: true });
const text = decoder.decodeToString(buffer);
3.6 请求取消与资源管理
typescript
let httpRequestTask: http.HttpRequest | null = null;

export function cancelAI(): void {
  if (httpRequestTask) {
    try {
      httpRequestTask.destroy();
    } catch (_) { /* ignore */ }
    httpRequestTask = null;
  }
}
在发起新请求前,先销毁上一次未完成的请求,避免内存泄漏和回调混乱。
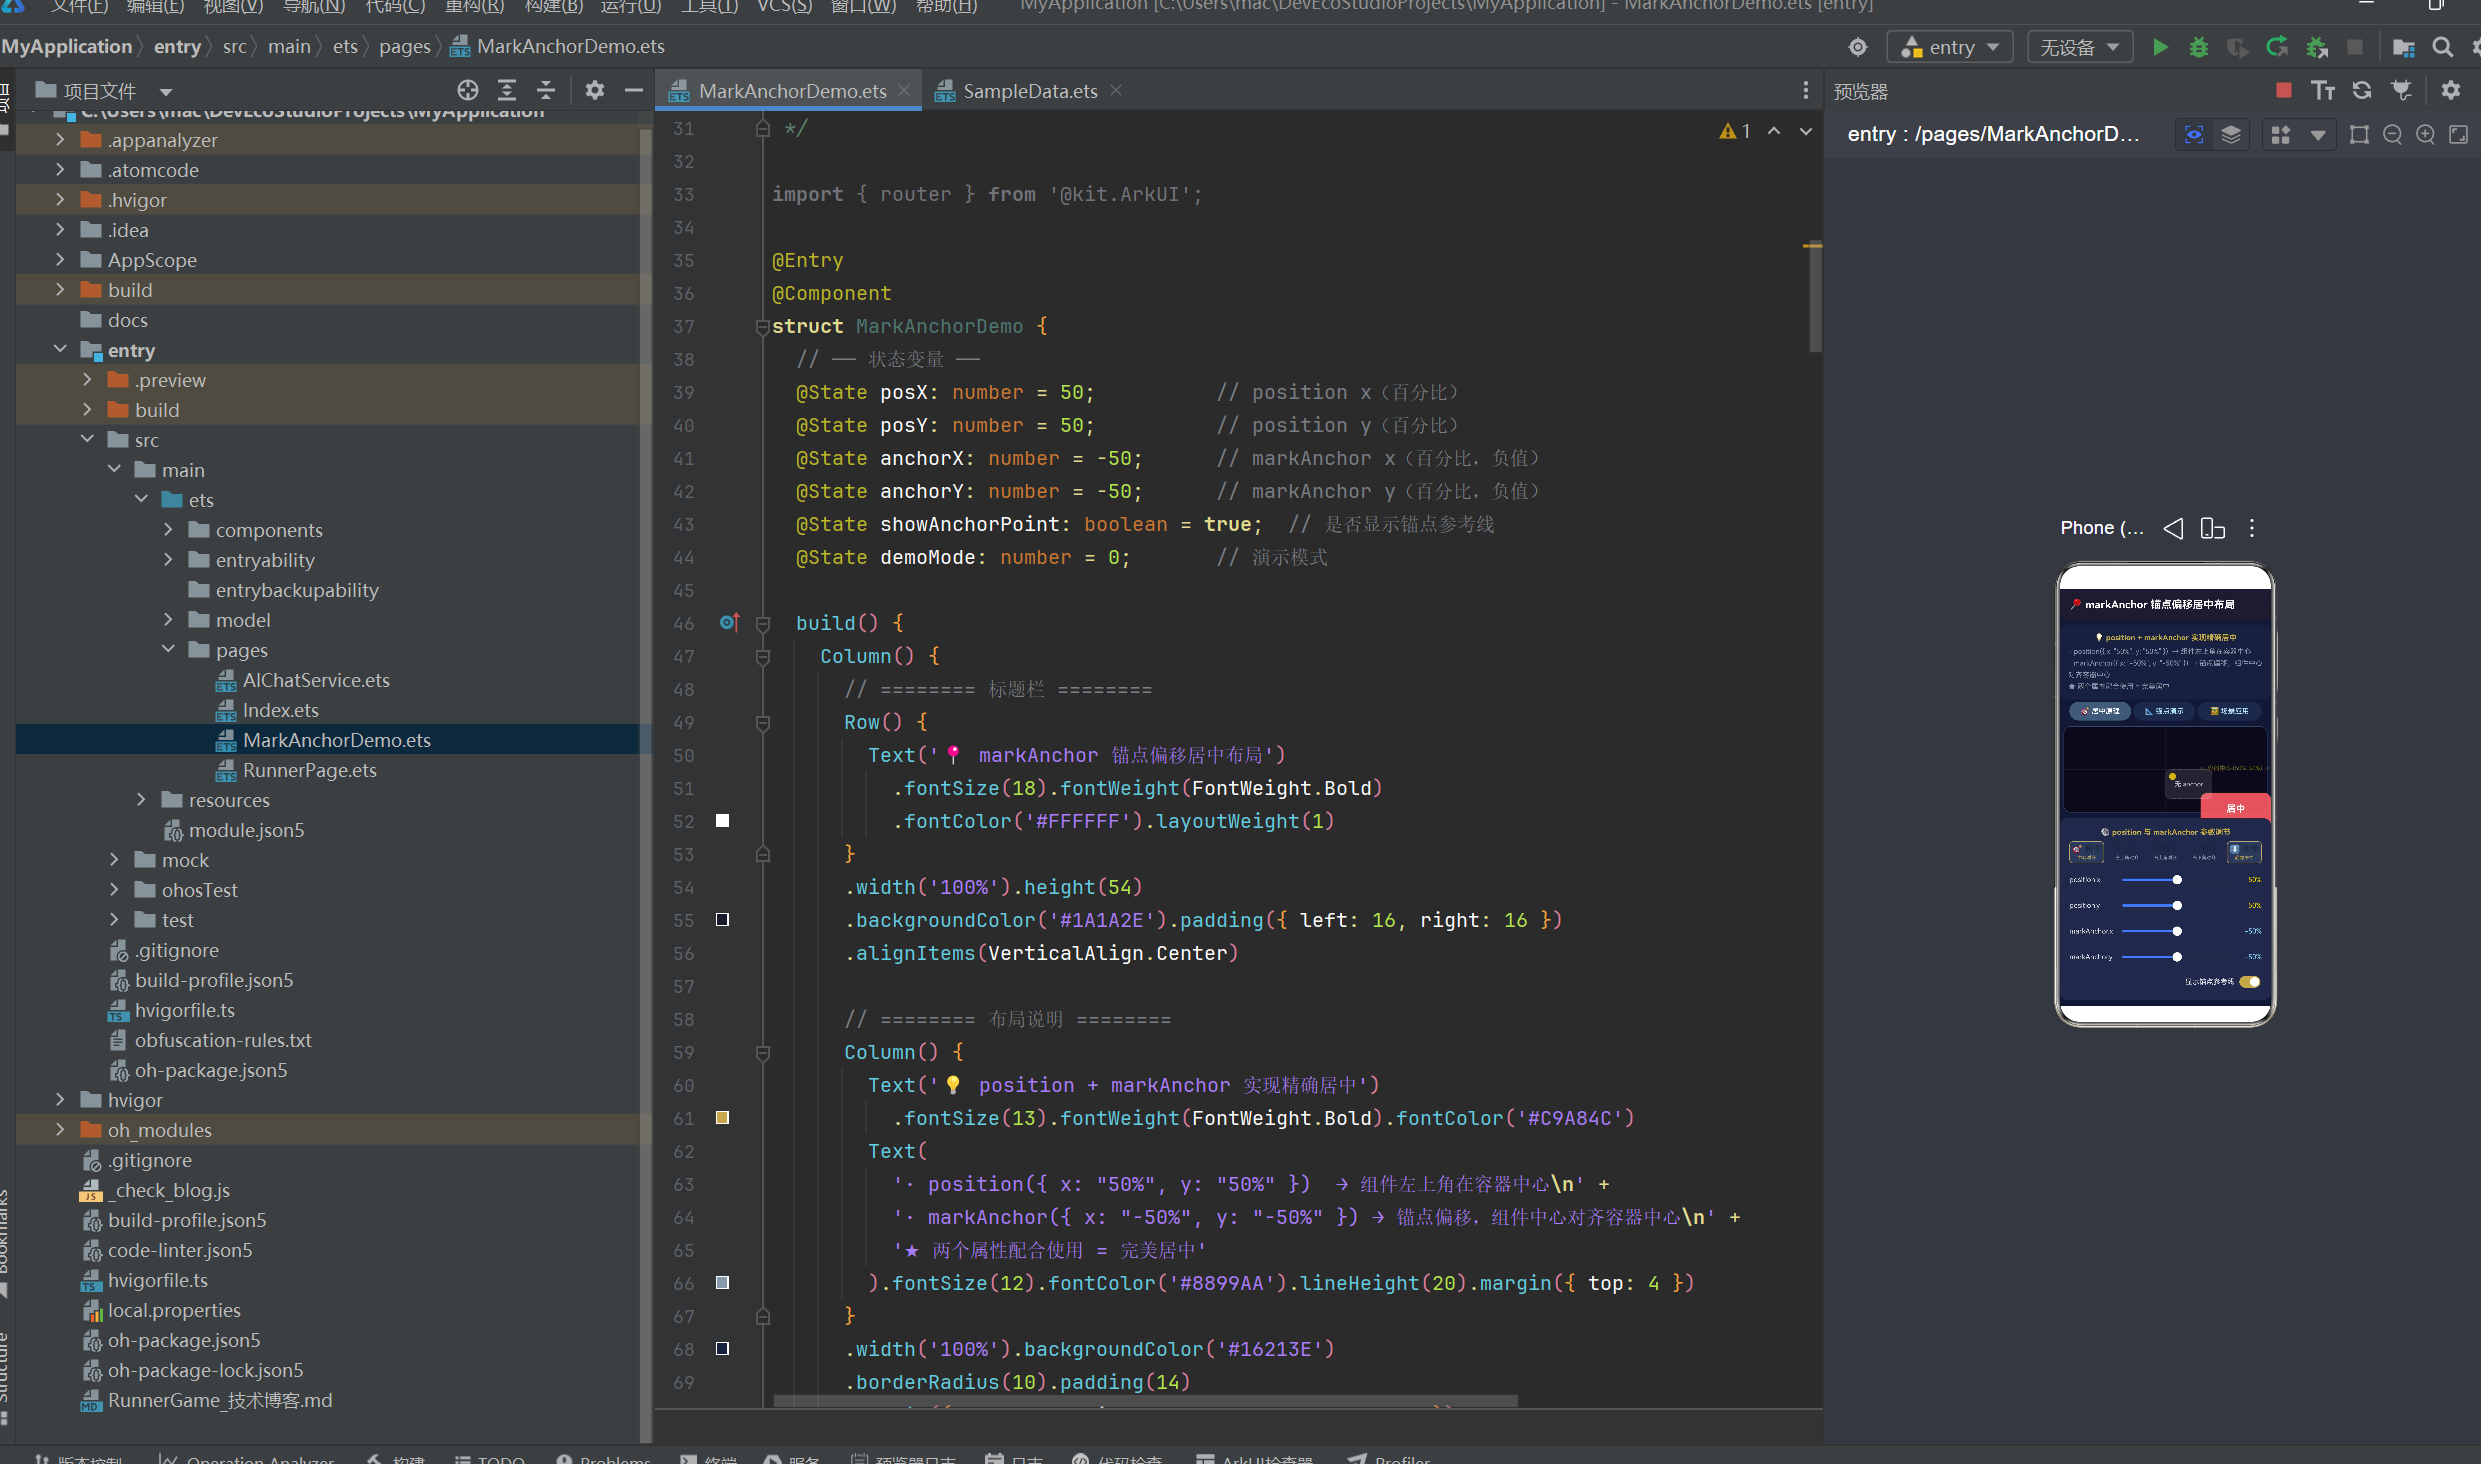
4. position + markAnchor 锚点居中布局全解
4.1 布局原理
在 ArkTS 中,position 和 markAnchor 是两个配合使用的属性,用于实现绝对定位布局。
核心公式:
typescript
.position({ x: '50%', y: '50%' })
.markAnchor({ x: '-50%', y: '-50%' })
分步理解:
-
没有
markAnchor时:.position({ x: '50%', y: '50%' }) → 组件的左上角 对齐到 父容器的 (50%, 50%) -
加上
markAnchor后:.position({ x: '50%', y: '50%' }) .markAnchor({ x: '-50%', y: '-50%' }) → 组件的中心点 对齐到 父容器的 (50%, 50%)
为什么 markAnchor 的值是负数?
markAnchor 定义的是组件锚点相对于组件自身左上角的偏移:
- 正值 = 锚点向右/下移动(锚点在组件内部偏向中心)
- 负值 = 锚点向左/上移动(锚点在组件外部)
(-50%, -50%)= 锚点从左上角移动到组件中心
换句话说,markAnchor 改变了"组件的哪个点"被放在 position 指定的位置。
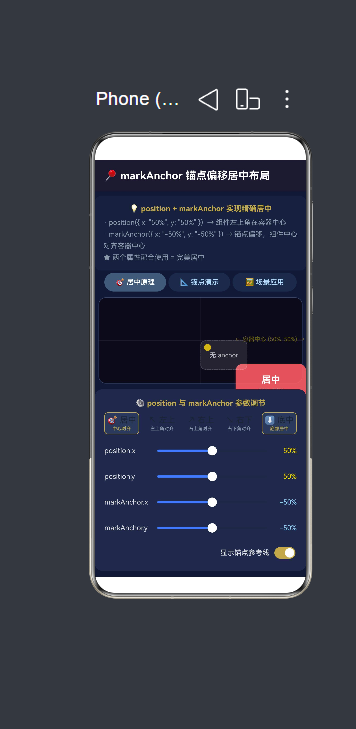
4.2 三种演示模式的架构
MarkAnchorDemo.ets 设计了三种互斥的演示模式,通过 @State demoMode: number 切换:
| 模式 | 值 | 演示目的 |
|---|---|---|
| 🎯 居中原理 | 0 | 展示核心公式的视觉效果,对比有/无 markAnchor |
| 📐 锚点演示 | 1 | 实时调节参数,观察组件位置变化 |
| 🖼️ 场景应用 | 2 | 展示 4 种实际应用场景 |
4.3 模式 0:居中原理 ------ 可视化的对比教学
typescript
@Builder
buildCenteringPrinciple(): void {
  Stack() {
    // 容器背景
    Column().width('100%').height('100%')
      .backgroundColor('#0A0A1A').borderRadius(12)

    // 十字参考线
    Column().width('100%').height(1)    // 水平参考线
      .position({ x: 0, y: '50%' })
    Column().width(1).height('100%')    // 垂直参考线
      .position({ x: '50%', y: 0 })

    // 金色中心点
    Column().width(12).height(12).backgroundColor('#FFD700')
      .borderRadius(6).opacity(0.8)
      .position({ x: '50%', y: '50%' })
      .markAnchor({ x: -6, y: -6 })      // ★ 圆点自身居中

    // ★★★ 核心方块:position + markAnchor 完美居中
    Column() {
      Text('居中').fontSize(16).fontWeight(FontWeight.Bold).fontColor('#FFF')
      Text('50%, 50%').fontSize(10).fontColor('rgba(255,255,255,0.7)')
    }
    .width(120).height(80)
    .backgroundColor('rgba(255,107,107,0.85)').borderRadius(12)
    .position({ x: '50%', y: '50%' })         // ★ 定位
    .markAnchor({ x: '-50%', y: '-50%' })     // ★ 锚点偏移
    .shadow({ radius: 6, color: 'rgba(255,107,107,0.4)', offsetY: 3 })

    // 对比:没有 markAnchor 的效果
    Column() {
      Text('无 anchor').fontSize(11).fontColor('#FFF').opacity(0.7)
    }
    .width(80).height(50)
    .backgroundColor('rgba(255,255,255,0.1)').borderRadius(8)
    .position({ x: '50%', y: '50%' })         // ★ 仅 position
    .border({ width: 1, color: 'rgba(255,255,255,0.2)', style: BorderStyle.Dashed })
  }
  .width('100%').layoutWeight(1).padding(6)
}这个演示中,红色方块 (使用 markAnchor)正好位于容器正中心,而半透明虚边框方块(无 markAnchor)的左上角对齐到容器中心,视觉上偏右下。这是理解 markAnchor 最直观的方式。
4.4 模式 1:锚点演示 ------ 交互式参数调节
这个模式通过底部的滑块动态控制 position 和 markAnchor 的值:
typescript
// ★★★ 核心:动态定位的卡片
Column() {
  Text('B').fontSize(24).fontWeight(FontWeight.Bold).fontColor('#FFF')
  Text('pos(' + this.posX.toFixed(0) + ', ' + this.posY.toFixed(0) + ')')
    .fontSize(8).fontColor('rgba(255,255,255,0.7)')
  Text('anc(' + this.anchorX.toFixed(0) + ', ' + this.anchorY.toFixed(0) + ')')
    .fontSize(8).fontColor('rgba(255,255,255,0.5)')
}
.width(100).height(70)
.backgroundColor('rgba(78,205,196,0.85)').borderRadius(10)
.position({ x: this.posX + '%', y: this.posY + '%' })       // ★ 跟随滑块
.markAnchor({ x: this.anchorX + '%', y: this.anchorY + '%' }) // ★ 跟随滑块
底部的控制面板通过 Slider 组件实现连续调节:
typescript
// position X 滑块
Row() {
  Text('position.x').fontSize(12).fontColor('#E0E0E0').width(80)
  Slider({ value: this.posX, min: 0, max: 100, step: 1 })
    .showTips(true).layoutWeight(1)
    .onChange((v: number) => { this.posX = v })
  Text(this.posX.toFixed(0) + '%').fontSize(12).fontColor('#FFD700')
    .width(40).textAlign(TextAlign.End)
}

// markAnchor X 滑块(值为负)
Text('markAnchor.x').fontSize(12).fontColor('#E0E0E0').width(80)
Slider({ value: this.anchorX, min: -100, max: 0, step: 1 })
  .showTips(true).layoutWeight(1)
  .onChange((v: number) => { this.anchorX = v })
4.5 模式 2:场景应用 ------ 4 种实际案例
typescript
// 场景 1:右上角关闭按钮
Column() { Text('✕').fontSize(18).fontColor('#FFF') }
.width(32).height(32).backgroundColor('rgba(255,0,0,0.7)').borderRadius(16)
.position({ x: '100%', y: 0 })     // 定位到父容器右上角
.markAnchor({ x: -8, y: 8 })       // 偏移留边距

// 场景 2:图片热区标记(人脸识别框)
Column() { Text('📸').fontSize(14); Text('检测到人脸').fontSize(8) }
.width(80).height(56).backgroundColor('rgba(76,175,80,0.75)')
.position({ x: '30%', y: '35%' })    // 标记到图片的特定位置
.markAnchor({ x: '-50%', y: '-50%' }) // 标记框自身居中

// 场景 3:底部居中提示文字
Text('👇 点击图片查看更多细节')
  .fontSize(11).fontColor('rgba(255,255,255,0.6)')
  .position({ x: '50%', y: '90%' })  // 底部居中
  .markAnchor({ x: '-50%', y: 0 })

// 场景 4:左上角返回按钮
Column() { Text('← 返回').fontSize(13) }
.padding({ left: 10, right: 10, top: 4, bottom: 4 })
.backgroundColor('rgba(0,0,0,0.5)').borderRadius(14)
.position({ x: 0, y: 0 })           // 定位到左上角
.markAnchor({ x: 12, y: 12 })       // 偏移留边距
这四种场景涵盖了 90% 的绝对定位居中需求:
| 场景 | position | markAnchor | 效果 |
|---|---|---|---|
| 关闭按钮 | (100%, 0) |
(-8, 8) |
右上角贴边留间距 |
| 热区标记 | (30%, 35%) |
(-50%, -50%) |
在指定坐标处居中 |
| 底部提示 | (50%, 90%) |
(-50%, 0) |
底部水平居中 |
| 返回按钮 | (0, 0) |
(12, 12) |
左上角贴边留间距 |
4.6 使用场景与设计建议
推荐使用 position + markAnchor 的场景:
- 模态框/弹窗居中 →
position(50%, 50%)+markAnchor(-50%, -50%) - 图片/视频上的标记点 → 标记点的百分比坐标 +
markAnchor(-50%, -50%) - 浮动操作按钮(FAB) →
position(85%, 92%)+markAnchor(-50%, -50%) - 角标/徽章 →
position(100%, 0)+markAnchor(50%, -50%)
不推荐的场景:
- 简单的线性排列(用 Column/Row/Flex 更简单)
- 响应式需要动态调整的布局(用 Flex/Grid 更合适)
5. Column + layoutWeight 弹性布局与跑酷游戏
5.1 layoutWeight 弹性权重原理
layoutWeight 是 ArkTS 中最强大的弹性布局属性之一,它允许子组件按照权重比例分配父容器的剩余空间。
计算公式:
子组件高度 = (容器总高度 - 所有固定高度之和) × (该子组件的 layoutWeight / 所有弹性组件的 layoutWeight 之和)关键条件: 父容器 Column 必须设置 height('100%'),否则没有"剩余空间"可言,layoutWeight 将无效。
5.2 跑酷游戏的布局结构
RunnerPage 的布局架构是一个五段式 Column:
Column(height('100%'))
├── 固定段 1:顶部状态栏                   .height(50)
├── 弹性段 A:游戏主场景 (Canvas)          .layoutWeight(1.0)  → 50%
├── 弹性段 B:游戏状态信息                 .layoutWeight(0.3)  → 15%
├── 弹性段 C:跳跃按钮                     .layoutWeight(0.7)  → 35%
└── 固定段 2:布局说明面板                 内容撑高(不参与弹性)
权重计算验证:
- 弹性权重总和 = 1.0 + 0.3 + 0.7 = 2.0
- 段 A 占比 = 1.0 / 2.0 = 50%
- 段 B 占比 = 0.3 / 2.0 = 15%
- 段 C 占比 = 0.7 / 2.0 = 35%
实际像素值还取决于屏幕总高度减去两个固定段的高度。
5.3 Canvas 游戏渲染引擎
游戏的核心是一个基于 Canvas 的自绘渲染引擎,通过 setInterval 实现固定帧率循环。
5.3.1 帧循环启动
typescript
this.timerId = setInterval(() => {
  this.gameLoop();
}, 24);  // 约 42fps
每 24ms 执行一次 gameLoop(),这个循环包含了三大步骤:
- 物理更新(施加重力、更新位置)
- 碰撞检测(AABB 矩形碰撞)
- 画面绘制(重绘 Canvas)
5.3.2 物理引擎实现
游戏物理使用简化的"跳跳乐"模型:
typescript
// 常量定义
const GRAVITY: number = 0.55;         // 重力加速度(每帧)
const JUMP_VEL: number = -9.0;        // 跳跃初速度(负值=向上)
const BASE_SPEED: number = 2.5;       // 基础移动速度
const MAX_SPEED: number = 7.0;        // 最大速度

// 物理更新(每帧执行)
private gameLoop(): void {
  // ★ 重力作用
  this.playerVY = this.playerVY + GRAVITY;
  this.playerY = this.playerY + this.playerVY;

  // ★ 地面碰撞
  if (this.playerY >= 0) {
    this.playerY = 0;
    this.playerVY = 0;
  }

  // ★ 速度递增(随得分增加游戏难度)
  this.curSpeed = BASE_SPEED + this.score * SPEED_STEP;
  if (this.curSpeed > MAX_SPEED) {
    this.curSpeed = MAX_SPEED;
  }

  // ★ 障碍物移动
  for (let i = 0; i < this.obstacles.length; i++) {
    this.obstacles[i].x = this.obstacles[i].x - this.curSpeed;
  }

  // ★ 生成新障碍物
  this.spawnCD--;
  if (this.spawnCD <= 0) {
    this.spawnCD = SPAWN_MIN + Math.floor(Math.random() * (SPAWN_MAX - SPAWN_MIN));
    this.obstacles[this.obstacles.length] = { x: this.canvasW };
  }

  // ...碰撞检测、绘制...
}
难度曲线设计:
游戏难度随得分呈线性递增:
- 障碍物移动速度从 2.5 开始,每得 1 分增加 0.08
- 当速度达到 7.0 后不再增加(上限保护)
- 障碍物生成间隔是随机的(60~110 帧),保证每局体验不同
5.3.3 AABB 碰撞检测
typescript
// ★ AABB 矩形碰撞检测
// 角色碰撞盒:左上角 (px, py),右下角 (px+P_SIZE, py+P_SIZE)
// 障碍物碰撞盒:左上角 (ox, oy),右下角 (ox+O_W, oy+O_H)

if (px < ox + O_W && px + P_SIZE > ox) {  // X 轴重叠
  if (py < oy + O_H && py + P_SIZE > oy) { // Y 轴重叠
    // 碰撞!游戏结束
    this.gameOver();
    return;
  }
}
AABB 原理: 两个轴对齐矩形碰撞的条件是:在 X 轴和 Y 轴上投影都有重叠。
- X 轴重叠条件:
rectA.left < rectB.right && rectA.right > rectB.left - Y 轴重叠条件:
rectA.top < rectB.bottom && rectA.bottom > rectB.top
5.3.4 Canvas 绘制详解
Canvas 绘制覆盖了7 个视觉层次:
typescript
private drawScene(): void {
  // 1. 清空画布
  ctx.clearRect(0, 0, w, h);

  // 2. 天空渐变背景
  const grad = ctx.createLinearGradient(0, 0, 0, h);
  grad.addColorStop(0, '#87CEEB');    // 天蓝
  grad.addColorStop(0.7, '#E0F7FA');  // 浅青色
  grad.addColorStop(1, '#A5D6A7');    // 浅绿
  ctx.fillStyle = grad;
  ctx.fillRect(0, 0, w, h);

  // 3. 地面与草地边沿
  ctx.fillStyle = '#5D4037';           // 棕色地面
  ctx.fillRect(0, groundY, w, h - groundY);
  ctx.fillStyle = '#66BB6A';           // 绿色草地
  ctx.fillRect(0, groundY - 4, w, 4);

  // 4. 地面纹理线(随帧滚动,产生移动感)
  for (let i = 0; i < 6; i++) {
    const lx = (this.frameCnt * 2 + i * 60) % (w + 40) - 20;
    // 绘制短线...
  }

  // 5. 障碍物(箱子)
  ctx.fillStyle = '#8D6E63';
  ctx.fillRect(ox, oy, O_W, O_H);
  ctx.strokeStyle = '#5D4037';
  ctx.strokeRect(ox, oy, O_W, O_H);
  // 装饰 X 图案...

  // 6. 角色(圆角矩形 + 眼睛 + 微笑)
  ctx.fillStyle = '#1565C0';
  ctx.beginPath();
  ctx.roundRect(px, py, P_SIZE, P_SIZE, 4);
  ctx.fill();
  // 眼睛、瞳孔、微笑、跳跃喷气效果...

  // 7. 状态蒙层(READY/OVER 时覆盖半透明遮罩)
  if (this.gameState === GameState.OVER) {
    ctx.fillStyle = '#00000080';
    ctx.fillRect(0, 0, w, h);
    ctx.fillStyle = '#ffffff';
    ctx.fillText('💥 游戏结束', w / 2, h / 2 - 20);
    // 显示得分...
  }
}
5.4 生命周期管理
typescript
aboutToDisappear(): void {
  if (this.timerId >= 0) {
    clearInterval(this.timerId);
    this.timerId = -1;
  }
}
aboutToDisappear 是 ArkTS 组件生命周期钩子,在组件销毁前调用。这里清理 setInterval 定时器,防止页面切换后定时器仍在运行,导致内存泄漏或性能问题。
5.5 Canvas 尺寸获取
typescript
Canvas(this.ctx)
  .width('100%')
  .height('100%')
  .onReady(() => {
    // ★ Canvas 就绪后才能获取实际像素尺寸
    this.canvasW = this.ctx.width;
    this.canvasH = this.ctx.height;
    this.drawScene();  // 绘制首帧
  })
onReady 是 Canvas 组件的初始化回调,在 Canvas 完成布局计算并分配实际像素尺寸后触发。在此之前调用 ctx.width 会得到 0。
5.6 单键交互设计
整个游戏的用户交互只有一个按钮:
typescript
Button(this.btnLabel)
  .width('100%')
  .height('100%')
  .backgroundColor('#FF6F00')
  .fontSize(24).fontWeight(FontWeight.Bold)
  .borderRadius(16)
  .shadow({ radius: 8, color: '#4DFF6F00', offsetX: 0, offsetY: 4 })
  .onClick(() => { this.doJump(); })
doJump() 是一个三态方法:
typescript
private doJump(): void {
  if (this.gameState === GameState.READY || this.gameState === GameState.OVER) {
    this.startGame();      // 开始新游戏
    return;
  }
  if (this.gameState === GameState.PLAYING) {
    if (this.playerY >= -2) {
      this.playerVY = JUMP_VEL;  // 跳跃
    }
  }
}
6. 自定义组件体系与复用设计
6.1 组件设计原则
CommonComponents.ets 中定义了 4 个通用组件,它们遵循以下设计原则:
- 单一职责 ------ 每个组件只做一件事
- 可配置性 ------ 通过
@Prop装饰器暴露属性 - 内容注入 ------ 通过
@BuilderParam实现自定义内容 - 非侵入样式 ------ 属性命名避免与系统属性冲突
6.2 @Prop 装饰器与单向数据流
typescript
@Component
export struct Card {
  // ★ @Prop 允许父组件传入值,子组件可读但不应修改
  @Prop cardPadding: number = 16;    // 内边距
  @Prop cardMargin: number = 12;     // 外边距(底部)
  @Prop cardColor: string = '#ffffff';  // 背景色
  @Prop cardRadius: number = 16;     // 圆角
}
@Prop 与 @State 的区别:
| 装饰器 | 数据来源 | 可修改性 | 使用场景 |
|---|---|---|---|
@State |
组件内部 | 可修改,触发 UI 更新 | 组件内部可变状态 |
@Prop |
父组件传入 | 可读但不宜修改 | 外部配置项 |
@Link |
父组件传入 | 修改同步回父组件 | 需要双向同步的场景 |
6.3 @BuilderParam 内容注入
typescript
@Component
export struct Card {
  @BuilderParam content: () => void = this.defaultContent;

  @Builder
  defaultContent(): void {
    Text('卡片内容').fontSize(14).fontColor('#888')
  }

  build() {
    Column() {
      this.content()  // ★ 渲染注入的内容
    }
    .width('100%')
    .padding(this.cardPadding)
    .backgroundColor(this.cardColor)
    .borderRadius(this.cardRadius)
    .margin({ bottom: this.cardMargin })
    .shadow({ radius: 4, color: '#1a000000', offsetX: 0, offsetY: 2 })
  }
}
在 Card 组件中使用 @BuilderParam 实现了"插槽"效果。ArkTS 不支持传统的 <slot> 标签,@BuilderParam 是标准的替代方案。
父组件中的使用方式:
typescript
// 方式 1:直接传递 @Builder 方法
Card({ cardColor: '#F5F5F5', cardRadius: 12 }) {
  Text('这是卡片内容').fontSize(16)
}

// 方式 2:也可以不传入,使用默认内容
Card()
6.4 Canvas 圆形进度条
typescript
@Component
export struct ProgressRing {
  @Prop ringProgress: number = 0;    // 进度值 0-100
  @Prop ringSize: number = 80;       // 组件尺寸
  @Prop ringStroke: number = 6;      // 线条宽度
  @Prop ringColor: string = '#3a7bd5';    // 进度颜色
  @Prop ringBgColor: string = '#e8ecf0';  // 背景环颜色
  @Prop ringLabel: string = '';      // 下方标签文字
  @Prop ringValue: string = '';      // 中心文字

  private ringContext: CanvasRenderingContext2D = new CanvasRenderingContext2D();
  private progressContext: CanvasRenderingContext2D = new CanvasRenderingContext2D();

  drawRing(ctx: CanvasRenderingContext2D, value: number, isBg: boolean): void {
    const cx = this.ringSize / 2;       // 圆心 X
    const cy = this.ringSize / 2;       // 圆心 Y
    const r = (this.ringSize - this.ringStroke) / 2;  // 半径
    const startAngle = -Math.PI / 2;    // 从 12 点钟方向开始
    const endAngle = startAngle + (value / 100) * 2 * Math.PI;

    ctx.beginPath();
    ctx.arc(cx, cy, r, startAngle, endAngle);
    ctx.strokeStyle = isBg ? this.ringBgColor : this.ringColor;
    ctx.lineWidth = this.ringStroke;
    ctx.lineCap = 'round';              // 圆角端点
    ctx.stroke();
  }
}
设计要点:
- 使用两个叠加的 Canvas:底层绘制背景环(完整圆),上层绘制进度弧段
Stack组件实现图层叠加,再在其上叠加文字层- 起始角度设为
-π/2(12 点钟方向),而非数学默认的 3 点钟方向 lineCap: 'round'让进度条端点呈现圆角效果
6.5 模块入口卡片与顶部标题栏
typescript
@Component
export struct ModuleEntryCard {
  @Prop entryIcon: string = '';      // 图标 emoji
  @Prop entryLabel: string = '';     // 标题
  @Prop entryColor: string = '#3a7bd5'; // 主题色
  onClickAction: () => void = () => {};  // 点击回调

  build() {
    Column() {
      Text(this.entryIcon).fontSize(32).margin({ bottom: 8 })
      Text(this.entryLabel).fontSize(13).fontColor('#333')
    }
    .width('30%')
    .aspectRatio(1.0)             // ★ 保持正方形
    .backgroundColor((this.entryColor + '18'))  // 透明度 18
    .borderRadius(16)
    .onClick(() => { this.onClickAction(); })
  }
}
aspectRatio 的妙用: 设置 aspectRatio(1.0) 使卡片始终保持 1:1 正方形,配合 width('30%'),在网格中自动保持等宽等高。
7. 数据模型与 SM-2 间隔重复算法
7.1 完整的数据类型体系
AppModel.ets 中定义了 10 个接口和 2 个枚举,构成了一个英语学习应用的数据模型:
typescript
// 难度等级枚举
export enum Difficulty { EASY = 1, MEDIUM = 2, HARD = 3 }

// 词性枚举
export enum PartOfSpeech { NOUN, VERB, ADJ, ADV, PREP, CONJ, PRON, INTERJ }

// 单词条目
export interface WordItem {
  id: number;                  // 唯一标识
  word: string;                // 单词
  phonetic: string;            // 音标
  translation: string;         // 中文释义
  partOfSpeech: string;        // 词性
  exampleSentence: string;     // 例句(英文)
  exampleTranslation: string;  // 例句翻译
  difficulty: Difficulty;      // 难度等级
  category: string;            // 分类标签
  audioPath: string;           // 音频路径
}

// 学习记录
export interface StudyRecord {
  wordId: number;              // 关联单词 ID
  reviewCount: number;         // 复习次数
  correctCount: number;        // 正确次数
  lastReviewTime: string;      // 上次复习时间
  masteryLevel: number;        // 掌握度 0.0 ~ 1.0
}

// 模块卡片信息
export interface ModuleCard {
  title: string;   icon: string;   color: string;
  route: string;   description: string;
}

// 每日统计
export interface DailyStats {
  date: string;       wordsLearned: number;
  minutesSpent: number;   accuracy: number;
}
听力、口语、阅读、语法模块的数据结构也都在此定义:
typescript
export interface ListeningMaterial {
  id: number;  title: string;  level: string;
  duration: string;  transcript: string;
  questions: ListeningQuestion[];
}

export interface SpeakingExercise {
  id: number;  topic: string;  prompt: string;
  exampleAnswer: string;  keywords: string[];
}

export interface ReadingArticle {
  id: number;  title: string;  level: string;
  wordCount: number;  content: string;
  questions: ReadingQuestion[];
}

export interface GrammarExercise {
  id: number;  topic: string;  question: string;
  options: string[];  correctIndex: number;
  explanation: string;
}
7.2 示例数据
SampleData.ets 包含:
- 30 个基础词汇(含音标、例句、难度、分类)
- 2 篇阅读文章(初级/中级,含 3 道阅读理解题)
- 8 道语法练习题(涵盖时态、条件句、被动语态等)
7.3 SM-2 间隔重复算法
SpacedRepetition.ets 实现了改进版 SM-2 算法------这是 SuperMemo 记忆软件的核心理念,用于最优化的复习时间安排。
7.3.1 核心思想
⭐ 人类记忆的遗忘曲线遵循指数规律:学过的内容会在大约 20 分钟后遗忘 42%
⭐ 在即将遗忘的时刻复习,效果最佳且复习间隔可以逐渐延长
⭐ SM-2 算法根据用户每次回忆的质量(quality),动态计算下次复习时间
7.3.2 算法实现
typescript
static schedule(
  quality: number,          // 回忆质量 0-5
  previousInterval: number, // 上次间隔(天)
  repetition: number,       // 连续正确次数
  previousEf: number = 2.5, // 当前易度系数
): ReviewResult {
  // ★ 质量 < 3:回答不合格,重置进度
  if (quality < 3) {
    return {
      nextInterval: 1,     // 明天复习
      newRepetition: 0,    // 连续正确次数归零
      newEf: this.updateEf(previousEf, quality),
      nextReview: new Date(Date.now() + 86400000),
    };
  }

  // ★ 回答合格,计算下次间隔
  const newEf = this.updateEf(previousEf, quality);
  let nextInterval: number;
  if (repetition === 0) {
    nextInterval = 1;      // 第 1 次正确 → 1 天后
  } else if (repetition === 1) {
    nextInterval = 3;      // 第 2 次正确 → 3 天后
  } else {
    nextInterval = Math.round(previousInterval * newEf); // ★ 指数增长
  }
  nextInterval = Math.min(nextInterval, 180); // 上限 180 天

  return {
    nextInterval,
    newRepetition: repetition + 1,
    newEf,
    nextReview: new Date(Date.now() + nextInterval * 86400000),
  };
}

// ★ 易度系数更新公式
static updateEf(oldEf: number, quality: number): number {
  // EF' = EF + (0.1 - (5-Q) × (0.08 + (5-Q) × 0.02))
  const newEf = oldEf + (0.1 - (5 - quality) * (0.08 + (5 - quality) * 0.02));
  return Math.max(newEf, 1.3);  // 下限 1.3
}
工作示例:
第 1 次学习(quality=4)→ 间隔 1 天,EF 略微降低(-0.04)
第 2 次复习(quality=5)→ 间隔 3 天,EF 略微升高(+0.1)
第 3 次复习(quality=5)→ 间隔 3 × 2.6 = 7.8 ≈ 8 天
第 4 次复习(quality=5)→ 间隔 8 × 2.7 = 21.6 ≈ 22 天
...每次复习正确,间隔呈指数级增长
如果某次忘记(quality<3)→ 重置为 1 天,从头开始
7.3.3 掌握度可视化
typescript
static getMasteryColor(mastery: number): string {
  if (mastery >= 0.8) return '#00b894';   // 绿色 - 已掌握
  if (mastery >= 0.5) return '#ff9f43';   // 橙色 - 学习中
  if (mastery >= 0.2) return '#e17055';   // 浅红 - 需加强
  return '#d63031';                         // 红色 - 新词
}

static getMasteryLabel(mastery: number): string {
  if (mastery >= 0.8) return '已掌握';
  if (mastery >= 0.5) return '学习中';
  if (mastery >= 0.2) return '需加强';
  return '新词';
}
8. 项目配置与构建系统
8.1 Hvigor 构建系统
HarmonyOS NEXT 使用 Hvigor(基于 Gradle 的鸿蒙构建系统)。核心配置文件:
根目录 build-profile.json5:
json
{
  "app": {
    "signingConfigs": [],
    "products": [{
      "name": "default",
      "targetSdkVersion": "6.1.1(24)",     // 目标 SDK
      "compatibleSdkVersion": "6.1.1(24)",  // 兼容 SDK
      "runtimeOS": "HarmonyOS"
    }]
  },
  "modules": [{
    "name": "entry",
    "srcPath": "./entry",
    "targets": [{ "name": "default", "applyToProducts": ["default"] }]
  }]
}
entry 模块 build-profile.json5:
json
{
  "apiType": "stageMode",       // Stage 模型
  "buildOptionSet": [{
    "name": "release",
    "arkOptions": {
      "obfuscation": {          // 代码混淆
        "ruleOptions": { "enable": false, "files": ["./obfuscation-rules.txt"] }
      }
    }
  }]
}
8.2 SDK 版本信息
从 .hvigor/cache/meta.json 可以看到确切版本:
json
{
  "compileSdkVersion": "6.1.1(24)",
  "hvigorVersion": "6.24.2",
  "toolChainsVersion": "6.1.1.125"
}
8.3 应用配置
AppScope/app.json5:
json
{
  "app": {
    "bundleName": "com.example.myapplication",  // 包名
    "vendor": "example",
    "versionCode": 1000000,
    "versionName": "1.0.0",
    "icon": "$media:layered_image",
    "label": "$string:app_name"
  }
}entry/src/main/module.json5:
json
{
  "module": {
    "name": "entry",
    "type": "entry",
    "mainElement": "EntryAbility",
    "deviceTypes": ["phone"],
    "abilities": [{
      "name": "EntryAbility",
      "srcEntry": "./ets/entryability/EntryAbility.ets",
      "exported": true,
      "skills": [{
        "entities": ["entity.system.home"],
        "actions": ["action.system.home"]
      }]
    }]
  }
}
8.4 字符串资源
字符串资源使用 string.json 国际化管理:
json
{
  "string": [
    { "name": "module_desc", "value": "鸿蒙英语学习应用" },
    { "name": "home_title", "value": "英语学习" },
    { "name": "word_study", "value": "词汇学习" },
    { "name": "listening", "value": "听力训练" },
    { "name": "speaking", "value": "口语练习" },
    { "name": "reading", "value": "阅读理解" },
    { "name": "grammar", "value": "语法练习" }
  ]
}
9. 总结与最佳实践
9.1 全栈技术图谱
本项目涵盖了 HarmonyOS NEXT 开发的多个核心领域:
| 技术领域 | 具体实现 | 关键 API/概念 |
|---|---|---|
| Ability | EntryAbility | UIAbility, windowStage.loadContent() |
| 网络请求 | AIChatService | http.createHttp(), SSE 流式解析 |
| 页面布局 | MarkAnchorDemo | position, markAnchor, 百分比坐标 |
| 弹性布局 | RunnerPage | layoutWeight, Column.height('100%') |
| Canvas 绘图 | 跑酷游戏 | CanvasRenderingContext2D, 物理引擎 |
| 自定义组件 | CommonComponents | @Component, @Prop, @BuilderParam |
| 状态管理 | Index, RunnerPage | @State, GameState 枚举 |
| 生命周期 | RunnerPage | aboutToDisappear, onPageShow |
| 数据模型 | AppModel | interface, enum, 类型安全 |
| 算法 | SpacedRepetition | SM-2 间隔重复 |
| 构建配置 | build-profile.json5 | Stage 模型, SDK 配置, 混淆 |
| 资源管理 | string.json | 国际化和资源引用 |
9.2 十大最佳实践
1. 状态机驱动 UI
始终使用枚举定义清晰的状态,避免用布尔值的组合控制 UI。GameState.WELCOME | CASE_LOADING | CASE_READY | RESULT_SHOWN 比 isLoading && !hasData && !isError 更可维护。
2. 网络请求要流式
对于耗时的 AI 请求,务必开启 stream: true 并结合 dataReceive 事件实现逐段展示,而不是等待完整响应。
3. 缓冲区式 SSE 解析
SSE 数据的边界不一定与 TCP 分片对齐,使用 buffer += chunk; lines = buffer.split('\n'); buffer = lines.pop() 模式保证解析正确。
4. layoutWeight 必须配合 height('100%')
弹性权重分配的"剩余空间"来源于 height('100%'),忘记设置会导致 layoutWeight 失效。
5. Canvas 尺寸在 onReady 中获取
Canvas 组件的实际像素尺寸只有在 onReady 事件触发后才可用,不要在 build() 中尝试读取。
6. 生命周期清理定时器
使用 setInterval 时,务必在 aboutToDisappear 中调用 clearInterval,否则页面切换后定时器仍在运行。
7. @BuilderParam 替代 Slot
ArkTS 不支持 <slot>,使用 @BuilderParam 配合 @Builder 实现内容注入。
8. position + markAnchor 实现绝对居中
记住经典公式:position('50%', '50%') + markAnchor('-50%', '-50%'),适用于弹窗、浮层等场景。
9. 类型解析要三层回退
解析 AI 响应时,按"SSE 流式 → SSE 批量 → 非流式 JSON"逐层尝试,兼容不同后端实现。
10. 组件的单一职责
一个组件只做一件事,通过 @Prop 暴露配置,通过 @BuilderParam 注入内容,保持组件的通用性和可复用性。
9.3 未来可扩展方向
- AI 推理大师:可增加对话历史留存、案件难度选择、多人推理模式
- 跑酷游戏:可增加道具系统、排行榜、存档功能
- 英语学习:结合 SM-2 算法,可构建完整的背单词应用
- 布局演示:可扩展 Flex、Grid、自适应布局的对比演示