文章目录
- 一、简要概述
- 二、实现步骤
-
- 1.定义登录页面
- 2.定义鉴权拦截器
- 3.登录相关接口
- [4. 定义登录服务类](#4. 定义登录服务类)
- 5.用户踢出核心逻辑
- 三、源码与效果展示
- 四、总结与扩展
-
- [1 核心要点总结](#1 核心要点总结)
- [2 扩展与优化方向](#2 扩展与优化方向)
-
- [2.1 使用 Redis 集中管理 Session](#2.1 使用 Redis 集中管理 Session)
- [2.2 结合 Spring Security 实现](#2.2 结合 Spring Security 实现)
- [2.3 分布式场景下的会话管理优化](#2.3 分布式场景下的会话管理优化)
- [2.4 其他优化建议](#2.4 其他优化建议)
一、简要概述
用户登录是现代企业级开发的常见功能,一般情况下,系统默认支持用户多点登录的,也就是说同一用户可以在不同的浏览器多次登录。
在某些安全要求较高的场合,需要实现后登录用户账号自动踢出已登录账号 或者已登录账号锁定的功能。
二、实现步骤
下面是用户登录、Session检查、踢出旧会话的完整逻辑流程图:
#mermaid-svg-jbVs5OIhEwzNPZpy{font-family:"trebuchet ms",verdana,arial,sans-serif;font-size:16px;fill:#333;}@keyframes edge-animation-frame{from{stroke-dashoffset:0;}}@keyframes dash{to{stroke-dashoffset:0;}}#mermaid-svg-jbVs5OIhEwzNPZpy .edge-animation-slow{stroke-dasharray:9,5!important;stroke-dashoffset:900;animation:dash 50s linear infinite;stroke-linecap:round;}#mermaid-svg-jbVs5OIhEwzNPZpy .edge-animation-fast{stroke-dasharray:9,5!important;stroke-dashoffset:900;animation:dash 20s linear infinite;stroke-linecap:round;}#mermaid-svg-jbVs5OIhEwzNPZpy .error-icon{fill:#552222;}#mermaid-svg-jbVs5OIhEwzNPZpy .error-text{fill:#552222;stroke:#552222;}#mermaid-svg-jbVs5OIhEwzNPZpy .edge-thickness-normal{stroke-width:1px;}#mermaid-svg-jbVs5OIhEwzNPZpy .edge-thickness-thick{stroke-width:3.5px;}#mermaid-svg-jbVs5OIhEwzNPZpy .edge-pattern-solid{stroke-dasharray:0;}#mermaid-svg-jbVs5OIhEwzNPZpy .edge-thickness-invisible{stroke-width:0;fill:none;}#mermaid-svg-jbVs5OIhEwzNPZpy .edge-pattern-dashed{stroke-dasharray:3;}#mermaid-svg-jbVs5OIhEwzNPZpy .edge-pattern-dotted{stroke-dasharray:2;}#mermaid-svg-jbVs5OIhEwzNPZpy .marker{fill:#333333;stroke:#333333;}#mermaid-svg-jbVs5OIhEwzNPZpy .marker.cross{stroke:#333333;}#mermaid-svg-jbVs5OIhEwzNPZpy svg{font-family:"trebuchet ms",verdana,arial,sans-serif;font-size:16px;}#mermaid-svg-jbVs5OIhEwzNPZpy p{margin:0;}#mermaid-svg-jbVs5OIhEwzNPZpy .label{font-family:"trebuchet ms",verdana,arial,sans-serif;color:#333;}#mermaid-svg-jbVs5OIhEwzNPZpy .cluster-label text{fill:#333;}#mermaid-svg-jbVs5OIhEwzNPZpy .cluster-label span{color:#333;}#mermaid-svg-jbVs5OIhEwzNPZpy .cluster-label span p{background-color:transparent;}#mermaid-svg-jbVs5OIhEwzNPZpy .label text,#mermaid-svg-jbVs5OIhEwzNPZpy span{fill:#333;color:#333;}#mermaid-svg-jbVs5OIhEwzNPZpy .node rect,#mermaid-svg-jbVs5OIhEwzNPZpy .node circle,#mermaid-svg-jbVs5OIhEwzNPZpy .node ellipse,#mermaid-svg-jbVs5OIhEwzNPZpy .node polygon,#mermaid-svg-jbVs5OIhEwzNPZpy .node path{fill:#ECECFF;stroke:#9370DB;stroke-width:1px;}#mermaid-svg-jbVs5OIhEwzNPZpy .rough-node .label text,#mermaid-svg-jbVs5OIhEwzNPZpy .node .label text,#mermaid-svg-jbVs5OIhEwzNPZpy .image-shape .label,#mermaid-svg-jbVs5OIhEwzNPZpy .icon-shape .label{text-anchor:middle;}#mermaid-svg-jbVs5OIhEwzNPZpy .node .katex path{fill:#000;stroke:#000;stroke-width:1px;}#mermaid-svg-jbVs5OIhEwzNPZpy .rough-node .label,#mermaid-svg-jbVs5OIhEwzNPZpy .node .label,#mermaid-svg-jbVs5OIhEwzNPZpy .image-shape .label,#mermaid-svg-jbVs5OIhEwzNPZpy .icon-shape .label{text-align:center;}#mermaid-svg-jbVs5OIhEwzNPZpy .node.clickable{cursor:pointer;}#mermaid-svg-jbVs5OIhEwzNPZpy .root .anchor path{fill:#333333!important;stroke-width:0;stroke:#333333;}#mermaid-svg-jbVs5OIhEwzNPZpy .arrowheadPath{fill:#333333;}#mermaid-svg-jbVs5OIhEwzNPZpy .edgePath .path{stroke:#333333;stroke-width:2.0px;}#mermaid-svg-jbVs5OIhEwzNPZpy .flowchart-link{stroke:#333333;fill:none;}#mermaid-svg-jbVs5OIhEwzNPZpy .edgeLabel{background-color:rgba(232,232,232, 0.8);text-align:center;}#mermaid-svg-jbVs5OIhEwzNPZpy .edgeLabel p{background-color:rgba(232,232,232, 0.8);}#mermaid-svg-jbVs5OIhEwzNPZpy .edgeLabel rect{opacity:0.5;background-color:rgba(232,232,232, 0.8);fill:rgba(232,232,232, 0.8);}#mermaid-svg-jbVs5OIhEwzNPZpy .labelBkg{background-color:rgba(232, 232, 232, 0.5);}#mermaid-svg-jbVs5OIhEwzNPZpy .cluster rect{fill:#ffffde;stroke:#aaaa33;stroke-width:1px;}#mermaid-svg-jbVs5OIhEwzNPZpy .cluster text{fill:#333;}#mermaid-svg-jbVs5OIhEwzNPZpy .cluster span{color:#333;}#mermaid-svg-jbVs5OIhEwzNPZpy div.mermaidTooltip{position:absolute;text-align:center;max-width:200px;padding:2px;font-family:"trebuchet ms",verdana,arial,sans-serif;font-size:12px;background:hsl(80, 100%, 96.2745098039%);border:1px solid #aaaa33;border-radius:2px;pointer-events:none;z-index:100;}#mermaid-svg-jbVs5OIhEwzNPZpy .flowchartTitleText{text-anchor:middle;font-size:18px;fill:#333;}#mermaid-svg-jbVs5OIhEwzNPZpy rect.text{fill:none;stroke-width:0;}#mermaid-svg-jbVs5OIhEwzNPZpy .icon-shape,#mermaid-svg-jbVs5OIhEwzNPZpy .image-shape{background-color:rgba(232,232,232, 0.8);text-align:center;}#mermaid-svg-jbVs5OIhEwzNPZpy .icon-shape p,#mermaid-svg-jbVs5OIhEwzNPZpy .image-shape p{background-color:rgba(232,232,232, 0.8);padding:2px;}#mermaid-svg-jbVs5OIhEwzNPZpy .icon-shape .label rect,#mermaid-svg-jbVs5OIhEwzNPZpy .image-shape .label rect{opacity:0.5;background-color:rgba(232,232,232, 0.8);fill:rgba(232,232,232, 0.8);}#mermaid-svg-jbVs5OIhEwzNPZpy .label-icon{display:inline-block;height:1em;overflow:visible;vertical-align:-0.125em;}#mermaid-svg-jbVs5OIhEwzNPZpy .node .label-icon path{fill:currentColor;stroke:revert;stroke-width:revert;}#mermaid-svg-jbVs5OIhEwzNPZpy :root{--mermaid-font-family:"trebuchet ms",verdana,arial,sans-serif;} Session管理逻辑
失败
成功
不存在
已存在
用户访问登录页面
提交登录表单
登录验证
返回登录页面
显示错误信息
检查Session中
是否存在该用户
创建新Session
存储用户信息
登录成功
跳转到主页
获取旧Session信息
使旧Session失效
(踢出旧会话)
创建新Session
存储用户信息
下面我们以后登录用户账号自动踢出已登录账号 来说明实现过程,已登录账号锁定作为待实现功能给各位大佬自己研究。
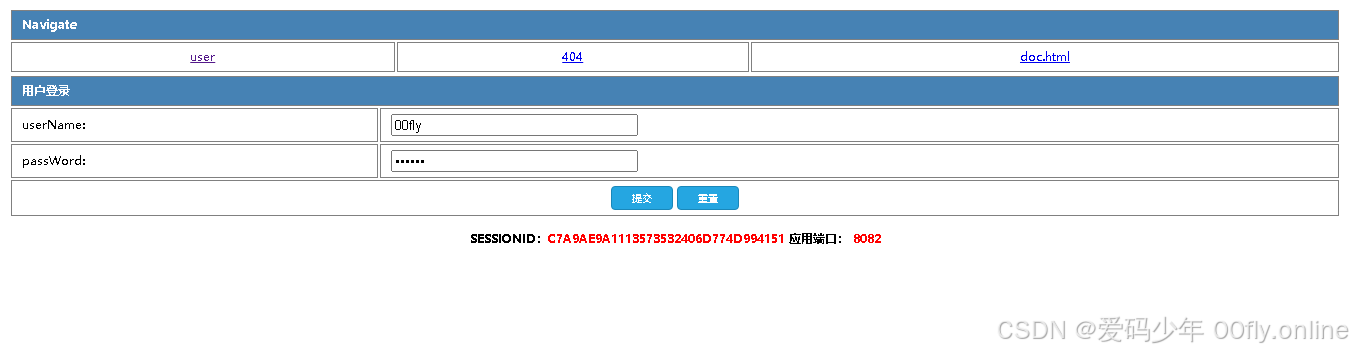
1.定义登录页面
我们以Thymeleaf来说明, 文件 login.html
html
<!DOCTYPE html PUBLIC "-//W3C//DTD HTML 4.01 Transitional//EN" "http://www.w3.org/TR/html4/loose.dtd">
<html lang="en" xmlns:th="http://www.thymeleaf.org">

<head>
<meta charset="utf-8">
<meta http-equiv="X-UA-Compatible" content="IE=edge,chrome=1">
<style>
body {
	margin: 10;
	font-size: 62.5%;
	line-height: 1.5;
}

.blue-button {
	background: #25A6E1;
	padding: 3px 20px;
	color: #fff;
	font-size: 10px;
	border-radius: 2px;
	-moz-border-radius: 2px;
	-webkit-border-radius: 4px;
	border: 1px solid #1A87B9
}

table {
	width: 70%;
}

th {
	background: SteelBlue;
	color: white;
}

td, th {
	border: 1px solid gray;
	font-size: 12px;
	text-align: left;
	padding: 5px 10px;
	overflow: hidden;
	white-space: nowrap;
	text-overflow: ellipsis;
	max-width: 200px;
	white-space: nowrap;
	text-overflow: ellipsis;
	text-overflow: ellipsis;
}
</style>
</head>
<title>00fly功能演示-Thymeleaf</title>
<script type="text/javascript">
	function formReset() {
		window.top.location.href = "/user/";
	}
</script>
<body>
	<center>
		<table>
			<tr>
				<th th:colspan="3">Navigate</th>
			</tr>
			<tr>
				<td style="text-align: center;"><a href="/user/">user</a></td>
				<td style="text-align: center;"><a href="/404">404</a></td>
				<td style="text-align: center;"><a target="_blank" href="/doc.html">doc.html</a></td>
			</tr>
		</table>
		<form th:object="${user}" method="post" action="/sys/login">
			<table>
				<tr>
					<th colspan="3">用户登录</th>
					<input type="hidden" name="userId" value="00fly" />
				</tr>
				<tr>
					<td>userName:</td>
					<td><input name="userName" size="30" maxlength="30" value="00fly" /><span th:errors="*{userName}" style="color: red" /></td>
				</tr>
				<tr>
					<td>passWord:</td>
					<td><input type="password" name="passWord" size="30" maxlength="30" value="123123" /><span th:errors="*{passWord}" style="color: red" /></td>
				</tr>
				<tr>
					<td colspan="3" style="text-align: center;"><input type="submit" class="blue-button" /> <input type="reset" class="blue-button" onclick="formReset()" /></td>
				</tr>
			</table>
		</form>
		<h3>
			SESSIONID:<font color="red">[[${#session!=null? #session.getId():''}]]</font> 应用端口: <font color="red">[[${application.port}]]</font>
		</h3>
	</center>
</body>
</html>
2.定义鉴权拦截器
AuthInterceptor.java
java
import javax.servlet.http.HttpServletRequest;
import javax.servlet.http.HttpServletResponse;
import javax.servlet.http.HttpSession;

import org.springframework.web.servlet.HandlerInterceptor;

import lombok.extern.slf4j.Slf4j;

/**
 *
 * 鉴权拦截器
 *
 * @author 00fly
 * @version [版本号, 2019年7月21日]
 * @see [相关类/方法]
 * @since [产品/模块版本]
 */
@Slf4j
public class AuthInterceptor implements HandlerInterceptor
{
    public boolean preHandle(HttpServletRequest request, HttpServletResponse response, Object handler)
        throws Exception
    {
        // log.info("##### preHandle {}", request.getServletPath());
        HttpSession session = request.getSession(true);
        if (session.getAttribute("userId") == null)
        {
            log.info("用户已注销或登录状态失效, {}", request.getServletPath());
            response.sendRedirect("/sys/toLogin"); // 重定向(新请求,新地址)
            return false;
        }
        return true;
    }
}
配置拦截器
java
import org.springframework.boot.autoconfigure.condition.ConditionalOnWebApplication;
import org.springframework.context.annotation.Configuration;
import org.springframework.web.servlet.config.annotation.InterceptorRegistry;
import org.springframework.web.servlet.config.annotation.WebMvcConfigurer;

import com.fly.core.interceptor.AuthInterceptor;

/**
 *
 * WebMvcConfig
 *
 * @author 00fly
 * @version [版本号, 2019年7月21日]
 * @see [相关类/方法]
 * @since [产品/模块版本]
 */
@Configuration
@ConditionalOnWebApplication
public class WebMvcConfig implements WebMvcConfigurer
{
    /**
     * 配置Interceptor
     *
     * @param registry
     */
    @Override
    public void addInterceptors(InterceptorRegistry registry)
    {
        registry.addInterceptor(new AuthInterceptor()).addPathPatterns("/**").excludePathPatterns("/favicon.ico", "/", "/404", "/error", "/rest/user/**", "/api/**", "/sys/**", "/doc.html/**", "/swagger-resources/**", "/webjars/**");
    }
}
3.登录相关接口
java
import java.io.IOException;

import javax.validation.Valid;
import javax.validation.constraints.NotBlank;

import org.springframework.beans.factory.annotation.Autowired;
import org.springframework.stereotype.Controller;
import org.springframework.validation.Errors;
import org.springframework.web.bind.annotation.GetMapping;
import org.springframework.web.bind.annotation.ModelAttribute;
import org.springframework.web.bind.annotation.PostMapping;
import org.springframework.web.bind.annotation.RequestMapping;

import com.fly.demo.service.LoginService;

import lombok.Data;
import lombok.extern.slf4j.Slf4j;

@Slf4j
@Controller
@RequestMapping("/sys")
public class LoginController
{
    @Autowired
    LoginService loginService;

    /**
     * 用户登录界面
     *
     * @return
     * @see [类、类#方法、类#成员]
     */
    @GetMapping("/toLogin")
    public String toLogin(@ModelAttribute("user") Login user)
    {
        return "/login";
    }

    @PostMapping("/login")
    public String login(@Valid @ModelAttribute("user") Login user, Errors errors)
        throws IOException
    {
        if (loginService.login(user.getUserName(), user.getPassWord()))
        {
            log.info("success login");
            return "redirect:/user/";
        }
        return "/login";
    }

    @GetMapping("/logout")
    public String logout()
    {
        loginService.logout();
        return "redirect:toLogin";
    }
}

@Data
class Login
{
    @NotBlank(message = "用户名不能为空")
    String userName;

    @NotBlank(message = "密码不能为空")
    String passWord;
}
4. 定义登录服务类
java
import java.util.HashMap;
import java.util.Map;

import javax.servlet.http.HttpSession;

import org.apache.commons.lang3.StringUtils;
import org.springframework.beans.factory.annotation.Autowired;
import org.springframework.stereotype.Service;

import com.fly.core.utils.IpUtils;

import lombok.extern.slf4j.Slf4j;

@Slf4j
@Service
public class LoginService
{
    @Autowired
    HttpSession session;

    /**
     * 用户是否登录
     *
     * @param userName
     * @param passWord
     * @return 成功或失败
     * @see [类、类#方法、类#成员]
     */
    public boolean login(String userName, String passWord)
    {
        if (StringUtils.isNoneBlank(userName, passWord))
        {
            session.setAttribute("userId", userName);
            session.setAttribute("ip", IpUtils.getClientIp());
            return true;
        }
        return false;
    }

    public void logout()
    {
        if (session != null)
        {
            String userName = (String)session.getAttribute("userId");
            log.info("##### 用户{}即将注销", userName);
            session.invalidate();
        }
    }

    public Map<String, String> getLoginUser()
    {
        if (session != null)
        {
            Map<String, String> map = new HashMap<>();
            map.put("userId", (String)session.getAttribute("userId"));
            map.put("ip", (String)session.getAttribute("ip"));
            map.put("sessionId", session.getId());
            return map;
        }
        return null;
    }
}
5.用户踢出核心逻辑
java
import java.util.Map;
import java.util.concurrent.ConcurrentHashMap;

import javax.servlet.annotation.WebListener;
import javax.servlet.http.HttpSession;
import javax.servlet.http.HttpSessionAttributeListener;
import javax.servlet.http.HttpSessionBindingEvent;
import javax.servlet.http.HttpSessionEvent;
import javax.servlet.http.HttpSessionListener;

import org.apache.commons.lang3.StringUtils;

import lombok.extern.slf4j.Slf4j;

@Slf4j
@WebListener
public class SessionListener implements HttpSessionAttributeListener, HttpSessionListener
{
    private Map<HttpSession, String> sessinMap = new ConcurrentHashMap<>();

    @Override
    public void sessionCreated(HttpSessionEvent event)
    {
        log.info("session {}创建", event.getSession().getId());
    }

    @Override
    public void sessionDestroyed(HttpSessionEvent event)
    {
        HttpSession session = event.getSession();
        sessinMap.remove(session);
        log.info("session {}销毁", session.getId());
    }

    @Override
    public void attributeAdded(HttpSessionBindingEvent event)
    {
        kickOut(event);
        log.info("session {}属性{} Added", event.getSession().getId(), event.getName());
    }

    @Override
    public void attributeRemoved(HttpSessionBindingEvent event)
    {
        HttpSession session = event.getSession();
        if ("userId".equals(event.getName()))
        {
            sessinMap.remove(session);
        }
        log.info("session {}属性{} Removed", session.getId(), event.getName());
    }

    @Override
    public void attributeReplaced(HttpSessionBindingEvent event)
    {
        kickOut(event);
        log.info("session {}属性{} Replaced", event.getSession().getId(), event.getName());
    }

    /**
     * 踢出当前用户已有Session
     *
     * @param event
     * @see [类、类#方法、类#成员]
     */
    private void kickOut(HttpSessionBindingEvent event)
    {
        HttpSession session = event.getSession();
        if ("userId".equals(event.getName()))
        {
            String userId = (String)event.getValue();
            // 使用户上次session失效,即踢出
            sessinMap.keySet().stream().filter(s -> StringUtils.equals((String)s.getAttribute("userId"), userId)).forEach(HttpSession::invalidate);
            sessinMap.put(session, userId);
        }
    }
}
三、源码与效果展示
1.源码放送
2.效果演示
四、总结与扩展
1 核心要点总结
本文详细介绍了在 Spring Boot 应用中实现"后登录用户自动踢出已登录账号"功能的完整流程,核心要点如下:
- 登录流程设计:通过流程图清晰展示了用户登录、Session 检查、踢出旧会话的完整逻辑流程。
- 前端页面实现:使用 Thymeleaf 模板引擎构建了简单的登录页面,包含表单提交和 Session 信息展示。
- 鉴权拦截器 :通过自定义
AuthInterceptor拦截器,实现对未登录用户的请求拦截和重定向到登录页面。 - 登录控制器 :
LoginController处理登录、登出请求,并与前端页面进行交互。 - 登录服务类 :
LoginService负责用户登录验证、Session 信息存储和获取等核心业务逻辑。 - 会话踢出核心 :通过实现
SessionListener监听器,在用户登录时检查并失效同一用户的旧 Session,实现"后登录踢出前登录"的功能。
2 扩展与优化方向
在实际生产环境中,本文的实现方案还可以从以下几个方向进行扩展和优化:
2.1 使用 Redis 集中管理 Session
- 问题 :当前方案使用内存中的
ConcurrentHashMap存储 Session 映射关系,在单机部署时可行,但在集群部署时无法共享 Session 状态。 - 解决方案:将 Session 信息存储到 Redis 中,实现分布式 Session 管理。可以使用 Spring Session 框架,通过简单的配置即可将会话数据存储到 Redis,支持多实例间的 Session 共享。
2.2 结合 Spring Security 实现
- 问题:手动实现的鉴权拦截器和登录逻辑较为基础,缺乏完善的权限管理和安全特性。
- 解决方案 :集成 Spring Security 框架,利用其成熟的认证授权机制。可以配置
ConcurrentSessionControlAuthenticationStrategy实现会话并发控制,自动处理"踢出旧会话"的逻辑,同时获得 CSRF 防护、密码加密等安全特性。
2.3 分布式场景下的会话管理优化
- 问题:在微服务或分布式架构中,Session 的一致性和高可用性面临挑战。
- 解决方案 :
- 采用 JWT(JSON Web Token)替代传统的 Session-Cookie 模式,实现无状态认证。
- 如果仍需使用 Session,可以结合 Spring Session 和 Redis 集群,确保会话数据的高可用和一致性。
- 考虑引入网关层(如 Spring Cloud Gateway)统一处理认证和会话管理,减轻业务服务的负担。
2.4 其他优化建议
- 安全性增强:添加登录失败次数限制、验证码机制、密码强度校验等。
- 用户体验优化:在踢出旧会话时,给被踢出的用户明确的提示信息(如"您的账号在另一设备登录")。
- 监控与日志:完善会话创建、销毁、踢出等关键操作的日志记录,便于问题排查和审计。
通过以上扩展和优化,可以使登录和会话管理功能更加健壮、安全,并适应更复杂的生产环境需求。