HarmonyOS @ohos.multimedia.camera 相机管理使用指南
本指南基于 HarmonyOS ArkTS 开发实践,系统讲解如何使用
@ohos.multimedia.camera模块实现自定义相机功能,涵盖权限配置、相机初始化、预览、拍照、焦距缩放等完整流程。
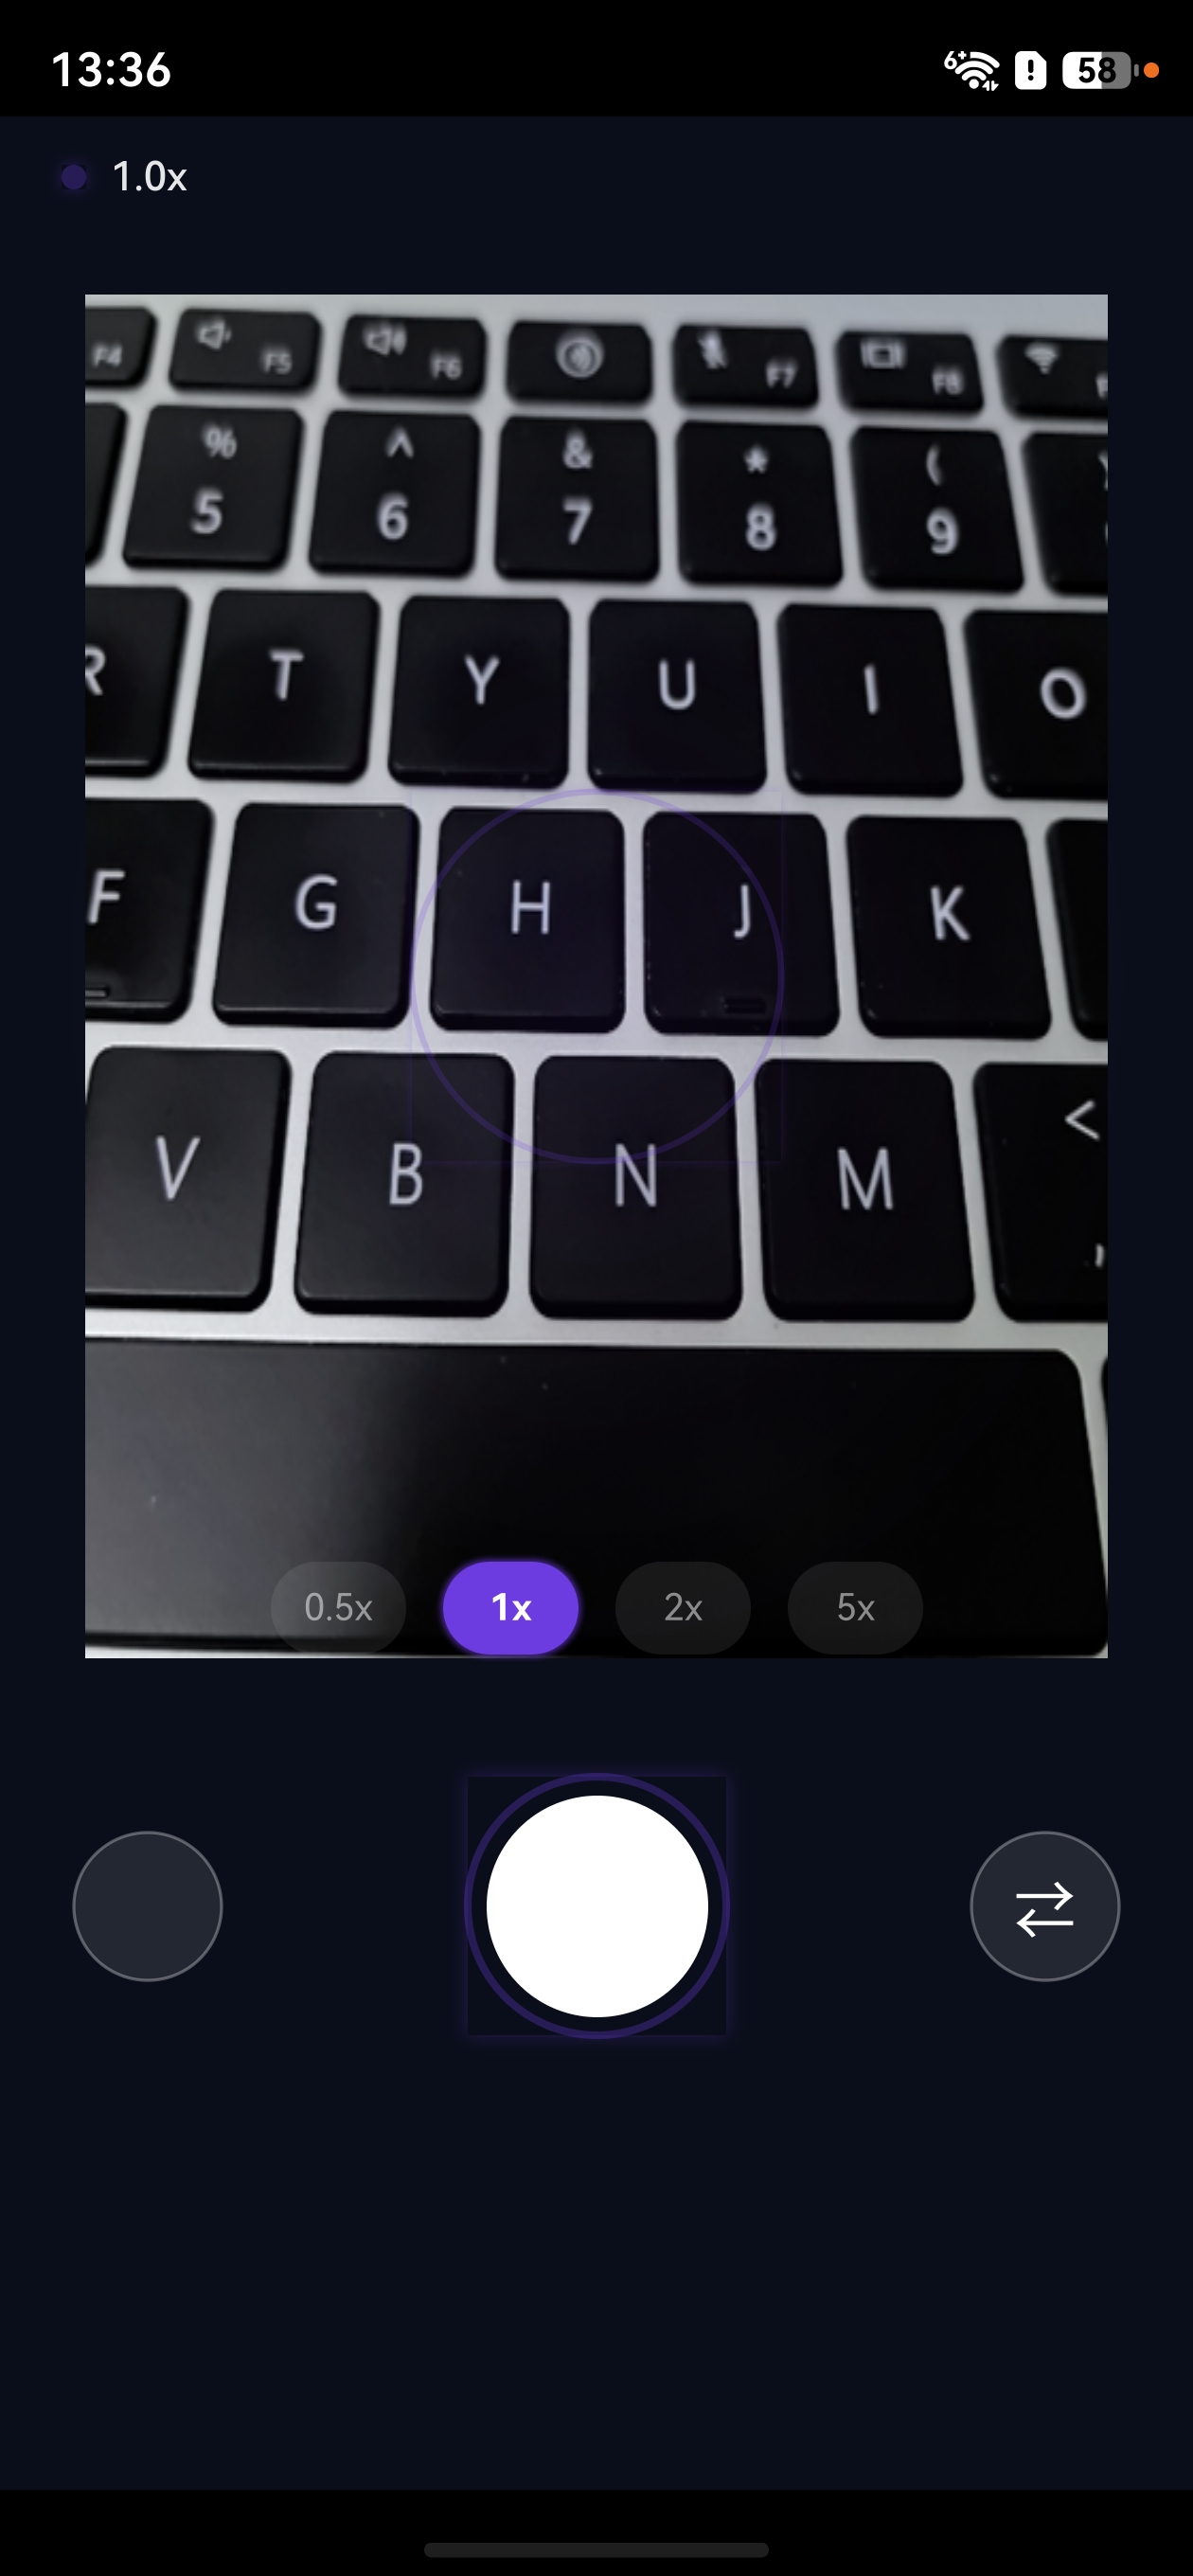
效果
一、概述
@ohos.multimedia.camera 是 HarmonyOS 提供的相机管理模块(通过 @kit.CameraKit 引入),支持以下核心能力:
- 获取设备支持的相机列表
- 创建相机输入流与预览输出流
- 配置拍照会话(PhotoSession)
- 实现拍照、闪光灯控制、对焦模式设置
- 实现焦距缩放(ZoomRatio)控制
二、环境准备
2.1 权限配置
在 entry/src/main/module.json5 中声明相机权限:
json5
{
  "module": {
    "requestPermissions": [
      {
        "name": "ohos.permission.CAMERA",
        "reason": "$string:reason_camera",
        "usedScene": {
          "abilities": ["EntryAbility"],
          "when": "inuse"
        }
      }
    ]
  }
}
同时在 resources/base/element/string.json 中添加权限说明:
json
{
  "string": [
    { "name": "reason_camera", "value": "应用需要使用相机进行拍照" }
  ]
}
2.2 动态权限申请
在页面 aboutToAppear() 生命周期中申请相机权限:
typescript
import { abilityAccessCtrl, Permissions } from '@kit.AbilityKit';
import { BusinessError } from '@kit.BasicServicesKit';

const cameraPermission: Array<Permissions> = ['ohos.permission.CAMERA'];

aboutToAppear(): void {
  const context = this.getUIContext().getHostContext();
  abilityAccessCtrl.createAtManager()
    .requestPermissionsFromUser(context, cameraPermission)
    .then(() => {
      // 权限获取成功后,若 XComponent surface 也已就绪,则初始化相机
      if (surfaceReady) {
        this.initCamera();
      }
      permReady = true;
    })
    .catch((err: BusinessError) => {
      console.error('权限申请失败: ' + err.message);
    });
}
注意: 首次运行时权限弹窗与 XComponent 渲染存在竞态,必须确保权限和 surface 都就绪后才初始化相机(详见第七节常见问题)。
三、核心流程
3.1 获取相机管理器
typescript
import { camera } from '@kit.CameraKit';

// 获取相机管理器实例
const cameraManager: camera.CameraManager = camera.getCameraManager(context);
3.2 获取支持的相机设备
typescript
// 获取所有支持的相机设备
const cameraArray: camera.CameraDevice[] = cameraManager.getSupportedCameras();

// cameraArray[0] 通常为后置相机
// cameraArray[1] 通常为前置相机(如果存在)
每个 CameraDevice 包含以下关键属性:
cameraPosition: 相机位置(前置/后置)cameraType: 相机类型cameraDirection: 相机方向
3.3 获取支持的场景模式
typescript
// 获取指定相机支持的场景模式
const sceneModes: camera.SceneMode[] =
  cameraManager.getSupportedSceneModes(cameraDevice);

// 判断是否支持普通拍照模式
const isSupportPhotoMode: boolean =
  sceneModes.indexOf(camera.SceneMode.NORMAL_PHOTO) >= 0;
常见场景模式:
| 模式 | 说明 |
|---|---|
NORMAL_PHOTO |
普通拍照 |
NORMAL_VIDEO |
普通录像 |
PORTRAIT |
人像模式 |
3.4 获取输出能力与配置流
typescript
// 获取指定场景模式下的输出能力
const cameraOutputCap: camera.CameraOutputCapability =
  cameraManager.getSupportedOutputCapability(cameraDevice, camera.SceneMode.NORMAL_PHOTO);

// 获取预览流配置列表
const previewProfiles: camera.Profile[] = cameraOutputCap.previewProfiles;

// 获取拍照输出配置列表
const photoProfiles: camera.Profile[] = cameraOutputCap.photoProfiles;
camera.Profile 包含:
format: 输出格式(数值类型)size: 分辨率{ width, height }
3.5 创建输入输出流
typescript
// 创建相机输入流
const cameraInput: camera.CameraInput =
  cameraManager.createCameraInput(cameraDevice);
await cameraInput.open();

// 创建预览输出流(surfaceId 来自 XComponent)
// 注意:预览分辨率应与显示区域宽高比匹配,避免预览变形
const previewOutput: camera.PreviewOutput =
  cameraManager.createPreviewOutput(previewProfile, surfaceId);

// 创建拍照输出流
const photoOutput: camera.PhotoOutput =
  cameraManager.createPhotoOutput(photoProfile);
预览防变形提示: 相机预览流为横向输出,而显示区域为竖向。选择预览分辨率时应使预览宽高比与显示区域宽高比一致(如显示区域为 3:4 竖屏,则选择 1080×1440 而非 1920×1080)。
3.6 配置拍照会话
typescript
// 创建拍照会话
const photoSession: camera.PhotoSession =
  cameraManager.createSession(camera.SceneMode.NORMAL_PHOTO) as camera.PhotoSession;

// 开始配置
photoSession.beginConfig();

// 添加输入和输出
photoSession.addInput(cameraInput);
photoSession.addOutput(previewOutput);
photoSession.addOutput(photoOutput);

// 提交配置并启动会话
await photoSession.commitConfig();
await photoSession.start();
3.7 获取焦距缩放范围
typescript
// 获取支持的焦距缩放范围 [min, max]
const zoomRatioRange: number[] = photoSession.getZoomRatioRange();
// zoomRatioRange[0] 为最小缩放倍数(如 1.0)
// zoomRatioRange[1] 为最大缩放倍数(如 10.0)
3.8 设置焦距缩放
typescript
// 设置焦距缩放倍数
const targetZoom: number = 2.0; // 2倍缩放
if (targetZoom >= zoomRatioRange[0] && targetZoom <= zoomRatioRange[1]) {
  photoSession.setZoomRatio(targetZoom);
}

// 获取当前焦距缩放倍数
const currentZoom: number = photoSession.getZoomRatio();
3.9 闪光灯与对焦控制
typescript
// 检查是否支持闪光灯
const hasFlash: boolean = photoSession.hasFlash();
if (hasFlash) {
  // 设置闪光灯模式
  photoSession.setFlashMode(camera.FlashMode.FLASH_MODE_CLOSE);  // 关闭
  // photoSession.setFlashMode(camera.FlashMode.FLASH_MODE_OPEN);    // 单次闪光
  // photoSession.setFlashMode(camera.FlashMode.FLASH_MODE_AUTO);    // 自动
  // photoSession.setFlashMode(camera.FlashMode.FLASH_MODE_ALWAYS_OPEN); // 常亮
}

// 检查是否支持连续自动对焦
const isFocusSupported: boolean =
  photoSession.isFocusModeSupported(camera.FocusMode.FOCUS_MODE_CONTINUOUS_AUTO);
if (isFocusSupported) {
  photoSession.setFocusMode(camera.FocusMode.FOCUS_MODE_CONTINUOUS_AUTO);
}
3.10 执行拍照
typescript
const captureSetting: camera.PhotoCaptureSetting = {
  quality: camera.QualityLevel.QUALITY_LEVEL_HIGH,
  rotation: camera.ImageRotation.ROTATION_0,
  mirror: false // 前置相机时设为 true
};

photoOutput.capture(captureSetting);
3.11 监听拍照结果
typescript
import { photoAccessHelper } from '@kit.MediaLibraryKit';
import { image } from '@kit.ImageKit';

// 定义缩略图回调(用于传递给 UI 层)
onThumbnailReady: ((thumb: PixelMap) => void) | undefined = undefined;

photoOutput.on('photoAssetAvailable',
  async (err: BusinessError, photoAsset: photoAccessHelper.PhotoAsset): Promise<void> => {
    // 保存到相册
    const accessHelper = photoAccessHelper.getPhotoAccessHelper(context);
    const assetChangeRequest = new photoAccessHelper.MediaAssetChangeRequest(photoAsset);
    assetChangeRequest.saveCameraPhoto();
    await accessHelper.applyChanges(assetChangeRequest);

    // 生成缩略图并通过回调传递给 UI(用于左下角预览)
    const thumbnail: image.PixelMap = await photoAsset.getThumbnail();
    if (this.onThumbnailReady) {
      this.onThumbnailReady(thumbnail);
    }
  });
注意: 在
@ComponentV2中不能使用@StorageLink,应使用回调函数将缩略图从引擎传递到 UI 层。
3.12 释放资源
typescript
async function releaseCamera(
  photoSession: camera.PhotoSession | undefined,
  cameraInput: camera.CameraInput | undefined,
  previewOutput: camera.PreviewOutput | undefined,
  photoOutput: camera.PhotoOutput | undefined
): Promise<void> {
  if (photoSession) {
    photoSession.stop();
    photoSession.release();
  }
  if (cameraInput) {
    cameraInput.close();
  }
  if (previewOutput) {
    previewOutput.release();
  }
  if (photoOutput) {
    photoOutput.release();
  }
}
四、完整示例代码
以下是一个最小化的自定义相机示例(使用状态管理 V2,含竞态修复和生命周期管理):
typescript
import { camera } from '@kit.CameraKit';
import { abilityAccessCtrl, common, Permissions } from '@kit.AbilityKit';
import { BusinessError } from '@kit.BasicServicesKit';
import { photoAccessHelper } from '@kit.MediaLibraryKit';

// 模块级标志位:解决权限与 surface 竞态
let permReady: boolean = false;
let surfaceReady: boolean = false;

@Entry
@ComponentV2
struct SimpleCameraPage {
  @Local isReady: boolean = false;
  private cameraInput: camera.CameraInput | undefined = undefined;
  private photoSession: camera.PhotoSession | undefined = undefined;
  private previewOutput: camera.PreviewOutput | undefined = undefined;
  private photoOutput: camera.PhotoOutput | undefined = undefined;
  private xComponentController: XComponentController = new XComponentController();
  private surfaceId: string = '';
  private eventHub: common.EventHub | undefined = undefined;

  aboutToAppear(): void {
    const context = this.getUIContext().getHostContext()!;
    const permissions: Array<Permissions> = ['ohos.permission.CAMERA'];
    abilityAccessCtrl.createAtManager()
      .requestPermissionsFromUser(context, permissions)
      .then(() => {
        permReady = true;
        if (surfaceReady) { this.initCamera(); }
      })
      .catch((err: BusinessError) => {
        console.error('权限申请失败: ' + err.message);
      });

    // 订阅应用前后台事件,处理从图库等返回后相机失效的问题
    const abilityCtx = context as common.UIAbilityContext;
    this.eventHub = abilityCtx.eventHub;
    this.eventHub!.on('appForeground', () => {
      // 回到前台时重启相机
      if (this.surfaceId !== '' && permReady) {
        setTimeout(() => { this.initCamera(); }, 300);
      }
    });
    this.eventHub!.on('appBackground', () => {
      // 进入后台时释放相机
      this.releaseAll();
    });
  }

  async initCamera(): Promise<void> {
    const context = this.getUIContext().getHostContext()!;
    const cameraManager = camera.getCameraManager(context);
    const cameraArray = cameraManager.getSupportedCameras();
    if (cameraArray.length === 0) return;

    const cameraDevice = cameraArray[0];
    this.cameraInput = cameraManager.createCameraInput(cameraDevice);
    await this.cameraInput.open();

    const outputCap = cameraManager.getSupportedOutputCapability(
      cameraDevice, camera.SceneMode.NORMAL_PHOTO);
    // 选择与显示区域宽高比匹配的预览分辨率(竖屏 3:4)
    const previewProfile = outputCap.previewProfiles.find((p) =>
      p.size.width === 1080 && p.size.height === 1440
    ) ?? outputCap.previewProfiles[0];
    const photoProfile = outputCap.photoProfiles[0];

    this.previewOutput = cameraManager.createPreviewOutput(previewProfile, this.surfaceId);
    this.photoOutput = cameraManager.createPhotoOutput(photoProfile);

    this.photoSession = cameraManager.createSession(camera.SceneMode.NORMAL_PHOTO) as camera.PhotoSession;
    this.photoSession.beginConfig();
    this.photoSession.addInput(this.cameraInput);
    this.photoSession.addOutput(this.previewOutput);
    this.photoSession.addOutput(this.photoOutput);
    await this.photoSession.commitConfig();
    await this.photoSession.start();

    if (this.photoSession.isFocusModeSupported(camera.FocusMode.FOCUS_MODE_CONTINUOUS_AUTO)) {
      this.photoSession.setFocusMode(camera.FocusMode.FOCUS_MODE_CONTINUOUS_AUTO);
    }
    this.isReady = true;
  }

  async releaseAll(): Promise<void> {
    if (this.photoSession) { this.photoSession.stop(); this.photoSession.release(); }
    if (this.cameraInput) { this.cameraInput.close(); }
    if (this.previewOutput) { this.previewOutput.release(); }
    if (this.photoOutput) { this.photoOutput.release(); }
    this.photoSession = undefined;
    this.cameraInput = undefined;
    this.previewOutput = undefined;
    this.photoOutput = undefined;
  }

  aboutToDisappear(): void {
    if (this.eventHub) {
      this.eventHub.off('appForeground', ...);
      this.eventHub.off('appBackground', ...);
    }
    this.releaseAll();
  }

  build() {
    Column() {
      XComponent({
        type: XComponentType.SURFACE,
        controller: this.xComponentController
      })
        .width('100%')
        .height(480) // 匹配 3:4 预览比例
        .onAttach(() => {
          this.xComponentController.setXComponentSurfaceRect({
            surfaceWidth: 1080,
            surfaceHeight: 1440 // 竖屏 3:4
          });
          this.surfaceId = this.xComponentController.getXComponentSurfaceId();
          surfaceReady = true;
          if (permReady) { this.initCamera(); }
        })

      Button('拍照')
        .margin({ top: 20 })
        .onClick(() => {
          this.photoOutput?.capture({
            quality: camera.QualityLevel.QUALITY_LEVEL_HIGH,
            rotation: camera.ImageRotation.ROTATION_0,
            mirror: false
          });
        })
    }
    .width('100%')
    .height('100%')
  }
}
五、关键注意事项
| 事项 | 说明 |
|---|---|
| 权限申请时机 | 必须在 aboutToAppear 中申请,且需与 surface 就绪状态做竞态同步 |
| Surface 绑定 | 预览流必须绑定到 XComponent 的 surfaceId |
| 会话配置顺序 | beginConfig() → addInput/addOutput → commitConfig() → start() |
| 资源释放顺序 | 先 stop() 会话,再依次 close/release 各流 |
| 焦距缩放范围 | 必须通过 getZoomRatioRange() 获取,不能硬编码 |
| 前后相机切换 | 需要重新释放并创建所有流和会话 |
| 预览分辨率 | 必须与显示区域宽高比匹配,否则预览会拉伸变形 |
| 前后台切换 | 进入后台应释放相机,回前台需重启,推荐用 EventHub |
| 缩略图传递 | @ComponentV2 中不能用 @StorageLink,应使用回调函数 |
| boot() 异常处理 | 相机初始化必须 try-catch,否则异常会被静默吞掉 |
六、API 速查表
| API | 说明 |
|---|---|
camera.getCameraManager(context) |
获取相机管理器 |
cameraManager.getSupportedCameras() |
获取支持的相机列表 |
cameraManager.getSupportedSceneModes(device) |
获取支持的场景模式 |
cameraManager.getSupportedOutputCapability(device, mode) |
获取输出能力 |
cameraManager.createCameraInput(device) |
创建相机输入 |
cameraManager.createPreviewOutput(profile, surfaceId) |
创建预览输出 |
cameraManager.createPhotoOutput(profile) |
创建拍照输出 |
cameraManager.createSession(mode) |
创建拍照会话 |
photoSession.setZoomRatio(ratio) |
设置焦距缩放 |
photoSession.getZoomRatio() |
获取当前焦距缩放 |
photoSession.getZoomRatioRange() |
获取焦距缩放范围 |
photoSession.hasFlash() |
检查闪光灯支持 |
photoSession.setFlashMode(mode) |
设置闪光灯模式 |
photoSession.setFocusMode(mode) |
设置对焦模式 |
photoOutput.capture(setting) |
执行拍照 |
photoOutput.on('photoAssetAvailable', cb) |
监听拍照结果 |
七、总结
使用 @ohos.multimedia.camera 开发自定义相机的核心流程为:
申请权限 → 获取相机管理器 → 获取相机设备 → 获取输出能力
→ 创建输入/输出流 → 配置会话 → 启动预览 → 拍照/缩放控制
→ 释放资源
掌握以上流程后,可以进一步扩展实现录像、人像模式、手动对焦等高级功能。