前言

1、openCV安装或编译
1.1 openCV下载安装
1)下载地址:下载地址 https://github.com/opencv/opencv/releases
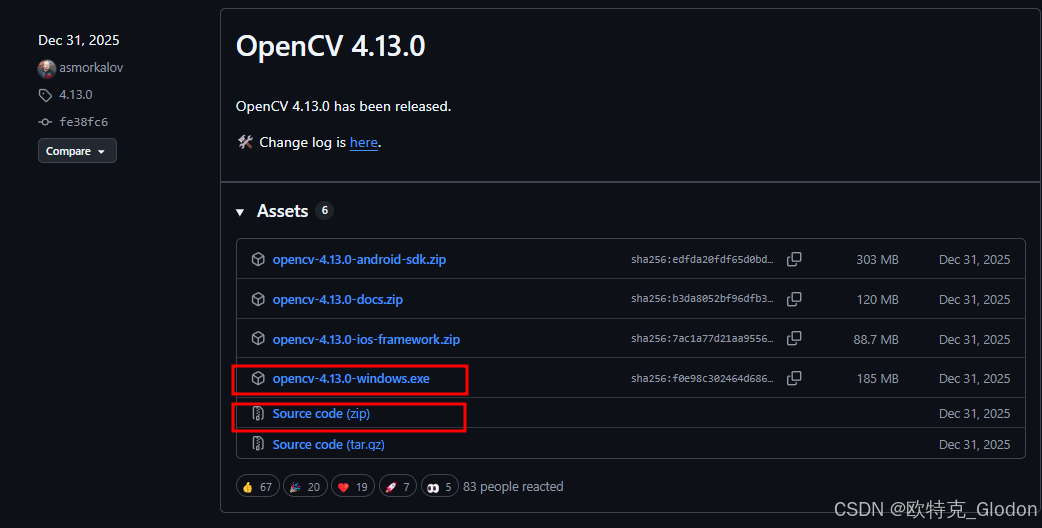
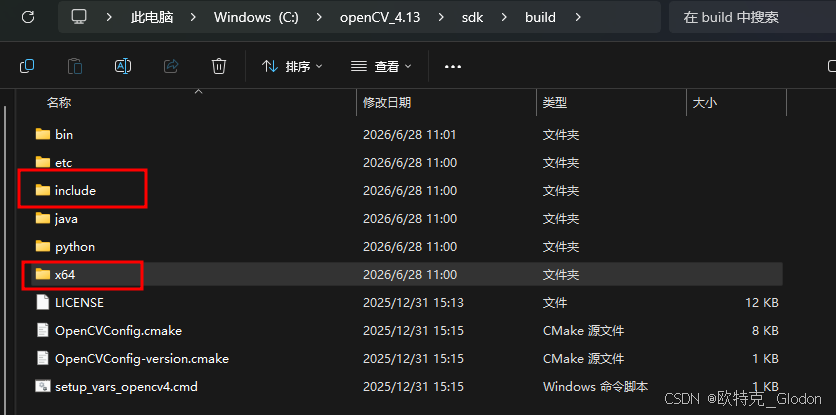
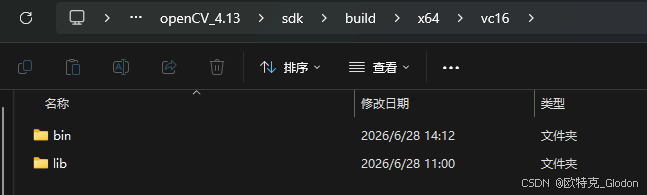
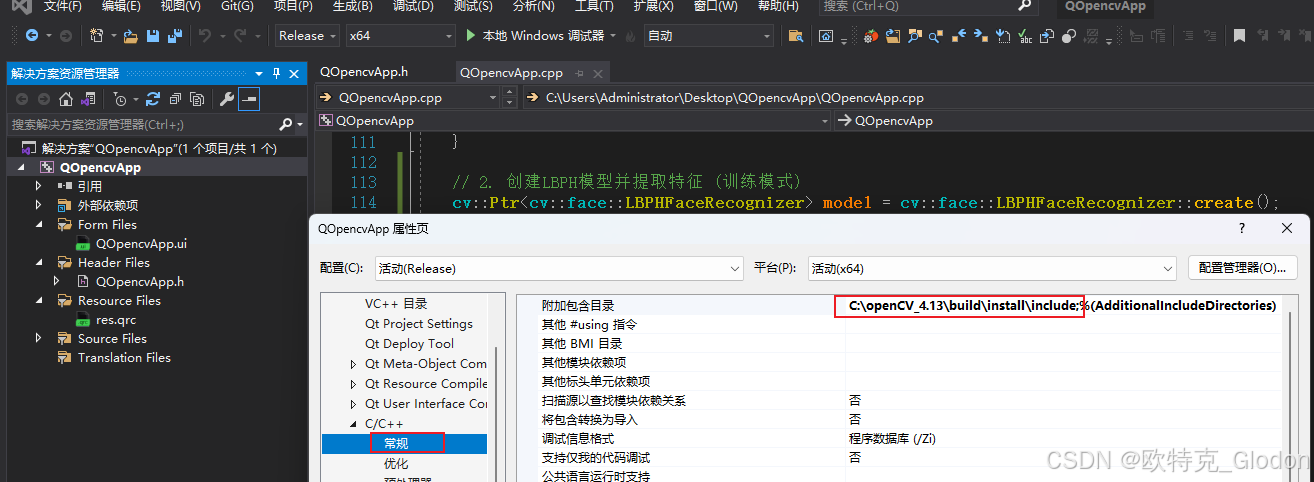
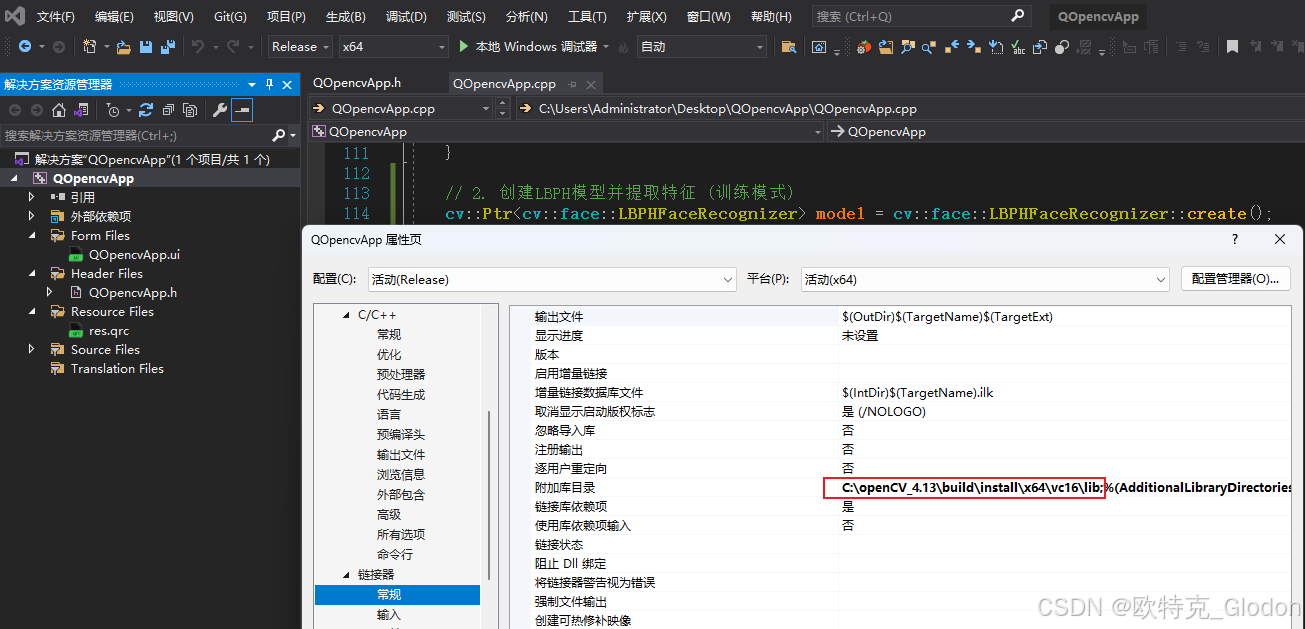
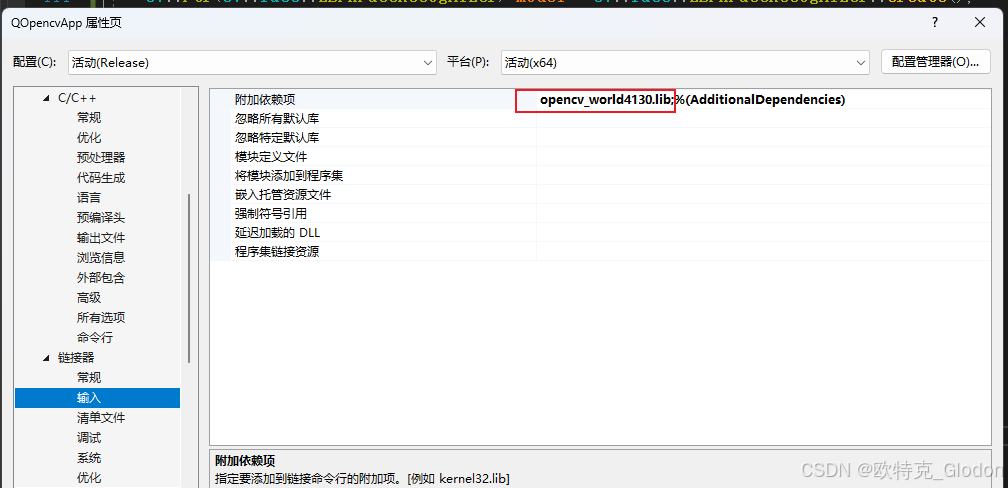
下载完成后安装exe文件,安装路径最好不要有中文,否则用起来比较麻烦。安装后的库文件include/lib/bin可以直接使用,如下所示:
1.2 openCV编译
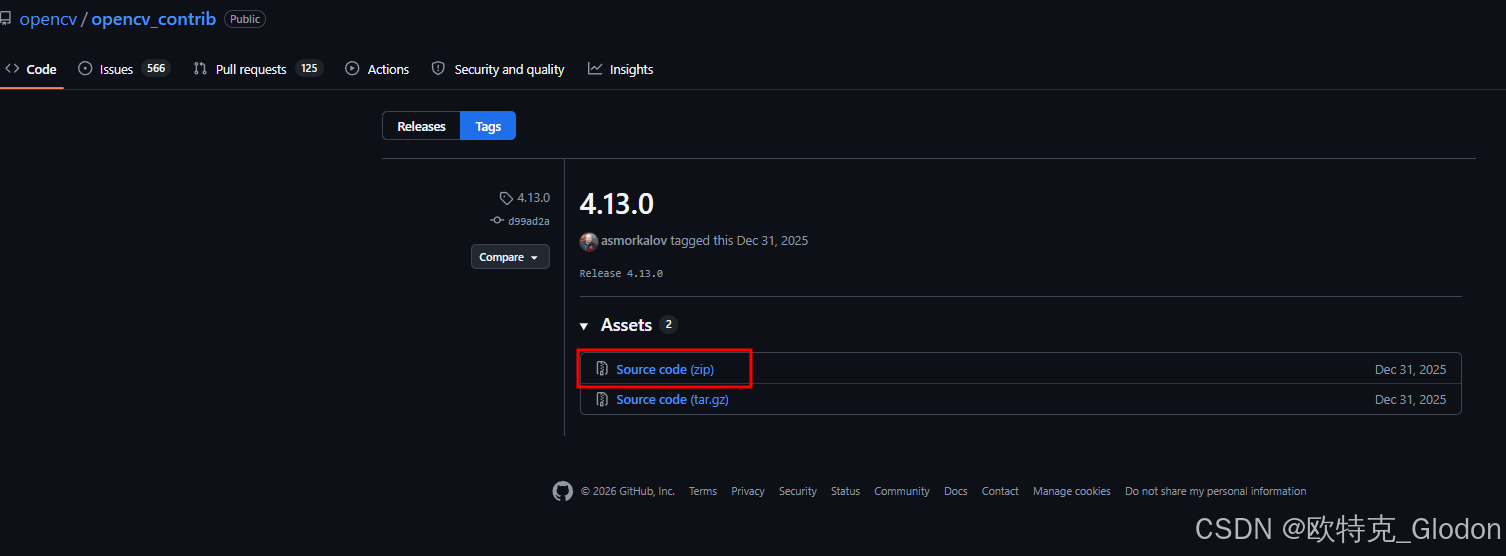
1)下载地址:
opencv下载地址 https://github.com/opencv/opencv/releases
opencv_contrib下载地址 https://github.com/opencv/opencv_contrib/releases/tag/4.13.0
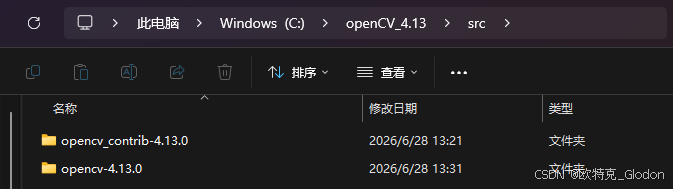
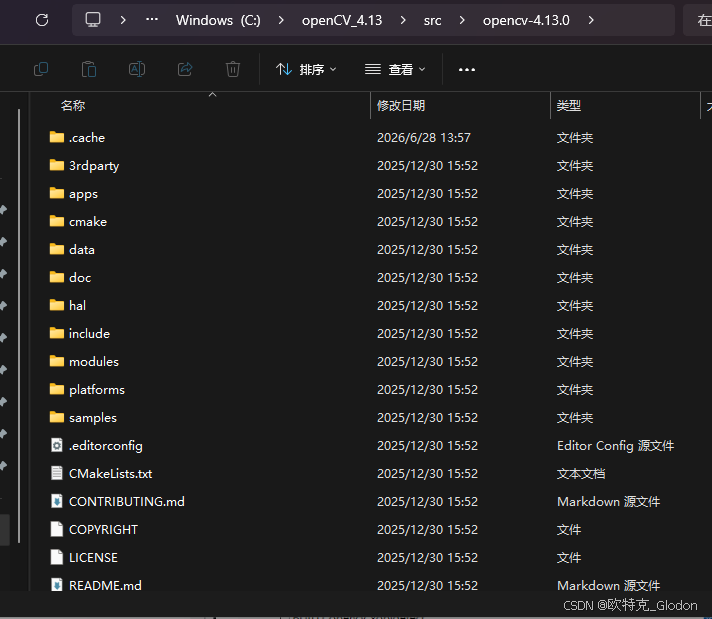
自己编译源码的话,就把扩展库也一起编译了,两个文件的版本必须保持一致,都是4.13.0,方便后续自己使用。
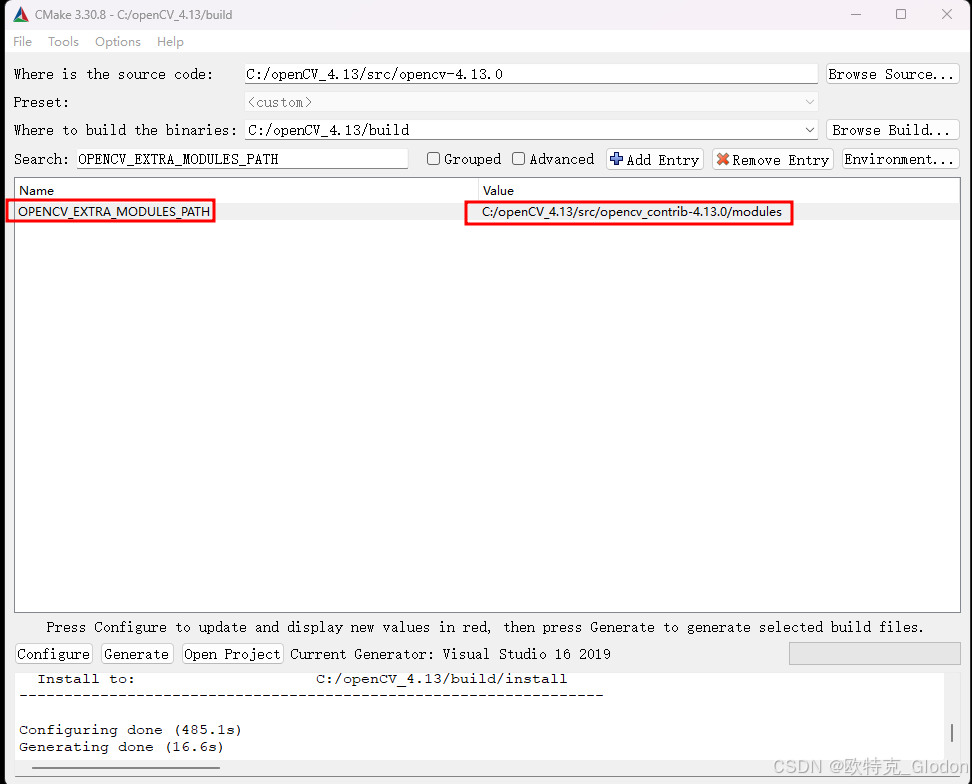
打开cmake软件:
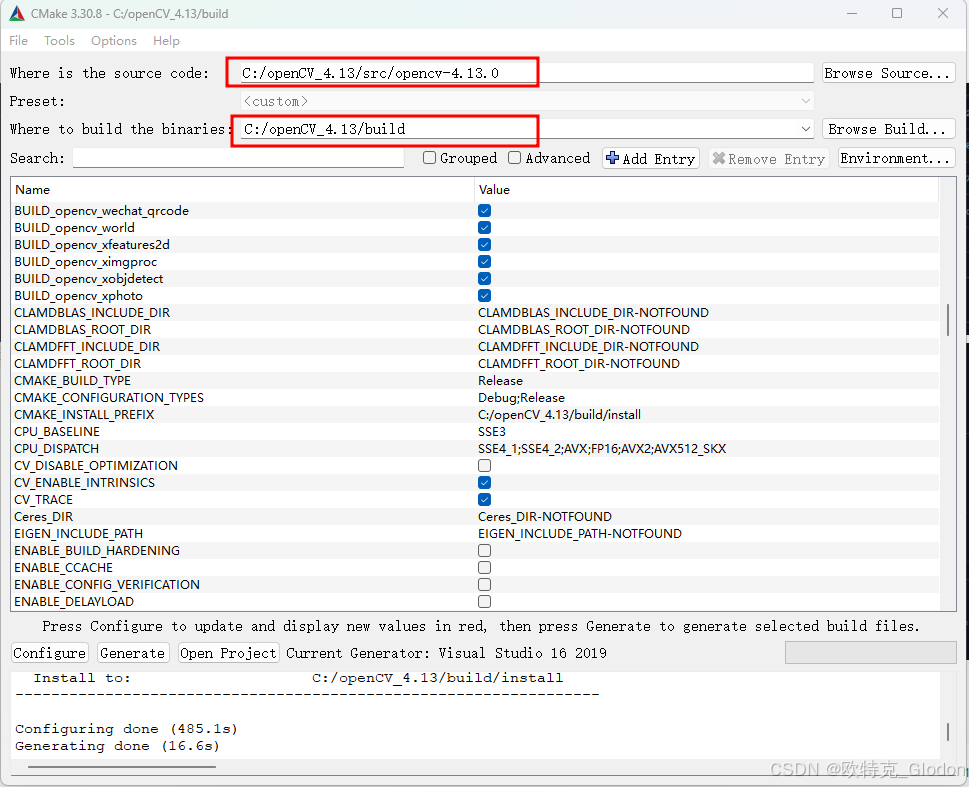
设定opencv_contrib路径:OPENCV_EXTRA_MODULES_PATH;
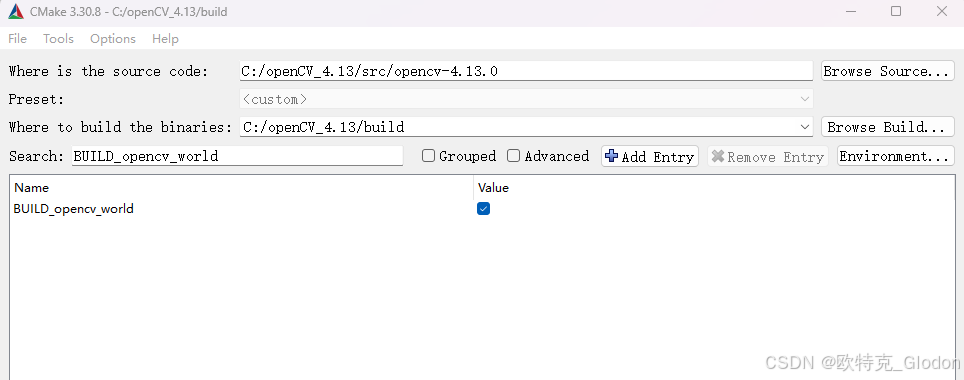
BUILD_opencv_world:ON,这个选项不开启,编译出来的是很多个分开的dll;开启后编译后就一个opencv_world4130.dll。
其余的很多选项,比如CUDA/FMPEG等自己按需求进行开启设定。
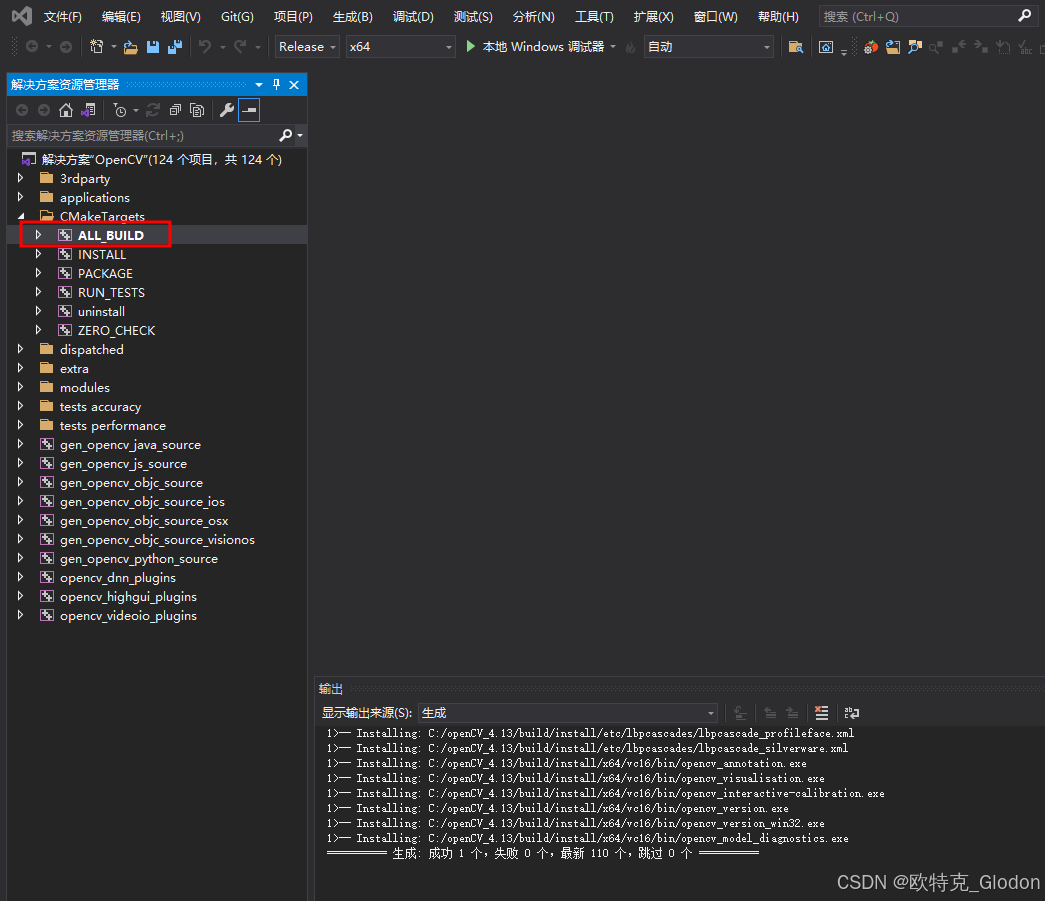
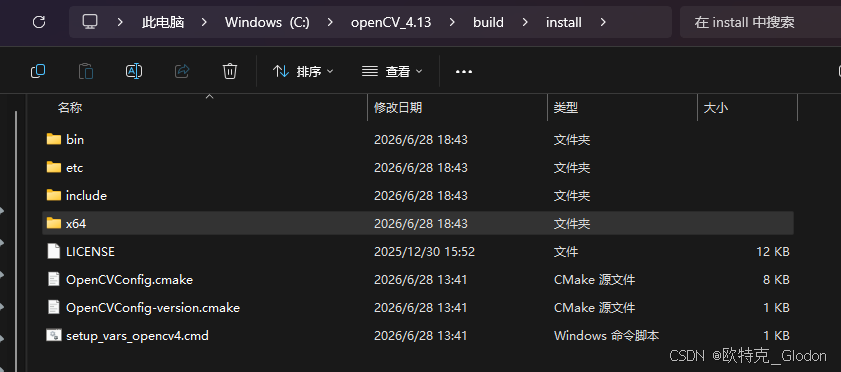
ALL_BUILD 右键-生成即可完成编译。然后 INSTALL右键-生成即可完成打包dll。
2、人脸图片识别程序
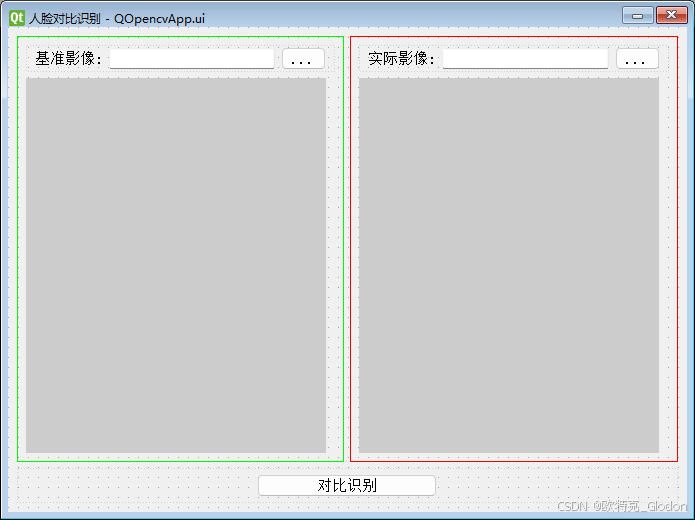
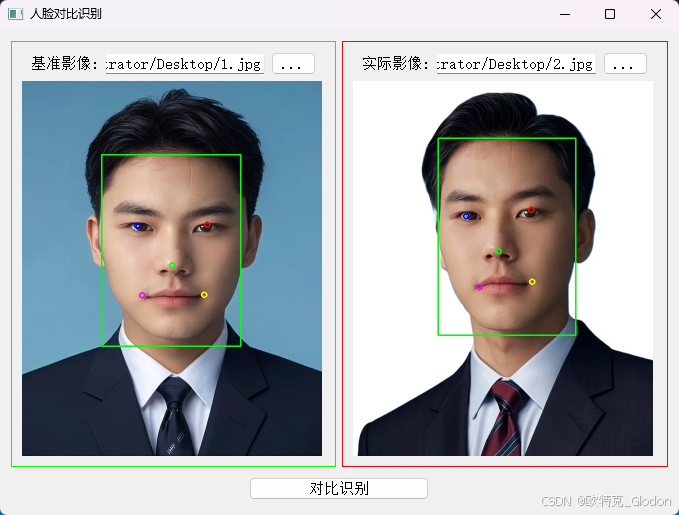
目的:做一个最简单的人脸识别及对比程序。
2.1 使用openCV安装版实现
用Qt设计一个简介的界面,配合安装版本的openCV4.13,暂时不用编译版本的。直接利用自带的 <opencv2/objdetect/face.hpp> 进行人脸对比,主要使用其中的 FaceDetectorYN(检测)和 FaceRecognizerSF(识别)两个类。它们都基于深度学习模型,精度高且使用方便。需要提前下载模型文件,下载地址: https://github.com/opencv/opencv_zoo。
// FaceDetectorYN 模型: face_detection_yunet_2026may.onnx
// FaceRecognizerSF 模型: face_recognition_sface_2021dec.onnx
QOpencvApp.h
cpp
#pragma once

#include <QtWidgets/QMainWindow>
#include <QMessageBox>
#include <QFileDialog>
#include <QPixmap>
#include <QString>
#include <QCoreApplication>
#include <QDir>
#include <iostream>

#include <opencv2/opencv.hpp>
#include <opencv2/objdetect/face.hpp>
using namespace cv;

#include "ui_QOpencvApp.h"

class QOpencvApp : public QMainWindow
{
    Q_OBJECT

public:
    QOpencvApp(QWidget *parent = nullptr);
    ~QOpencvApp();

private slots:
	void onBaseImgButtonClicked();
    void onSourceImgButtonClicked();
    void onCompareButtonClicked();

private:
    Ui::QOpencvAppClass ui;
};
QOpencvApp.cpp
cpp
#include "QOpencvApp.h"

QOpencvApp::QOpencvApp(QWidget *parent)
    : QMainWindow(parent)
{
    ui.setupUi(this);

    connect(ui.baseImgBtn, SIGNAL(clicked()), this, SLOT(onBaseImgButtonClicked()));
    connect(ui.sourceImageBtn, SIGNAL(clicked()), this, SLOT(onSourceImgButtonClicked()));
	connect(ui.compareBtn, SIGNAL(clicked()), this, SLOT(onCompareButtonClicked()));
}

QOpencvApp::~QOpencvApp()
{}

void QOpencvApp::onBaseImgButtonClicked()
{
	QString filter = "图片文件 (*.png *.jpg *.jpeg *.bmp *.gif *.tiff *.webp);;"
		"PNG 图片 (*.png);;"
		"JPG 图片 (*.jpg *.jpeg);;"
		"所有文件 (*.*)";

	// 2. 打开文件选择对话框
	QString filePath = QFileDialog::getOpenFileName(
		this,                       // 父窗口
		u8"请选择一张图片",            // 对话框标题
		"",                         // 默认打开路径(空=上次路径或默认)
		filter                      // 文件过滤器
	);

	// 3. 判断用户是否取消了选择(路径为空表示取消)
	if (filePath.isEmpty())
	{
		QMessageBox::information(this, u8"提示", u8"未选择任何文件");
		return;
	}

	// 4. 处理选中的图片(例如:显示在 QLabel 中)
	QPixmap pixmap(filePath);
	if (!pixmap.isNull())
	{
		// 缩放图片以适应 Label 大小(保持宽高比)
		QPixmap scaled = pixmap.scaled(ui.label_base->size(),
			Qt::KeepAspectRatio,
			Qt::SmoothTransformation);
		ui.label_base->setPixmap(scaled);
		ui.label_base->setText("");  // 清除文本
		ui.lineEdit->setText(filePath);
		//QMessageBox::information(this, u8"成功", QString(u8"已加载图片:%1").arg(filePath));
	}
	else
	{
		QMessageBox::warning(this, u8"错误", u8"无法加载图片,文件可能已损坏!");
	}
}

void QOpencvApp::onSourceImgButtonClicked()
{
	QString filter = u8"图片文件 (*.png *.jpg *.jpeg *.bmp *.gif *.tiff *.webp);;"
		"PNG 图片 (*.png);;"
		"JPG 图片 (*.jpg *.jpeg);;"
		"所有文件 (*.*)";

	// 2. 打开文件选择对话框
	QString filePath = QFileDialog::getOpenFileName(
		this,                       // 父窗口
		u8"请选择一张图片",            // 对话框标题
		"",                         // 默认打开路径(空=上次路径或默认)
		filter                      // 文件过滤器
	);

	// 3. 判断用户是否取消了选择(路径为空表示取消)
	if (filePath.isEmpty())
	{
		QMessageBox::information(this, u8"提示", u8"未选择任何文件");
		return;
	}

	// 4. 处理选中的图片(例如:显示在 QLabel 中)
	QPixmap pixmap(filePath);
	if (!pixmap.isNull())
	{
		// 缩放图片以适应 Label 大小(保持宽高比)
		QPixmap scaled = pixmap.scaled(ui.label_source->size(),
			Qt::KeepAspectRatio,
			Qt::SmoothTransformation);
		ui.label_source->setPixmap(scaled);
		ui.label_source->setText("");  // 清除文本
		ui.lineEdit_2->setText(filePath);
		//QMessageBox::information(this, u8"成功", QString(u8"已加载图片:%1").arg(filePath));
	}
	else {
		QMessageBox::warning(this, u8"错误", u8"无法加载图片,文件可能已损坏!");
	}
}

void QOpencvApp::onCompareButtonClicked()
{
	QString sBaseImage = ui.lineEdit->text();
	QString sSourceImage = ui.lineEdit_2->text();

	// 1. 读取两张人脸图片,建议转换为灰度图
	cv::Mat img1 = cv::imread(sBaseImage.toStdString());
	cv::Mat img2 = cv::imread(sSourceImage.toStdString());

	if (img1.empty() || img2.empty())
	{
		QMessageBox::warning(this, u8"错误", u8"无法读取图片!");
		std::cerr << "无法读取图片!" << std::endl;
		return;
	}

	// ========== 2. 创建检测器和识别器 ==========
   // 需要提前下载模型文件
   // FaceDetectorYN 模型: face_detection_yunet_2023mar.onnx
   // FaceRecognizerSF 模型: face_recognition_sface_2021dec.onnx
   // 下载地址: https://github.com/opencv/opencv_zoo

	// 使用 try-catch 捕获异常,查看具体错误信息
	//try {
	//	Ptr<FaceDetectorYN> detector = FaceDetectorYN::create(
	//		modelPath,
	//		"",
	//		Size(320, 320),
	//		0.9f,
	//		0.3f,
	//		5000
	//	);

	//	if (detector.empty()) {
	//		std::cerr << "创建检测器失败,返回空指针" << std::endl;
	//		return ;
	//	}

	//	std::cout << "检测器创建成功!" << std::endl;

	//	// 后续检测代码...

	//}
	//catch (const cv::Exception& e) {
	//	std::cerr << "OpenCV 异常: " << e.what() << std::endl;
	//	return;
	//}
	//catch (const std::exception& e) {
	//	std::cerr << "标准异常: " << e.what() << std::endl;
	//	return;
	//}

	QString configPath1 = QCoreApplication::applicationDirPath() + "/face_detection_yunet_2026may.onnx";
	QString configPath2 = QCoreApplication::applicationDirPath() + "/face_recognition_sface_2021dec.onnx";

	Ptr<FaceDetectorYN> detector = FaceDetectorYN::create(
		configPath1.toStdString(),  // 检测模型路径
		"",                                    // 配置文件(ONNX不需要)
		Size(320, 320),                        // 输入尺寸
		0.9f,                                  // 分数阈值
		0.3f,                                  // NMS阈值
		5000                                   // Top K
	);

	Ptr<FaceRecognizerSF> recognizer = FaceRecognizerSF::create(
		configPath2.toStdString(), // 识别模型路径
		""                                     // 配置文件(ONNX不需要)
	);

	if (!detector || !recognizer)
	{
		// 隐式转换为 bool
		QMessageBox::warning(this, u8"错误", u8"模型加载失败!请检查模型文件路径!");
		return;
	}

	// ===== 2. 检查并打印图片信息 =====
	Size size1 = img1.size();
	Size size2 = img2.size();

	std::cout << "========== 图片信息 ==========" << std::endl;
	std::cout << "图片1尺寸: " << size1.width << " x " << size1.height
		<< ", 通道数: " << img1.channels() << std::endl;
	std::cout << "图片2尺寸: " << size2.width << " x " << size2.height
		<< ", 通道数: " << img2.channels() << std::endl;

	// ===== 3. 判断图片尺寸是否相等 =====
	bool sizesEqual = (size1 == size2);
	std::cout << "图片尺寸是否相等: " << (sizesEqual ? "是" : "否") << std::endl;

	// ===== 4. 根据尺寸相等性进行不同处理 =====
	Mat img1_processed = img1.clone();
	Mat img2_processed = img2.clone();

	if (!sizesEqual)
	{
		std::cout << "警告: 图片尺寸不同,将统一缩放到 " << size1.width << " x " << size1.height << std::endl;
		// 将 img2 缩放到与 img1 相同的尺寸(也可以选择缩放 img1)
		cv::resize(img2, img2_processed, size1);
		std::cout << "缩放后图片2尺寸: " << img2_processed.size().width
			<< " x " << img2_processed.size().height << std::endl;
	}
	else
	{
		std::cout << "图片尺寸相同,无需缩放" << std::endl;
	}

	// ========== 3. 人脸检测 ==========
	// 注意:检测时需要设置输入尺寸为图片实际大小
	detector->setInputSize(img1.size());

	Mat faces1, faces2;
	// 3. 使用 try-catch 捕获异常,查看具体错误信息
	try {
		detector->detect(img1, faces1);
		detector->detect(img2, faces2);
	}
	catch (const cv::Exception& e) {
		std::cerr << "OpenCV 异常: " << e.what() << std::endl;
		return;
	}
	catch (const std::exception& e) {
		std::cerr << "标准异常: " << e.what() << std::endl;
		return;
	}

	if (faces1.rows == 0 || faces2.rows == 0)
	{
		QMessageBox::warning(this, u8"错误", u8"某张图片未检测到人脸!");
		return;
	}

	// ========== 4. 提取人脸特征 ==========
	// faces 中每行格式: [x, y, width, height, left_eye_x, left_eye_y, right_eye_x, right_eye_y, nose_x, nose_y, mouth_x, mouth_y, right_ear_x, right_ear_y, left_ear_x, left_ear_y]
	// 取第一张人脸
	Mat face1 = faces1.row(0);
	Mat face2 = faces2.row(0);

	// 获取人脸框 (前4个元素)
	Rect rect1(face1.at<float>(0), face1.at<float>(1),
		face1.at<float>(2), face1.at<float>(3));
	Rect rect2(face2.at<float>(0), face2.at<float>(1),
		face2.at<float>(2), face2.at<float>(3));

	// 对齐并裁剪人脸
	Mat aligned1, aligned2;
	recognizer->alignCrop(img1, face1, aligned1);  // 使用关键点自动对齐
	recognizer->alignCrop(img2, face2, aligned2);

	// 提取特征向量 (128维浮点数)
	Mat feature1, feature2;
	recognizer->feature(aligned1, feature1);
	recognizer->feature(aligned2, feature2);

	// ========== 5. 计算相似度 ==========
	// 方法1: 使用内置 match 方法 (返回相似度分数, 0~1, 越高越相似)
	double similarity = recognizer->match(feature1, feature2, FaceRecognizerSF::FR_COSINE);

	// 方法2: 手动计算余弦相似度 (与上面等价)
	//double similarity = feature1.dot(feature2) / (norm(feature1) * norm(feature2));

	std::cout << "人脸相似度: " << similarity << std::endl;

	// ========== 6. 判断结果 ==========
	// 阈值需要根据实际场景调整,一般 0.5~0.7 之间
	double threshold = 0.7;
	if (similarity >= threshold)
	{
		QMessageBox::information(this, u8"错误", u8"判断为同一个人!");
	}
	else
	{
		QMessageBox::warning(this, u8"错误", u8"判断为不同的人!");
	}

	// ========== 7. 绘制检测结果 ==========
	// 在图片上绘制人脸框和5个关键点
	rectangle(img1, rect1, Scalar(0, 255, 0), 2);
	rectangle(img2, rect2, Scalar(0, 255, 0), 2);

	// 遍历检测到的每一张人脸
	for (int i = 0; i < face1.rows; i++)
	{
		// 从 faces 矩阵中获取第 i 行数据的指针
		float* data = (float*)face1.ptr(i);

		// 2. 提取并绘制5个关键点
		// 右眼 (索引 4, 5)
		circle(img1, Point2i(int(data[4]), int(data[5])), 5, Scalar(255, 0, 0), 2);
		// 左眼 (索引 6, 7)
		circle(img1, Point2i(int(data[6]), int(data[7])), 5, Scalar(0, 0, 255), 2);
		// 鼻尖 (索引 8, 9)
		circle(img1, Point2i(int(data[8]), int(data[9])), 5, Scalar(0, 255, 0), 2);
		// 右嘴角 (索引 10, 11)
		circle(img1, Point2i(int(data[10]), int(data[11])), 5, Scalar(255, 0, 255), 2);
		// 左嘴角 (索引 12, 13)
		circle(img1, Point2i(int(data[12]), int(data[13])), 5, Scalar(0, 255, 255), 2);
	}

	// 遍历检测到的每一张人脸
	for (int i = 0; i < face2.rows; i++)
	{
		// 从 faces 矩阵中获取第 i 行数据的指针
		float* data = (float*)face2.ptr(i);

		// 2. 提取并绘制5个关键点
		// 右眼 (索引 4, 5)
		circle(img2, Point2i(int(data[4]), int(data[5])), 5, Scalar(255, 0, 0), 2);
		// 左眼 (索引 6, 7)
		circle(img2, Point2i(int(data[6]), int(data[7])), 5, Scalar(0, 0, 255), 2);
		// 鼻尖 (索引 8, 9)
		circle(img2, Point2i(int(data[8]), int(data[9])), 5, Scalar(0, 255, 0), 2);
		// 右嘴角 (索引 10, 11)
		circle(img2, Point2i(int(data[10]), int(data[11])), 5, Scalar(255, 0, 255), 2);
		// 左嘴角 (索引 12, 13)
		circle(img2, Point2i(int(data[12]), int(data[13])), 5, Scalar(0, 255, 255), 2);
	}

	QString imgPath1 = QCoreApplication::applicationDirPath() + "/result1.jpg";
	QString imgPath2 = QCoreApplication::applicationDirPath() + "/result2.jpg";

	imwrite(imgPath1.toStdString(), img1);
	imwrite(imgPath2.toStdString(), img2);

	// 缩放图片以适应 Label 大小(保持宽高比)
	QPixmap pixmap(imgPath1);
	if (!pixmap.isNull())
	{
		QPixmap scaled = pixmap.scaled(ui.label_base->size(),
			Qt::KeepAspectRatio,
			Qt::SmoothTransformation);
		ui.label_base->setPixmap(scaled);
	}

	QPixmap pixmap2(imgPath2);
	if (!pixmap2.isNull())
	{
		QPixmap scaled = pixmap2.scaled(ui.label_source->size(),
			Qt::KeepAspectRatio,
			Qt::SmoothTransformation);
		ui.label_source->setPixmap(scaled);
	}
}
运行效果:
2.2 使用openCV编译版实现
cpp
void QOpencvApp::onCompareButtonClicked()
{
QString sBaseImage = ui.lineEdit->text();
QString sSourceImage = ui.lineEdit_2->text();
// 1. 读取两张人脸图片,建议转换为灰度图
cv::Mat faceA = cv::imread(sBaseImage.toStdString(), cv::IMREAD_GRAYSCALE);
cv::Mat faceB = cv::imread(sSourceImage.toStdString(), cv::IMREAD_GRAYSCALE);
if (faceA.empty() || faceB.empty())
{
QMessageBox::warning(this, u8"错误", u8"无法读取图片!");
std::cerr << "无法读取图片!" << std::endl;
return;
}
// 2. 创建LBPH模型并提取特征 (训练模式)
cv::Ptr<cv::face::LBPHFaceRecognizer> model = cv::face::LBPHFaceRecognizer::create();
std::vector<cv::Mat> images = { faceA, faceB };
std::vector<int> labels = { 1, 2 };
model->train(images, labels);
// 3. 预测 (计算距离)
int predictedLabel;
double confidence = 0.0;
model->predict(faceB, predictedLabel, confidence);
//confidence值越低相似度越高
double threshold = 80.0; // 需要根据实际情况调整
if (confidence < threshold)
{
std::cout << "两张人脸相似,为同一个人。置信度: " << confidence << std::endl;
}
else
{
std::cout << "两张人脸不相似。置信度: " << confidence << std::endl;
}
return;
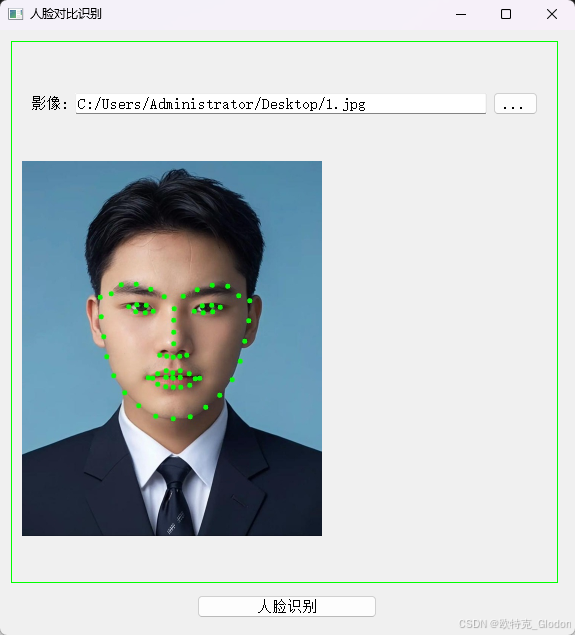
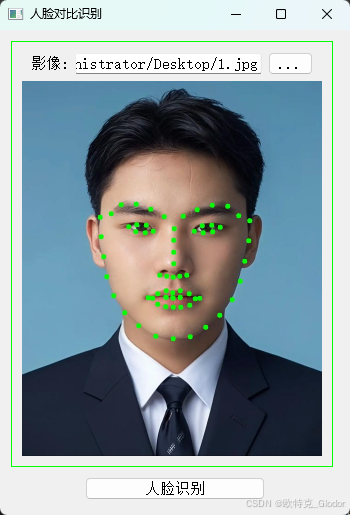
}2.3 使用openCV编译版实现68个特征点
cpp
void QOpencvApp::onCompareButtonClicked()
{
	QString sBaseImage = ui.lineEdit->text();

	// 1. 加载图像
	cv::Mat img = cv::imread(sBaseImage.toStdString());
	if (img.empty())
	{
		QMessageBox::warning(this, u8"错误", u8"无法读取图片!");
		return;
	}

	// 2. 初始化人脸检测器 (用于检测人脸区域)
	// 使用 OpenCV 自带的 Haar 或 LBP 级联分类器
	QString configPath1 = QCoreApplication::applicationDirPath() + "/haarcascade_frontalface_default.xml";

	CascadeClassifier faceDetector;
	if (!faceDetector.load(configPath1.toStdString()))
	{
		QMessageBox::warning(this, u8"错误", u8"无法加载人脸检测模型!");
		std::cerr << "无法加载人脸检测模型!" << std::endl;
		return ;
	}

	// 3. 初始化特征点检测器 (FacemarkLBF)
	Ptr<cv::face::Facemark> facemark = cv::face::FacemarkLBF::create();

	// 加载预训练好的LBF模型
	QString configPath2 = QCoreApplication::applicationDirPath() + "/lbfmodel.yaml";
	facemark->loadModel(configPath2.toStdString());

	// 4. 执行人脸检测,获取人脸区域 (ROI)
	std::vector<Rect> faces;
	Mat gray;
	cvtColor(img, gray, COLOR_BGR2GRAY);
	faceDetector.detectMultiScale(gray, faces);

	// 5. 在检测到的人脸区域上,执行特征点拟合
	std::vector<std::vector<Point2f>> landmarks;
	bool success = facemark->fit(img, faces, landmarks);

	if (success)
	{
		// 6. 绘制检测到的 68 个特征点
		for (size_t i = 0; i < landmarks.size(); i++)
		{
			for (size_t j = 0; j < landmarks[i].size(); j++)
			{
				circle(img, landmarks[i][j], 5, Scalar(0, 255, 0), -1);
			}
		}
	}

	QString imgPath = QCoreApplication::applicationDirPath() + "/result68Landmarks.jpg";
	imwrite(imgPath.toStdString(), img);

	// 缩放图片以适应 Label 大小(保持宽高比)
	QPixmap pixmap(imgPath);
	if (!pixmap.isNull())
	{
		QPixmap scaled = pixmap.scaled(ui.label_base->size(),
			Qt::KeepAspectRatio,
			Qt::SmoothTransformation);
		ui.label_base->setPixmap(scaled);
	}
}