项目演示
一、概述
1.1 背景与意义
在移动应用开发中,亮度调节是一项基础且重要的功能。无论是阅读类应用、视频播放应用,还是图像处理应用,都需要根据用户的环境光线和个人偏好动态调整显示亮度,以提供最佳的视觉体验。
HarmonyOS NEXT 作为新一代智能终端操作系统,提供了丰富的亮度调节能力。开发者可以通过两种方式实现亮度调节:
- 组件级亮度调节 :通过 ArkUI 组件的
brightness属性,对单个组件或组件树进行亮度调整 - 系统级亮度调节 :通过
window.setWindowBrightness()API,对当前应用窗口的亮度进行整体调整
本文将深入探讨这两种亮度调节方式的原理、实现方法和最佳实践,帮助开发者掌握鸿蒙原生ArkTS布局方式之Brightness亮度调节布局的核心技术。
1.2 核心概念
1.2.1 组件级亮度(Component Brightness)
组件级亮度是指通过 ArkUI 组件的 brightness 属性,对组件的视觉效果进行亮度调整。这种方式只影响组件的渲染结果,不会改变系统的实际屏幕亮度。
brightness 属性值范围:
0.0:完全黑暗(组件显示为黑色)1.0:原始亮度(组件正常显示)2.0:双倍亮度(组件显示更亮)
1.2.2 窗口亮度(Window Brightness)
窗口亮度是指通过 window.setWindowBrightness() API,对当前应用窗口的显示亮度进行调整。这种方式会影响整个屏幕的实际亮度,但只在当前应用窗口处于前台时生效。
窗口亮度值范围:
0.0:最暗1.0:最亮-1:恢复系统默认亮度
1.3 应用场景
Brightness亮度调节布局适用于以下场景:
- 阅读类应用:根据环境光线自动调整页面亮度,保护用户视力
- 视频播放应用:播放视频时调整亮度以获得更好的观看体验
- 图像处理应用:预览图片时实时调整亮度进行编辑
- 护眼模式:夜间使用时降低亮度减少眼睛疲劳
- 节能模式:低电量时自动降低亮度延长续航
二、组件级Brightness属性详解
2.1 brightness属性语法
typescript
Component()
.brightness(value: number)参数说明:
value:number类型,亮度值,范围0.0~2.0
效果说明:
- 当
value < 1.0时,组件变暗 - 当
value = 1.0时,组件保持原始亮度 - 当
value > 1.0时,组件变亮
2.2 brightness属性原理
brightness 属性本质上是通过 CSS 的 filter: brightness() 滤镜实现的。滤镜会对组件的所有像素进行亮度调整:
输出像素值 = 输入像素值 × brightness值例如,对于一个 RGB 值为 (255, 128, 64) 的像素:
- brightness = 0.5 时,输出为 (127, 64, 32)
- brightness = 1.0 时,输出为 (255, 128, 64)
- brightness = 2.0 时,输出为 (255, 255, 128)(超过255的部分被截断)
2.3 brightness属性的继承性
brightness 属性具有继承性,当父组件设置了 brightness 属性后,子组件会自动继承该属性。这意味着我们可以通过在根容器上设置 brightness 属性,实现整个页面的亮度调节。
typescript
Column() {
  Text('标题')
    .fontSize(32)

  Image('image.jpg')
    .width(200)
    .height(200)
}
.brightness(0.5) // 整个Column及其子组件都变暗
2.4 brightness属性的应用示例
2.4.1 单组件亮度调节
typescript
@Entry
@Component
struct SingleComponentBrightness {
  @State brightnessValue: number = 1.0;

  build() {
    Column({ space: 20 }) {
      Image('https://example.com/image.jpg')
        .width(300)
        .height(200)
        .brightness(this.brightnessValue) // 仅图片应用亮度效果

      Slider({
        value: this.brightnessValue,
        min: 0,
        max: 2,
        step: 0.01
      })
      .onChange((value: number) => {
        this.brightnessValue = value;
      });
    }
    .width('100%')
    .height('100%');
  }
}
2.4.2 多组件亮度调节
typescript
@Entry
@Component
struct MultiComponentBrightness {
  @State brightnessValue: number = 1.0;

  build() {
    Column({ space: 20 }) {
      Text('图片预览')
        .fontSize(24)
        .fontWeight(FontWeight.Bold)
        .brightness(this.brightnessValue);

      Image('https://example.com/image1.jpg')
        .width(300)
        .height(150)
        .brightness(this.brightnessValue);

      Image('https://example.com/image2.jpg')
        .width(300)
        .height(150)
        .brightness(this.brightnessValue);

      Button('调整亮度')
        .width(200)
        .height(44)
        .brightness(this.brightnessValue);

      Slider({
        value: this.brightnessValue,
        min: 0,
        max: 2,
        step: 0.01
      })
      .onChange((value: number) => {
        this.brightnessValue = value;
      });
    }
    .width('100%')
    .height('100%');
  }
}
2.4.3 容器级亮度调节
typescript
@Entry
@Component
struct ContainerBrightness {
  @State brightnessValue: number = 1.0;

  build() {
    Column({ space: 20 }) {
      Text('整体亮度调节')
        .fontSize(24)
        .fontWeight(FontWeight.Bold);

      Image('https://example.com/image.jpg')
        .width(300)
        .height(200);

      Button('按钮')
        .width(200)
        .height(44);

      Slider({
        value: this.brightnessValue,
        min: 0,
        max: 2,
        step: 0.01
      })
      .onChange((value: number) => {
        this.brightnessValue = value;
      });
    }
    .width('100%')
    .height('100%')
    .brightness(this.brightnessValue); // 整个容器应用亮度效果
  }
}
三、系统级Window Brightness API详解
3.1 API概述
在 HarmonyOS API Level 24 中,系统提供了 window.setWindowBrightness() API 用于设置当前应用窗口的亮度。
API所属模块 :@kit.ArkUI
API签名:
typescript
setWindowBrightness(brightness: number): Promise<void>参数说明:
brightness:number类型,亮度值- 范围:0.0~1.0(0.0最暗,1.0最亮)
- 特殊值:-1(恢复系统默认亮度)
返回值:
Promise<void>:异步操作结果
3.2 API使用前提
使用 setWindowBrightness() API 前,需要先获取当前窗口对象:
typescript
import { window } from '@kit.ArkUI';
import { common } from '@kit.AbilityKit';

private currentWindow: window.Window | undefined = undefined;

private async initWindow(): Promise<void> {
  const hostContext = this.getUIContext().getHostContext();
  const context = hostContext as common.UIAbilityContext;
  this.currentWindow = await window.getLastWindow(context);
}
3.3 窗口亮度与屏幕亮度的区别
| 特性 | 窗口亮度 | 屏幕亮度 |
|---|---|---|
| API | window.setWindowBrightness() |
@ohos.settings(系统应用专用) |
| 作用范围 | 当前应用窗口 | 整个设备屏幕 |
| 生效条件 | 窗口处于前台且获焦 | 始终生效 |
| 退出应用后 | 自动恢复系统亮度 | 保持设置 |
| 权限要求 | 无需特殊权限 | 系统应用权限 |
3.4 API使用示例
3.4.1 基础使用
typescript
import { window } from '@kit.ArkUI';
import { common } from '@kit.AbilityKit';
import type { BusinessError } from '@kit.BasicServicesKit';

@Entry
@Component
struct WindowBrightnessExample {
  @State brightnessValue: number = 0.5;
  private currentWindow: window.Window | undefined = undefined;

  aboutToAppear(): void {
    void this.initWindow();
  }

  private async initWindow(): Promise<void> {
    try {
      const hostContext = this.getUIContext().getHostContext();
      const context = hostContext as common.UIAbilityContext;
      this.currentWindow = await window.getLastWindow(context);

      // 获取当前窗口亮度
      const properties = this.currentWindow.getWindowProperties();
      if (properties.brightness >= 0) {
        this.brightnessValue = properties.brightness;
      }
    } catch (err) {
      const error = err as BusinessError;
      console.error(`Failed to init window: ${error.code}, ${error.message}`);
    }
  }

  private setBrightness(value: number): void {
    if (!this.currentWindow) {
      console.error('Window is not initialized.');
      return;
    }
    this.currentWindow.setWindowBrightness(value)
      .then(() => {
        console.info(`Brightness set to ${value}`);
      })
      .catch((err) => {
        const error = err as BusinessError;
        console.error(`Failed to set brightness: ${error.code}, ${error.message}`);
      });
  }

  build() {
    Column({ space: 20 }) {
      Text(`当前亮度: ${Math.round(this.brightnessValue * 100)}%`)
        .fontSize(24);

      Slider({
        value: this.brightnessValue,
        min: 0,
        max: 1,
        step: 0.01
      })
      .onChange((value: number) => {
        this.brightnessValue = value;
        this.setBrightness(value);
      });

      Button('恢复系统亮度')
        .onClick(() => {
          this.brightnessValue = 0.5;
          this.setBrightness(-1);
        });
    }
    .width('100%')
    .height('100%');
  }
}
3.4.2 监听系统亮度变化
typescript
import { window } from '@kit.ArkUI';
import { common } from '@kit.AbilityKit';
import type { BusinessError } from '@kit.BasicServicesKit';

@Entry
@Component
struct BrightnessObserverExample {
  @State brightnessValue: number = 0.5;
  @State systemBrightness: number = 0.5;
  private currentWindow: window.Window | undefined = undefined;

  aboutToAppear(): void {
    void this.initWindow();
    void this.observeSystemBrightness();
  }

  private async initWindow(): Promise<void> {
    const hostContext = this.getUIContext().getHostContext();
    const context = hostContext as common.UIAbilityContext;
    this.currentWindow = await window.getLastWindow(context);
  }

  private async observeSystemBrightness(): Promise<void> {
    // 模拟监听系统亮度变化
    // 实际开发中可以通过 settings.registerKeyObserver 监听
    try {
      // 定期获取系统亮度
      setInterval(() => {
        if (this.currentWindow) {
          const properties = this.currentWindow.getWindowProperties();
          this.systemBrightness = properties.brightness;
        }
      }, 1000);
    } catch (err) {
      const error = err as BusinessError;
      console.error(`Failed to observe brightness: ${error.code}`);
    }
  }

  build() {
    Column({ space: 20 }) {
      Text(`当前窗口亮度: ${Math.round(this.brightnessValue * 100)}%`)
        .fontSize(24);

      Text(`系统亮度: ${this.systemBrightness >= 0 ? Math.round(this.systemBrightness * 100) + '%' : '跟随系统'}`)
        .fontSize(20);

      Slider({
        value: this.brightnessValue,
        min: 0,
        max: 1,
        step: 0.01
      })
      .onChange((value: number) => {
        this.brightnessValue = value;
        if (this.currentWindow) {
          void this.currentWindow.setWindowBrightness(value);
        }
      });
    }
    .width('100%')
    .height('100%');
  }
}
四、完整示例:Brightness亮度调节布局
4.1 需求分析
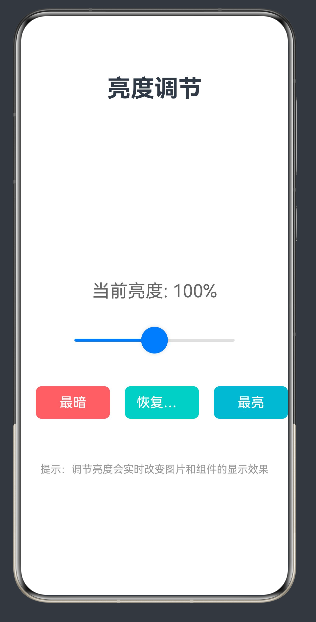
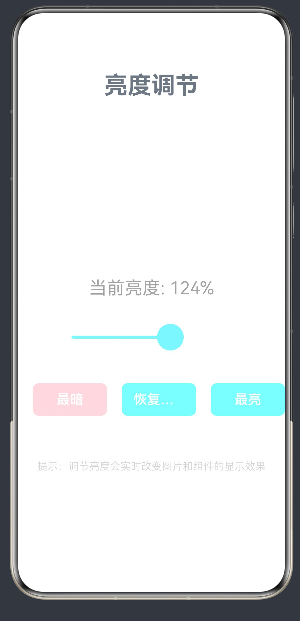
根据用户需求,我们需要实现一个完整的亮度调节页面,包含以下功能:
- 使用
@Entry @Component装饰器构建页面 - 支持组件级亮度调节(通过 brightness 属性)
- 支持系统级亮度调节(通过 window.setWindowBrightness)
- 提供滑块控件进行亮度调节
- 提供快捷按钮(最暗、恢复默认、最亮)
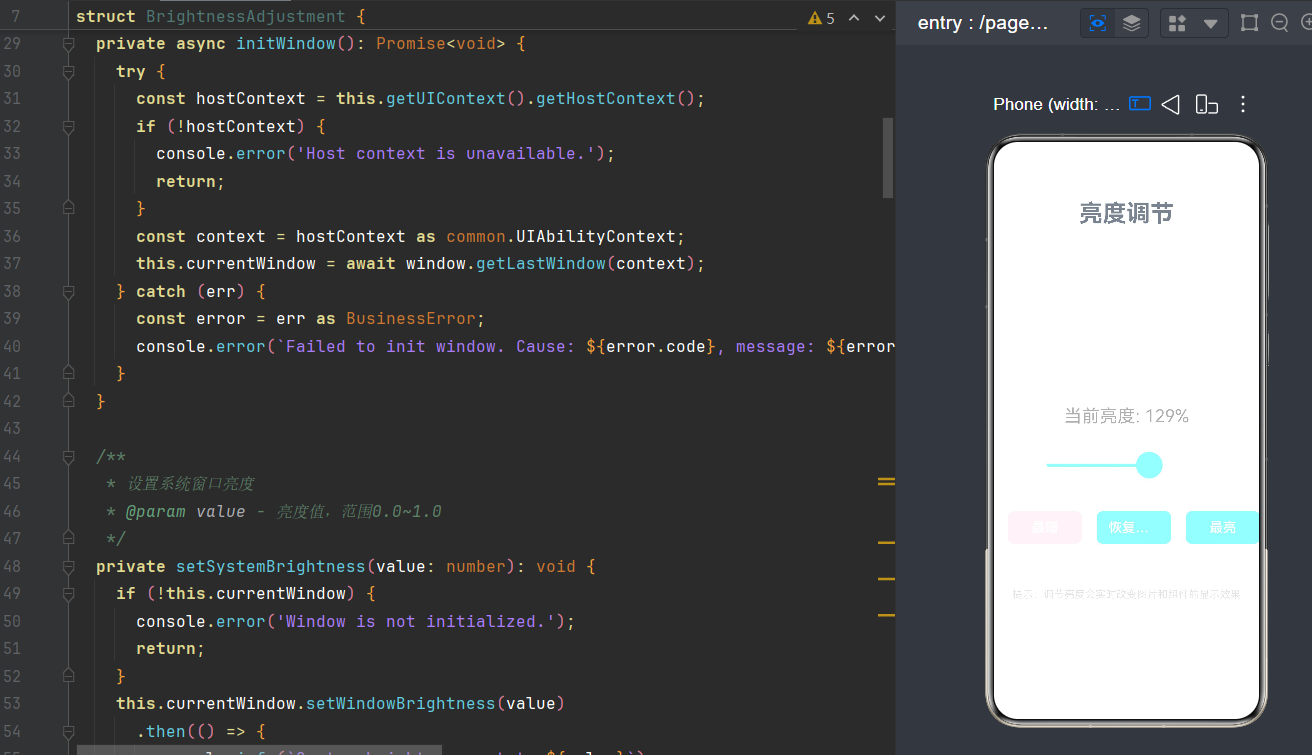
- 实时显示当前亮度值
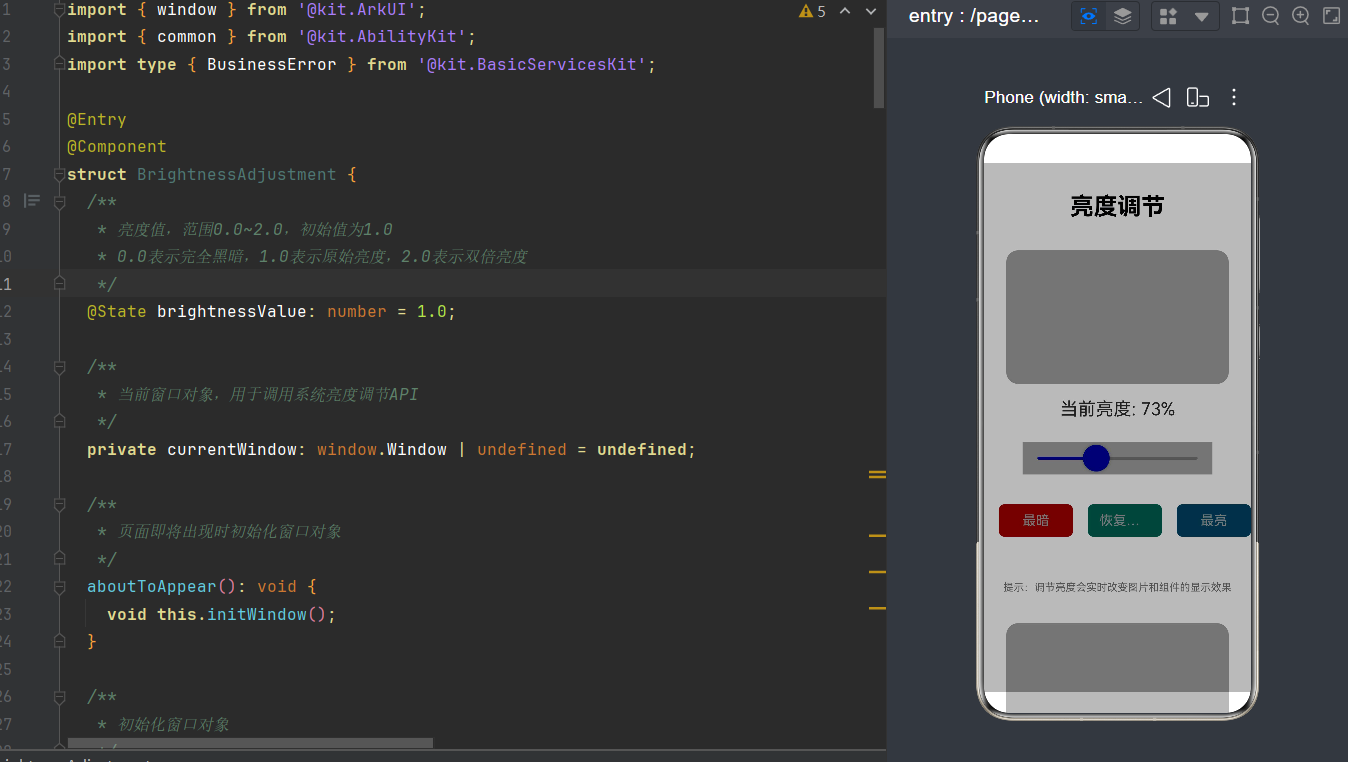
- 通过图片直观展示亮度调节效果
4.2 技术方案
4.2.1 布局结构
Column(主容器)
├── Text(标题)
├── Image(示例图片1)
├── Text(亮度值显示)
├── Slider(亮度调节滑块)
├── Row(快捷按钮组)
│   ├── Button(最暗)
│   ├── Button(恢复默认)
│   └── Button(最亮)
├── Text(提示信息)
└── Image(示例图片2)
4.2.2 状态管理
brightnessValue:组件级亮度值(0.0~2.0)currentWindow:当前窗口对象
4.2.3 核心逻辑
- 页面初始化时获取窗口对象
- 滑块拖动时更新 brightnessValue 并同步到系统窗口
- 快捷按钮点击时设置对应亮度值
- 所有组件绑定 brightness 属性实现视觉效果
4.3 完整代码
typescript
import { window } from '@kit.ArkUI';
import { common } from '@kit.AbilityKit';
import type { BusinessError } from '@kit.BasicServicesKit';

@Entry
@Component
struct BrightnessAdjustment {
  /**
   * 亮度值,范围0.0~2.0,初始值为1.0
   * 0.0表示完全黑暗,1.0表示原始亮度,2.0表示双倍亮度
   */
  @State brightnessValue: number = 1.0;

  /**
   * 当前窗口对象,用于调用系统亮度调节API
   */
  private currentWindow: window.Window | undefined = undefined;

  /**
   * 页面即将出现时初始化窗口对象
   * 在生命周期方法中初始化,避免在build函数中调用异步API
   */
  aboutToAppear(): void {
    void this.initWindow();
  }

  /**
   * 初始化窗口对象
   * 通过getUIContext获取宿主上下文,再获取当前窗口
   */
  private async initWindow(): Promise<void> {
    try {
      // 获取UI上下文
      const hostContext = this.getUIContext().getHostContext();
      if (!hostContext) {
        console.error('Host context is unavailable.');
        return;
      }
      // 转换为UIAbilityContext类型
      const context = hostContext as common.UIAbilityContext;
      // 获取当前窗口对象
      this.currentWindow = await window.getLastWindow(context);
    } catch (err) {
      const error = err as BusinessError;
      console.error(`Failed to init window. Cause: ${error.code}, message: ${error.message}`);
    }
  }

  /**
   * 设置系统窗口亮度
   * @param value - 亮度值,范围0.0~1.0,-1表示恢复系统默认
   */
  private setSystemBrightness(value: number): void {
    // 确保窗口对象已初始化
    if (!this.currentWindow) {
      console.error('Window is not initialized.');
      return;
    }
    // 调用setWindowBrightness设置窗口亮度
    this.currentWindow.setWindowBrightness(value)
      .then(() => {
        console.info(`System brightness set to ${value}`);
      })
      .catch(this.handleError);
  }

  /**
   * Slider滑动时的回调函数
   * 实时更新亮度值并应用到组件和系统窗口
   * @param value - Slider的当前值(0.0~2.0)
   */
  private onBrightnessChange(value: number): void {
    // 更新组件级亮度值
    this.brightnessValue = value;
    // 同步到系统窗口(转换为0.0~1.0范围)
    this.setSystemBrightness(value / 2);
  }

  /**
   * 恢复默认亮度
   * 组件级亮度恢复为1.0,系统窗口恢复为默认
   */
  private restoreDefault(): void {
    this.brightnessValue = 1.0;
    this.setSystemBrightness(-1);
  }

  /**
   * 设置最大亮度
   * 组件级亮度设置为2.0,系统窗口设置为1.0
   */
  private setMaxBrightness(): void {
    this.brightnessValue = 2.0;
    this.setSystemBrightness(1.0);
  }

  /**
   * 设置最小亮度
   * 组件级亮度设置为0.0,系统窗口设置为0.0
   */
  private setMinBrightness(): void {
    this.brightnessValue = 0.0;
    this.setSystemBrightness(0.0);
  }

  /**
   * 错误处理函数
   * @param err - 业务错误对象
   */
  private handleError(err: BusinessError): void {
    console.error(`Failed to set brightness. Cause: ${err.code}, message: ${err.message}`);
  }

  build() {
    /**
     * 使用Column布局作为主容器,垂直排列子组件
     * 通过brightness属性实现整体页面的亮度调节效果
     * Column本身也应用了brightness属性,实现容器级亮度调节
     */
    Column({ space: 20 }) {
      /**
       * 标题区域
       * 使用Text组件显示页面标题
       * 设置较大的字体和加粗样式
       */
      Text('亮度调节')
        .fontSize(32)
        .fontWeight(FontWeight.Bold)
        .textAlign(TextAlign.Center)
        .width('100%')
        .margin({ top: 40 });

      /**
       * 图片预览区域1
       * 使用Image组件展示示例图片
       * 通过brightness属性绑定亮度值,实现实时亮度调节效果
       */
      Image('https://trae-api-cn.mchost.guru/api/ide/v1/text_to_image?prompt=beautiful%20landscape%20with%20mountains%20and%20lake%20at%20sunset&image_size=landscape_16_9')
        .width(300)
        .height(180)
        .borderRadius(16)
        .objectFit(ImageFit.Cover)
        .margin({ top: 20 })
        .brightness(this.brightnessValue);

      /**
       * 亮度值显示区域
       * 实时显示当前亮度百分比
       * 通过Math.round将小数转换为整数百分比
       */
      Text(`当前亮度: ${Math.round(this.brightnessValue * 100)}%`)
        .fontSize(24)
        .fontColor('#666666')
        .textAlign(TextAlign.Center)
        .width('100%');

      /**
       * 亮度调节滑块
       * 使用Slider组件实现精确的亮度调节
       * - min: 0, max: 2, step: 0.01 设置调节范围和精度
       * - style: SliderStyle.OutSet 滑块样式为外置
       * - blockColor: 设置滑块按钮颜色
       * - trackColor: 设置滑块轨道背景色
       * - selectedColor: 设置已选中部分的颜色
       * - brightness: 绑定亮度值,滑块本身也会随亮度变化
       * - onChange: 绑定滑动时的回调函数
       */
      Slider({
        value: this.brightnessValue,
        min: 0,
        max: 2,
        step: 0.01,
        style: SliderStyle.OutSet
      })
        .blockColor('#007DFF')
        .trackColor('#E0E0E0')
        .selectedColor('#007DFF')
        .blockSize({ width: 36, height: 36 })
        .width('80%')
        .margin({ top: 10 })
        .brightness(this.brightnessValue)
        .onChange((value: number) => {
          this.onBrightnessChange(value);
        });

      /**
       * 快捷按钮区域
       * 使用Row布局水平排列三个按钮
       * - 最暗按钮:点击设置最小亮度
       * - 恢复默认按钮:点击恢复原始亮度
       * - 最亮按钮:点击设置最大亮度
       * 每个按钮都应用了brightness属性
       */
      Row({ space: 20 }) {
        Button('最暗')
          .width(100)
          .height(44)
          .fontSize(18)
          .backgroundColor('#FF6B6B')
          .fontColor('#FFFFFF')
          .borderRadius(8)
          .brightness(this.brightnessValue)
          .onClick(() => {
            this.setMinBrightness();
          });

        Button('恢复默认')
          .width(100)
          .height(44)
          .fontSize(18)
          .backgroundColor('#4ECDC4')
          .fontColor('#FFFFFF')
          .borderRadius(8)
          .brightness(this.brightnessValue)
          .onClick(() => {
            this.restoreDefault();
          });

        Button('最亮')
          .width(100)
          .height(44)
          .fontSize(18)
          .backgroundColor('#45B7D1')
          .fontColor('#FFFFFF')
          .borderRadius(8)
          .brightness(this.brightnessValue)
          .onClick(() => {
            this.setMaxBrightness();
          });
      }
      .width('100%')
      .justifyContent(FlexAlign.Center)
      .margin({ top: 20 });

      /**
       * 提示信息区域
       * 使用Text组件显示使用说明
       * 设置较小的字体和灰色颜色
       */
      Text('提示:调节亮度会实时改变图片和组件的显示效果')
        .fontSize(14)
        .fontColor('#999999')
        .textAlign(TextAlign.Center)
        .width('100%')
        .margin({ top: 40 });

      /**
       * 图片预览区域2
       * 第二张示例图片,同样应用了brightness属性
       * 用于更直观地展示亮度调节效果
       */
      Image('https://trae-api-cn.mchost.guru/api/ide/v1/text_to_image?prompt=city%20skyline%20at%20night%20with%20lights&image_size=landscape_16_9')
        .width(300)
        .height(180)
        .borderRadius(16)
        .objectFit(ImageFit.Cover)
        .margin({ top: 20 })
        .brightness(this.brightnessValue);
    }
    .width('100%')
    .height('100%')
    .padding({ left: 20, right: 20 })
    .justifyContent(FlexAlign.Start)
    .brightness(this.brightnessValue);
  }
}
4.4 代码分析
4.4.1 状态变量
typescript
@State brightnessValue: number = 1.0;
private currentWindow: window.Window | undefined = undefined;brightnessValue:使用@State装饰器,当值发生变化时会触发UI更新currentWindow:存储当前窗口对象,用于调用系统亮度API
4.4.2 生命周期方法
typescript
aboutToAppear(): void {
  void this.initWindow();
}- 在页面即将出现时调用
initWindow()初始化窗口对象 - 使用
void关键字忽略Promise返回值,避免编译警告
4.4.3 窗口初始化
typescript
private async initWindow(): Promise<void> {
  const hostContext = this.getUIContext().getHostContext();
  const context = hostContext as common.UIAbilityContext;
  this.currentWindow = await window.getLastWindow(context);
}- 通过
getUIContext().getHostContext()获取宿主上下文 - 将上下文转换为
UIAbilityContext类型 - 调用
window.getLastWindow()获取当前窗口对象
4.4.4 亮度设置逻辑
typescript
private setSystemBrightness(value: number): void {
  if (!this.currentWindow) {
    console.error('Window is not initialized.');
    return;
  }
  this.currentWindow.setWindowBrightness(value)
    .then(() => {
      console.info(`System brightness set to ${value}`);
    })
    .catch(this.handleError);
}- 检查窗口对象是否已初始化
- 调用
setWindowBrightness()设置系统窗口亮度 - 使用
.then()和.catch()处理异步操作结果
4.4.5 滑块回调
typescript
private onBrightnessChange(value: number): void {
  this.brightnessValue = value;
  this.setSystemBrightness(value / 2);
}- 更新组件级亮度值
- 将组件级亮度值(0.02.0)转换为系统窗口亮度值(0.01.0)
4.4.6 布局结构
typescript
Column({ space: 20 }) {
  // ... 子组件
}
.width('100%')
.height('100%')
.padding({ left: 20, right: 20 })
.justifyContent(FlexAlign.Start)
.brightness(this.brightnessValue);- 使用
Column布局作为主容器 - 设置宽度和高度为100%,占据整个屏幕
- 添加左右内边距防止内容贴边
- 设置子组件起始对齐
- 应用
brightness属性实现容器级亮度调节
五、高级应用场景
5.1 场景一:阅读模式亮度调节
在阅读类应用中,亮度调节是一项核心功能。用户需要根据环境光线调整阅读界面的亮度,以获得最佳的阅读体验。
typescript
@Entry
@Component
struct ReadingMode {
  @State brightnessValue: number = 1.0;
  @State fontSize: number = 16;
  private currentWindow: window.Window | undefined = undefined;

  aboutToAppear(): void {
    void this.initWindow();
  }

  private async initWindow(): Promise<void> {
    const hostContext = this.getUIContext().getHostContext();
    const context = hostContext as common.UIAbilityContext;
    this.currentWindow = await window.getLastWindow(context);
  }

  build() {
    Column() {
      // 顶部工具栏
      Row({ space: 10 }) {
        Button('字号-')
          .onClick(() => {
            this.fontSize = Math.max(12, this.fontSize - 2);
          });

        Text(`${this.fontSize}号`)
          .fontSize(16);

        Button('字号+')
          .onClick(() => {
            this.fontSize = Math.min(24, this.fontSize + 2);
          });
      }
      .width('100%')
      .justifyContent(FlexAlign.Center)
      .padding(10)
      .backgroundColor('#f5f5f5');

      // 阅读内容区域
      Scroll() {
        Text('这里是阅读内容...\n'.repeat(50))
          .fontSize(this.fontSize)
          .lineHeight(this.fontSize * 1.5)
          .padding(20)
          .textAlign(TextAlign.Justify);
      }
      .flexGrow(1);

      // 亮度调节区域
      Row({ space: 20 }) {
        Text('亮度')
          .fontSize(16);

        Slider({
          value: this.brightnessValue,
          min: 0,
          max: 2,
          step: 0.01
        })
        .flexGrow(1)
        .onChange((value: number) => {
          this.brightnessValue = value;
          if (this.currentWindow) {
            void this.currentWindow.setWindowBrightness(value / 2);
          }
        });

        Text(`${Math.round(this.brightnessValue * 100)}%`)
          .fontSize(16)
          .width(60);
      }
      .width('100%')
      .padding(20)
      .backgroundColor('#f5f5f5');
    }
    .width('100%')
    .height('100%')
    .brightness(this.brightnessValue);
  }
}
5.2 场景二:视频播放器亮度调节
在视频播放器中,亮度调节是一项重要的用户体验功能。用户需要在播放视频时快速调整亮度。
typescript
@Entry
@Component
struct VideoPlayer {
  @State brightnessValue: number = 1.0;
  @State isPlaying: boolean = false;
  private currentWindow: window.Window | undefined = undefined;

  aboutToAppear(): void {
    void this.initWindow();
  }

  private async initWindow(): Promise<void> {
    const hostContext = this.getUIContext().getHostContext();
    const context = hostContext as common.UIAbilityContext;
    this.currentWindow = await window.getLastWindow(context);
  }

  build() {
    Column() {
      // 视频播放区域
      Stack() {
        Image('https://example.com/video-cover.jpg')
          .width('100%')
          .height(300)
          .objectFit(ImageFit.Cover)
          .brightness(this.brightnessValue);

        Button(this.isPlaying ? '暂停' : '播放')
          .width(60)
          .height(60)
          .borderRadius(30)
          .backgroundColor('rgba(0,0,0,0.5)')
          .fontColor('#FFFFFF')
          .onClick(() => {
            this.isPlaying = !this.isPlaying;
          });
      }
      .width('100%');

      // 控制区域
      Row({ space: 20 }) {
        // 播放进度
        Slider({
          value: 30,
          min: 0,
          max: 100,
          step: 1
        })
        .flexGrow(1);

        Text('01:23 / 02:45')
          .fontSize(14);
      }
      .width('100%')
      .padding(10);

      // 亮度调节
      Row({ space: 10 }) {
        Image('brightness-icon.png')
          .width(24)
          .height(24);

        Slider({
          value: this.brightnessValue,
          min: 0,
          max: 2,
          step: 0.01
        })
        .flexGrow(1)
        .onChange((value: number) => {
          this.brightnessValue = value;
          if (this.currentWindow) {
            void this.currentWindow.setWindowBrightness(value / 2);
          }
        });
      }
      .width('100%')
      .padding(10);
    }
    .width('100%')
    .height('100%');
  }
}
5.3 场景三:图片编辑器亮度调节
在图片编辑器中,亮度调节是一项基础的图片处理功能。用户需要实时调整图片的亮度进行编辑。
typescript
@Entry
@Component
struct ImageEditor {
  @State brightnessValue: number = 1.0;
  @State contrastValue: number = 1.0;
  @State saturationValue: number = 1.0;
  private originalImage: string = 'https://example.com/image.jpg';

  build() {
    Column() {
      // 图片预览区域
      Stack() {
        Image(this.originalImage)
          .width('100%')
          .height(400)
          .objectFit(ImageFit.Contain)
          .brightness(this.brightnessValue)
          .contrast(this.contrastValue)
          .saturation(this.saturationValue);

        // 编辑工具栏
        Position({ x: 10, y: 10 }) {
          Row({ space: 10 }) {
            Button('重置')
              .onClick(() => {
                this.brightnessValue = 1.0;
                this.contrastValue = 1.0;
                this.saturationValue = 1.0;
              });

            Button('保存')
              .onClick(() => {
                // 保存编辑后的图片
              });
          }
        }
      }
      .width('100%')
      .height(400);

      // 参数调节区域
      Column({ space: 20 }) {
        // 亮度调节
        Row({ space: 10 }) {
          Text('亮度')
            .width(60);

          Slider({
            value: this.brightnessValue,
            min: 0,
            max: 2,
            step: 0.01
          })
          .flexGrow(1);

          Text(`${Math.round(this.brightnessValue * 100)}%`)
            .width(60);
        }

        // 对比度调节
        Row({ space: 10 }) {
          Text('对比度')
            .width(60);

          Slider({
            value: this.contrastValue,
            min: 0,
            max: 2,
            step: 0.01
          })
          .flexGrow(1);

          Text(`${Math.round(this.contrastValue * 100)}%`)
            .width(60);
        }

        // 饱和度调节
        Row({ space: 10 }) {
          Text('饱和度')
            .width(60);

          Slider({
            value: this.saturationValue,
            min: 0,
            max: 2,
            step: 0.01
          })
          .flexGrow(1);

          Text(`${Math.round(this.saturationValue * 100)}%`)
            .width(60);
        }
      }
      .width('100%')
      .flexGrow(1)
      .padding(20);
    }
    .width('100%')
    .height('100%');
  }
}
六、性能优化建议
6.1 避免过度使用brightness属性
虽然 brightness 属性非常方便,但过度使用会影响性能。每次 brightness 值变化时,所有绑定该属性的组件都需要重新渲染。
优化策略:
- 尽量在高层容器上设置 brightness 属性,利用继承性减少属性绑定次数
- 对于不需要亮度变化的组件,避免绑定 brightness 属性
6.2 合理控制滑块更新频率
滑块的 onChange 回调会在用户拖动时频繁触发,如果每次都调用系统API设置亮度,可能会导致性能问题。
优化策略:
- 使用防抖(debounce)技术减少API调用频率
- 在滑块拖动结束后(
onChangeEnd)再同步到系统窗口
typescript
private debounceTimer: number | undefined = undefined;

private onBrightnessChange(value: number): void {
  this.brightnessValue = value;

  // 清除之前的定时器
  if (this.debounceTimer !== undefined) {
    clearTimeout(this.debounceTimer);
  }

  // 延迟300ms后设置系统亮度
  this.debounceTimer = setTimeout(() => {
    this.setSystemBrightness(value / 2);
    this.debounceTimer = undefined;
  }, 300);
}
6.3 注意内存泄漏
在使用 setInterval 或 setTimeout 时,需要注意清理定时器,避免内存泄漏。
优化策略:
- 在
aboutToDisappear生命周期方法中清理定时器 - 使用
clearInterval和clearTimeout清除定时器
typescript
private timerId: number | undefined = undefined;

aboutToAppear(): void {
  this.timerId = setInterval(() => {
    // 定期执行的逻辑
  }, 1000);
}

aboutToDisappear(): void {
  if (this.timerId !== undefined) {
    clearInterval(this.timerId);
    this.timerId = undefined;
  }
}
6.4 合理使用异步操作
在调用 window.setWindowBrightness() API 时,需要注意异步操作的处理。
优化策略:
- 使用
.then()和.catch()处理异步结果 - 避免在 build 函数中调用异步API
- 在生命周期方法中初始化异步资源
七、常见问题与解决方案
7.1 问题一:亮度调节不生效
现象:拖动滑块后,屏幕亮度没有变化。
可能原因:
- 窗口对象未正确初始化
- API调用参数错误
- 应用未获得焦点
解决方案:
typescript
private async initWindow(): Promise<void> {
  try {
    const hostContext = this.getUIContext().getHostContext();
    if (!hostContext) {
      console.error('Host context is unavailable.');
      return;
    }
    const context = hostContext as common.UIAbilityContext;
    this.currentWindow = await window.getLastWindow(context);

    // 验证窗口对象是否获取成功
    if (!this.currentWindow) {
      console.error('Failed to get window.');
      return;
    }

    console.info('Window initialized successfully.');
  } catch (err) {
    const error = err as BusinessError;
    console.error(`Failed to init window: ${error.code}, ${error.message}`);
  }
}
7.2 问题二:组件亮度与系统亮度不同步
现象:组件亮度变化了,但系统屏幕亮度没有变化。
可能原因:
- 系统亮度API调用失败
- 参数转换错误
- 应用处于后台
解决方案:
typescript
private onBrightnessChange(value: number): void {
  // 更新组件级亮度
  this.brightnessValue = value;

  // 同步到系统窗口
  if (this.currentWindow) {
    this.currentWindow.setWindowBrightness(value / 2)
      .then(() => {
        console.info('System brightness updated.');
      })
      .catch((err) => {
        const error = err as BusinessError;
        console.error(`Failed to update system brightness: ${error.code}`);
      });
  }
}
7.3 问题三:catch子句类型错误
现象:编译报错 "Type annotation in catch clause is not supported"。
原因:ArkTS 不支持在 catch 子句中直接使用类型注解。
解决方案:
typescript
// 错误写法
catch (err: BusinessError) {
  console.error(`Error: ${err.code}`);
}

// 正确写法
catch (err) {
  const error = err as BusinessError;
  console.error(`Error: ${error.code}`);
}
7.4 问题四:使用any类型报错
现象:编译报错 "Use explicit types instead of 'any', 'unknown'"。
原因:ArkTS 不支持 any 和 unknown 类型。
解决方案:
typescript
// 错误写法
.catch((err) => {
  console.error(`Error: ${err}`); // err 被推断为 any 类型
});

// 正确写法
private handleError(err: BusinessError): void {
  console.error(`Error: ${err.code}, ${err.message}`);
}

.catch(this.handleError);
八、总结
8.1 核心要点回顾
- 组件级亮度调节 :通过
brightness属性实现,值范围0.0~2.0,具有继承性 - 系统级亮度调节 :通过
window.setWindowBrightness()API 实现,值范围0.0~1.0,-1表示恢复系统默认 - 两种方式结合:组件级亮度调节提供视觉反馈,系统级亮度调节改变实际屏幕亮度
- ArkTS语法约束:注意 catch 子句类型注解、any类型等语法限制
8.2 最佳实践
- 在高层容器上设置 brightness 属性,利用继承性减少属性绑定次数
- 使用防抖技术减少系统API调用频率
- 在生命周期方法中初始化窗口对象,避免在 build 函数中调用异步API
- 注意清理定时器,避免内存泄漏
- 使用类型断言处理 catch 子句中的错误对象
8.3 应用价值
Brightness亮度调节布局是鸿蒙原生ArkTS开发中的一项基础布局技术,适用于多种应用场景:
- 阅读类应用:根据环境光线调整阅读界面亮度
- 视频播放应用:提供良好的观看体验
- 图片编辑应用:实时调整图片亮度
- 护眼模式:夜间使用时降低亮度保护视力
掌握这项技术,可以帮助开发者构建更加人性化、用户体验更好的应用。
附录:API参考
A.1 window.setWindowBrightness
所属模块 :@kit.ArkUI
API签名:
typescript
setWindowBrightness(brightness: number): Promise<void>参数:
| 参数名 | 类型 | 必填 | 说明 |
|---|---|---|---|
| brightness | number | 是 | 亮度值,范围0.0~1.0,-1表示恢复系统默认 |
返回值:
Promise<void>:异步操作结果
API Level:9+
A.2 window.getWindowProperties
所属模块 :@kit.ArkUI
API签名:
typescript
getWindowProperties(): WindowProperties返回值:
| 属性 | 类型 | 说明 |
|---|---|---|
| brightness | number | 当前窗口亮度值,范围0.0~1.0,-1表示跟随系统 |
API Level:9+
A.3 Component.brightness
所属模块 :@kit.ArkUI
API签名:
typescript
brightness(value: number): Component参数:
| 参数名 | 类型 | 必填 | 说明 |
|---|---|---|---|
| value | number | 是 | 亮度值,范围0.0~2.0 |
API Level:9+