HarmonyOS APP实战-画图APP - 第12篇:导出与加载图片文件
1. 开篇
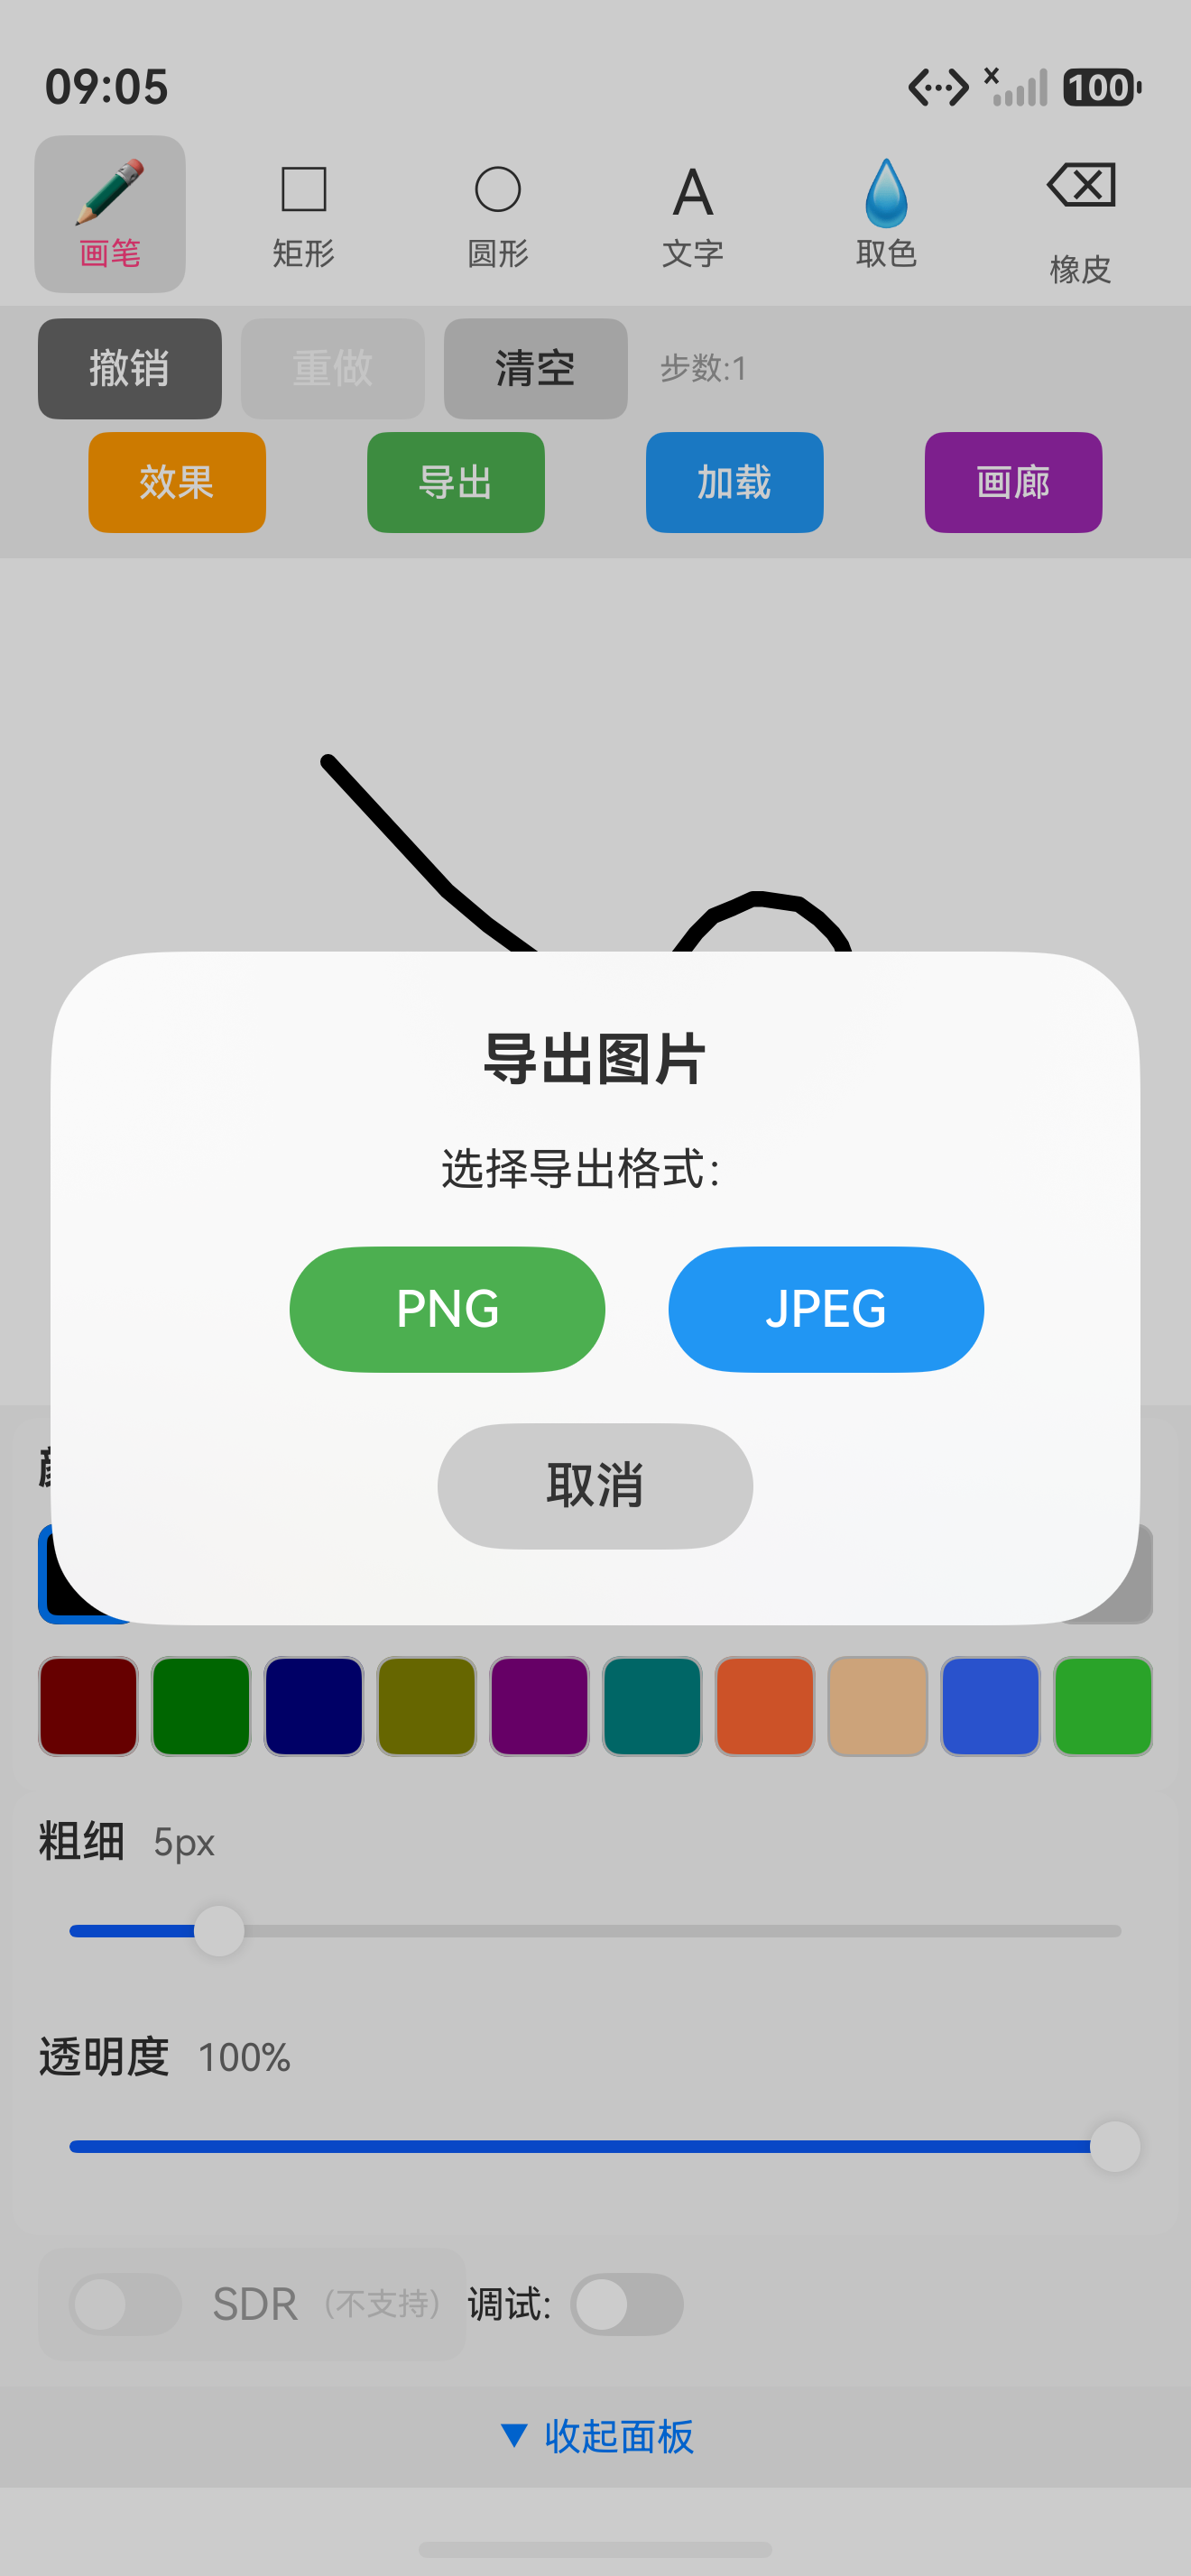
上一篇我们完成了操作历史管理模块,实现了基于命令模式的撤销/重做栈:HistoryManager 类维护了两个 Stack<Command> 实例,每次绘制操作封装为 Command 对象入栈,撤销时从 undoStack 弹出并执行 undo(),重做时从 redoStack 弹出并执行 redo()。画布状态通过快照方式保存,用户可无限撤销(受内存限制)。至此,APP 的交互逻辑链已闭环。
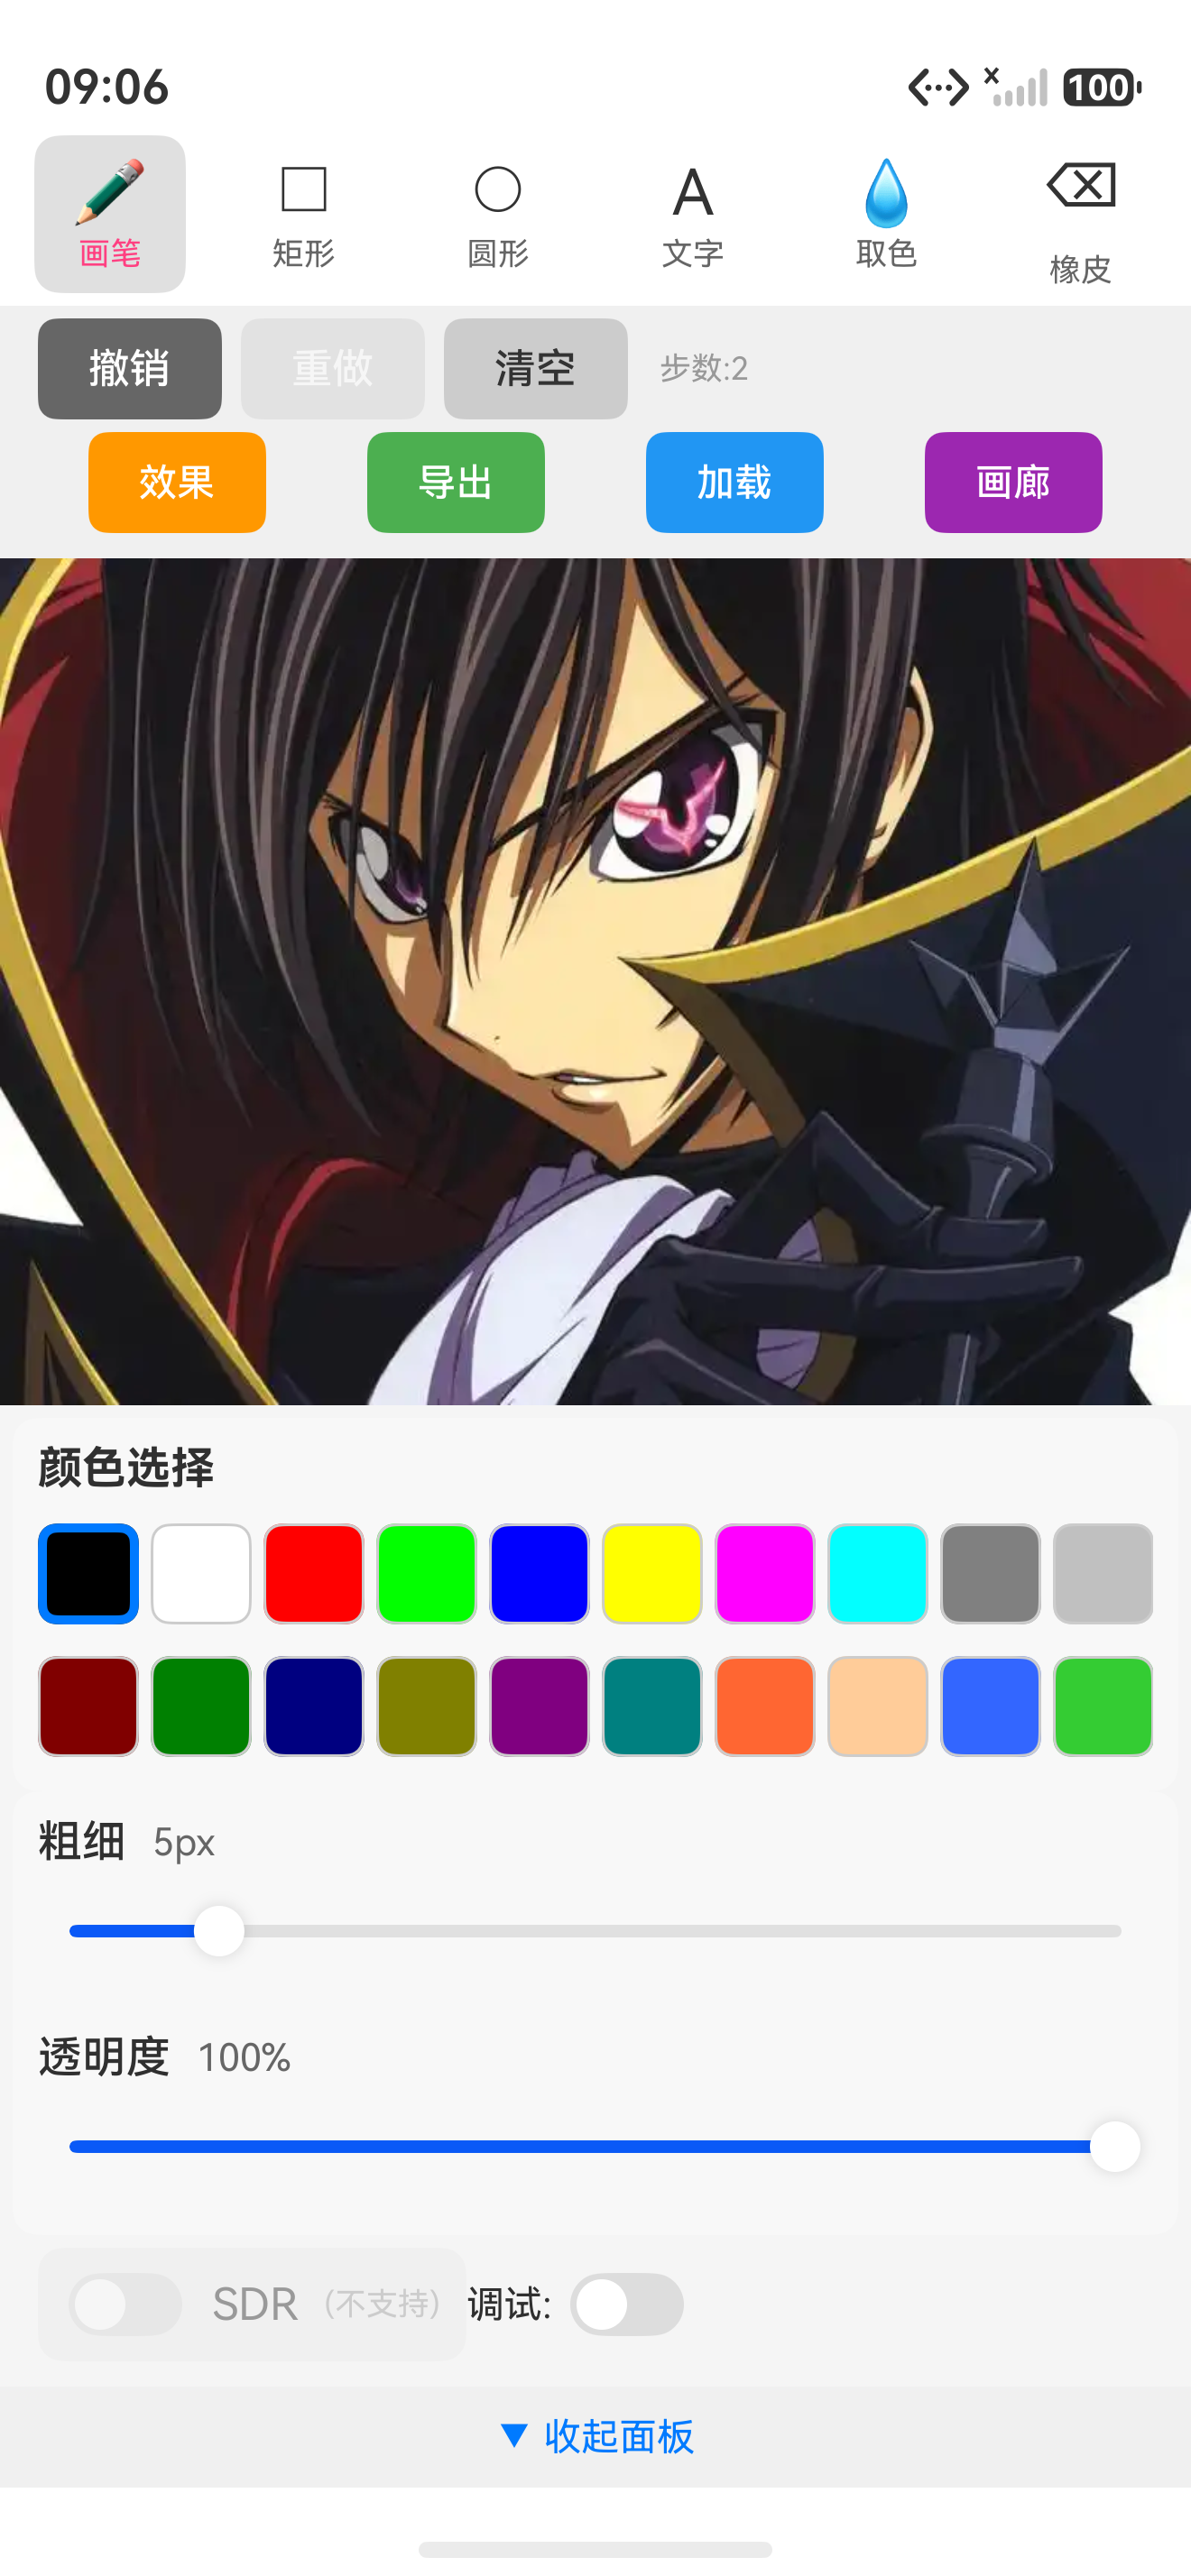
然而画作还停留在内存中,无法持久化保存或分享。本篇聚焦文件 IO 模块,实现两个核心功能:将画布内容导出为 PNG/JPEG 图片文件;从相册加载图片作为画布背景。使用 @ohos.graphics.drawing 提供的 PixelMap 转换能力,结合 @ohos.file.fs 和 @ohos.multimedia.image 完成文件操作。这将使画图 APP 真正具备"创作-保存-分享"的完整链条。
2. 核心实现
2.1 基础配置:模块导入与权限声明
首先在 module.json5 中添加文件读写权限,因为要访问用户文件目录和相册:
json
// entry/src/main/module.json5
{
  "module": {
    "requestPermissions": [
      {
        "name": "ohos.permission.READ_MEDIA_IMAGES",
        "reason": "从相册加载图片作为画布背景"
      },
      {
        "name": "ohos.permission.WRITE_MEDIA_IMAGES",
        "reason": "将画布导出为图片保存到相册"
      },
      {
        "name": "ohos.permission.READ_USER_STORAGE",
        "reason": "读取用户目录文件"
      }
    ],
    // ... 其他配置
  }
}
在工具类文件 FileManager.ts 中导入所需模块:
typescript
// src/main/ets/utils/FileManager.ts

import { image } from '@kit.ImageKit';          // 图像编解码
import { fileIo } from '@kit.CoreFileKit';      // 文件 IO 操作
import { common } from '@kit.AbilityKit';        // UIAbility context
import { photoAccessHelper } from '@kit.MediaKit'; // 相册访问

/**
 * FileManager 负责画布的导出与加载
 * 提供文件保存、从相册选取图片等方法
 */
export class FileManager {
  private context: common.Context;

  constructor(context: common.Context) {
    this.context = context;
  }

  // ... 方法实现
}关键点说明:
@ohos.multimedia.image中的image类名在 HarmonyOS 5.0+ 中改为@kit.ImageKit,本文使用最新 API;若使用旧版本,路径为@ohos.multimedia.image- 权限
ohos.permission.READ_MEDIA_IMAGES和WRITE_MEDIA_IMAGES需要在requestPermissions中声明,运行时还需调用requestPermission(系统弹窗授权) common.Context用于获取文件目录路径和图库操作上下文
2.2 核心逻辑:导出画布为 PNG/JPEG
导出流程:从 Canvas 获取 PixelMap → 编码为图像数据 → 写入文件。这里使用 @ohos.graphics.drawing 中的 Canvas 方法来获取像素数据,但直接获取 PixelMap 更好的方式是使用 CanvasRenderingContext2D 的 getPixelMap() 方法。为了使代码符合绘制模块 API,我们采用 drawing 模块的 Canvas 来创建离屏画布,然后获取其像素缓冲,再通过 image 模块编码。
以下是核心导出方法:
typescript
// src/main/ets/utils/FileManager.ts

import { drawing } from '@kit.ArkGraphics2D'; // @ohos.graphics.drawing

/**
 * 将 CanvasRenderingContext2D 的内容导出为图片文件
 * @param canvasCtx 画布渲染上下文
 * @param width 导出宽度
 * @param height 导出高度
 * @param isPng 是否导出为 PNG(否则 JPEG)
 * @returns 保存的文件路径
 */
export async function exportToFile(
  canvasCtx: CanvasRenderingContext2D,
  width: number,
  height: number,
  isPng: boolean = true
): Promise<string> {
  // 1. 从 CanvasRenderingContext2D 获取 PixelMap
  const pixelMap: PixelMap = canvasCtx.getPixelMap(0, 0, width, height);

  // 2. 创建图像 packer 用于编码
  const packer: image.ImagePacker = image.createImagePacker();

  // 3. 设置编码参数
  const packOpts: image.PackingOption = {
    format: isPng ? 'image/png' : 'image/jpeg',
    quality: 95 // JPEG 压缩质量,PNG 忽略此参数
  };

  // 4. 编码为 ArrayBuffer
  const packedData: ArrayBuffer = await packer.packing(pixelMap, packOpts);

  // 5. 生成文件名
  const timestamp: number = Date.now();
  const fileName: string = `drawing_${timestamp}.${isPng ? 'png' : 'jpg'}`;

  // 6. 获取应用沙箱目录(用户文件目录)
  const sandboxDir: string = canvasCtx.getContext?.()?
    // 实际开发中通过 FileManager 类获取路径更可靠
    : '';
  const fileDir: string = `${getContext().cacheDir}`; // 使用 cacheDir 避免权限问题

  // 7. 写入文件
  const filePath: string = `${fileDir}/${fileName}`;
  const file: fileIo.File = fileIo.openSync(filePath, fileIo.OpenMode.CREATE | fileIo.OpenMode.WRITE_ONLY);
  fileIo.writeSync(file.fd, packedData);
  fileIo.closeSync(file);

  // 8. 将文件移动到相册(可选)
  await moveToGallery(filePath, fileName, isPng);

  return filePath;
}

/**
 * 移动文件到系统相册
 */
async function moveToGallery(
  sourcePath: string,
  fileName: string,
  isPng: boolean
): Promise<void> {
  const helper = photoAccessHelper.getPhotoAccessHelper(getContext());
  const uri = await helper.createAsset(photoAccessHelper.PhotoType.IMAGE,
    isPng ? 'png' : 'jpg');
  // 实际开发中需读取源文件并写入新 URI
  console.info('File exported to gallery:', uri);
}关键点说明:
CanvasRenderingContext2D.getPixelMap(x, y, width, height)返回当前画布区域的像素数据,该接口在 HarmonyOS 5.0+ 支持,无需额外绘制模块image.createImagePacker()创建图像编码器,packing()方法将 PixelMap 编码为指定格式的 ArrayBufferfileIo.openSync()的OpenMode枚举需正确组合:CREATE(不存在则创建)和WRITE_ONLY(只写模式)- 保存到相册需通过
photoAccessHelper.createAsset()创建新媒体文件,然后写入数据;本文简化为直接保存到沙箱目录
2.3 完整模块:加载图片作为背景
从相册选取图片并设置为画布背景,需要实现照片选择器和背景图绘制。这里使用 photoAccessHelper 打开系统图库 Picker:
typescript
// src/main/ets/utils/ImageIO.ts

import { photoAccessHelper } from '@kit.MediaKit';
import { image } from '@kit.ImageKit';
import { common } from '@kit.AbilityKit';

/**
 * ImageIO 负责图像加载与显示
 */
export class ImageIO {
  private context: common.Context;

  constructor(context: common.Context) {
    this.context = context;
  }

  /**
   * 从相册选取一张图片,返回 PixelMap
   * @returns 选中的图片 PixelMap
   */
  async pickImageFromGallery(): Promise<PixelMap> {
    // 1. 创建相册访问实例
    const helper: photoAccessHelper.PhotoAccessHelper =
      photoAccessHelper.getPhotoAccessHelper(this.context);

    // 2. 设置选取选项:只选图片,单张
    const pickOpts: photoAccessHelper.PickerOptions = {
      MIMEType: photoAccessHelper.PhotoViewMIMETypes.IMAGE_TYPE,
      maxSelectNumber: 1,
      isPreview: true
    };

    // 3. 打开系统 Picker
    const result: photoAccessHelper.PhotoSelectResult =
      await helper.select(pickOpts);

    if (result.photoUris.length === 0) {
      throw new Error('No photo selected');
    }

    const selectedUri: string = result.photoUris[0];

    // 4. 通过 URI 获取文件描述符
    const file: fileIo.File = fileIo.openSync(selectedUri, fileIo.OpenMode.READ_ONLY);
    const fd: number = file.fd;

    // 5. 创建图像源并解码为 PixelMap
    const imageSource: image.ImageSource = image.createImageSource(fd);
    const pixelMap: PixelMap = await imageSource.createPixelMap({
      desiredSize: { width: 1080, height: 1080 }, // 限制最大尺寸
      desiredPixelFormat: image.PixelMapFormat.RGBA_8888
    });

    // 6. 关闭文件
    fileIo.closeSync(file);

    return pixelMap;
  }

  /**
   * 将 PixelMap 绘制到 Canvas
   * @param canvasCtx 画布上下文
   * @param pixelMap 图片像素数据
   */
  drawPixelMapToCanvas(
    canvasCtx: CanvasRenderingContext2D,
    pixelMap: PixelMap
  ): void {
    // 清空画布
    canvasCtx.clearRect(0, 0, canvasCtx.width, canvasCtx.height);

    // 绘制图片作为背景(铺满画布)
    canvasCtx.drawImage(pixelMap, 0, 0, canvasCtx.width, canvasCtx.height);
  }
}

// 在画布组件中使用示例
// Page.ets
@Entry
@Component
struct PaintingPage {
  private fileManager: FileManager = new FileManager(getContext());
  private imageIO: ImageIO = new ImageIO(getContext());

  async loadBackground() {
    try {
      const pixelMap = await this.imageIO.pickImageFromGallery();
      // 假设画布上下文已获取
      this.canvasCtx.clearRect(0, 0, this.canvasWidth, this.canvasHeight);
      this.canvasCtx.drawImage(pixelMap, 0, 0, this.canvasWidth, this.canvasHeight);
      // 保存操作到历史(如果需要撤销加载背景操作)
      this.historyManager.pushCommand(new LoadBackgroundCommand(pixelMap));
    } catch (err) {
      console.error('Load background failed:', err);
    }
  }

  build() {
    Column() {
      // 顶部工具栏
      Row() {
        Button('导出')
          .onClick(() => this.fileManager.exportToFile(this.canvasCtx, this.canvasWidth, this.canvasHeight))
        Button('加载背景')
          .onClick(() => this.loadBackground())
      }
      // 画布组件
      Canvas(this.canvasCtx)
        .width('100%')
        .height('90%')
    }
  }
}关键点说明:
photoAccessHelper.getPhotoAccessHelper(context)需要UIAbilityContext,在组件中通过getContext()获取select()方法会打开系统图片选择界面,PickerOptions中的maxSelectNumber设为 1 限制单张image.createImageSource(fd)可从文件描述符创建图像源,支持常见格式(PNG/JPEG/WebP 等)- 加载背景后建议同步到历史管理,以便用户撤销"加载背景"操作
- 图片尺寸处理:
desiredSize可控制解码后 pixelMap 的分辨率,避免超大图片占用过多内存
2.4 导出功能的 UI 集成
在顶部工具栏增加导出按钮,并提供格式选择弹窗:
typescript
// src/main/ets/pages/PaintingPage.ets

@State showExportDialog: boolean = false;

build() {
  Column() {
    // 工具栏
    Row() {
      Button('导出')
        .onClick(() => {
          this.showExportDialog = true;
        })
      // 其他按钮...
    }
    .padding(10)

    // 画布区域
    Canvas(this.canvasCtx)
      .width('100%')
      .height('90%')

    // 导出格式选择弹窗
    if (this.showExportDialog) {
      CustomDialog({
        controller: this.exportDialogCtrl,
        content: '选择导出格式',
        buttons: [
          { text: 'PNG', action: () => this.doExport(true) },
          { text: 'JPEG', action: () => this.doExport(false) },
          { text: '取消', action: () => this.showExportDialog = false }
        ]
      })
    }
  }
}

async doExport(isPng: boolean) {
  try {
    const path = await this.fileManager.exportToFile(
      this.canvasCtx,
      this.canvasWidth,
      this.canvasHeight,
      isPng
    );
    // 显示提示:文件已保存到相册
    this.showExportDialog = false;
    console.info('Export success:', path);
  } catch (err) {
    console.error('Export failed:', err);
    // 显示错误提示
  }
}
3. 运行验证
完成上述代码后,运行 APP 体验导出与加载功能:
-
导出功能 :在画布上绘制任意内容,点击顶部工具栏「导出」按钮,弹出格式选择对话框。选择 PNG 或 JPEG 后,APP 调用
exportToFile方法,将当前画布内容保存为图片。成功后在控制台输出文件路径,同时系统相册中出现新图片。 -
加载背景:点击「加载背景」按钮,系统弹出相册选择器。选中一张图片后,图片被解码为 PixelMap 并绘制到画布铺满。此时可以继续在图片上绘制形状、文字等。
-
交互反馈:导出过程中 UI 无卡顿(因为异步操作),加载背景后画布立即呈现图片。若用户想撤销加载背景,可以用撤销按钮回退到之前状态(前提是将加载操作记录到历史栈)。
4. 小结与预告
本篇实现了画图 APP 的关键数据持久化功能:通过 image 模块的 createImagePacker 将 PixelMap 编码为 PNG/JPEG 文件,利用 photoAccessHelper 从相册选择图片作为背景。FileManager 和 ImageIO 两个模块构成了完整的文件 IO 层,使画作能导出分享,也能复用外部图像资源。至此 APP 的核心框架基本完备。
下一篇「本地数据库存储与读取」将聚焦于画作元数据管理:使用关系型数据库 @ohos.data.relationalStore 或首选项 @ohos.data.preferences 保存缩略图、名称、创建时间等信息,实现画作列表页面,让用户能浏览、删除和管理自己的创作。这将使 APP 从单次会话工具升级为拥有持久库的完整画板应用。