摘要 :本文深入探讨 HarmonyOS NEXT (API 24) 中 ArkTS 布局体系下,如何利用
Button组件结合translate、animateTo实现优雅的抖动效果。从原理剖析、代码实现到应用场景,全面覆盖抖动按钮在表单验证中的实战应用。
项目演示
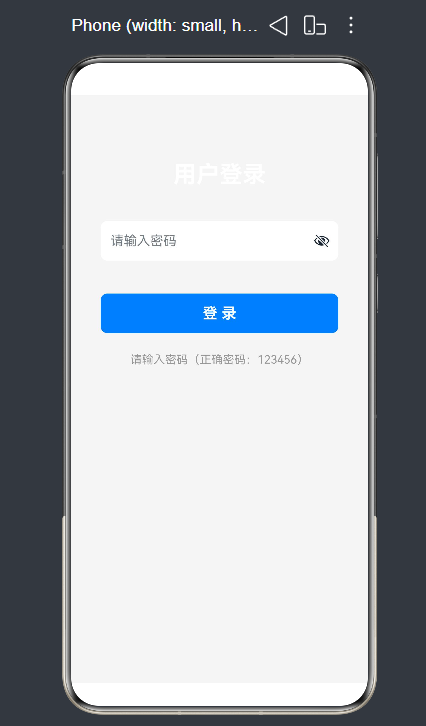
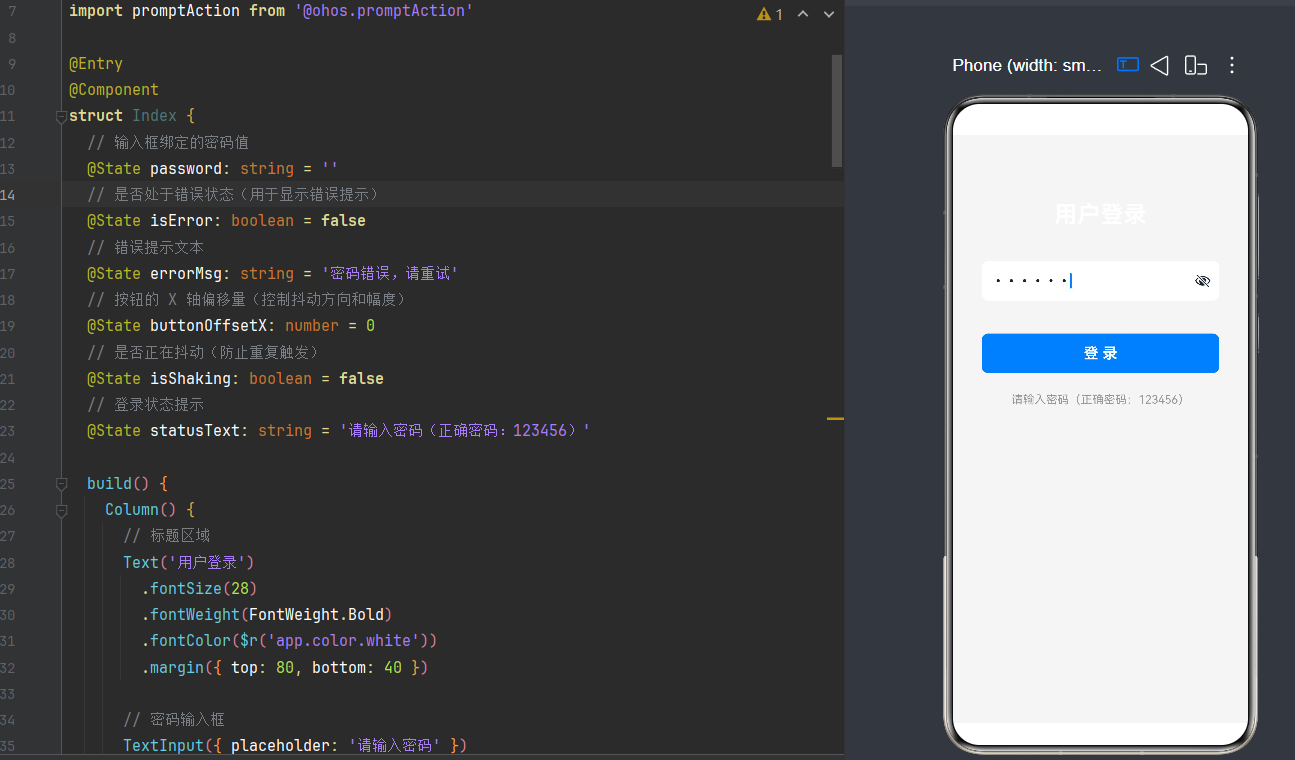
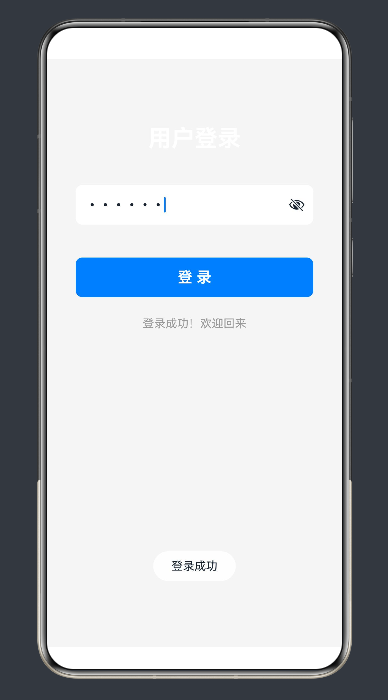
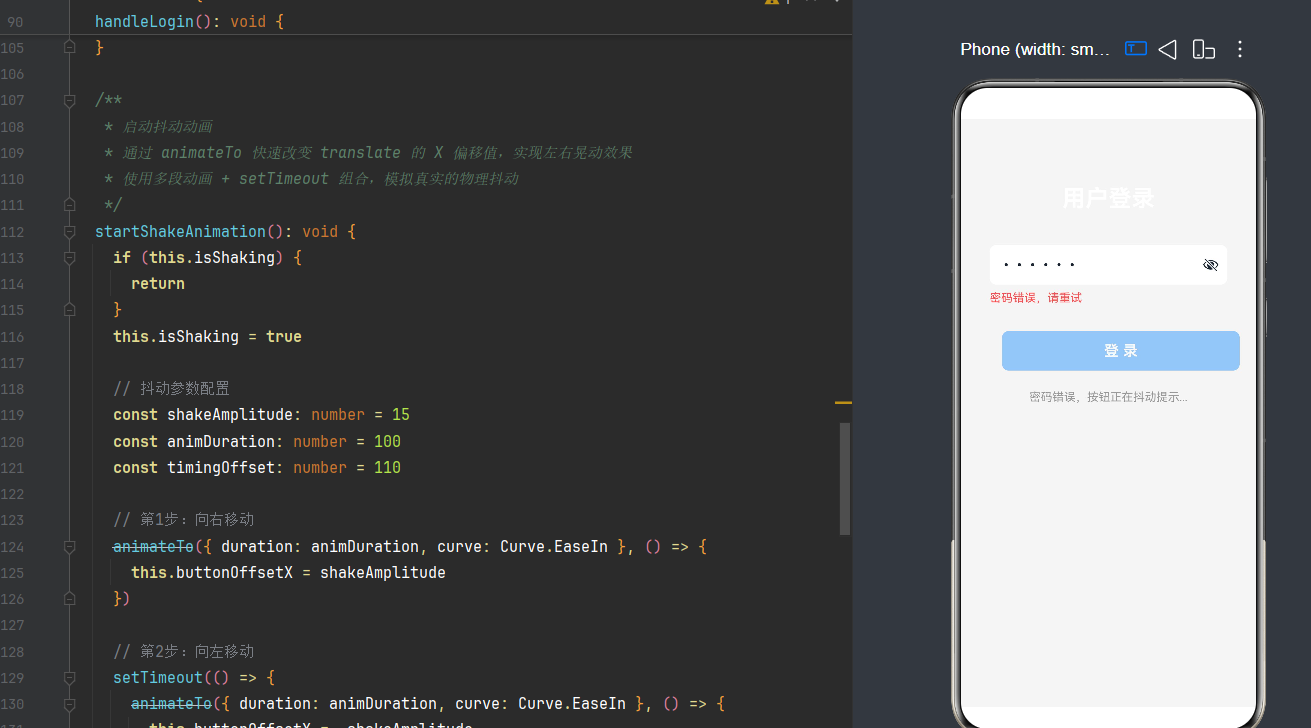
目录
- 引言:为什么需要抖动效果
- [ArkTS 布局体系概述](#ArkTS 布局体系概述)
- [核心 API 深度解析(API 24)](#核心 API 深度解析(API 24))
- 抖动按钮实现原理
- 完整代码实现
- 代码逐行解析
- 进阶技巧与优化方案
- 多样化抖动效果
- 实际应用场景
- 常见问题解答
- 性能优化指南
- 总结与展望
1. 引言:为什么需要抖动效果
1.1 现代移动应用的交互设计哲学
在当今移动应用生态中,用户体验(User Experience, UX)已成为衡量应用质量的核心指标之一。好的交互设计不仅仅是让功能可用,更是要让用户直觉上感到愉悦 、操作上感到顺畅。这其中,动效(Motion)扮演着至关重要的角色。
当用户在应用中执行操作后,界面的动效反馈能够传达出丰富的语义信息:操作是否成功、是否需要修正、系统当前的状态如何等等。在这些动效反馈中,抖动效果(Shake Animation)是一个经典且高效的错误提示方式。
1.2 抖动效果的心理学原理
从认知心理学的角度来看,抖动效果之所以有效,是因为它契合了人类视觉系统的几个特性:
第一,运动显著性。人类视觉系统对运动物体的关注度远高于静态物体。当按钮突然开始左右晃动时,它会立刻抓住用户的注意力,使用户意识到"这里有问题"。
第二,不对称运动暗示异常。在自然界中,稳定的物体往往是静止或匀速直线运动的。而反复切换方向的抖动运动,会让我们的大脑本能地感知到"不寻常"或"有问题"。
第三,抖动强度传达紧急程度。通过调整抖动的幅度、频率、持续时间,我们可以传达不同程度的错误严重性。轻微的抖动暗示"需要注意",剧烈的抖动则暗示"严重错误"。
1.3 经典应用案例
抖动效果在众多知名应用中都有使用:
- 微信支付:支付密码输入错误时,输入框会短暂抖动
- 支付宝:同样在密码错误时使用抖动反馈
- iOS 原生键盘:输入密码错误时,整个密码框区域会抖动
- GitHub 登录页:登录失败时按钮会有轻微的抖动效果
这些应用都证明了:在表单验证中,抖动是一种经过时间检验的有效反馈机制。
1.4 HarmonyOS NEXT 的独特优势
HarmonyOS NEXT (API 24) 作为华为新一代全场景操作系统,在动效设计方面提供了独特的能力:
- 声明式动画 :通过
animateTo等 API,开发者只需声明动画参数,系统负责底层实现 - 物理动画曲线:内置多种缓动曲线,让动画更加自然
- 高性能渲染:ArkUI 框架对动画做了深度优化,即使在低端设备上也能流畅运行
- 跨设备一致体验:同一套动效代码可以在手机、平板、折叠屏等设备上一致运行
接下来,让我们深入了解 ArkTS 的布局体系和实现抖动所需的核心 API。
2. ArkTS 布局体系概述
2.1 声明式 UI 的革命
ArkTS 是 HarmonyOS 专为全场景应用开发设计的编程语言,它的核心特点是声明式 UI 开发范式。与传统的命令式 UI 开发(如 Android 的 View 操作、iOS 的 UIKit)不同,声明式开发让开发者专注于描述"界面应该是什么样",而不是"如何一步步创建界面"。
typescript
// 命令式开发(传统方式)
let button = new Button();
button.setText("登录");
button.setLayoutParams(params);
button.setBackgroundColor(Color.BLUE);
container.addView(button);

// 声明式开发(ArkTS 方式)
Button('登录')
  .width('80%')
  .height(48)
  .backgroundColor(Color.Blue)
这种范式的转变带来了几个显著好处:
- 代码更简洁:减少了大量模板化的 UI 操作代码
- 状态驱动更新:UI 自动响应状态变化,无需手动刷新
- 天然支持动画:状态变化可以直接驱动动画,开发体验流畅
2.2 布局容器类型
ArkUI 提供了丰富的布局容器,每种容器都有其特定的布局规则:
Column(纵向布局)
Column 是最常用的布局容器之一,它的子元素从上到下依次排列。类似于 Android 的 LinearLayout(垂直方向)或 iOS 的 UIStackView(axis = vertical)。
typescript
Column() {
  Text('标题')
  Text('内容')
  Button('确认')
}
Column 的关键属性包括:
alignItems:设置子元素在交叉轴(水平方向)的对齐方式justifyContent:设置子元素在主轴(垂直方向)的排列方式space:设置子元素之间的间距
Row(横向布局)
Row 与 Column 类似,但子元素从左到右排列。
typescript
Row() {
  Text('左侧')
  Text('中间')
  Text('右侧')
}
Stack(层叠布局)
Stack 允许子元素层叠放置,后面的元素覆盖前面的元素。适用于需要叠加效果的场景,如头像加角标。
typescript
Stack() {
  Image($r('app.media.avatar'))
  Text('在线')
    .position({ x: 50, y: 10 })
}
Flex(弹性布局)
Flex 是功能最强大的布局容器,它实现了 CSS Flexbox 的大部分特性。通过灵活的属性组合,可以实现复杂的响应式布局。
typescript
Flex({ direction: FlexDirection.Row }) {
  Text('元素1').flexGrow(1)
  Text('元素2').flexGrow(2)
  Text('元素3').flexGrow(1)
}
RelativeContainer(相对布局)
RelativeContainer 允许子元素相对于容器或其他元素定位。适用于需要精确控制位置的场景。
typescript
RelativeContainer() {
  Text('标题')
    .alignRules({ center: { anchor: '__container__', align: VerticalAlign.Top } })
  Button('确认')
    .alignRules({
      bottom: { anchor: '__container__', align: VerticalAlign.Bottom },
      middle: { anchor: '__container__', align: HorizontalAlign.Center }
    })
}
2.3 组件属性与状态绑定
ArkUI 的组件采用链式调用方式设置属性。每个组件都支持一系列属性方法,这些方法可以链式组合:
typescript
Button('登录')
  .width('80%')           // 设置宽度
  .height(48)             // 设置高度
  .fontSize(18)           // 设置字体大小
  .fontWeight(FontWeight.Bold)  // 设置字重
  .fontColor(Color.White)       // 设置字体颜色
  .backgroundColor(Color.Blue)  // 设置背景色
  .borderRadius(8)              // 设置圆角
.margin({ top: 32 }) // 设置外边距其中,最关键的是状态绑定 。通过 @State 装饰器声明的变量可以绑定到组件属性上,当状态变化时,组件自动更新:
typescript
@State buttonOffsetX: number = 0

Button('登录')
.translate({ x: this.buttonOffsetX, y: 0 })在这个例子中,buttonOffsetX 的变化会直接驱动按钮的 translate 属性更新,这正是我们实现抖动动画的基础。
3. 核心 API 深度解析(API 24)
3.1 Button 组件
Button 是 ArkUI 中最基础也最重要的交互组件之一。在 API 24 中,Button 组件有了诸多增强。
基本用法
typescript
// 文本按钮
Button('登录')

// 自定义子内容按钮
Button() {
  Row() {
    Image($r('app.media.icon'))
    Text('提交')
  }
}
关键属性解析
尺寸属性:
typescript
Button('登录')
  .width(200)           // 固定宽度(vp 单位)
  .height(48)           // 固定高度
  .width('80%')         // 百分比宽度
.constraintSize({ minWidth: 100, maxWidth: 300 }) // 尺寸约束视觉属性:
typescript
Button('登录')
  .fontSize(18)                    // 字体大小
  .fontColor(Color.White)          // 字体颜色
  .backgroundColor(Color.Blue)     // 背景色
  .borderRadius(24)                // 圆角(胶囊按钮)
  .borderWidth(2)                  // 边框宽度
.borderColor(Color.DarkBlue) // 边框颜色交互状态:
typescript
Button('登录')
  .enabled(this.isButtonEnabled)   // 是否可点击
  .stateEffect(true)               // 开启状态效果(按压高亮等)
  .clickEffect(true)               // 开启点击涟漪效果
3.2 translate 属性
translate 是实现抖动的核心属性之一。它可以在不改变组件布局位置的情况下,改变组件的渲染位置。
属性定义
typescript
.translate({ x: number, y: number, z: number })x:X 轴方向的偏移量(正值向右,负值向左)y:Y 轴方向的偏移量(正值向下,负值向上)z:Z 轴方向的偏移量(用于 3D 效果)
与其他位置属性的区别
ArkUI 中有多种改变组件位置的方式,理解它们的区别很重要:
| 属性 | 是否影响布局 | 是否影响点击区域 | 适用场景 |
|---|---|---|---|
translate |
否 | 否 | 动画位移、视觉微调 |
position |
否 | 是 | 绝对定位 |
offset |
否 | 否 | 视觉微调 |
margin |
是 | 是 | 外边距布局 |
translate 的独特之处在于它只改变渲染位置,不影响布局计算和点击区域。这使得它非常适合用于动画效果。
实际效果示例
typescript
@State offsetX: number = 0

Button('登录')
  .translate({ x: offsetX, y: 0 })
  .onClick(() => {
    // 每次点击向右偏移 10vp
    offsetX += 10
  })
3.3 animateTo 动画 API
animateTo 是 ArkUI 中实现隐式动画的核心 API。它可以让状态变化产生平滑的过渡效果。
API 签名
typescript
animateTo(
  options: AnimateParam,
  handler: () => void
): void参数说明:
options 是动画参数对象,包含以下属性:
typescript
interface AnimateParam {
  duration?: number          // 动画时长(毫秒),默认 1000
  tempo?: number             // 动画速度倍率,默认 1
  curve?: Curve | string     // 缓动曲线
  delay?: number             // 延迟时间(毫秒),默认 0
  iterations?: number        // 重复次数,默认 1(0 表示无限)
  playMode?: PlayMode        // 播放模式
  onFinish?: () => void      // 动画完成回调
}
handler 是一个函数,包含触发动画的状态修改操作。
基本用法
typescript
@State offsetX: number = 0

// 让 offsetX 的变化产生动画
animateTo({ duration: 300, curve: Curve.EaseInOut }, () => {
  this.offsetX = 100  // 这个状态变化会被动画化
})
缓动曲线详解
ArkUI 内置了多种缓动曲线,每种曲线都有不同的动画感觉:
typescript
// 线性曲线 - 匀速运动
animateTo({ curve: Curve.Linear }, () => { ... })

// EaseIn - 慢速开始,快速结束(加速效果)
animateTo({ curve: Curve.EaseIn }, () => { ... })

// EaseOut - 快速开始,慢速结束(减速效果)
animateTo({ curve: Curve.EaseOut }, () => { ... })

// EaseInOut - 慢速开始和结束,中间快速(标准效果)
animateTo({ curve: Curve.EaseInOut }, () => { ... })

// FastOutSlowIn - Material Design 标准曲线
animateTo({ curve: Curve.FastOutSlowIn }, () => { ... })

// ExtremeDeceleration - 极缓减速(用于返回原位)
animateTo({ curve: Curve.ExtremeDeceleration }, () => { ... })
重复播放模式
typescript
// 从起始到结束后,反向播放回来
animateTo({
  iterations: 2,
  playMode: PlayMode.Reverse
}, () => { ... })

// 循环播放(不反向)
animateTo({
  iterations: 3,
  playMode: PlayMode.Normal
}, () => { ... })
3.4 状态管理装饰器
@State
@State 是最基础的状态装饰器,用于声明组件内部的响应式状态。当 @State 变量变化时,组件会自动重新渲染。
typescript
@Component
struct MyComponent {
  @State count: number = 0

  build() {
    Column() {
      Text(`点击次数: ${this.count}`)
      Button('点击我')
        .onClick(() => {
          this.count++  // 触发重新渲染
        })
    }
  }
}
@Prop
@Prop 用于从父组件向子组件传递单向数据流。父组件变化时,子组件会更新,但子组件不能直接修改 @Prop 变量。
typescript
// 子组件
@Component
struct ChildComponent {
  @Prop message: string = ''
}

// 父组件
@Component
struct ParentComponent {
  @State parentMessage: string = 'Hello'

  build() {
    ChildComponent({ message: this.parentMessage })
  }
}
@Link
@Link 用于跨组件双向数据绑定。子组件可以直接修改 @Link 变量的源头。
typescript
// 子组件
@Component
struct ChildComponent {
  @Link count: number

  build() {
    Button(`增加: ${this.count}`)
      .onClick(() => {
        this.count++  // 会修改父组件的 count
      })
  }
}

// 父组件
@Component
struct ParentComponent {
  @State parentCount: number = 0

  build() {
    ChildComponent({ count: $parentCount })
  }
}
3.5 promptAction 提示 API
promptAction 提供了轻量级的用户提示功能,包括 Toast 和 Dialog。
typescript
import promptAction from '@ohos.promptAction'

// 显示短时长 Toast
promptAction.showToast({
  message: '操作成功',
  duration: 2000,    // 显示时长(毫秒)
  bottom: 50         // 距底部距离
})

// 显示加载对话框
promptAction.showLoading({
  message: '加载中...',
  duration: 3000
})

// 隐藏加载对话框
promptAction.hideLoading()
4. 抖动按钮实现原理
4.1 核心思路
抖动效果的本质是让组件在短时间内快速来回移动。我们可以将其分解为以下几个关键步骤:
- 改变 translate 属性:通过修改 X 轴偏移量来改变组件位置
- 平滑过渡:使用 animateTo 让位移具有动画效果,而不是瞬间跳转
- 多段组合:将多段动画按时间顺序排列,形成完整的抖动序列
- 衰减效果:让每一次的位移幅度逐渐减小,模拟物理世界的阻尼效果
4.2 动画时序图
时间轴 (ms):  0    100   200   300   400   500   600   700   800
             |     |     |     |     |     |     |     |     |
translate:   0 → 15 → -15 → 12 → -12 → 8  → -8  → 0  → 结束
             |     |     |     |     |     |     |     |
             ↓     ↓     ↓     ↓     ↓     ↓     ↓     ↓
动画段:    第1段  第2段  第3段  第4段  第5段  第6段  第7段  重置
             ↑                                                        ↑
          开始抖动                                                  回到原位
4.3 为什么用 setTimeout 而不是嵌套回调
在 HarmonyOS NEXT 中,animateTo 只接受两个参数:配置对象和执行函数。早期版本可能支持第三个回调参数,但现在已经不推荐使用。
使用 setTimeout 有以下优势:
代码可读性好:每一步动画都是独立的代码块,一目了然。
typescript
// 使用 setTimeout
animateTo({ duration: 100 }, () => { this.offsetX = 15 })
setTimeout(() => {
  animateTo({ duration: 100 }, () => { this.offsetX = -15 })
}, 110)避免回调地狱:如果使用嵌套回调,代码会向右缩进越来越深,难以阅读和维护。
typescript
// 如果支持回调(假设),会变成这样:
animateTo({ duration: 100 }, () => {
  this.offsetX = 15
}, () => {
  animateTo({ duration: 100 }, () => {
    this.offsetX = -15
  }, () => {
    animateTo({ duration: 100 }, () => {
      this.offsetX = 12
    }, () => {
      // ... 继续嵌套
    })
  })
})
灵活控制时序 :setTimeout 可以精确控制每段动画的开始时间,方便调试和调整。
4.4 衰减算法的数学原理
为了让抖动看起来自然,我们需要让每一段的位移幅度逐渐减小。这里使用一个简单的衰减系数:
第 n 段幅度 = 初始幅度 × 衰减系数^(n-1)但在实际应用中,过于数学化的衰减可能显得生硬。更好的方式是使用经验值:
typescript
const amplitudes: number[] = [15, 15, 12, 12, 8, 8, 0]这样的序列可以让抖动先剧烈后缓和,更接近真实物体的运动。
4.5 防抖与锁机制
在动画执行期间,如果用户再次点击按钮,可能会导致动画混乱。因此需要一个锁机制:
typescript
@State isShaking: boolean = false

startShakeAnimation(): void {
  if (this.isShaking) {  // 检查锁
    return
  }
  this.isShaking = true  // 上锁

  // ... 执行动画

  setTimeout(() => {
    this.isShaking = false  // 动画结束后解锁
  }, totalDuration)
}
同时,可以将锁状态绑定到按钮的 enabled 属性上,让按钮在抖动期间不可点击:
typescript
Button('登录')
  .enabled(!this.isShaking)
  .onClick(() => {
    this.startShakeAnimation()
  })
5. 完整代码实现
5.1 项目结构
entry/src/main/
├── ets/
│   ├── pages/
│   │   └── Index.ets          # 主页面
│   └── entryability/
│       └── EntryAbility.ets   # 入口组件
└── resources/
    ├── base/
    │   ├── element/
    │   │   ├── color.json     # 颜色资源
    │   │   └── string.json    # 字符串资源
    │   └── profile/
    │       └── main_pages.json
    └── dark/
        └── element/
            └── color.json     # 深色模式颜色
5.2 颜色资源配置
浅色模式(resources/base/element/color.json):
json
{
  "color": [
    { "name": "start_window_background", "value": "#FFFFFF" },
    { "name": "white", "value": "#FFFFFF" },
    { "name": "page_background", "value": "#F5F5F5" },
    { "name": "input_background", "value": "#FFFFFF" },
    { "name": "primary_blue", "value": "#007DFF" },
    { "name": "error_red", "value": "#FF4D4F" },
    { "name": "gray", "value": "#999999" }
  ]
}深色模式(resources/dark/element/color.json):
json
{
  "color": [
    { "name": "start_window_background", "value": "#000000" },
    { "name": "white", "value": "#FFFFFF" },
    { "name": "page_background", "value": "#1A1A1A" },
    { "name": "input_background", "value": "#2C2C2C" },
    { "name": "primary_blue", "value": "#007DFF" },
    { "name": "error_red", "value": "#FF4D4F" },
    { "name": "gray", "value": "#888888" }
  ]
}
5.3 完整页面代码
typescript
// ============================================================
// 鸿蒙原生 ArkTS 布局方式之 Button + Shake 抖动按钮
// 场景:登录表单 - 密码输入错误时按钮抖动提示
// API 版本:HarmonyOS NEXT API 24
// ============================================================

import promptAction from '@ohos.promptAction'

@Entry
@Component
struct Index {
  // ========== 状态变量声明 ==========

  // 输入框绑定的密码值
  @State password: string = ''

  // 是否处于错误状态(用于显示错误提示文本)
  @State isError: boolean = false

  // 错误提示文案
  @State errorMsg: string = '密码错误,请重试'

  // 按钮的 X 轴偏移量 - 这是抖动效果的核心驱动变量
  @State buttonOffsetX: number = 0

  // 是否正在抖动 - 防止动画重复触发的锁
  @State isShaking: boolean = false

  // 底部状态提示文本
  @State statusText: string = '请输入密码(正确密码:123456)'

  // ========== UI 构建 ==========

  build() {
    Column() {
      // --- 标题区域 ---
      Text('用户登录')
        .fontSize(28)                    // 大号标题
        .fontWeight(FontWeight.Bold)    // 加粗
        .fontColor($r('app.color.white'))
        .margin({ top: 80, bottom: 40 })

      // --- 密码输入框 ---
      TextInput({ placeholder: '请输入密码' })
        .type(InputType.Password)       // 密码类型,隐藏输入内容
        .width('80%')
        .height(48)
        .fontSize(16)
        .backgroundColor($r('app.color.input_background'))
        .borderRadius(8)
        .padding({ left: 12, right: 12 })
        .onChange((value: string) => {
          this.password = value
          // 用户开始输入时,清除错误状态
          if (this.isError) {
            this.isError = false
          }
        })

      // --- 错误提示文本(条件渲染) ---
      Text(this.isError ? this.errorMsg : '')
        .fontSize(14)
        .fontColor($r('app.color.error_red'))
        .margin({ top: 8, left: '10%', right: '10%' })
        .width('80%')
        .textAlign(TextAlign.Start)

      // --- 登录按钮(抖动效果的核心) ---
      Button('登 录')
        .width('80%')
        .height(48)
        .fontSize(18)
        .fontWeight(FontWeight.Bold)
        .fontColor($r('app.color.white'))
        .backgroundColor($r('app.color.primary_blue'))
        .borderRadius(8)
        .margin({ top: 32 })
        // 关键:绑定 translate 属性到状态变量
        .translate({ x: this.buttonOffsetX, y: 0 })
        // 关键:抖动期间禁用按钮,防止重复触发
        .enabled(!this.isShaking)
        .onClick(() => {
          this.handleLogin()
        })

      // --- 底部状态提示 ---
      Text(this.statusText)
        .fontSize(14)
        .fontColor($r('app.color.gray'))
        .margin({ top: 24 })
    }
    .width('100%')
    .height('100%')
    .backgroundColor($r('app.color.page_background'))
  }

  // ========== 业务逻辑方法 ==========

  /**
   * 处理登录逻辑
   * 验证密码正确性,根据结果触发不同反馈
   */
  handleLogin(): void {
    const correctPassword: string = '123456'

    if (this.password === correctPassword) {
      // 密码正确 - 成功反馈
      this.isError = false
      this.statusText = '登录成功!欢迎回来'
      promptAction.showToast({ message: '登录成功' })
    } else {
      // 密码错误 - 抖动反馈
      this.isError = true
      this.statusText = '密码错误,按钮正在抖动提示...'
      this.startShakeAnimation()
    }
  }

  /**
   * 启动抖动动画
   * 通过多段 animateTo + setTimeout 组合实现衰减式抖动效果
   */
  startShakeAnimation(): void {
    // 防止重复触发
    if (this.isShaking) {
      return
    }
    this.isShaking = true

    // ========== 动画参数配置 ==========
    const shakeAmplitude: number = 15     // 初始抖动幅度(vp)
    const animDuration: number = 100      // 单段动画时长(毫秒)
    const timingOffset: number = 110      // 每段动画的起始间隔(毫秒)

    // ========== 多段动画序列 ==========

    // 第 1 段:向右移动到最大幅度
    animateTo({ duration: animDuration, curve: Curve.EaseIn }, () => {
      this.buttonOffsetX = shakeAmplitude
    })

    // 第 2 段:向左移动到最大幅度
    setTimeout(() => {
      animateTo({ duration: animDuration, curve: Curve.EaseIn }, () => {
        this.buttonOffsetX = -shakeAmplitude
      })
    }, timingOffset)

    // 第 3 段:向右移动(幅度减小到 80%)
    setTimeout(() => {
      animateTo({ duration: animDuration, curve: Curve.EaseIn }, () => {
        this.buttonOffsetX = shakeAmplitude * 0.8
      })
    }, timingOffset * 2)

    // 第 4 段:向左移动(幅度减小到 80%)
    setTimeout(() => {
      animateTo({ duration: animDuration, curve: Curve.EaseIn }, () => {
        this.buttonOffsetX = -shakeAmplitude * 0.8
      })
    }, timingOffset * 3)

    // 第 5 段:向右移动(幅度减小到 50%)
    setTimeout(() => {
      animateTo({ duration: animDuration, curve: Curve.EaseIn }, () => {
        this.buttonOffsetX = shakeAmplitude * 0.5
      })
    }, timingOffset * 4)

    // 第 6 段:向左移动(幅度减小到 50%)
    setTimeout(() => {
      animateTo({ duration: animDuration, curve: Curve.EaseIn }, () => {
        this.buttonOffsetX = -shakeAmplitude * 0.5
      })
    }, timingOffset * 5)

    // 第 7 段:回到原点(使用 EaseOut 实现回弹效果)
    setTimeout(() => {
      animateTo({ duration: animDuration, curve: Curve.EaseOut }, () => {
        this.buttonOffsetX = 0
      })
    }, timingOffset * 6)

    // ========== 动画结束清理 ==========
    setTimeout(() => {
      this.isShaking = false  // 解锁,允许再次点击
    }, timingOffset * 7)
  }
}
6. 代码逐行解析
6.1 导入与装饰器
typescript
import promptAction from '@ohos.promptAction'这行代码导入了 promptAction 模块,它是 HarmonyOS 提供的用户交互提示 API。在我们的示例中,用它来显示登录成功的 Toast 提示。
typescript
@Entry
@Component
struct Index {
@Entry 装饰器标记这个组件为页面入口点。每个 HarmonyOS 应用至少有一个入口组件,系统启动时会加载它。
@Component 装饰器标记这是一个 UI 组件。在 ArkTS 中,所有 UI 组件都需要这个装饰器。
struct 关键字用于定义组件结构。与 class 不同,struct 是值类型,具有更高的性能,适合作为 UI 组件。
6.2 状态变量详解
typescript
@State password: string = ''@State 声明这是一个响应式状态。password 存储用户输入的密码。当它变化时,组件会自动重新渲染。初始值为空字符串。
typescript
@State isError: boolean = falseisError 标记当前是否处于错误状态。我们用它来控制错误提示文本的显示与隐藏。
typescript
@State buttonOffsetX: number = 0这是实现抖动的核心变量 。buttonOffsetX 存储按钮的 X 轴偏移量。它的变化会通过 translate 属性直接反映到按钮的视觉位置上。
- 初始值
0:按钮在正常位置 - 正值:按钮向右偏移
- 负值:按钮向左偏移
typescript
@State isShaking: boolean = falseisShaking 是一个锁标记,用于防止动画重复触发。如果用户在抖动过程中再次点击按钮,这个锁会阻止新动画启动,避免动画叠加导致的混乱。
6.3 UI 构建部分
标题文本
typescript
Text('用户登录')
  .fontSize(28)
  .fontWeight(FontWeight.Bold)
  .fontColor($r('app.color.white'))
  .margin({ top: 80, bottom: 40 })
这里使用 $r('app.color.white') 引用资源文件中定义的颜色,而不是直接使用颜色值。这种做法有几个好处:
- 支持主题切换:系统自动根据深色/浅色模式选择对应资源
- 易于维护:修改颜色只需改资源文件,不用搜索整个代码库
- 符合规范:华为设计规范要求颜色等常量使用资源引用
密码输入框
typescript
TextInput({ placeholder: '请输入密码' })
  .type(InputType.Password)
  .onChange((value: string) => {
    this.password = value
    if (this.isError) {
      this.isError = false
    }
  })
type(InputType.Password) 让输入框以密码模式显示,内容会被隐藏为点号。
onChange 回调在输入内容变化时触发。这里做了两件事:
- 更新
password状态 - 如果之前有错误提示,用户开始输入时清除错误状态(提升用户体验)
错误提示的条件渲染
typescript
Text(this.isError ? this.errorMsg : '')这里使用三元表达式实现条件渲染。当 isError 为 false 时,显示空字符串,Text 组件虽然存在但不可见。
更优的做法是使用 if 条件组件,但在这个简单场景下三元表达式已经足够。
按钮的关键配置
typescript
Button('登 录')
  .translate({ x: this.buttonOffsetX, y: 0 })
  .enabled(!this.isShaking)
这三行是整个抖动效果的关键:
translate:将buttonOffsetX状态绑定到按钮的 X 轴偏移。状态变化自动驱动视觉变化。enabled(!this.isShaking):抖动期间禁用按钮,配合isShaking锁使用。
6.4 抖动动画实现
动画参数
typescript
const shakeAmplitude: number = 15     // 抖动幅度
const animDuration: number = 100      // 单段时长
const timingOffset: number = 110      // 起始间隔
参数选择的理由:
- 15vp 幅度:足够明显但不会太夸张。在大多数设备上,15vp 约等于 6-7mm 的视觉位移。
- 100ms 时长:足够快以产生"抖动"感,又足够慢让动画流畅。人眼在 60fps 下能识别约 16ms 的单帧。
- 110ms 间隔:略大于动画时长(100ms),确保上一段动画开始后下一段才开始,避免叠加。
第一段动画
typescript
animateTo({ duration: animDuration, curve: Curve.EaseIn }, () => {
  this.buttonOffsetX = shakeAmplitude
})
Curve.EaseIn 让动画从慢速开始,然后加速。这对于抖动来说是合适的,因为实际物体被推动时也是从慢速开始加速。
注意:animateTo 是异步的,它不会等待动画完成就会返回。这就是为什么我们需要用 setTimeout 来安排后续动画。
后续动画的时序控制
typescript
setTimeout(() => {
  animateTo({ duration: animDuration, curve: Curve.EaseIn }, () => {
    this.buttonOffsetX = -shakeAmplitude
  })
}, timingOffset)
setTimeout 的第二个参数是延迟时间。由于第一段动画在时间点 0 开始,在 100ms 时结束,我们让第二段在 110ms 时开始,形成平滑衔接。
衰减序列
typescript
// 前两段:完整幅度
this.buttonOffsetX = 15     // 向右
this.buttonOffsetX = -15    // 向左

// 中间两段:80% 幅度
this.buttonOffsetX = 12     // 向右 (15 × 0.8)
this.buttonOffsetX = -12    // 向左

// 后两段:50% 幅度
this.buttonOffsetX = 7.5    // 向右 (15 × 0.5)
this.buttonOffsetX = -7.5   // 向左
这样的幅度衰减模拟了真实物理世界中的阻尼效果------每次往返都损失一些能量,最终停止。
最后的回弹
typescript
animateTo({ duration: animDuration, curve: Curve.EaseOut }, () => {
  this.buttonOffsetX = 0
})
回到原点时使用 Curve.EaseOut(快速开始,慢速结束),这让按钮有一种"稳稳落下"的感觉,比直接归零更自然。
清理阶段
typescript
setTimeout(() => {
  this.isShaking = false
}, timingOffset * 7)所有动画完成后重置锁状态。计算方式:timingOffset * 7 = 110ms × 7 = 770ms,这略大于完整抖动周期,确保动画完全结束。
7. 进阶技巧与优化方案
7.1 抽取可复用的抖动工具
如果项目中有多个地方需要抖动效果,可以抽取一个通用的工具类:
typescript
// utils/ShakeHelper.ets

export class ShakeHelper {
  /**
   * 执行抖动动画
   * @param state 需要驱动的偏移量状态变量(需通过引用传递)
   * @param isShaking 锁状态(需通过引用传递)
   * @param amplitude 抖动幅度,默认 15
   * @param duration 单段动画时长,默认 100
   * @param interval 动画起始间隔,默认 110
   */
  static doShake(
    state: { value: number },
    isShaking: { value: boolean },
    amplitude: number = 15,
    duration: number = 100,
    interval: number = 110
  ): void {
    if (isShaking.value) {
      return
    }
    isShaking.value = true

    const offsets: number[] = [
      amplitude, -amplitude,
      amplitude * 0.8, -amplitude * 0.8,
      amplitude * 0.5, -amplitude * 0.5,
      0
    ]
    const curves: Curve[] = [
      Curve.EaseIn, Curve.EaseIn,
      Curve.EaseIn, Curve.EaseIn,
      Curve.EaseIn, Curve.EaseIn,
      Curve.EaseOut
    ]

    for (let i = 0; i < offsets.length; i++) {
      setTimeout(() => {
        animateTo({ duration: duration, curve: curves[i] }, () => {
          state.value = offsets[i]
        })
      }, interval * i)
    }

    setTimeout(() => {
      isShaking.value = false
    }, interval * offsets.length)
  }
}
使用示例:
typescript
import { ShakeHelper } from '../utils/ShakeHelper'

@Component
struct ExamplePage {
  @State buttonOffsetX: number = 0
  @State isShaking: boolean = false

  triggerShake(): void {
    ShakeHelper.doShake(
      { value: this.buttonOffsetX },
      { value: this.isShaking },
      15,    // 幅度
      100,   // 时长
      110    // 间隔
    )
  }
}
7.2 自定义抖动曲线
除了使用 ArkUI 内置的 Curve 枚举,还可以使用 Curve 字符串格式定义贝塞尔曲线:
typescript
// 自定义贝塞尔曲线
animateTo({
  duration: 300,
  curve: 'cubic-bezier(0.68, -0.55, 0.265, 1.55)'  // back ease
}, () => {
  this.offsetX = 15
})

// 弹性效果
animateTo({
  duration: 400,
  curve: 'cubic-bezier(0.175, 0.885, 0.32, 1.275)'  // back
}, () => {
  this.offsetX = -15
})
7.3 抖动时改变按钮颜色
为了增强错误反馈效果,可以在抖动的同时改变按钮颜色:
typescript
@State buttonOffsetX: number = 0
@State buttonColor: string = '#007DFF'

startShakeAnimation(): void {
  this.isShaking = true
  this.buttonColor = '#FF4D4F'  // 变红表示错误

  // ... 抖动动画

  setTimeout(() => {
    this.isShaking = false
    this.buttonColor = '#007DFF'  // 恢复原色
  }, totalDuration)
}

// UI 中
Button('登录')
  .backgroundColor(this.buttonColor)
  .translate({ x: this.buttonOffsetX, y: 0 })
7.4 添加震动反馈
在设备支持的情况下,可以同时触发震动反馈:
typescript
import vibrator from '@ohos.vibrator'

startShakeAnimation(): void {
  this.isShaking = true

  // 触发短震动
  try {
    vibrator.vibrate(80)  // 震动 80ms
  } catch (e) {
    // 设备可能不支持震动,忽略错误
  }

  // ... 抖动动画
}
7.5 长输入框的抖动
对于较长的输入框,可能需要更大的抖动幅度才能产生明显效果:
typescript
// 根据组件宽度动态计算幅度
@State componentWidth: number = 0

Button('登录')
  .onAreaChange((_old, newValue) => {
    this.componentWidth = newValue.width as number
  })

// 计算合适的抖动幅度
const amplitude: number = Math.min(20, this.componentWidth * 0.05)
8. 多样化抖动效果
8.1 水平抖动(当前方案)
水平抖动是最经典的错误提示方式,模拟左右摇摆:
状态变化: 0 → 15 → -15 → 12 → -12 → 8 → -8 → 0
方向:     静止 → 右 → 左 → 右 → 左 → 右 → 左 → 静止
8.2 垂直抖动
垂直抖动在某些场景下也很有效,模拟上下晃动:
typescript
@State buttonOffsetY: number = 0

animateTo({ duration: 100 }, () => {
  this.buttonOffsetY = -10  // 向上
})
setTimeout(() => {
  animateTo({ duration: 100 }, () => {
    this.buttonOffsetY = 10  // 向下
  })
}, 110)

// UI 中使用
Button('登录')
  .translate({ x: 0, y: this.buttonOffsetY })
8.3 旋转抖动
旋转抖动增加了趣味性,适用于游戏或娱乐类应用:
typescript
@State buttonRotation: number = 0

animateTo({ duration: 80 }, () => {
  this.buttonRotation = -8   // 逆时针旋转
})
setTimeout(() => {
  animateTo({ duration: 80 }, () => {
    this.buttonRotation = 8   // 顺时针旋转
  })
}, 90)

// UI 中使用
Button('登录')
  .rotate({ angle: this.buttonRotation })
8.4 复合抖动
可以组合多种效果,产生更丰富的动画:
typescript
@State offsetX: number = 0
@State scale: number = 1.0

// 先放大缩小,再抖动
animateTo({ duration: 150 }, () => {
  this.scale = 1.15
})
setTimeout(() => {
  animateTo({ duration: 150 }, () => {
    this.scale = 1.0
  })
}, 160)

// 然后开始水平抖动
setTimeout(() => {
  animateTo({ duration: 100 }, () => {
    this.offsetX = 15
  })
}, 320)

// UI 中同时应用
Button('登录')
  .scale({ x: this.scale, y: this.scale })
  .translate({ x: this.offsetX, y: 0 })
8.5 弹性抖动(Bounce)
弹性抖动让组件像弹簧一样弹回原位:
typescript
const offsets: number[] = [20, -15, 10, -5, 0]
const curves: Curve[] = [
  Curve.EaseOut,      // 快速开始,慢速结束
  Curve.FastOutSlowIn,
  Curve.FastOutSlowIn,
  Curve.FastOutSlowIn,
  Curve.ExtremeDeceleration  // 极缓减速
]

for (let i = 0; i < offsets.length; i++) {
  setTimeout(() => {
    animateTo({ duration: 150, curve: curves[i] }, () => {
      this.offsetX = offsets[i]
    })
  }, 160 * i)
}
9. 实际应用场景
9.1 用户登录
这是我们示例代码的场景。密码输入错误时,按钮抖动提示用户。
增强方案:
- 第一次错误:轻微抖动
- 第二次错误:中等抖动 + 红色边框
- 第三次错误:剧烈抖动 + 错误提示文字变化
typescript
@State errorCount: number = 0

handleLogin(): void {
  if (this.password !== '123456') {
    this.errorCount++

    let amplitude: number = 10
    let message: string = '密码错误,请重试'

    if (this.errorCount === 2) {
      amplitude = 15
      message = '密码再次错误,请确认'
    } else if (this.errorCount >= 3) {
      amplitude = 20
      message = '密码多次错误,请找回密码'
    }

    this.errorMsg = message
    this.startShakeAnimation(amplitude)
  }
}
9.2 表单验证
注册页面的各种验证场景:
typescript
validateForm(): boolean {
  if (this.username.length < 3) {
    this.usernameShakeOffsetX = 15
    this.usernameError = '用户名至少 3 个字符'
    this.startShakeOn('username')
    return false
  }

  if (!this.email.includes('@')) {
    this.emailShakeOffsetX = 15
    this.emailError = '邮箱格式不正确'
    this.startShakeOn('email')
    return false
  }

  return true
}
9.3 支付验证
支付密码输入:
typescript
// 支付场景可能需要更强烈的反馈
startPaymentShake(): void {
  const amplitude: number = 20  // 更大幅度
  const duration: number = 80   // 更快速度

  // 同时震动
  vibrator.vibrate(100)

  // 播放错误音效(如果支持)
  soundPool.play('error.mp3')

  // 执行抖动
  // ...
}
9.4 消息通知
收到新消息时,应用图标可以轻微抖动吸引注意:
typescript
@State appIconRotation: number = 0

onNewMessage(): void {
  // 触发小幅度旋转抖动
  for (let i = 0; i < 3; i++) {
    setTimeout(() => {
      animateTo({ duration: 100 }, () => {
        this.appIconRotation = (i % 2 === 0) ? -5 : 5
      })
    }, 110 * i)
  }

  setTimeout(() => {
    animateTo({ duration: 100 }, () => {
      this.appIconRotation = 0
    })
  }, 330)
}
9.5 游戏交互
游戏中按钮点击失败时的反馈:
typescript
@State buttonScale: number = 1.0
@State buttonOffsetX: number = 0

onFailedAction(): void {
  // 组合效果:先缩小,再抖动
  animateTo({ duration: 100 }, () => {
    this.buttonScale = 0.9
  })

  setTimeout(() => {
    animateTo({ duration: 100 }, () => {
      this.buttonScale = 1.0
      this.buttonOffsetX = 12
    })
  }, 110)

  setTimeout(() => {
    animateTo({ duration: 100 }, () => {
      this.buttonOffsetX = -12
    })
  }, 220)

  // ...
}
10. 常见问题解答
Q1: 为什么 animateTo 的回调不按预期执行?
问题:可能出现动画重叠、时序错乱等问题。
原因 :animateTo 不会阻塞线程,它是异步执行的。如果连续调用多个 animateTo,它们可能会同时开始,而不是按顺序执行。
解决方案 :使用 setTimeout 控制时序,或者使用 animateTo 的 onFinish 回调(API 24 支持)。
typescript
// 方案一:setTimeout(推荐,简单直观)
animateTo({ duration: 100 }, () => { this.offsetX = 15 })
setTimeout(() => {
  animateTo({ duration: 100 }, () => { this.offsetX = -15 })
}, 110)

// 方案二:onFinish 回调(API 24)
animateTo({
  duration: 100,
  onFinish: () => {
    animateTo({ duration: 100 }, () => { this.offsetX = -15 })
  }
}, () => {
  this.offsetX = 15
})
Q2: 抖动期间如何防止用户操作?
问题:抖动过程中用户继续点击,可能导致动画混乱。
解决方案:使用锁机制 + 禁用组件。
typescript
@State isShaking: boolean = false

// 方式一:禁用按钮
Button('登录')
  .enabled(!this.isShaking)

// 方式二:阻止事件
Button('登录')
  .onClick(() => {
    if (this.isShaking) {
      return  // 直接返回,不执行任何操作
    }
    this.handleLogin()
  })

// 方式三:同时禁用整个页面
@State pageInteractive: boolean = true

Column() {
  // ...
}
.enabled(this.pageInteractive)
Q3: 如何让抖动更自然?
问题:抖动看起来生硬、机械。
优化建议:
- 使用缓动曲线 :避免
Curve.Linear,使用Curve.EaseIn或Curve.FastOutSlowIn - 调整幅度序列:前几次幅度大,后几次幅度小,形成衰减
- 最后一段慢一些 :回到原点时用
Curve.EaseOut或Curve.ExtremeDeceleration - 适当增加阻尼:总时长不要太短,留出衰减时间
typescript
// 更好的参数配置
const amplitudes: number[] = [20, -18, 14, -10, 6, -3, 0]
const durations: number[] = [90, 90, 100, 100, 110, 110, 130]  // 逐渐放慢
Q4: translate 和 offset 有什么区别?
问题:两者都能改变位置,该用哪个?
区别:
| 特性 | translate | offset |
|---|---|---|
| 是否参与布局 | 否 | 否 |
| 是否影响层级 | 否 | 否 |
| 是否支持动画 | 是 | 是 |
| 计算方式 | 相对当前位置的偏移 | 相对正常位置的偏移 |
| 适用场景 | 动画、视觉微调 | 静态位置调整 |
建议 :动画场景统一使用 translate,静态布局调整使用 margin 或 position。
Q5: 在折叠屏上抖动效果如何适配?
问题:屏幕尺寸变化时,抖动效果是否需要调整?
解决方案:
typescript
@State screenWidth: number = 0
@State shakeAmplitude: number = 15

aboutToAppear(): void {
  // 监听屏幕尺寸变化
  window.getLastWindow().on('windowSizeChange', (size) => {
    this.screenWidth = size.width
    // 根据屏幕宽度调整抖动幅度
    this.shakeAmplitude = Math.min(25, Math.max(10, size.width * 0.04))
  })
}
Q6: 如何实现无限循环的抖动?
问题:需要组件持续抖动直到某个条件满足。
解决方案 :使用 animateTo 的 iterations 参数或定时器循环。
typescript
// 方式一:animateTo iterations(API 24)
animateTo({
  duration: 200,
  iterations: -1,  // -1 表示无限循环
  playMode: PlayMode.Reverse
}, () => {
  this.offsetX = 10
})

// 方式二:setInterval 手动循环(更灵活)
let loopCount: number = 0
const maxLoops: number = 10

const timer = setInterval(() => {
  animateTo({ duration: 100 }, () => {
    this.offsetX = (loopCount % 2 === 0) ? 10 : -10
  })
  loopCount++

  if (loopCount >= maxLoops) {
    clearInterval(timer)
    animateTo({ duration: 100 }, () => {
      this.offsetX = 0
    })
  }
}, 110)
11. 性能优化指南
11.1 避免频繁重渲染
每调用一次 animateTo 都会触发组件重渲染。虽然 ArkUI 框架已经做了优化,但仍然需要注意:
减少状态变量数量:将相关的状态合并,减少重渲染范围。
typescript
// 推荐:合并相关状态
interface ShakeState {
  offsetX: number
  isShaking: boolean
  color: string
}

@State shakeState: ShakeState = {
  offsetX: 0,
  isShaking: false,
  color: '#007DFF'
}
使用 renderGroup :对于复杂组件,使用 renderGroup(true) 可以将子组件的渲染合批。
typescript
Button('登录')
  .renderGroup(true)  // 合批渲染
  .translate({ x: this.offsetX, y: 0 })
11.2 动画帧管理
控制动画总数:避免同时执行过多的动画,超过 3-4 个并发动画可能导致卡顿。
合理设置 duration:过短的 duration 可能导致动画跳帧,过长则显得拖沓。推荐范围:80-200ms。
使用合适的曲线:某些复杂曲线(如自定义贝塞尔)可能增加计算开销。优先使用内置枚举。
11.3 内存管理
及时清理定时器 :在组件销毁时,清理所有 setTimeout 和 setInterval。
typescript
@Component
struct ShakeComponent {
  private timers: number[] = []

  startShake(): void {
    const t1 = setTimeout(() => { ... }, 100)
    this.timers.push(t1)
    // ...
  }

  aboutToDisappear(): void {
    // 清理所有定时器
    this.timers.forEach(timerId => {
      clearTimeout(timerId)
    })
    this.timers = []
  }
}
11.4 硬件加速
ArkUI 默认开启硬件加速,但某些场景可能被关闭。确保:
- 动画属性(translate, rotate, scale, opacity)使用 GPU 加速
- 避免同时动画
width、height、padding等布局属性(会触发重新布局)
typescript
// 好的做法:动画 transform 属性
Button('登录')
  .translate({ x: this.offsetX, y: 0 })  // GPU 加速

// 不好的做法:动画布局属性
Button('登录')
  .margin({ left: this.marginLeft })    // CPU 计算,可能卡顿
11.5 低端设备适配
降级策略:在性能较差的设备上,减少动画复杂度。
typescript
@State isLowEndDevice: boolean = false

aboutToAppear(): void {
  // 检测设备性能
  const info = deviceInfo.deviceType
  this.isLowEndDevice = (info === 'phone')  // 可根据实际情况调整
}

startShake(): void {
  if (this.isLowEndDevice) {
    // 简化的抖动:只有 3 段
    animateTo({ duration: 120 }, () => { this.offsetX = 12 })
    setTimeout(() => {
      animateTo({ duration: 120 }, () => { this.offsetX = -12 })
    }, 130)
    setTimeout(() => {
      animateTo({ duration: 120 }, () => { this.offsetX = 0 })
    }, 260)
  } else {
    // 完整的抖动:7 段
    // ...
  }
}
12. 总结与展望
12.1 核心要点回顾
本文系统地介绍了 HarmonyOS NEXT (API 24) 中实现抖动按钮的完整方案,核心要点包括:
第一,理解了声明式 UI 的精髓 。ArkTS 的状态驱动范式让我们只需修改状态变量,UI 自动响应更新。@State 装饰器是整个动画实现的基石。
第二,掌握了关键 API 的用法 。translate 属性实现位置变化,animateTo 让变化有了动画效果,两者结合产生了抖动。
第三,学会了多段动画的编排 。通过 setTimeout 精确控制时序,配合衰减幅度序列,实现了自然的物理阻尼效果。
第四,建立了防错设计意识。锁机制、状态绑定、资源管理等细节确保代码健壮可靠。
12.2 技术演进方向
抖动效果虽然看似简单,但背后体现的是鸿蒙动效体系的设计哲学。随着 HarmonyOS 的持续演进,我们可以期待:
更丰富的动效预设:系统可能内置更多标准动效,开发者只需配置参数即可使用。
更强大的动画编排:声明式的动画编排 API,让多段动画的组合更直观。
更好的性能优化:框架层面的动画优化,让复杂动效在更多设备上流畅运行。
跨场景的一致性:同一套动效在手机、平板、车机、智能穿戴等设备上保持一致体验。
12.3 学习资源推荐
12.4 结语
动效是用户体验的灵魂。一个精心设计的抖动效果,不仅能有效传达错误信息,更能在细微处体现应用的品质感。希望本文能帮助你在自己的 HarmonyOS 应用中实现优雅、流畅的抖动动效。
作者寄语:动效无小事。每一个像素的位移、每一次缓动曲线的选择,都是向用户传递信息的方式。用心打磨每一处细节,才能打造出真正让用户喜爱的应用。