一 UIAbility 组件
1.1 声明周期
- 左边为
UIAbility生命周期 - 右边为
WinDowStage声明周期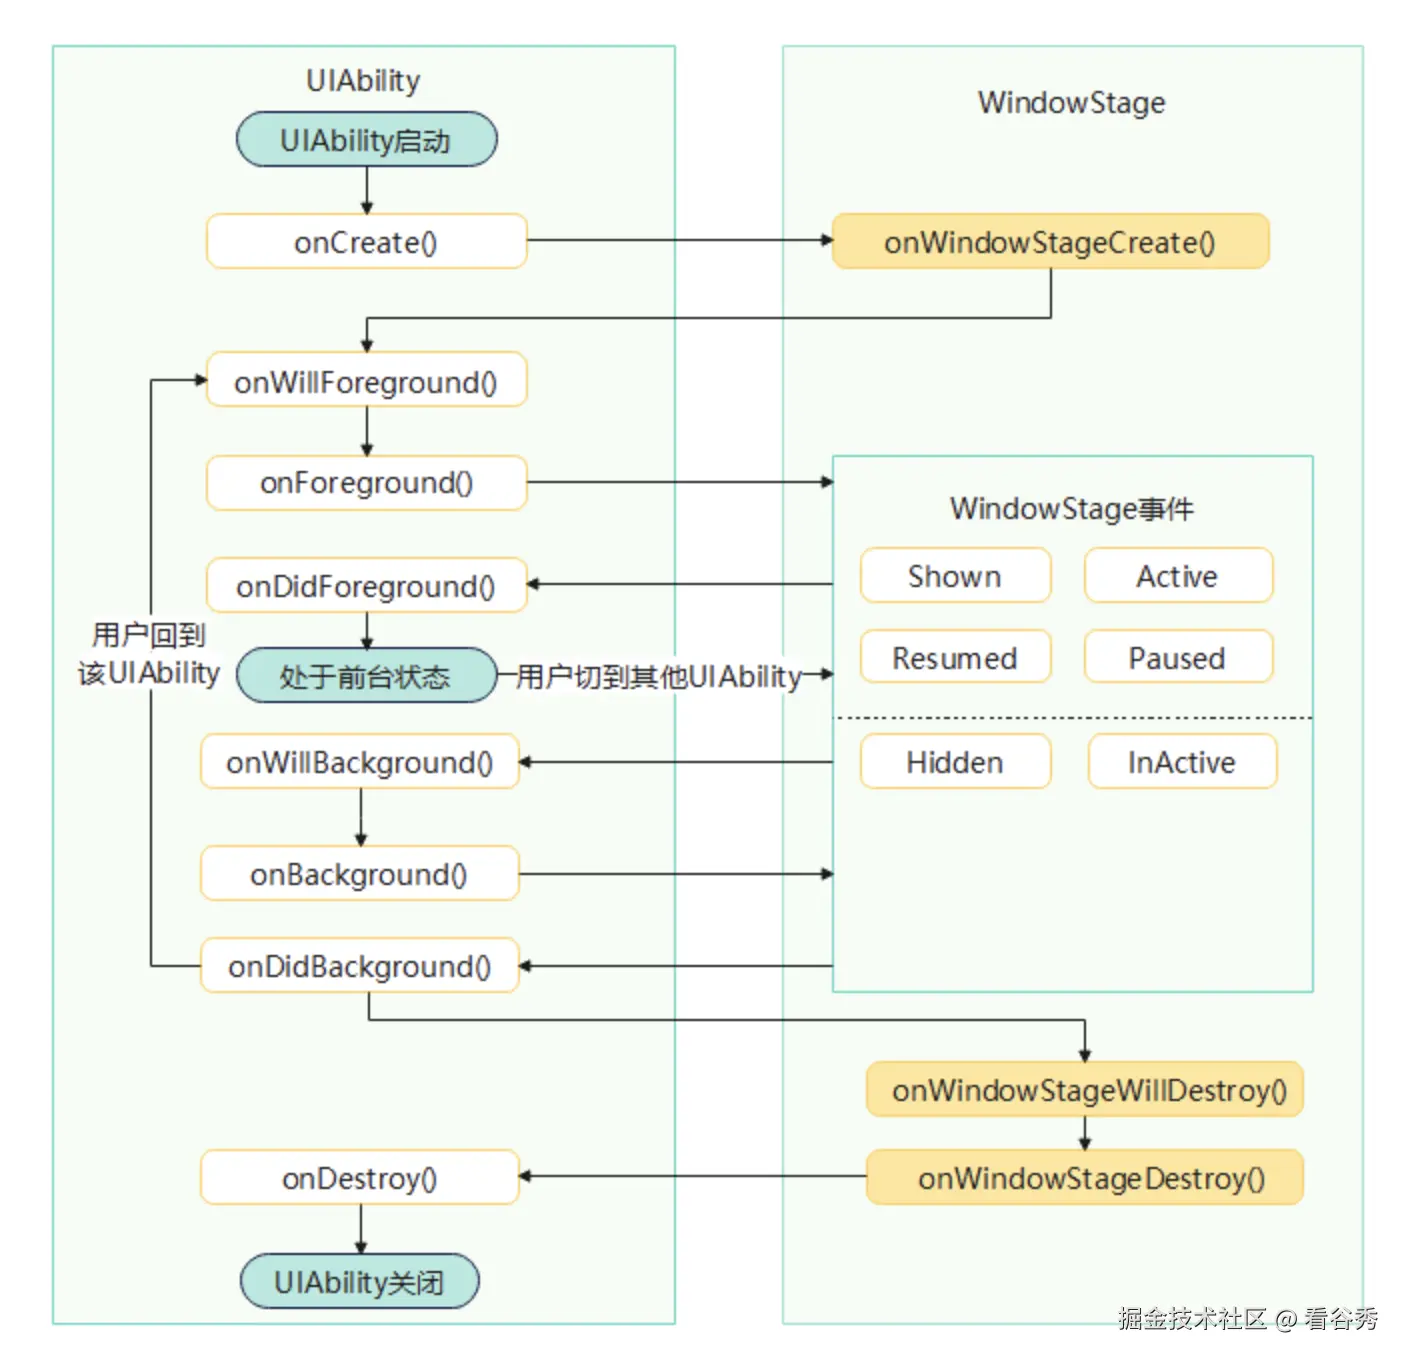
js
/** UIAbility 声明周期 **/


// 1 UIAbility 首次创建
onCreate(want: Want, launchParam: AbilityConstant.LaunchParam): void {

}

// 2 窗口即将显示,但屏幕还是黑的/白的
onWillForeground(): void {

}

// 3 已经进入前台 + UI 渲染中
onForeground(): void {

}

// 4 前台切换完成,UI 完全显示
onDidForeground(): void {

}

// 5 应用即将切到后台,但界面还没完全消失(可能还看得见)
onWillBackground(): void {

}

// 6 界面已完全切到后台,用户看不到该应用了
onBackground(): void {

}

// 7 应用已经完全处于后台状态
onDidBackground(): void {

}

// 8 UIAbility 实例即将被销毁
onDestroy(): void {

}
js
/** WinDowStage声明周期 **/


// 1 窗口创建完成
onWindowStageCreate(windowStage: window.WindowStage): void {

}

// 2 窗口即将销毁
onWindowStageWillDestroy(windowStage: window.WindowStage): void {

}

// 3 窗口已销毁
onWindowStageDestroy(): void {

}
1.2 组件配置信息
js
// MyProject/entry/src/main/module.json5

"abilities": [
  {
    "name": "EntryAbility", // UIAbility组件的名称
    "srcEntry": "./ets/entryability/EntryAbility.ets",  // UIAbility组件的路径
    "description": "$string:EntryAbility_desc", // UIAbility组件的描述
    "icon": "$media:layered_image", // app图标
    "label": "$string:EntryAbility_label", // app名称
    "startWindowIcon": "$media:startIcon", // 闪屏页
    "startWindowBackground": "$color:start_window_background", // 闪屏页 背景色
    "exported": true, // 是否允许其他应用调用当前 UIAbility
  }
]
二 compontV2
- 状态变量: 状态装饰器 + 变量
- 状态变量变化 会导致UI 刷新
2.1 @Local (定义组件内状态)
- 定义状态变量,须本地初始化,不允许外部传入初始化。
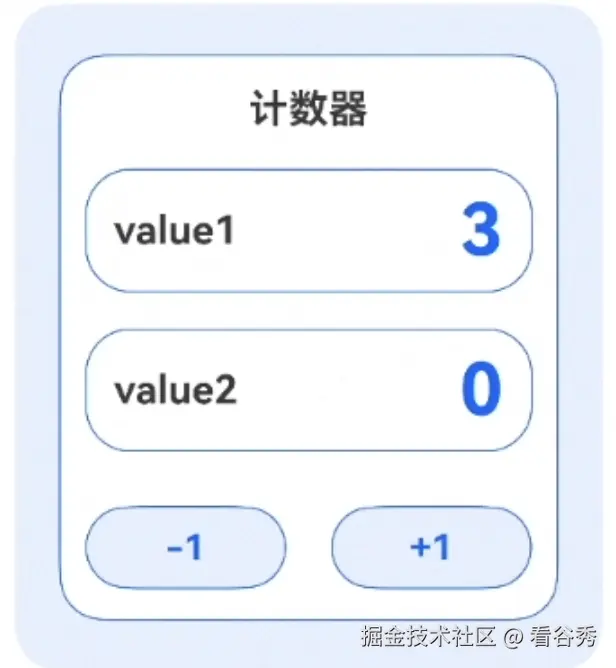
父->子 - 解决 @ObservedV2 + @Trace 监听 + @Local 修改自身的值
@Local,仅能观察变量本身,@State则能观测变量本身以及一层的成员属性@Local想观察状态变量的下一级, 用@ObserverV2 + @Trace观察
js
@ComponentV2
struct Parent {
  @Local value1: number = 0; // 更新
  public value2: number = 0; // 不更新

  build() {
    Column() {
      Text(this.value1.toString())
      Text(this.value2.toString())
      Row() {
        Button('-1')
          .onClick(() => {
            this.value1 -= 1
            this.value2 -= 1
          })
        Button('+1')
          .onClick(() => {
            this.value1 += 1
            this.value2 += 1
          })
      }
    }
  }
}
2.2 @Param / @Param + @Once
- 定义
@Param来接收父组件传入的状态变量父->子 - 子组件不能修改 @Param 修饰的变量
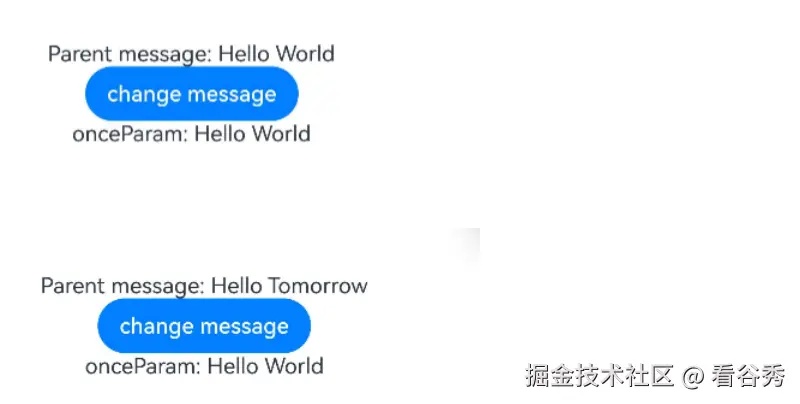
- @Param + @Once 装饰的变量仅初始化同步一次
js
// @Param

@ComponentV2
struct Parent {
  @Local value1: number = 0;
  @Local value2: number = 0;
  build() {
    Column() {
      MyCounter({ title: 'value1', value: this.value1})
      MyCounter({ title: 'value2', value: this.value2})
    }
  }
}

@ComponentV2
struct MyCounter {
  @Param title: string = ''; // 不能修改
  @Param value: number = 0;
  build() {
    Row() {
      Text(this.title)
      Text(this.value.toString())
    }
  }
}
js
// @Param + @Once

@ComponentV2
struct ChildComponent {
  // @Once装饰的onceParam仅初始化同步一次
  @Param @Once onceParam: string = '';

  build() {
    Column() {
      Text(`onceParam: ${this.onceParam}`)
    }
  }
}

@Entry
@ComponentV2
struct MyComponent {
  // ...
  @Local message: string = 'Hello World';

  build() {
    Column() {
      Text(`Parent message: ${this.message}`)
      Button('change message')
        .onClick(() => {
          this.message = 'Hello Tomorrow';
        })
      ChildComponent({ onceParam: this.message })
    }
  }
}
2.3 @Even (父子事件通信)
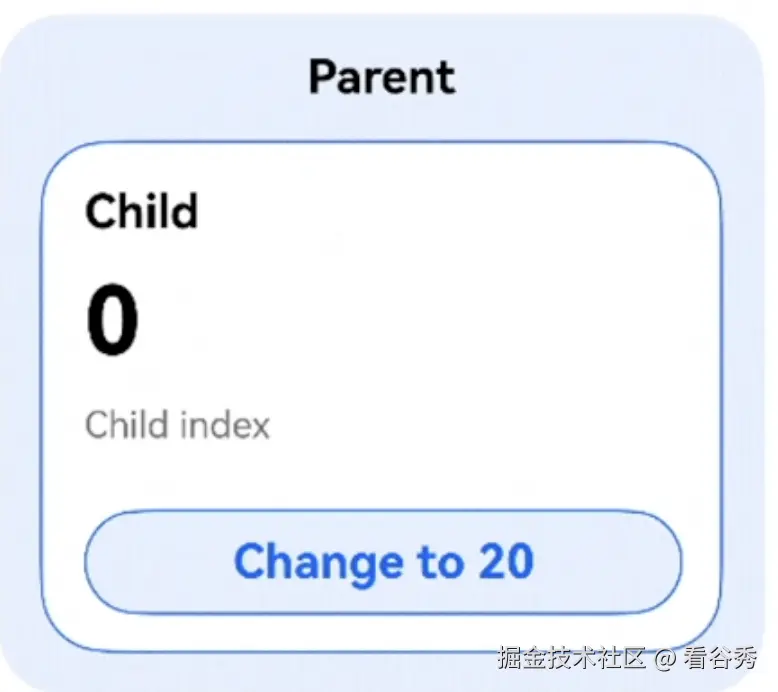
- 用于实现
子组件中修改 给父组件传入数据
js
// 子组件Child 定义 @Event 函数并通过调用 @Event函数,  给主组件 Parent 传数据

// 父组件
@ComponentV2
struct Parent {
  @Local index: number = 0;

  build() {
    Column() {
      Text ('Parent')
      Child({
        index: 10,
        changeIndex : (val: number) => { // 父组件实现函数 接收 var
          this.index = val;
        }
      })
    }
  }
}

// 子组件
@ComponentV2
struct Child {
  @Param index: number = 0
  @Event changeIndex: (val: number) => void; // 定义函数类型
  build() {
    Column() {
      Text('Child')
      Text(this.index.toString())
      Text('Child index')
      Button('Change to 20')
        .onClick(() => {
          this.changeIndex(20) // 子组件调用函数 发送 var
        })
    }
  }
}
// ps: 正常组件中定义函数类型, 你直接调用会报错~
2.4 @ObservedV2 + @Trace 深度观察属性
- 深度观察负责数据元素变化 (深度监听,非第二层)
- @ObservedV2 只能修饰类 不能修饰组件
- 监听场景有:
嵌套类,继承类,静态属性,内置类型(Array、Map、Date、Set) - 对标
@Observed + @ObjectLink解决其,每次监听下一级,就需要创建新组件的尴尬 - 场景: 监听数组 元素属性变化
js
// 嵌套类

@ObservedV2
export class Son {
  @Trace public age: number = 100;
}

export class Father {
  public son: Son = new Son();
}

// observer组件 监听 状态变量 father.son.age
@ComponentV2
export struct observer {
  father: Father = new Father();

  build() {
    Column() {
      // 当点击改变age时,Text组件会刷新
      Text(`${this.father.son.age}`)
        .backgroundColor(Color.Green)
        .fontSize(64)
        .onClick(() => {
          this.father.son.age++;
        })
    }
  }
}
js
// 内置类型 数组

@ObservedV2
class Arr {
  @Trace public numberArr: number[] = [];

  constructor() {
    this.numberArr = [ 1, 2, 3, 4, 5];
  }
}

// observer组件 监听 状态变量 arr 元素的变化
@ComponentV2
export struct observer {
 @Local arr: Arr = new Arr();

  build() {
    Scroll() {
      Column() {
        ForEach(this.arr.numberArr, (item: number, index: number) => {
          Text(`${index} ${item}`)
            .fontSize(40)
        })

        // numberArr是@Trace装饰的数组
        // 使用数组API操作numberArr时,可以观测到对应的变化
        Button('push')
          .onClick(() => {
            this.arr.numberArr.push(50); //  [ 1, 2, 3, 4, 5, 50];
          })

        Button('pop')
          .onClick(() => {
            this.arr.numberArr.pop(); // [ 1, 2, 3, 4];
          })
        Button('修改本身')
          .onClick(() => {
            //  注意!!  如果不加 @Local 修改不了本身
            // @Local arr: Arr = new Arr();
            this.arr = new Arr(); // []
          })
      }
    }
  }
}
2.5 @Provider 和 @Consumer(跨级通信)
- 跨越组件层级,数据双向传递
(v1 就有这个组件 v2 做了升级) - v1 传变量,v2 能传方法
- v1允许
@Provide(r)从父组件初始化,v2 不允许(必须本地设置默认值) - 都是观察一层没有变
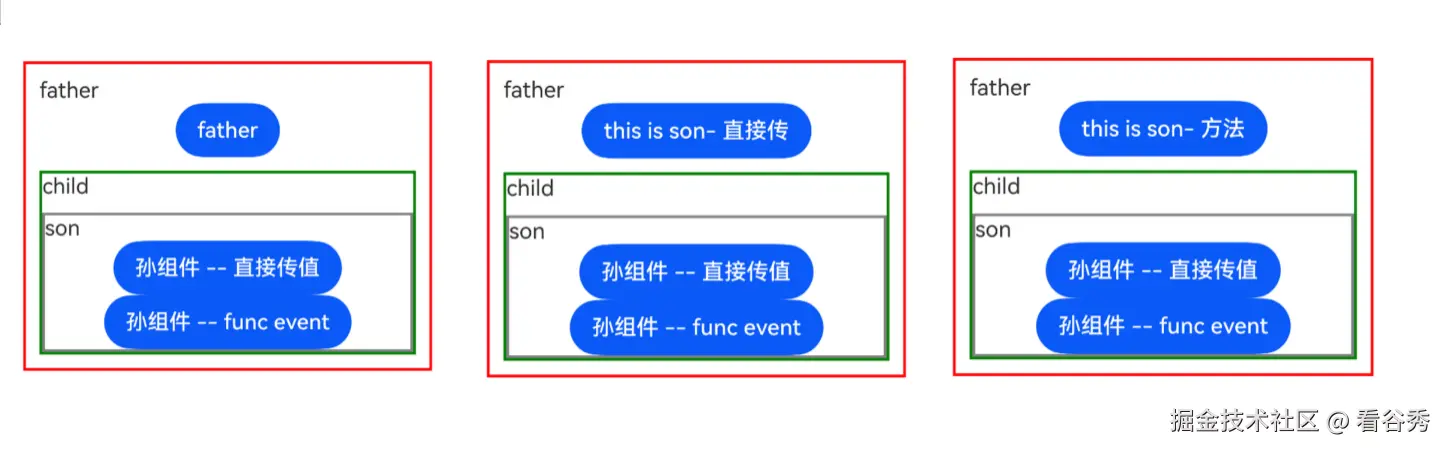
js
// 孙组件 给 父组件 传递数据

//  父组件
@Entry
@ComponentV2
struct Father {
  @Provider() title: string = 'father'
  @Provider() func: (val: string) => void = (val: string) => {
    this.title = val // 接收孙组件传过来的值
  }
  build() {
    Column(){
      Text('father').width('100%')
      Button(this.title)
        .onClick(()=>{
          this.title = 'i am father'
        })
      Child() // 我是子组件
        .margin({top:10})

    }.borderWidth(2) .borderColor(Color.Red) .padding(10) .width('80%') .margin('10%')
  }
}

// 子组件
@ComponentV2
struct Child {
  // @Consumer() title: string = '我是子组件'
  build() {
    Column() {
      Text('child').width('100%')
      Son().margin({top:10})// 我是孙组件
    }.borderWidth(2) .borderColor(Color.Green)
  }
}

// 孙组件
@ComponentV2
struct Son {
  @Consumer() title: string = 'i am son'
  @Consumer() func: (val: string) => void = () => {};
  build() {
    Column(){
      Text('son').width('100%')
      Button('孙组件 -- 直接传值') // 方式1  直接传值
        .onClick(()=>{
          this.title = 'this is son- 直接传'
        })
      Button('孙组件 -- func event') // 方式2 通过方法 传值
        .onClick(()=>{
          this.func('his is son- 方法')
        })

    } .borderWidth(2) .borderColor(Color.Gray)
  }
}
2.6 @computed 计算属性
- 定义计算属性 (
计算属性缓存) - 注意 他算属性, 非方法 this.com
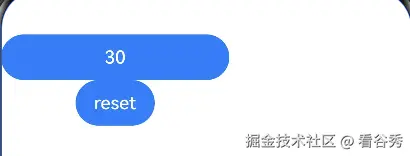
js
@Entry
@ComponentV2
struct Father {
  value: number = 15
  @Local count: number = 0

  @Computed
  get com(): number { // 注意还有 'get'
    return this.value * this.count
  }

  // 直接定义个函数也行, 不过  @Computed 添加了缓存等, 优化更好
  // com(): number {
  //   return this.value * this.count
  // }

  build() {
    Column(){
      Button(this.com.toString()) // 展示 (单价 * 数量)
        .onClick(() => {
          this.count = this.count + 1 // 数量自增
        })
        .width(200)

      Button('reset')
        .onClick(() => {
          this.count = 0
        })
    }
  }
}
2.7 @Monito 监听状态变化
- 监听
状态变量及其所有属性(含计算属性)的变化
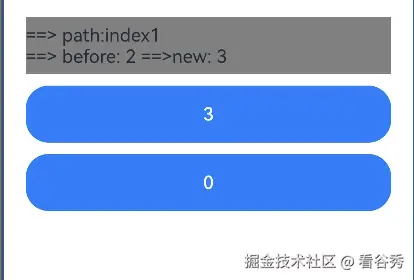
js
@Entry
@ComponentV2
struct Father {
  @Local index1: number = 0
  @Local index2: number = 0
  @Local change: string = ''
  @Monitor('index1','index2')
  indexChange(monitor: IMonitor) {
    this.change = `==> path:${monitor.value()?.path}\n==> before: ${monitor.value()?.before} ==>new: ${monitor.value()?.now}`
  }

  build() {
    Column() {
      Text(this.change)
        .size({width: '90%', height: 50})
        .backgroundColor(Color.Gray)
      Button(this.index1.toString())
        .onClick((event: ClickEvent) => {
          this.index1 = this.index1 + 1

        })
        .width('90%')
        .height('50')
        .margin({top:10})
      Button(this.index2.toString())
        .onClick((event: ClickEvent) => {
          this.index2 = this.index2 + 1
        })
        .width('90%')
        .height('50')
        .margin({top:10})
    }
  }
}
2.8 @Require 必须传参
父组件初始化子组件时候,必须传参- 修饰装饰器有 @Prop、@State、@Provide、@BuilderParam、@Param
js
@Entry
@Component
struct PageOne {
  message: string = 'Hello World';

  build() {
    Column() {
      // 父组件初始化子组件时候, 必须传参
      ChildIndex({ message: this.message })
    }
  }
}

@Component
struct ChildIndex {
  @Require @State message: string;

  build() {
    Column() {
      Text(this.message)
    }
  }
}
三 网络
3.1 http
js
import { BusinessError } from '@kit.BasicServicesKit';
import {message} from '../request/requestModel'
import { hilog } from '@kit.PerformanceAnalysisKit';
import { JSON } from '@kit.ArkTS';
import { http } from '@kit.NetworkKit'

loadHttpRequest() {
  let httpRequest = http.createHttp()

  httpRequest.request(IMAGE_URL,{
    method: http.RequestMethod.GET,
    connectTimeout: 3000
  }).then((response: http.HttpResponse) => {
    if(response && response.responseCode === 200 && response.resultType === http.HttpDataType.STRING ) {
      this.array = JSON.parse(response.result as string) as Array<message>; // 解析接口返回的数据

    }
  }).catch((error: BusinessError) => {
    this.array = []
    hilog.error(0x0000,TAG, `httpRequest failed, code: ${error.code}, message: ${error.message}`)
  }).finally(()=> {
    httpRequest.destroy() //  销毁http
  })
}
3.2 rcp
js
import { BusinessError } from '@kit.BasicServicesKit';
import {message} from '../request/requestModel'
import { hilog } from '@kit.PerformanceAnalysisKit';
import { JSON } from '@kit.ArkTS';
import { rcp } from '@kit.RemoteCommunicationKit';
import { RcpUtil } from './RcpUtil';

loadRCPRequest() {
  this.rcpUtil.getRcpGetRequest()?.then((response: rcp.Response) => {
    if (response &&  response.statusCode === 200) {
      this.array = response.toJSON() as  Array<message>
      console.log('--');
    }
  }).catch((error: BusinessError)=>{
    this.array = []; // 清空数组
    hilog.error(0x0000, TAG, `rcpGetData failed. Cause code: ${error.code}, message: ${error.message}`);
  })
}
js
// rcp工具类

import { hilog } from '@kit.PerformanceAnalysisKit';
import { rcp } from '@kit.RemoteCommunicationKit';

const IMAGE_URL: string =
  'https://raw.gitcode.com/HarmonyOS_Codelabs/ObtainNetworkData/raw/master/Resources/rawfile/response.json';
const  TAG: string = 'RcpUtil'

// rcp请求工具类
export class  RcpUtil {
  rcpSession?: rcp.Session; // 注意可以为空

  constructor() {
    try {
      this.rcpSession = rcp.createSession()
    } catch (error) {
      hilog.error(0x000, TAG, `${error.code}---${error.message.toString()}`)
    }
  }
  // 销毁session
  deStorySession() {
    if(this.rcpSession) {
      this.rcpSession.close()
    }
  }
  // 创建get请求
  getRcpGetRequest(): Promise<rcp.Response> | undefined {
    if (this.rcpSession) {
      let promise = this.rcpSession.get(IMAGE_URL).catch(()=>{
        throw  new Error('rcp error')
      })
      return promise
    }
    return;
  }
四 数据存储
4.1 用户首选项 preference
- 数据存储 变化订阅
js
// 1 导入模块
import {preferences} from '@kit.ArkData'
import { UIAbility } from '@kit.AbilityKit';
import window from '@ohos.window';

class myAbility extends UIAbility {
  onWindowStageCreate(windowStage: window.WindowStage): void {

    // 2 声明 dataPreference实例
    let dataPreference: preferences.Preferences | undefined | null = null;

    // 3 初始化 dataPreference实例
    let options: preferences.Options = {name: 'myStore'}
    dataPreference = preferences.getPreferencesSync(this.context, options)
    // this.context 这个为 UIAbility 的属性

    // 4 存入数据
    // key: value; value可以 基本数据类型(string number boolean) 数组string | number | boolean[]等
    dataPreference.putSync('loginData', [1,2,3,4])

    // 5 持久化
    // dataPreference.flush()
    dataPreference.flush((error: BusinessError)=>{
      if (error) {
        console.error(`faile to flush code: ${error.code} message${error.message}`)
        return
      }
      console.info('success in flush')
    })

    // 5 获取数据 查不到 key 'loginData' 返回默认 []
    let value1: preferences.ValueType = dataPreference.getSync('loginData',[]) // 同步方法 会阻塞主线程
  }
}
js
@Entry
@Component
struct preference {
  @StorageLink('fontSize0ffset') fontSize0ffset: number = 0;
  aboutToAppear (){
    // 获取缓存的字体
    this.fontSize0ffset = PreferencesUtil.getChangeFontSize();
  }

  build() {
    Text(title)
      .margin({ top: 10})
      .fontSize(10 + this.fontSize0ffset)
  }
}
4.2 关系型数据库 sqlite
五 CodeGenie(AI 辅助)
- 页面开发 逻辑开发 问题修复
5.1 下载CodeGenie
开发 -> DevEco studio -> CodeGenie 立即下载
5.2 安装CodeGenie
设置 -> 插件 -> 已安装 -> 设置 -> 从磁盘安装插件 -> 下载选.zip -> 安装
5.3 意图注解
LinkPageFunctionFormEntry
六 动画
6.1 组件动画 / 属性动画
.translate()位移动画.rotate()旋转动画.scale()缩放动画.opacity()透明度动画
6.1.1 animateTo()
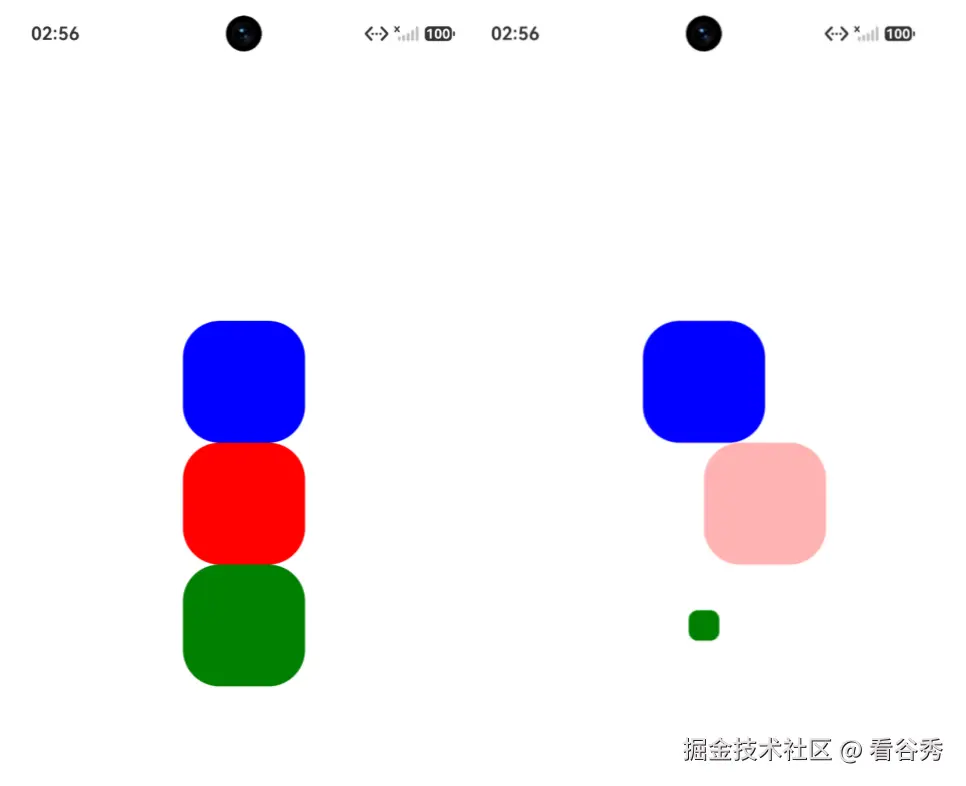
js
// animateTo() 通过触发闭包内变化, 更新UI


// 组件1 旋转动画
// 组件2 位移 + 透明度 动画
// 组件3 缩放动画

import { curves } from '@kit.ArkUI';

@Entry
@Component
struct LearnAnimation {
  @State animate: boolean = false;
  @State rotateValue: number = 0; // 组件一旋转角度

  @State translateX: number = 0; // 组件二偏移量
  @State opacityValue: number = 1; // 组件二透明度

  @State scaleValue: number = 1 // 组件三 缩放

  // 开启动画
  beginAnimate() {
    this.getUIContext().animateTo({
      delay: 10, // 延迟播放时间
      tempo: 0.68, //  动画速度
      iterations: 1, // 执行次数
      duration: 500, // 持续时间
      curve: Curve.Smooth, // 动画曲线 平滑
      playMode: PlayMode.Normal // 播放模式 正常播放
    }, () => {
      // 闭包内所有状态变化引起的 UI 变化,统一添加动画
      this.animate = !this.animate;

      this.rotateValue = this.animate ? 90 : 0; // 组件一 旋转动画

      this.translateX = this.animate ? 50 : 0; // 组件二 位移动画
      this.opacityValue = this.animate ? 0.3 : 1;  // 组件二 透明度动画

      this.scaleValue =  this.animate ? 0.25 : 1; // 组件三 缩放动画
    })
  }

  build() {
    Column() {
      // 组件一
      Column() {
      }
      .rotate({ // 1 添加 旋转动画 (z轴旋转)
        x: 0,
        y: 0,
        z: 1,
        angle: this.rotateValue })

      .backgroundColor(Color.Blue)
      .justifyContent(FlexAlign.Center)
      .width(100)
      .height(100)
      .borderRadius(30)
      .onClick(() => {
        this.beginAnimate() // 开启动画
      })

      // 组件二
      Column() {
      }
      .justifyContent(FlexAlign.Center)
      .width(100)
      .height(100)
      .backgroundColor(Color.Red)
      .borderRadius(30)
      .translate({ x: this.translateX }) // 2 添加 位移动画
      .opacity(this.opacityValue) // 3 添加 透明度动画

      // 组件三
      Column() {
      }
      .justifyContent(FlexAlign.Center)
      .width(100)
      .height(100)
      .backgroundColor(Color.Green)
      .borderRadius(30)
      .scale({ // 4 添加 缩放动画
        x: this.scaleValue,
        y: this.scaleValue,
      })
    }
    .width('100%')
    .height('100%')
    .justifyContent(FlexAlign.Center)
  }
}
6.1.2 .animation()
js
  // 组件一
  Column() {
  }
  .rotate({ angle: this.rotateValue }) // 1 添加旋转动画
  .animation({ curve: curves.springMotion() }) // 2 添加动画属性
  .onClick(() => {
    this.animate = !this.animate;
    // 旋转动画值 rotateValue 变化, UI动画更新
    this.rotateValue = this.animate ? 90 : 0;

  })
6.1.3 关键帧动画 keyframeAnimateTo
js
.onClick(() => {
  // 第三步:调用keyframeAnimateTo接口
  this.getUIContext()?.keyframeAnimateTo({
    iterations: 1
  }, [
    {
      // 第一段关键帧动画时长为800ms,组件一顺时针旋转90度,组件二的透明度变从1变为0.6,组件二的translate从0位移到50
      duration: 800,
      event: () => {
        this.rotateValue = 90;
        this.opacityValue = 0.6;
        this.translateX = 50;
      }
    },
    {
      // 第二段关键帧动画时长为500ms,组件一逆时针旋转90度恢复至0度,组件二的透明度变从0.6变为1,组件二的translate从50位移到0
      duration: 500,
      event: () => {
        this.rotateValue = 0;
        this.opacityValue = 1;
        this.translateX = 0;
      }
    }
  ]);
})
6.2 转场动画
6.2.1 出现消失转场
- 实现一个组件出现或者消失时的动画效果
js
.transition(
  TransitionEffect.asymmetric(
    this.appearEffect,  // 进场动画
    this.disappearEffect // 出场动画
  )
)
// 注意!!!    这不是.translate
js
@Component
export struct ComponentTransition {
  @State isShow: boolean = false;
  // 进场动画
  appearEffect = TransitionEffect.scale({ x: 0, y: 0 }).combine(TransitionEffect.OPACITY); // 配置缩放起点 透明度
  // 出场动画
  disappearEffect = TransitionEffect.rotate({ x: 0, y: 1, z: 0, angle: 360 }).combine(TransitionEffect.OPACITY); // 配置旋转方式 透明度

  build() {
    NavDestination() {
      Column() {
        if (this.isShow) {
          Image($r('app.media.bg_element'))
            .scale({x:1.3,y:1.3}) // 旋转终点
            .transition(TransitionEffect.asymmetric(this.appearEffect, this.disappearEffect))
        }

        Button($r('app.string.Component_transition_toggle'))
          .width('100%')
          .onClick(() => {
            this.getUIContext().animateTo({ duration: 600 }, () => {
              this.isShow = !this.isShow;
            });
          })
      }
    }
}
6.2.2 模态转场
- 转场是新的界面覆盖在旧的界面上,旧的界面不消失的一种转场方式。
js
bindSheet(isShow: boolean, builder: CustomBuilder, options?: SheetOptions): T;
js
.bindSheet($$this.isShowSheet, this.mySheet(), {
  height: SheetSize.MEDIUM, // 窗口高度
  onDisappear: () => {
    // 模态窗口关闭
  }
})

// $$代表双向绑定 所以 bindSheet()的 isShow 和 isShowSheet 状态同步

// SheetSize: MEDIUM半屏 LARGE 几乎全屏 FIT_CONTENT 自适应
6.2.3 共享元素转场/一镜到底
共享元素转场是一种界面切换时对相同或者相似的两个元素做的一种位置和大小匹配的过渡动画效果,也称一镜到底动效。
js
/**
 * Share transition id.
 */
export const GEOMETRY_TRANSITION_ID: string = 'shareId';
js
// pageA 页面

Image($r('app.media.bg_transition'))
  .geometryTransition(GEOMETRY_TRANSITION_ID)  // ⭐ 核心1:标记共享元素
  .onClick(() => {
    this.getUIContext().animateTo({ duration: 600 }, () => {
      this.navPageInfos.pushPath({ name: 'pageB' });
    });
  })
js
// pageB 页面

Image($r('app.media.bg_transition'))
  .geometryTransition(GEOMETRY_TRANSITION_ID)  // ⭐ 核心2:相同ID

// 整个页面
.transition(TransitionEffect.OPACITY)  // ⭐ 辅助:淡入淡出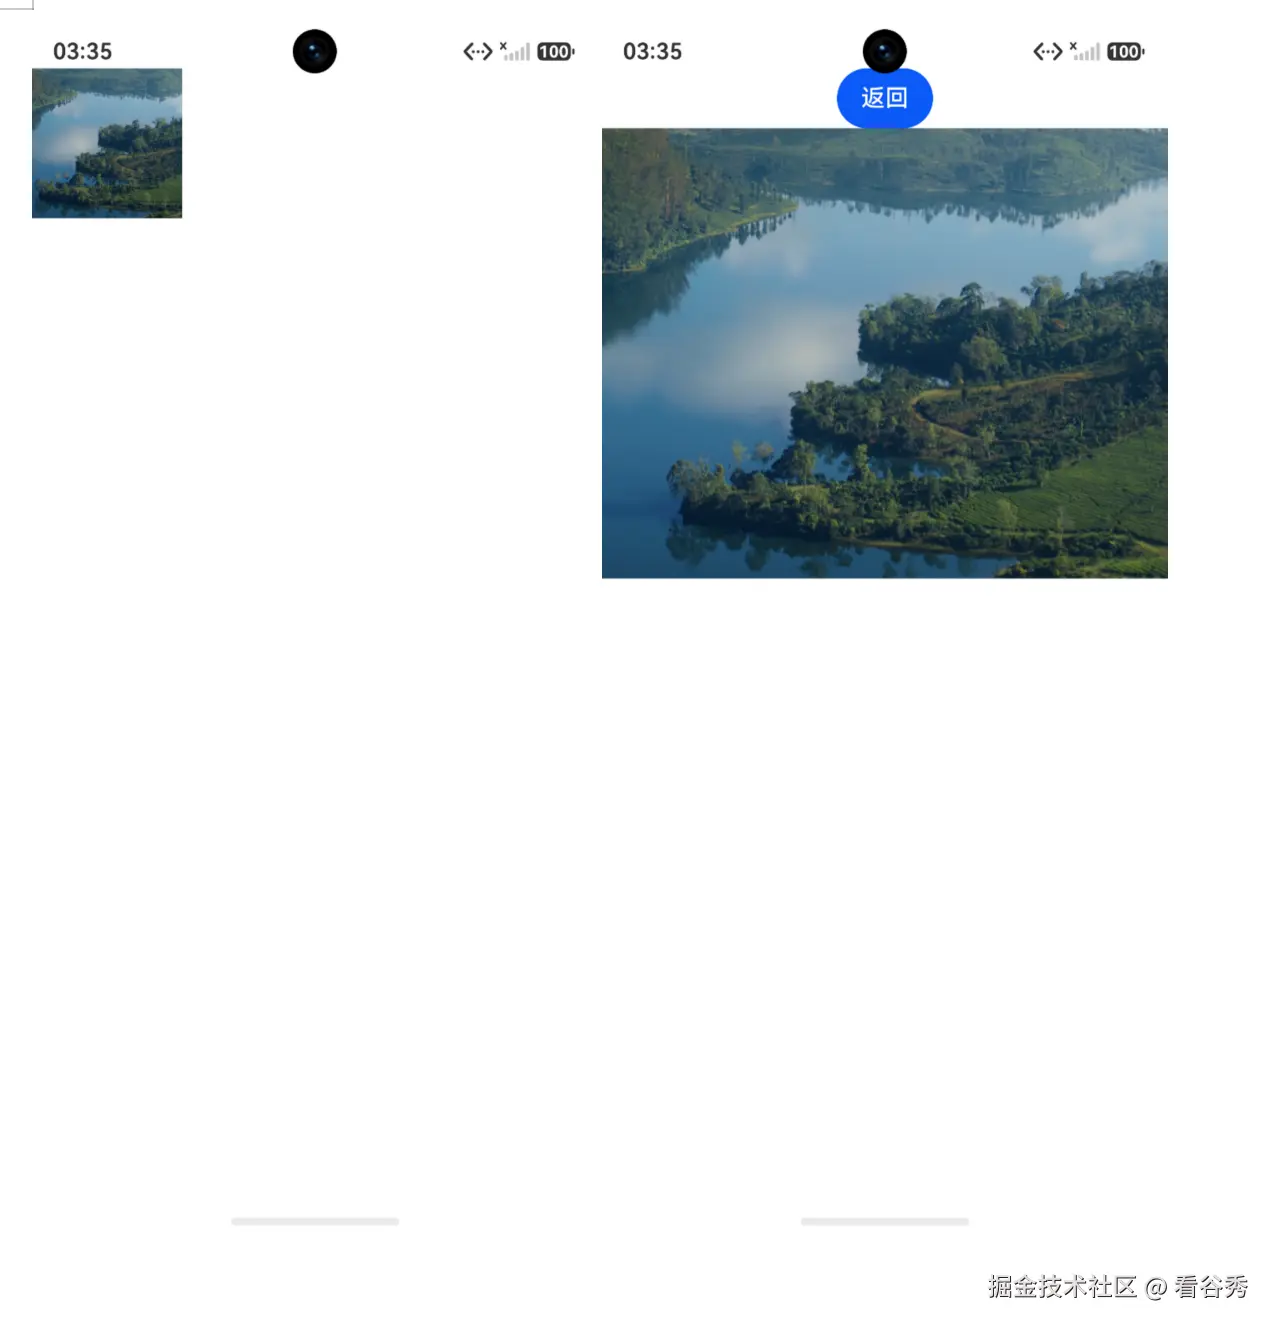
js
import { util } from '@kit.ArkTS';

@Entry
@Component
struct LearnAnimation {
  @State showDetail: boolean = false
  idstr: string = util.generateRandomUUID()

  build() {
    Stack() {
      // 1 缩略图
      Image($r("app.media.test"))
        .width(100)
        .height(100)
        .geometryTransition(this.idstr) // 3.1 配置相同的id
        .onClick(() => {
          this.getUIContext().animateTo({ duration: 300 }, () => {
            this.showDetail = true
          })
        })

      // 2 详情大图
      if (this.showDetail) {
        Column() {
          Button("返回")
            .onClick(() => {
              this.getUIContext().animateTo({ duration: 300 }, () => {
                this.showDetail = false
              })
            })
          Image($r("app.media.test"))
            .width("100%")
            .height(300)
            .geometryTransition(this.idstr)// 3.2 配置相同的id

        }
        .width("100%")
        .height("100%")
        .backgroundColor(Color.White)
      }
    }
  }
}
6.2.4 旋转屏幕动画
- 旋转屏动画
- 透明度变化的旋转屏动画
js
// module.json5

"abilities": [
  {
    "orientation": "auto_rotation"
  }
]
6.2.5 页面转场动画 (不推荐)
Navigation转场动画和模态转场替代
js
// 页面跳转

Button('pushUrl')
 .onClick(() => {
   // 路由到下一个页面,push操作
   this.getUIContext().getRouter().pushUrl({ url: 'pages/Learn/LearnSlider'});
})
Button('back')
 .onClick(() => {
   // 返回到上一页面,相当于pop操作
   this.getUIContext().getRouter().back();
 })
}.justifyContent(FlexAlign.Center)
js
// 页面配置

/**
例如: A页面 push进入 B页面
则此时: A页面退出, 页面栈 push
此方法调用 PageTransitionExit({ type: RouteType.Push, duration: 1000 })

*/

pageTransition() {
  // 定义页面进入时的效果,从右侧滑入,时长为1000ms,页面栈发生push操作时该效果才生效
  PageTransitionEnter({ type: RouteType.Push, duration: 1000 })
    .slide(SlideEffect.Right)

  // 定义页面进入时的效果,从左侧滑入,时长为1000ms,页面栈发生pop操作时该效果才生效
  PageTransitionEnter({ type: RouteType.Pop, duration: 1000 })
    .slide(SlideEffect.Left)

  // 定义页面退出时的效果,向左侧滑出,时长为1000ms,页面栈发生push操作时该效果才生效
  PageTransitionExit({ type: RouteType.Push, duration: 1000 })
    .slide(SlideEffect.Left)

  // 定义页面退出时的效果,向右侧滑出,时长为1000ms,页面栈发生pop操作时该效果才生效
  PageTransitionExit({ type: RouteType.Pop, duration: 1000 })
    .slide(SlideEffect.Right)
}
七 弹框
7.1 toast
js
this.getUIContext().getPromptAction().showToast({
  message: ' 你好',
  duration:30
 })
7.2 气泡弹框
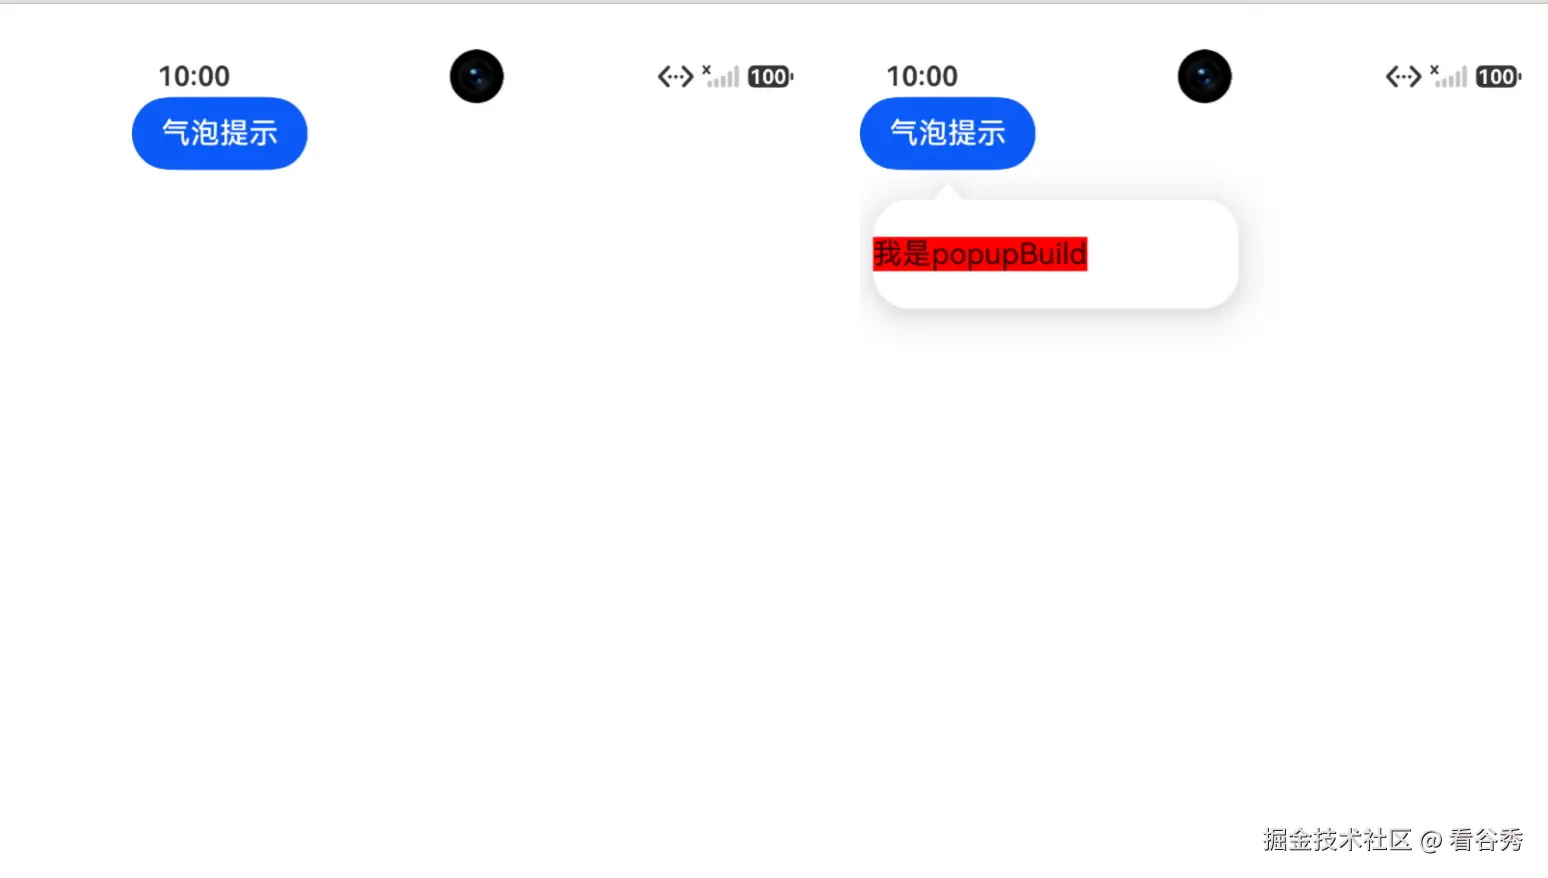
js
@Entry
@Component
struct toastLearn {
  @State showPopup: boolean = false

  @Builder
  popupBuild() {
    Row(){
      Text('我是popupBuild')
        .backgroundColor(Color.Red)
    }.size({width:200 ,height: 60})
  }

  build() {
    Column(){
      Button('气泡提示').onClick(()=>{
        this.showPopup = true

      })
        .bindPopup(this.showPopup,{
          builder: this.popupBuild(),
          placement:Placement.Bottom,
          onStateChange: (e)=> { // 点击bindPopup 绑定组件其他区域, 会收起组件
            console.log('===>' + String(e.isVisible));
            if (e.isVisible == false) {
              this.showPopup = false
            }
          }
        })
    }
  }
}
7.3 日期弹框/文本弹框
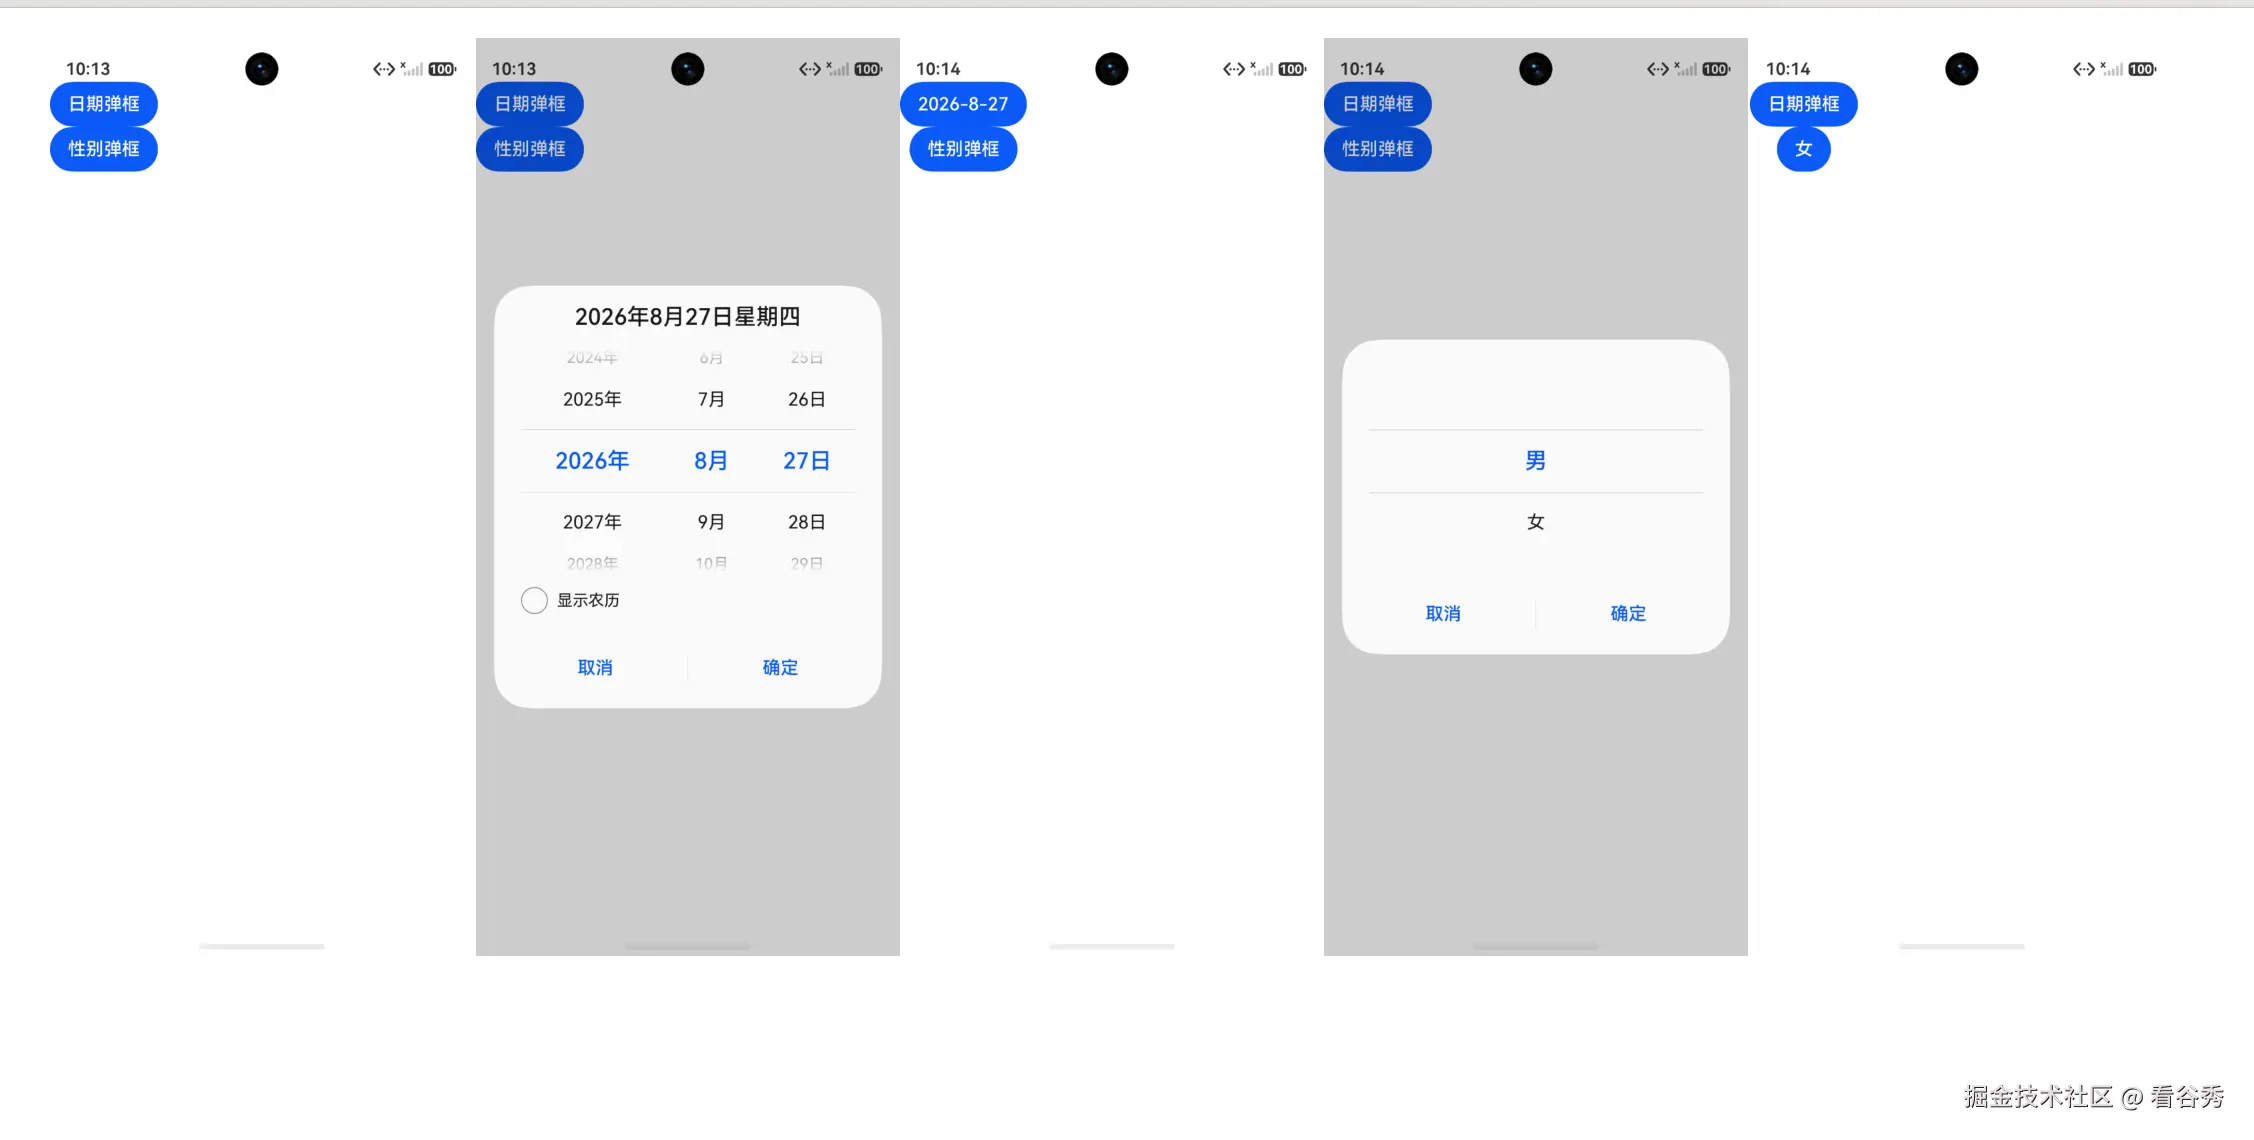
js
import { JSON } from '@kit.ArkTS'


@Entry
@Component
struct toastLearn {
  @State selectTime: Date = new Date('2000-12-25T08:30:00');
  @State dateString: string = '日期弹框'
  @State sexString: string = '性别弹框'
  @State select: number = 0

  sexArray: string[] = ['男','女']

  aboutToAppear(): void {
    let date = new Date();
    let year = date.getFullYear();
    let month = date.getMonth() + 1;
    let day = date.getDate();
    const  currentDate: string  = year + '-' + month + '-' + day;
    this.selectTime = new Date(`${currentDate}T08:30:00`);
  }

  build() {
    Column(){
      // 日期弹框
      Button(this.dateString)
        .onClick(()=>{
          this.getUIContext().showDatePickerDialog({
            start: new Date('1925-1-1'),
            end: new Date('2055-1-1'),
            selected: this.selectTime,// 当前选择
            lunarSwitch: true,
            showTime: false,
            onDateAccept: (value: Date) => { // 点击确定
              this.selectTime = value;
              let valuestring = JSON.stringify(value) // "2026-08-27T14:12:00.000Z"
              let birthDateArray = JSON.stringify(value).slice(1, 11).split('-');
              let year = Number(birthDateArray[0]);
              let month = Number(birthDateArray[1]);
              let day = Number(birthDateArray[2]);
              this.dateString = String(year) + '-'+ String(month) + '-' + String(day)
            }
          })
        })

      // 文本弹框
      Button(this.sexString)
        .onClick(()=>{
          this.getUIContext().showTextPickerDialog({
            range: this.sexArray,
            selected: this.select,
            canLoop: false,
            onAccept: (value: TextPickerResult) => {
              this.select = value.index as number;
              this.sexString = value.value as string;
            },
            onChange: (value: TextPickerResult) => {
              this.select = value.index as number;
            }
          })
        })
    }
  }
}
7.4 自定义弹框
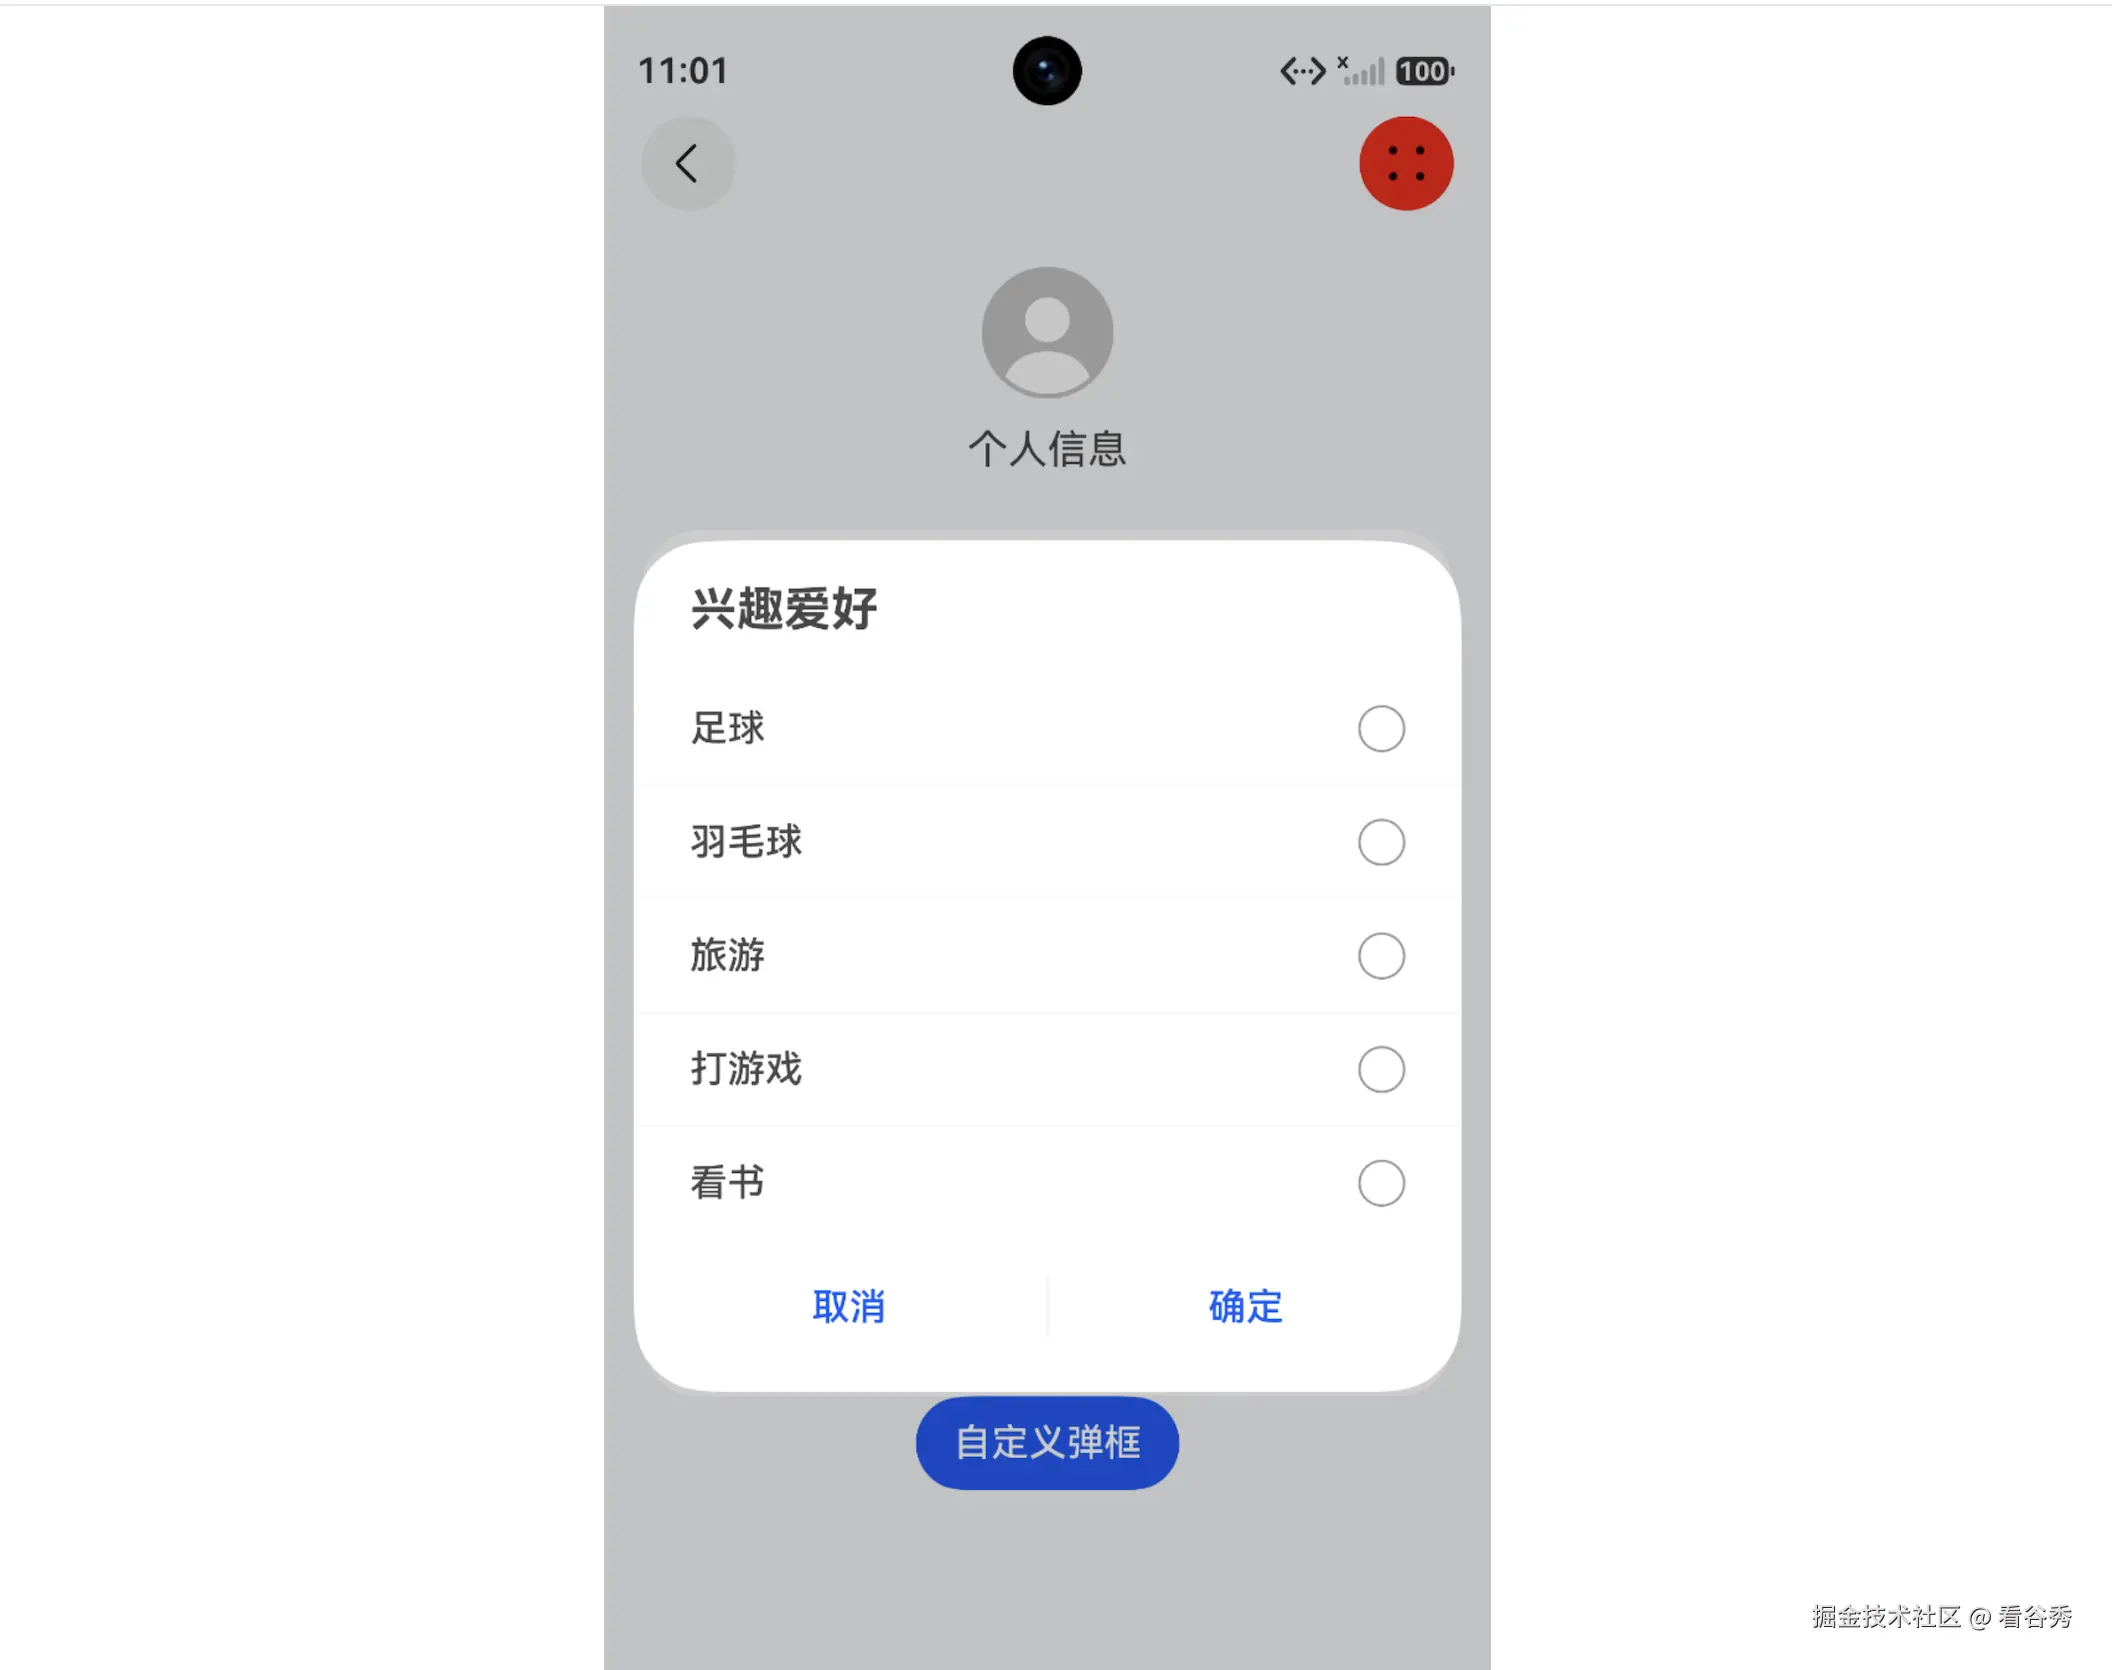
js
private ctx: UIContext = this.getUIContext();


// 1. 创建弹窗内容节点
this.contentNode = new ComponentContent(
  this.ctx,                              // UIContext 上下文
  wrapBuilder(buildHobbyItems),          // 自定义弹窗的 UI 构建器, 必须全局 @Builder
  new Params(this.hobbyItems)            // 传递给 UI 的数据
);

// 2. 配置弹窗选项
let option: promptAction.BaseDialogOptions = {
  alignment: DialogAlignment.Center      // 弹窗居中显示
};

// 3. 显示弹窗(新写法)
this.ctx  // 获取当前 UI 上下文
    .getPromptAction()                   // 获取 PromptAction 实例
    .openCustomDialog(this.contentNode, option);  // 打开自定义弹窗


@Builder
function buildHobbyItems(params: Params) { // 必须是全局@Builder
// 自定义弹框UI

  Button('关闭')
    .onClick(()=>{
        this.ctx?.getPromptAction().closeCustomDialog(this.contentNode)
    })
}