大家好,我是锋哥。最近连载更新Vue3+Vite+ElementPlus前端开发技术专题。
本课程主要介绍和讲解 Vue3框架,Vite构建工具,以及element-plus UI框架。Vue3核心知识介绍,Vite构建工具使用,以及element-plus UI框架的基础组件,配置组件,Form表单组件,Data数据展示组件,Navigation导航组件,Feedback反馈组件,Container布局组件介绍和使用。同时也配套视频教程《一天学会 Vue3 + Vite + element-plus UI框架 视频教程》
列表渲染用来根据数组(或对象)批量生成一组 DOM 。Vue3 用 v-for 指令完成这件事。
适合:商品列表、待办事项、评论区、表格行、下拉选项等场景。
1. 为什么需要列表渲染?
页面上经常要展示「很多条结构相同的数据」。如果一条条手写标签,数据一变就要手动改 DOM。用 v-for 绑定数组后,增删改数据,列表会自动更新:
xml
<!-- 不推荐:手写很多重复标签 -->
<li>苹果</li>
<li>香蕉</li>
<li>橙子</li>
<!-- 推荐:用 v-for 根据数据生成 -->
<li v-for="item in fruits" :key="item">{{ item }}</li>2. v-for 基本用法
2.1 遍历数组
语法:v-for="item in list",也可写成 (item, index) in list 拿到下标。
xml
<script setup>
/**
* v-for 基础 Demo
* 根据水果数组渲染列表
*/
import { ref } from 'vue'
/** 水果列表 */
const fruits = ref(['苹果', '香蕉', '橙子'])
</script>
<template>
<ul>
<li v-for="(item, index) in fruits" :key="index">
{{ index + 1 }}. {{ item }}
</li>
</ul>
</template>要点:
item是当前项,index是下标(从 0 开始)- 模板里
fruits会自动解包,不用写.value - 尽量给每项加
:key(见下文)
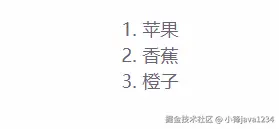
运行截图:
2.2 必须了解:key
:key 帮 Vue 识别「哪一项是哪一项」,在列表增删、排序、过滤时复用/更新 DOM 更准确。
css
<li v-for="item in list" :key="item.id">
  {{ item.name }}
</li>
建议:
- 优先用唯一且稳定的 id(数据库主键、UUID 等)
- 不要轻易用
index当 key(尤其列表会插入、删除、排序时) key的值在同一列表里应唯一
2.3 遍历对象
也可以遍历对象的属性:
xml
<script setup>
/**
* v-for 遍历对象 Demo
*/
import { reactive } from 'vue'
/** 用户信息对象 */
const user = reactive({
name: '小明',
age: 20,
city: '上海'
})
</script>
<template>
<ul>
<!-- value:属性值;key:属性名;index:序号 -->
<li v-for="(value, key, index) in user" :key="key">
{{ index + 1 }}. {{ key }}:{{ value }}
</li>
</ul>
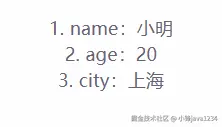
</template>运行截图:
2.4 用 <template> 包一组元素
想为每一项渲染多个相邻标签时,用 <template>(本身不会生成额外标签):
xml
<template v-for="item in list" :key="item.id">
  <h4>{{ item.title }}</h4>
  <p>{{ item.desc }}</p>
</template>
3. 数组更新会驱动视图
Vue 能追踪常见数组变更方法,调用后列表会自动刷新:
| 方法 | 作用 |
|---|---|
push / pop |
末尾增 / 删 |
shift / unshift |
开头删 / 增 |
splice |
按位置增删改 |
sort / reverse |
排序 / 反转 |
也可以整体替换数组(如过滤、映射后赋新值):
xml
<script setup>
/**
* 数组操作 Demo
* 演示增删与过滤
*/
import { ref } from 'vue'
const todos = ref([
{ id: 1, text: '学习 Vue3' },
{ id: 2, text: '写列表 Demo' }
])
let nextId = 3
/** 追加一项 */
function addTodo() {
todos.value.push({ id: nextId++, text: '新任务' })
}
/** 删除指定 id */
function removeTodo(id) {
todos.value = todos.value.filter((t) => t.id !== id)
}
</script>
<template>
<button @click="addTodo">添加</button>
<ul>
<li v-for="todo in todos" :key="todo.id">
{{ todo.text }}
<button @click="removeTodo(todo.id)">删除</button>
</li>
</ul>
</template>运行截图:
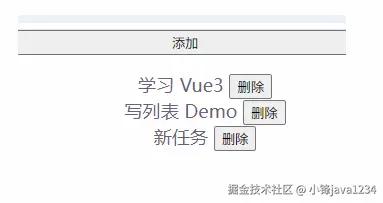
4. v-for 和 v-if
不要写在同一个元素上 (可读性差,且容易踩坑)。推荐先过滤数据,或用 <template> 分层:
xml
<!-- 推荐:先算好要渲染的列表 -->
<li v-for="item in activeList" :key="item.id">
{{ item.name }}
</li>
<!-- 或:外层 template 过滤,内层再渲染 -->
<template v-for="item in list" :key="item.id">
<li v-if="item.active">{{ item.name }}</li>
</template>空列表提示可以配合条件渲染:
xml
<p v-if="list.length === 0">暂无数据</p>
<ul v-else>
  <li v-for="item in list" :key="item.id">{{ item.name }}</li>
</ul>
5. 入门综合 Demo
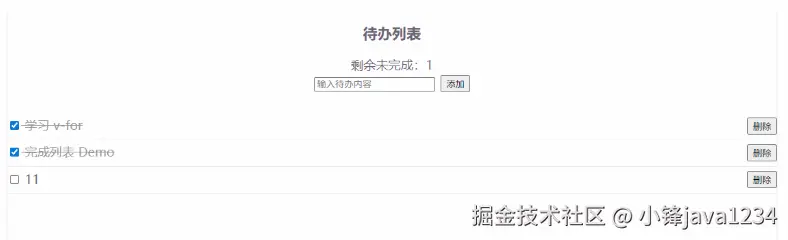
一个简易待办列表:支持添加、完成切换、删除,并用 v-if 显示空状态。
xml
<script setup>
/**
* 列表渲染综合 Demo
* - v-for:渲染待办列表
* - :key:用唯一 id 标识每一项
* - 数组方法:push / filter / 改属性
* - v-if:空列表提示
*/
import { ref, computed } from 'vue'
/** 待办列表 */
const todos = ref([
{ id: 1, text: '学习 v-for', done: true },
{ id: 2, text: '理解 key 的作用', done: false },
{ id: 3, text: '完成列表 Demo', done: false }
])
/** 输入框内容 */
const input = ref('')
/** 下一 id */
let nextId = 4
/** 未完成数量 */
const leftCount = computed(() => todos.value.filter((t) => !t.done).length)
/** 添加待办 */
function addTodo() {
const text = input.value.trim()
if (!text) return
todos.value.push({ id: nextId++, text, done: false })
input.value = ''
}
/** 切换完成状态 */
function toggleTodo(id) {
const todo = todos.value.find((t) => t.id === id)
if (todo) todo.done = !todo.done
}
/** 删除一项 */
function removeTodo(id) {
todos.value = todos.value.filter((t) => t.id !== id)
}
</script>
<template>
<h3>待办列表</h3>
<p>剩余未完成:{{ leftCount }}</p>
<div class="row">
<input v-model="input" placeholder="输入待办内容" @keyup.enter="addTodo" />
<button @click="addTodo">添加</button>
</div>
<p v-if="todos.length === 0">暂无待办,先添加一条吧</p>
<ul v-else>
<li v-for="todo in todos" :key="todo.id" :class="{ done: todo.done }">
<label>
<input
type="checkbox"
:checked="todo.done"
@change="toggleTodo(todo.id)"
/>
{{ todo.text }}
</label>
<button @click="removeTodo(todo.id)">删除</button>
</li>
</ul>
</template>
<style>
.row {
margin-bottom: 12px;
}
.row input {
margin-right: 8px;
}
.done {
color: #999;
text-decoration: line-through;
}
ul {
padding-left: 0;
list-style: none;
}
li {
display: flex;
justify-content: space-between;
align-items: center;
padding: 6px 0;
border-bottom: 1px solid #eee;
}
</style>运行效果预期:
- 初始:显示 3 条待办,第 1 条已完成(删除线)
- 输入内容点「添加」或回车:列表末尾多一项
- 勾选复选框:完成状态切换,剩余数量跟着变
- 点「删除」:该项从列表消失;删光后出现空状态提示
运行截图: