Linux重要指令梳理
- 1.pwd
- 2.clear
- 3.whoami
- 4.ls
- 5.mkdir
- 6.cd
- 7.touch
- 8.问题:
- 9.ls
- 10.cd
- 11.tree
- 12.touch
- 13.mkdir
- 14.file
- 15.rmdir
- 16.rm
- 17.man指令
- 18.echo
- 19.cat
- 20.用户
- 21.知识点
- 22,文件的拷贝
- [23. MV指令](#23. MV指令)
- [24. cat](#24. cat)
- 25.tac
- 26.less
- 27.head指令
- 28.管道
- 29.date
- 30.cal指令
- 31.find
- 32.自己创建一个指令
- 33.which
- 34.file
- 35.whereis
- 36.alias
- 37.grep指令
- 38.打包和压缩指令zip/unzip
- 39.rzsz
- 40.tar
1.pwd
功能:查看当前用户所在工作目录
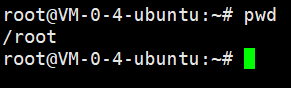
Windows系统里面标识文件唯一性的是通过路径标识的
无论是Linux还是Windows我们登录成功,都会默认处在一个默认路径下面
2.clear
功能:对当前屏幕清屏
3.whoami
功能:查看当前是谁在访问Linux系统
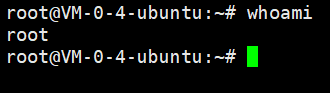
这里的是root账号
4.ls
功能:罗列当前目录下面的文件名(文件夹==目录)
bash
root@VM-0-4-ubuntu:~# ls
1_2  lesson1  md  snap
5.mkdir
功能:在当前目录下面新建一个文件夹/目录
bash
root@VM-0-4-ubuntu:~# ls
1_2  lesson1  md  snap
root@VM-0-4-ubuntu:~# mkdir test1
root@VM-0-4-ubuntu:~# ls
1_2  lesson1  md  snap  test1
上面就新建了test1
6.cd
功能:更改路径
root@VM-0-4-ubuntu:~# pwd
/root
root@VM-0-4-ubuntu:~# ls
1_2  lesson1  md  snap  test1
root@VM-0-4-ubuntu:~# cd md
root@VM-0-4-ubuntu:~/md# pwd
/root/md
``
上面就是从root目录进入md目录
7.touch
功能:新建一个普通文件(文本文件)
root@VM-0-4-ubuntu:~/md# touch code.c
root@VM-0-4-ubuntu:~/md# ls
code.c
8.问题:
如果我在Windows新建一个空的文件,这个文件要不要占据磁盘空间?文件的属性是不是数据?
答:文件!=文件内容 文件 == 文件的内容+文件属性 文件的内容是文件编写的内容,属性则是文件大小,命名等等。
下面是对一些指令的细化使用,以及这些指令的一些细节
9.ls
1.ls-l
更加详细的显示文件属性
bash
root@VM-0-4-ubuntu:~/md# ls -l
total 0
-rw-r--r-- 1 root root 0 Jul 24 13:10 code.c
0 Jul 24 13:10 属性这里面的0代表文件大小,后面的则是文件创建时间
其他属性具体是什么后面会慢慢接触到
2.ls -l -a
这个指令则会把隐藏的文件也显示出来
bash
root@VM-0-4-ubuntu:~/md# ls -l -a
total 8
drwxr-xr-x  2 root root 4096 Jul 24 13:10 .
drwx------ 10 root root 4096 Jul 24 13:02 ..
-rw-r--r--  1 root root    0 Jul 24 13:10 code.c
其中
bash
drwxr-xr-x  2 root root 4096 Jul 24 13:10 .
drwx------ 10 root root 4096 Jul 24 13:02 ..
这两行后面有.和... 代表是隐藏文件
像ls -la,ls -al这两个指令和ls -l -a 的作用是一样的
10.cd
cd~的使用:对于root账号,这个指令可以直接跳到root文件夹下面
bash
root@VM-0-4-ubuntu:~/md/a# pwd
/root/md/a
root@VM-0-4-ubuntu:~/md/a# cd ~
root@VM-0-4-ubuntu:~# pwd
/root
cd - 的使用:回退到上次所处的路径
bash
root@VM-0-4-ubuntu:~/md/a# pwd
/root/md/a
root@VM-0-4-ubuntu:~/md/a# cd ~
root@VM-0-4-ubuntu:~# pwd
/root
root@VM-0-4-ubuntu:~# cd -
/root/md/a
在Linux中 . 代表当前文件,而 ... 代表上级目录
所以可以使用cd...返回上级目录
而一直使用cd...则会退到根目录
bash
root@VM-0-4-ubuntu:~/md# pwd
/root/md
root@VM-0-4-ubuntu:~/md# cd ..
root@VM-0-4-ubuntu:~# pwd
/root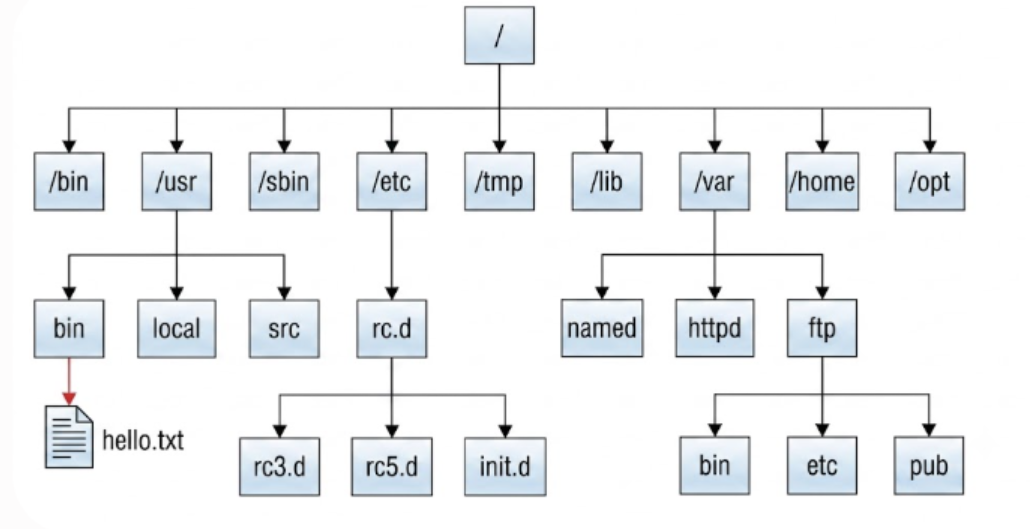
目录的本质是树形结构的
结论1:这颗多叉树叶子节点一定是普通文件或者空的文件夹
节点2:非叶子节点的本质是文件夹或者目录
在Linux里面任何一个目录都会包含 . 和 ... 两个文件,但它们是隐藏的,而根目录的 ... 是指向自己
11.tree
功能:查看上级目录的树状结果
bash
root@VM-0-4-ubuntu:~# tree
.
├── 1_2
├── lesson1
│?? └── code.c
├── md
│?? └── code.c
├── snap
│?? └── lxd
│??     ├── 38800
│??     ├── 40115
│??     ├── common
│??     └── current -> 40115
└── test1

10 directories, 2 files
注意:如果第一次使用需要自己安装tree这个指令
安装指令:
bash
centos:yum install -y tree
ubuntu:apt install -y tree
12.touch
bash
root@VM-0-4-ubuntu:~/md/a# touch hellow.txt
root@VM-0-4-ubuntu:~/md/a# ls -l
total 0
-rw-r--r-- 1 root root 0 Jul 24 22:30 hellow.txt
root@VM-0-4-ubuntu:~/md/a# stat hellow.txt
  File: hellow.txt
  Size: 0         	Blocks: 0          IO Block: 4096   regular empty file
Device: fc02h/64514d	Inode: 657248      Links: 1
Access: (0644/-rw-r--r--)  Uid: (    0/    root)   Gid: (    0/    root)
Access: 2026-07-24 22:30:33.994008266 +0800
Modify: 2026-07-24 22:30:33.994008266 +0800
Change: 2026-07-24 22:30:33.994008266 +0800
 Birth: 2026-07-24 22:30:33.994008266 +0800
这里创建了hellow.txt文本,并且注意Access,Modify,Change 这三个时间
bash
root@VM-0-4-ubuntu:~/md/a# touch hellow.txt
root@VM-0-4-ubuntu:~/md/a# stat hellow.txt
  File: hellow.txt
  Size: 0         	Blocks: 0          IO Block: 4096   regular empty file
Device: fc02h/64514d	Inode: 657248      Links: 1
Access: (0644/-rw-r--r--)  Uid: (    0/    root)   Gid: (    0/    root)
Access: 2026-07-24 22:34:04.863318660 +0800
Modify: 2026-07-24 22:34:04.863318660 +0800
Change: 2026-07-24 22:34:04.863318660 +0800
 Birth: 2026-07-24 22:30:33.994008266 +0800
再次使用touch文本的时间属性就会更新
13.mkdir
mkdir -p x:创建一串目录
bash
root@VM-0-4-ubuntu:~/md/a# mkdir -p a/b/c/d
root@VM-0-4-ubuntu:~/md/a# tree
.
├── a
│   └── b
│       └── c
│           └── d
└── hellow.txt

4 directories, 1 file
root@VM-0-4-ubuntu:~/md/a# ls
a  hellow.txt
要注意:在Linux里面文件的后缀不决定文件的类型,比如test.c只是一个文本文件,不一定里面就是代码
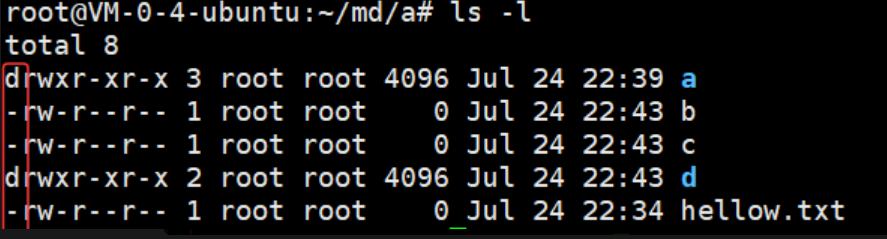
框住的这一列就代表文件的类型其中d代表目录文件,而'-'代表普通文件,普通文件包括文本,二进制可执行程序,图片,音视频等等。
14.file
功能:查看文件类型
bash
root@VM-0-4-ubuntu:~/md/a# file a
a: directory
15.rmdir
功能:用于删除空目录
bash
root@VM-0-4-ubuntu:~/md/a# tree
.
├── a
│   └── b
│       └── c
│           └── d
├── b
├── c
├── d
└── hellow.txt

5 directories, 3 files
root@VM-0-4-ubuntu:~/md/a# rmdir a
rmdir: failed to remove 'a': Directory not empty
root@VM-0-4-ubuntu:~/md/a# rmdir d
root@VM-0-4-ubuntu:~/md/a# tree
.
├── a
│   └── b
│       └── c
│           └── d
├── b
├── c
└── hellow.txt

4 directories, 3 files
root@VM-0-4-ubuntu:~/md/a# rmdir b
rmdir: failed to remove 'b': Not a directory
从上面可以看出,删除a失败就是因为a目录不是空的,而删除b失败是因为b是文件,不是目录
16.rm
功能:可用于删除有内容的文件,在Linux里面使用rm删除的东西不可以恢复,但是它在删除的时候会询问是否要删除。
rm -f代表强制删除,这个不会询问是否要删除,但是这个依旧删除不了有内容的目录
如果要删除有文件的内容,且内容文件里面还有文件的就要使用递归删除 rm -r a
bash
root@VM-0-4-ubuntu:~/md# tree
.
└── a
    ├── a
    │   └── b
    │       └── c
    │           └── d
    ├── b
    ├── c
    └── hellow.txt

5 directories, 3 files
root@VM-0-4-ubuntu:~/md# rm -r a
root@VM-0-4-ubuntu:~/md# tree
.

0 directories, 0 files
17.man指令
用来看一个指令是干什么的
bash
root@VM-0-4-ubuntu:~/test1# man tree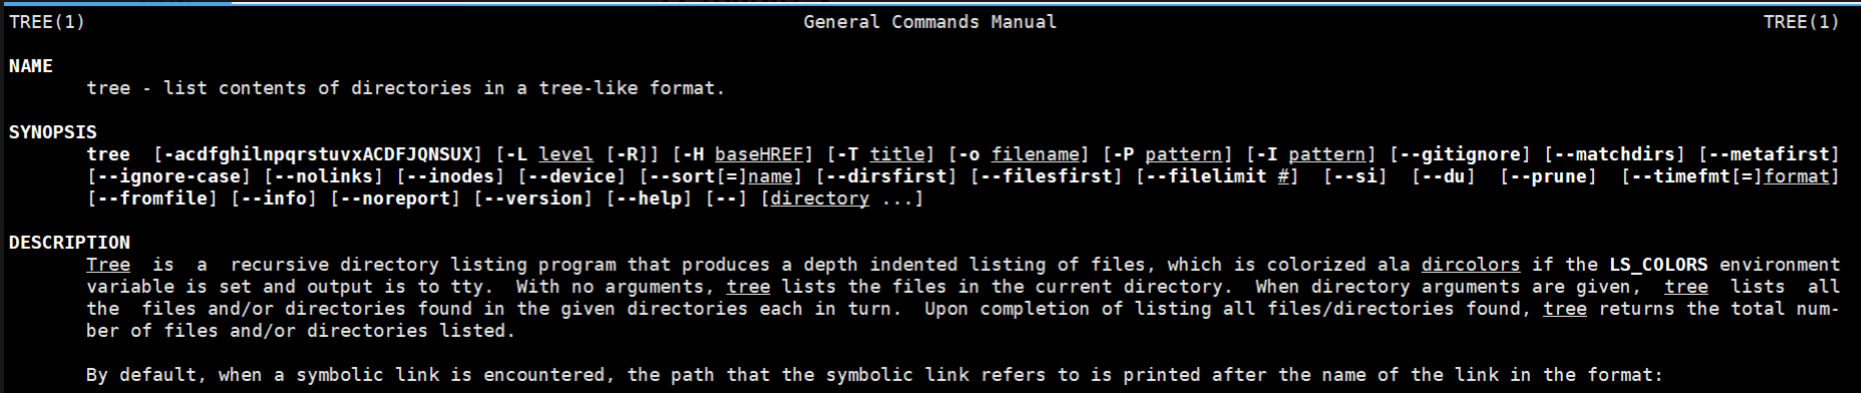
18.echo
功能:默认往显示器上打印东西
在Linux系统下面一切皆文件,
1.向显示器打印-->就是向显示器文件进行写入
2.从键盘scanf读取数据-->从键盘文件读取数据
bash
root@VM-0-4-ubuntu:~/test1# echo hellow
hellow
下面使用'>'
echo本来是要将内容写入到显示器文件的,而'>'就是将echo输出的内容写到hellow.txt,进行了重定向,而如果这个文件本来不存在的话就会新建。注意每次写入都会将原始数据清除再写入
bsah
root@VM-0-4-ubuntu:~/test1# ls -al
total 12
drwxr-xr-x 3 root root 4096 Aug  4 22:57 .
drwx------ 6 root root 4096 Aug  4 22:45 ..
drwxr-xr-x 2 root root 4096 Aug  4 22:32 a
-rw-r--r-- 1 root root    0 Aug  4 22:36 code.c
root@VM-0-4-ubuntu:~/test1# echo "hello world" > hellow.txt
root@VM-0-4-ubuntu:~/test1# la -al
total 16
drwxr-xr-x 3 root root 4096 Aug  4 22:58 .
drwx------ 6 root root 4096 Aug  4 22:45 ..
drwxr-xr-x 2 root root 4096 Aug  4 22:32 a
-rw-r--r-- 1 root root    0 Aug  4 22:36 code.c
-rw-r--r-- 1 root root   12 Aug  4 22:58 hellow.txt
如果使用
bash
>hellow.txt这是清空指定文件,清空其中的内容
下面这个是写入后不删除之前的内容 '>>' 追加重定向
bash
root@VM-0-4-ubuntu:~/test1# cat code.c
root@VM-0-4-ubuntu:~/test1# echo "aaaaaaacccc" >> code.c
root@VM-0-4-ubuntu:~/test1# echo "aaaaaaacccc" >> code.c
root@VM-0-4-ubuntu:~/test1# echo "aaaaaaacccc" >> code.c
root@VM-0-4-ubuntu:~/test1# echo "aaaaaaacccc" >> code.c
root@VM-0-4-ubuntu:~/test1# echo "aaaaaaacccc" >> code.c

root@VM-0-4-ubuntu:~/test1# cat code.c  //使用cat查看文件内容
aaaaaaacccc
aaaaaaacccc
aaaaaaacccc
aaaaaaacccc
aaaaaaacccc
注意:还有一个输出重定向 '<'从文件中获取数据
19.cat
功能:获取文件内容
bash
root@VM-0-4-ubuntu:~/test1# cat hellow.txt
hello world   获取hellow.txt 文本文件的内容
下面这个加上 -n 可以给每一行内容加上数据
bash
root@VM-0-4-ubuntu:~/test1# cat test.c
hello world
hello world1
root@VM-0-4-ubuntu:~/test1# cat -n test.c
     1	hello world      打印的时候加上了序号
     2	hello world1
20.用户
新建用户
sudo adduser 用户名切换用户
bash
su 用户名下面可以使用指令看到创建的用户 la /dev/pts -l
bash
wyj1@VM-0-4-ubuntu:/root/test1$ la /dev/pts -l
total 0
crw------- 1 root tty  136, 0 Aug  5 18:03 0
crw------- 1 root tty  136, 1 Aug  5 18:34 1
c--------- 1 root root   5, 2 Jun 25 21:29 ptmx
3,4两行的0,1代表两个终端
下面展示往其他终端写入东西的指令
bash
wyj1@VM-0-4-ubuntu:/root/test1$ echo "hellow" > /dev/pts/0
//往终端0这个用户写入内容
21.知识点
在Linux里面一切皆文件,是不是也代表xshell终端也是文件呢?-->对的
22,文件的拷贝
使用 cp x y 将x的内容拷贝给y
bash
root@VM-0-4-ubuntu:~/test1# ls
a  code.c  test.c
root@VM-0-4-ubuntu:~/test1# cat code.c
hello world
hello world1
root@VM-0-4-ubuntu:~/test1# cat test.c
root@VM-0-4-ubuntu:~/test1# cp code.c test.c
root@VM-0-4-ubuntu:~/test1# cat test.c
hello world
hello world1
当使用cp进行拷贝的时候,如果y文件原来是没有的,那么就会自己创建这个文件,然后将内容拷贝进去
bash
root@VM-0-4-ubuntu:~/test1# ls
a  code.c  test.c
root@VM-0-4-ubuntu:~/test1# cp code.c test1.c     由于test1.c原本是没有的,所以会先创建,再拷贝
root@VM-0-4-ubuntu:~/test1# ls
a  code.c  test1.c  test.c
root@VM-0-4-ubuntu:~/test1# cat test1.c
hello world
hello world1
也可以将文件拷贝到上级目录
bash
root@VM-0-4-ubuntu:~/test1# tree ../   查看上个路径的数结构其中  ../ 代表上个路径
../
└── test1
    ├── a
    ├── code.c
    ├── test1.c
    └── test.c

2 directories, 4 files
root@VM-0-4-ubuntu:~/test1# cp code.c ../     将code.c这个文件拷贝到上个路径
root@VM-0-4-ubuntu:~/test1# tree ../
../
├── code.c
└── test1
    ├── a
    ├── code.c
    ├── test1.c
    └── test.c

2 directories, 5 files
拷贝目录文件:使用上面的cp x y 这是不可以的,因为目录里面可能还有目录,所有要使用到递归
"cp -rf x y" 将目录x拷贝到y里面
bash
root@VM-0-4-ubuntu:~# tree    当前说有目录结果
.
├── test1
│   ├── a
│   ├── code.c
│   ├── test1.c
│   └── test.c
└── test2
    ├── q
    └── w
        └── e

6 directories, 3 files
root@VM-0-4-ubuntu:~# cp -rf test2 test2-1
#将test2拷贝复制到test2-1,由于test2-1原本不存在,所以首先会创建test2-1,再拷贝
root@VM-0-4-ubuntu:~# tree
.
├── test1
│   ├── a
│   ├── code.c
│   ├── test1.c
│   └── test.c
├── test2
│   ├── q
│   └── w
│       └── e
└── test2-1
    ├── q
    └── w
        └── e

10 directories, 3 files
23. MV指令
功能:转移指令
bash
root@VM-0-4-ubuntu:~/test1# tree ..    最初当前文件树状结构
..
├── test1
│   ├── a
│   ├── test1.c
│   ├── test2
│   └── test.c
├── test2
│   ├── q
│   └── w
│       └── e
└── test2-1
    ├── q
    └── w
        └── e

10 directories, 3 files
root@VM-0-4-ubuntu:~/test1# mv test.c ..  将test.c文件转移到上级目录
root@VM-0-4-ubuntu:~/test1# tree ..
..
├── test1
│   ├── a
│   ├── test1.c
│   └── test2
├── test2
│   ├── q
│   └── w
│       └── e
├── test2-1
│   ├── q
│   └── w
│       └── e
└── test.c     从这里可以看到test.c这个文件转移到了这里

10 directories, 3 files
上面转移的是文本文件,而目录文件是不可以使用mv指令进行转移的
24. cat
对于mv指令还可以用来进行重命名
bash
root@VM-0-4-ubuntu:~/test1# tree ..
..
├── test1
│?? ├── a
│?? ├── test1.c
│?? └── test2
└── test2
    ├── q
    └── w
        └── e

6 directories, 2 files
root@VM-0-4-ubuntu:~/test1# mv test1.c test.c   将test1.c这个文件重命名为test,c
root@VM-0-4-ubuntu:~/test1# tree
.
├── a
├── test2
└── test.c

1 directory, 2 files
这个重命名是对原本的文件剪拷贝,在重新生成,完成重命名
25.tac
功能:和cat相似,只不过是倒序打印
bash
root@VM-0-4-ubuntu:~/test1# cat test.c
hello world
hello world1
root@VM-0-4-ubuntu:~/test1# tac test.c
hello world1
hello world
26.less
功能:这个指令也和cat差不多,可以显示文件内容,但是文件过多的时候不会像cat那样刷屏,可以使用回车,上下键进行上下移动查看
像cat打印文件内容,查看小文件,当内容过多就会导致一直刷屏
而less和more这两个指令可以上下查找,搜索关键字,而less又比more更加常用,但是less一般要搭配其他指令使用才可以发挥重要作用。
27.head指令
head和tail用来显示开头或结尾某个数量的文字区块,head用来显示档案的开头至标准输出中,而tail就是看档案的结尾
head默认用来显示文档的开头10行
bash
root@VM-0-4-ubuntu:~/test1# cat test.c   查看了所有内容
hello 1
hello 2
hello 3
hello 4 echo hello 5
hello 5
hello 6
hello 7
hello 8
hello 9
hello 10
hello 11
hello 12
root@VM-0-4-ubuntu:~/test1# head test.c     head test.c默认查看前十行数据
hello 1
hello 2
hello 3
hello 4 echo hello 5
hello 5
hello 6
hello 7
hello 8
hello 9
hello 10
root@VM-0-4-ubuntu:~/test1#
bash
root@VM-0-4-ubuntu:~/test1# head -3 test.c     加上  -3  可以使得只打印指点的行数
hello 1
hello 2
hello 3
root@VM-0-4-ubuntu:~/test1#
bash
root@VM-0-4-ubuntu:~/test1# tail test.c  查看后10行数据
hello 3
hello 4 echo hello 5
hello 5
hello 6
hello 7
hello 8
hello 9
hello 10
hello 11
hello 12
28.管道
bash
root@VM-0-4-ubuntu:~/test1# for i in {13..1000}; do echo "hello $i" >> test.c; done
这个指令是创建1000个hello i这样的内容,其中i代表数字
bash
这就是执行前面那个指令得来的结果,而这些知识结果的最后一部分
hello 981
hello 982
hello 983
hello 984
hello 985
hello 986
hello 987
hello 988
hello 989
hello 990
hello 991
hello 992
hello 993
hello 994
hello 995
hello 996
hello 997
hello 998
hello 999
hello 1000
这里来说明管道的一些作用,例如用来得到文本中间的内容
bash
root@VM-0-4-ubuntu:~/test1# head -100 test.c | tail -20    //head -100 test.c 代表取头部100行数据
hello 93                                                 //  | 这个竖杠代表管道,tail -20代表取刚刚取
hello 94                                                  //100行数据的后20行数据
hello 95                 //整条指令代表的意思是取100条数据放到管道里面,管道用来传输资源,再取出管道后20行数据
hello 96
hello 97
hello 98
hello 99
hello 100
hello 101
hello 102
hello 103
hello 104
hello 105
hello 106
hello 107
hello 108
hello 109
hello 110
hello 111
hello 112
Linux里面一切皆文件,而管道也是文件
29.date
功能:用来打印当前时间
bash
root@VM-0-4-ubuntu:~/test1# date
Thu Aug 13 09:48:59 PM CST 2026
bash
root@VM-0-4-ubuntu:~/test1# date "+%Y-%m-%d %H:%M:%S"    //"+%Y-%m-%d %H:%M:%S"  这些对格式进行规范
2026-08-13 21:57:55
30.cal指令
用来显示公历日历->但是要注意,这个指令需要自己下载
bash
root@VM-0-4-ubuntu:~/test1# cal
    August 2026
Su Mo Tu We Th Fr Sa
                   1
 2  3  4  5  6  7  8
 9 10 11 12 13 14 15
16 17 18 19 20 21 22
23 24 25 26 27 28 29
30 31
31.find
功能:用于在文件树中查找文件,并做出相应的处理(可能访问磁盘)
bash
root@VM-0-4-ubuntu:~/test1# find ~/ -name q    在家目录找所有文件q的路径
/root/test2/q
下面是find结合通配符的使用
bash
root@VM-0-4-ubuntu:~/test2# find ~/ -name *.c     找到所有后缀为.c的文件  *就是通配符,后面可以是任何字符
/root/test1/code.c
/root/test1/test1.c
/root/test1/test.c
用find查找指令
bash
root@VM-0-4-ubuntu:~/test2# find / -name ls
/usr/bin/ls
/usr/lib/klibc/bin/ls
/usr/local/qcloud/YunJing/bin/ls
/snap/core22/2411/usr/bin/ls
/snap/core20/2669/usr/bin/ls
/snap/core20/2866/usr/bin/ls
从这里也可以发现,指令也是文件,本质就是可执行文件
32.自己创建一个指令
首先要船舰一个程序
我这里首先使用touch创建一个code.c的文本文件,再使用nano指令往code.c文本里面写入代码,这里我简单写的一个打印hello world 的指令
bash
int main()
{

printf("hello world");
return 0;


}
//这是指令的代码
使用gcc code.c对这个代码进行编译,可以得到一个a.out文件
再使用指令 mv a.out mycmd 将 a.out改名为mycmd,后面mycmd就是一个自己创建的指令了。
但是到这一步,mycmd还不可以直接作为指令运行,因为这个命令还没有放到存放指令专门的路径下面
再使用cp mycmd /usr/bin/ 将mycmd这个指令拷贝到/usr/bin/ 这个路径下面,使其成为真正的指令
下面是使用指令的执行结果
bash
root@VM-0-4-ubuntu:~/test1# mycmd
hello worldroot@VM-0-4-ubuntu:~/test1#    //打印了hello world
上面就是自己创建一个指令的过程
33.which
功能:展示指定命令的全部路径
bash
hello worldroot@VM-0-4-ubuntu:~/test1# which ls
/usr/bin/ls
root@VM-0-4-ubuntu:~/test1# which tree
/usr/bin/tree
34.file
功能:查看指令类型
bash
root@VM-0-4-ubuntu:~/test1# file code.c
code.c: C source, ASCII text   //一个C语言程序
35.whereis
功能:whereis命令用于在Linux系统中查找可执行文件,二进制文件及手册页,搜索范围限定在系统预设路径,不包含用户自设路径。与find命令相比whereis搜索路径固定且有限,主要针对系统核心目录进行快速定位。
bash
root@VM-0-4-ubuntu:~/test1# whereis ls
ls: /usr/bin/ls /usr/share/man/man1/ls.1.gz
36.alias
功能:创建别名
bash
root@VM-0-4-ubuntu:~/test1# alias ls1='ls -a -l'    //将ls -a -l 这个指令重命名为ls1
root@VM-0-4-ubuntu:~/test1# ls1
total 48
drwxr-xr-x 3 root root  4096 Aug 14 10:44 .
drwx------ 8 root root  4096 Aug 14 09:56 ..
drwxr-xr-x 2 root root  4096 Aug  4 22:32 a
-rw-r--r-- 1 root root    69 Aug 14 10:40 code.c
-rwxr-xr-x 1 root root 15960 Aug 14 10:41 mycmd
-rw-r--r-- 1 root root     0 Aug 14 09:35 test1.c
-rw-r--r-- 1 root root    25 Aug 13 08:49 test2
-rw-r--r-- 1 root root  9843 Aug 14 10:01 test.c
取消设置的别名就只需要将别名设置为空就可以了
bash
root@VM-0-4-ubuntu:~/test1# alias ls1=' '要注意:起的别名是内存级的,并不在文件中真实存在,就是在操作系统内部,一旦退出也就没有了。当换一个终端也一样,别名也不起作用了。
37.grep指令
功能:在文件中搜索字符串,将找到的行打印出来
bash
root@VM-0-4-ubuntu:~/test1# grep '99' test.c    //将test.c里面的所有含有99的行筛选出来
hello 99
hello 199
hello 299
hello 399
hello 499
hello 599
hello 699
hello 799
hello 899
hello 990
hello 991
hello 992
hello 993
hello 994
hello 995
hello 996
hello 997
hello 998
hello 999
这里还可以结合管道进行数据的筛选,可以给要筛选得到数据加上更多的约束
bash
root@VM-0-4-ubuntu:~/test1# cat test.c | head -210 | tail -100 | grep '8'
hello 128               //读取   test.c  前210行数据 取最后100个数据 里面的含8的数据
hello 138
hello 148
hello 158
hello 168
hello 178
hello 180
hello 181
hello 182
hello 183
hello 184
hello 185
hello 186
hello 187
hello 188
hello 189
hello 198
hello 208
hello 218
bash
root@VM-0-4-ubuntu:~/test1# cat test.c | head -210 | tail -100 | grep -n '8'
6:hello 128                           //在grep后面加上-n,这里相比于上面给每一行数据都加上了序号
16:hello 138
26:hello 148
36:hello 158
46:hello 168
56:hello 178
58:hello 180
59:hello 181
60:hello 182
61:hello 183
62:hello 184
63:hello 185
64:hello 186
65:hello 187
66:hello 188
67:hello 189
76:hello 198
86:hello 208
96:hello 218
bash
root@VM-0-4-ubuntu:~/test1# grep -v 'hello' code.c   将code.c这个文本里面除了含有hello的所有行都打印
#include<stdio.h>
int main()
{

return 0;


}
小结:-n 顺便输出行号
-i 忽略大小写不同,将大小写视为相同
-v :反向选择。即显示出没有' 搜索字符串'内容的那一行
38.打包和压缩指令zip/unzip
bash
root@VM-0-4-ubuntu:~# zip test1.zip test1     //将test1压缩为哦test1.zip
  adding: test1/ (stored 0%)
root@VM-0-4-ubuntu:~# ls
test1  test1.zip  test2

root@VM-0-4-ubuntu:~# mkdir test3     //新建一个文件夹
root@VM-0-4-ubuntu:~# mv test1.zip test3   //将被压缩的文件放到test3里面
root@VM-0-4-ubuntu:~# ls
test1  test2  test3
root@VM-0-4-ubuntu:~# cd test3
root@VM-0-4-ubuntu:~/test3# ls   //查看发现压缩包以及放到test3里面了
test1.zip


接下来进行解压缩


root@VM-0-4-ubuntu:~/test3# unzip test1.zip    //解压缩
Archive:  test1.zip
   creating: test1/
root@VM-0-4-ubuntu:~/test3# cd test1
root@VM-0-4-ubuntu:~/test3/test1# ll  //这里会发现test1里面并没有内容,这是什么问题呢?
total 8
drwxr-xr-x 2 root root 4096 Aug 14 10:44 ./
drwxr-xr-x 3 root root 4096 Aug 14 16:33 ../
之所以出现上面压缩包打开以后test1里面上面都没有,是因为test1的结果是树状结果,打包压缩也要递归打包才可以
将上面压缩的指令改成下面的就可以了
bash
root@VM-0-4-ubuntu:~# zip -r test1.zip test1
//-r 代表递归
解压缩的时候无需递归
bash
root@VM-0-4-ubuntu:~/test3# tree
.
└── test1.zip

0 directories, 1 file
root@VM-0-4-ubuntu:~/test3# unzip test1.zip   //解压缩
Archive:  test1.zip
   creating: test1/
 extracting: test1/code.c
   creating: test1/a/
 extracting: test1/test1.c
  inflating: test1/test.c
  inflating: test1/mycmd
  inflating: test1/test2
root@VM-0-4-ubuntu:~/test3# tree    //解压缩后的结果

├── test1
│   ├── a
│   ├── code.c
│   ├── mycmd
│   ├── test1.c
│   ├── test2
│   └── test.c
└── test1.zip

2 directories, 6 files
39.rzsz
功能:用于window机器与远端的Linxu机器通过xshell传输文件,安装完毕以后可以通过拖拽的方法将文件上传上去
40.tar
功能:打包/解压,不打开它直接看内容
- -c:建立一个压缩文件的参数指令 (create 的意思);
- -x:解开一个压缩文件的参数指令!
- -t:查看 tarfile 里面的文件!
- -z:是否同时具有 gzip 的属性?亦即是否需要用 gzip 压缩?
- -j:是否同时具有 bzip2 的属性?亦即是否需要用 bzip2 压缩?
- -v:压缩的过程中显示文件!这个常用,但不建议用在背景执行过程!
- -f:使用档名,请留意,在 f 之后要立即接档名喔!不要再加参数!
- -C:解压到指定目录
bash
root@VM-0-4-ubuntu:~# tar czf test1.zip test1  //压缩过程
root@VM-0-4-ubuntu:~# ls
test1  test1.zip  test2


解压缩
root@VM-0-4-ubuntu:~/test3# tar xzf test1.zip
root@VM-0-4-ubuntu:~/test3# tree
.
├── test1
│   ├── a
│   ├── code.c
│   ├── mycmd
│   ├── test1.c
│   ├── test2
│   └── test.c
└── test1.zip

2 directories, 6 files