最近火了一个电影哈!
可以说是拳打《蜘蛛侠》,脚踢《龙餐馆》,没错就是这个"土到极致就是潮"的"巨制"------《牛来》

我简单看了一下背景,这个电影据传就俩人的主创。
8月5号那天"悄悄"上线的,没预告、没路演、没海报,唯一的就是一张水墨画一样的宣发材料。
首日票房也是相当高,整整342块钱,是的,342元!
按理说这种片子基本上就影院"一周游",很快就下线了。

结果一个热搜把它送上了"神坛" ------ "牛来票房7352元没有万"。
第二天就炸了,全国排片从最低不足5场猛增至168场!
我从网上也扒了扒网友发的电影画面,不能说"简陋",只能说在AI盛行的今天,依旧有艺术家坚持手搓。
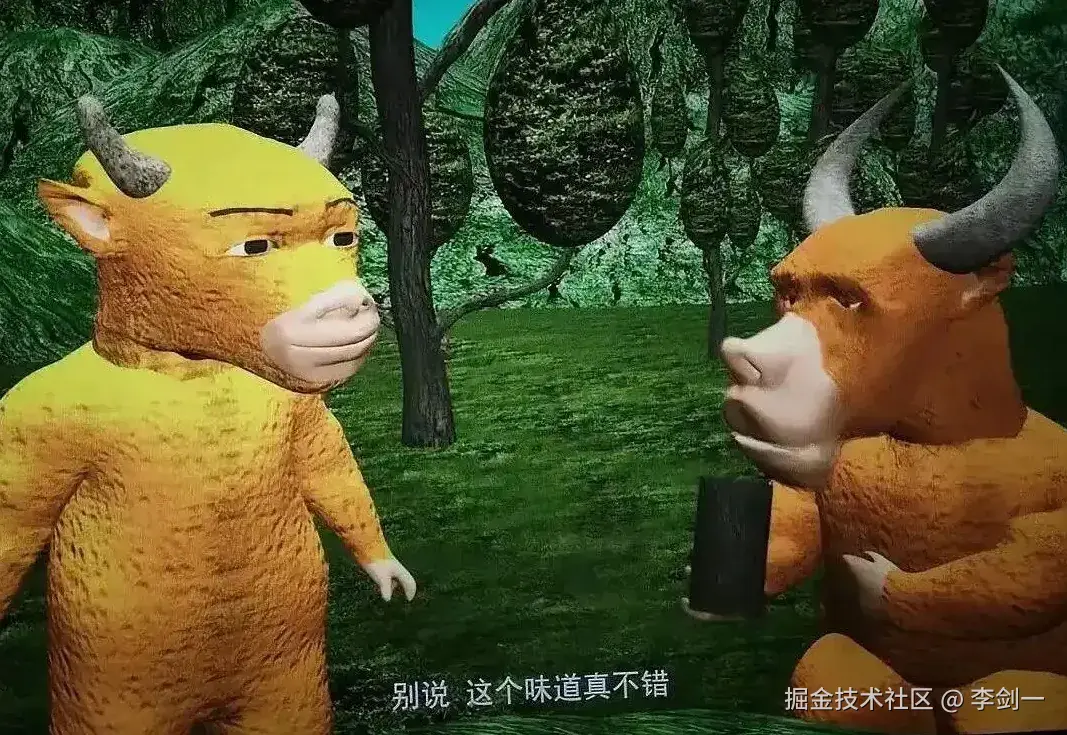
令人敬仰!
于是乎,我用ThreeJs简单做了一个小场景,以此来表达我个人的敬仰之情。
事先声明:
- 此项目所有的外观、版权等均归属原创作团队,本人不享有任何版权权益,不承担任何侵权责任。
- 此项目仅仅用于ThreeJs学习展示用途,没有任何嘲讽他人的意思。
好了,进入正题。
首先我们需要一个 3D 人物模型,大家可以在网上自己下载一个,我这里简单手搓了一个。
毕竟是"致敬",所以咱们不能马虎。
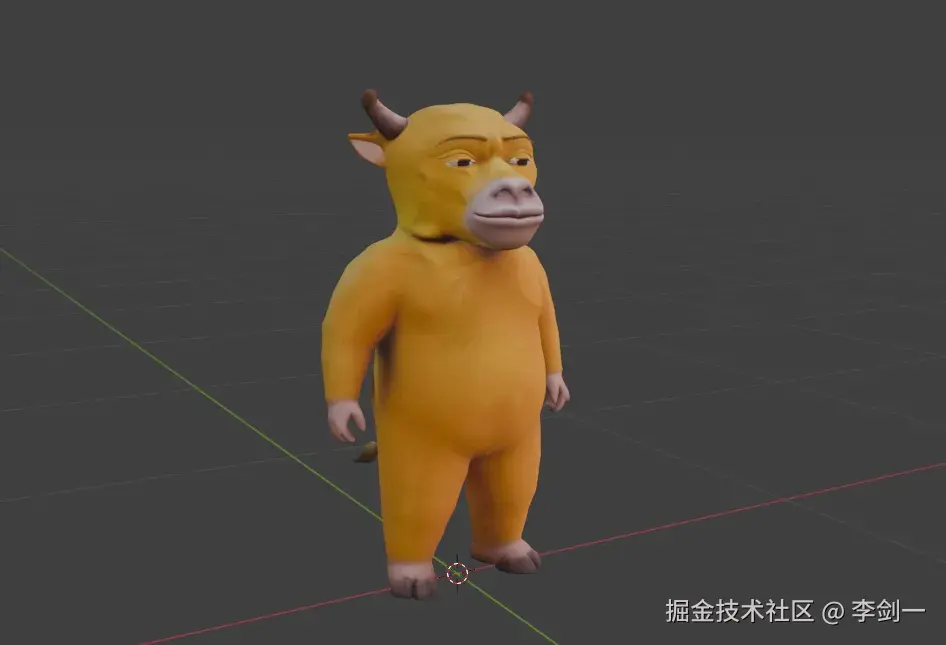
主要实现的功能有:

- 创建地面、天空场景,及ThreeJs加载3D人物模型。
- 使用方向键或WASD操作人物移动。
- 使用空格键实现人物跳跃效果。
- 使用Ctrl键实现人物蹲下效果。
- 人物移动过程中随机在地面上出现草。
首先是创建一个基础的容器代码,ThreeJs 渲染在 Canvas 中。
html
<template>
<div class="scene-wrap">
<div ref="container" class="canvas-container"></div>
<div v-if="loading" class="loading">
<div class="spinner"></div>
<p>加载模型中... {{ progress }}%</p>
<p class="tip">(niu.glb 约 45MB,首次加载稍慢)</p>
</div>
<div class="hint">
<b>WASD / 方向键</b> 移动 · <b>空格</b> 跳跃 · <b>Ctrl</b> 蹲下
</div>
</div>
</template>这里增加模型加载 Loading,让用户减少白屏等待。
js
const container = ref<HTMLDivElement>()
const loading = ref(true)
// 加载进度百分比(0~100)
const progress = ref(0)
// 持有 GameWorld 实例,卸载时用于 dispose
let world: GameWorld | null = null

onMounted(() => {
  if (!container.value) return
  world = new GameWorld({
    container: container.value,
    // 加载进度回调:把 0~1 的比例转成百分比显示
    onProgress: (p) => {
      progress.value = Math.round(p * 100)
    },
    // 模型加载完成(成功或失败都触发):关闭 loading 遮罩
    onLoaded: () => {
      loading.value = false
    },
  })
})

// 组件卸载前销毁 3D 世界,释放 GPU 资源与事件监听
onBeforeUnmount(() => {
  world?.dispose()
})
核心方法通过 GameWorld 类进行了封装。
js
// 引入所需资源
import * as THREE from 'three'
import { GLTFLoader } from 'three/examples/jsm/loaders/GLTFLoader.js'
import { mergeGeometries } from 'three/examples/jsm/utils/BufferGeometryUtils.js'
首先实现场景渲染部分
js
this.container = opts.container
this.onProgress = opts.onProgress
this.onLoaded = opts.onLoaded

// ---------- 渲染器 ----------
this.renderer = new THREE.WebGLRenderer({ antialias: true })
// 限制像素比上限为 2,避免高分屏下过度绘制拖慢帧率
this.renderer.setPixelRatio(Math.min(window.devicePixelRatio, 2))
this.renderer.setSize(this.container.clientWidth, this.container.clientHeight)
// 开启阴影并选用软阴影(PCF),让人物在地上有柔和投影
this.renderer.shadowMap.enabled = true
this.renderer.shadowMap.type = THREE.PCFSoftShadowMap
// 输出到 sRGB 色彩空间,保证纹理颜色显示正确(现代 Three.js 标准做法)
this.renderer.outputColorSpace = THREE.SRGBColorSpace
this.container.appendChild(this.renderer.domElement)

// ---------- 场景 ----------
this.scene = new THREE.Scene()
this.scene.background = new THREE.Color(SKY_COLOR)
// 远处加雾:让地面边缘"融"进天空,避免看到方形地面边界
this.scene.fog = new THREE.Fog(SKY_COLOR, 90, 220)

// ---------- 相机(第三人称跟随,初始在人物后上方) ----------
this.camera = new THREE.PerspectiveCamera(
    60, // 视场角 FOV
    this.container.clientWidth / this.container.clientHeight,
    0.1, // 近裁剪面
    1000 // 远裁剪面
)
this.camera.position.set(0, 6, 14)
this.camera.lookAt(0, 1, 0)

// ---------- 监听 ----------
window.addEventListener('keydown', this.onKeyDown)
window.addEventListener('keyup', this.onKeyUp)
window.addEventListener('resize', this.onResize)
绘制地面
js
/** 地面:一块铺满程序化土地纹理的平面,接收阴影 */
private setupGround() {
    const tex = this.makeGroundTexture()
    // 平面默认在 XY 面,绕 X 轴转 -90° 变成水平地面
    const geo = new THREE.PlaneGeometry(GROUND_HALF * 2, GROUND_HALF * 2, 1, 1)
    const mat = new THREE.MeshStandardMaterial({
        map: tex,
        color: 0xffffff,
        roughness: 1, // 土地不反光
        metalness: 0,
    })
    const ground = new THREE.Mesh(geo, mat)
    ground.rotation.x = -Math.PI / 2
    ground.receiveShadow = true // 让人物阴影投在地面上
    this.scene.add(ground)
}

/** 程序化生成土地纹理:土色底 + 大量随机斑块 + 零星草点,再平铺重复 */
private makeGroundTexture(): THREE.Texture {
    const c = document.createElement('canvas')
    c.width = c.height = 512
    const ctx = c.getContext('2d')!
    ctx.fillStyle = '#7a5532'
    ctx.fillRect(0, 0, 512, 512)
    // 土色斑块:随机颜色/位置/大小的半透明圆,叠出泥土质感
    for (let i = 0; i < 2600; i++) {
        const x = Math.random() * 512
        const y = Math.random() * 512
        const r = 2 + Math.random() * 16
        const col =
        Math.random() > 0.5
            ? `rgba(${(110 + Math.random() * 40) | 0}, ${(78 + Math.random() * 30) | 0}, ${(46 + Math.random() * 20) | 0}, ${0.12 + Math.random() * 0.22})`
            : `rgba(${(60 + Math.random() * 30) | 0}, ${(42 + Math.random() * 20) | 0}, ${(26 + Math.random() * 14) | 0}, ${0.12 + Math.random() * 0.22})`
        ctx.fillStyle = col
        ctx.beginPath()
        ctx.arc(x, y, r, 0, Math.PI * 2)
        ctx.fill()
    }
    // 零星草点:在纹理上点几笔绿色,让土地看起来有草感(与实例化草叠加)
    for (let i = 0; i < 400; i++) {
        const x = Math.random() * 512
        const y = Math.random() * 512
        ctx.fillStyle = `rgba(90,140,60,${0.15 + Math.random() * 0.25})`
        ctx.fillRect(x, y, 2, 4)
    }
    const tex = new THREE.CanvasTexture(c)
    tex.wrapS = tex.wrapT = THREE.RepeatWrapping // 允许平铺
    tex.repeat.set(40, 40) // 在一张地面上重复 40×40 次
    tex.colorSpace = THREE.SRGBColorSpace
    // 各向异性过滤:视角很低(贴地看)时纹理依然清晰,不糊
    tex.anisotropy = this.renderer.capabilities.getMaxAnisotropy()
    return tex
}
生成草,这里用 InstancedMesh 一次性渲染最多 GRASS_MAX 株草。
一株草由 3 片交叉的竖直平面 PlaneGeometry 合并而成,省 draw call。
不论多少株草,都只提交一次几何体。
js
private setupGrass() {
    const leaves: THREE.BufferGeometry[] = []
    for (let i = 0; i < 3; i++) {
        const g = new THREE.PlaneGeometry(0.14, 0.6)
        g.translate(0, 0.3, 0) // 把原点挪到草底部,方便以脚底为基准缩放/摆放
        g.rotateY((i / 3) * Math.PI) // 三片互成 60°,形成立体感
        g.rotateX(0.25) // 稍微外倾,像被风吹/有体积
        leaves.push(g)
    }
    const geo = mergeGeometries(leaves)! // 合并为单一几何体
    const mat = new THREE.MeshStandardMaterial({
        color: 0x4f8a36,
        side: THREE.DoubleSide, // 双面可见(平面无厚度)
        roughness: 1,
        metalness: 0,
    })
    this.grass = new THREE.InstancedMesh(geo, mat, GRASS_MAX)
    this.grass.instanceMatrix.setUsage(THREE.DynamicDrawUsage) // 矩阵会频繁更新
    this.grass.frustumCulled = false // 禁用视锥剔除,否则整片草可能被整体剔除
    // 初始全部隐藏:移到地下并把缩放趋近 0(实例矩阵里看不见即"不存在")
    for (let i = 0; i < GRASS_MAX; i++) {
        this.dummy.position.set(0, -1000, 0)
        this.dummy.scale.setScalar(0.0001)
        this.dummy.updateMatrix()
        this.grass.setMatrixAt(i, this.dummy.matrix)
    }
    this.grass.instanceMatrix.needsUpdate = true
    this.scene.add(this.grass)
}
帧处理部分,每帧的输入处理 + 运动/物理积分。
整个交互的核心为:读取按键 → 计算移动向量 → 更新朝向/位置/跳跃/蹲下/弹跳。
js
private handleInput(dt: number) {
    const k = this.keys
    // 把按键映射成"前/后/左/右"四个方向的有无(1/0)
    const fwd = k['KeyW'] || k['ArrowUp'] ? 1 : 0
    const back = k['KeyS'] || k['ArrowDown'] ? 1 : 0
    const left = k['KeyA'] || k['ArrowLeft'] ? 1 : 0
    const right = k['KeyD'] || k['ArrowRight'] ? 1 : 0
    const ix = right - left
    const iz = back - fwd
    const moving = ix !== 0 || iz !== 0

    // 蹲下 / 空格
    const crouching = !!(k['ControlLeft'] || k['ControlRight'])
    const space = !!k['Space']
    // 边沿检测
    if (space && !this.spacePrev && this.onGround) {
      this.vy = JUMP_SPEED
      this.onGround = false
    }
    this.spacePrev = space

    // 速度
    let speed = moving ? RUN_SPEED : 0
    if (crouching) speed *= 0.4
    if (!this.onGround) speed *= 0.6 // 空中减速

    if (moving) {
      const target = Math.atan2(ix, iz) + FACING_OFFSET
      this.heading = lerpAngle(this.heading, target, Math.min(1, dt * 12))
    }
    this.pivot.rotation.y = this.heading

    this.pivot.position.x += ix * speed * dt
    this.pivot.position.z += iz * speed * dt
    // 限制在地面范围内,别跑出地图
    const lim = GROUND_HALF - 2
    this.pivot.position.x = THREE.MathUtils.clamp(this.pivot.position.x, -lim, lim)
    this.pivot.position.z = THREE.MathUtils.clamp(this.pivot.position.z, -lim, lim)

    // 离地后用重力做匀加速积分,落地归零
    if (!this.onGround) {
      this.vy -= GRAVITY * dt
      this.jumpY += this.vy * dt
      if (this.jumpY <= 0) {
        this.jumpY = 0
        this.vy = 0
        this.onGround = true
      }
    }

    // 用缩放系数平滑过渡,并让缩放绕脚底(pivot 底部即 y=0)发生,
    const targetCrouch = crouching ? 0.55 : 1
    this.crouch += (targetCrouch - this.crouch) * Math.min(1, dt * 10)
    this.pivot.scale.y = this.crouch

    // 跑步上下弹跳效果
    if (moving && this.onGround) {
      this.runTime += dt * 16
      this.bob = Math.abs(Math.sin(this.runTime)) * 0.12
    } else {
      this.bob *= 0.82
      if (Math.abs(this.bob) < 0.001) this.bob = 0
    }
    // 最终 y = 跳跃高度 + 弹跳
    this.pivot.position.y = this.jumpY + this.bob

    // 随跑动在附近随机生成草:累计移动距离超过阈值就补一株
    const moved = this.pivot.position.distanceTo(this.prevPos)
    this.distAccum += moved
    if (this.distAccum > 1.6) {
      this.distAccum = 0
      this.spawnGrass()
    }
    this.prevPos.copy(this.pivot.position)
}
为了页面操作比较平滑,这里增加了相机跟随人物效果。
增加了跟随系数 a = 1 - 0.0015^dt。
dt 越大跟得越紧、越小越松,保证不同帧率下观感一致。
js
private updateCamera(dt: number) {
    const p = this.pivot.position
    const tx = p.x
    const ty = p.y + 6 // 始终在人物头顶上方 6 单位
    const tz = p.z + 14 // 始终在人物身后 14 单位(第三人称视角)
    const a = 1 - Math.pow(0.0015, dt)
    this.camera.position.x += (tx - this.camera.position.x) * a
    this.camera.position.y += (ty - this.camera.position.y) * a
    this.camera.position.z += (tz - this.camera.position.z) * a
    this.camera.lookAt(p.x, p.y + 1.3, p.z) // 看向人物上半身
}
除了上述部分以外,最好在页面销毁的时候,将循环停止,相关事件全部解绑。
释放 GPU 资源,以及 Canvas 部分,避免出现内存泄漏。
演示效果给大家放一下,因为是 Gif 图片,可能会有点儿卡,实际效果要丝滑很多。
免责声明:
- 本项目基于 Three.js 开发,属于个人技术学习 Demo,仅供技术研究与交流学习,严禁用于任何商业场景、盈利用途。
- Demo 内使用的电影角色形象、相关视觉素材的著作权、商标权全部归属原电影版权持有方。本人不对该影视 IP 享有任何版权。
- 本项目不存在任何商业推广、二次售卖、衍生盈利行为。
- 如果版权权利人认为本 Demo 构成侵权,请与我联系,我会立刻删除、下架全部相关内容。
- 任何人不得将本 Demo 内的形象、代码用于商用,若第三方擅自使用产生的一切法律责任,由使用方自行承担,与本项目作者无关。