一、配置petalinux 工程
安装petalinux
petalinux 下载:
安装虚拟机
安装Ubuntu 22.04的虚拟机
安装依赖
bash
sudo apt-get install gawk xterm \
gcc-multilib \
zlib1g:i386 \
autoconf \
libtool \
texinfo \
zlib1g-dev \
build-essential \
libncurses5-dev
bash
sudo apt install net-tools安装
bash
sudo chmod 755 petalinux-v2022.2-10141622-installer.run
mkdir -p ~/petalinux/2022.2
./petalinux-v2022.2-10141622-installer.run --dir ~/petalinux/2022.2


# 1. 设置环境(每次新终端都要执行)
source ~/petalinux/2022.2/petalinux/settings.sh

# 2. 创建工程(这时才会生成完整的工程结构)
petalinux-create -t project --template zynq -n my_first_project

# 3. 进入工程目录
cd my_first_project

# 4. 此时工程内部才有完整的组件目录
#    project-spec/  - 配置规格(内核、rootfs、设备树)
#    components/    - 软链接到 U-Boot/Kernel 源码
#    build/         - 编译输出(创建后为空,build 后才生成)
#    images/        - 最终镜像输出目录
遇到阅读就按下 enter,阅读后点击q退出,按照提示安装。
配置PetaLinux工作环境
bash
sudo gedit ~/.bashrc 然后翻页到末尾,在末尾添加这句话:
bash
#   ~ /home/你的用户名
source ~/petalinux/2022.2/settings.sh
保存之后,重启终端之后,运行:
bash
echo $PETALINUX二、使用petalinux
bash
petalinux-config --help?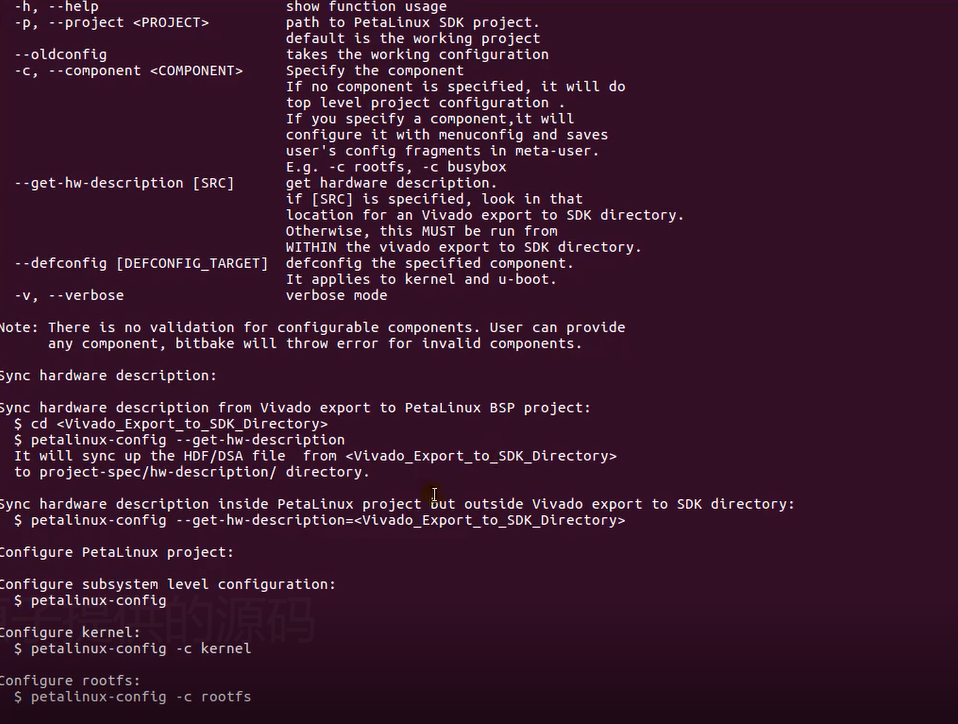
bash
petalinux-config --get-hw-description ~/hdf/Navigator_7020.sdk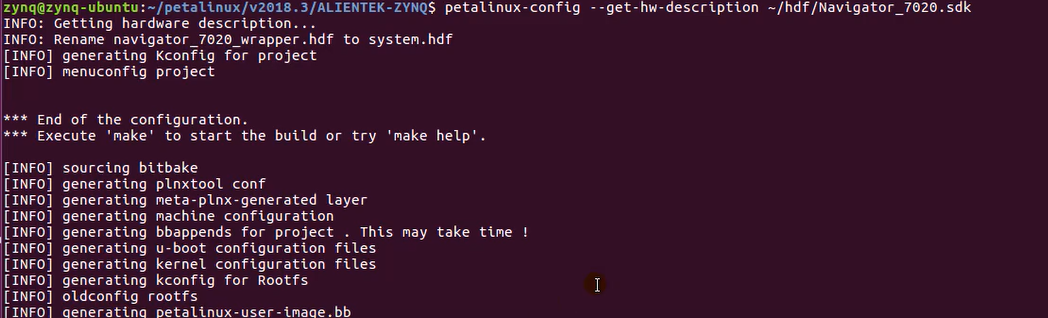
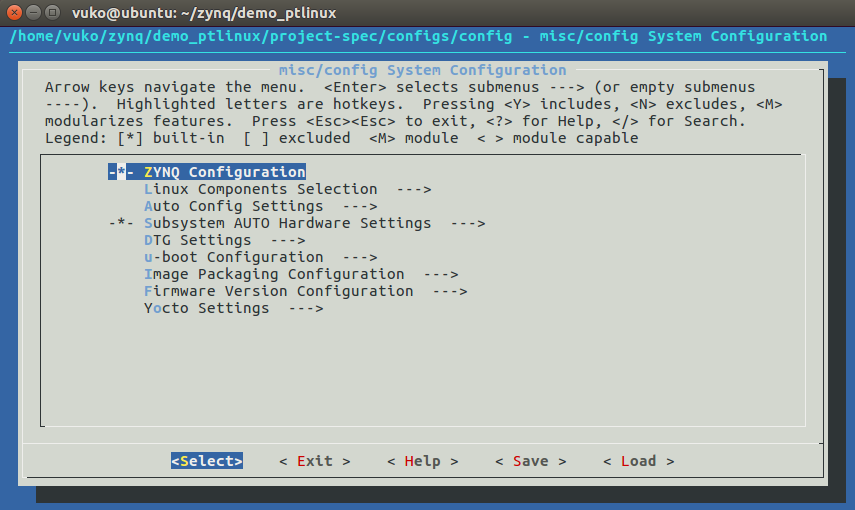
1.图像界面操作打开之前的工程的配置界面,使用petalinux-config
2.选择Linux Components Selection
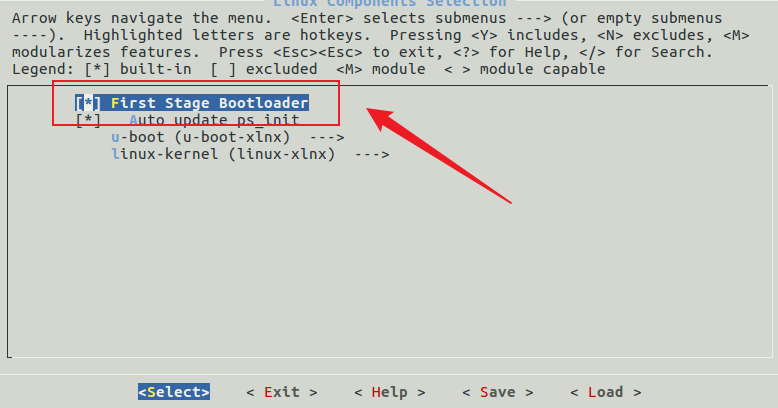
3. 配置U-Boot 源码来源为正点原子提供的U-Boot源码
选择u-boot --->选择 ext-local-src
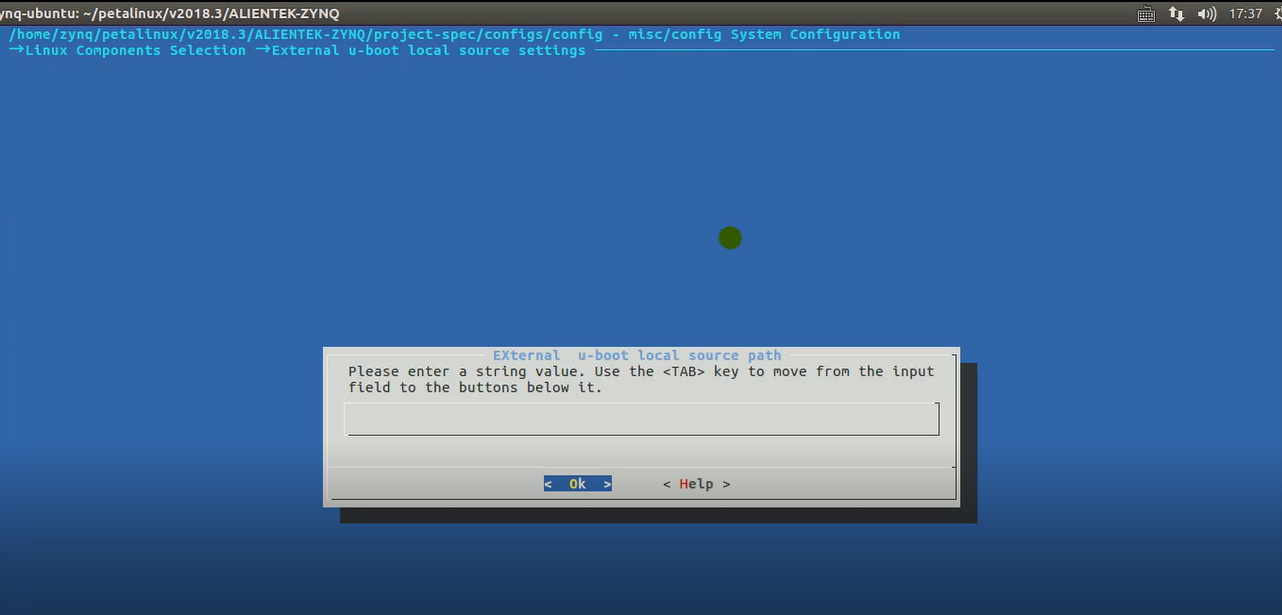
4.配置内核源码来源为正点原子提供的内核源码
5. 配置根文件系统的类型为SD Card
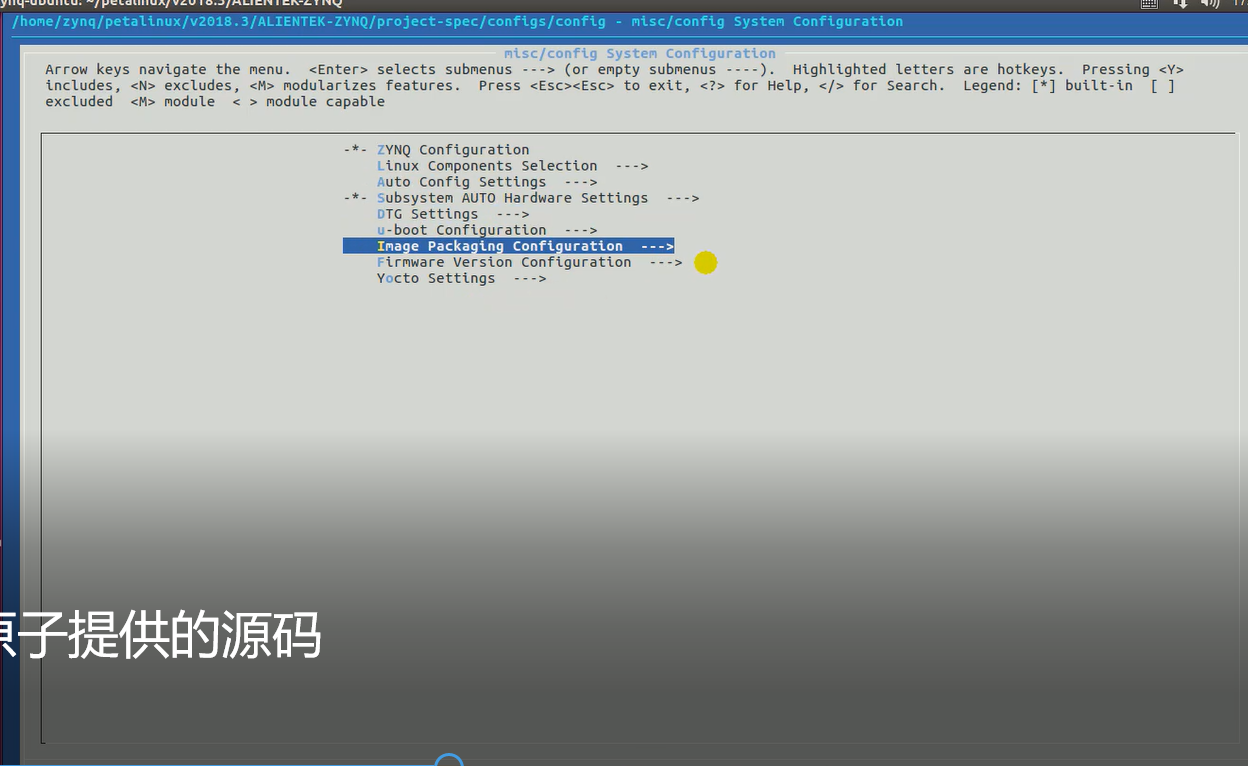
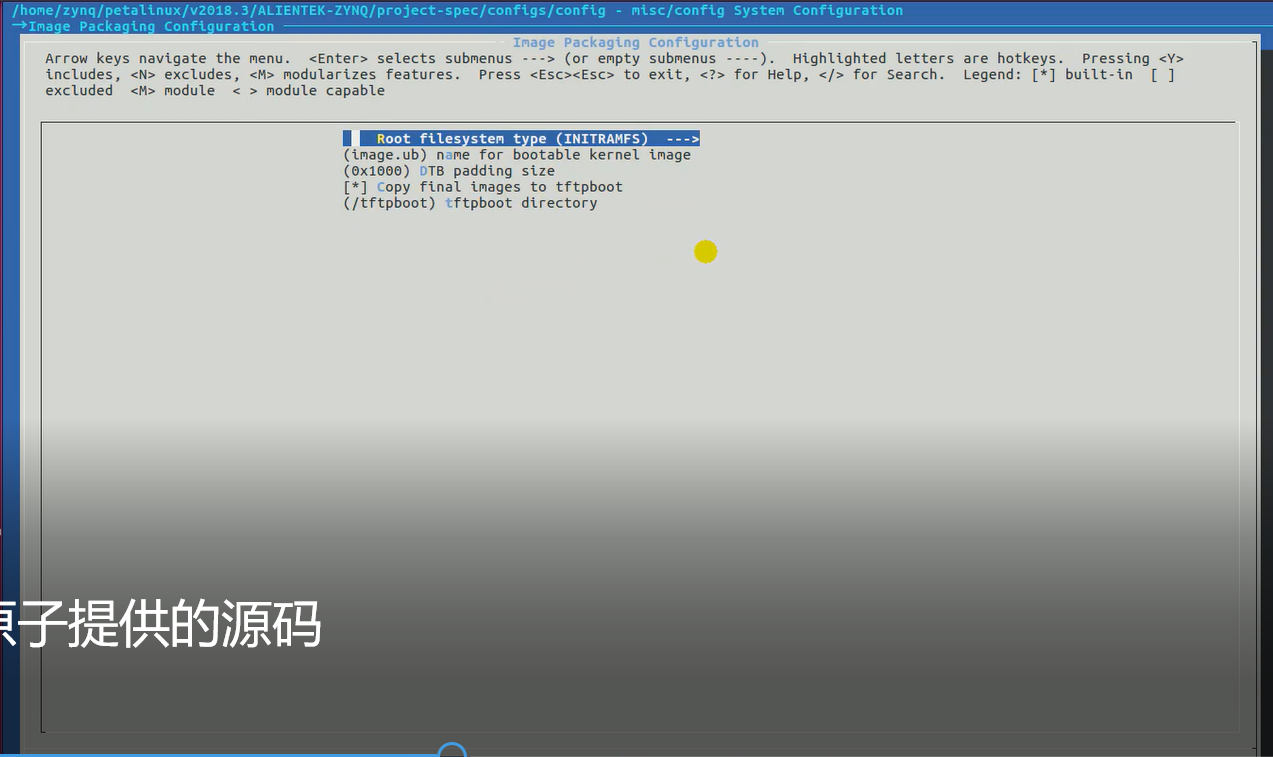
二、配置设备树
将相应的设备树文件 system-user.dtsi
bash
project-spec/meta-user/recipes-bsp/device-tree/files/system-user.dtsi三、编译petalinux 工程
在petalinux 工程目录下运行
bash
petalinux-build
四、将镜像文件和根文件系统拷贝到SD启动卡
bash
petalinux-package --boot --fsbl --fpga --uboot --force|------------------|-------------------------|-------------------------------------------------|
| 参数 | 全称/含义 | 说明 |
| --boot | Boot Image | 指定进入 **生成启动镜像** 模式,输出 BOOT.BIN |
| --fsbl <file> | First Stage Boot Loader | 指定 FSBL ELF 文件路径(Zynq/ZynqMP)或 PLM(Versal) |
| --fpga <file> | FPGA Bitstream | 指定 bitstream 文件(`.bit` 或 `.bin`),**可选** |
| --uboot <file> | U-Boot ELF | 指定 U-Boot ELF 文件,作为第二级启动加载器 |
| --force | Force Overwrite | 强制覆盖已存在的 BOOT.BIN,不提示确认 |
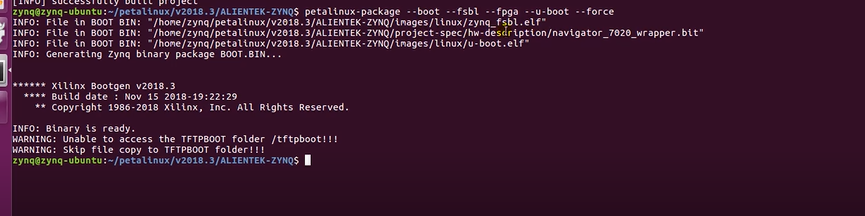
五、说明
PetaLinux 完全支持分别启动 U-Boot 和 Linux Kernel 原生的 menuconfig 配置界面,无需手动进入源码目录操作。
核心操作命令
- 启动 U-Boot menuconfig :在 PetaLinux 项目根目录执行
petalinux-config -c u-boot,即可直接打开 U-Boot 的图形化配置界面,自定义启动相关参数、硬件驱动等选项。 - 启动 Kernel menuconfig :在项目根目录执行
petalinux-config -c kernel,就能进入 Linux 内核的标准 menuconfig 界面,调整内核功能开关、驱动支持、编译选项等内容。
|----------------|---------------------------------------------------------------------------|--------------------------------------------------------|
| 组件 | 最终生效配置路径(构建后)**** | 用户修改推荐路径(持久化)**** |
| Linux Kernel | build/tmp/work-shared/<machine>/kernel-build-artifacts/.config | project-spec/meta-user/conf/user-config.cfg |
| U-Boot | build/tmp/work/<machine>-xilinx-linux/u-boot-xlnx/<ver>/build/.config | project-spec/meta-user/recipes-bsp/u-boot/files/*.cfg |
petalinux-config -c u-boot后会进入menuconfig 退出后保存文件名为user-boot.cfg
- 提示输入文件名 :系统会弹窗要求你输入一个配置文件名(例如
uboot.config或.config)。
当你退出 menuconfig 并执行 petalinux-build -c u-boot 后,PetaLinux 会将你的修改与默认配置合并,生成最终用于编译的 .config 文件。
|----------------------------|--------------------------------|
| 命令 | 作用 |
| petalinux-build | 非交互式全量构建,不会进入任何 menuconfig |
| petalinux-config | 进入 RootFS / 系统级** menuconfig |
| petalinux-config -c kernel | 进入 Kernel menuconfig |
| petalinux-config -c u-boot | 进入 U-Boot menuconfig |
| petalinux-config -c rootfs | 进入 RootFS 软件包 menuconfig |
完整工作流示例
1. 先配置,后构建
bash
# 进入项目目录
cd <plnx-proj-root>

# 配置 Kernel(会弹出 menuconfig)
petalinux-config -c kernel
# → 修改配置 → Save → Exit

# 配置 U-Boot(会弹出 menuconfig)
petalinux-config -c u-boot
# → 修改配置 → Save → Exit

# 非交互式构建(使用刚才保存的配置)
petalinux-build
bash
<plnx-proj-root>/
├── project-spec/
│   ├── configs/
│   │   └── config              # 系统级配置
│   └── meta-user/
│       └── recipes-kernel/
│           └── linux/
│               └── linux-xlnx/       # Kernel 配置片段
│                   └── user_*.cfg    # 你的 Kernel 修改
│       └── recipes-bsp/
│           └── u-boot/
│               └── u-boot-xlnx/      # U-Boot 配置片段
│                   └── user_*.cfg    # 你的 U-Boot 修改
关键点 :PetaLinux 不会直接修改 U-Boot / Kernel 源码树里的 .config,而是把你的 menuconfig 变更生成 .cfg 片段文件 ,通过 bbappend 机制注入到 Yocto 构建中。