昨天的python入门没写完,就有点迫不及待写vue入门(生活不易,亚历山大)
首先
首先啊,你得有一个VUE源码(不说需的)
就算是CSDN这里,也有很多,实在找不到就让 CSDN的 AI实验室写一个
再首先 .vue 好像不是TypeScript ,而是js

不能写 != ,这是Ts 的语法
javascript
  console.log(blobUrl);
  const ext = file.name.split('.').pop().toUpperCase();
  let modelType = ext === 'GLB' ? 'GLTF' : ext
四个菜单,加一个菜单,如何实现
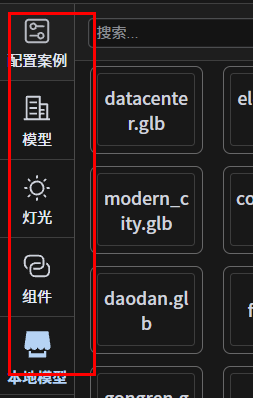
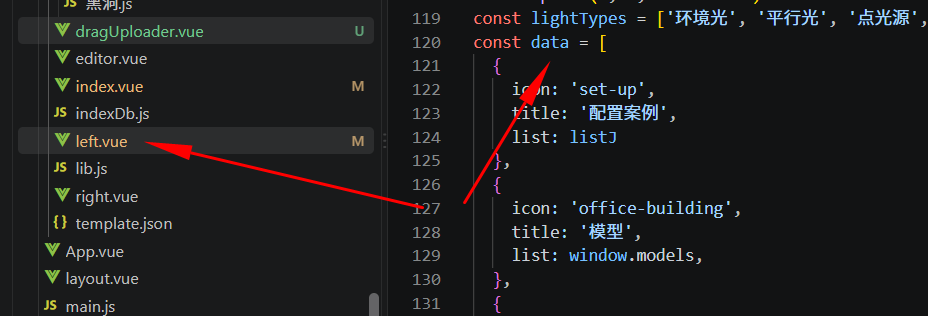
javascript
<template>
  <div class="left">
    <div class="nav-menu">
      <div class="menu-item" v-for="item in data" :key="item.title" @click="setActive(item)">
        <el-button :class="{ 'active-icon': active == item.title, 'normal-icon': active != item.title }" link
          :icon="item.icon" :title="item.title" />
        <span :class="{ 'active-text': active == item.title }">{{ item.title }}</span>
      </div>
    </div>
</div>
</template>

<script setup>
const data = [
  {
    icon: 'set-up',
    title: '配置案例',
    list: listJ
  },
  {
    icon: 'office-building',
    title: '模型',
    list: window.models,
  },
  {
    title: '灯光',
    icon: 'sunny',
    list: lightTypes
  },
  {
    title: '组件',
    icon: 'connection',
    list: editor_components
  },
  {
    title:'本地模型',
    icon:'shop',
    list:window.models,
  }
];
//上面是 left.vue 代码
//是 <template> + <script>
//而 <script> 需要带上 setup
AI 写的一个几乎完整的上传图片 x 拖入即可
引入代码.vue 的写法如下,现在还没有 dragUploader.vue ,下面是创建该文件的完整代码
javascript
<div>
<DragUploader />
</div>


<script setup>
import DragUploader from './dragUploader.vue'- 你说接近PHP也接近,所以解析语言还真是不错的;;;;
- 你说写成一个文件不爽,还是一个牛排分4次吃才好,那估计黄花菜都凉了;;;;
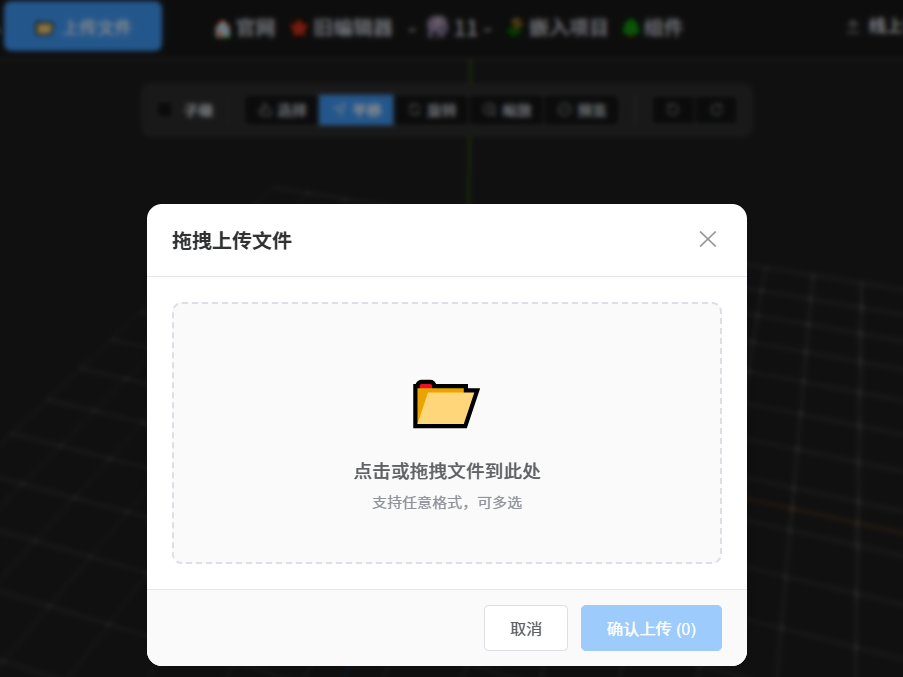
创建一个 dragUploader.vue
javascript
<template>
  <div class="file-uploader">
    <!-- 触发按钮 -->
    <button class="upload-btn" @click="openModal">
      <span>📁 上传文件</span>
    </button>

    <!-- 弹框遮罩 -->
    <Teleport to="body">
      <Transition name="fade">
        <div v-if="visible" class="modal-overlay" @click="closeModal">
          <div class="modal-content" @click.stop>
            <!-- 头部 -->
            <div class="modal-header">
              <h3>拖拽上传文件</h3>
              <button class="close-btn" @click="closeModal">✕</button>
            </div>

            <!-- 拖拽区域 -->
            <div
              class="drop-zone"
              :class="{ 'drag-over': isDragging }"
              @dragenter.prevent="isDragging = true"
              @dragover.prevent="isDragging = true"
              @dragleave.prevent="isDragging = false"
              @drop.prevent="handleDrop"
              @click="triggerFileInput"
            >
              <input
                ref="fileInput"
                type="file"
                multiple
                hidden
                @change="handleFileSelect"
              />
              <div class="drop-content">
                <div class="icon">📂</div>
                <p class="main-text">
                  {{ isDragging ? '松开以上传' : '点击或拖拽文件到此处' }}
                </p>
                <p class="sub-text">支持任意格式,可多选</p>
              </div>
            </div>

            <!-- 文件列表 -->
            <div v-if="fileList.length" class="file-list">
              <div
                v-for="(file, index) in fileList"
                :key="index"
                class="file-item"
              >
                <span class="file-name">{{ file.name }}</span>
                <span class="file-size">{{ formatSize(file.size) }}</span>
                <button class="remove-btn" @click="removeFile(index)">✕</button>
              </div>
            </div>

            <!-- 底部操作 -->
            <div class="modal-footer">
              <button class="btn-secondary" @click="closeModal">取消</button>
              <button
                class="btn-primary"
                :disabled="!fileList.length"
                @click="confirmUpload"
              >
                确认上传 ({{ fileList.length }})
              </button>
            </div>
          </div>
        </div>
      </Transition>
    </Teleport>
  </div>
</template>

<script setup>
import { ref } from 'vue'

const visible = ref(false)
const isDragging = ref(false)
const fileList = ref([])
const fileInput = ref(null)

const openModal = () => {
  visible.value = true
  fileList.value = []
}

const closeModal = () => {
  visible.value = false
  isDragging.value = false
}

const triggerFileInput = () => {
  fileInput.value?.click()
}

// 处理拖拽放下
const handleDrop = (e) => {
  isDragging.value = false
  const files = Array.from(e.dataTransfer.files)
  addFiles(files)
}

// 处理点击选择
const handleFileSelect = (e) => {
  const files = Array.from(e.target.files)
  addFiles(files)
  e.target.value = '' // 清空,允许重复选择同一文件
}

const addFiles = (files) => {
  fileList.value.push(...files)
}

const removeFile = (index) => {
  fileList.value.splice(index, 1)
}

const formatSize = (bytes) => {
  if (bytes === 0) return '0 B'
  const k = 1024
  const sizes = ['B', 'KB', 'MB', 'GB']
  const i = Math.floor(Math.log(bytes) / Math.log(k))
  return parseFloat((bytes / Math.pow(k, i)).toFixed(2)) + ' ' + sizes[i]
}

const confirmUpload = () => {
  // 这里处理实际上传逻辑
  console.log('待上传文件:', fileList.value)

  const file = fileList.value[0];
  const blobUrl = URL.createObjectURL(file)
  console.log(blobUrl);
  const ext = file.name.split('.').pop().toUpperCase();
  let modelType = ext === 'GLB' ? 'GLTF' : ext

  alert(`已选择 ${fileList.value.length} 个文件,准备上传 t=${modelType}`);
  //closeModal()
}
</script>

<style scoped>
.upload-btn {
  padding: 10px 24px;
  background: #409eff;
  color: white;
  border: none;
  border-radius: 6px;
  font-size: 14px;
  cursor: pointer;
  transition: all 0.2s;
}

.upload-btn:hover {
  background: #66b1ff;
}

/* 遮罩 */
.modal-overlay {
  position: fixed;
  inset: 0;
  background: rgba(0, 0, 0, 0.45);
  display: flex;
  align-items: center;
  justify-content: center;
  z-index: 1000;
  backdrop-filter: blur(2px);
}

/* 弹框 */
.modal-content {
  background: white;
  border-radius: 12px;
  width: 480px;
  max-width: 90vw;
  box-shadow: 0 20px 60px rgba(0, 0, 0, 0.15);
  overflow: hidden;
}

.modal-header {
  display: flex;
  justify-content: space-between;
  align-items: center;
  padding: 16px 20px;
  border-bottom: 1px solid #e4e7ed;
}

.modal-header h3 {
  margin: 0;
  font-size: 16px;
  color: #303133;
}

.close-btn {
  background: none;
  border: none;
  font-size: 18px;
  color: #909399;
  cursor: pointer;
  padding: 4px;
  line-height: 1;
}

.close-btn:hover {
  color: #409eff;
}

/* 拖拽区域 */
.drop-zone {
  margin: 20px;
  padding: 40px 20px;
  border: 2px dashed #dcdfe6;
  border-radius: 8px;
  text-align: center;
  cursor: pointer;
  transition: all 0.3s;
  background: #fafafa;
}

.drop-zone.drag-over {
  border-color: #409eff;
  background: #ecf5ff;
}

.drop-content .icon {
  font-size: 48px;
  margin-bottom: 12px;
}

.main-text {
  margin: 0 0 6px;
  font-size: 15px;
  color: #606266;
  font-weight: 500;
}

.sub-text {
  margin: 0;
  font-size: 12px;
  color: #909399;
}

/* 文件列表 */
.file-list {
  margin: 0 20px 16px;
  max-height: 160px;
  overflow-y: auto;
}

.file-item {
  display: flex;
  align-items: center;
  gap: 10px;
  padding: 8px 12px;
  background: #f5f7fa;
  border-radius: 6px;
  margin-bottom: 6px;
  font-size: 13px;
}

.file-name {
  flex: 1;
  overflow: hidden;
  text-overflow: ellipsis;
  white-space: nowrap;
  color: #303133;
}

.file-size {
  color: #909399;
  font-size: 12px;
  white-space: nowrap;
}

.remove-btn {
  background: none;
  border: none;
  color: #c0c4cc;
  cursor: pointer;
  font-size: 12px;
  padding: 2px 6px;
}

.remove-btn:hover {
  color: #f56c6c;
}

/* 底部 */
.modal-footer {
  display: flex;
  justify-content: flex-end;
  gap: 10px;
  padding: 12px 20px;
  border-top: 1px solid #e4e7ed;
  background: #fafafa;
}

.btn-secondary,
.btn-primary {
  padding: 8px 20px;
  border-radius: 4px;
  font-size: 13px;
  cursor: pointer;
  border: 1px solid #dcdfe6;
  transition: all 0.2s;
}

.btn-secondary {
  background: white;
  color: #606266;
}

.btn-secondary:hover {
  color: #409eff;
  border-color: #c6e2ff;
}

.btn-primary {
  background: #409eff;
  color: white;
  border-color: #409eff;
}

.btn-primary:hover:not(:disabled) {
  background: #66b1ff;
}

.btn-primary:disabled {
  opacity: 0.5;
  cursor: not-allowed;
}

/* 过渡动画 */
.fade-enter-active,
.fade-leave-active {
  transition: opacity 0.25s ease;
}

.fade-enter-from,
.fade-leave-to {
  opacity: 0;
}
</style>
可以接入 file 逻辑(未验证,但就这么简单)
file 上传逻辑
javascript
// input file 拿到本地File对象
async function loadLocalFileToEditor(file: File) {
  // 本地文件 → 浏览器内存blob url
  const blobUrl = URL.createObjectURL(file)

  // 解析后缀判断模型类型
  const ext = file.name.split('.').pop()!.toUpperCase()
  let modelType = ext === 'GLB' ? 'GLTF' : ext

  const rootInfo = {
    url: blobUrl,      // 传入blob内存地址,loadModel把它当作普通url加载
    type: modelType,
    // threeEditorDBNameUrl: `IndexDB:${file.name}` // 需要存入内置indexDB缓存时开启
  }

  const { loaderService } = threeEditor.modelCores.loadModel(rootInfo)

  loaderService.progress = (e) => {
    console.log('加载进度', e)
  }
  loaderService.complete = (modelObj) => {
    console.log('本地模型加载成功', modelObj)
    // 使用完必须释放blob,防止内存泄漏
    URL.revokeObjectURL(blobUrl)
  }
  loaderService.error = (err) => {
    console.error('加载失败', err)
    URL.revokeObjectURL(blobUrl)
  }
}
其实 vue 就这么简单,会逻辑就行,右手就行
无厘头(2020年前后)参考:
vue是一个前后端分离的框架,这。。。。。。。。。凡是都是两面性(怎么感觉:此地无银三百两,一般人也会把自己最厉害的技能排第一名说,然后就没有然后)
好处
- 就是分离(其实这个分离,可以有很种方法处理,例如Php前后端,nodejs前后端,js离线)
- 确实分布式开发,需要分离的结构
坏处
- 就是分离,既是优点也是缺点,搞了太大一个框架。还必须重新学
- 因为是单人开发或者是学习阶段,你所需要的框架不单单是vue,还需要从0开始学习nodejs等后台,那以前不分离也需要啊,不是更混乱?但以前可能就是一个大包给安装,现在你得每个框架独立分开安装,也意味着你一个人要做5人份的工作
注意!要在一个空文件夹目录下,执行以下命令:
注意!要在一个空文件夹目录下,执行以下命令:
注意!要在一个空文件夹目录下,执行以下命令:
cs
vue init webpack vue-demo写错了会有下面提示:
cs
>vue init wbpack vue-demo //错的命令
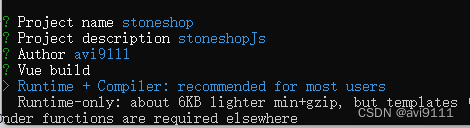
-demo命令正确之后,按提示输入(Project name不能大写),Runtime选择第一项(键盘上下选择,官方推荐)
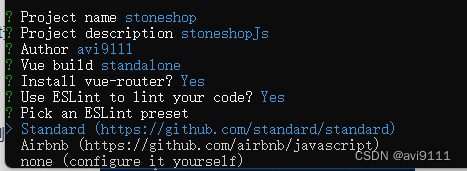
是否安装vue-router?是否使用ESLine 做代码规范?
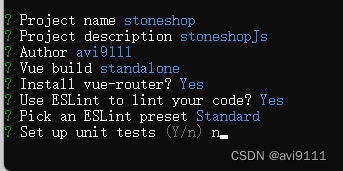
单元测试?(no)
然后就会在执行该命令的目录下生成一个新的项目(很多文件)
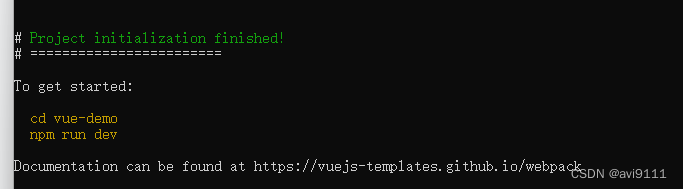
而一些基础的库,应该会安装在C盘,npm-modules目录下,因为个人Nodejs安装在c盘

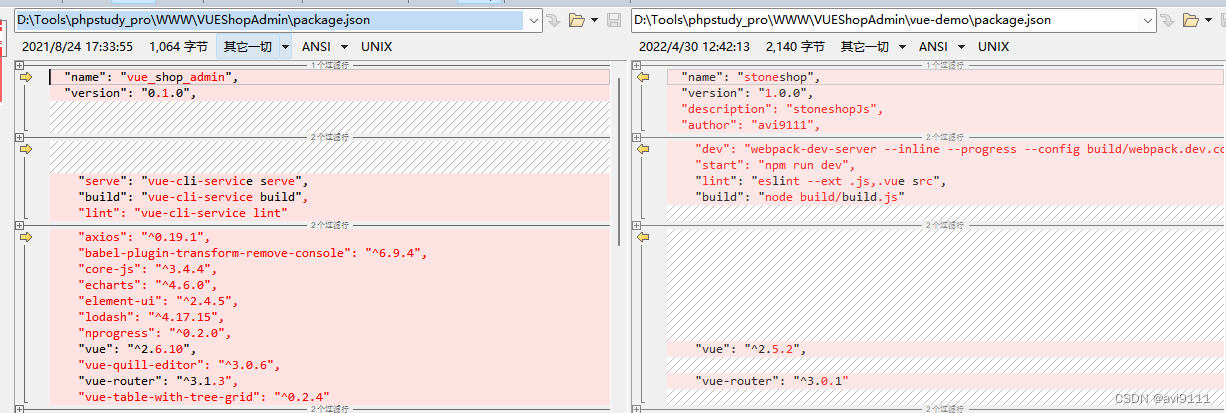
提示

npm install @vue/cli-service
提示

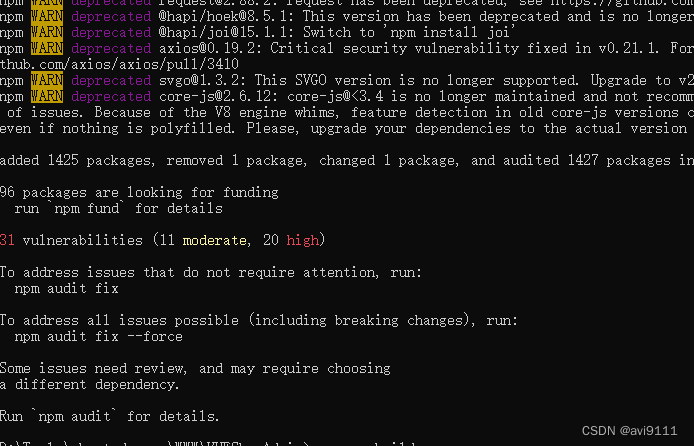
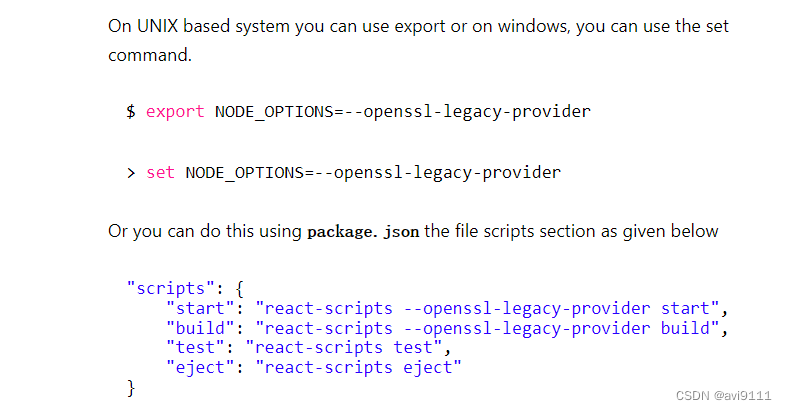
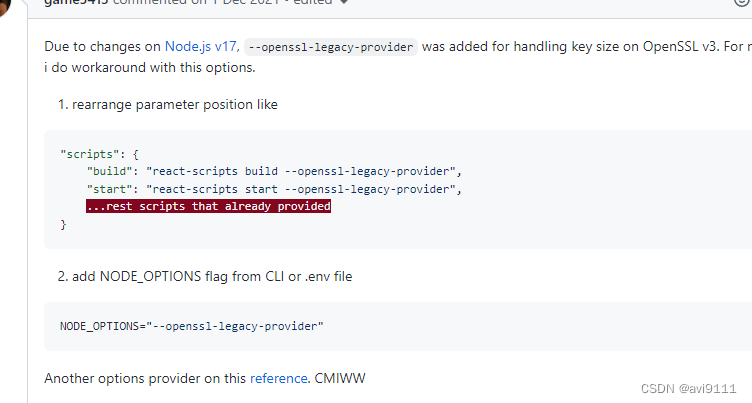
参考:
vue-cli(vue脚手架)搭建项目详细 - SegmentFault 思否
vue-cli-service 不是内部或者外部命令 - SegmentFault 思否
https://github.com/vuejs/vue-cli/issues/6770
javascript - What is --openssl-legacy-provider in NPM? - Stack Overflow