一. Openclaw 的定时需求
给大模型说:你帮我定个闹钟,定到9:00,我要起床去上班。
第二天,你手机的闹钟就响了。
分析openclaw的代码,我们发现它走的是以下流程:
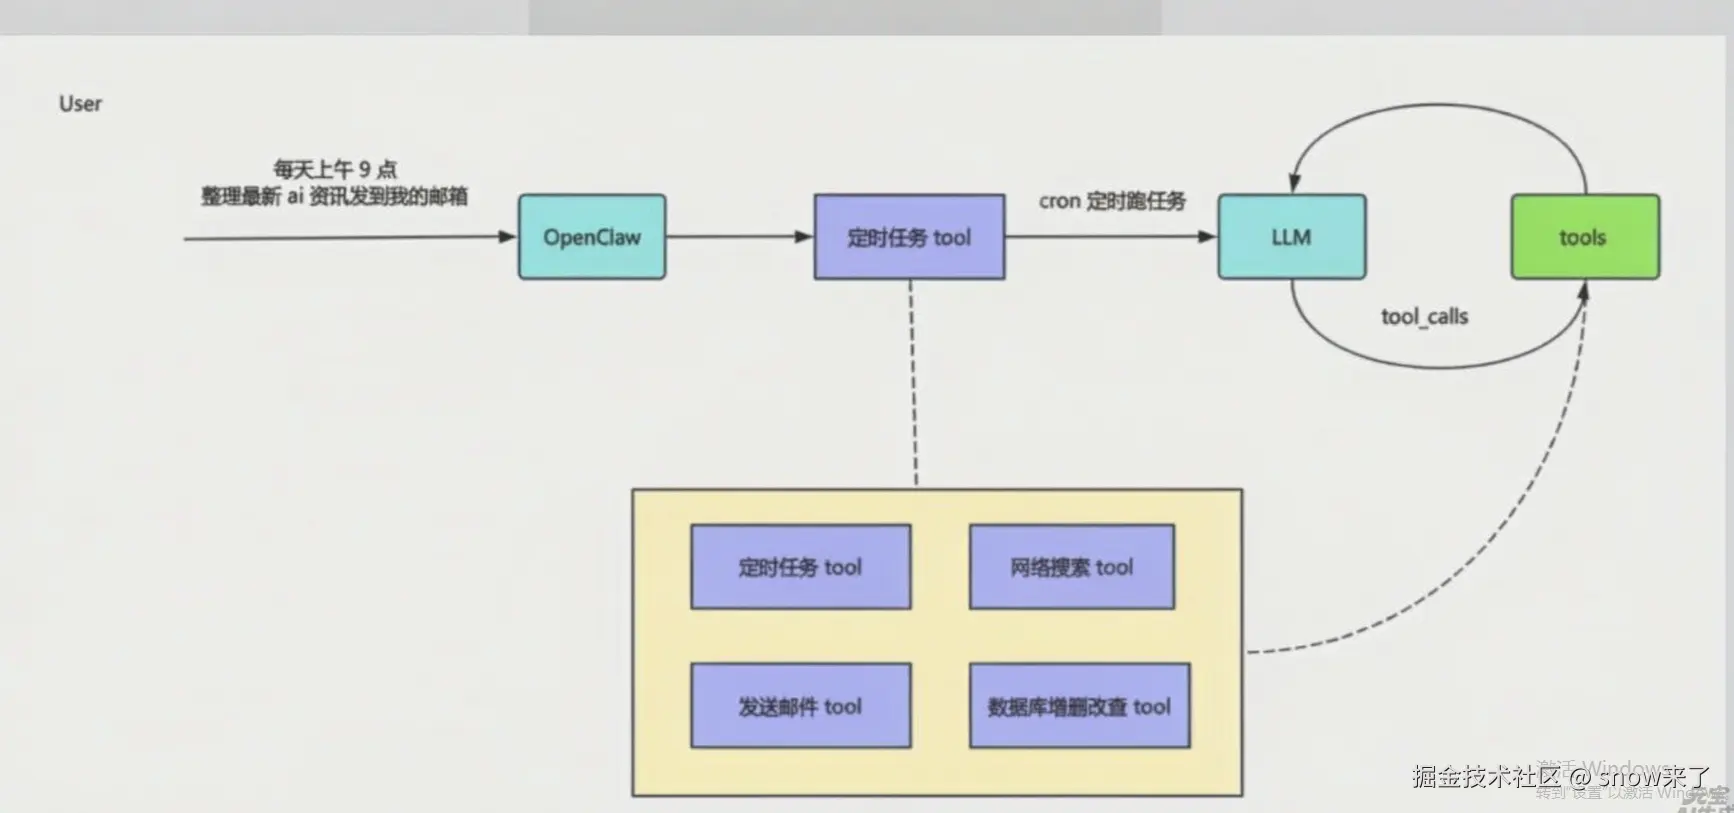
最主要的就是这个tool:
在大模型里面有个定时器,帮你盯着时间。还有一个网络信息搜索tool,帮你检索网上相关资讯。还有一个发送邮件的tool。以上三个通过字面意思就能理解。但是数据库呢?
为什么要用到数据库?
首先,发送邮件的邮件地址需要维护不?
你在哪里,什么时间段的信息,具体是哪个国家地区的信息,哪种信息。
其次是几点发送资讯信息,还有昨天给都发了哪些?哪些是你喜欢的,哪些是你不喜欢的,今天又发送了哪些?是不是都该记住,为明天更准确地为主人服务做准备?
二.创建nest项目,开发人员查询的tool
执行命令创建项目,并按照相关的包
js
nest new cron-job-tool
cd cron-job-tool
pnpm install @langchain/core @langchain/openai zod @nestjs/config我在# ai agent ---nest+langchain实现SSE推送信息里面已经说了nest 的env 文件,下面就不再赘述,默认系统已经引入了 .env 文件。
1.用invoke搜索数据库里面的用户信息
invoke是一次性调用大模型获取数据。
现在直接在ai.service.ts 文件里面写一个runChain 方法,他的作用就是根据要求找出database对应用户的信息。
js
import { Inject, Injectable } from '@nestjs/common';
import { ChatOpenAI } from '@langchain/openai';
import { tool } from '@langchain/core/tools';
import {
  AIMessage,
  BaseMessage,
  HumanMessage,
  SystemMessage,
  ToolMessage,
} from '@langchain/core/messages';
import { z } from 'zod';
import { Runnable } from '@langchain/core/runnables';

const database: any = {
  users: {
    '001': {
      id: '001',
      name: '张三',
      email: 'zhangsan@example.com',
      role: 'admin',
    },
    '002': { id: '002', name: '李四', email: 'lisi@example.com', role: 'user' },
    '003': {
      id: '003',
      name: '王五',
      email: 'wangwu@example.com',
      role: 'user',
    },
  },
};

const queryUserArgsSchema = z.object({
  userId: z.string().describe('用户 ID,例如:001, 002, 003'),
});

type QueryUserArgs = {
  userId: string;
};

const queryUserTool = tool(
  async ({ userId }: QueryUserArgs) => {
    const user = database.users[userId];

    if (!user) {
      return `用户 ID ${userId} 不存在。可用的 ID: 001, 002, 003`;
    }

    return `用户信息:\n- ID: ${user.id}\n- 姓名: ${user.name}\n- 邮箱: ${user.email}\n- 角色: ${user.role}`;
  },
  {
    name: 'query_user',
    description:
      '查询数据库中的用户信息。输入用户 ID,返回该用户的详细信息(姓名、邮箱、角色)。',
    schema: queryUserArgsSchema,
  },
);

@Injectable()
export class AiService {
  private readonly modelWithTools: Runnable<BaseMessage[], AIMessage>;

  // 获取model
  constructor(@Inject('CHAT_MODEL') model: ChatOpenAI) {
    this.modelWithTools = model.bindTools([queryUserTool]);
  }

  async runChain(query: string): Promise<string> {
    const messages: BaseMessage[] = [
      new SystemMessage(
        '你是一个智能助手,可以在需要时调用工具(如 query_user)来查询用户信息,再用结果回答用户的问题。',
      ),
      new HumanMessage(query),
    ];

    while (true) {
      const aiMessage = await this.modelWithTools.invoke(messages);
      messages.push(aiMessage);

      const toolCalls = aiMessage.tool_calls ?? [];

      // 没有要调用的工具,直接把回答返回给调用方
      if (!toolCalls.length) {
        return aiMessage.content as string;
      }

      // 依次执行本轮需要调用的所有工具
      for (const toolCall of toolCalls) {
        const toolCallId = toolCall.id || '';
        const toolName = toolCall.name;

        if (toolName === 'query_user') {
          const args = queryUserArgsSchema.parse(toolCall.args);
          const result = await queryUserTool.invoke(args);

          messages.push(
            new ToolMessage({
              tool_call_id: toolCallId,
              name: toolName,
              content: result,
            }),
          );
        }
      }
    }
  }
}在controller文件里面定义接口
js
import { Controller, Get, Query, Sse } from '@nestjs/common';
import { AiService } from './ai.service.js';
import { Observable, from, map } from 'rxjs';

@Controller('ai')
export class AiController {
  constructor(private readonly aiService: AiService) {}

  @Get('chat')
  async chat(@Query('query') query: string) {
    const answer = await this.aiService.runChain(query);
    return answer;
  }
}
启动项目测试
js
npm run start:dev
2.用stream搜索数据库里面的用户信息
stream是流式调用,一边生产,一边返回数据。
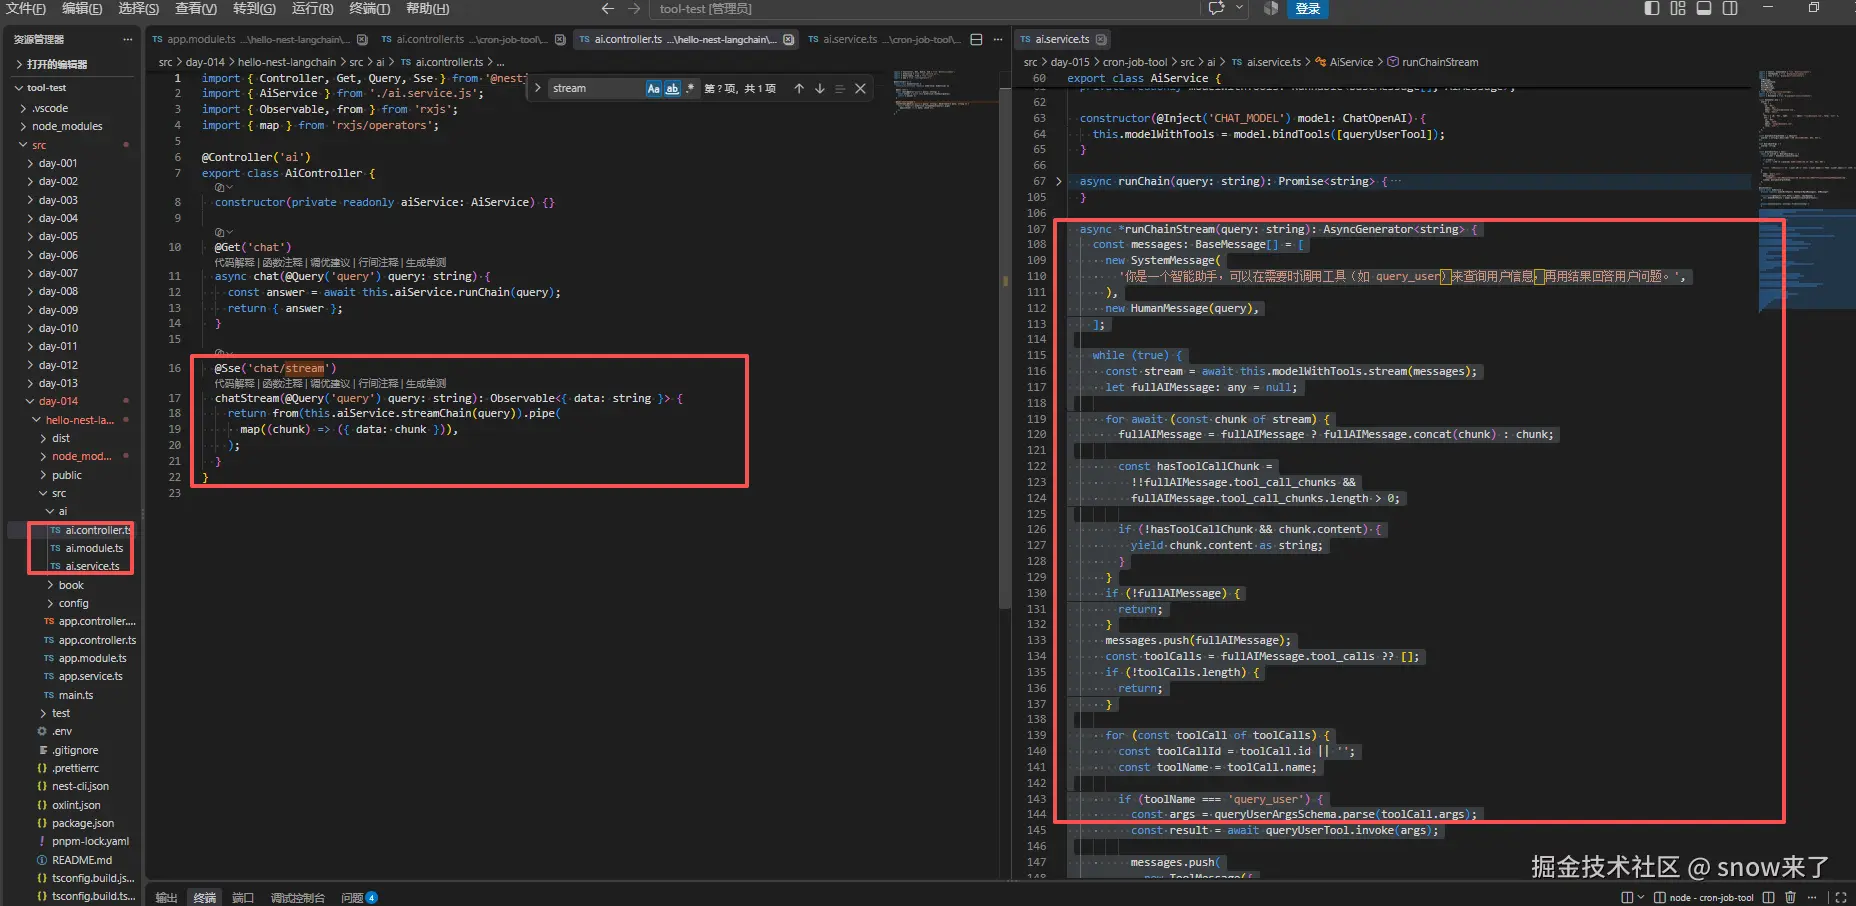
在ai.service.ts文件里面添加runChainStream的方法如下:
js
  async *runChainStream(query: string): AsyncGenerator<string> {
    const messages: BaseMessage[] = [
      new SystemMessage(
        '你是一个智能助手,可以在需要时调用工具(如 query_user)来查询用户信息,再用结果回答用户问题。',
      ),
      new HumanMessage(query),
    ];

    while (true) {
      const stream = await this.modelWithTools.stream(messages);
      let fullAIMessage: any = null;

      for await (const chunk of stream) {
        fullAIMessage = fullAIMessage ? fullAIMessage.concat(chunk) : chunk;

        const hasToolCallChunk =
          !!fullAIMessage.tool_call_chunks &&
          fullAIMessage.tool_call_chunks.length > 0;

        if (!hasToolCallChunk && chunk.content) {
          yield chunk.content as string;
        }
      }
      if (!fullAIMessage) {
        return;
      }
      messages.push(fullAIMessage);
      const toolCalls = fullAIMessage.tool_calls ?? [];
      if (!toolCalls.length) {
        return;
      }

      for (const toolCall of toolCalls) {
        const toolCallId = toolCall.id || '';
        const toolName = toolCall.name;

        if (toolName === 'query_user') {
          const args = queryUserArgsSchema.parse(toolCall.args);
          const result = await queryUserTool.invoke(args);

          messages.push(
            new ToolMessage({
              tool_call_id: toolCallId,
              name: toolName,
              content: result,
            }),
          );
        }
      }
    }
}然后在controller里面添加接口
js
  @Sse('chat/stream')
  chatStream(@Query('query') query: string): Observable<{ data: string }> {
    const stream = this.aiService.runChainStream(query);

    return from(stream).pipe(map((chunk) => ({ data: chunk })));
  }
}
具体如下:
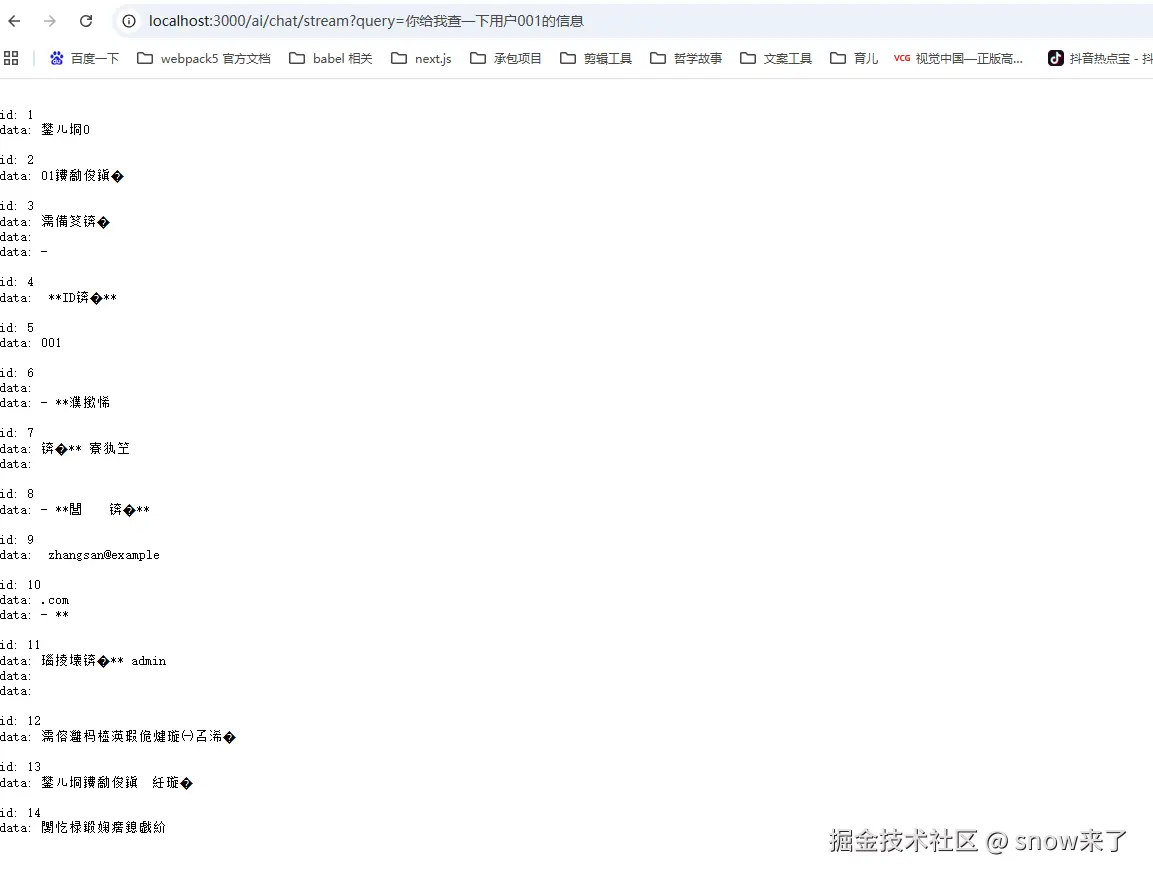
启动项目测试
对比两个方法
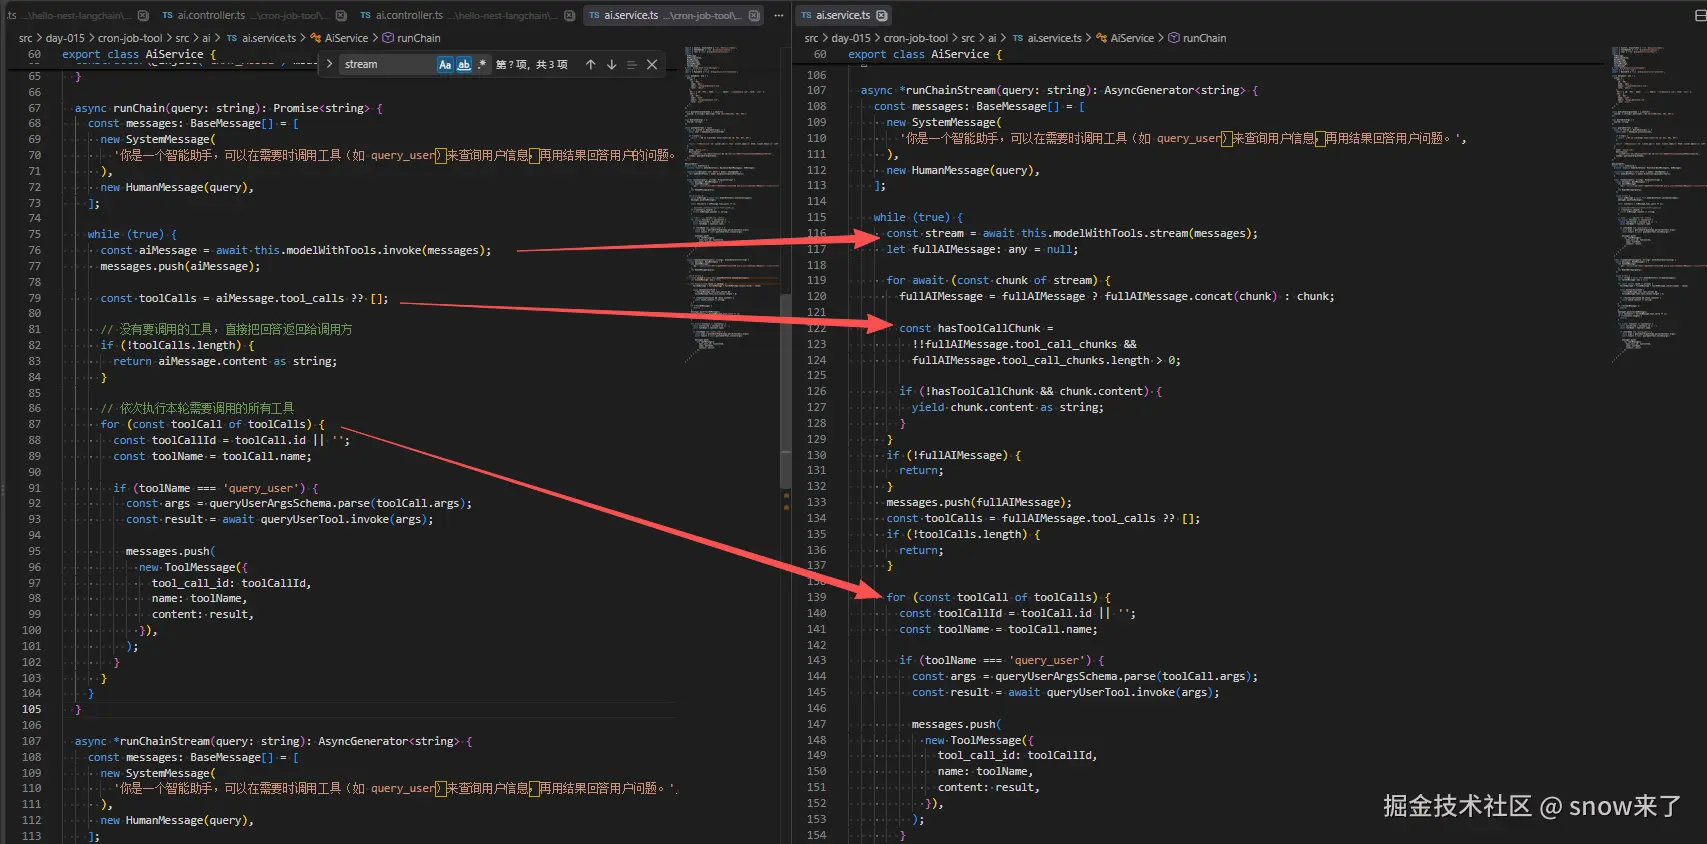
从上面的对比我们可以看到
- const aiMessage = await this.modelWithTools.invoke(messages); 一次性可以拿到所有的返回数据,然后找到对应工具去处理,处理以后返回给用户就好。
- const stream = await this.modelWithTools.stream(messages); 是生成一个数据就返回一个数据,需要把这些chunk包拼接在一起,才能组成一个完整的答案。用
fullAIMessage = fullAIMessage.concat(chunk)把流式片段拼成一个完整 AI 消息对象,因为工具调用信息可能分片到达。
3.将人员tool提取到其他文件里面
原来,关于人员的增删改查都是放在ai.service.ts里面的,这样代码显得比较凌乱。 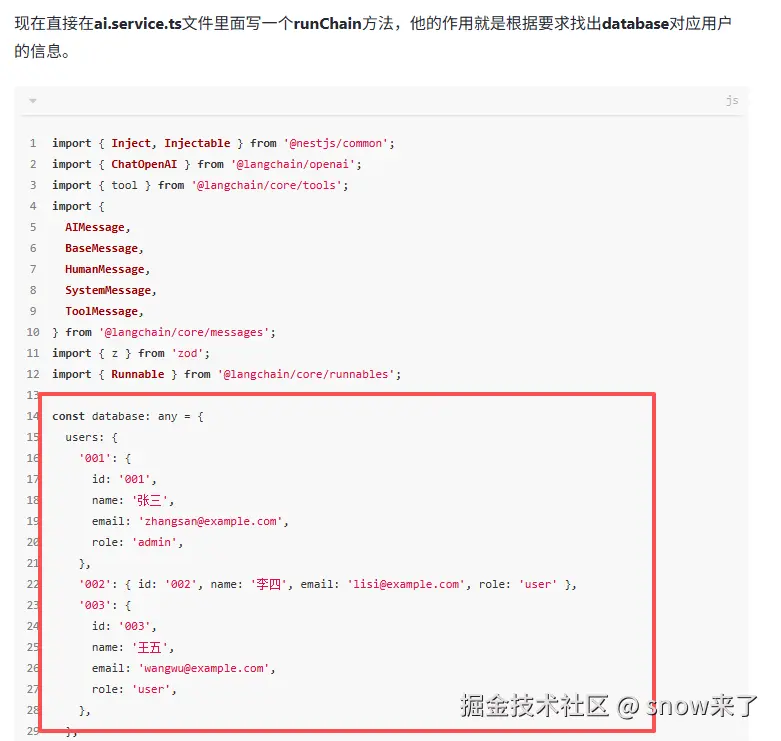
我们进行优化,就是将 queryUserTool的这部分业务拆分出去。
在建立一个文件user.service.ts--创建 UserService 类,理由有一个数据users,对users进行增删改查。目录如下
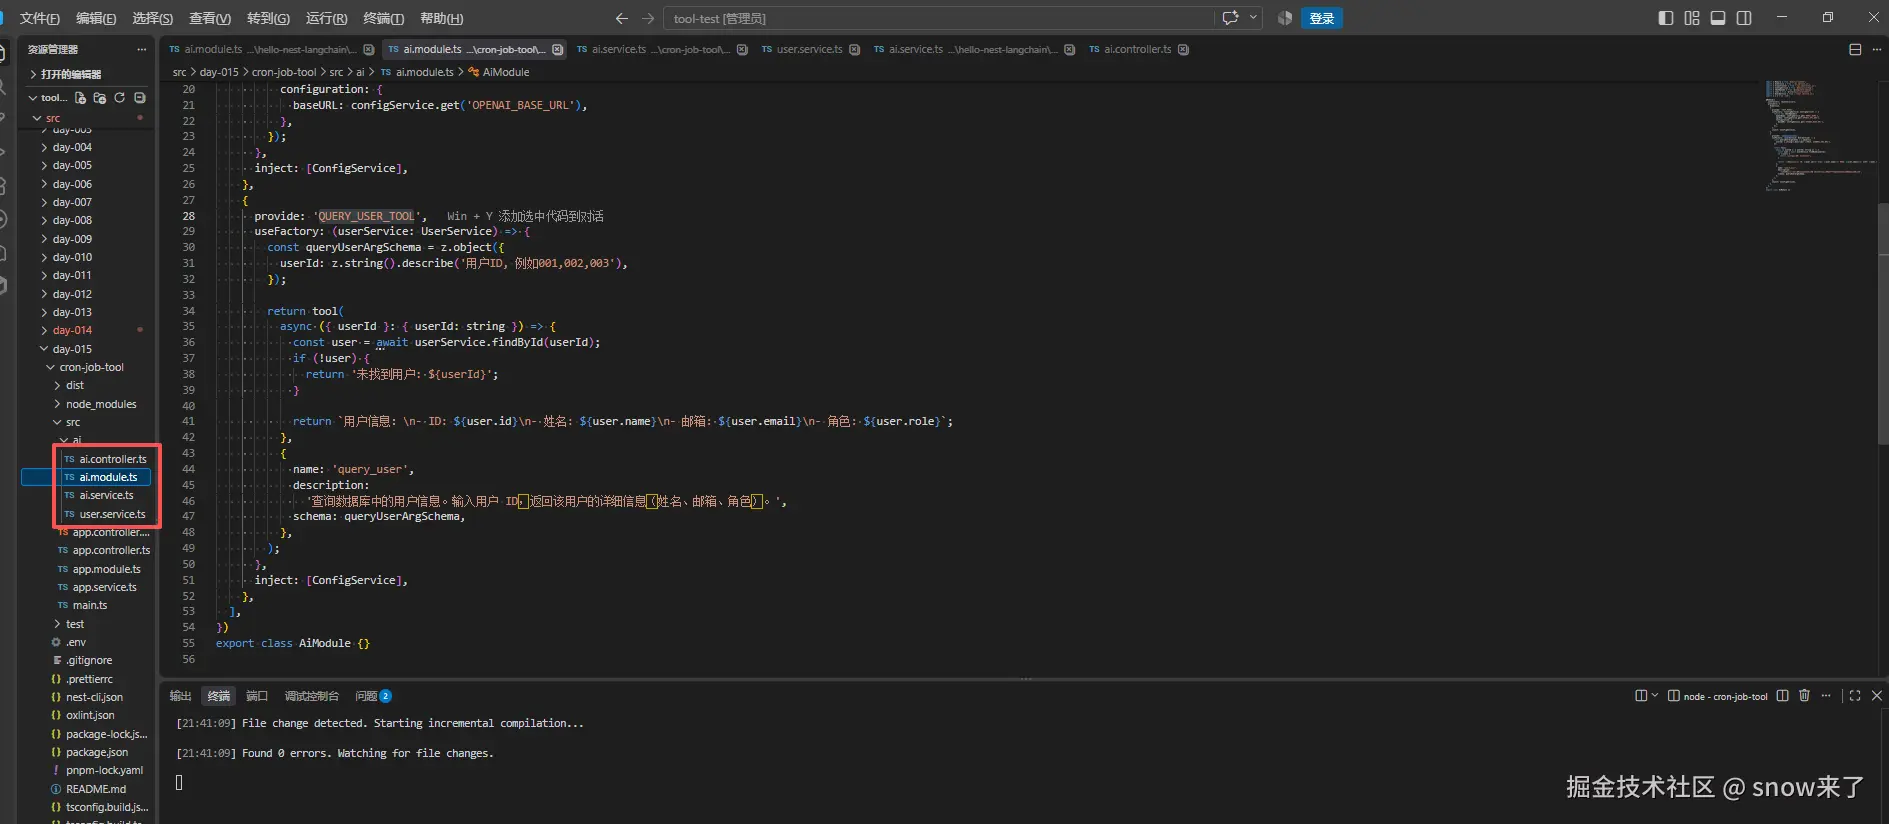
js
import { Injectable } from '@nestjs/common';

type User = {
  id: string;
  name: string;
  email: string;
  role: string;
};

@Injectable()
export class UserService {
  private readonly users = new Map<string, User>([
    [
      '001',
      { id: '001', name: '张三', email: 'zhangsan@example.com', role: 'admin' },
    ],
    [
      '002',
      { id: '002', name: '李四', email: 'lisi@example.com', role: 'user' },
    ],
    [
      '003',
      { id: '003', name: '王五', email: 'wangwu@example.com', role: 'user' },
    ],
    [
      '004',
      { id: '004', name: '赵六', email: 'zhaoliu@example.com', role: 'user' },
    ],
    [
      '005',
      { id: '005', name: '孙七', email: 'sunqi@example.com', role: 'user' },
    ],
    [
      '006',
      { id: '006', name: '周八', email: 'zhouba@example.com', role: 'user' },
    ],
  ]);

  findAll(): User[] {
    return Array.from(this.users.values());
  }

  findById(id: string): User | undefined {
    return this.users.get(id);
  }

  create(user: User): User {
    this.users.set(user.id, user);
    return user;
  }

  update(id: string, partial: Partial<Omit<User, 'id'>>): User | undefined {
    const existing = this.users.get(id);

    if (!existing) {
      return undefined;
    }

    const updated: User = {
      ...existing,
      ...partial,
      id: existing.id,
    };

    this.users.set(id, updated);

    return updated;
  }

  remove(id: string): boolean {
    return this.users.delete(id);
  }
}
然后在ai.module.ts 里面注册
js
    {
      provide: 'QUERY_USER_TOOL',
      useFactory: (userService: UserService) => {
        const queryUserArgSchema = z.object({
          userId: z.string().describe('用户ID, 例如001,002,003'),
        });

        return tool(
          async ({ userId }: { userId: string }) => {
            const user = await userService.findById(userId);
            if (!user) {
              return '未找到用户: ${userId}';
            }

            return `用户信息:\n- ID: ${user.id}\n- 姓名: ${user.name}\n- 邮箱: ${user.email}\n- 角色: ${user.role}`;
          },
          {
            name: 'query_user',
            description:
              '查询数据库中的用户信息。输入用户 ID,返回该用户的详细信息(姓名、邮箱、角色)。',
            schema: queryUserArgSchema,
          },
        );
      },
      inject: [ConfigService],
    },
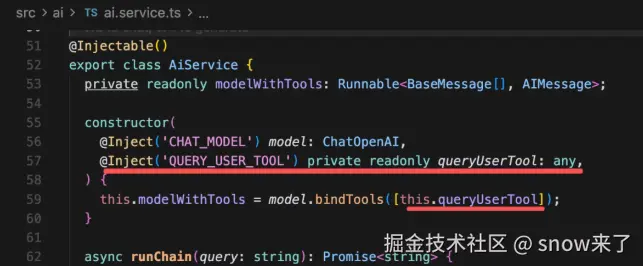
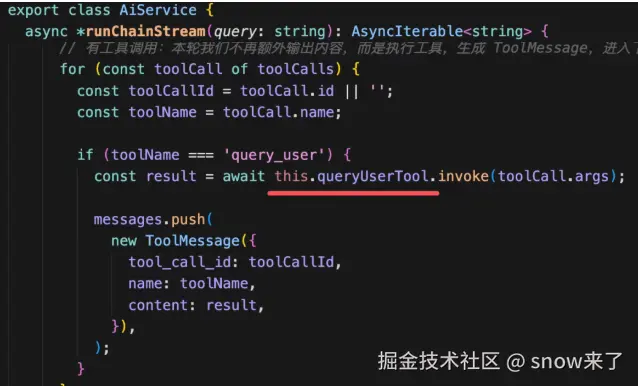
在ai.service.ts里面修改原来的代码,先在构造函数里面注入QUERY_USER_TOOL
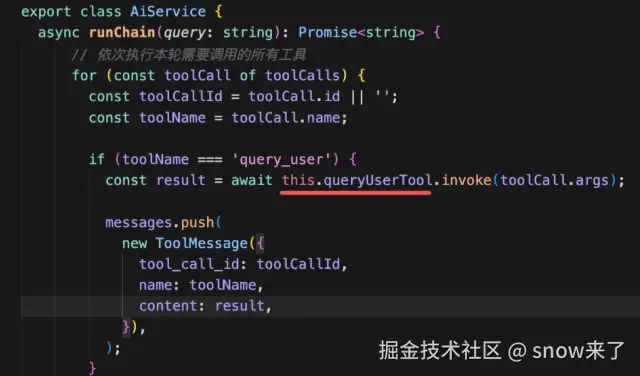
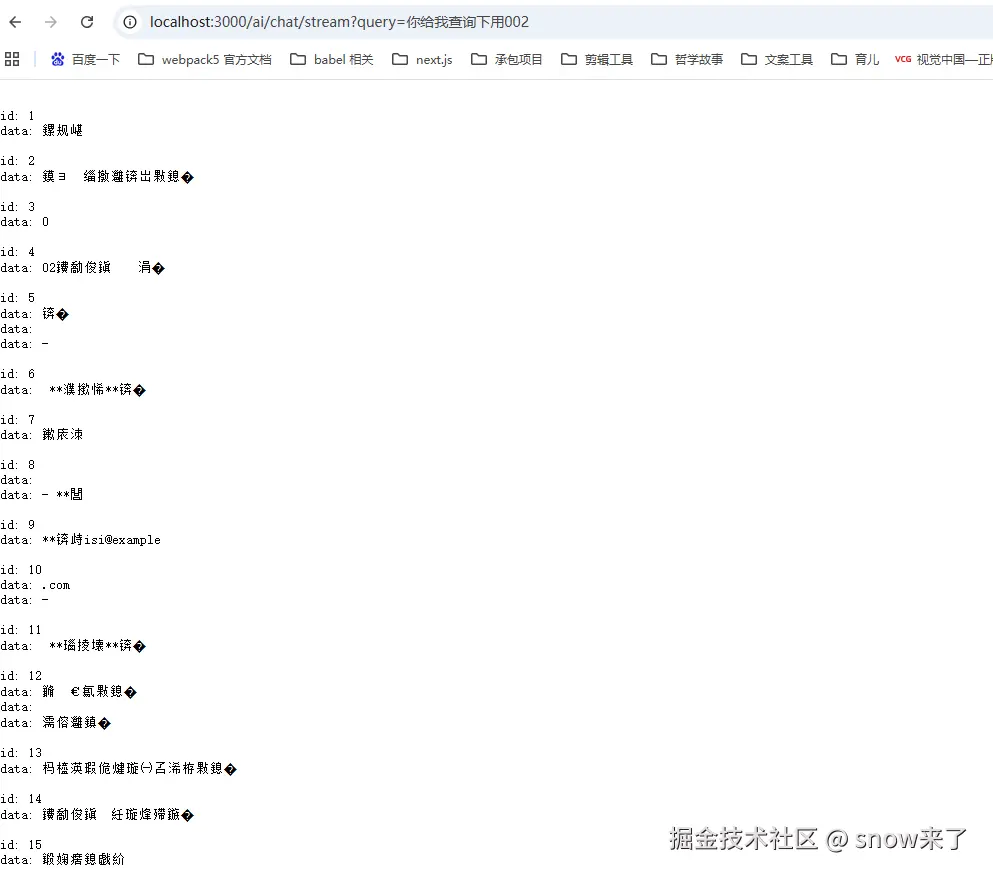
修改完之后跑一下
三. 开发发送邮件的tool
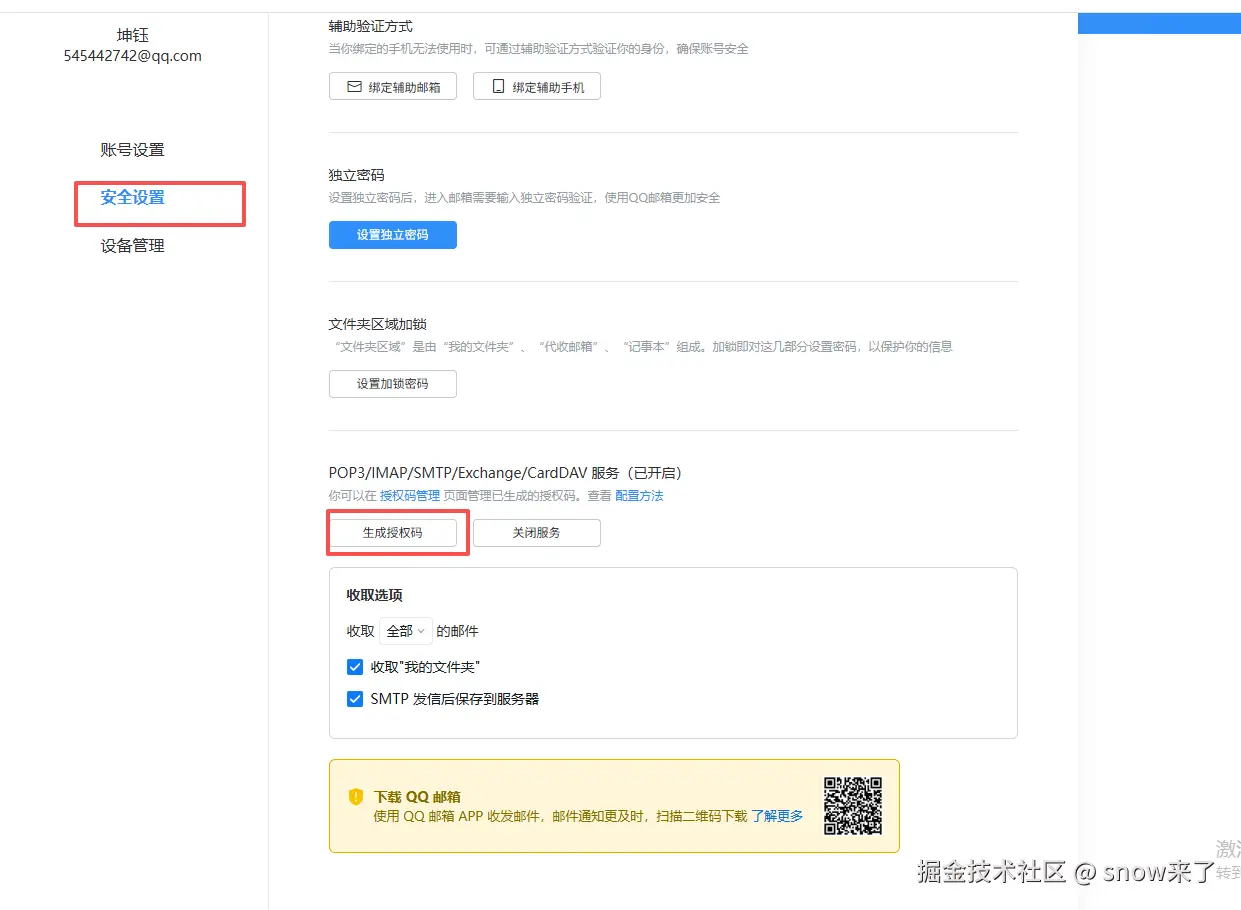
首先获取你邮箱的授权码,步骤如下:打开有设置,找到安全上设置,点击生成授权码。
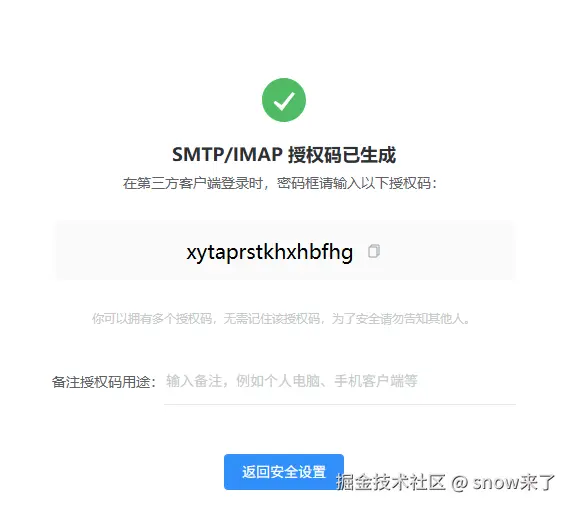
邮箱码:xytaprstkhxhbfhg