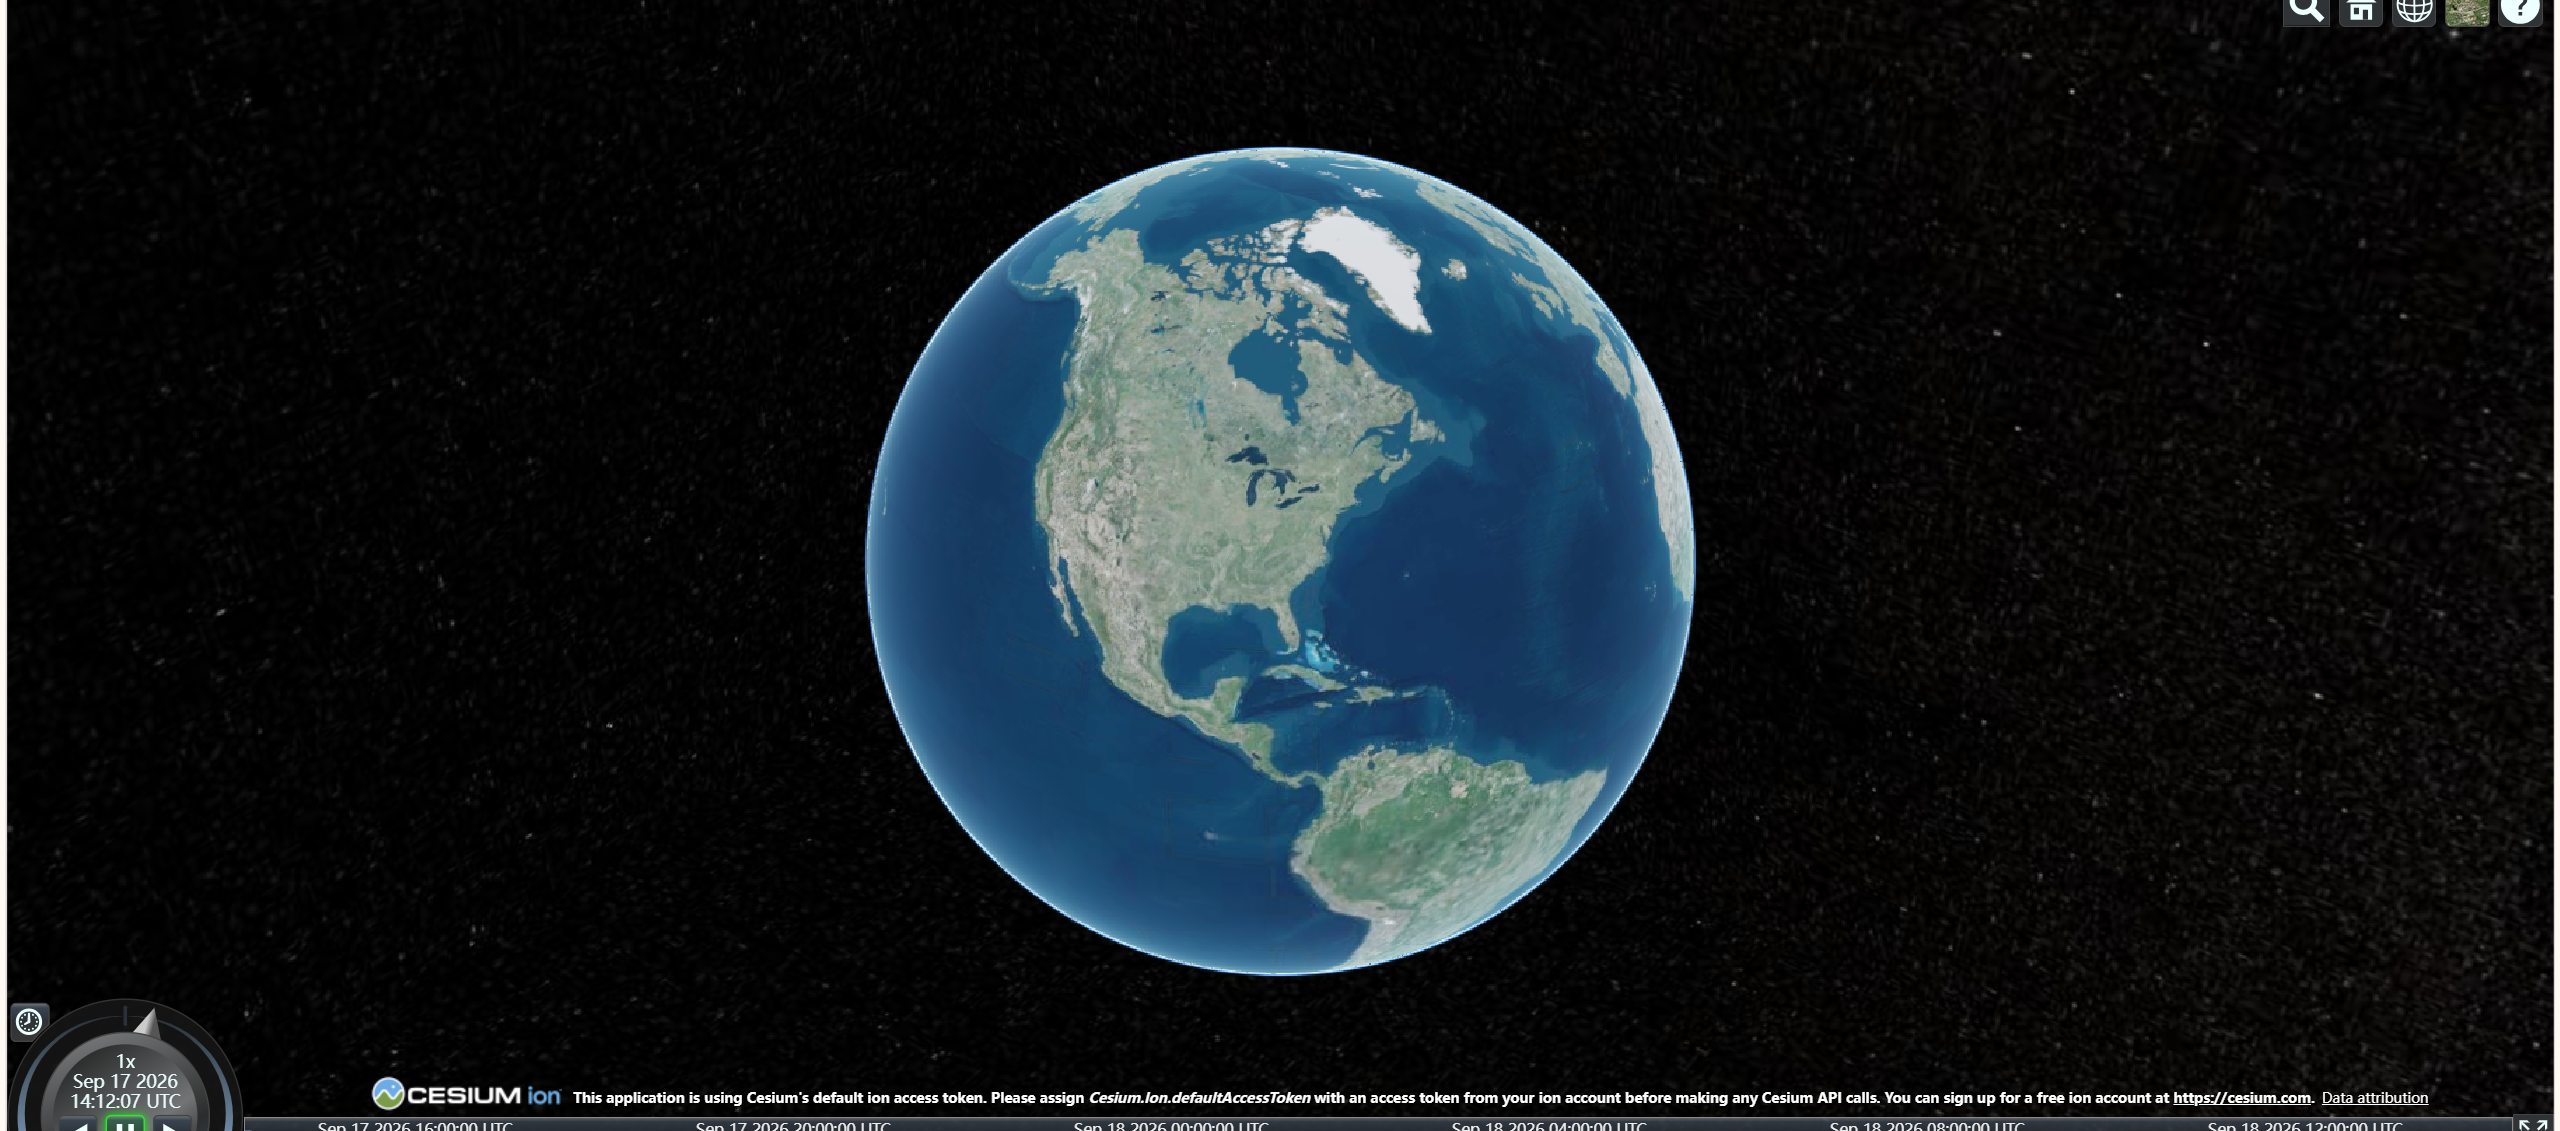
在web端实现cesium 3D地球场景,以最简单的引入地球为例,最终效果如下:
1. 下载cesium插件
创建好一个vite+vue3项目以后,需要下载cesium插件,但凡用到cesium都需要先下载插件。在项目的terminal终端输入以下:
npm install cesium vite-plugin-cesium vite --save-dev2. 加入cesium配置
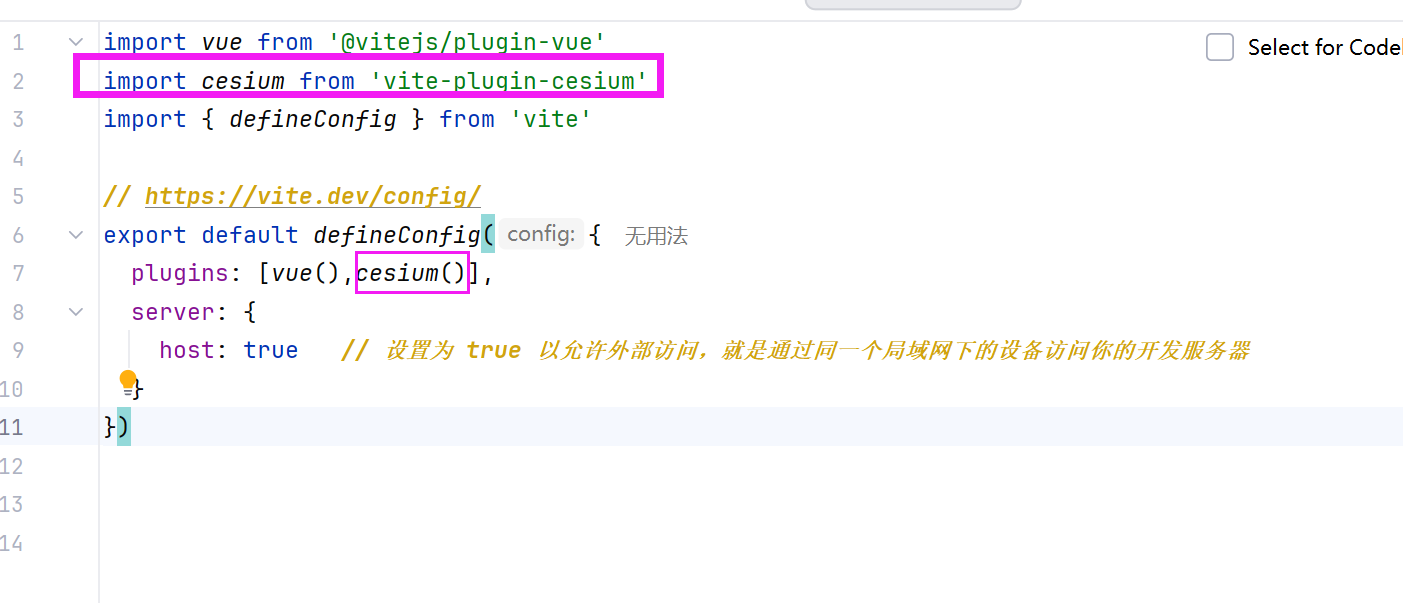
找到vite.config.js文件,添加如下图中所圈的代码
3. 创建viewer实例
引入cesium,并创建一个Viewer实例,用于放置你所想要加载的cesium场景。在APP.vue写入:
html
<script setup>
import * as Cesium from 'cesium';
import {onMounted, onBeforeUnmount} from "vue";

let viewer = null;

onMounted(() => {
  // 创建一个Viewer实例
  const viewer = new Cesium.Viewer('cesiumContainer')}


onBeforeUnmount(() => {
  if (viewer) {
    viewer.destroy()  //彻底销毁和释放一个 Viewer
    viewer = null
  }
})
</script>
因为要渲染页面,所以需要onmounted挂载viewer实例,不然页面不加载。具体onmounted有关的生命周期函数知识点自行查阅。
4. 设置一个前端元素来承载cesium场景
在APP.vue写入:
html
<template>
   <div id="cesiumContainer" style="width: 100%; height: 100vh;"></div>
</template>
5. 设置div盒子的宽高,不然场景没有宽高不会显示
html
<style>
  #cesiumContainer {
    font-family: Avenir, Helvetica, Arial, sans-serif;
    -webkit-font-smoothing: antialiased;
    -moz-osx-font-smoothing:grayscale;
    text-align: center;
    color: #2c3e50;
    z-index: 1;
  }
  html,body,#cesiumContainer{
    width: 100%;
    height: 100%;
    margin: 0;
    padding: 0;
    overflow: hidden;
  }
</style>
6. 代码汇总
在同一个App.vue中写入:
html
<script setup>
import * as Cesium from 'cesium';
import {onMounted, onBeforeUnmount} from "vue";

let viewer = null;

onMounted(() => {
  // 创建一个Viewer实例
  const viewer = new Cesium.Viewer('cesiumContainer')
}

onBeforeUnmount(() => {
  if (viewer) {
    viewer.destroy()
    viewer = null
  }
})
</script>

<template>
<div id="cesiumContainer" style="width: 100%; height: 100vh;"></div>
</template>


<style>
  #cesiumContainer {
    font-family: Avenir, Helvetica, Arial, sans-serif;
    -webkit-font-smoothing: antialiased;
    -moz-osx-font-smoothing:grayscale;
    text-align: center;
    color: #2c3e50;
    z-index: 1;
  }
  html,body,#cesiumContainer{
    width: 100%;
    height: 100%;
    margin: 0;
    padding: 0;
    overflow: hidden;
  }


</style>
写好以后在终端运行项目:
npm run dev
然后打开网址就可以看到一个3D的地球场景了,这是最简单的。复杂一些的可以继续添加cesium有关配置即可。