Unity新的输入系统使用办法
插件安装及设置
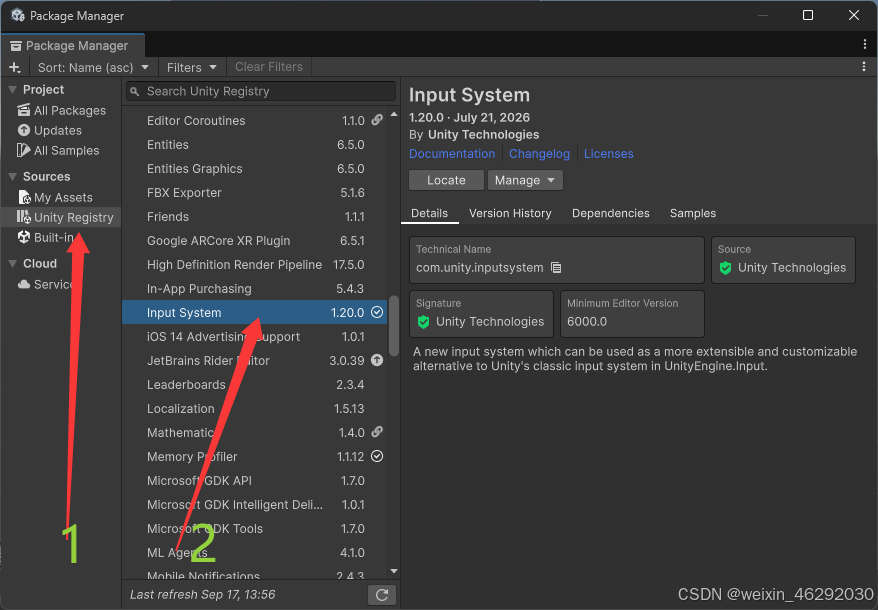
- 打开Unity上方工具栏中的Window --->Package Manager打开Unity插件包管理界面
- 在Package Manager界面的选择Unity Regiestry--->Input System进行安装,如下图:
3.设置使用新的输入系统:
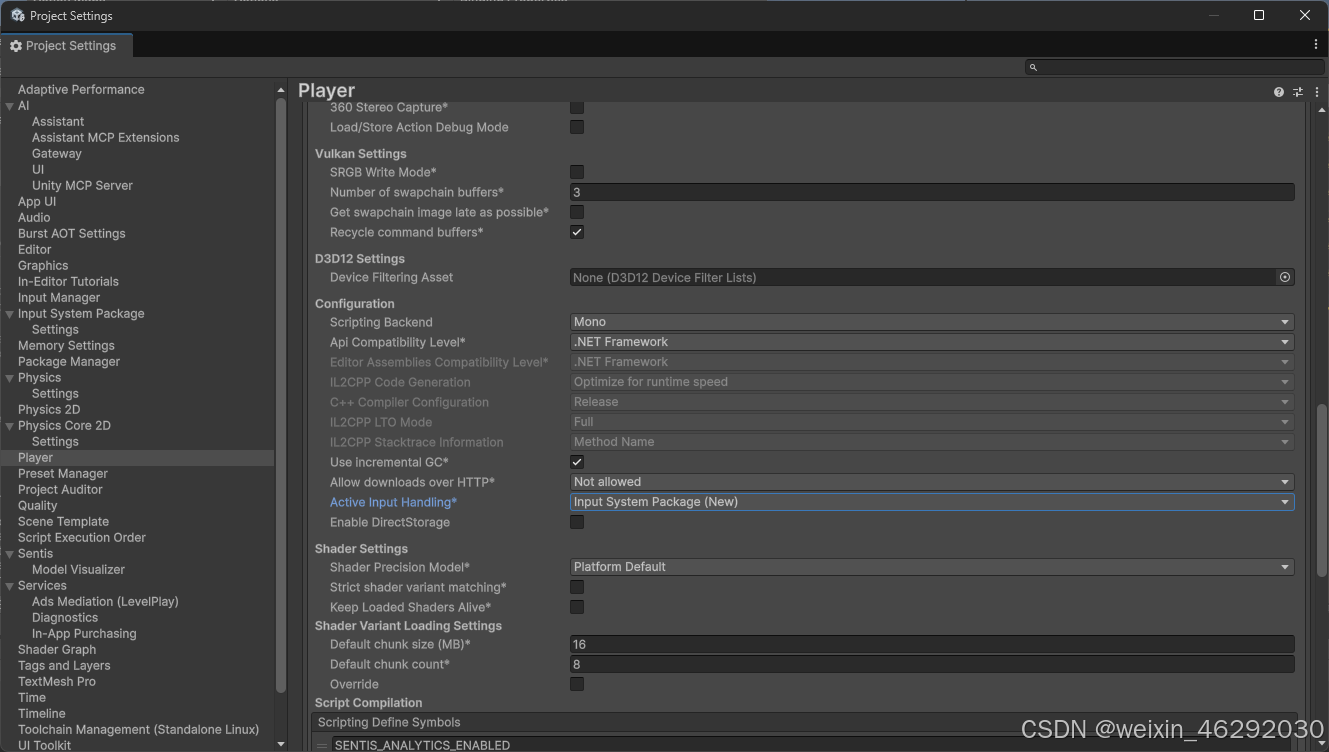
打开 Edit → Project Settings → Player
展开 Other Settings 区域
找到 Active Input Handling 选项
从下拉菜单中选择 Input System Package (New)
如果项目中还有旧输入代码未迁移,可选择 Both(同时支持新旧系统)
点击 Apply 确认------Unity Editor 会自动重启
创建InputActions
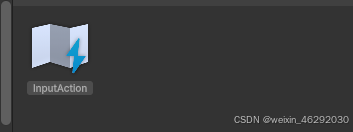
- 项目Project中右键点击Creater若出现InputActions选项证明插件安装成功,点击创建InputActions。
2.双击InputAction打开进行编辑
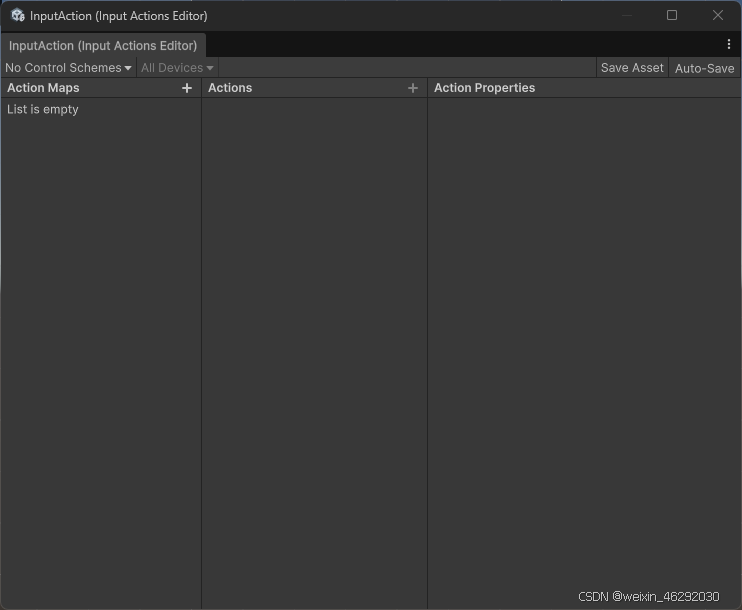
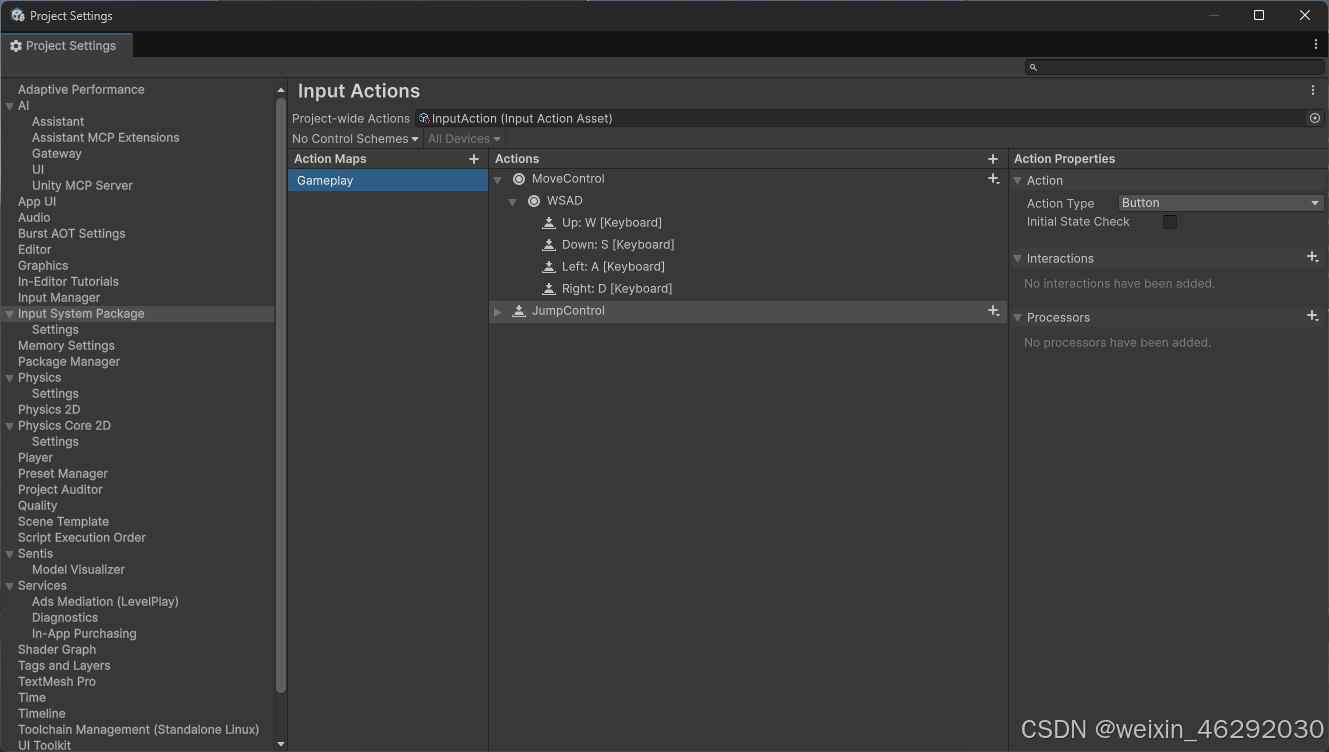
3.配置action和绑定
以创建"移动"和"跳跃"两个动作为例:
点击 "+" 新建一个 Action Map,命名为 Gameplay
在 Action Map 中点击 "+" 添加 Action:
创建 MoveControl,Action Type 设为 Value,Control Type 设为 Vector2
创建JumpControl,Action Type 设为 Button
为 MoveControl添加绑定:
点击 MoveControl 右侧的 "+" → 选择 Add 2D Vector Composite(WASD 自动生成四个方向)
分别设置 Up = W,Down = S,Left = A,Right = D
为 JumpControl 添加绑定:点击 "+" → 选择键盘按键(如 Space)或手柄按钮
点击 Save Asset 保存
在脚本中读取输入
1.创建PlayerMovement脚本,控制移动`
csharp
using UnityEngine;
using UnityEngine.InputSystem;

public class PlayerMovement : MonoBehaviour
{
    private Vector2 moveInput;

    // 【重点1】方法名必须是 OnMoveControl,对应你设置的 Action 名字
    // 【重点2】参数必须是 InputValue,而不是 CallbackContext
    public void OnMoveControl(InputValue value)
    {
        // 读取二维向量
        moveInput = value.Get<Vector2>();
        Debug.Log("接收到移动输入: " + moveInput); // 加上这个测试是否成功接收
    }

    public void OnJumpControl(InputValue value)
    {
        // 对于 Button 类型的 Action,检测是否按下
        if (value.isPressed)
        {
            Debug.Log("跳跃!");
        }
    }

    void Update()
    {
        // 【重点3】确保你的物体真的在移动
        if (moveInput != Vector2.zero)
        {
            Vector3 move = new Vector3(moveInput.x, 0, moveInput.y);
            transform.Translate(move * Time.deltaTime * 5f);
        }
    }
}
2.添加组件,为要移动的物体添加PlayerMovement 和PlayerInput组件,PlayerInput组件添加新建的inputaction
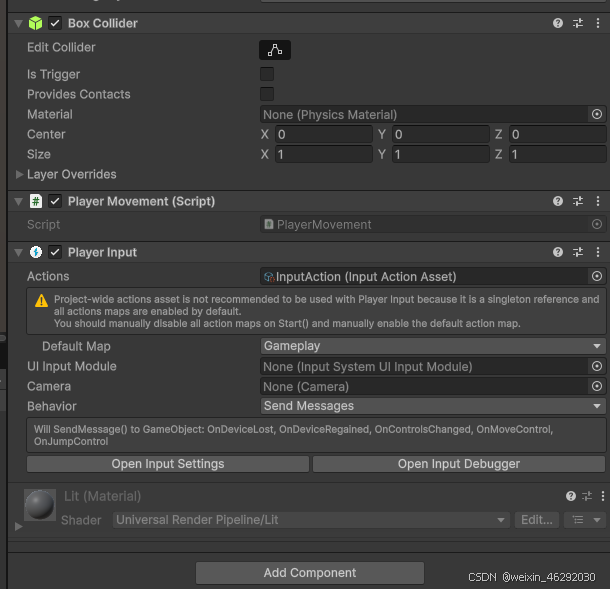 保存运行就可以!!!