目录
[2.Ubuntu 部署 JFrog 制品库](#2.Ubuntu 部署 JFrog 制品库)
[3.Ubuntu 部署 postgresql数据库](#3.Ubuntu 部署 postgresql数据库)
[4.Ubuntu 部署 Xray](#4.Ubuntu 部署 Xray)
[5. 使用JFrog 增删项目](#5. 使用JFrog 增删项目)
[1.Ubuntu 如何通过apt方式部署 JFrog 制品库](#1.Ubuntu 如何通过apt方式部署 JFrog 制品库)
[2.Ubuntu 如何通过docker方式部署 JFrog 制品库](#2.Ubuntu 如何通过docker方式部署 JFrog 制品库)
[4.安装JFrog Artifactory报错](#4.安装JFrog Artifactory报错)
[5.JFrog Artifactory 启动报错](#5.JFrog Artifactory 启动报错)
[7.HELM 方式如何安装JFrog](#7.HELM 方式如何安装JFrog)
一、实验
1.环境
(1)主机
表1 主机
|---------|--------------|--------|-----------------|---------------------------------------------|
| 主机 | 架构 | 版本 | IP | 备注 |
| master1 | K8S master节点 | 1.23.1 | 192.168.204.102 | 需求部署JFrog Artifactory - 对二进制文件、制品和依赖项进行通用管理 |
| node1 | K8S node节点 | 1.23.1 | 192.168.204.104 | 需求部署XRAY- 进行开源漏洞扫描,包括策略和监视 |
(2) Termius连接主机

(3)查看系统版本
bash
cat /etc/os-release master1
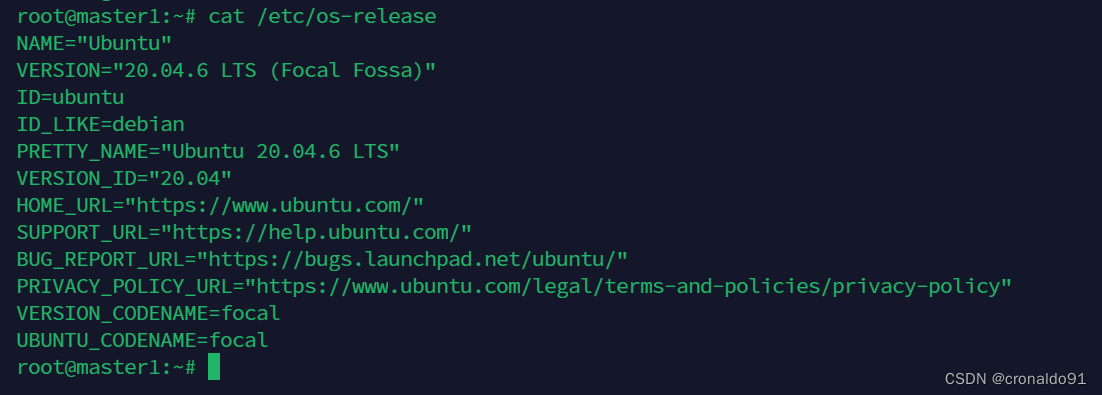
node1
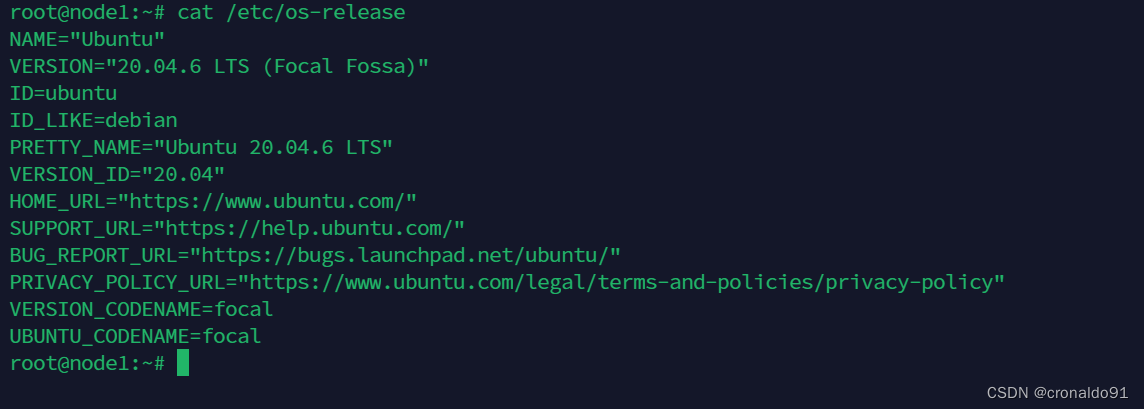
(4) 查看K8S集群
bash
kubectl get node
kubectl get node -o wide
(5)查看docker版本
bash
docker -vmaster1

node1

2.Ubuntu 部署 JFrog 制品库
(1)查阅
bash
https://jfrog.com/download-legacy/

https://jfrog.com/open-source/
最新版为7.84.12

(2)关闭防火墙或者开放服务端口
bash
#关闭防火墙
sudo ufw disable

#查看防火墙状态
sudo ufw status

#开启防火墙
sudo ufw enable

#开放8081、8082端口
sudo ufw allow 8081/tcp
sudo ufw allow 8082/tcp

#重启防火墙
sudo ufw reload
(3)检查服务器配置
bash
nproc #检查处理器 cores
free -m #检查内存大小
df -h # 确认文件系统挂载,数据盘默认挂载/var/opt
ulimit -a # 确认 ulimit 是否满足要求
date # 确认时间同步
hostname # 确认主机名(artifactory 自动获取为 node name)
hostname -i # 确认主机名对应 ip(artifactory 自动获取为 node ip)

(4)下载
选择一个稳定版的Debian安装
弹出界面
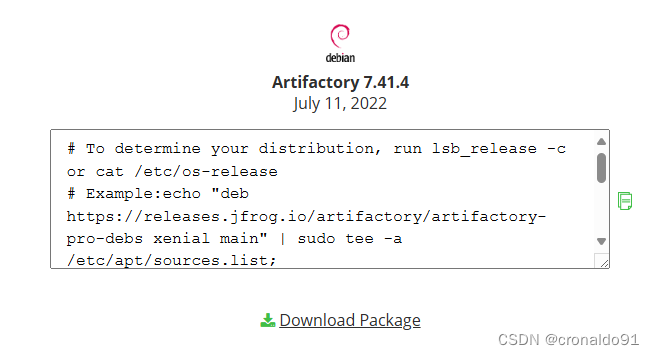
点击下载

(5)安装
bash
dpkg -i jfrog-artifactory-pro-7.41.4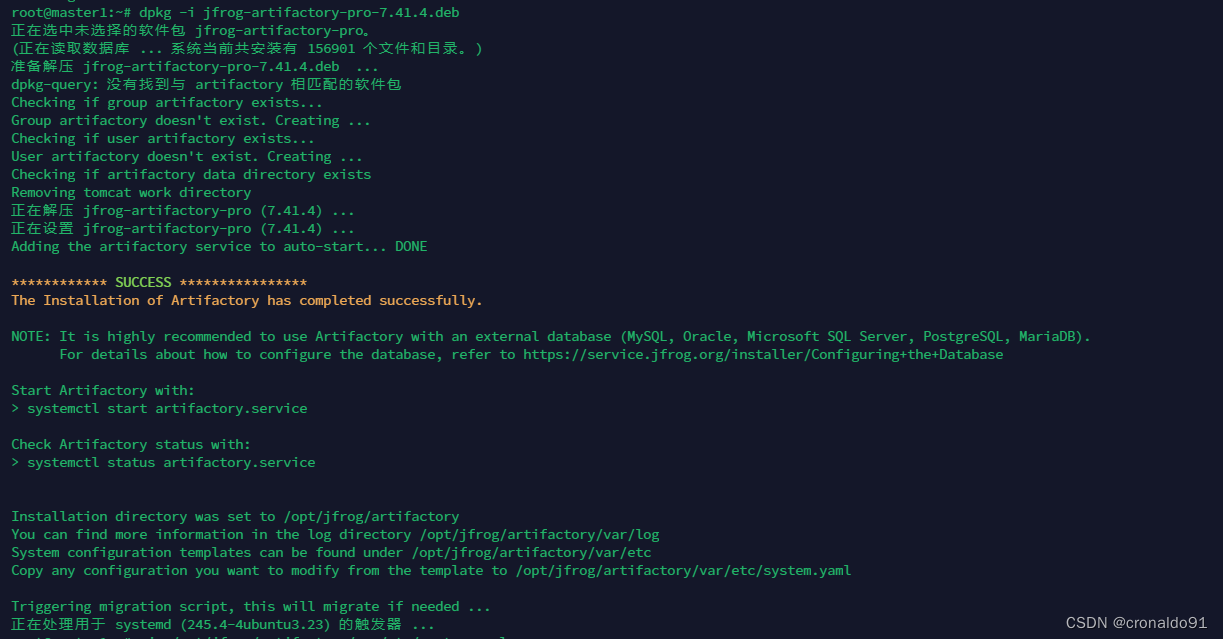
(6)修改Artifactory配置文件
bash
vim /opt/jfrog/artifactory/var/etc/system.yaml
......
 id: "master1"
 ip: "192.168.204.102"
......

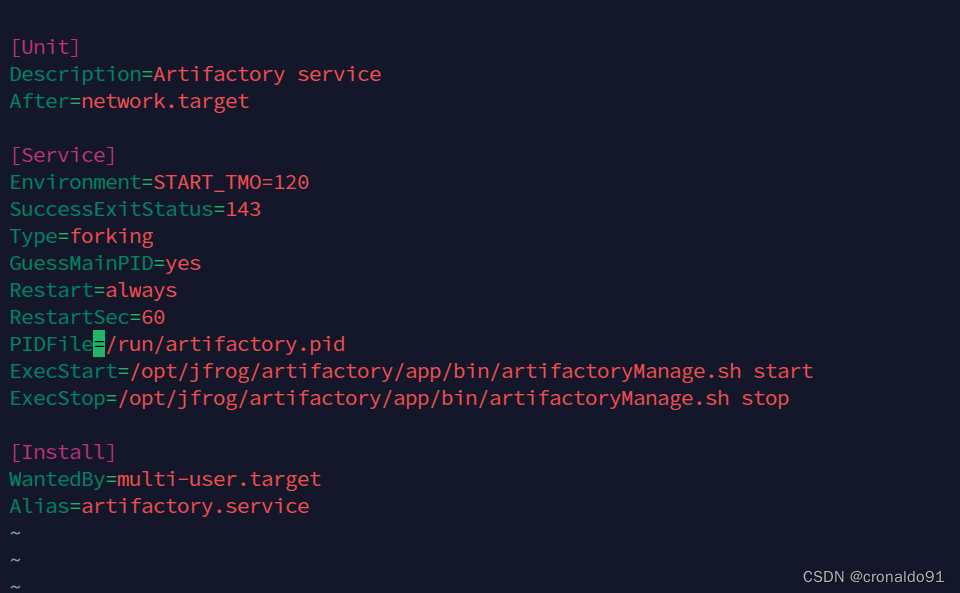
(7)修改systemd文件
bash
vim /etc/systemd/system/artifactory.service通过Environment=START_TMO=120定义中添加更长的超时时间
修改PIDFile路径为指定路径:/run/artifactory.pid
(8) 重新加载配置文件
bash
systemctl daemon-reload (9) 生成随机数并写入master.key中
bash
cd /opt/jfrog/artifactory/var/etc/security
touch master.key
openssl rand -hex 16 > master.key

#以下部署集群时需要
touch join.key
openssl rand -hex 16 > join.key 
(10)授权:
bash
chown -R artifactory:artifactory /opt/jfrog/artifactory/var/log
(11)启动服务和查看日志
bash
1)启动服务
systemctl start artifactory.service && systemctl enable artifactory.service

2)查看日志,如下图启动成功
tail -f /var/opt/jfrog/artifactory/log/console.log

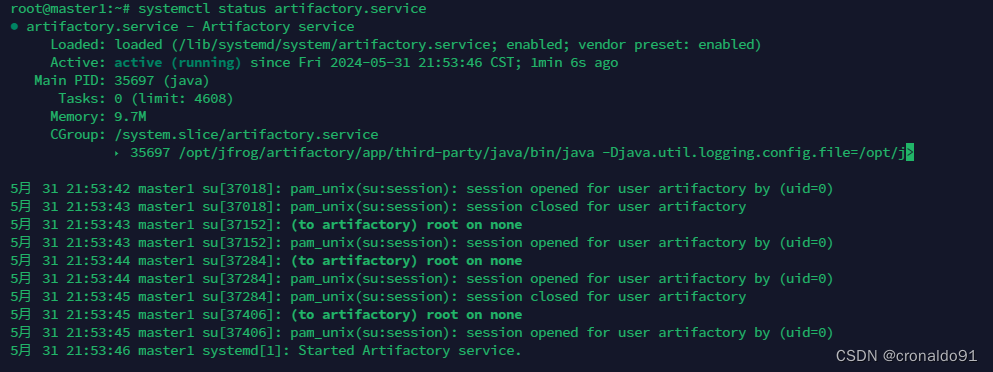
3)查看服务状态
systemctl status artifactory.service
启动

查看日志

查看服务状态
查看端口
bash
lsof -i:8081
(12)访问
bash
http://ip:8081

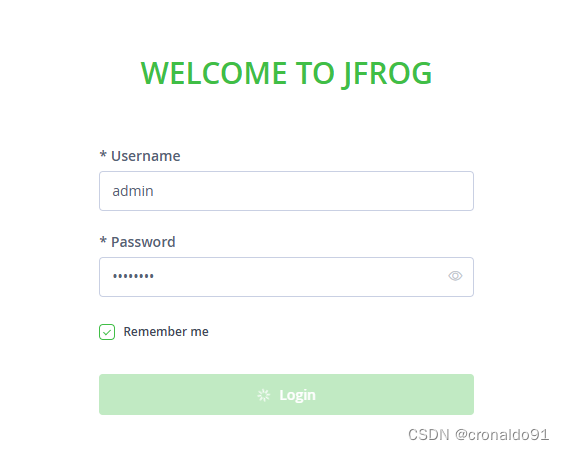
初始用户名:admin
初始密码:password
进入系统
bash
http://192.168.204.102:8082/ui/login/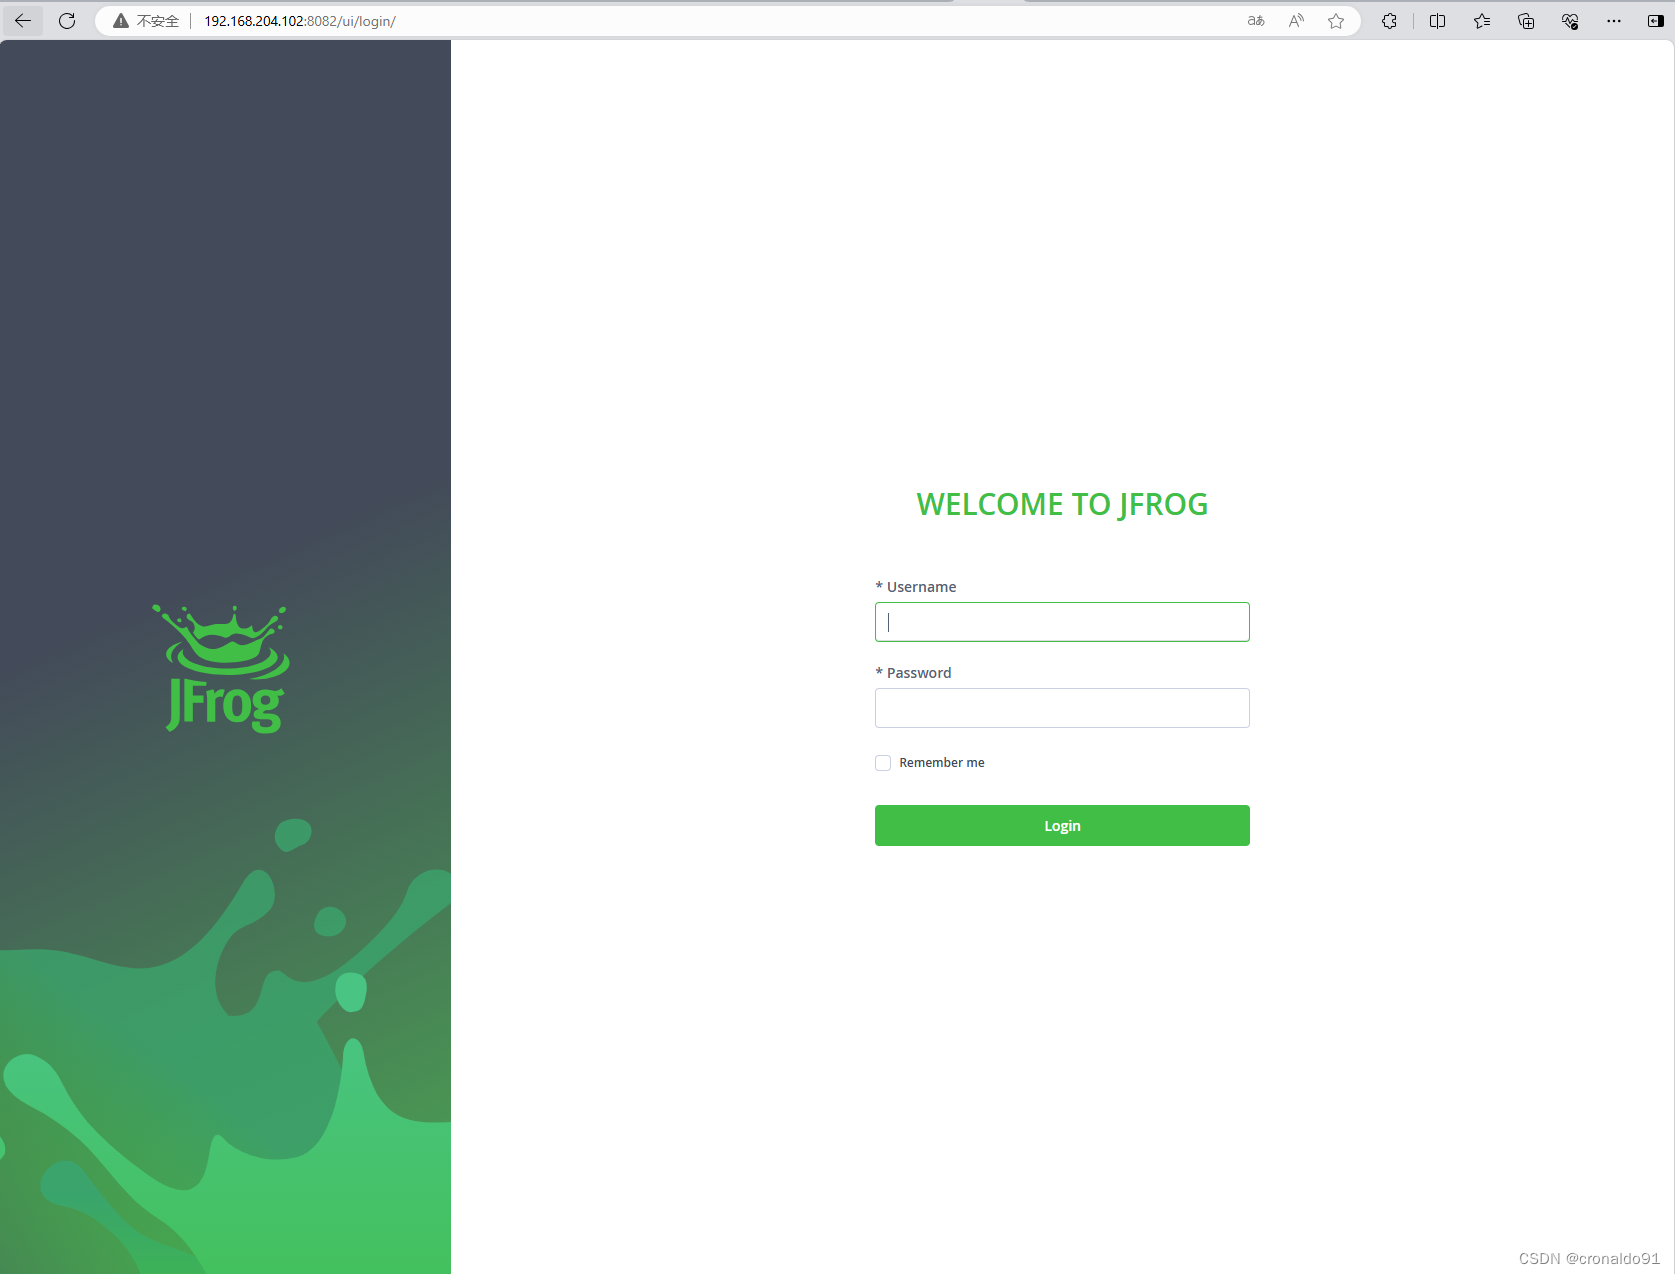
(13)初始化设置
输入账号密码
开始设置
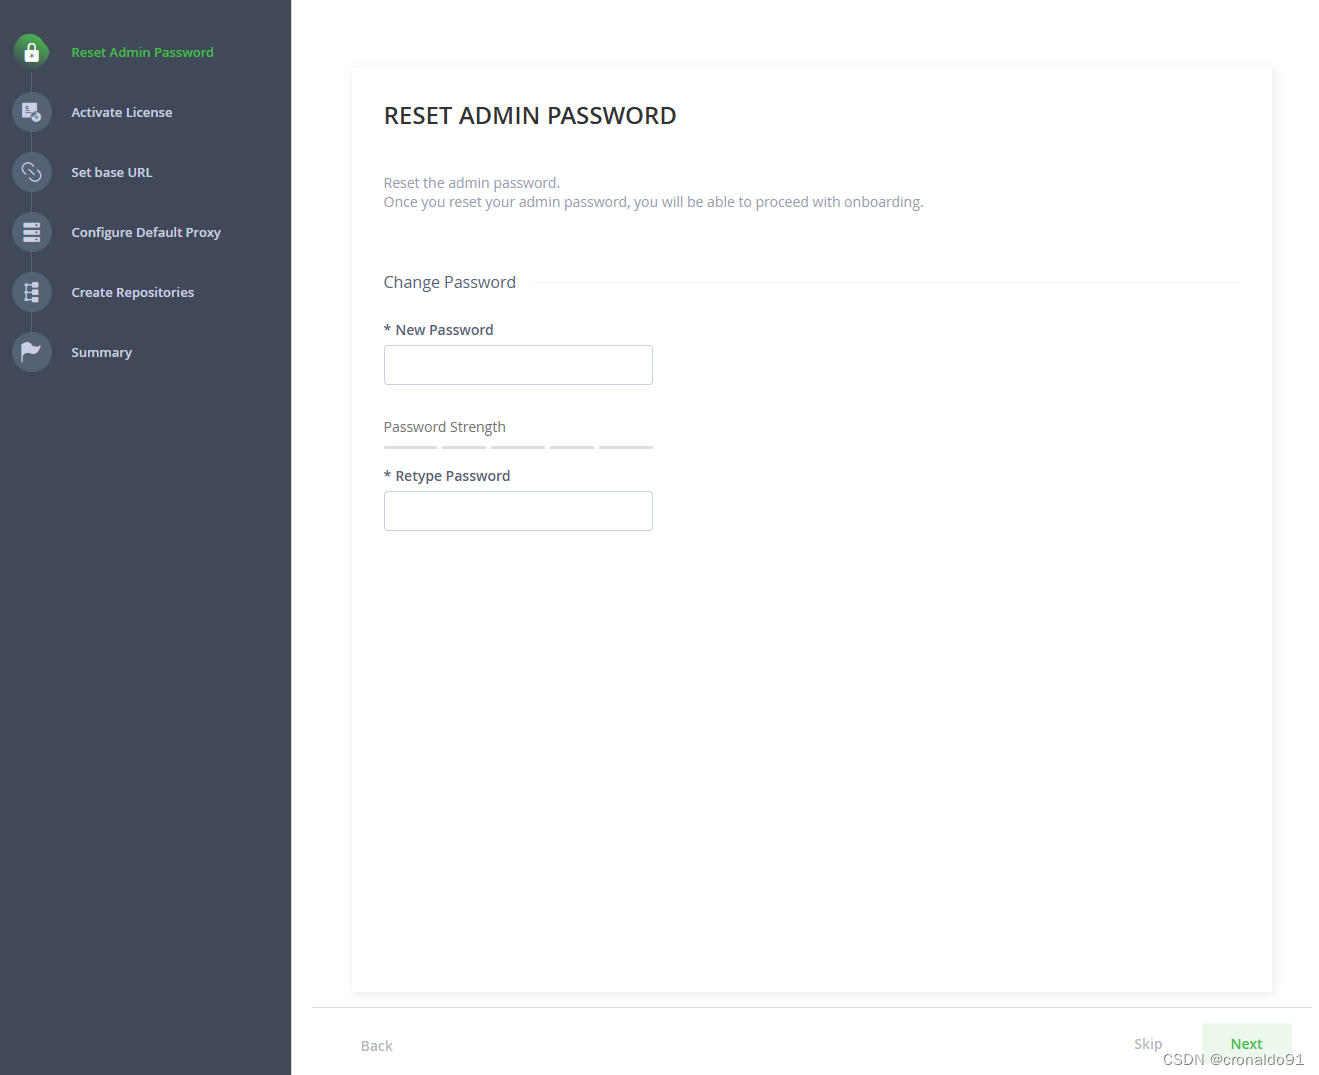
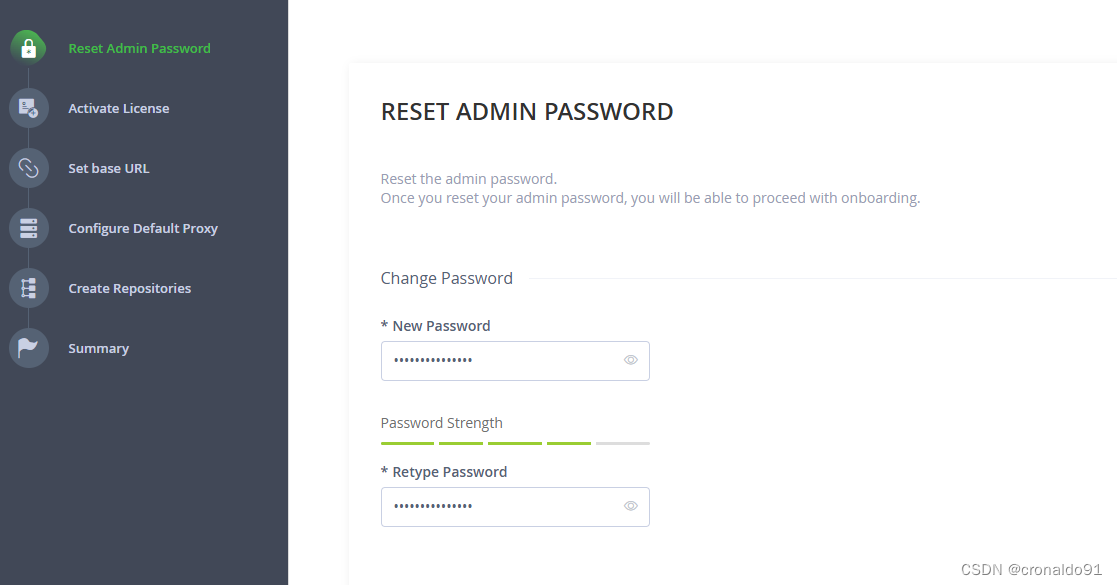
重设密码
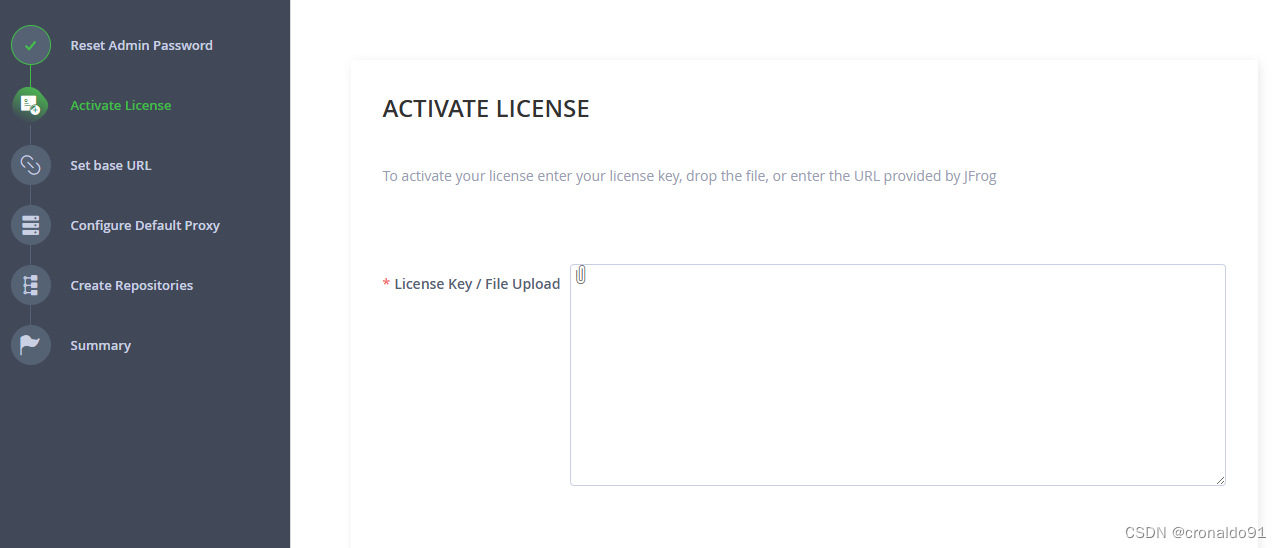
需要输入授权文件
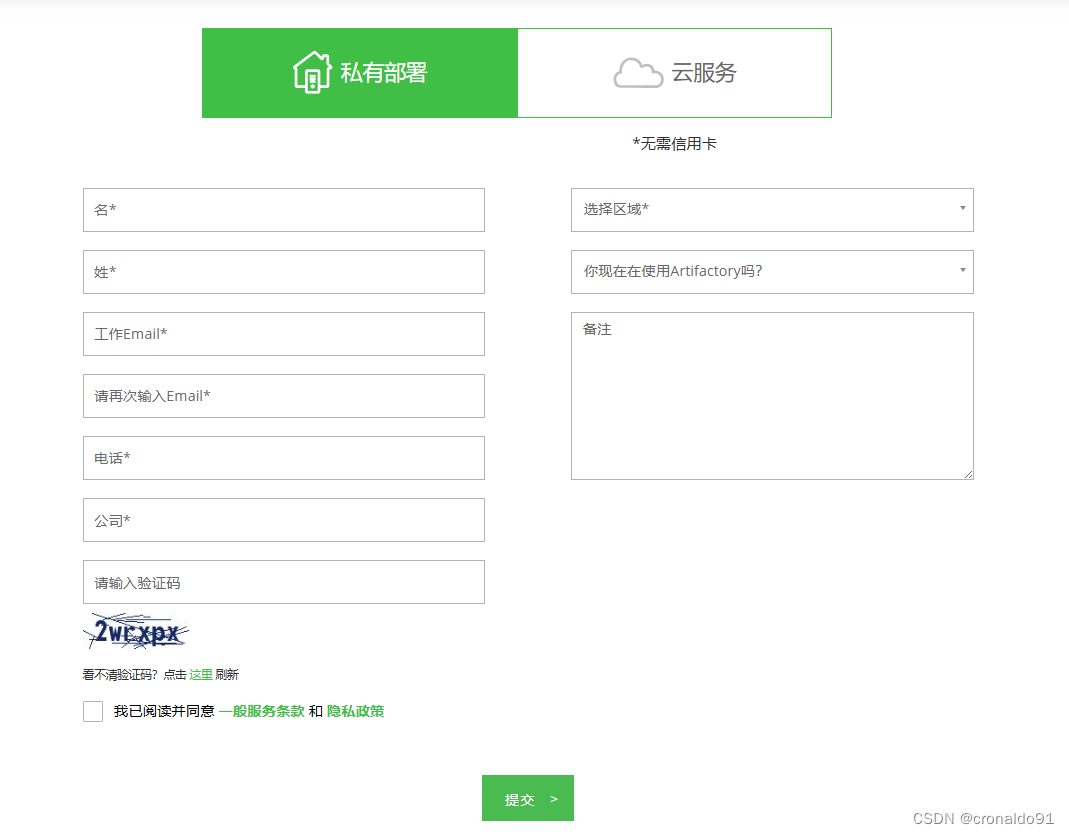
申请授权
bash
https://www.jfrogchina.com/platform/free-trial/选择私有部署(登录账号需要企业邮箱)
设置访问地址
bash
http://192.168.204.102:8082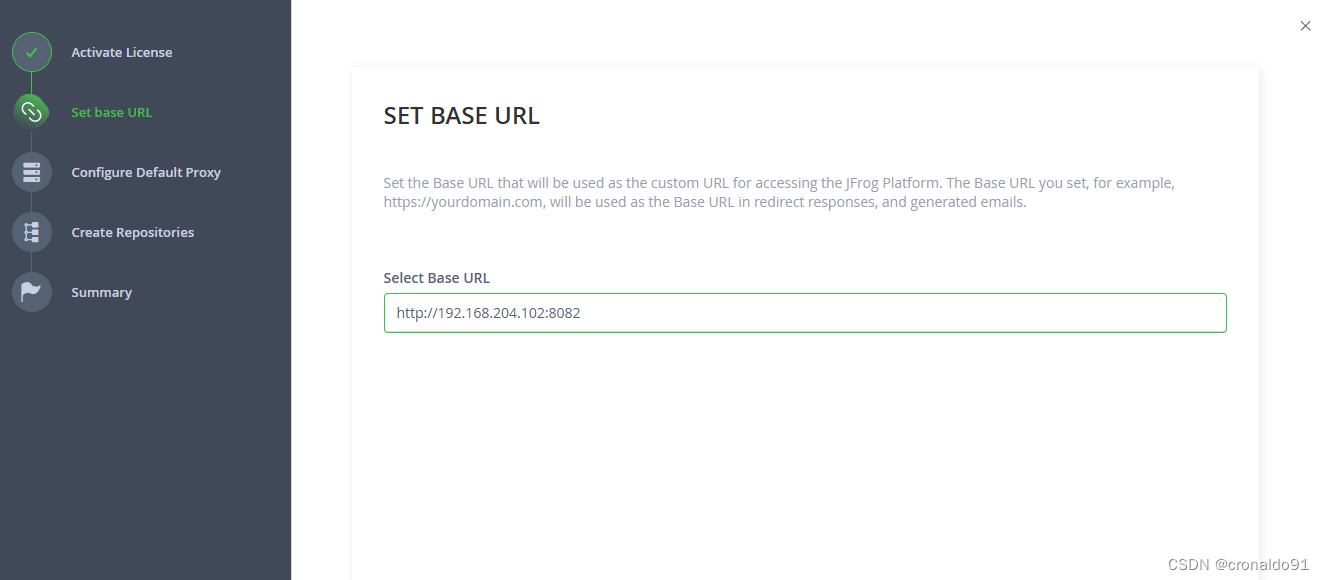
跳过代理设置
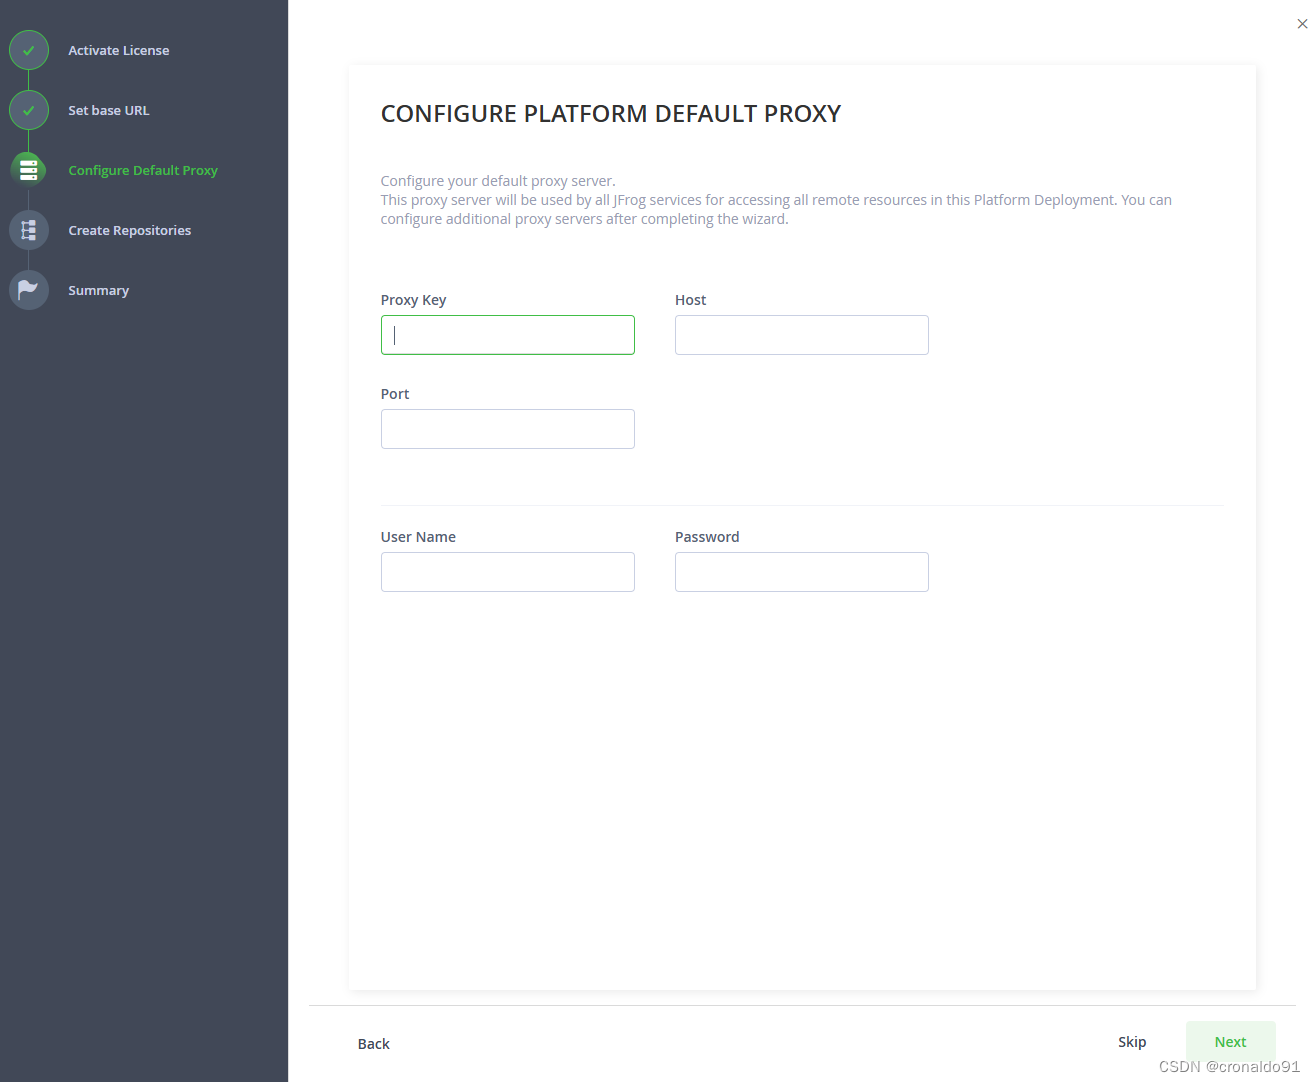
选择类型
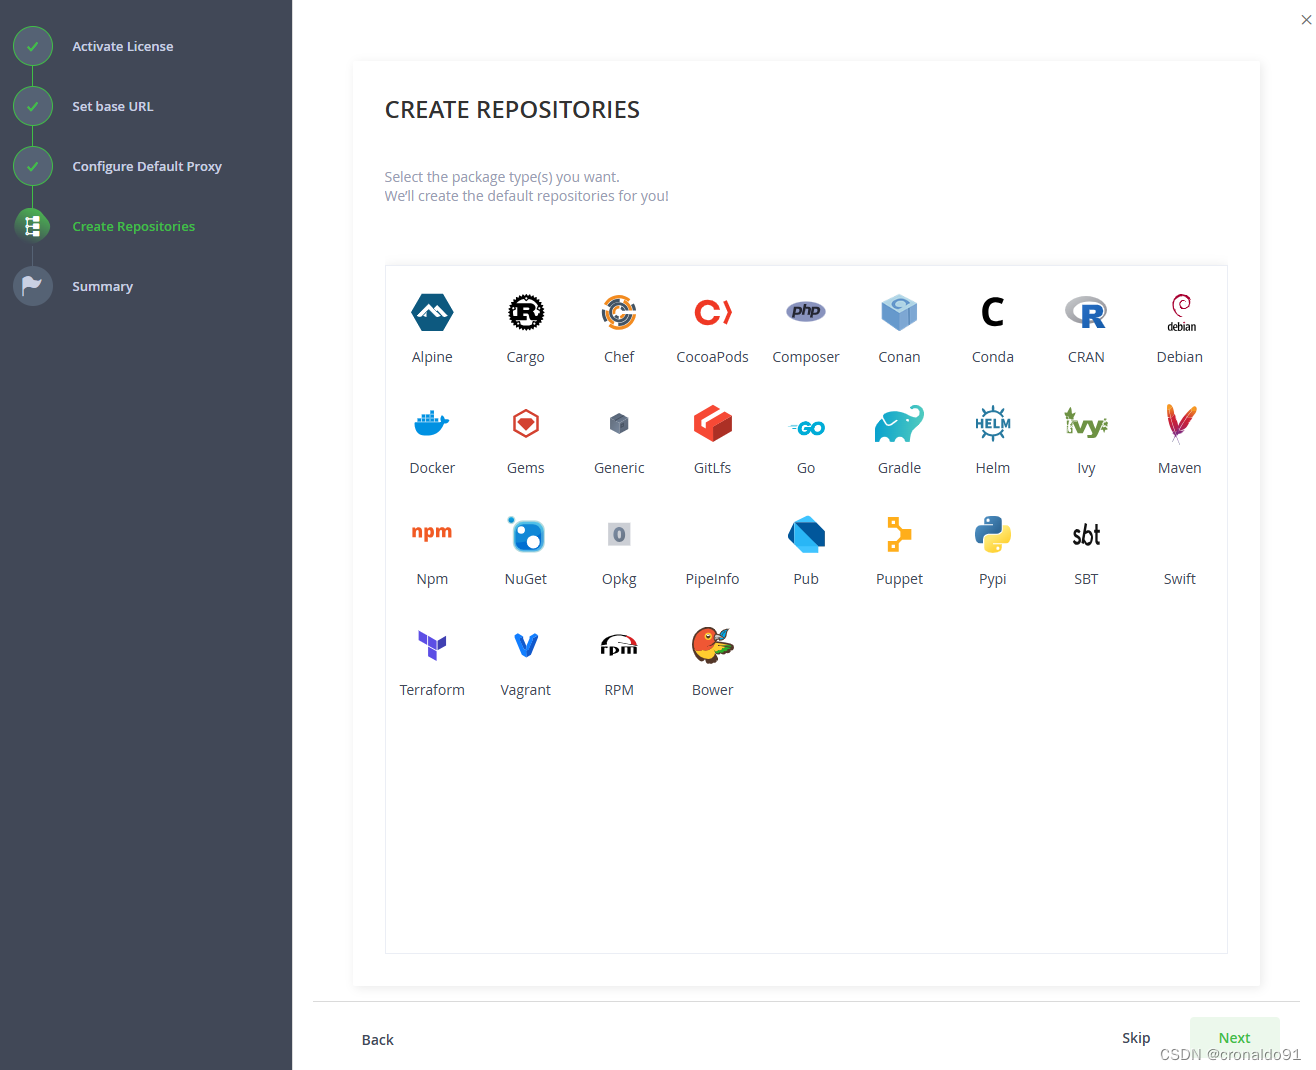
根据自身需求选择
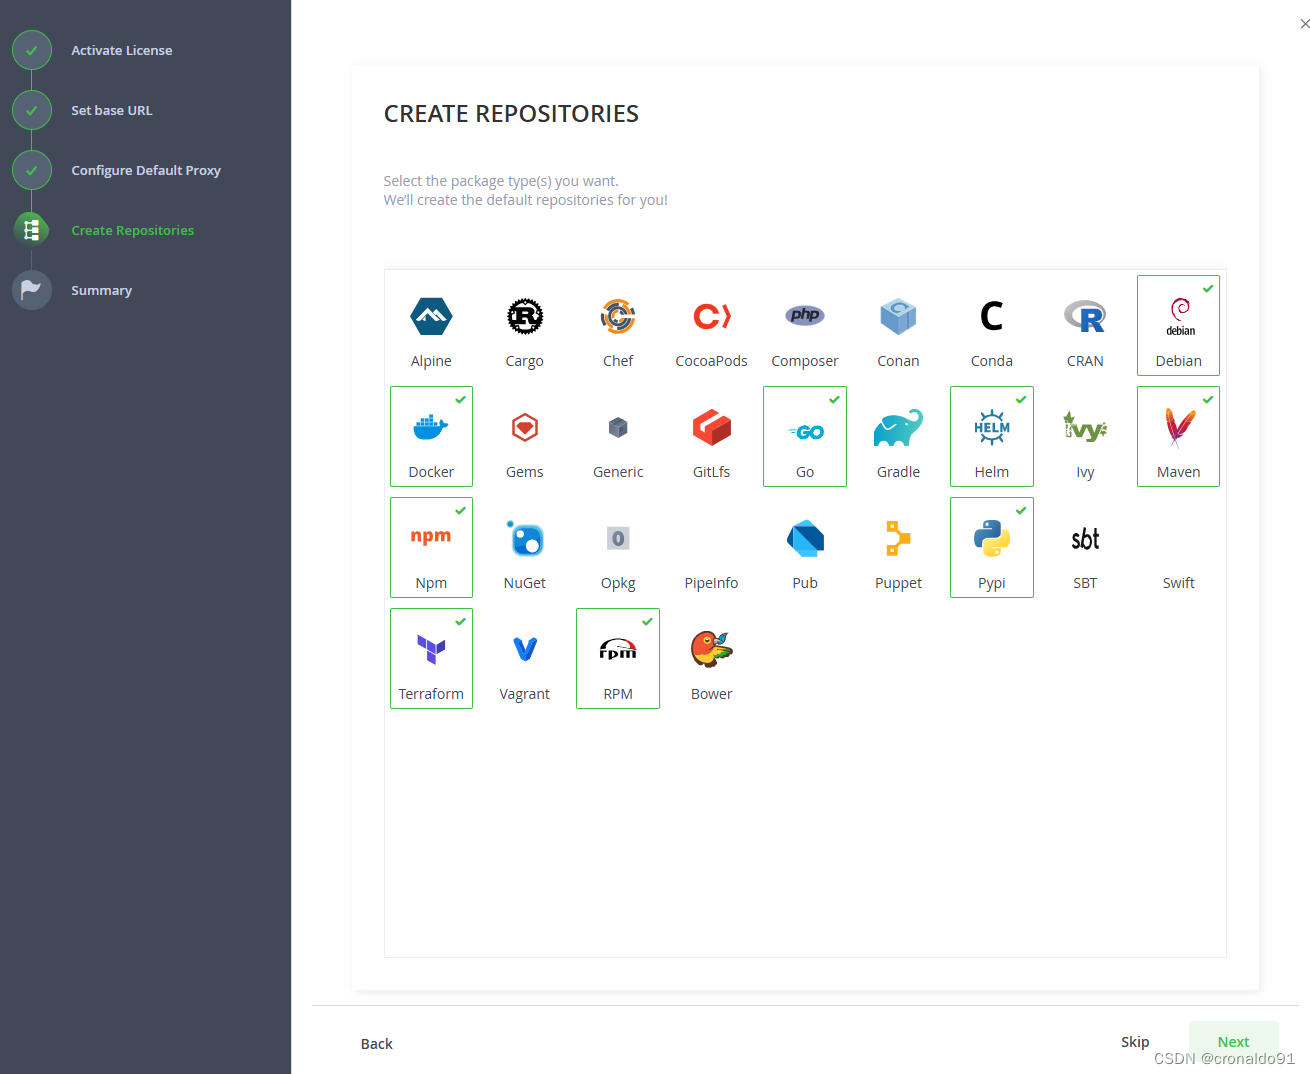
完成
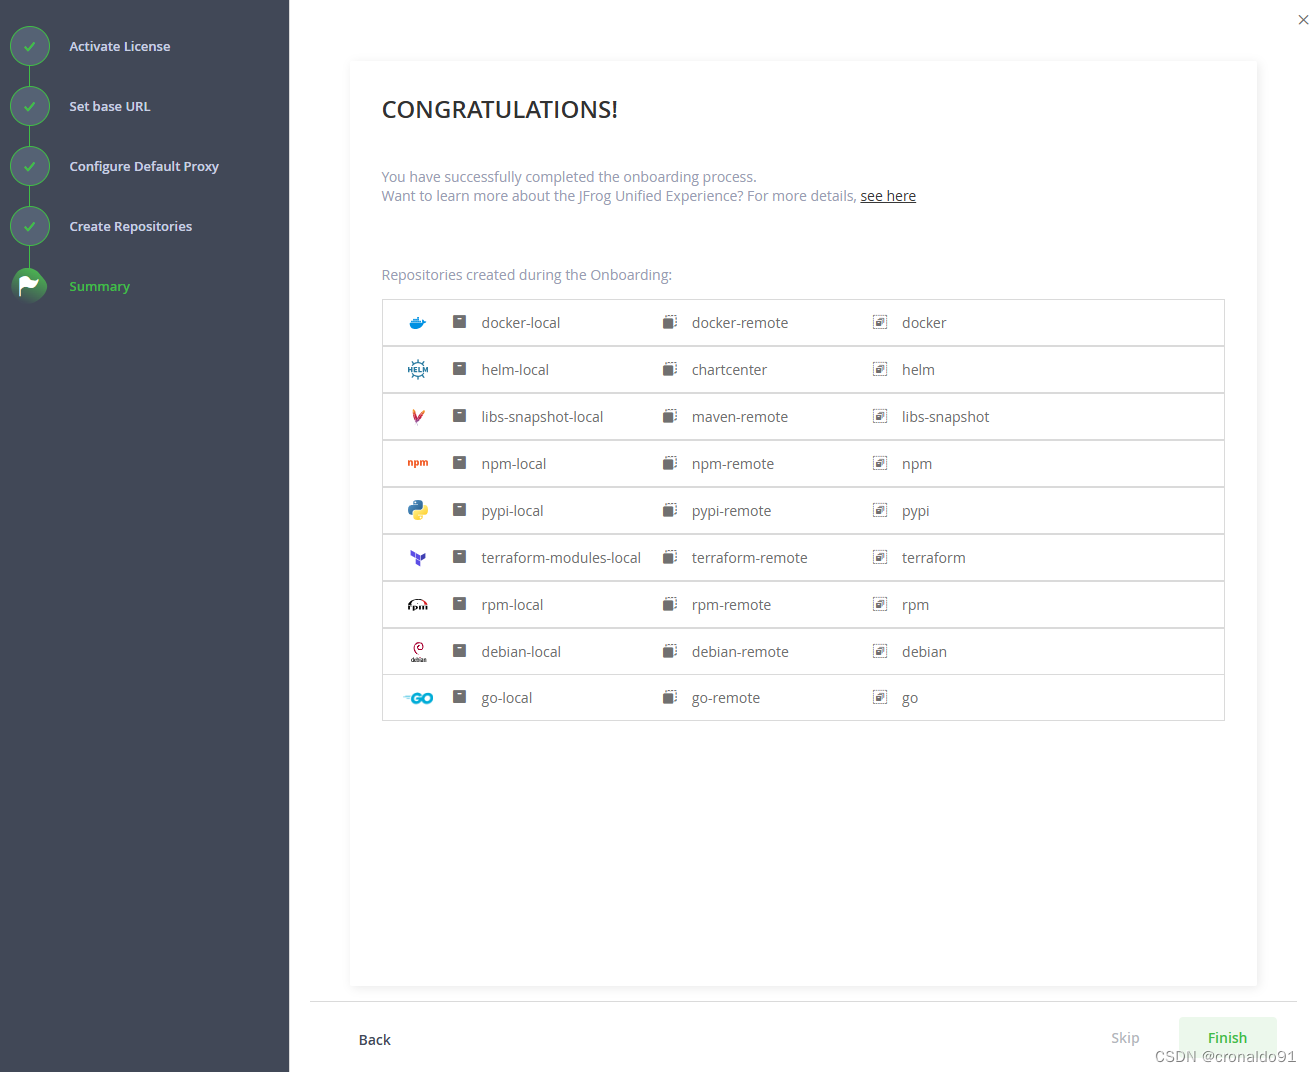
(14)查看界面
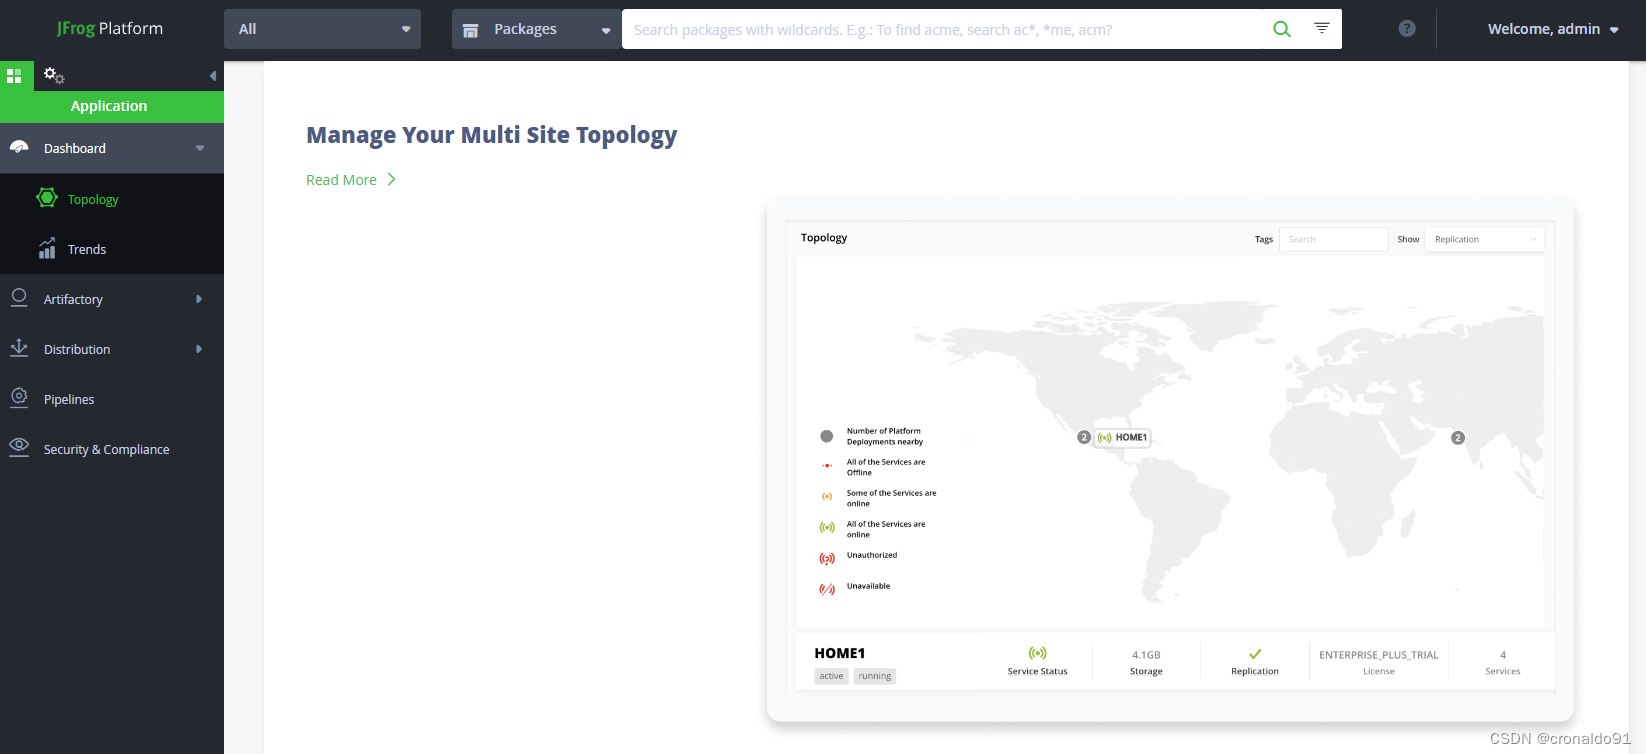
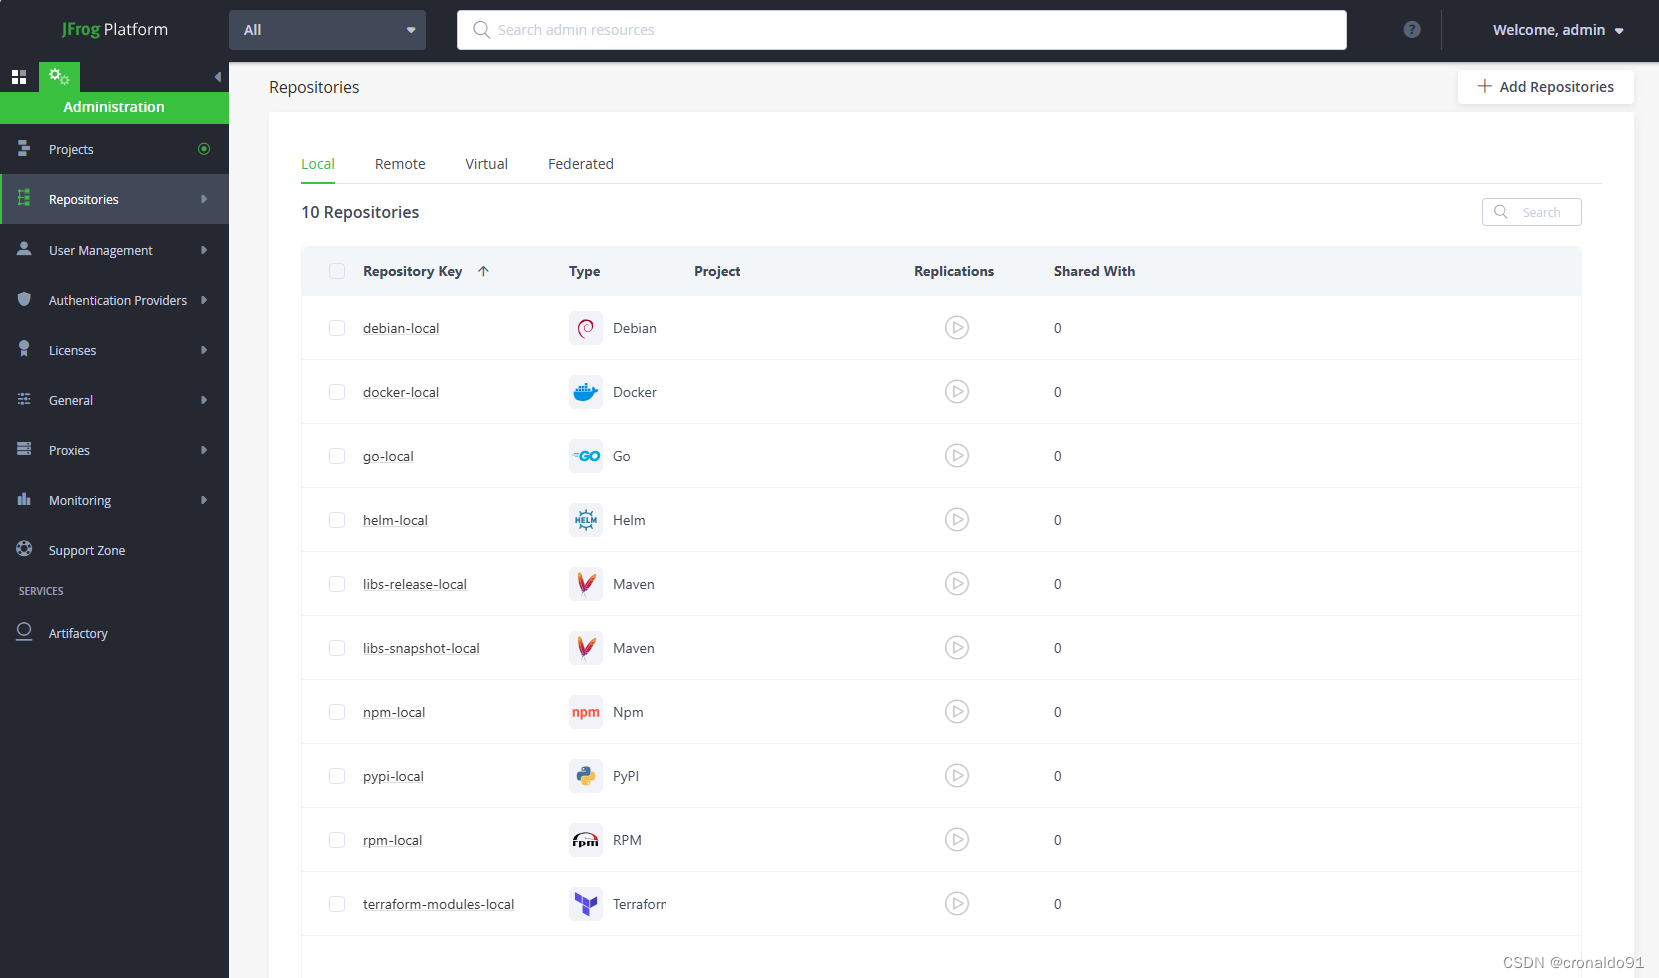
(15)获取xray相关验证信息
在User Management->setting->输入password->点击unlock
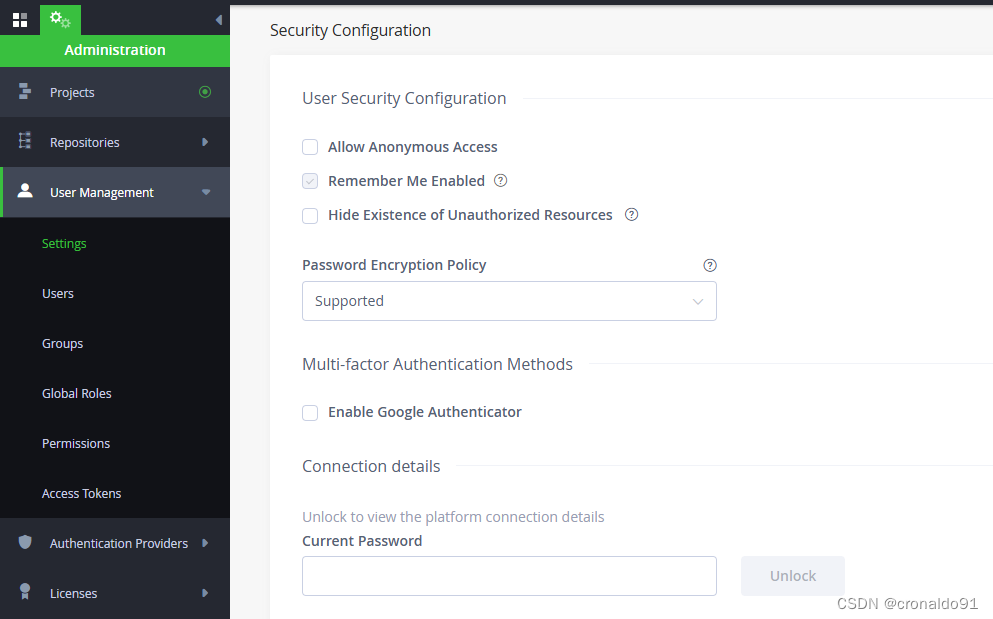
解锁

显示Artifactory的Join Key和JFrog URL

3.Ubuntu部署 postgresql数据库
(1)创建文件存储库配置
bash
sudo sh -c 'echo "deb http://apt.postgresql.org/pub/repos/apt $(lsb_release -cs)-pgdg main" > /etc/apt/sources.list.d/pgdg.list'
(2)导入存储库签名密钥
bash
wget --quiet -O - https://www.postgresql.org/media/keys/ACCC4CF8.asc | sudo apt-key add -
(3)更新软件包列表
bash
sudo apt-get update
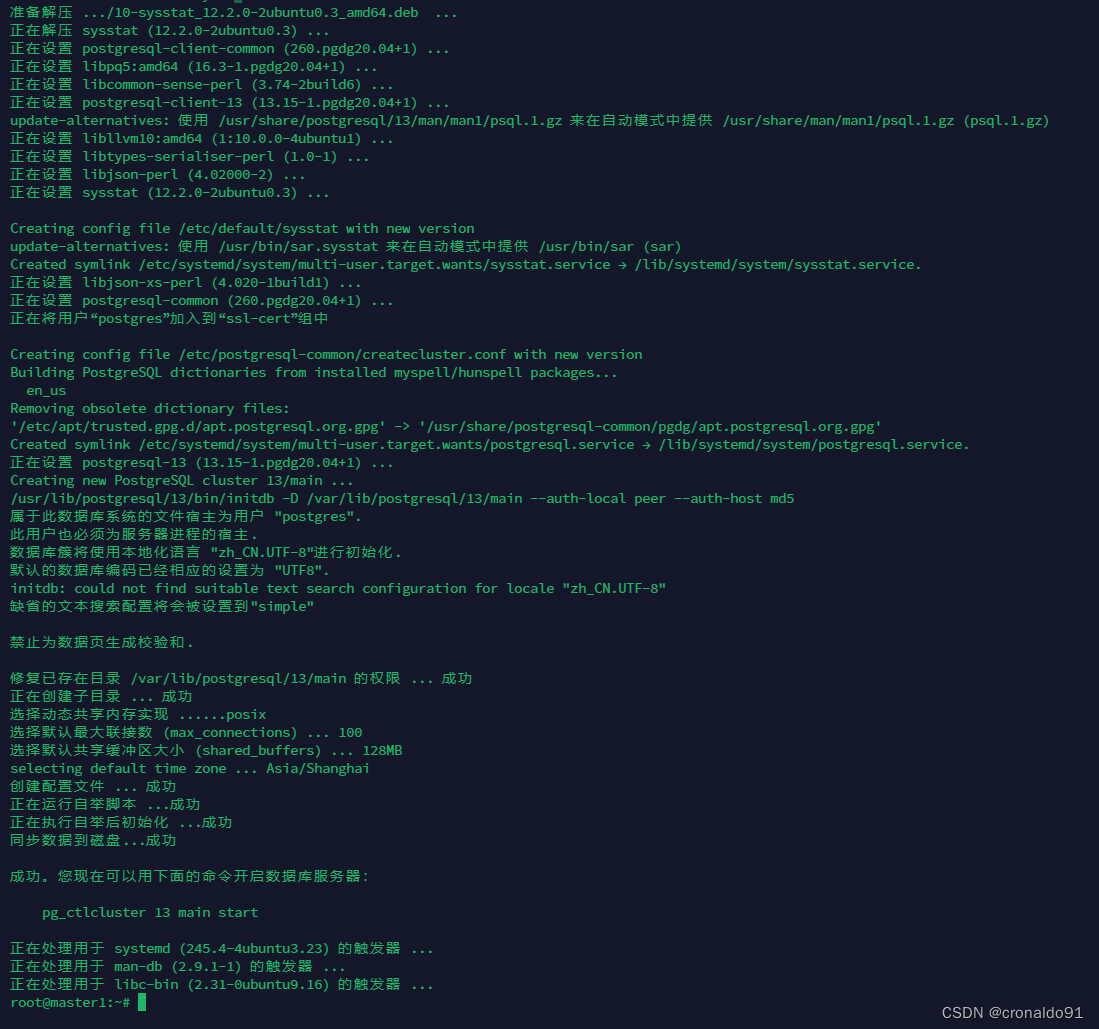
(4)安装
bash
sudo apt-get -y install postgresql-13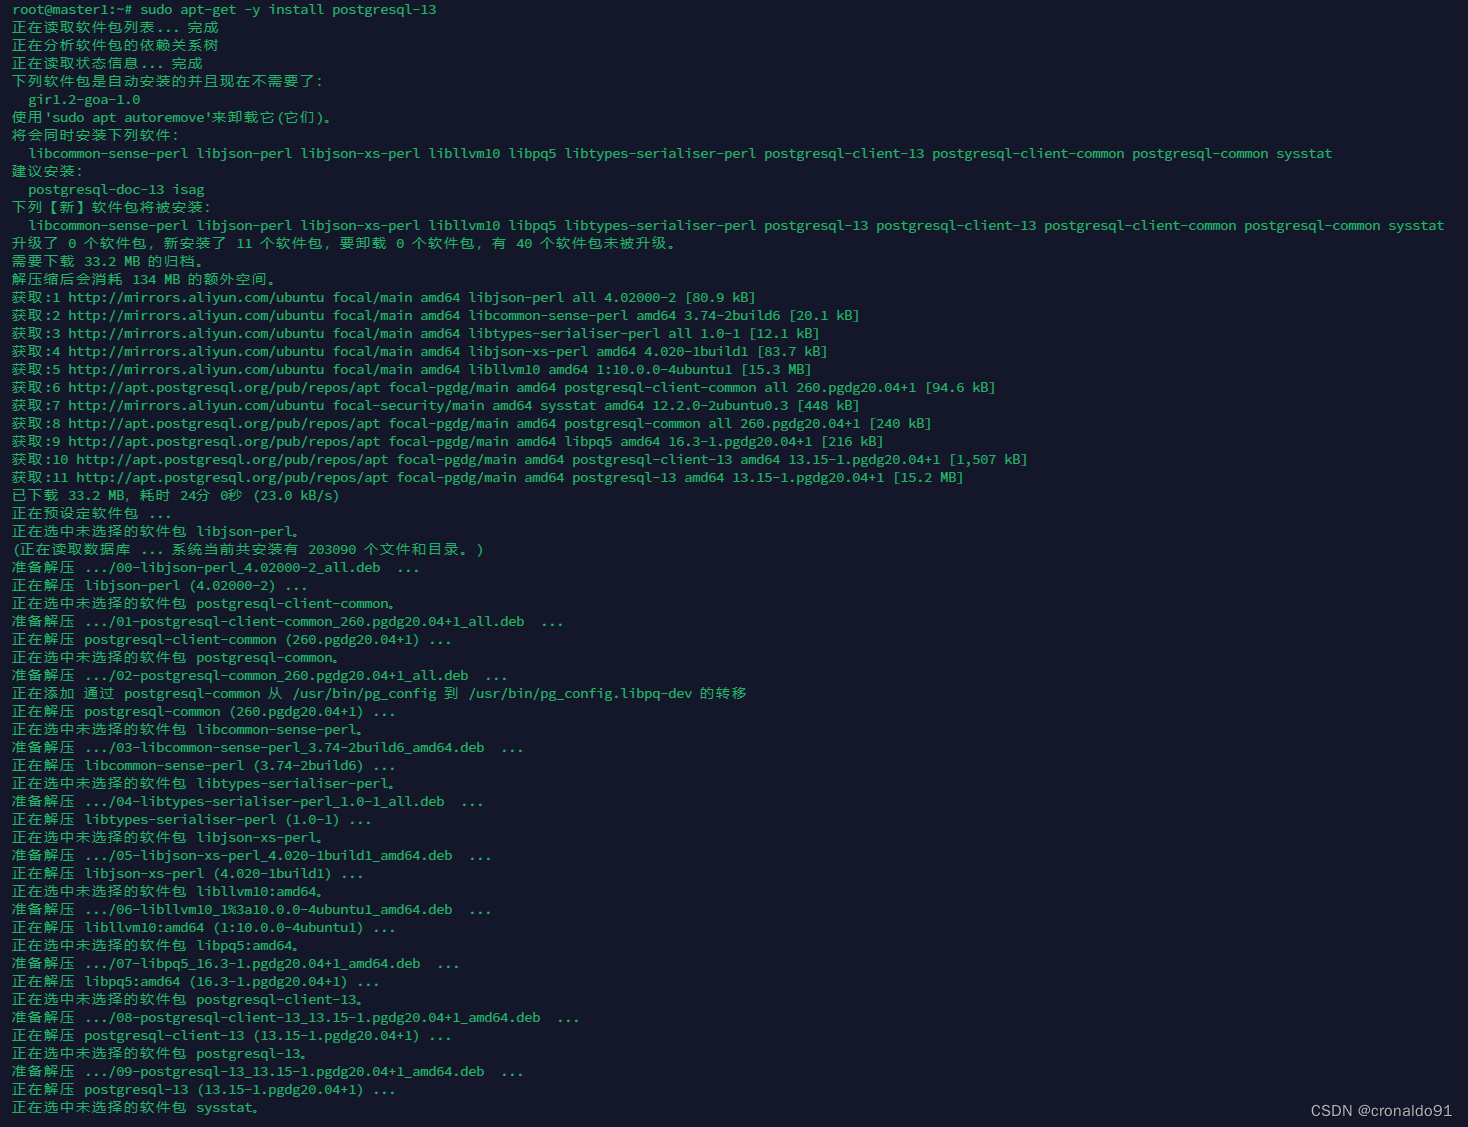
(5)启动并查看服务
bash
1)配置开机自启动
systemctl enable postgresql

2)启动postgresql
systemctl start postgresql

3)查看postgresql状态
systemctl status postgresql

(6)创建用户与数据库,授予用户权限
bash
1)进入数据库:
sudo -u postgres psql

2)创建xray用户
CREATE USER xray WITH PASSWORD 'password';

3)创建xraydb库
CREATE DATABASE xraydb WITH OWNER=xray ENCODING='UTF8';

4)授权库给用户
GRANT ALL PRIVILEGES ON DATABASE xraydb TO xray;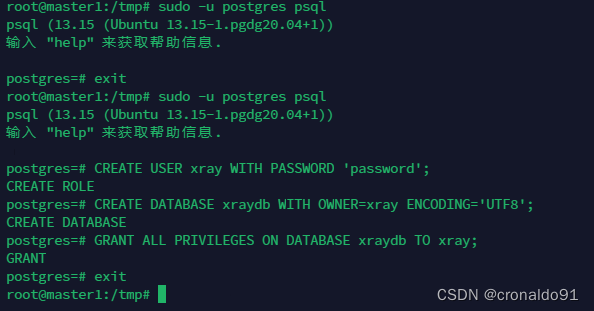
(7)修改数据库配置与访问IP,允许远程访问
bash
vim /etc/postgresql/13/main/postgresql.conf
bash
vim /etc/postgresql/13/main/pg_hba.conf

(8)重启postgresql
bash
sudo systemctl restart postgresql
4.Ubuntu 部署 Xray
(1)node节点修改配置文件
永久修改同一时间打开文件数上限
bash
1)修改/etc/security/limits.conf文件
vim /etc/security/limits.conf

2)在limits.conf文件中插入如下两行设置 (CentOS 开头设置为*,Ubuntu需要设置为用户)
root soft nofile 100000
root hard nofile 100000
root hard nproc 100000
root hard nproc 100000
//* - nofile 100000 也可以用这一行代替上面的两行

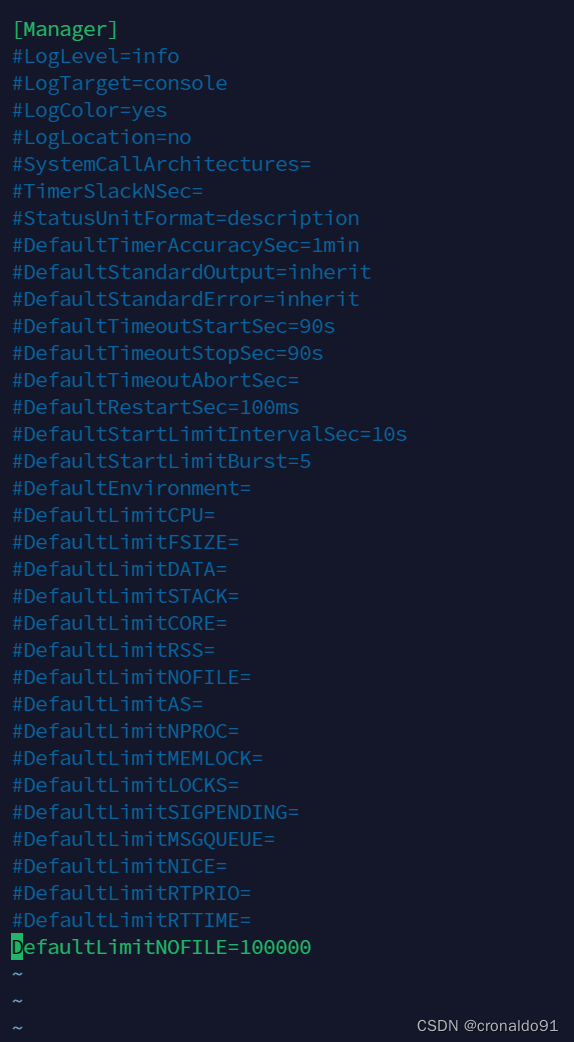
3)处理非图像登录
在下面的两文件中加入:DefaultLimitNOFILE=100000

vim /etc/systemd/user.conf
vim /etc/systemd/system.conf

4)重启
reboot

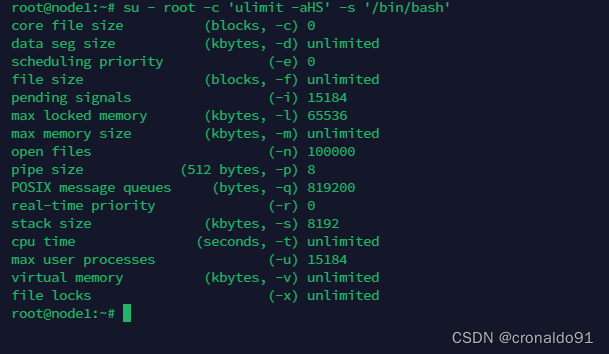
5)确认
输入 ulimit -n ,查看系统级是否修改成功
输入 su - root -c 'ulimit -aHS' -s '/bin/bash'  查看用户级是否修改成功
输入 cat /proc/[PID]/limits   查看进程级是否修改成功



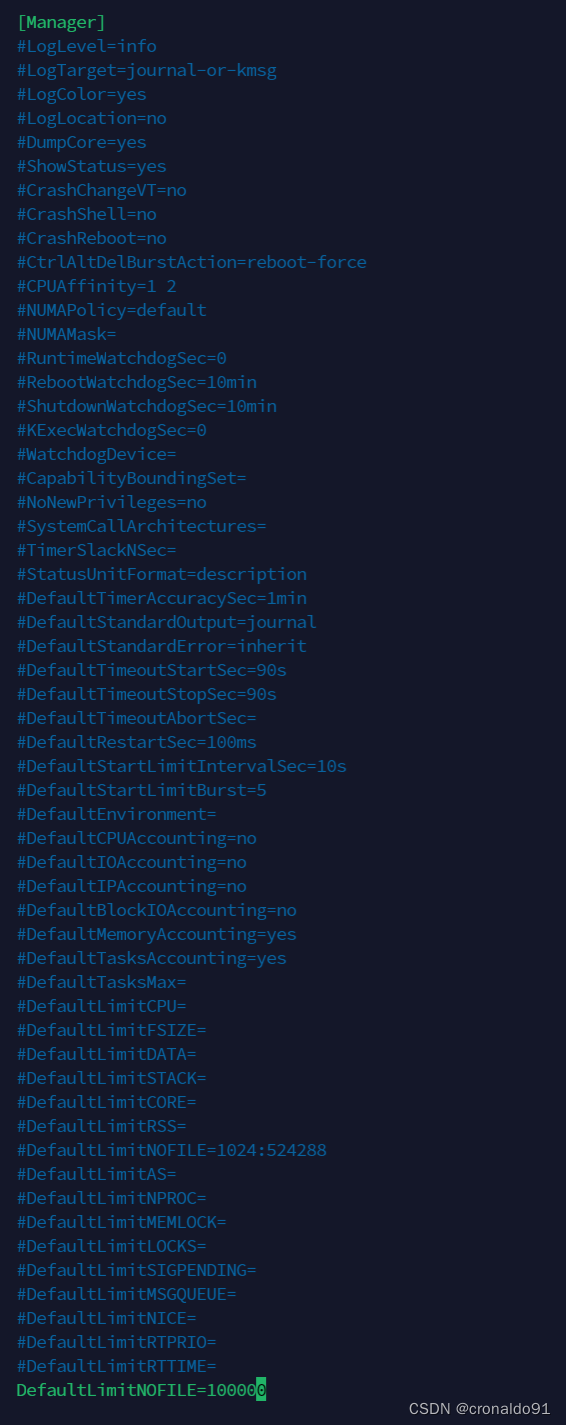
重启

确认

(2)查阅
bash
https://jfrog.com/download-legacy/?product=xray&installer=rpm最新版为3.96.1

(3)下载
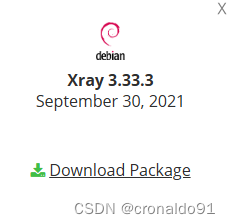
选择一个稳定版,类型为debian

点击下载
(4)解压
bash
tar -xvf jfrog-xray-3.33.3-deb.tar.gz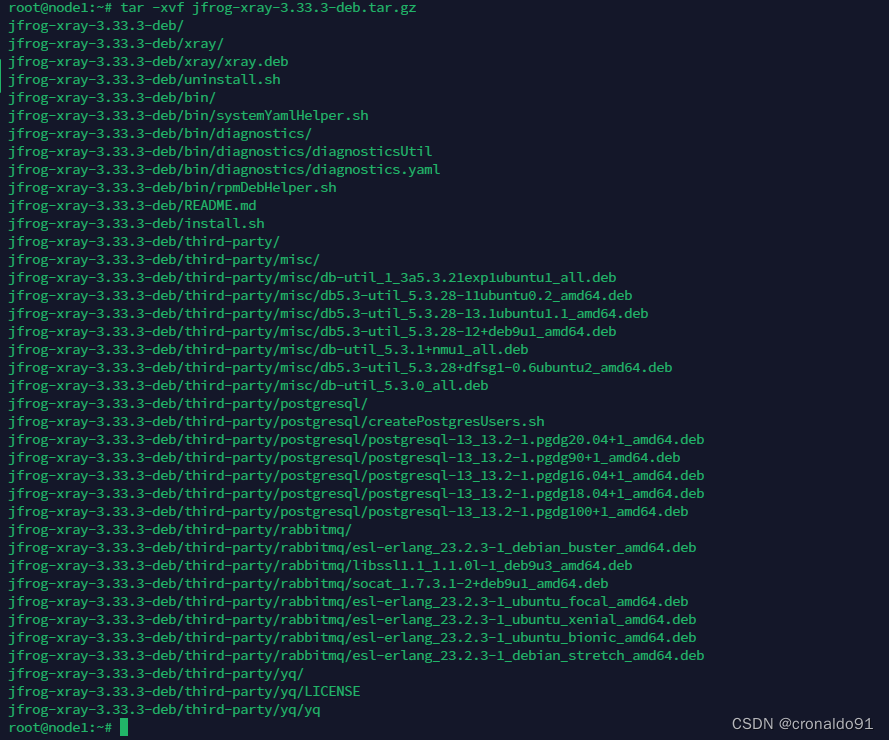
(5)安装
bash
cd jfrog-xray-3.33.3-deb
./install.sh
默认安装路径

输入Artifactory的JFrog URL

输入Artifactory的Join Key

输入本机IP

单节点输入n

连接外部数据库输入n
 依次输入pg数据库地址、用户、密码

安装成功
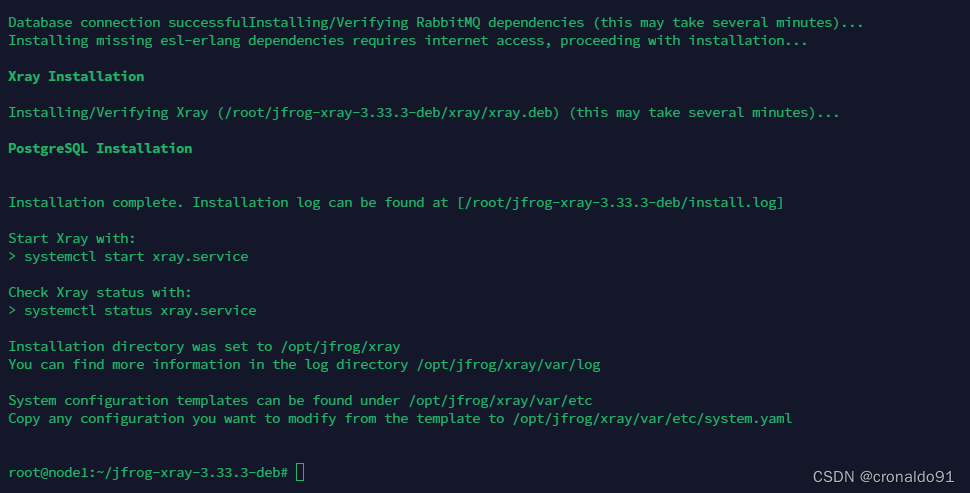
完整安装记录:
bash
root@node1:~/jfrog-xray-3.33.3-deb# ./install.sh

Beginning JFrog Xray setup


This script will install Xray and its dependencies.
After installation, logs can be found at /root/jfrog-xray-3.33.3-deb/install.log
[WARN] Running with 3GB Total RAM. Recommended value: 4GB
Running system diagnostics checks, logs can be found at [/root/jfrog-xray-3.33.3-deb/systemDiagnostics.log]

Installation Directory (Default: /var/opt/jfrog/xray):

The JFrog URL allows Xray to connect to a JFrog Platform Instance.
(You can copy the JFrog URL from Admin > Security > Settings)
JFrog URL: http://192.168.204.102:8082
Attempt to connect JFrogURL succeeded

The Join key is the secret key used to establish trust between services in the JFrog Platform.
(You can copy the Join Key from Admin > Security > Settings)
Join Key:


For IPv6 address, enclose value within square brackets as follows : [<ipv6_address>]
Please specify the IP address of this machine (Default: 192.168.204.104): 192.168.204.104

Are you adding an additional node to an existing product cluster? [y/N]: n

The installer can install a PostgreSQL database, or you can connect to an existing compatible PostgreSQL database
(https://service.jfrog.org/installer/System+Requirements#SystemRequirements-RequirementsMatrix)
If you are upgrading from an existing installation, select N if you have externalized PostgreSQL, select Y if not.
Do you want to install PostgreSQL? [Y/n]: n

Provide the database connection details
PostgreSQL url. Example: [postgres://<IP_ADDRESS>:<PORT>/xraydb?sslmode=disable]: postgres://192.168.204.102:5432/xraydb?sslmode=disable

Database username (If your existing connection URL already includes the username, leave this empty): xray

Database password (If your existing connection URL already includes the password, leave this empty):


Database connection successfulInstalling/Verifying RabbitMQ dependencies (this may take several minutes)...
Installing missing esl-erlang dependencies requires internet access, proceeding with installation...

Xray Installation

Installing/Verifying Xray (/root/jfrog-xray-3.33.3-deb/xray/xray.deb) (this may take several minutes)...

PostgreSQL Installation


Installation complete. Installation log can be found at [/root/jfrog-xray-3.33.3-deb/install.log]

Start Xray with:
> systemctl start xray.service

Check Xray status with:
> systemctl status xray.service

Installation directory was set to /opt/jfrog/xray
You can find more information in the log directory /opt/jfrog/xray/var/log

System configuration templates can be found under /opt/jfrog/xray/var/etc
Copy any configuration you want to modify from the template to /opt/jfrog/xray/var/etc/system.yaml
(6)启动服务
bash
systemctl start xray.service
systemctl status xray.service
(7)查看日志
bash
tail -f /var/opt/jfrog/xray/log/console.log
(8)JFrog查看服务
目前只有1个
(9)刷新Arifactory,会弹出一个Getting Started页面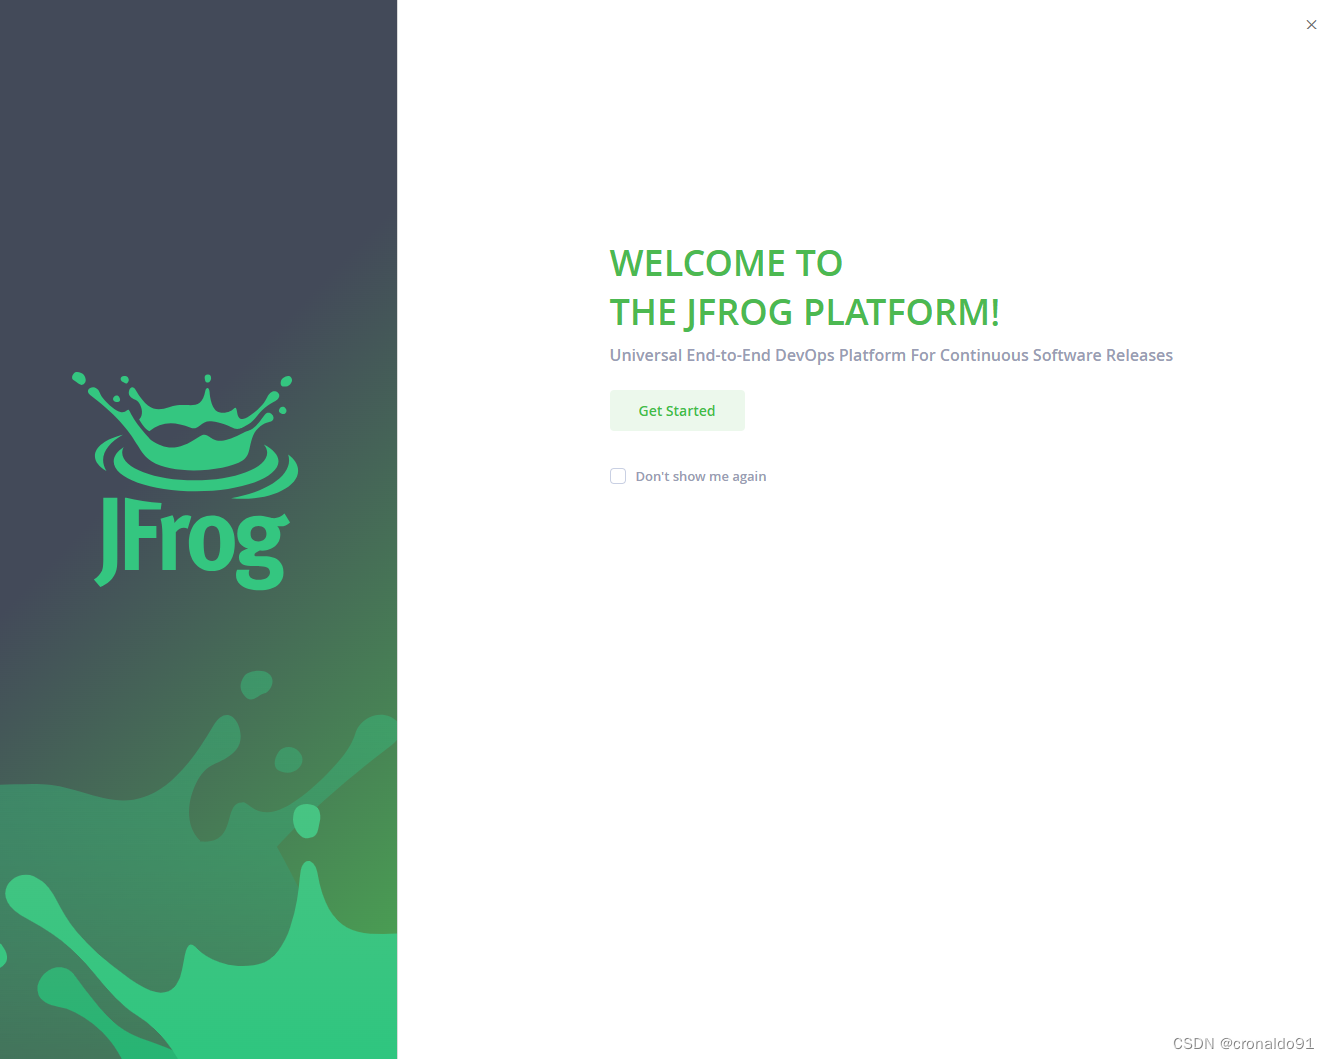
(10)输入Xray的license
这里可以选第一个,把之前的授权复制过来

下一步,这里会卡主
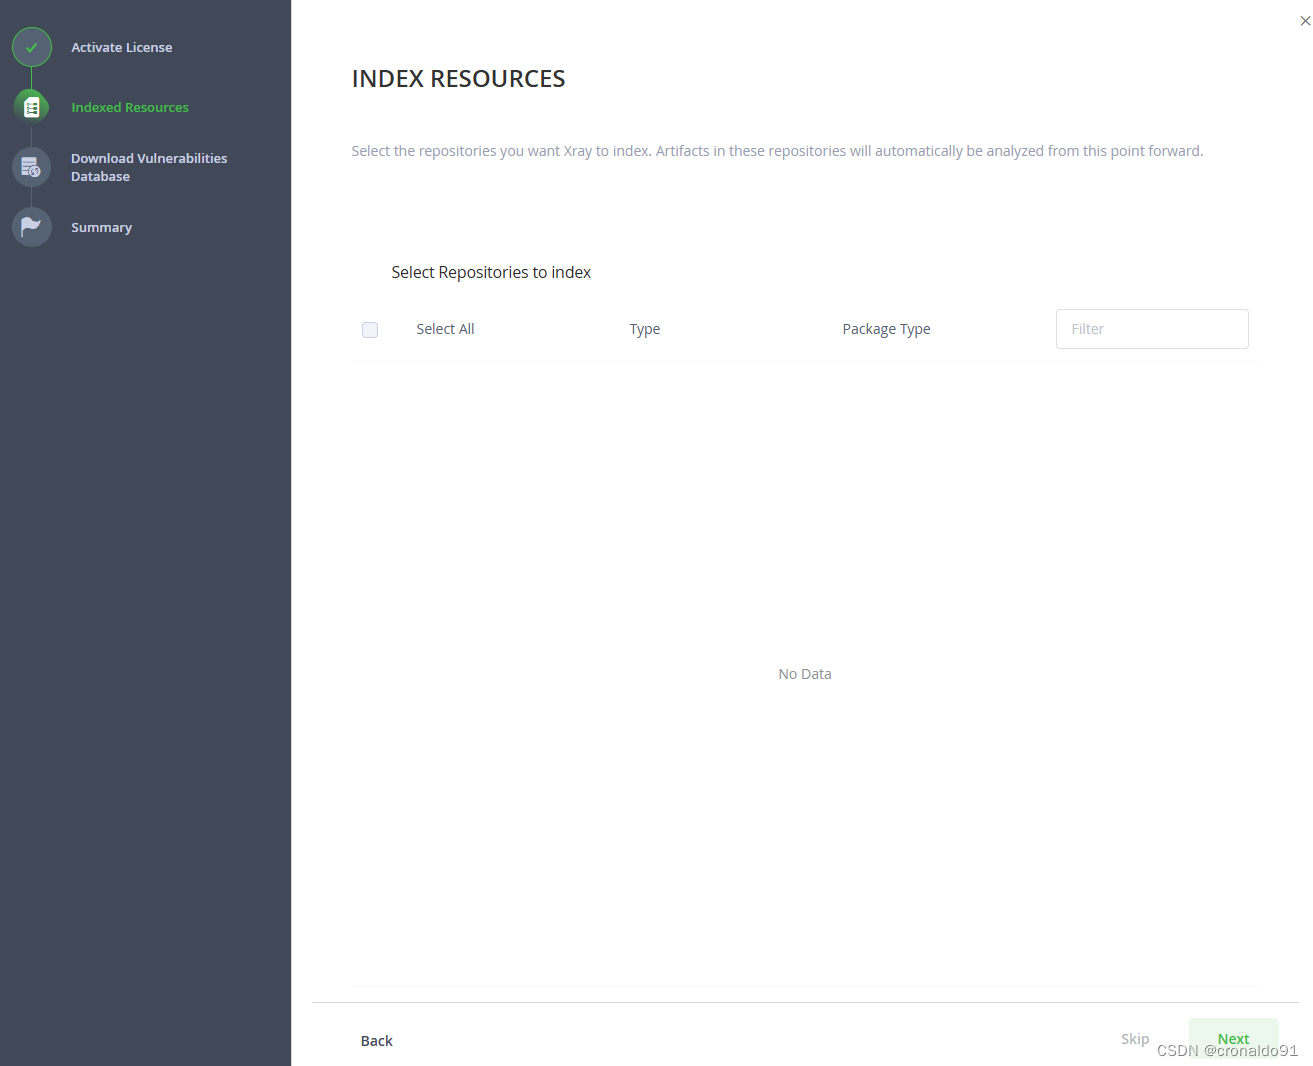
原因如下

也可以自行申请
bash
https://www.jfrogchina.com/xray/
5. 使用JFrog 增删项目
(1)新建项目
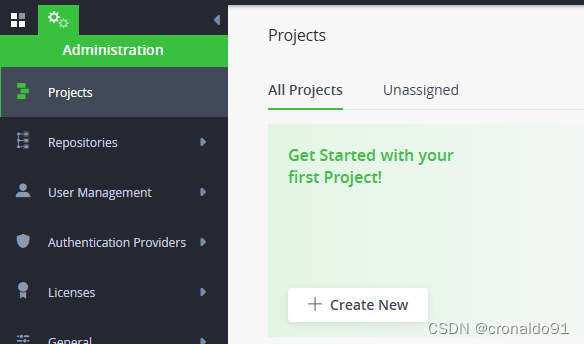
(2)新建
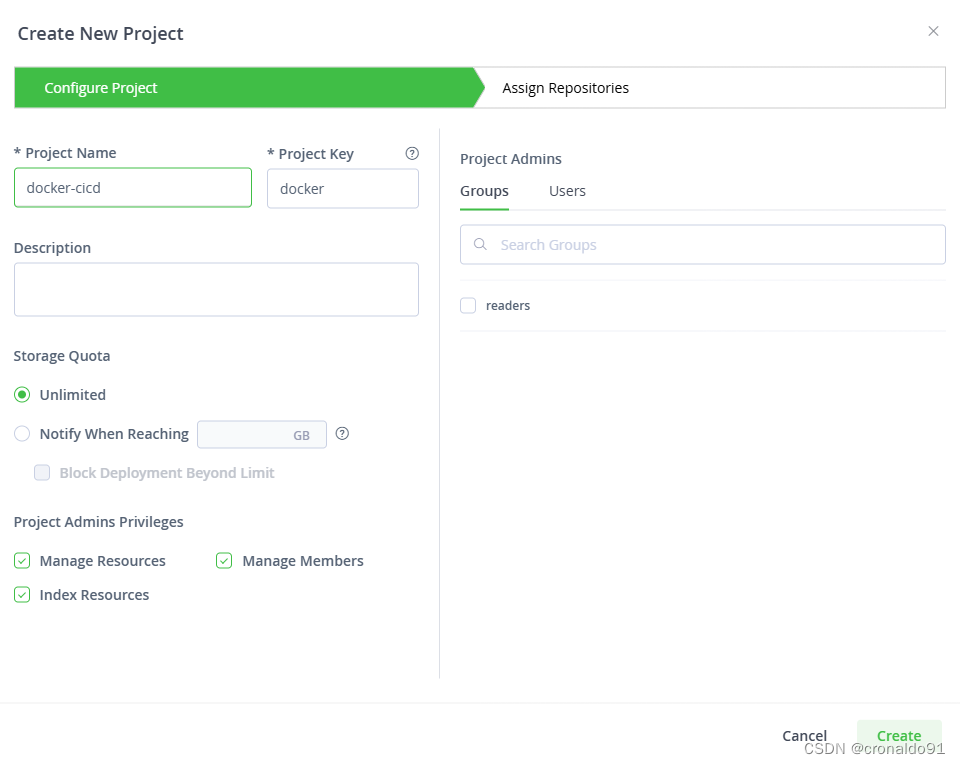
(3)完成
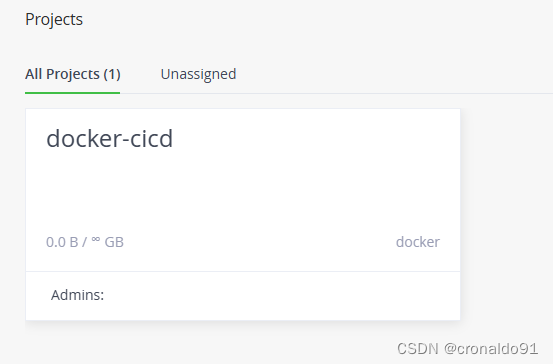
(4)分配到本地
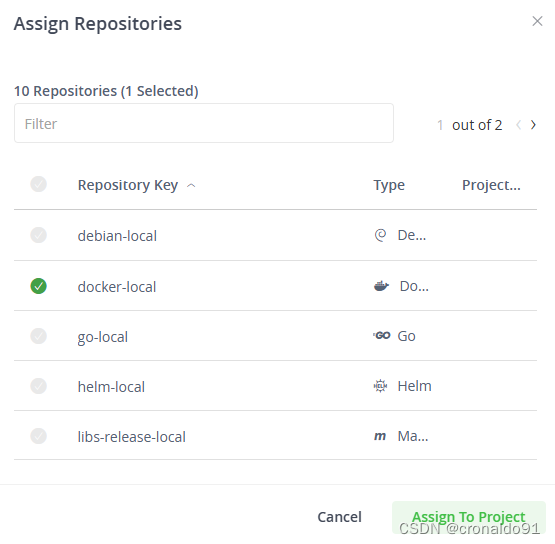
显示已分配
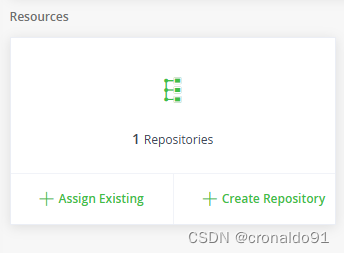
(5)分配成员
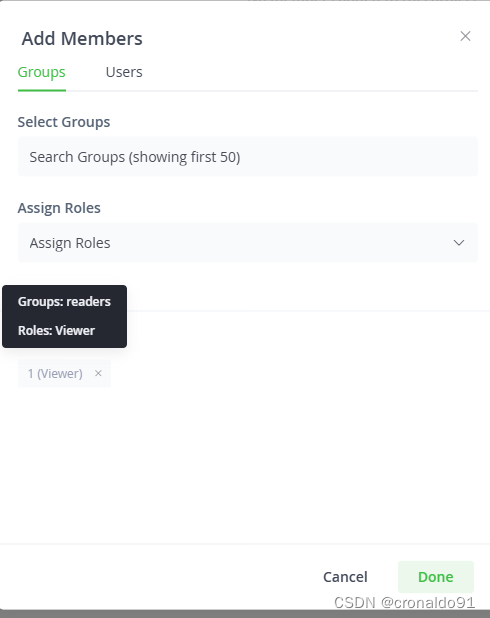
查看已分配成员

(6)项目概览
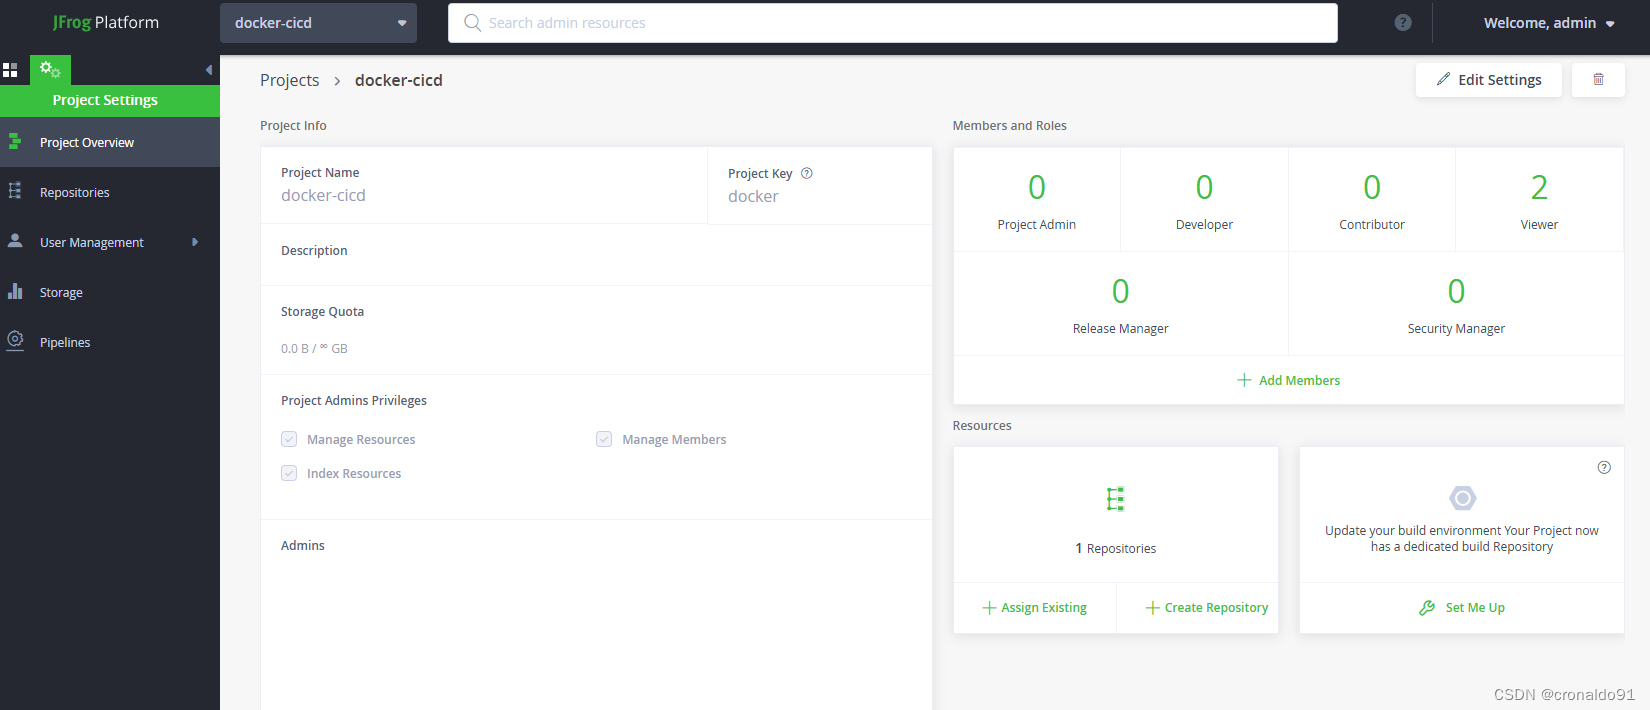
(7)修改上传大小
选择左下角Artifactory
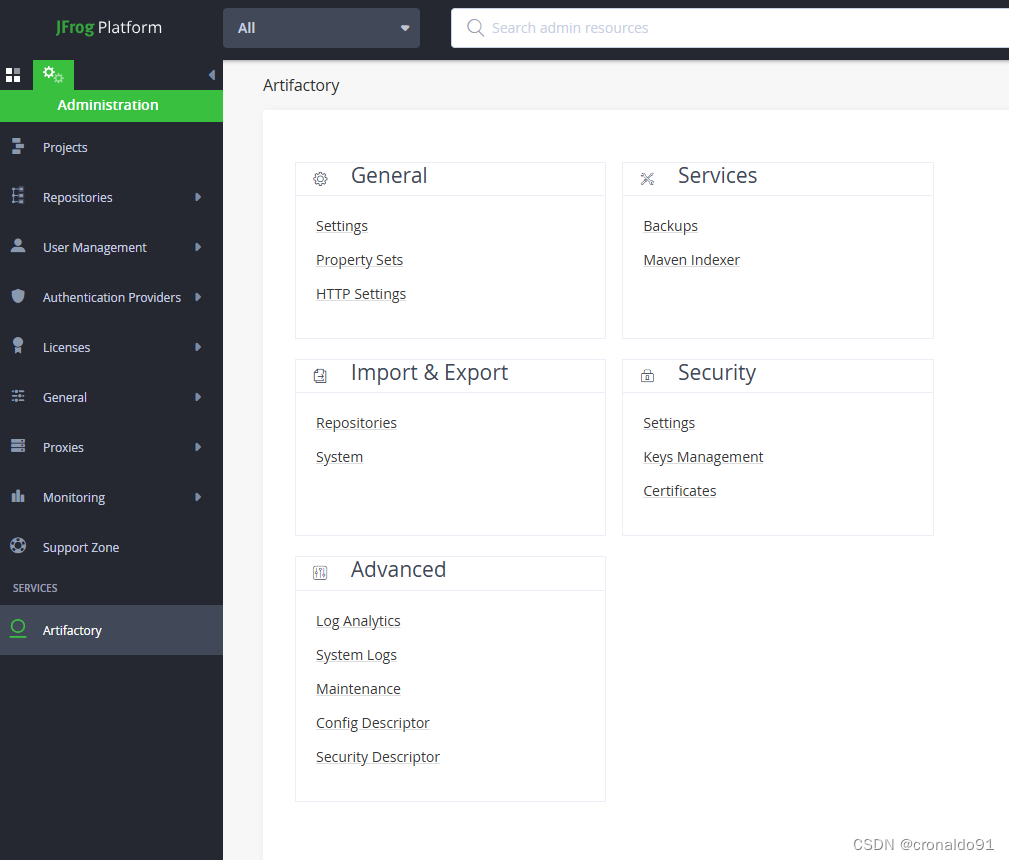
选择Settings
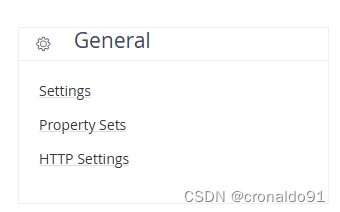
默认大小为100M
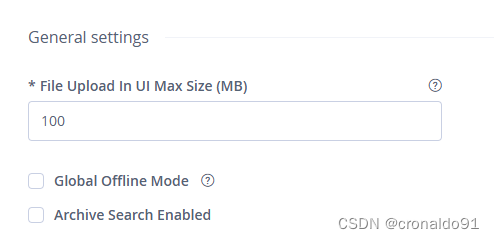
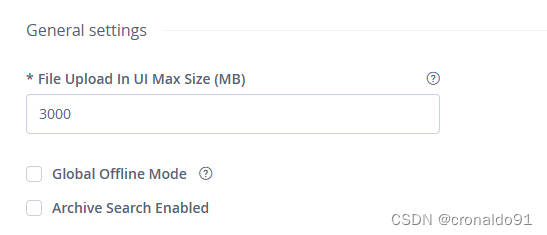
修改
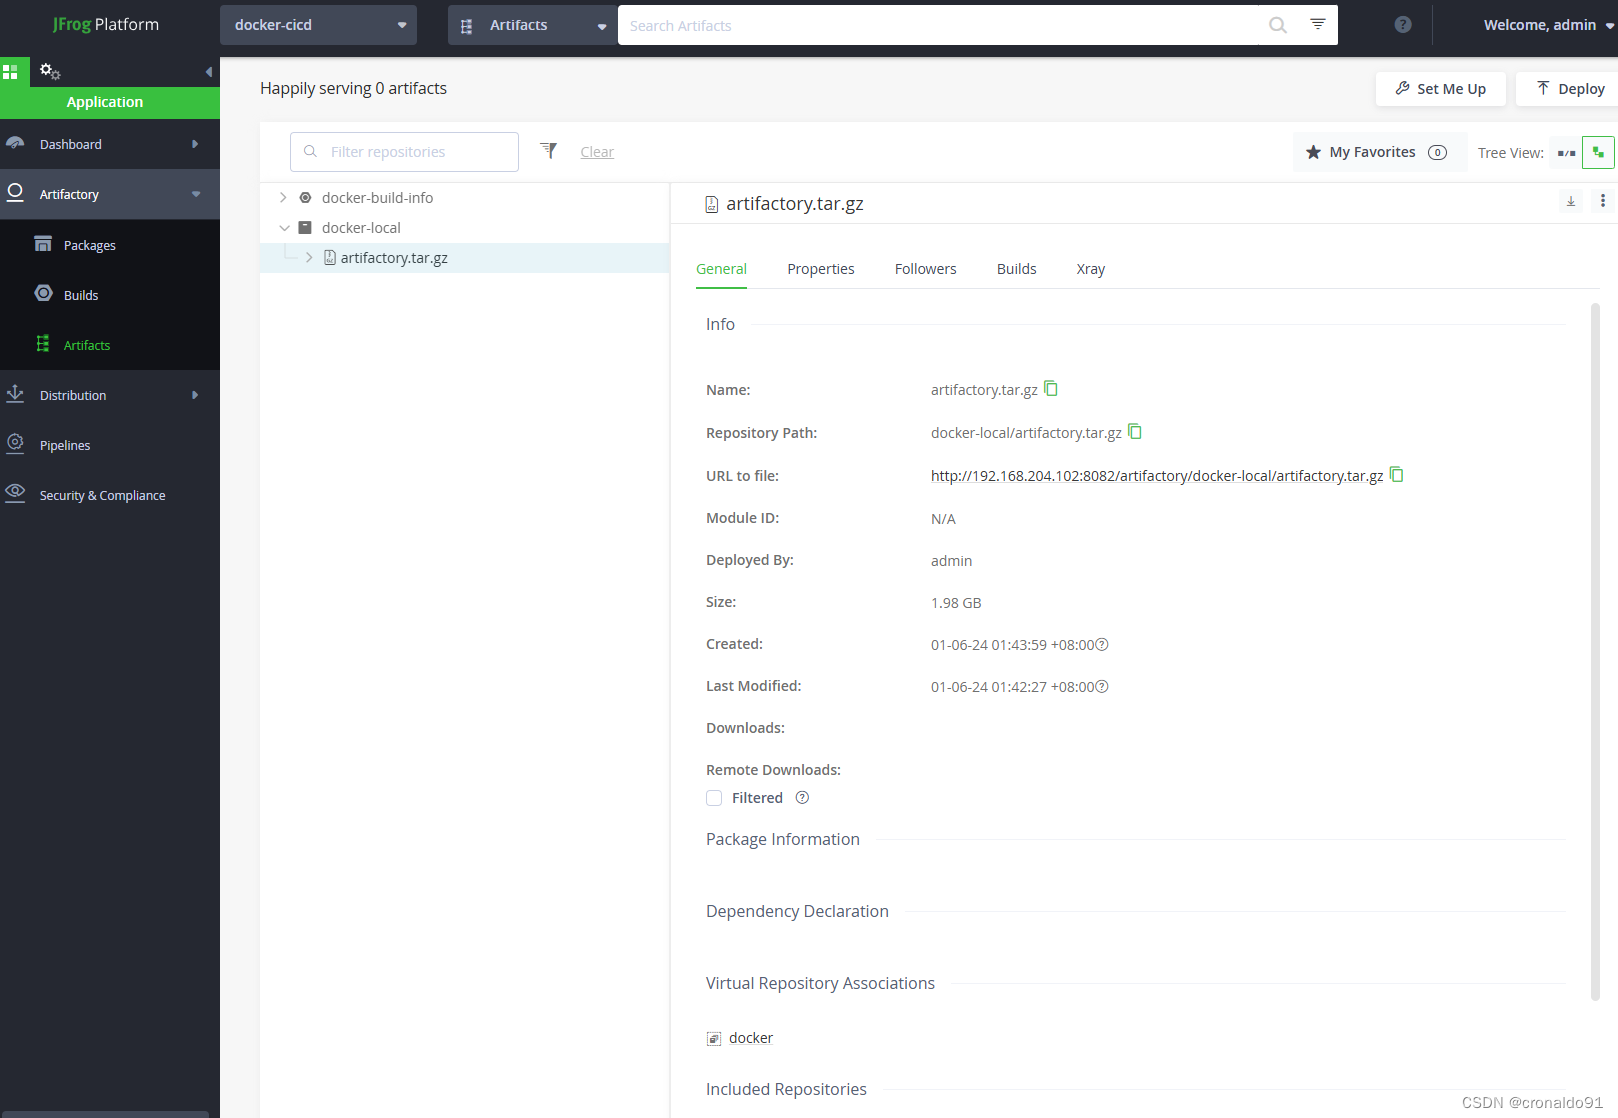
(8) 上传制品
大小为1.98GB
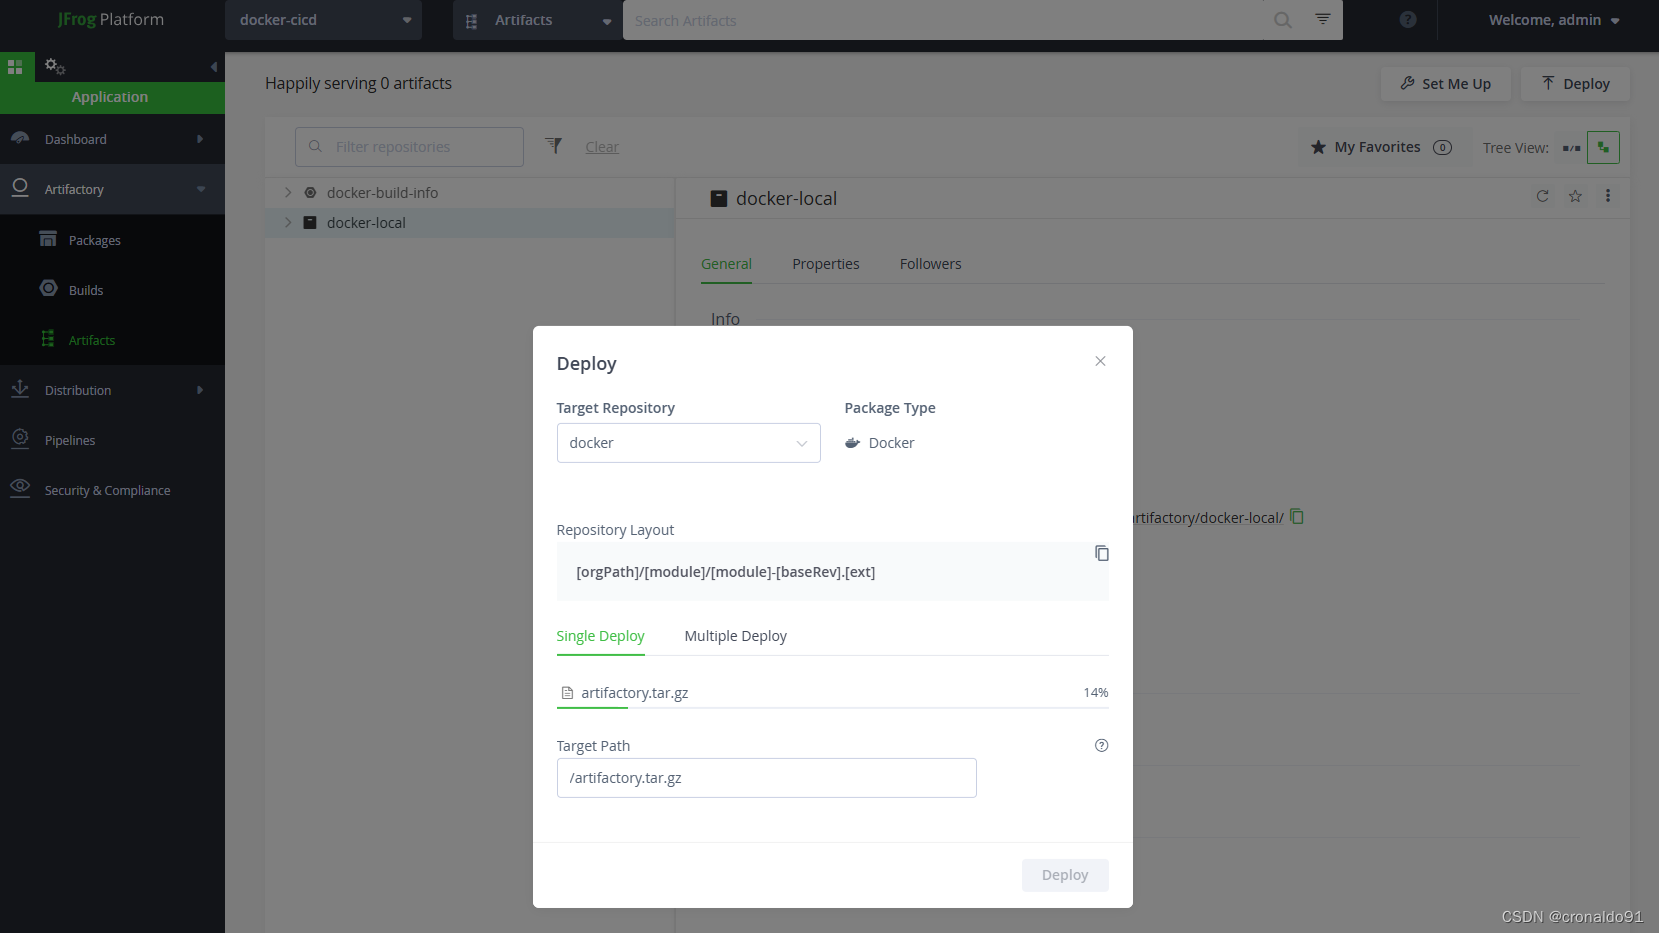
已上传
(9) 删除项目


无法删除

先删除资源

确认

删除成功

继续删除已有仓库
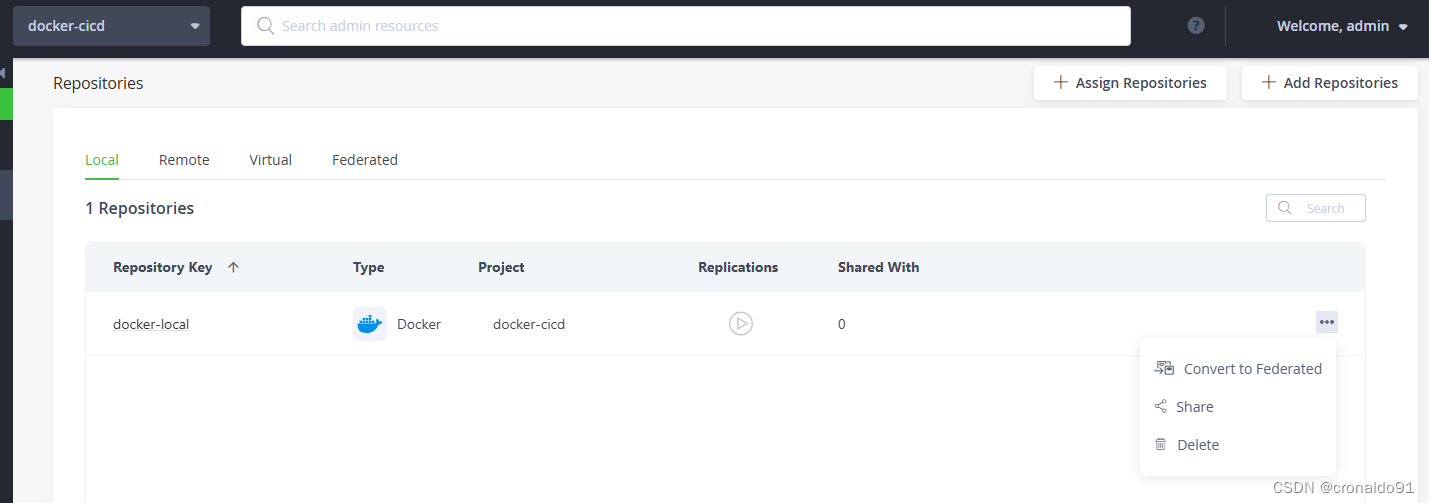
删除
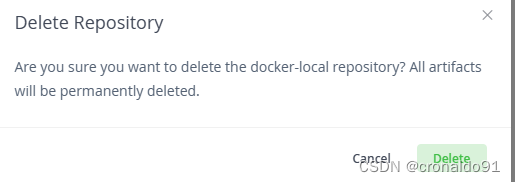
删除成功
此时完整项目可以删除成功

二、问题
1.Ubuntu 如何通过apt方式部署 JFrog 制品库
查看java版本
bash
java -version
(3)安装java
bash
sudo apt update
sudo apt install -y default-jdk

再次查看版本
bash
java -version
(4)将 MariaDB 数据库服务器存储库添加到系统中
bash
curl -LsS https://downloads.mariadb.com/MariaDB/mariadb_repo_setup | sudo bash -s --
(5)安装 MariaDB 服务器和客户端软件包
bash
sudo apt update
sudo apt install mariadb-server mariadb-client -y

(6)启动数据库服务
bash
sudo systemctl enable --now mariadb
(7)添加JFrog Artifactory存储库
bash
echo "deb https://releases.jfrog.io/artifactory/artifactory-debs xenial main" | sudo tee -a /etc/apt/sources.list.d/artifactory.list;
查看


(8)导入存储库 GGP 秘钥
bash
curl -fsSL https://releases.jfrog.io/artifactory/api/gpg/key/public|sudo gpg --dearmor -o /etc/apt/trusted.gpg.d/artifactory.gpg
(9)更新
bash
sudo apt update
(10)安装JFrog Artifactory
bash
sudo apt install jfrog-artifactory-oss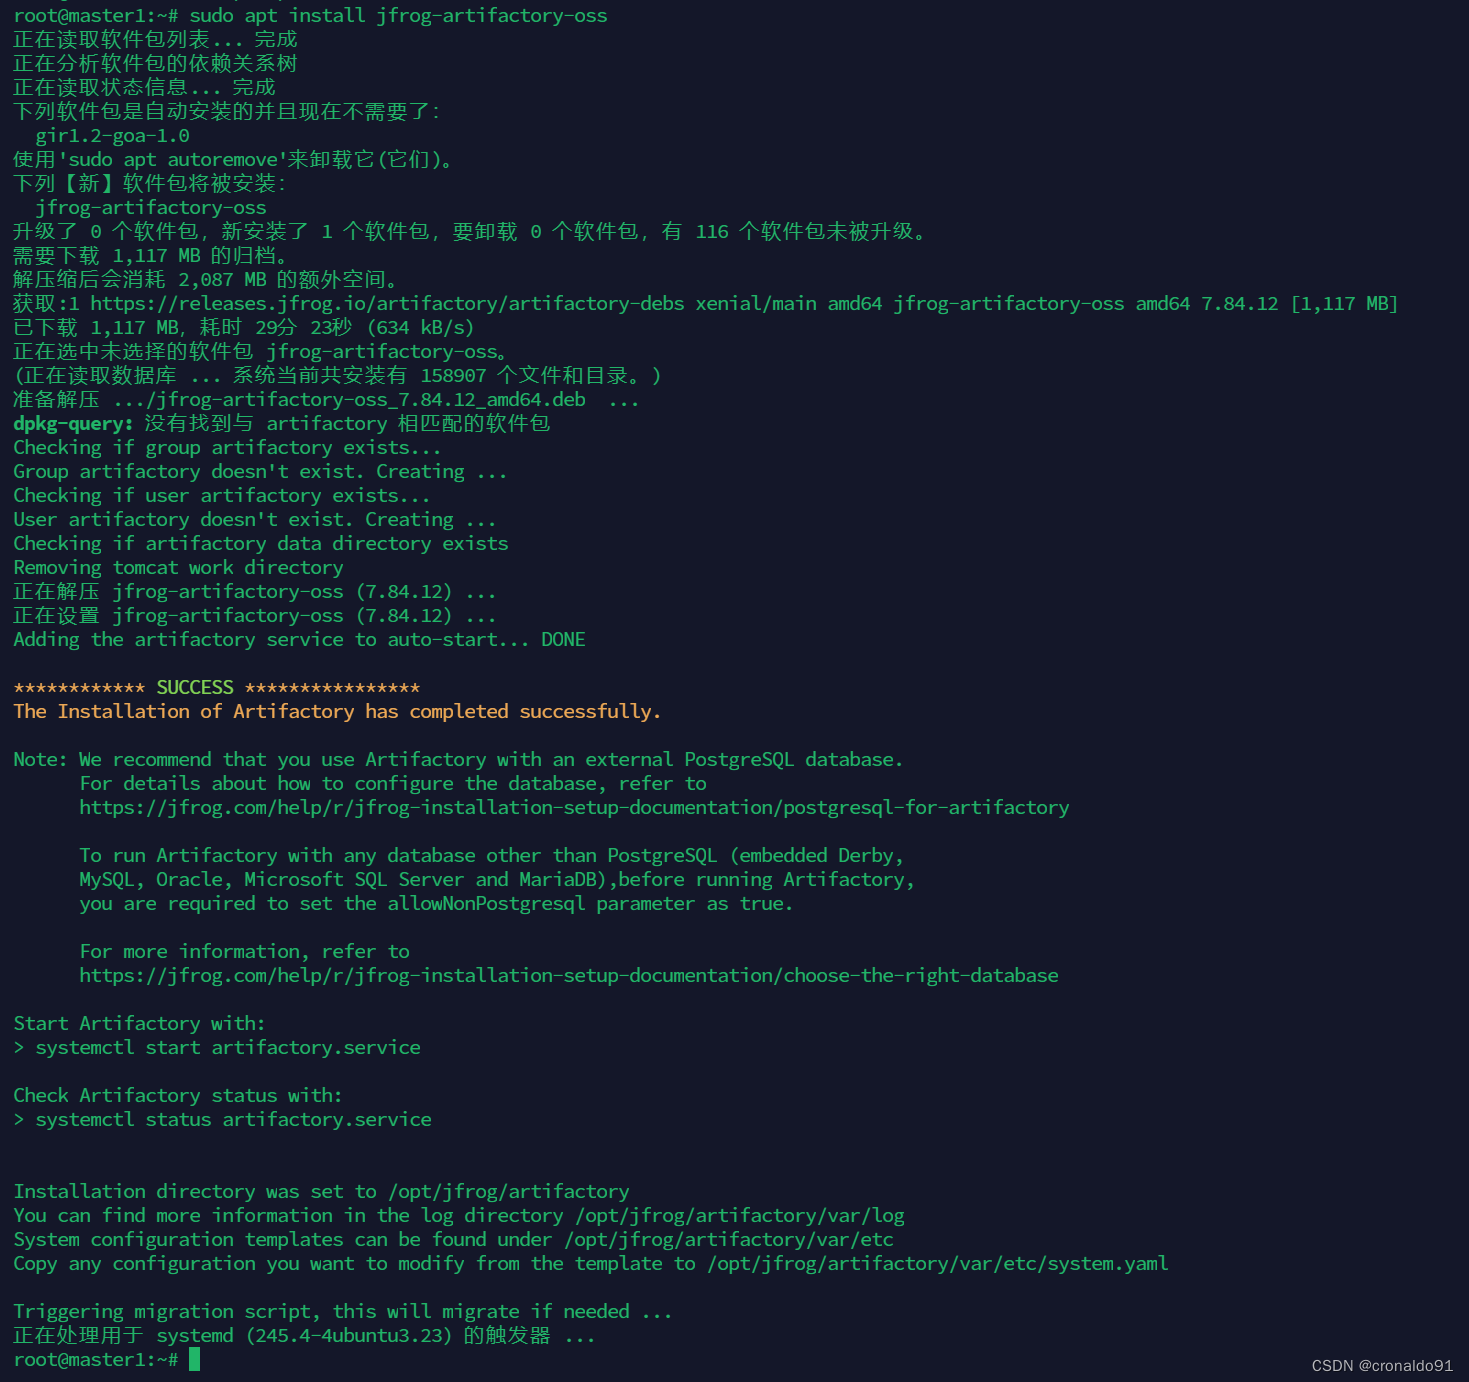
完整记录:
bash
root@master1:~# sudo apt install jfrog-artifactory-oss
正在读取软件包列表... 完成
正在分析软件包的依赖关系树
正在读取状态信息... 完成
下列软件包是自动安装的并且现在不需要了:
  gir1.2-goa-1.0
使用'sudo apt autoremove'来卸载它(它们)。
下列【新】软件包将被安装:
  jfrog-artifactory-oss
升级了 0 个软件包,新安装了 1 个软件包,要卸载 0 个软件包,有 116 个软件包未被升级。
需要下载 1,117 MB 的归档。
解压缩后会消耗 2,087 MB 的额外空间。
获取:1 https://releases.jfrog.io/artifactory/artifactory-debs xenial/main amd64 jfrog-artifactory-oss amd64 7.84.12 [1,117 MB]
已下载 1,117 MB,耗时 29分 23秒 (634 kB/s)
正在选中未选择的软件包 jfrog-artifactory-oss。
(正在读取数据库 ... 系统当前共安装有 158907 个文件和目录。)
准备解压 .../jfrog-artifactory-oss_7.84.12_amd64.deb  ...
dpkg-query: 没有找到与 artifactory 相匹配的软件包
Checking if group artifactory exists...
Group artifactory doesn't exist. Creating ...
Checking if user artifactory exists...
User artifactory doesn't exist. Creating ...
Checking if artifactory data directory exists
Removing tomcat work directory
正在解压 jfrog-artifactory-oss (7.84.12) ...
正在设置 jfrog-artifactory-oss (7.84.12) ...
Adding the artifactory service to auto-start... DONE

************ SUCCESS ****************
The Installation of Artifactory has completed successfully.

Note: We recommend that you use Artifactory with an external PostgreSQL database.
      For details about how to configure the database, refer to
      https://jfrog.com/help/r/jfrog-installation-setup-documentation/postgresql-for-artifactory

      To run Artifactory with any database other than PostgreSQL (embedded Derby,
      MySQL, Oracle, Microsoft SQL Server and MariaDB),before running Artifactory,
      you are required to set the allowNonPostgresql parameter as true.

      For more information, refer to
      https://jfrog.com/help/r/jfrog-installation-setup-documentation/choose-the-right-database

Start Artifactory with:
> systemctl start artifactory.service

Check Artifactory status with:
> systemctl status artifactory.service


Installation directory was set to /opt/jfrog/artifactory
You can find more information in the log directory /opt/jfrog/artifactory/var/log
System configuration templates can be found under /opt/jfrog/artifactory/var/etc
Copy any configuration you want to modify from the template to /opt/jfrog/artifactory/var/etc/system.yaml

Triggering migration script, this will migrate if needed ...
正在处理用于 systemd (245.4-4ubuntu3.23) 的触发器 ...
(11)启动服务(如报错,请参考问题集)
bash
sudo systemctl start artifactory.service && sudo systemctl enable artifactory.service
(12)检查服务状态
bash
systemctl status artifactory.service
(13)查看数据库
bash
root@master1:~# cd /opt/jfrog/artifactory/app/misc/db

root@master1:/opt/jfrog/artifactory/app/misc/db# ls
createdb_mariadb.sql  createdb_mssqlBlob.sql  createdb_mssqlRecreateBlob.sql  createdb_mssql.sql  createdb_mysql.sql  createdb_postgres.sql
(14)为 JFrog Artifactory 创建 MariaDB 数据库
bash
sudo mariadb -u root

source /opt/jfrog/artifactory/app/misc/db/createdb_mariadb.sql;
exit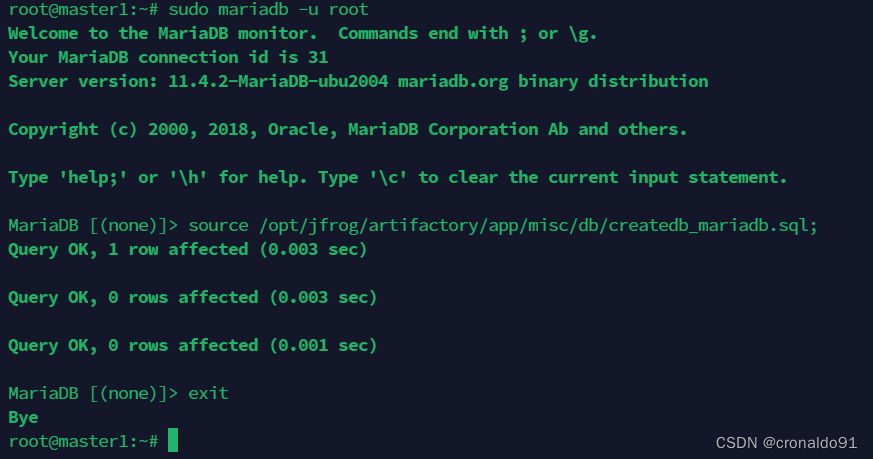
(14)测试
bash
curl 127.0.0.1:8081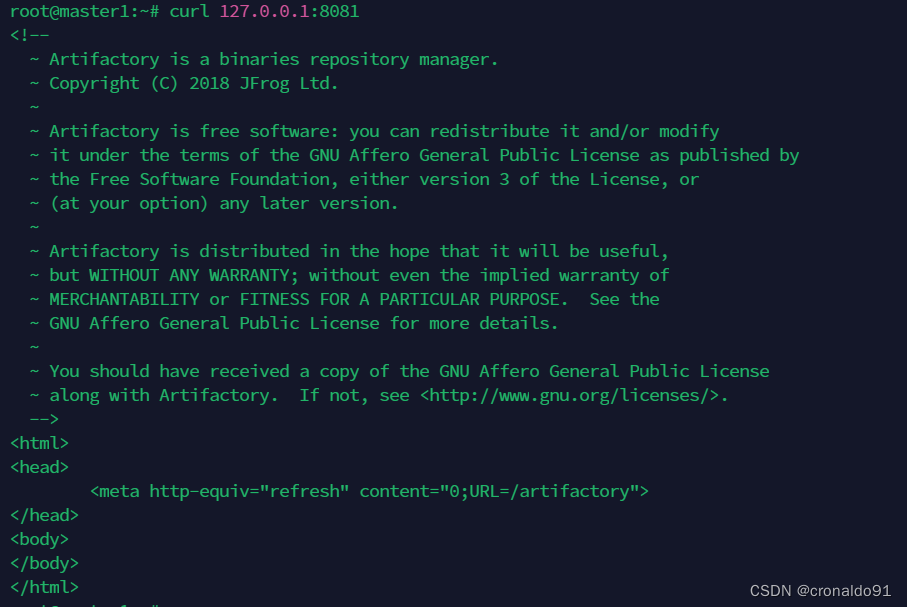
2.Ubuntu 如何通过docker方式部署 JFrog 制品库
(1) 查看端口
bash
lsof -i:80818081已被占用

(2)拉取镜像
oss社区社区版
bash
docker pull docker.bintray.io/jfrog/artifactory-oss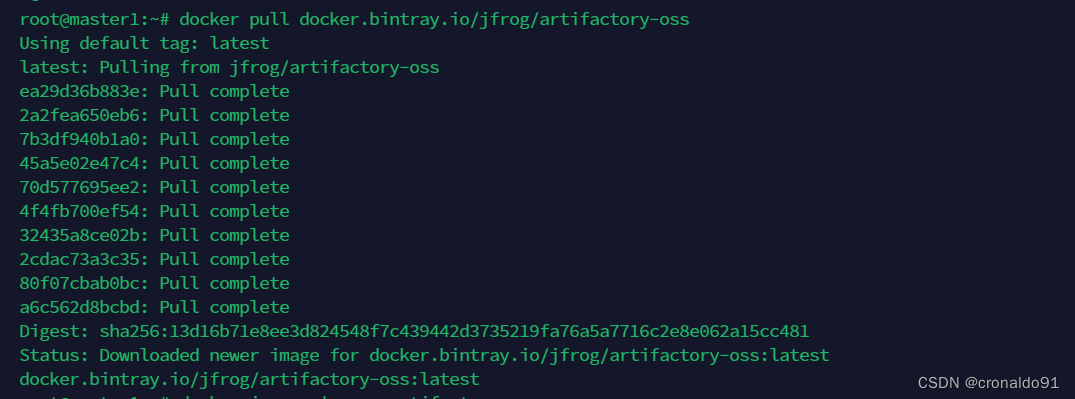
查看镜像
bash
docker images | grep artifactory-oss
(3)挂载卷
持久化容器数据
bash
docker volume create data_artifactory
(4)查看卷详情
宿主机文件位置
bash
docker volume inspect data_artifactory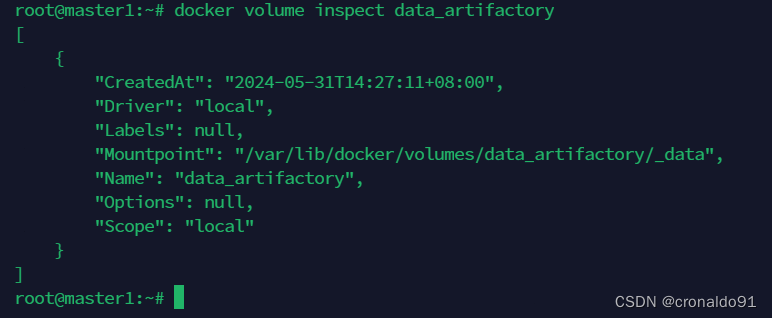
(5)创建容器
bash
docker run --name jfrog-artifactory -d -v data_artifactory:/var/opt/jfrog/artifactory -p 8011:8081 -p 8012:8082 docker.bintray.io/jfrog/artifactory-oss
查看进程
bash
docker ps | grep jfrog
(6)测试
bash
curl 127.0.0.1:8011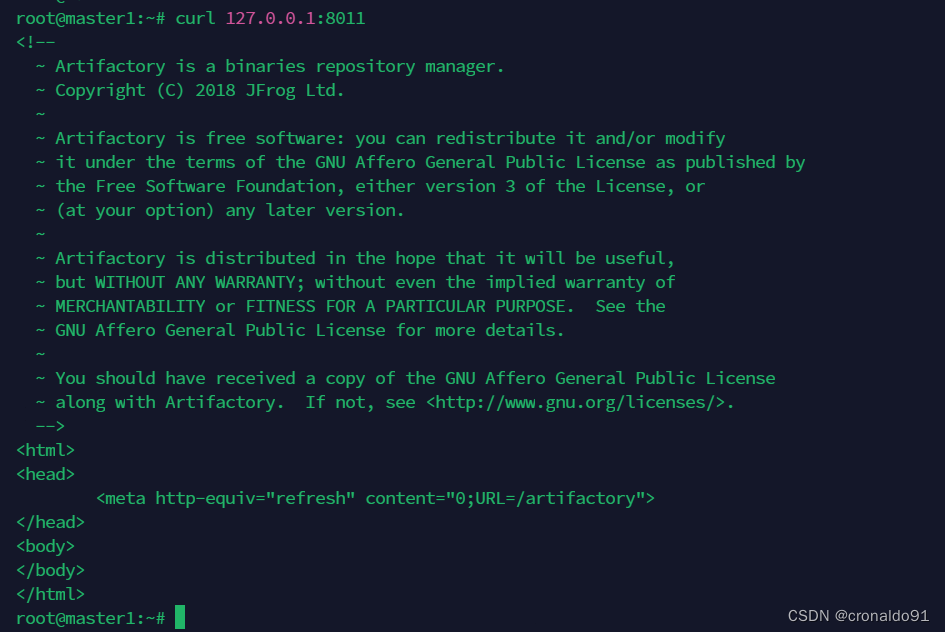
3.安装jdk报错
(1)报错
bash
等待缓存锁:无法获得锁 /var/lib/dpkg/lock-frontend。锁正由进程 29960(unattended-upgr)
(2)原因分析
bash
这个错误通常是由于其他进程正在使用APT包管理器而导致的。在你的情况下,进程29960(unattended-upgr)正在持有APT的锁。这是因为系统正在进行软件更新或升级。在进行这些操作时,APT会锁定相关文件以防止多个进程同时修改它们,以确保系统的稳定性和一致性。(3)解决方法
杀掉进程
bash
sudo kill 29960
清除锁文件:手动清除,手动清除APT的锁文件
bash
sudo rm /var/lib/dpkg/lock-frontend
sudo rm /var/cache/apt/archives/lock
成功:

4.安装JFrog Artifactory报错
(1)报错
bash
 暂时不能解析域名"jfrog-prod-use1-shared-virginia-main.s3.amazonaws.com"
E: 无法下载 https://releases.jfrog.io/artifactory/artifactory-debs/pool/jfrog-artifactory-oss/jfrog-artifactory-oss-7.84.12.deb  暂时不能解析域名"jfrog-prod-use1-shared-virginia-main.s3.amazonaws.com"
(2)原因分析
未添加hosts,通过设置host,强制把访问节点重定向。
(3)解决方法
添加hosts:
bash
vim /etc/hosts
bash
219.76.4.4 s3.amazonaws.com
219.76.4.4 github-cloud.s3.amazonaws.com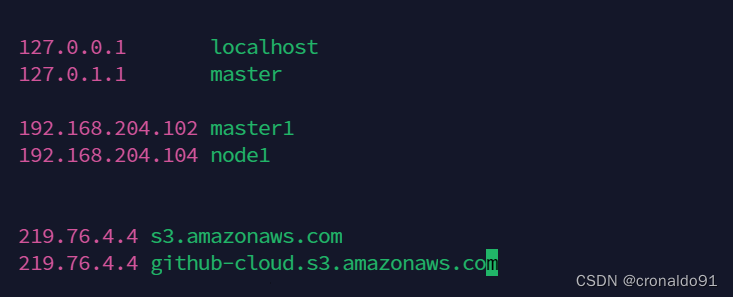
5.JFrog Artifactory 启动报错
(1)报错

(2)查阅
bash
https://stackoverflow.com/questions/45297704/problems-with-catalina-pid-and-artifactory-pid-while-upgrading-artifactory-to-th查看日志

查看异常
bash
journalctl -xe
(3)解决方法
bash
vim /etc/systemd/system/artifactory.service修改前:
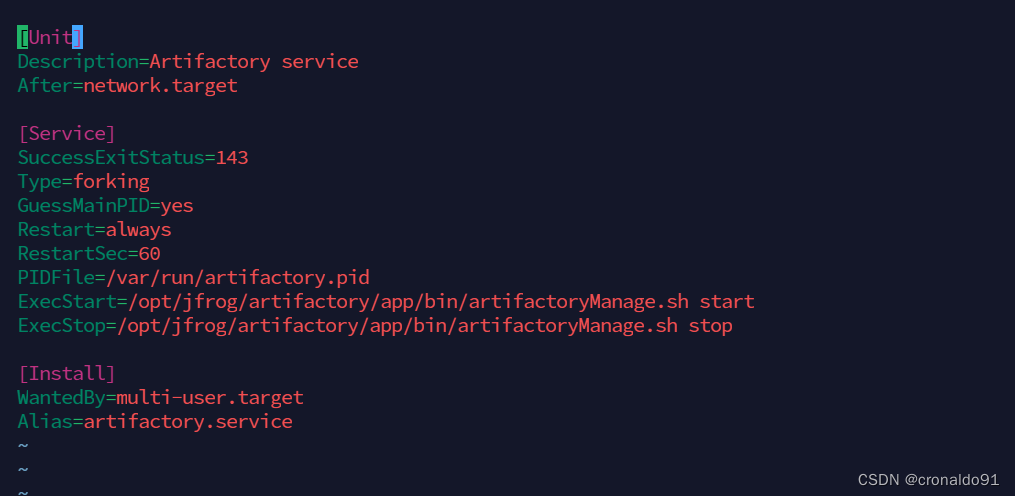
修改后:
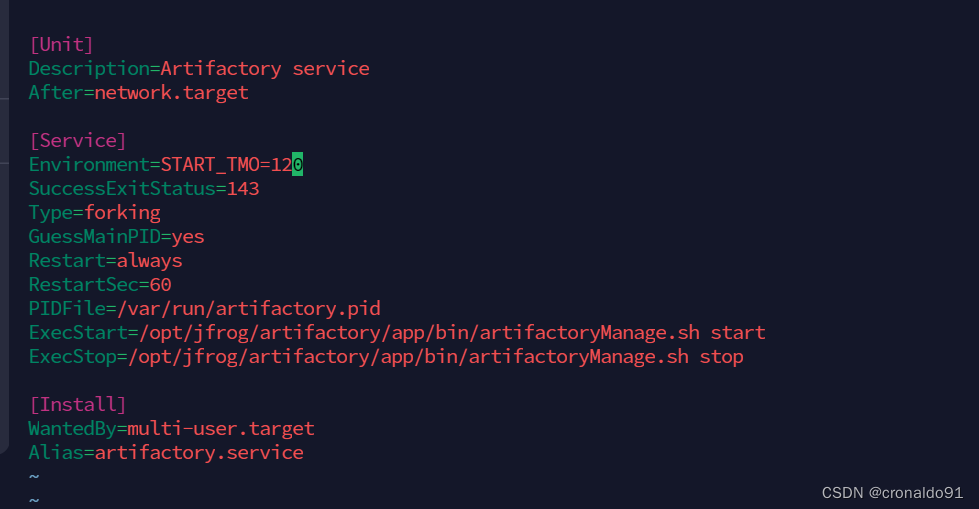
bash
systemctl daemon-reload
执行判断
bash
root@master1:~# /opt/jfrog/artifactory/app/bin/artifactoryManage.sh start
/usr/bin/netstat
2024-05-31T05:21:04.973Z [shell] [INFO ] [] [artifactoryManage.sh:87       ] [main] - Starting Artifactory tomcat as user artifactory...
2024-05-31T05:21:05.008Z [shell] [INFO ] [] [installerCommon.sh:1617       ] [main] - Checking open files and processes limits
2024-05-31T05:21:05.048Z [shell] [INFO ] [] [installerCommon.sh:1620       ] [main] - Current max open files is 1024
2024-05-31T05:21:05.089Z [shell] [INFO ] [] [installerCommon.sh:1631       ] [main] - Current max open processes is 15362
yaml validation succeeded
2024-05-31T05:21:05.157Z [shell] [INFO ] [] [installerCommon.sh:2991       ] [main] - System.yaml validation succeeded

Database connection check failed Could not determine database type
2024-05-31T05:21:05.399Z [shell] [INFO ] [] [installerCommon.sh:3493       ] [main] - Setting JF_SHARED_NODE_ID to master1
2024-05-31T05:21:05.521Z [shell] [INFO ] [] [installerCommon.sh:3493       ] [main] - Setting JF_SHARED_NODE_IP to 192.168.204.102
2024-05-31T05:21:05.631Z [shell] [INFO ] [] [installerCommon.sh:3493       ] [main] - Setting JF_SHARED_NODE_NAME to master1
2024-05-31T05:21:05.998Z [shell] [INFO ] [] [artifactoryCommon.sh:221      ] [main] - Using Tomcat template to generate : /opt/jfrog/artifactory/app/artifactory/tomcat/conf/server.xml
2024-05-31T05:21:06.195Z [shell] [INFO ] [] [systemYamlHelper.sh:981       ] [main] - Resolved ${artifactory.port||8081} to default value : 8081
2024-05-31T05:21:06.312Z [shell] [INFO ] [] [systemYamlHelper.sh:981       ] [main] - Resolved ${artifactory.tomcat.connector.sendReasonPhrase||false} to default value : false
2024-05-31T05:21:06.430Z [shell] [INFO ] [] [systemYamlHelper.sh:981       ] [main] - Resolved ${artifactory.tomcat.connector.relaxedPathChars||_SQUARE_BRACKETS_} to default value : _SQUARE_BRACKETS_
2024-05-31T05:21:06.552Z [shell] [INFO ] [] [systemYamlHelper.sh:981       ] [main] - Resolved ${artifactory.tomcat.connector.relaxedQueryChars||_SQUARE_BRACKETS_} to default value : _SQUARE_BRACKETS_
2024-05-31T05:21:06.673Z [shell] [INFO ] [] [systemYamlHelper.sh:981       ] [main] - Resolved ${artifactory.tomcat.connector.maxThreads||200} to default value : 200
2024-05-31T05:21:06.876Z [shell] [INFO ] [] [systemYamlHelper.sh:981       ] [main] - Resolved ${artifactory.tomcat.maintenanceConnector.port||8091} to default value : 8091
2024-05-31T05:21:06.998Z [shell] [INFO ] [] [systemYamlHelper.sh:981       ] [main] - Resolved ${artifactory.tomcat.maintenanceConnector.maxThreads||5} to default value : 5
2024-05-31T05:21:07.114Z [shell] [INFO ] [] [systemYamlHelper.sh:981       ] [main] - Resolved ${artifactory.tomcat.maintenanceConnector.acceptCount||5} to default value : 5
2024-05-31T05:21:07.304Z [shell] [INFO ] [] [systemYamlHelper.sh:981       ] [main] - Resolved ${access.http.port||8040} to default value : 8040
2024-05-31T05:21:07.423Z [shell] [INFO ] [] [systemYamlHelper.sh:981       ] [main] - Resolved ${access.tomcat.connector.sendReasonPhrase||false} to default value : false
2024-05-31T05:21:07.544Z [shell] [INFO ] [] [systemYamlHelper.sh:981       ] [main] - Resolved ${access.tomcat.connector.maxThreads||50} to default value : 50
2024-05-31T05:21:07.782Z [shell] [INFO ] [] [systemYamlHelper.sh:621       ] [main] - Resolved JF_PRODUCT_HOME (/opt/jfrog/artifactory) from environment variable
2024-05-31T05:21:08.046Z [shell] [INFO ] [] [systemYamlHelper.sh:981       ] [main] - Resolved ${shared.tomcat.workDir||/opt/jfrog/artifactory/var/work/artifactory/tomcat} to default value : /opt/jfrog/artifactory/var/work/artifactory/tomcat

========================
JF Environment variables
========================

JF_SHARED_NODE_ID                   : master1
JF_SHARED_NODE_IP                   : 192.168.204.102
JF_ARTIFACTORY_PID                  : /var/run/artifactory.pid
JF_SYSTEM_YAML                      : /opt/jfrog/artifactory/var/etc/system.yaml
JF_PRODUCT_HOME                     : /opt/jfrog/artifactory
JF_ROUTER_TOPOLOGY_LOCAL_REQUIREDSERVICETYPES : jfrt,jfac,jfmd,jffe,jfob,jfevt
JF_SHARED_NODE_NAME                 : master1
2024-05-31T05:21:10.096Z [shell] [ERROR] [] [installerCommon.sh:3379       ] [main] - ##############################################################################
2024-05-31T05:21:10.134Z [shell] [ERROR] [] [installerCommon.sh:3380       ] [main] - Ownership mismatch. You can try executing following instruction and do a restart
2024-05-31T05:21:10.178Z [shell] [ERROR] [] [installerCommon.sh:3381       ] [main] - Command : chown -R artifactory:artifactory /opt/jfrog/artifactory/var/log
2024-05-31T05:21:10.216Z [shell] [ERROR] [] [installerCommon.sh:3382       ] [main] - ##############################################################################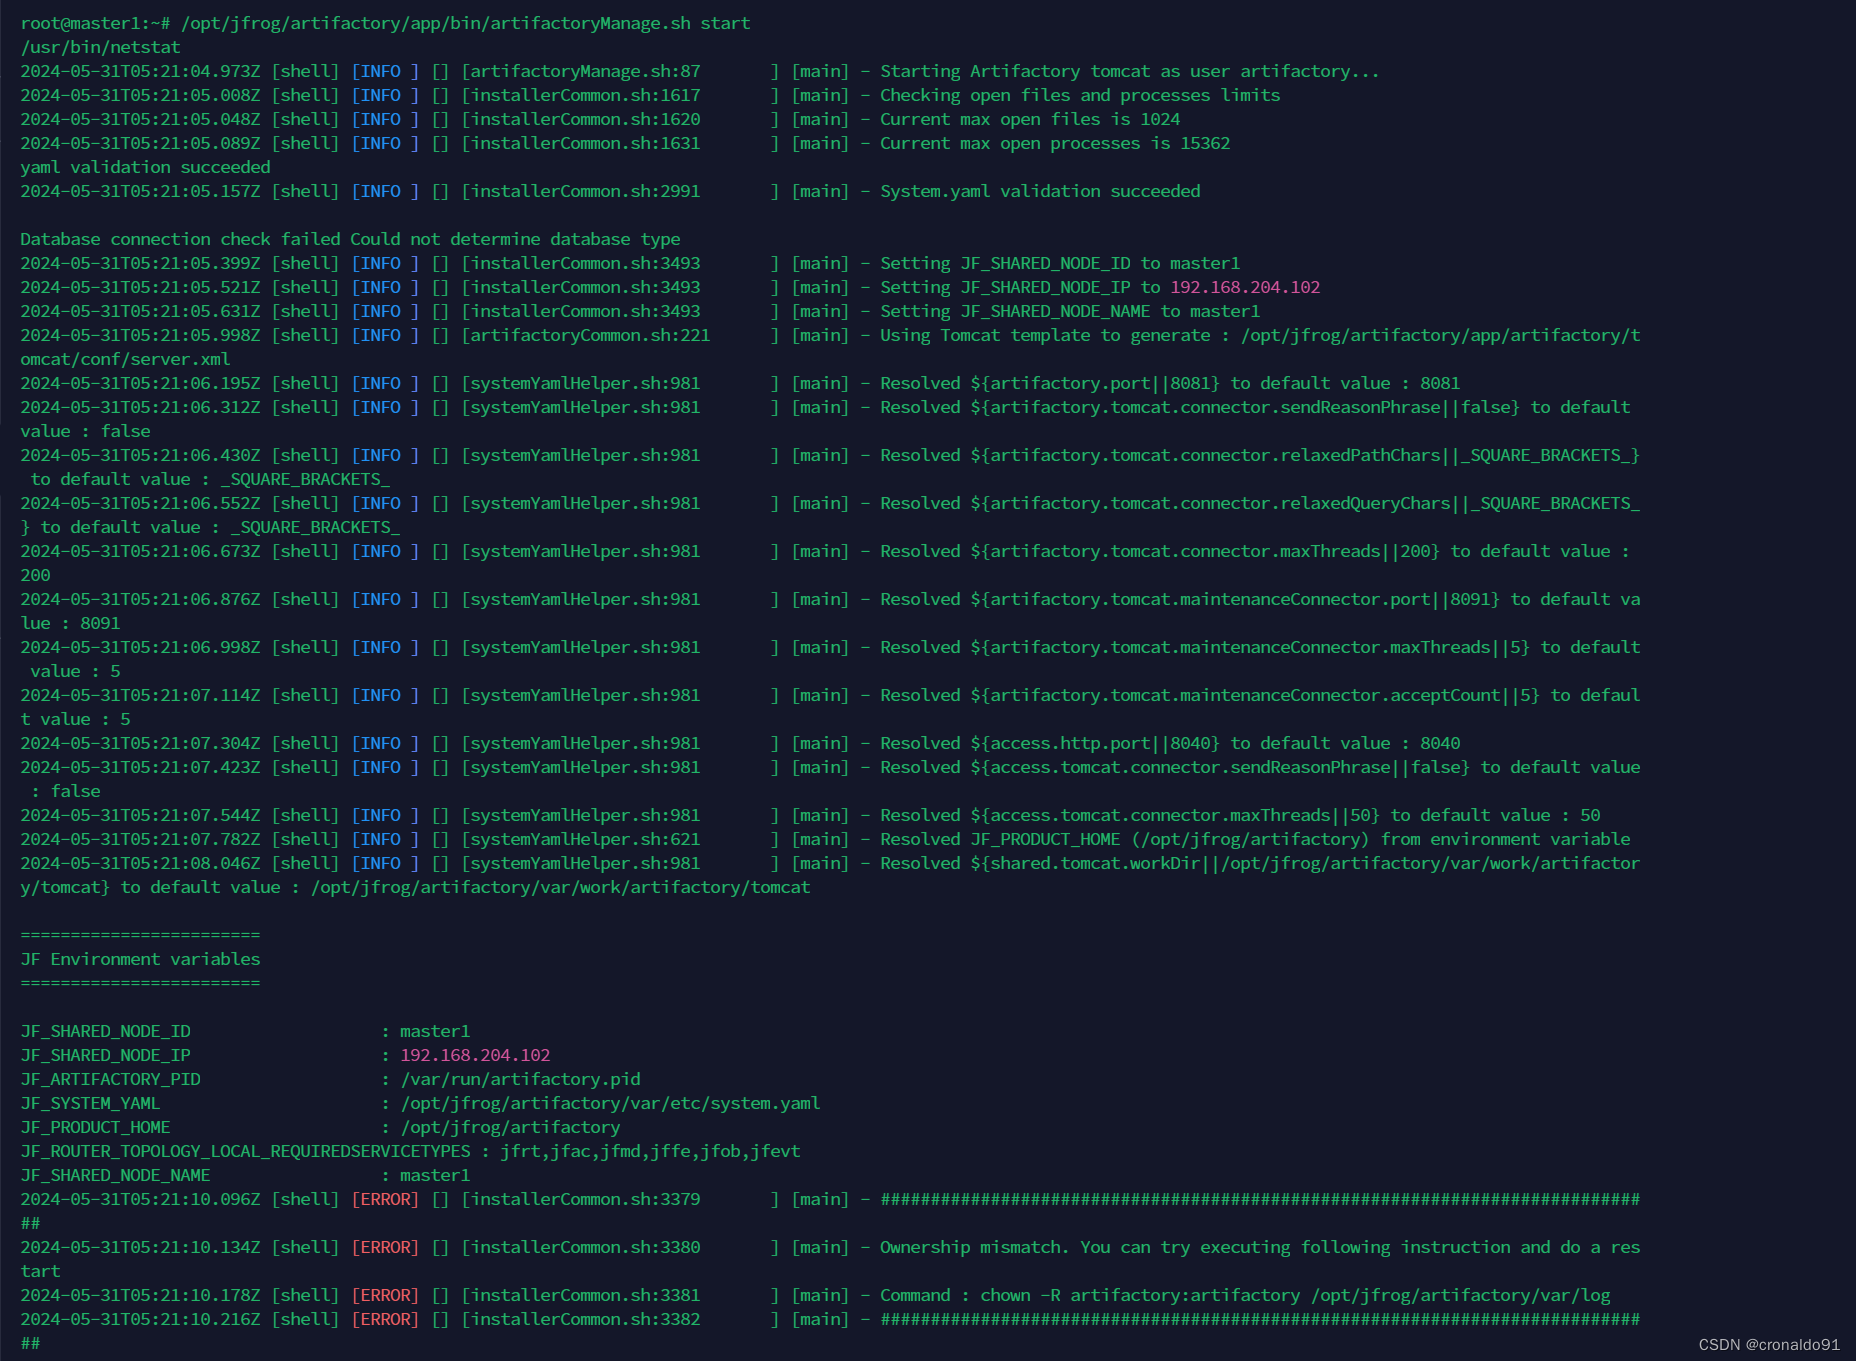
出现关键信息:

授权:
bash
chown -R artifactory:artifactory /opt/jfrog/artifactory/var/log
成功重新启动:

再次查看日志
bash
cd /opt/jfrog/artifactory/var/log
ls
6.启动artifactory镜像报错
(1)报错
缺少master.key

(2)原因分析
未声明变量。
(3)解决方法
bash
export MASTER_KEY=$(openssl rand -hex 32)

echo ${MASTER_KEY}
7.HELM 方式如何安装JFrog
(1)查阅
bash
https://github.com/helm/helm/releases/tag/v3.15.1目前最新版为v3.15.1

(2) 部署HELM
bash
1)安装 helm
//下载二进制 Helm client 安装包
helm-v3.15.1-linux-amd64.tar.gz

tar -zxvf helm-v3.15.1-linux-amd64.tar.gz
mv linux-amd64/helm /usr/local/bin/helm
helm version

//命令补全
source <(helm completion bash)
(3)添加JFrog HELM仓库
bash
helm repo add jfrog https://charts.jfrog.io
(4)更新
bash
helm repo update(5)查看可用的 JFrog Helm 图表
bash
helm search repo jfrog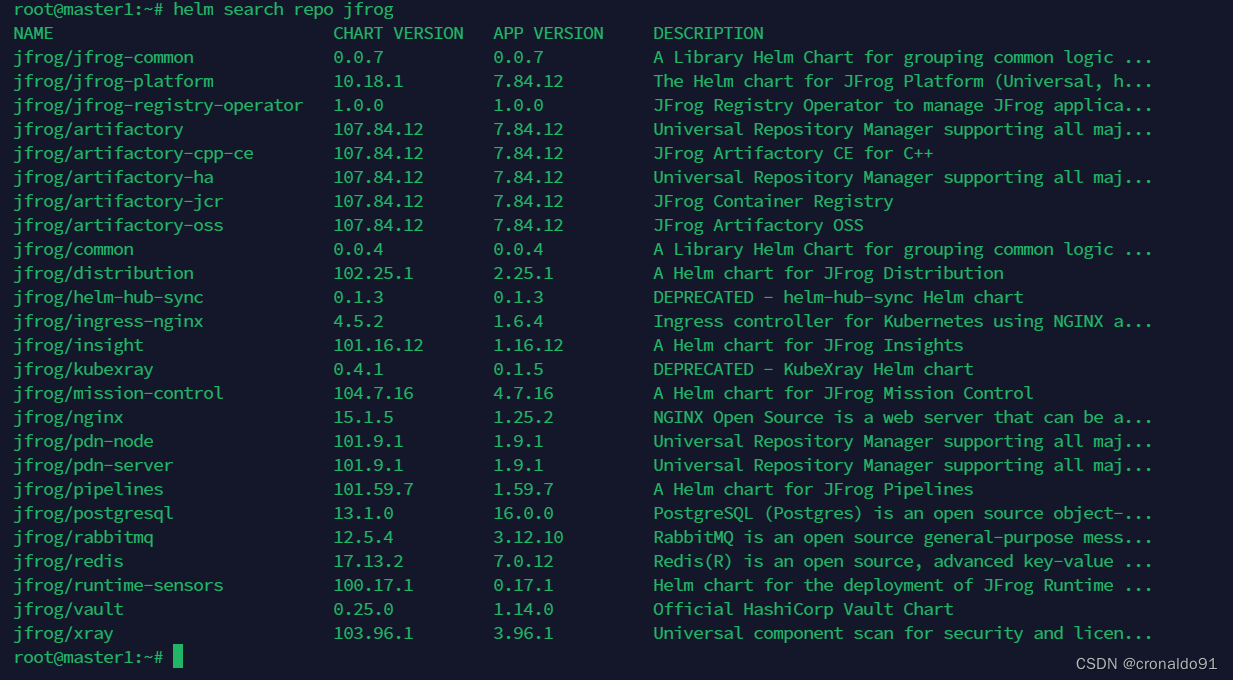
(6)下载 Helm 图表
bash
helm pull jfrog/artifactory-oss
(7) K8S创建命名空间
bash
kubectl create ns devops-artifactory-dev
(8) 创建项目
bash
helm install artifactory-oss \
  --set artifactory.nginx.enabled=false \
  --set artifactory.postgresql.enabled=false \
  --set postgresql.enabled=false \
  --set artifactory.artifactory.service.type=NodePort \
  --set artifactory.artifactory.resources.requests.cpu="500m" \
  --set artifactory.artifactory.resources.limits.cpu="2" \
  --set artifactory.artifactory.resources.requests.memory="1Gi" \
  --set artifactory.artifactory.resources.limits.memory="4Gi" \
  --set artifactory.artifactory.javaOpts.xms="1g" \
  --set artifactory.artifactory.javaOpts.xmx="3g" \
  jfrog/artifactory-oss -n devops-artifactory-dev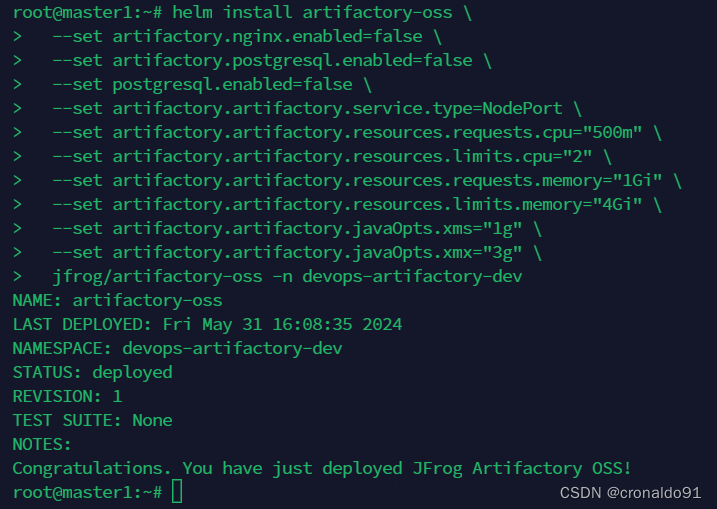
删除项目
bash
helm unstall artifactory-oss -n devops-artifactory-dev
8.安装JFrog报错
(1)报错

(2)原因分析
无相关用户。
(3)解决方法
创建相关用户
bash
useradd artifactory
chown artifactory:artifactory /opt/jfrog/artifactory/var/etc
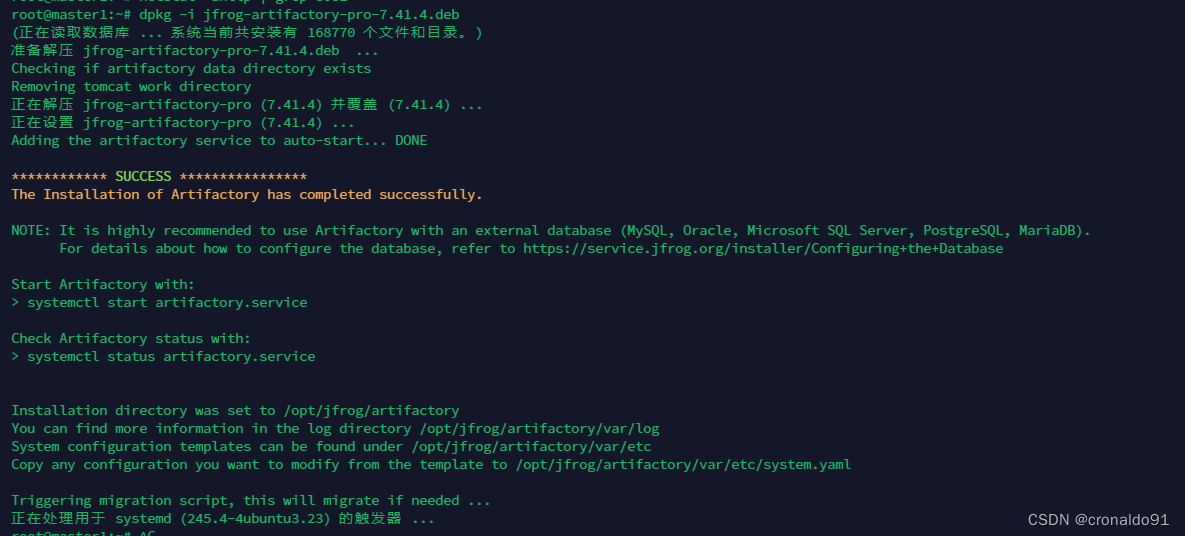
成功:
9.dpkg如何删除已有项目
(1) dpkg 查看已安装软件包
bash
dpkg -l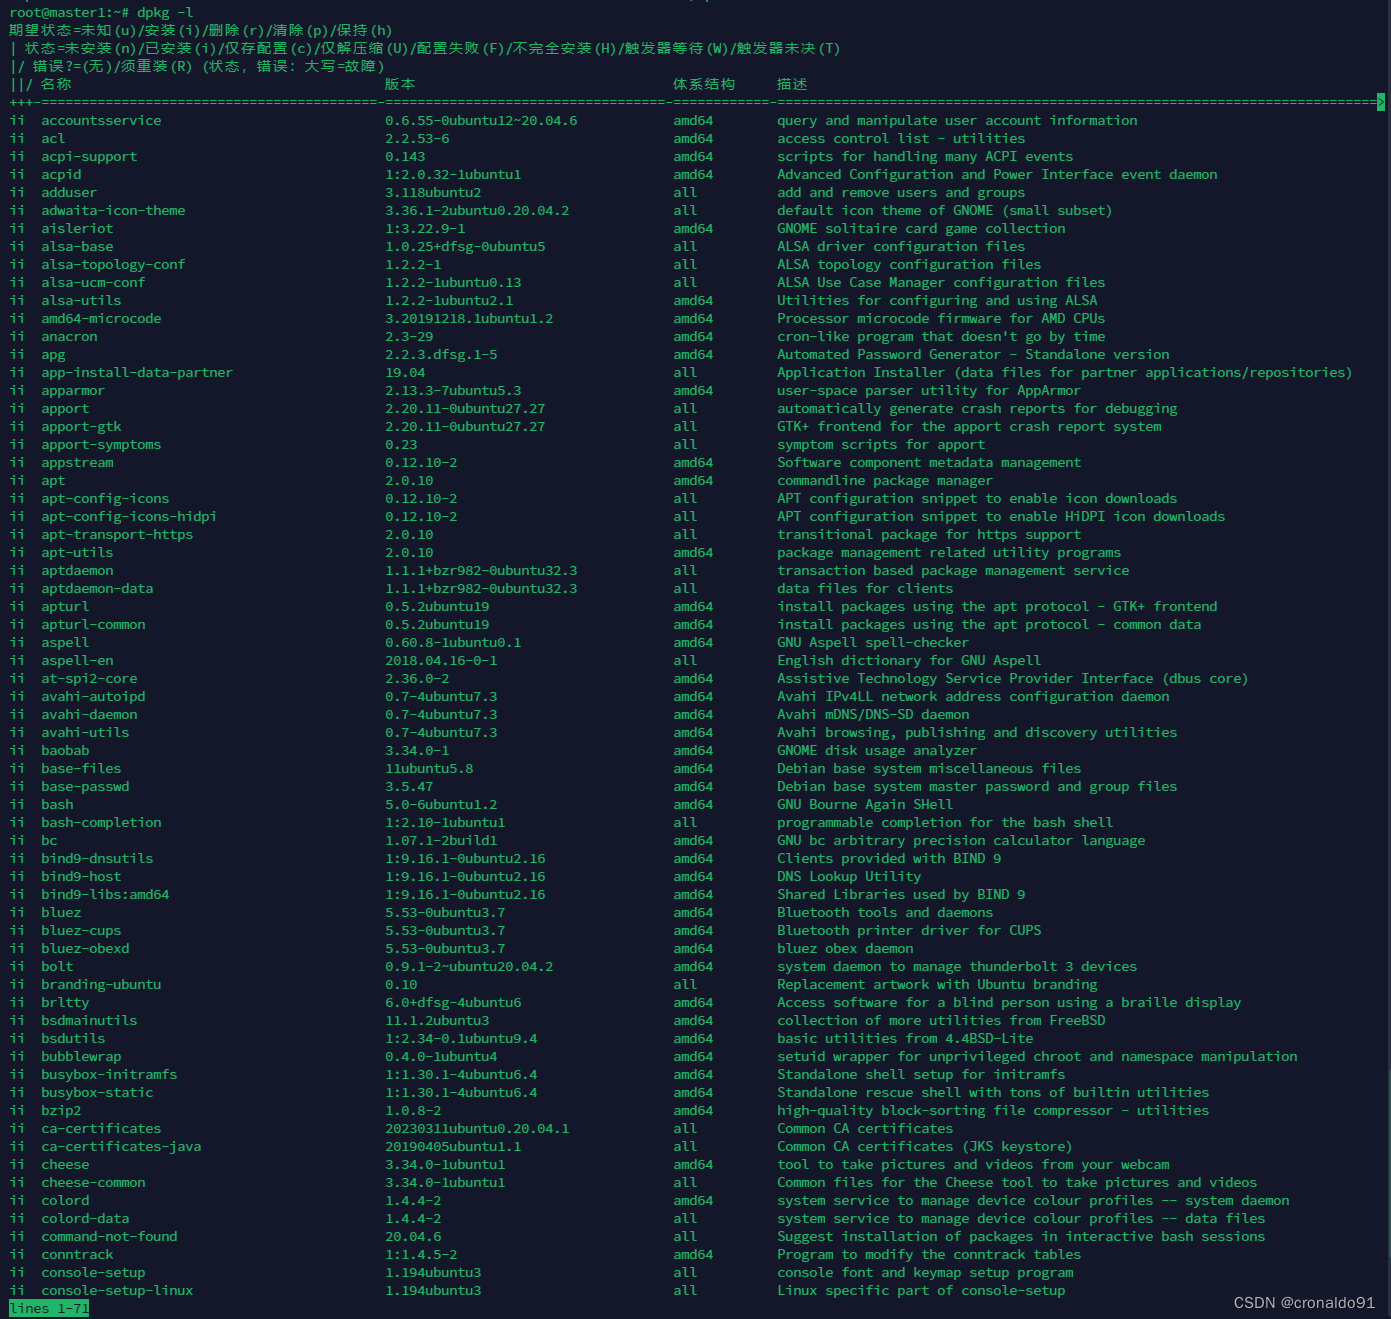
bash
dpkg -l | grep jfrog
bash
systemctl stop artifactory.service
netstat -antlp | grep 8081
(2)删除已有项目
bash
dpkg -r jfrog-artifactory-pro 
10.JFrog有哪些服务命令
(1)命令
bash
1)停止服务
systemctl stop artifactory.service

2)检查服务状态
systemctl status artifactory.service

3)重启服务
systemctl restart artifactory.service
