P3. 创建个人中心页面
-
- [0 概述](#0 概述)
- Tips
- [1 个人中心页面](#1 个人中心页面)
-
- [1.1 创建 Bot 表及 pojo, mapper](#1.1 创建 Bot 表及 pojo, mapper)
- [1.2 实现 Bot 增删改查的 API](#1.2 实现 Bot 增删改查的 API)
- [1.3 实现个人中心页面前端](#1.3 实现个人中心页面前端)
0 概述
-
主要介绍了一下添加一个表(类),及其CRUD的前端和后端的实现方式,介绍的是通用的方法。
后端的CRUD很好写,在前几节P2. 配置MySQL和用户注册登录模块已经介绍过了,因此这边只是带过。
Tips
- 在数据库中用下划线定义字段
user_id,在pojo中用驼峰命名来定义属性userId,在queryWrapper中还是用下划线的变量。 - 创建数据库表字段的时候一般除了
id设置成主键非空自增唯一,其他的一般不会设置,比如bot的title字段,我们可以在service中判断使其非空,未来如果实现草稿功能,那么是允许为空的,因此别设置死这些属性。
1 个人中心页面
1.1 创建 Bot 表及 pojo, mapper
以下字段仅供参考,创建 table, pojo, mapper 的实现在P2. 配置MySQL和用户注册登录模块介绍过了。
java
@Data
@NoArgsConstructor
@AllArgsConstructor
public class Bot {
    @TableId(type = IdType.AUTO)
    private Integer id;
    private Integer userId;
    private String title;
    private String description;
    private String content;
    private Integer rating;
    @JsonFormat(pattern = "yyyy-MM-dd HH:mm:ss", timezone = "Asia/Shanghai")
    private Date createtime;
    @JsonFormat(pattern = "yyyy-MM-dd HH:mm:ss", timezone = "Asia/Shanghai")
    private Date modifytime;
}
1.2 实现 Bot 增删改查的 API
同样的,根据P2. 配置MySQL和用户注册登录模块中介绍的,分别实现每个功能的 service, serviceImpl, controller 很容易写这几个功能,要注意以下几个细节:
- 创建
bot要判断用户传入的参数是否合法; - 删除
bot要看用户是否有权限删除该bot,且该bot是否存在; - 更新
bot首先判断参数是否合法,bot是否存在,用户是否有权限修改bot,再更新当前bot数据; - 获取所有
bot只需要根据当前登录用户的user_id进行查找即可;
1.3 实现个人中心页面前端
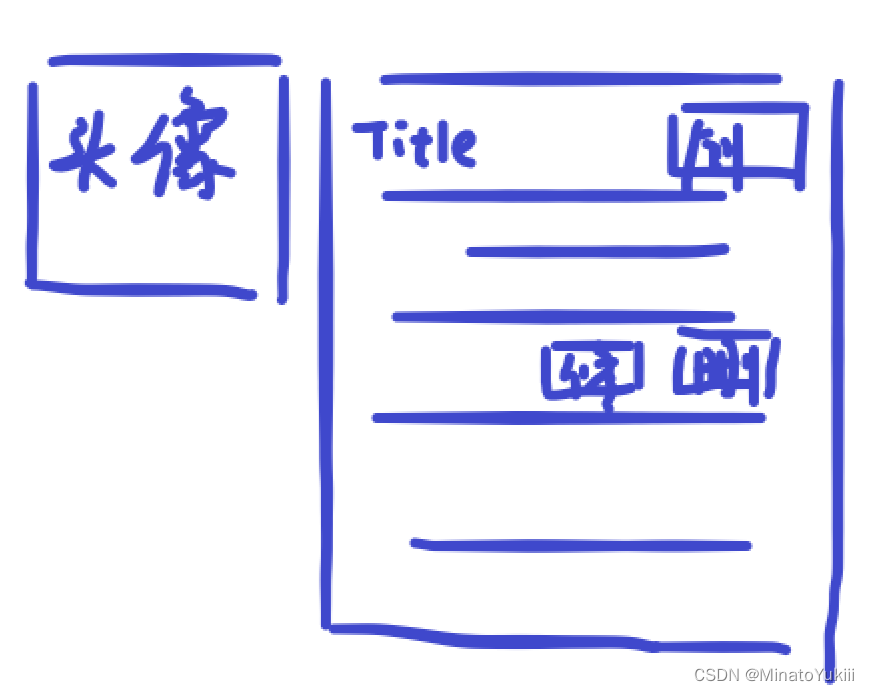
希望整一个上图所示的简单的样子,左边显示头像,右边显示具体的 Bot 信息,提供创建,修改,删除按钮。
整个前端页面分成以下几个步骤实现:
(1) 创建头像栏和右侧 bot 显示栏
首先创建
container可以动态调整区域,row, col是通过grid将整个containier分成 3 份和 9 份。这里取出头像的方式是通过
:src="$store.state.user.photo",:表示后面是表达式,photo从state中取出。
vue
<template>
    <div class="container">
        <div class="row">

            <div class="col-3">
                <div class="card" style="margin-top: 20px;">
                    <div class="card-body">
                        <img :src="$store.state.user.photo" alt="" style ="width: 100%;">
                    </div>
                </div>
            </div>

            <div class="col-9">
                <div class="card" style = "margin-top: 20px;">

                    <div class="card-header">
                        <span style="font-size: 130%;">
                            My Bots
                        </span>

                        <button type="button" class="btn btn-primary float-end">
                            Create Bots
                        </button>
                    </div>

                    <div class = "card-body">
                    </div>

                </div>
            </div>

        </div>
    </div>
</template>
(2) 把该用户的所有 bots 通过 api 查询出来并保存
javascript
setup() {
    const store = useStore();
    let bots = ref([]);

    const refresh_bots = () => {
        $.ajax({
            url: "http://127.0.0.1:3000/user/bot/getlist/",
            type: "get",
            headers: {
                Authorization: "Bearer " + store.state.user.token,
            },
            success(resp) {
                bots.value = resp;
                console.log(resp);
            }
        })
    }

    refresh_bots();

    return {
        bots,
    }
}
(3) 把所有 bot 信息渲染出来
以表格形式显示每个
bot信息,通过v-for和:key可以取出来每个bot。
vue
<div class = "card-body">
    <table class="table table-hover">
		<thead>
			<tr>
				<th>名称</th>
				<th>创建时间</th>
                <th>操作</th>
            </tr>
        </thead>
        <tbody>
			<tr v-for="bot in bots" :key = "bot.id">
				<td>{{ bot.title }}</td>
				<td>{{ bot.createtime }}</td>
				<td>
					<button type="button" class="btn btn-secondary" style = "margin-right: 10px;">
                    	修改
                	</button>
                	<button type="button" class="btn btn-danger">删除</button>
                </td>
            </tr>
         </tbody>
	</table>
</div>
(4) 实现创建 bot 的模态框并且绑定对象
首先要实现一个模态框,供用户输入相关信息,打开模态框的 button 和模态框通过 id 进行绑定。
vue 中对象一般用 reactive,变量一般用 ref,在 <template> 中通过 v-model 绑定变量或对象的属性。
点击创建按钮,触发
add_bug事件,用于调试模态框及其是否绑定到对象。
vue
<template>
	<button type="button" class="btn btn-primary float-end"
            data-bs-toggle="modal" data-bs-target="#add-bot-btn">
        Create Bot
    </button>

    <!-- Modal -->
    <div class="modal fade" id="add-bot-btn" tabindex="-1">
        <div class="modal-dialog modal-xl">
            <div class="modal-content">

                <div class="modal-header">
                    <h5 class="modal-title">Create Bot</h5>
                    <button type="button" class="btn-close"
                            data-bs-dismiss="modal" aria-label="Close"></button>
                </div>

                <div class="modal-body">
                    <div class="mb-3">
                        <label for="add-bot-title" class="form-label">名称</label>
                        <input v-model = "botadd.title" type="text" class="form-control"
                               id="add-bot-title" placeholder="请输入BOT名称">
                    </div>

                    <div class="mb-3">
                         <label for="add-bot-description" class="form-label">简介</label>
                         <textarea v-model = "botadd.description" class="form-control"
                                   id="add-bot-description" rows="3" placeholder="请输入BOT简介">
    					 </textarea>
                    </div>

                    <div class="mb-3">
                          <label for="add-bot-code" class="form-label">代码</label>
                          <textarea v-model = "botadd.content" class="form-control"
                                    id="add-bot-code" rows="7" placeholder="请编写BOT代码"></textarea>
                    </div>
                </div>

                <div class="modal-footer">
                    <div class="error_message">{{ botadd.error_message }}</div>
                    <button type="button" class="btn btn-primary" @click = "add_bot">创建</button>
                    <button type="button" class="btn btn-secondary" data-bs-dismiss="modal">取消</button>
                </div>

            </div>
        </div>
    </div>
</template>

<script>
export default {
    setup() {
        const botadd = reactive({
            title:"",
            description:"",
            content: "",
            error_message: "",
        });

        const add_bot = () => {
            console.log(botadd);
        }

        return {
            botadd,
            add_bot,
        }
    }
}
</script>

<style scoped>
div.error_message {
    color: red;
}
</style>
(5) 将创建 bot 绑定到后端 api,也就是修改上面的 add_bot 函数
这里要注意几点,首先每次记得把上次的错误信息清空;其次在创建成功之后要把所有的信息清空,方便下次创建;在创建完成之后要记得把模态框关掉 Modal.getInstance(#add-bot-btn).hide,并且要重新加载所有的 bots: refresh_bots()。
Modal.getInstance(#btn_id)通过id进行绑定。另外,这里的
success是指成功返回结果,而不是说成功创建,因此还要判断error_message === "success"。
javascript
const add_bot = () => {
	botadd.error_message = "";
	$.ajax({
		url: "http://127.0.0.1:3000/user/bot/add/",
		type: "post",
		data: {
			title: botadd.title,
			content: botadd.content,
            description: botadd.description,
        },
        headers: {
            Authorization: "Bearer " + store.state.user.token,
        },
        success(resp) {
            if (resp.error_message === "success") {
            	botadd.title = "";
                botadd.description = "";
                botadd.content = "";

                Modal.getInstance("#add-bot-btn").hide();

                refresh_bots();
          	} else {
                 botadd.error_message = resp.error_message;
          	}
    	},
	})
}
(6) 将删除功能绑定到后端 api
比较简单,不再赘述,删除成功后也要记得刷新
bot列表。删除需要传入参数
bot。
javascript
const remove_bot = (bot) => {
	$.ajax({
		url: "http://127.0.0.1:3000/user/bot/delete/",
        type: "post",
        data: {
        	bot_id: bot.id,
        },
        headers: {
            Authorization: "Bearer " + store.state.user.token,
        },
        success(resp) {
            if (resp.error_message === "success") {
            	refresh_bots();
			}
		}
	})
}
(7) 实现修改功能的模态框并绑定后端 api
模态框和创建的类似,直接搬过来就行,但有一点要注意,每个 bot 是不同的,因此对应的模态框也要对应起来,也就是不只有一个修改模态框,而是有多个修改模态框,根据 bot_id 来绑定 :id="'update-bot-modal-' + bot.id"。
vue
<template>
<button type="button" class="btn btn-secondary" style = "margin-right: 10px;"
        data-bs-toggle="modal" :data-bs-target="'#update-bot-modal-' + bot.id">修改</button>

<div class="modal fade" :id="'update-bot-modal-' + bot.id" tabindex="-1">
	<div class="modal-dialog modal-xl">
		<div class="modal-content">

            <div class="modal-header">
                <h5 class="modal-title">Update Bot</h5>
                <button type="button" class="btn-close" data-bs-dismiss="modal" aria-label="Close">
    		 	</button>
            </div>

            <div class="modal-body">
                <div class="mb-3">
                    <label for="update-bot-title" class="form-label">名称</label>
                    <input v-model = "bot.title" type="text" class="form-control"
                           id="update-bot-title" placeholder="请输入bot名称">
                </div>

                <div class="mb-3">
                    <label for="update-bot-description" class="form-label">简介</label>
                    <textarea v-model = "bot.description" class="form-control"
                              id="update-bot-description" rows="3" placeholder="请输入bot简介"></textarea>
                </div>

                <div class="mb-3">
                     <label for="update-bot-code" class="form-label">代码</label>
                     <textarea v-model = "bot.content" class="form-control"
                               id="update-bot-code" rows="7" placeholder="请编写bot代码"></textarea>
                </div>
            </div>

            <div class="modal-footer">
                <div class="error_message">{{ update_error_message }}</div>
                <button type="button" class="btn btn-primary" @click = "update_bot(bot)">保存</button>
                <button type="button" class="btn btn-secondary" data-bs-dismiss="modal">取消</button>
            </div>

		</div>
	</div>
</div>
</template>

<script>
const update_bot = (bot) => {
	update_error_message.value = "";
    $.ajax({
        url: "http://127.0.0.1:3000/user/bot/update/",
        type: "post",
        data: {
            bot_id: bot.id,
            title: bot.title,
            description: bot.description,
            content: bot.content,
        },
        headers: {
            Authorization: "Bearer " + store.state.user.token,
        },
        success(resp) {
            if(resp.error_message === "success") {
                Modal.getInstance('#update-bot-modal-' + bot.id).hide();
                refresh_bots();
            } else {
                update_error_message.value = resp.error_message;
            }
        }
    })
}
</script>