- 前导知识点:
1、table表格标签
<table> </table> 是用于定义表格的标签;
<thead></thead> 表头部(放表格的标题之类);
<tbody></tbody> 表主体(放表格主体数据);
<tfoot></tfoot> 表脚注(放表格脚注);
<tr> </tr> 标签用于定义表格中的行,必须嵌套在 <table> </table>标签中;
<td> </td> 用于定义表格中的单元格,即数据单元格的内容,必须嵌套在<tr></tr>标签中;
表格样式设置:
<style>
    table {
        width: 600px;
        color: 8f8e8e;
        text-align: center;
        border-collapse: collapse;
    }
    table thead {
        background-color: aqua;
    }
    table tr {
        height: 30px;
        line-height: 30px;
        border: 1px solid #ececec;
    }
</style>
2、let声明变量
let和var的作用差不多,但let声明的范围是块作用域,而var声明的范围是函数作用域。
- 实现效果:
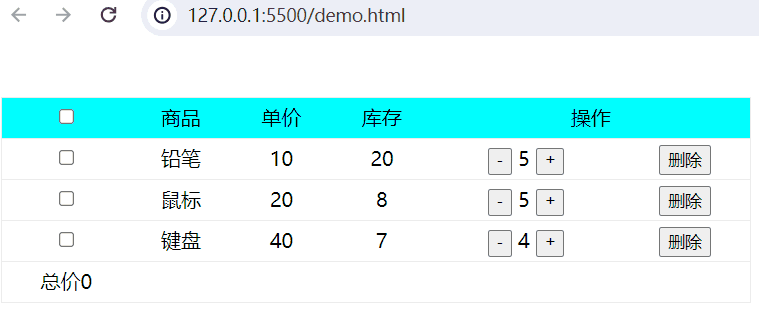
- 使用change事件实现购物车功能
完整示例代码:
<!DOCTYPE html>
<html lang="en">
<head>
    <meta charset="UTF-8">
    <meta name="viewport" content="width=device-width, initial-scale=1.0">
    <title>Document</title>
    <style>
        table {
            width: 600px;
            color: 8f8e8e;
            text-align: center;
            border-collapse: collapse;
        }
        table thead {
            background-color: aqua;
        }
        table tr {
            height: 30px;
            line-height: 30px;
            border: 1px solid #ececec;
        }
    </style>
</head>
<body>
    <div id="app">
        <table>
            <thead>
                <tr>
                    <td><input type="checkbox" v-model="data.selected" @change="selectAll"/></td>
                    <td>商品</td>
                    <td>单价</td>
                    <td>库存</td>
                    <td colspan="2">操作</td>
                </tr>
            </thead>
            <tbody>
                <tr v-for="(value, index) in data.list">
                    <td><input type="checkbox" :value="value" v-model="data.checkboxList" @change="checkSelect"/></td>
                    <td>{{value.name}}</td>
                    <td>{{value.price}}</td>
                    <td>{{value.stock}}</td>
                    <td>
                        <button @click="sub(value)">-</button>
                        {{value.number}}
                        <button @click="add(value)">+</button>
                    </td>
                    <td><button @click="del(index,value.id)">删除</button></td>
                </tr>
            </tbody>
            <tfoot>
                <tr>
                    <td>总价{{totalPrice()}}</td>
                </tr>
            </tfoot>
        </table>
    </div>
    <script type="module">
        import {createApp, reactive} from './vue.esm-browser.js'
        // const {createApp, reactive} = Vue
        createApp({
            // setup选项,用于设置响应式数据和方法等
            setup(){
                const data = reactive({
                    selected:false,
                    checkboxList:[],
                    list:[{
                        id:1,
                        name:"铅笔",
                        price:10,
                        number:5,
                        stock:20
                    },
                    {
                        id:2,
                        name:"鼠标",
                        price:20,
                        number:5,
                        stock:8
                    },
                    {
                        id:3,
                        name:"键盘",
                        price:40,
                        number:4,
                        stock:7
                    }],
                })
                const selectAll = () =>{
                    console.log(data.selected)
                    if(data.selected){
                        data.checkboxList = data.list
                    }
                    else{
                        data.checkboxList = []
                    }
                    console.log(data.checkboxList)
                }
                const checkSelect = () =>{
                    if (data.checkboxList.length == data.list.length && data.list.length != 0){
                        data.selected = true
                    }
                    else{
                        data.selected = false
                    }
                }
                const totalPrice = () =>{
                    let total = 0
                    console.log(data.checkboxList)
                    for(let i = 0; i < data.checkboxList.length; i++){
                        total += data.checkboxList[i].price*data.checkboxList[i].number
                    }
                    return total
                }
                const sub = (value) =>{
                    value.number --
                    if(value.number <= 1){
                        value.number = 1
                    }
                }
                const add =(value) =>{
                    value.number++
                    if(value.number >= value.stock){
                        value.number = value.stock
                    }
                }
                const del = (index,id) =>{
                    data.list.splice(index,1)
                    let newArr = data.checkboxList.filter((value,index) =>{
                        return value.id != id
                    })
                    data.checkboxList = newArr
                    checkSelect()
                }
                return{
                    data,
                    selectAll,
                    checkSelect,
                    totalPrice,
                    add,
                    sub,
                    del
                }
            }
        }).mount("#app")
        // mount为挂载
    </script>
</body>
</html>- 使用watch侦听器与computed计算属性优化购物车案例
去掉checkbox的change事件,添加如下代码:
let flag = true
watch(()=>data.selected,(newValue,oldValue)=>{
    // console.log("newValue:",newValue,"oldValue:",oldValue)
    if(newValue){
        data.checkboxList = data.list
    }
    else{
        if(flag){
            data.checkboxList = []
        }
    }
})

watch(()=>data.checkboxList,(newValue,oldValue)=>{
    console.log("newValue:",newValue.length,"oldValue:",oldValue)
    console.log(data.list.length)
    if (newValue.length == data.list.length && data.list.length != 0){
        data.selected = true
        flag = true
    }
    else{
        flag = false
        data.selected = false
    }
})

const totalPrice = computed(() => {
    return data.checkboxList.reduce((total, item) => total + item.price * item.number, 0)
})
reduce定义:用于对数组中所有元素进行迭代操作,并将每次操作的结果累加到一个初始值上;
输入参数:累加器函数、初始值,total(累加器)用于存储每次计算的结果,初始值为0,item(当前元素)在每次迭代过程中,当前元素的值会被传递给回调函数;