需求文档
概述
实现基于Redis和第三方短信服务商的短信验证码登录功能。用户可以通过手机号码获取验证码,并使用验证码进行登录。
需求细节
- 用户请求验证码
- 用户在登录页面输入手机号码并请求获取验证码。
- 系统生成验证码并将其存储在Redis中,同时通过第三方短信服务商发送验证码到用户手机。
- 用户提交验证码
- 用户在登录页面输入手机号码和验证码。
- 系统验证手机号码和验证码的匹配情况,如果匹配成功,用户登录成功。
功能模块
- 短信验证码生成与存储
- 生成一个随机的6位数字验证码。
- 验证码和手机号码绑定存储在Redis中,设置验证码有效期(例如5分钟)。
- 验证码发送
- 集成第三方短信服务商API,发送验证码到用户手机。
- 验证码验证
- 校验用户提交的手机号码和验证码是否匹配。
- 如果匹配成功,允许用户登录。
- 用户登录
- 生成用户会话或JWT令牌,返回给前端。
安全考虑
- 对于频繁请求验证码的行为进行限制(如一个手机号每分钟只能请求一次,每小时不超过5次)。
- 验证码存储在Redis中设置合理的过期时间。
- 确保与第三方短信服务商的API通信使用HTTPS协议。
流程图
- 用户请求验证码
- 用户提交手机号 -> 系统生成验证码 -> 存储到Redis -> 发送验证码到用户手机
- 用户提交验证码
- 用户提交手机号和验证码 -> 系统验证验证码 -> 如果成功,生成会话或JWT令牌 -> 返回登录成功信息
第三方短信服务商
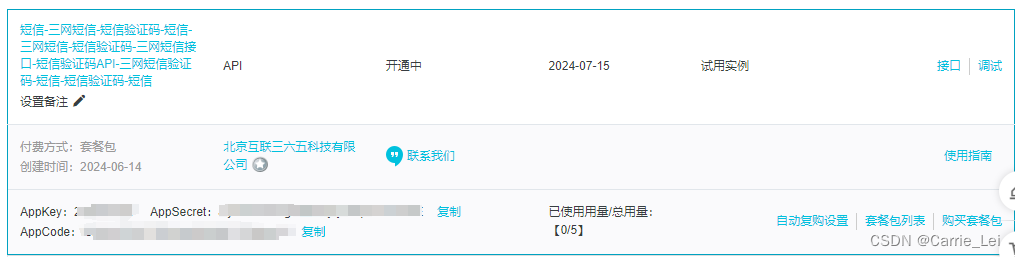
基于aliyun的第三方短信服务商提供5次免费试用功能,开通后配置后台页面如下:
调用方式
python
import urllib, urllib2, sys
import ssl


host = 'https://zwp.market.alicloudapi.com'
path = '/sms/sendv2'
method = 'GET'
appcode = '你自己的AppCode'
querys = 'mobile=1343994XXXX&content=%E3%80%90%E6%99%BA%E8%83%BD%E4%BA%91%E3%80%91%E6%82%A8%E7%9A%84%E9%AA%8C%E8%AF%81%E7%A0%81%E6%98%AF568126%E3%80%82%E5%A6%82%E9%9D%9E%E6%9C%AC%E4%BA%BA%E6%93%8D%E4%BD%9C%EF%BC%8C%E8%AF%B7%E5%BF%BD%E7%95%A5%E6%9C%AC%E7%9F%AD%E4%BF%A1'
bodys = {}
url = host + path + '?' + querys

request = urllib2.Request(url)
request.add_header('Authorization', 'APPCODE ' + appcode)
ctx = ssl.create_default_context()
ctx.check_hostname = False
ctx.verify_mode = ssl.CERT_NONE
response = urllib2.urlopen(request, context=ctx)
content = response.read()
if (content):
    print(content)
开启服务
云市场API商品的认证方式主要以下两种方式
- 简单身份认证Appcode
- 签名认证
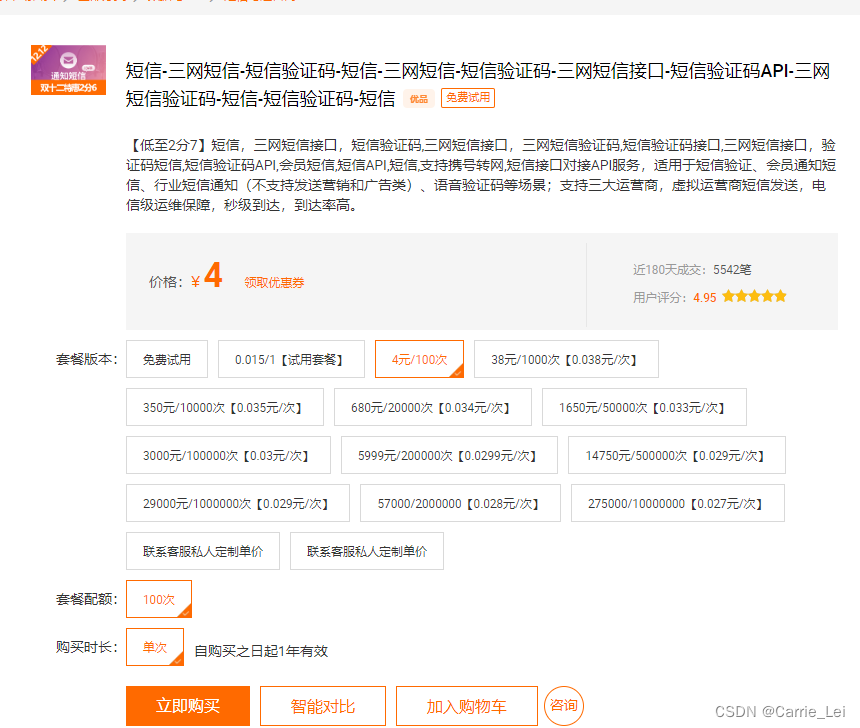
目前先采用简单身份认证,购买4元套餐启动认证,否则请求调用返回403鉴权错误。
技术实现
技术栈
- HTML5
- CSS3
- JavaScript (使用Vue.js)
- Axios (用于HTTP请求)
架构概述
- 前端部分:使用 Vue.js 编写手机验证码登录页面。
- 后端部分:使用 Django 编写 API,处理手机号码和验证码的验证逻辑,并与 Redis 集成存储验证码。
Django + Vue
Django 和 Vue.js 可以很好的集成在一起。Django 处理后端逻辑和 API,而 Vue.js 可以处理前端交互和视图。通过 Django 提供的 API 接口,与 Vue.js 前端进行数据交互。
Vue
- 在项目目录下创建 Vue.js 项目
bash
npm install -g @vue/cli
vue create frontend
cd frontend- 创建登录组件
在 src/components/LoginWithSMS.vue 中:
vue
<template>
    <div class="login-container">
        <form
        @submit.prevent="submitLogin">
        <div class="input-group">
            <select id="country_code" v-model="countryCode">

                <!-- 添加其他国家的区号选项 -->
                <option v-for="country in countryCodes" :key="country.code" :value="country.code">{{ country.name }} ({{
                    country.code }})
                </option>

            </select>
            <input type="text" id="phone_number" v-model="phoneNumber" placeholder="请输入手机号" required>
        </div>
        <div class="input-group">
            <label for="verification_code" style="float: top;">验证码</label>
            <input type="text" class="verification_code" id="verification_code"  v-model="verificationCode"
                   style="width: calc(100%); float: top;" required>
                <button type="button" class="verification_code_button"
                @click="requestVerificationCode" :disabled="isSendingCode" style="float: bottom;">
                {{ buttonText }}
            </button>
        </div>
        <button type="submit">登录</button>
    </form>
    <div v-if="message" class="message">{{ message }}</div>
</div>
        </template>

<script>
import axios from 'axios';
import { countryCodes } from '../assets/countryCodes'; // 导入国家代码数据

export default {
  data() {
    return {
        countryCodes: countryCodes, // 使用导入的国家代码数据
      countryCode: '+86',
      phoneNumber: '',
      verificationCode: '',
      isSendingCode: false,
      countdown: 60,
       message: '', // 添加 message 状态
    };
  },
  computed: {
    buttonText() {
      return this.isSendingCode ? `${this.countdown} 秒后重新获取` :'获取验证码'  ;
    }
  },
  methods: {
    async requestVerificationCode() {
      if (!this.phoneNumber) {
       this.message = '请填写手机号';
        return;
      }
      this.isSendingCode = true;
      try {
        const csrftoken = document.querySelector('[name=csrfmiddlewaretoken]').value;
        const response = await axios.post('/api/request_verification_code/', {
          country_code: this.countryCode,
          phone_number: this.phoneNumber,
        }, {
      headers: {
      'Content-Type': 'application/json', // 指定请求的数据格式为 JSON
        'X-CSRFToken': csrftoken
      }
    });
        if (response.data.success) {
          this.isSendingCode = true;
          this.message = '验证码已发送';
          // 开始倒计时
          this.startCountdown();
        } else {
           this.message = '发送验证码失败';
           this.isSendingCode = false;
        }
      } catch (error) {
      console.error(error);
         this.message = '发送验证码失败';
         this.isSendingCode = false;
      }
    },
    async submitLogin() {
      if (!this.phoneNumber || !this.verificationCode) {
        this.message = '请填写完整信息';
        this.isSendingCode = false;
        return;
      }
      try {
      const csrftoken = document.querySelector('[name=csrfmiddlewaretoken]').value;
        const response = await axios.post('http://localhost:8000/api/login_with_verification_code/', {
          country_code: this.countryCode,
          phone_number: this.phoneNumber,
          verification_code: this.verificationCode,
        }, {
      headers: {
      'Content-Type': 'application/json', // 指定请求的数据格式为 JSON
        'X-CSRFToken': csrftoken
      }
    }
        );
        if (response.data.success) {
           this.message = '登录成功';
          // 可以根据需要进行重定向或其他登录成功操作
        } else {
          this.message = '验证码错误或登录失败';
          this.isSendingCode = false;
        }
      } catch (error) {
        console.error(error);
         this.message = '登录失败';
         this.isSendingCode = false;
      }
    },
    startCountdown() {
      const countdownInterval = setInterval(() => {
        if (this.countdown > 0) {
          this.countdown--;
        } else {
          clearInterval(countdownInterval);
          this.countdownTimer = null;
          this.isSendingCode = false;
          this.countdown = 60; // 重置倒计时时间
        }
      }, 1000);
    },
  },
};
</script>

<style scoped>
.login-container {
  background: white;
  padding: 20px;
  border-radius: 8px;
  box-shadow: 0 2px 4px rgba(0, 0, 0, 0.1);
  width: 200px;
  text-align: center;
}

.input-group {
  margin-bottom: 15px;
}


label {
  display: block;
  margin-bottom: 5px;
}

input[type="text"], select {
  padding: 8px;
  margin-right: 5px;
  border: 1px solid #ccc;
  border-radius: 4px;
}

button {
  padding: 8px 15px;
  border: none;
  border-radius: 4px;
  background-color: #007bff;
  color: white;
  cursor: pointer;
}

button:disabled {
  background-color: #ccc;
  cursor: not-allowed;
}
.message {
  margin-top: 15px;
  color: red; /* 可以根据需要更改消息的样式 */
}
</style>配置setting如下:
vue
import { createApp } from 'vue'
import App from './App.vue'
import LoginWithSMS from './components/LoginWithSMS.vue';

createApp(App)
.component('LoginWithSMS', LoginWithSMS)
.mount('#app');
Django
在 Django 中设置 API 来处理手机号码和验证码的验证逻辑,并与 Redis 集成存储验证码。
- 创建 Django API 端点
在 myblog 应用中,创建 API 端点以处理验证码请求和登录验证。
python
from django.urls import path
from .views import request_verification_code, login_with_verification_code

urlpatterns = [
    path('api/request_verification_code/', request_verification_code, name='request_verification_code'),
    path('api/login_with_verification_code/', login_with_verification_code, name='login_with_verification_code'),
]- 创建视图函数
在 blog/views.py 中:
python
import random
import redis
from django.conf import settings
from django.http import JsonResponse
from django.contrib.auth.models import User
from django.contrib.auth import login
from django.views.decorators.csrf import csrf_exempt
from django.utils.decorators import method_decorator
import json
# 连接Redis
redis_client = redis.StrictRedis(host=settings.REDIS_HOST, port=settings.REDIS_PORT, db=0)
@require_POST
def request_verification_code(request):
data = json.loads(request.body)
phone_number = data.get('phone_number')
if not phone_number:
return JsonResponse({'success': False, 'message': '手机号不能为空'}, status=400)
code = str(random.randint(100000, 999999))
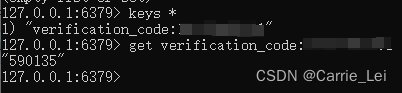
redis_key = f"verification_code:{phone_number}"
redis_client.set(redis_key, code, ex=300) # 5分钟有效期
# 这里调用第三方短信服务商API发送验证码
# send_verification_code(phone_number, code)
return JsonResponse({'success': True, 'message': '验证码已发送'})
@require_POST
def login_with_verification_code(request):
data = json.loads(request.body)
phone_number = data.get('phone_number')
verification_code = data.get('verification_code')
if not phone_number or not verification_code:
return JsonResponse({'success': False, 'message': '手机号和验证码不能为空'}, status=400)
redis_key = f"verification_code:{phone_number}"
stored_code = redis_client.get(redis_key)
if stored_code and stored_code.decode('utf-8') == verification_code:
redis_client.delete(redis_key)
user, created = User.objects.get_or_create(username=phone_number)
if created:
user.set_unusable_password()
user.save()
login(request, user)
return JsonResponse({'success': True, 'message': '登录成功'})
return JsonResponse({'success': False, 'message': '验证码错误'}, status=400)- 在 Django 模板中引入 Vue.js 应用
在 Django 的模板文件中login.html,引入 Vue.js 组件:
html
{% load static %}
<!DOCTYPE html>
<html>
<head>
    <meta charset="UTF-8">
    <meta name="viewport" content="width=device-width, initial-scale=1.0">
    <title>Login</title>
    <link rel="stylesheet" href="{% static 'css/login.css' %}">

    <!-- 引入 Vue 3 的静态文件 -->
    <script src="{% static 'js/app.85a93ec8.js' %}" defer></script>
    <script src="{% static 'js/chunk-vendors.6b7a5a13.js' %}" defer></script>
    <link rel="stylesheet" type="text/css" href="{% static 'css/app.438959e3.css' %}">

    <script src="https://code.jquery.com/jquery-3.6.0.min.js"></script>
    <script>
        // 当点击验证码图片时,刷新验证码
        $('.captcha').click(function () {
                $.getJSON('/captcha/refresh/',function (result) {
                    $('.captcha').attr('src',result['image_url']);
                    $('#id_captcha_0').val(result['key']);
                });
            });
    </script>
    <style>
        .focusable {
            padding: 10px;
            margin: 10px;
            border: 1px solid #ccc;
            outline: none;
        }
        .focusable:focus {
            border-color: #007BFF;
            background-color: #E9F7FF;
        }
    </style>
</head>
<body>
<div id="main-container">
    <div class="main">
        <div class="auth-content">
            <div class="auth-form">
                <div class="tabs">

                    <input type="radio" id="tab1" name="tab-group" checked>
                    <label for="tab1">邮箱登录</label>
                    <div class="tab-content">

                        {% if error_message %}
                        <p>{{ error_message }}</p>
                        {% endif %}
                        <form method="post">
                            {% csrf_token %}
                            {{ form.as_p }}
                        </form>
                    </div>

                    <input type="radio" id="tab2" name="tab-group">
                    <label for="tab2">手机登录</label>
                    <div class="tab-content" id="app">
                        <login-with-sms></login-with-sms>
                    </div>

                    <input type="radio" id="tab3" name="tab-group">
                    <label for="tab3">扫码登录</label>
                    <div class="tab-content">
                        <h2>Content 3</h2>
                        <p>This is the content of tab 3.</p>
                    </div>


                    <div class="clearfix shortcut-action">
                        <span class="login"><button type="submit">登录</button></span>
                        <span class="forgot"><a href="{% url 'password_reset_request' %}">忘记密码</a></span>
                    </div>

                </div>
            </div>
        </div>
    </div>
</div>
</body>

</html>
效果如下:

运行 Django 和 Vue.js 项目
- 运行 Django 项目
确保你在虚拟环境中安装了 Django 和 Redis:
bash
pip install django djangorestframework redis
python manage.py runserver- 运行 Vue.js 项目
bash
npm run serve集成第三方调用短信API
集成上面的API调用,采用AppCode方式简单鉴权。
python
def send_verification_code(phone_number, code):
host = 'http://zwp.market.alicloudapi.com'
path = '/sms/sendv2'
method = 'GET'
appcode = settings.SEND_TEXT_APP_CODE
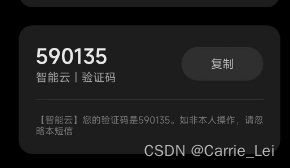
content = f"【智能云】您的验证码是{code}。如非本人操作,请忽略本短信"
querys = f'mobile={phone_number}&content={content}'
print(f'querys, {querys}')
bodys = {}
api_url = host + path + '?' + querys
print(f'api_url, {api_url}')
headers = {
'Authorization': 'APPCODE ' + appcode,
'Content-Type': 'application/json',
}
print(f'headers, {headers}')
try:
response = requests.get(api_url, headers=headers, verify=True)
if response.status_code == 200:
print('短信发送成功')
return True
else:
print(f'短信发送失败,错误代码: {response.status_code}, {response.text}')
return False
except requests.RequestException as e:
print(f'短信发送失败: {str(e)}')
return False运行
确保 Vue.js 应用编译和打包正确:
- 确保你已经正确编译和打包了 Vue.js 应用。你可以通过以下命令进行打包:
bash
npm run build这将生成一个 dist 目录,其中包含所有静态文件。
将编译后的文件放到 Django 的静态文件目录:
- 确保将编译后的静态文件(通常在
dist目录中)放置在 Django 项目的静态文件目录中。你可以将这些文件复制到static目录中:
bash
cp -r frontend/dist/* path/to/django/static/启动Django服务。效果如下:
输入手机号
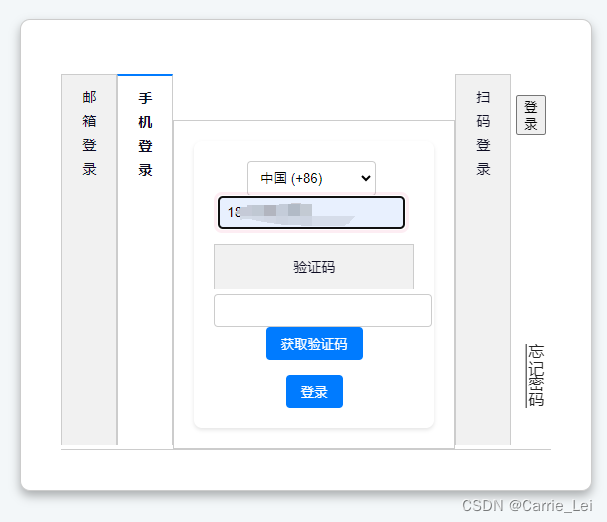
点击获取验证码,启动1分钟倒计时禁止重复请求验证码功能。
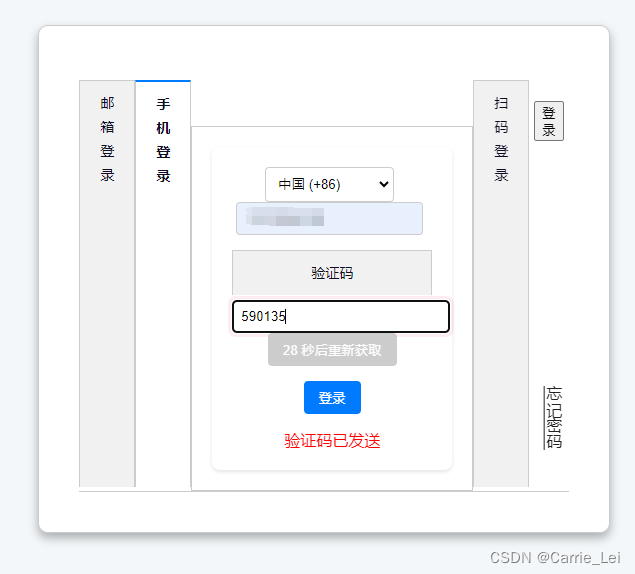
同时,成功发送验证码到用户手机。
查询redis服务器能够看到对应的值。
输入验证码,点击登录。报错AxiosError: Network Error at u.onerror (http://127.0.0.1:8000/static/vue/js/chunk-vendors.6b7a5a13.js:18:56732) at nn.request (http://127.0.0.1:8000/static/vue/js/chunk-vendors.6b7a5a13.js:18:64167) at async Proxy.requestVerificationCode (http://127.0.0.1:8000/static/vue/js/app.8100d9be.js:1:2450)
Axios错误解决方法:
AxiosError: Network Error 表示 Axios 在尝试进行网络请求时遇到了问题。以下是一些可能的原因和解决方法:
1. 确保 Django 服务器正在运行
确保你的 Django 服务器正在运行,并且你可以通过浏览器访问 http://127.0.0.1:8000。
bash
python manage.py runserver2. 检查 URL 和端口
确保在 Vue.js 中 Axios 请求的 URL 和端口是正确的。
javascript
const response = await axios.post('http://127.0.0.1:8000/api/request_verification_code/', {
  // 请求数据
});
3. 确保 CORS 配置正确
如果前端和后端在不同的端口上运行,请确保你已经正确配置了 CORS。
安装 django-cors-headers
如果还没有安装 django-cors-headers,请先安装它:
bash
pip install django-cors-headers配置 django-cors-headers
在你的 Django 项目的 settings.py 文件中进行以下配置:
python
INSTALLED_APPS = [
    ...
    'corsheaders',
    ...
]

MIDDLEWARE = [
    ...
    'corsheaders.middleware.CorsMiddleware',
    'django.middleware.common.CommonMiddleware',
    ...
]

CORS_ALLOWED_ORIGINS = [
    "http://localhost:8080",
    "http://127.0.0.1:8080",
    # 其他允许的源
]
4. 检查网络和代理设置
确保你的网络连接正常,并且没有任何代理服务器阻止网络请求。
5. 确保 CSRF Token 正确传递
在你的 Django 模板中添加 CSRF token:
html
<input type="hidden" id="csrf_token" name="csrfmiddlewaretoken" value="{% csrf_token %}">在 Vue.js 中读取并传递 CSRF token:
javascript
async requestVerificationCode() {
  if (!this.phoneNumber) {
    this.message = '请填写手机号';
    return;
  }
  this.isSendingCode = true;
  try {
    const csrftoken = document.querySelector('[name=csrfmiddlewaretoken]').value;
    const response = await axios.post('http://127.0.0.1:8000/api/request_verification_code/', {
      country_code: this.countryCode,
      phone_number: this.phoneNumber,
    }, {
      headers: {
        'Content-Type': 'application/json',
        'X-CSRFToken': csrftoken
      }
    });
    if (response.data.success) {
      this.message = '验证码已发送';
      this.startCountdown();
    } else {
      this.message = '发送验证码失败';
      this.isSendingCode = false;
    }
  } catch (error) {
    console.error(error);
    this.message = '发送验证码失败';
    this.isSendingCode = false;
  }
}
6. 检查浏览器控制台和网络请求日志
使用浏览器的开发者工具(通常按 F12 打开),查看 Network 面板,检查网络请求的详细信息。
7. 确保前后端运行在正确的端口
确保你的前端(Vue.js)和后端(Django)都在正确的端口上运行。
示例 Vue.js 代码
javascript
export default {
  data() {
    return {
      countryCodes: countryCodes, // 使用导入的国家代码数据
      countryCode: '+86',
      phoneNumber: '',
      verificationCode: '',
      isSendingCode: false,
      countdown: 0,
      countdownSeconds: 60,
      message: '',
    };
  },
  computed: {
    buttonText() {
      return this.isSendingCode ? `${this.countdown} 秒后重新获取` : '获取验证码';
    }
  },
  methods: {
    async requestVerificationCode() {
      if (!this.phoneNumber) {
        this.message = '请填写手机号';
        return;
      }
      this.isSendingCode = true;
      try {
        const csrftoken = document.querySelector('[name=csrfmiddlewaretoken]').value;
        const response = await axios.post('http://127.0.0.1:8000/api/request_verification_code/', {
          country_code: this.countryCode,
          phone_number: this.phoneNumber,
        }, {
          headers: {
            'Content-Type': 'application/json',
            'X-CSRFToken': csrftoken
          }
        });
        if (response.data.success) {
          this.message = '验证码已发送';
          this.startCountdown();
        } else {
          this.message = '发送验证码失败';
          this.isSendingCode = false;
        }
      } catch (error) {
        console.error(error);
        this.message = '发送验证码失败';
        this.isSendingCode = false;
      }
    },
    async submitLogin() {
      if (!this.phoneNumber || !this.verificationCode) {
        this.message = '请填写完整信息';
        return;
      }
      try {
        const response = await axios.post('http://127.0.0.1:8000/api/login_with_verification_code/', {
          phone_number: this.countryCode + this.phoneNumber,
          verification_code: this.verificationCode,
        });
        if (response.data.success) {
          this.message = '登录成功';
          // 可以根据需要进行重定向或其他登录成功操作
        } else {
          this.message = '验证码错误或登录失败';
        }
      } catch (error) {
        console.error(error);
        this.message = '登录失败';
      }
    },
    startCountdown() {
      const countdownInterval = setInterval(() => {
        if (this.countdownSeconds > 0) {
          this.countdownSeconds--;
        } else {
          clearInterval(countdownInterval);
          this.countdownTimer = null;
          this.isSendingCode = false;
          this.countdownSeconds = 60; // 重置倒计时时间
        }
      }, 1000);
    },
  },
};
通过以上步骤,你应该能够解决 AxiosError: Network Error 问题。如果问题仍然存在,请提供更多详细信息以便进一步帮助。
再次点击登录,报错网络请求报错 302 found,分析原因在login_with_verification_code中调用了redirect('/post_list')。
Redirect错误解决
在 Vue.js 中成功登录后,使用浏览器的原生 JavaScript 方法进行页面重定向。
在 submitLogin 方法中,当登录成功时,使用 window.location.href 或 window.location.replace() 方法来实现页面的重定向。这些方法直接操作浏览器的地址栏,可以导航到任何 URL,包括 Django 中定义的页面 URL。
示例:
在django中处理rediect逻辑如下:
python
        if stored_code and stored_code.decode('utf-8') == verification_code:
            redis_client.delete(redis_key)
            user, created = CustomUser.objects.get_or_create(username=phone_number)
            print(f'user, {user}')
            if created:
                user.set_password(phone_number)
                user.email = f'{phone_number}@qq.com'
                user.save()
            login(request, user)
            redirect_url = '/post_list'  # 修改为实际的 post_list 页面 URL
            return JsonResponse({'success': True, 'redirect_url': redirect_url})
        return JsonResponse({'success': False, 'message': '验证码错误'}, status=400)
在urls.py中添加路由如下:
python
path('post_list', views.post_list, name='post_list'),在vue里面添加重定向路径:
js
if (response.data.success) {
this.message = '登录成功';
if (response.data.redirect_url) {
window.location.href = response.data.redirect_url; // 页面重定向到 Django 中的 post_list 页面
} else {
this.message = '验证码错误或登录失败';
this.isSendingCode = false;
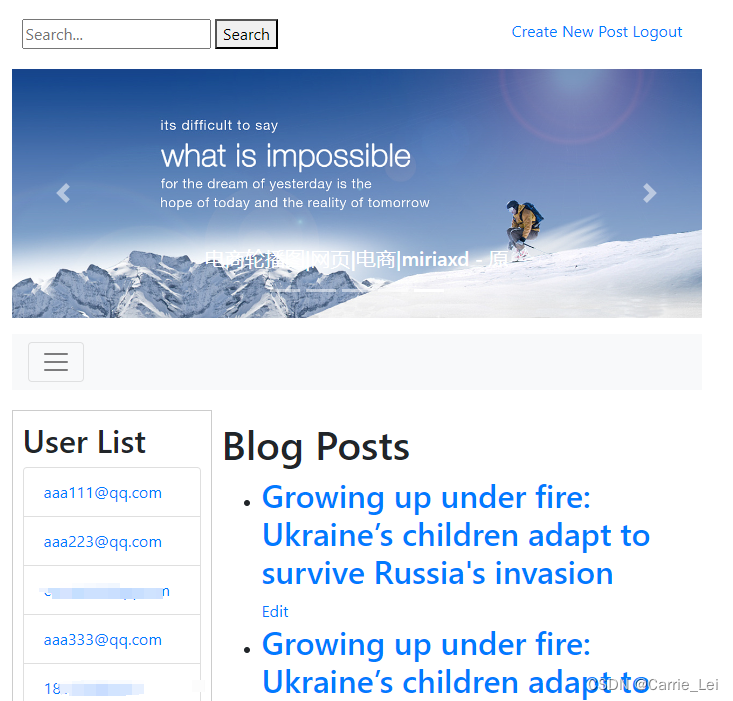
}效果
再次点击登录,成功登录跳转