SEGGER Embedded Studio IDE移植embOS
- 一、背景介绍
- 二、任务目标
- 三、技术实现
-
- [3.1 获得embOS](#3.1 获得embOS)
- [3.2 创建SES工程](#3.2 创建SES工程)
-
- [3.2.1 创建初始Solution和Project](#3.2.1 创建初始Solution和Project)
- [3.2.2 制作项目文件结构](#3.2.2 制作项目文件结构)
- [3.2.3 移植embOS库和有关头文件](#3.2.3 移植embOS库和有关头文件)
-
- [3.2.3.1 头文件](#3.2.3.1 头文件)
- [3.2.3.2 库文件](#3.2.3.2 库文件)
- [3.2.3.3 创建RTOSInit.c源文件](#3.2.3.3 创建RTOSInit.c源文件)
- [3.2.3.4 OS_Error.c文件](#3.2.3.4 OS_Error.c文件)
- [3.2.4 测试用例](#3.2.4 测试用例)
- [3.3 测试](#3.3 测试)
- 四、结论
一、背景介绍
一直以来我们项目和学习用到的最多的RTOS主要是FreeRTOS、RTT、Keil RTX。但是在SEGGER Embedded Studio(SES)上,我们还可以使用SEGGER出品的embOS系统。和FreeRTOS源码类似,我们也得做一些的移植工作。
这里郑重声明:本贴仅用于学习和非商业化应用。如果您要将embOS用于商业化项目中,还需要采购。
SEGGER的很多工具有个最大的好处就是,对于学习和爱好者是比较友好的。我们可以直接下载二进制库,根据手册稍微做一点适配就可以应用了。由于笔者目前对SEGGER的这些工具还没有那么熟悉,本次就仅仅是移植embOS,就不联合其他的工具了。
这里有关的移植的办法都是参考的手册。同时,embOS包里也有一些成型的项目可以测试。
主要参考文件都是来自embOS包的文件,有:
- UM01001_embOS.pdf
- UM01061_embOS_CortexM_ES.pdf
- /embOS_CortexM_ES_Obj_SFL_V5.18.0.0/Start/BoardSupport中有关的板级支持包源代码
二、任务目标
在"墨子号"开发板上运行程序。这个"墨子号"是个在马云家上买的一个小开发板,有2个485,1个CAN和若干其他的资源。图片如下所示。
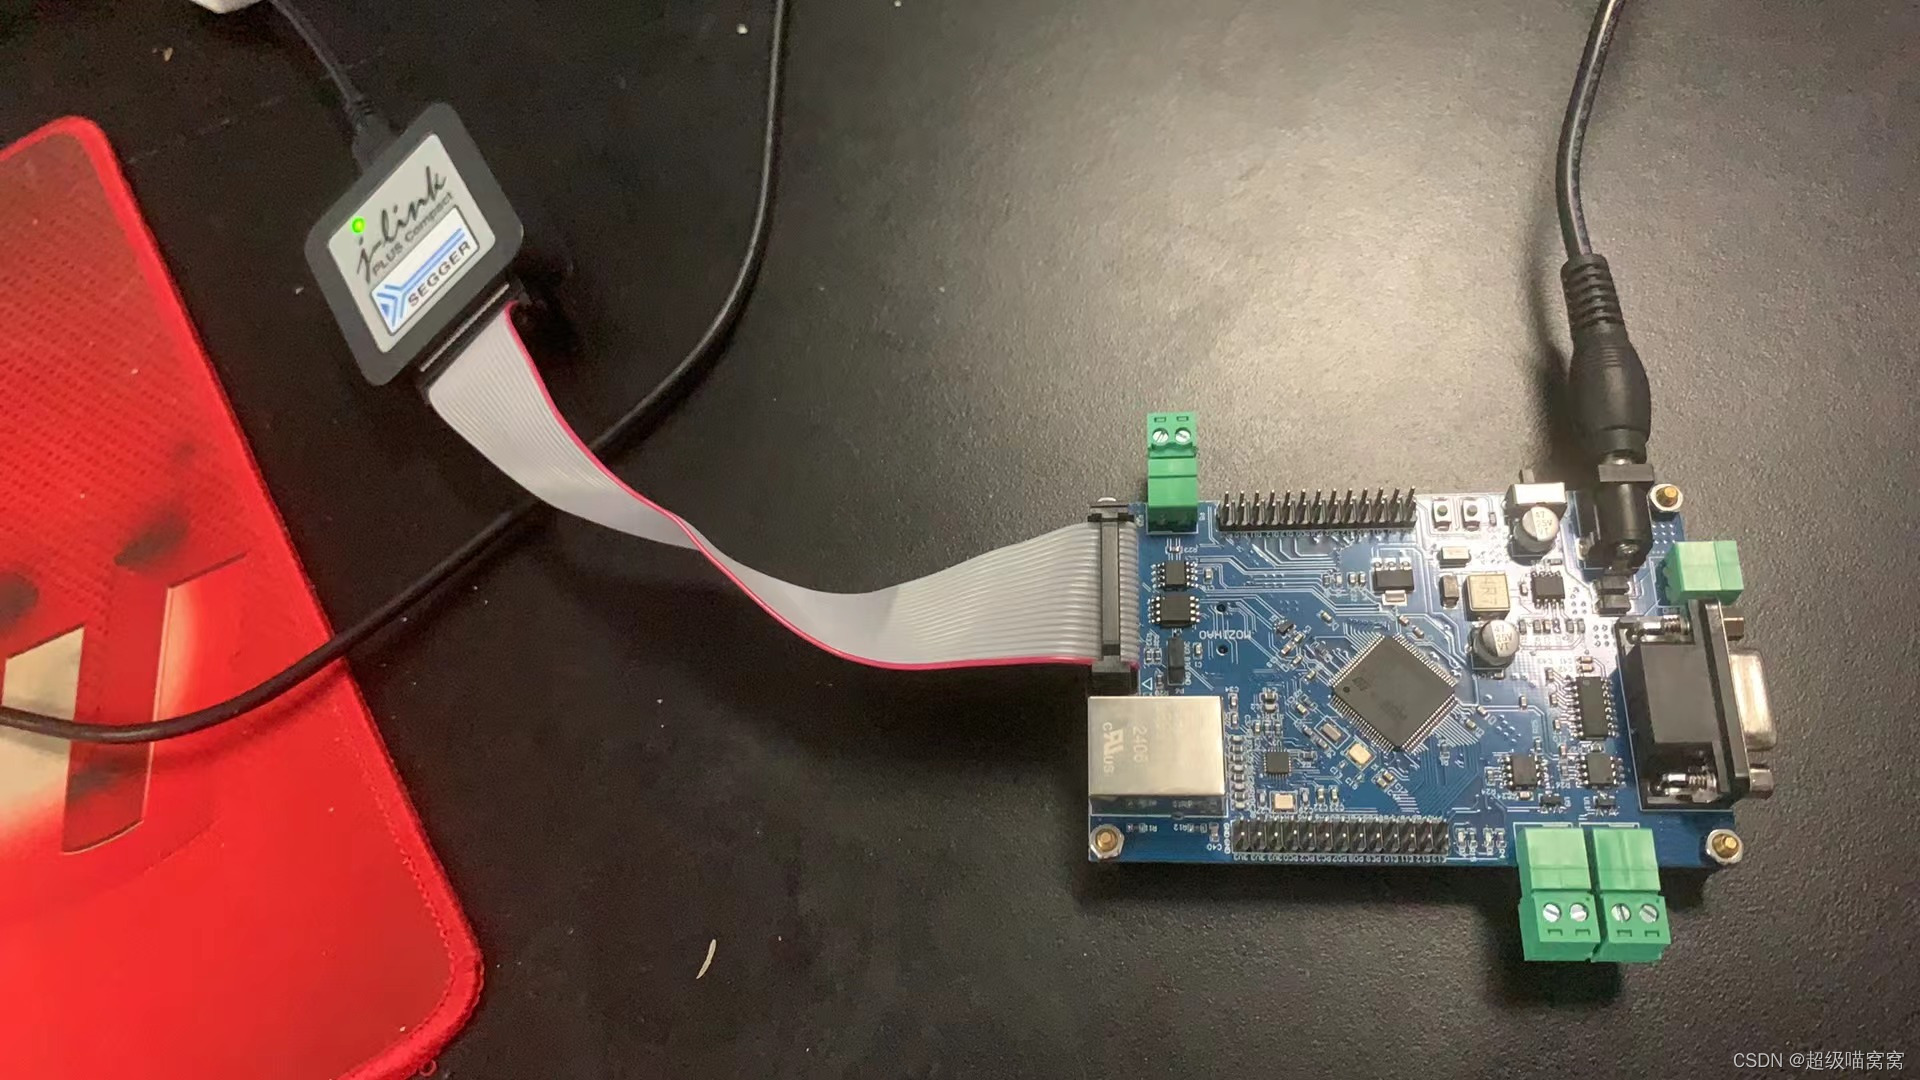
调试器还是SEGGER J-link Compact。
这次的任务目标是
- 配置embOS的配置头文件
- 编译通过带embOS的代码
- 运行一个任务
- 运行一个定时器
三、技术实现
3.1 获得embOS
去SEGGER embOS的官方网址下载。打开这个网址以后会发现货比较多,我这里用的是"
embOS for Cortex-M and SEGGER Embedded Studio"

注意:虽然我们后面在编译器上可能还是用GCC,但是这里不是上面的那个GCC的。那个GCC版本的好像是不用IDE,你自己用CMAKE那样的工具做个项目再用GCC编译的时候会用到。
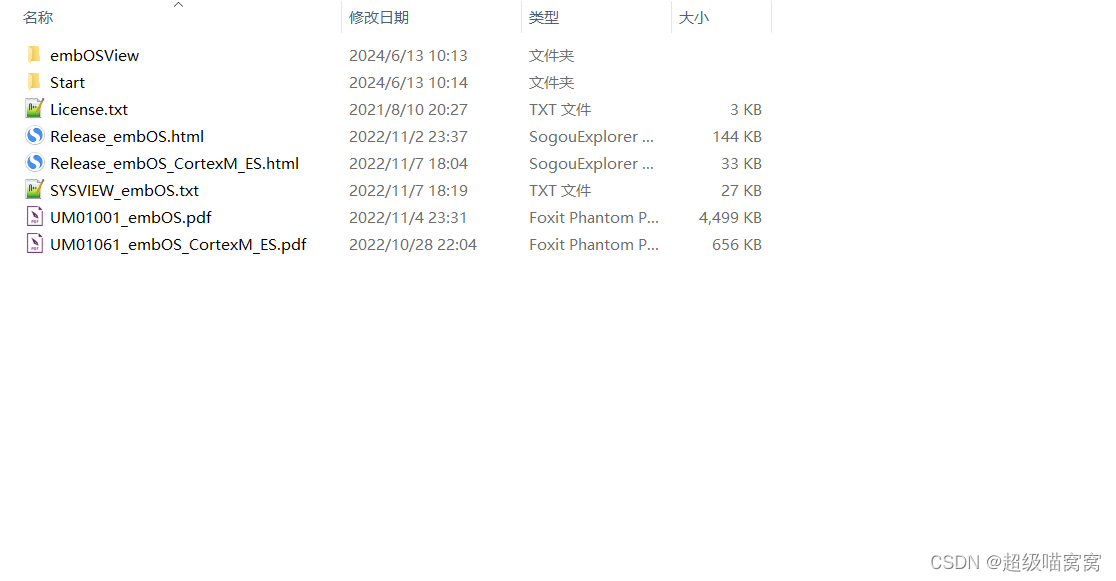
下载后,解压,我们会得到一个文件夹叫"embOS_CortexM_ES_Obj_SFL_V5.18.0.0",里面的内容如下:
3.2 创建SES工程
3.2.1 创建初始Solution和Project
打开SES,创建一个工程叫做embOS_Portion。创建的时候有关的IDE配置做如下的初始配置。
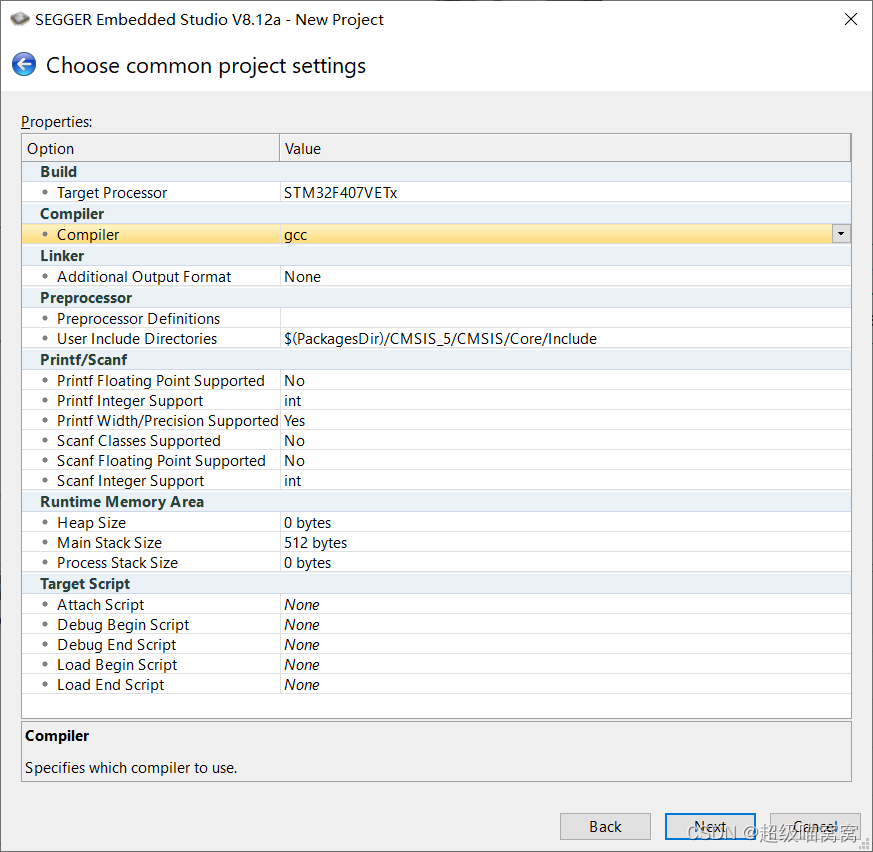
编译器默认的是SEGGER,但是我这里改成了GCC。printf函数打开"Printf Width/Precision Supported"。本程序不用堆,主栈给个512字节够启动就可以了。
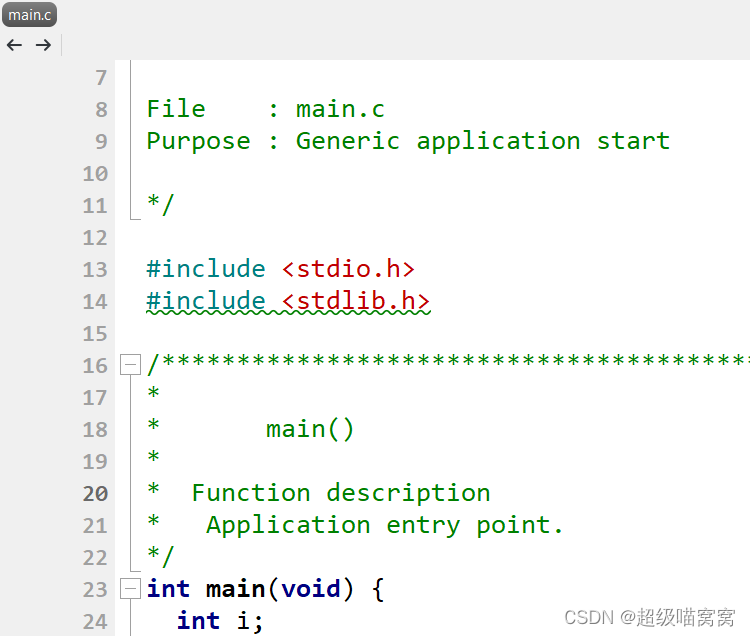
跟往常一样,系统生成了一个Solution,一个Project和一个main.c。不过这次IDE升级以后,凡是在C文件中的没有被用到的但是被包含了两头文件,都给你打个波浪线。就像这样的:
3.2.2 制作项目文件结构
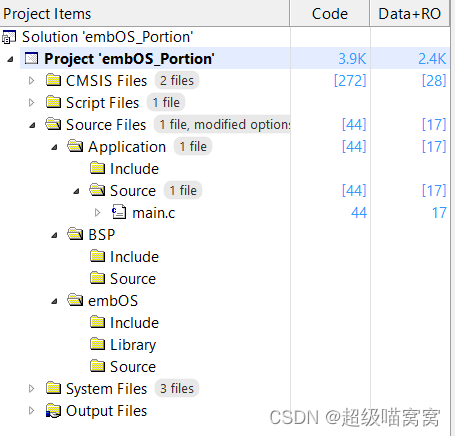
在SES中的Source Files下面创建文件夹和子文件夹,最终形成项目的文件结构。在物理上去项目文件夹内创建Source Files文件夹,在里面再创建Application,BSP,embOS这三个子文件夹。
3.2.3 移植embOS库和有关头文件
3.2.3.1 头文件
参考随包配送的两个pdf,分别是UM01001_embOS.pdf和UM01061_embOS_CortexM_ES.pdf。需要在工程文件夹的embOS文件夹下出现RTOS.h和OS_Config.h两个文件。那就去/embOS_CortexM_ES_Obj_SFL_V5.18.0.0/Start/Inc下面的这两个文件移动到工程文件夹的embOS/下面。
参考OS_Config.h里面的内容,我们想链接哪个库,就要定义相关的宏。
c
/*********************************************************************
*
*       Configuration for RTOS build and embOSView communication
*
*  In your application program, you need to let the compiler know
*  which build of embOS you are using. This is done by adding the
*  corresponding define to your preprocessor settings and linking the
*  appropriate library file.
*
*  OS_LIBMODE_XR    Extremely small release build without Round robin
*  OS_LIBMODE_R     Release build
*  OS_LIBMODE_S     Release build with stack check
*  OS_LIBMODE_SP    Release build with stack check and profiling
*  OS_LIBMODE_D     Debug build
*  OS_LIBMODE_DP    Debug build with profiling
*  OS_LIBMODE_DT    Debug build with trace
*
*  If no preprocessor setting is used, this file will select default
*  modes for debug and release configurations of your project.
*/
在这个里面定义的控制宏如下所示。
c
#if (defined(DEBUG) && (DEBUG == 1))
  #define OS_LIBMODE_DP
#else
  #define OS_LIBMODE_R
  #define OS_VIEW_IFSELECT  OS_VIEW_DISABLED  // embOSView communication is disabled per default in release configuration
#endif
但是我这里只是为了任务目标,就不采用DP了。我们的头文件是
c
/*********************************************************************
*                     SEGGER Microcontroller GmbH                    *
*                        The Embedded Experts                        *
**********************************************************************
*                                                                    *
*       (c) 1995 - 2022 SEGGER Microcontroller GmbH                  *
*                                                                    *
*       Internet: segger.com  Support: support_embos@segger.com      *
*                                                                    *
**********************************************************************
*                                                                    *
*       embOS * Real time operating system                           *
*                                                                    *
*       Please note:                                                 *
*                                                                    *
*       Knowledge of this file may under no circumstances            *
*       be used to write a similar product or a real-time            *
*       operating system for in-house use.                           *
*                                                                    *
*       Thank you for your fairness !                                *
*                                                                    *
**********************************************************************
*                                                                    *
*       OS version: V5.18.0.0                                        *
*                                                                    *
**********************************************************************

-------------------------- END-OF-HEADER -----------------------------
File    : OS_Config.h
Purpose : Configuration settings for the OS build and embOSView
*/

#ifndef OS_CONFIG_H
#define OS_CONFIG_H

/*********************************************************************
*
*       Configuration for RTOS build and embOSView communication
*
*  In your application program, you need to let the compiler know
*  which build of embOS you are using. This is done by adding the
*  corresponding define to your preprocessor settings and linking the
*  appropriate library file.
*
*  OS_LIBMODE_XR    Extremely small release build without Round robin
*  OS_LIBMODE_R     Release build
*  OS_LIBMODE_S     Release build with stack check
*  OS_LIBMODE_SP    Release build with stack check and profiling
*  OS_LIBMODE_D     Debug build
*  OS_LIBMODE_DP    Debug build with profiling
*  OS_LIBMODE_DT    Debug build with trace
*
*  If no preprocessor setting is used, this file will select default
*  modes for debug and release configurations of your project.
*/

#if (defined(DEBUG) && (DEBUG == 1))
  #define OS_LIBMODE_D
#else
  #define OS_LIBMODE_R
  #define OS_VIEW_IFSELECT  OS_VIEW_DISABLED  // embOSView communication is disabled per default in release configuration
#endif

/*********************************************************************
*
*  Additional embOS compile time configuration defines when using
*  embOS sources in your project or rebuilding the embOS libraries
*  can be added here, e.g.:
*    #define OS_SUPPORT_TICKLESS  0  // Disable tickless support
*/

#endif  // OS_CONFIG_H

/*************************** End of file ****************************/
3.2.3.2 库文件
打开/embOS_CortexM_ES_Obj_SFL_V5.18.0.0/Start/Lib,会发现里面有很多的库文件。
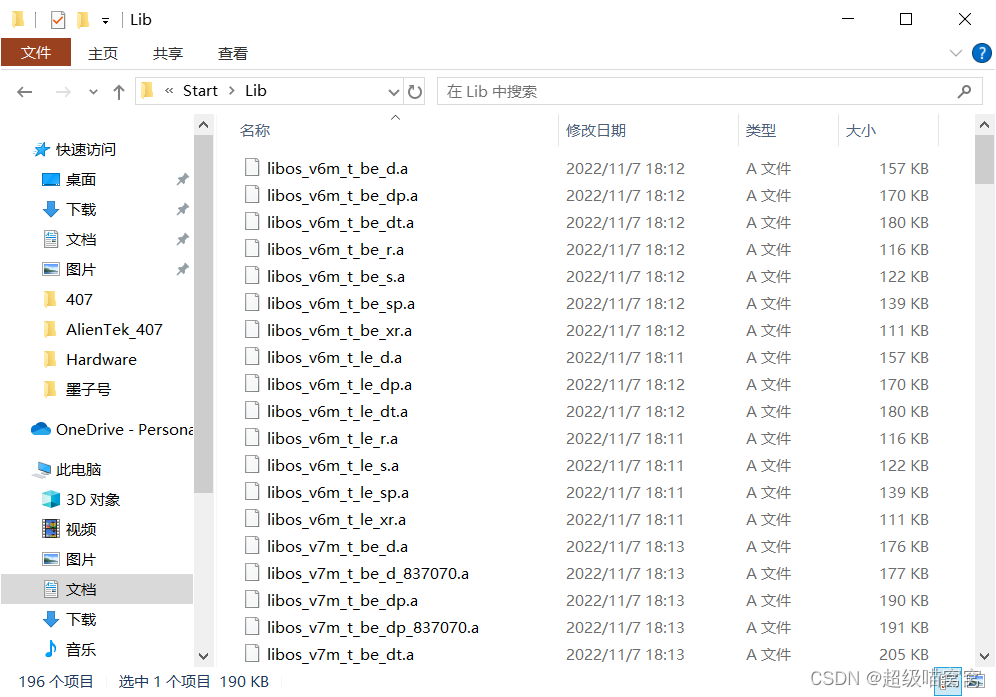
我们就只需要把libos_v7m_t_vfpv4_le_d.a和libos_v7m_t_vfpv4_le_r.a两个库复制到项目文件夹下面的/Source Files/embOS/Library下面。
至于为什么是这两个库呢?这是因为,根据芯片的内核手册,ST的ARM核是ARMv7M,cortex-m4的内核里面有个FPUv4f的乘法器。ARM-CM是小端。所以我们选这两个库文件。
3.2.3.3 创建RTOSInit.c源文件
参考《UM01001_embOS.pdf》的第26章的内容和有关的例程源码文件,必须要创建RTOSInit.c文件并在里面实现有关的接口函数。下面这几个接口是必须要实现的。

下面这几个是可选的,但是要注意的是,那个SysTick_Handler,貌似是必须要实现的。因为通过调试我们发现,似乎系统并没有给实现一个默认的函数。如果自己不实现一个,一旦异常发生,会卡住在异常向量表。

这样,我们实现的RTOSInit.c源文件的源代码如下所示。
c
#include "RTOS.h"
#include "stm32f4xx.h"

#define OS_TIMER_FREQ (168000000u) // Peripheral clock for timer
#define OS_TICK_FREQ (1000u) // System tick frequency
#define OS_INT_FREQ (OS_TICK_FREQ) // Timer interrupt frequency

#if (OS_VIEW_IFSELECT == OS_VIEW_IF_JLINK)
  const OS_U32 OS_JLINKMEM_BufferSize = 32u;  // Size of the communication buffer for JLINKMEM
#else
  const OS_U32 OS_JLINKMEM_BufferSize = 0u;   // Buffer not used
#endif

static unsigned int _OS_GetHWTimerCycles(void) {
  return SysTick->VAL;
}
static unsigned int _OS_GetHWTimer_IntPending(void) {
  return SCB->ICSR & SCB_ICSR_PENDSTSET_Msk;
}
void SysTick_Handler(void) {
  OS_INT_EnterNestable();
  OS_TICK_Handle();
  OS_INT_LeaveNestable();
}

void OS_InitHW(void) {
  SystemCoreClockUpdate();
  SysTick_Config(SystemCoreClock / OS_INT_FREQ);
  NVIC_SetPriority(SysTick_IRQn, (1u << __NVIC_PRIO_BITS) - 2u);

  OS_SYSTIMER_CONFIG SysTimerConfig = {
    SystemCoreClock / OS_TICK_FREQ,
    OS_INT_FREQ,
    OS_TIMER_DOWNCOUNTING,
    _OS_GetHWTimerCycles,
    _OS_GetHWTimer_IntPending
  };

  OS_INT_IncDI();
//
// Initialize timer for embOS
//
//
// Setup timing information
//
  OS_TIME_ConfigSysTimer(&SysTimerConfig);
//
// Initialize communication for embOSView
//
  OS_INT_DecRI();
}

void OS_Idle(void) { // Idle loop: No task is ready to execute
  while (1) { // Nothing to do ... wait for interrupt
  }
}

void OS_COM_Send1(OS_U8 c) {
}这个文件里就是要实现6个函数。其中最主要的工作量是实现void OS_InitHW(void)函数。这个函数
- 在这个函数里面要初始化SysTick异常处理
- 构造用于设置RTOS时钟的
OS_SYSTIMER_CONFIG结构体。 - 调用
OS_TIME_ConfigSysTimer(OS_SYSTIMER_CONFIG*)函数设置RTOS的系统时钟。 OS_INT_IncDI()和OS_INT_DecRI()这两个函数目前还不清楚功能。只是模板上的东西,就放在上面就好
其次要注意的函数有void SysTick_Handler(void)。我这里直接采用了模板的代码。
3.2.3.4 OS_Error.c文件
这个文件用于编译Debug目标用的。直接去板级移植包里搞一个就可以了
3.2.4 测试用例
参考了一下手册,我用主函数直接做了测试
c
#include "RTOS.h"

static OS_STACKPTR int StackHP[128], StackLP[128]; // Task stacks
static OS_TASK TCBHP, TCBLP; // Task control blocks
static OS_TIMER Timer0, Timer1;
static void Callback0(void) {
  OS_TIMER_Restart(&Timer0);
}
static void Callback1(void) {
  OS_TIMER_Restart(&Timer1);
}
static void HPTask(void) {
  while (1) {
    OS_TASK_Delay(50);
  }
}
static void LPTask(void) {
  while (1) {
    OS_TASK_Delay(200);
  }
}

int main(void) {
  OS_Init();
  OS_InitHW();
  OS_TASK_Create(&TCBHP, "HP Task", 100, HPTask, StackHP, sizeof(StackHP), 2);
  OS_TASK_Create(&TCBLP, "LP Task", 100, LPTask, StackLP, sizeof(StackLP), 2);
  OS_TIMER_CREATE(&Timer0, Callback0, 50u);
  OS_TIMER_CREATE(&Timer1, Callback1, 200u);

  OS_Start();
  return 0;
}

/*************************** End of file ****************************/
检查一下是否有error出现。我这几次编译都没有出现任何问题。
3.3 测试
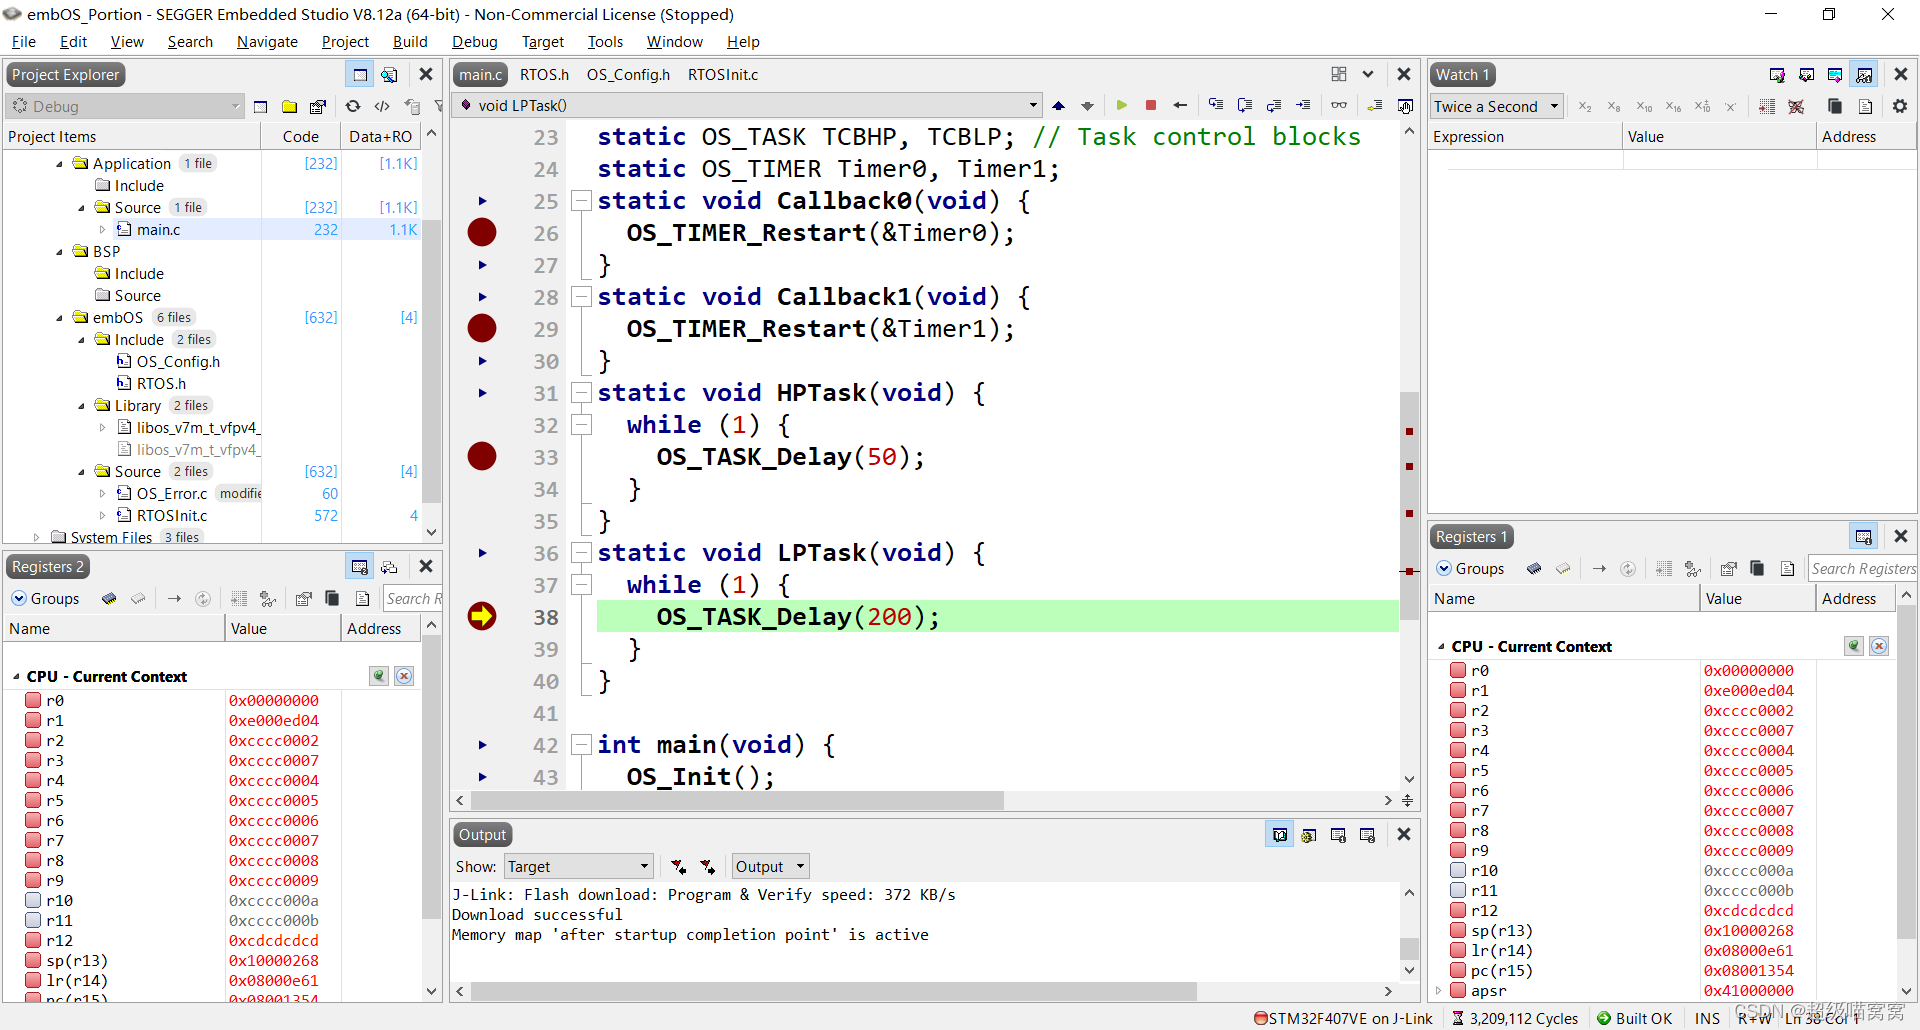
编译、链接、运行。
在进程和软定时器回调函数里面下断,会发现可以正常进入。
四、结论
经过上述的步骤,可以成功在SEGGER Embedded Studio上使用embOS。