文章目录
- [cv2.aruco 介绍](#cv2.aruco 介绍)
- [imutils.perspective.four_point_transform 介绍](#imutils.perspective.four_point_transform 介绍)
- [skimage.exposure.match_histograms 介绍](#skimage.exposure.match_histograms 介绍)
- 牛刀小试
- 遇到的问题
参考学习来自 OpenCV基础(18)使用 OpenCV 和 Python 进行自动色彩校正
cv2.aruco 介绍
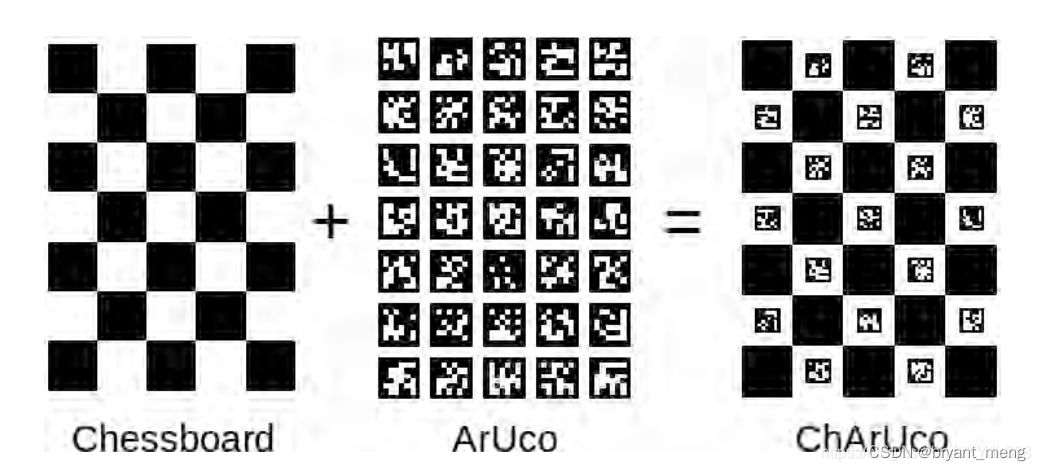
一、cv2.aruco模块概述
cv2.aruco 是 OpenCV 库中用于 ArUco 标记检测和识别的模块。ArUco 是一种基于 OpenCV 的二进制标记系统,用于多种计算机视觉应用,如姿态估计、相机校准、机器人导航和增强现实等。
以下是关于 cv2.aruco 的中文文档概要,按照参考文章中的信息进行整理和归纳:
一、ArUco 标记概述
ArUco 标记是带有黑色边框的二进制正方形图像,内部主体为白色,标记根据特定的编码变化。
ArUco 标记由 ArUco 字典、标记大小和标记 ID 组成。例如,一个 4x4_100 字典由 100 个标记组成,4x4 标记大小意味着标记由 25 位组成,每个标记将有一个唯一的 ID。
二、主要函数与参数
(1)cv2.aruco.detectMarkers()
- 功能:检测图像中的 ArUco 标记。
- 参数:
- 输入图像:包含 ArUco 标记的图像。
- 字典:用于搜索的 ArUco 字典。
- 参数(可选):检测参数,如 cv2.aruco.DetectorParameters()。
- 返回值:
- 标记角:检测到的标记的四个角的位置坐标。
- 标记 ID:检测到的标记的 ID。
- 拒绝标记(可选):未满足检测条件的标记信息。
(2)cv2.aruco.drawDetectedMarkers()
-
功能:在图像上绘制检测到的 ArUco 标记。
-
参数:
- 输入图像:包含 ArUco 标记的图像。
- 标记角:检测到的标记的四个角的位置坐标。
- 边界颜色(可选):绘制标记边界的颜色。
-
返回值:绘制了标记的图像。
(3)cv2.aruco.getPredefinedDictionary()
-
功能:获取预定义的 ArUco 字典。
-
参数:字典类型(如 aruco.DICT_ARUCO_ORIGINAL)。
-
返回值:预定义的 ArUco 字典。
三、检测过程与参数调整
阈值化:检测的第一步是对输入图像进行阈值化。这可以通过调整 cv2.aruco.DetectorParameters() 中的相关参数来完成,如 adaptiveThreshWinSizeMin、adaptiveThreshWinSizeMax 和 adaptiveThreshWinSizeStep。
角点细化:为了提高角点检测的精度,可以使用 cornerRefinementMethod 和 cornerRefinementWinSize 参数进行角点细化。
四、使用示例
以下是一个简单的示例,演示了如何使用 cv2.aruco 检测和可视化 ArUco 标记:
python
import cv2
import cv2.aruco as aruco

# 读取图片
img = cv2.imread("marker.jpg")

# 创建字典
dictionary = aruco.getPredefinedDictionary(aruco.DICT_ARUCO_ORIGINAL)

# 检测标记
corners, ids, _ = aruco.detectMarkers(img, dictionary)

# 可视化标记
img_with_markers = aruco.drawDetectedMarkers(img, corners)

# 显示结果
cv2.imshow("ArUco detection", img_with_markers)
cv2.waitKey(0)
cv2.destroyAllWindows()
五、注意事项
-
确保已正确安装 OpenCV,并包含 cv2.aruco 模块。
-
根据具体应用需求选择合适的 ArUco 字典和标记大小。
-
调整检测参数以优化标记检测性能。
imutils.perspective.four_point_transform 介绍
使用前先安装 pip install imutils
imutils.perspective.four_point_transform 是 OpenCV 图像处理库的一个辅助工具,用于实现透视变换(Perspective Transformation)。透视变换可以将一个图像从一个视角转换到另一个视角,这在图像校正、文档扫描、车牌识别等任务中非常有用。
以下是关于 imutils.perspective.four_point_transform 函数的详细解释和用法:
一、函数定义
imutils.perspective.four_point_transform 函数需要两个主要参数:
-
image:要进行透视变换的原始图像。
-
pts:包含图像中感兴趣区域(ROI)四个顶点的坐标列表。这四个点定义了原始图像中的一个四边形区域,该区域将被变换成一个矩形区域。
二、使用步骤
a. 读取图像
首先,使用 OpenCV 的 cv2.imread() 函数读取要进行透视变换的图像。
b. 确定变换点
然后,需要确定要进行透视变换的 ROI 的四个顶点。这可以通过各种方法实现,如边缘检测、轮廓查找、角点检测等。
c. 调用 four_point_transform 函数
将原始图像和四个顶点的坐标列表传递给 imutils.perspective.four_point_transform 函数。函数将返回一个经过透视变换后的新图像。
d. 显示或保存变换后的图像
使用 OpenCV 的 cv2.imshow() 函数显示变换后的图像,或者使用 cv2.imwrite() 函数将其保存为文件。
三、示例代码
以下是一个简单的示例代码,展示了如何使用 imutils.perspective.four_point_transform 函数进行透视变换:
python
import cv2
import numpy as np
import imutils

# 读取图像
image = cv2.imread('input.jpg')

# 假设我们已经通过某种方法找到了 ROI 的四个顶点,这里我们直接给出坐标
pts = np.array([[100, 100], [300, 100], [300, 300], [100, 300]], dtype="float32")

# 进行透视变换
warped = imutils.perspective.four_point_transform(image, pts)

# 显示变换后的图像
cv2.imshow("Warped", warped)
cv2.waitKey(0)
cv2.destroyAllWindows()
四、注意事项
-
确保 pts 列表中的坐标点按照正确的顺序排列(通常是左上角、右上角、右下角、左下角)。
-
透视变换的结果可能会受到原始图像中 ROI 的形状和大小的影响。因此,在实际应用中,可能需要通过调整 ROI 的位置和大小来优化变换结果。
skimage.exposure.match_histograms 介绍
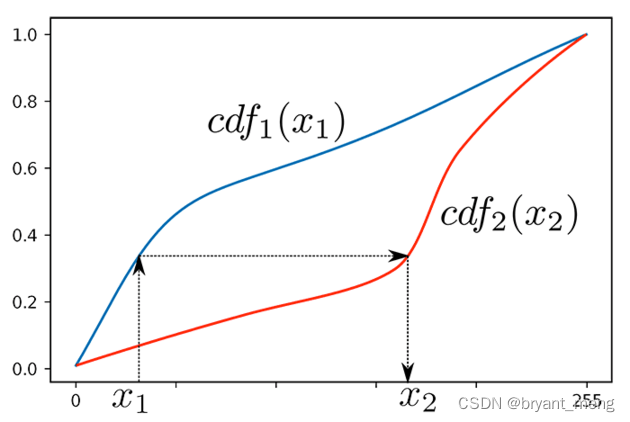
可参考 【python】OpenCV---Histogram Matching(9.2)
牛刀小试
素材来自于
python
链接:https://pan.baidu.com/s/1ja5RZUiV5Hyu-Z65JEJWzg
提取码:123a
python
# -----------------------------
#   USAGE
# -----------------------------
# python color_correction.py
# -----------------------------
#   IMPORTS
# -----------------------------
# Import the necessary packages
from imutils.perspective import four_point_transform
from skimage import exposure
import numpy as np
import argparse
import imutils
import cv2
import sys


# -----------------------------
#   FUNCTIONS
# -----------------------------
def find_color_card(image, colors, savename=None):
    # Load the ArUCo dictionary, grab the ArUCo parameters and detect the markers in the input image
    arucoDict = cv2.aruco.Dictionary_get(cv2.aruco.DICT_ARUCO_ORIGINAL)
    arucoParams = cv2.aruco.DetectorParameters_create()
    (corners, ids, rejected) = cv2.aruco.detectMarkers(image, arucoDict, parameters=arucoParams)

    # Plot corners
    if savename:
        image_copy = image.copy()
        for i in range(len(corners)):  # traverse corners
            for j in range(4):  # traverse coordinates
                cv2.circle(image_copy, center=(int(corners[i][0][j][0]), int(corners[i][0][j][1])),
                           radius=10, color=colors[i], thickness=-1)
                cv2.imwrite(savename, image_copy)

    # Try to extract the coordinates of the color correction card
    try:
        # Otherwise, this means that the four ArUCo markers have been found and
        # so continue by flattening the ArUCo IDs list
        ids = ids.flatten()
        # Extract the top-left marker
        i = np.squeeze(np.where(ids == 923))  # 3
        topLeft = np.squeeze(corners[i])[0]  # array([111., 123.], dtype=float32)
        # Extract the top-right marker
        i = np.squeeze(np.where(ids == 1001))  # 2
        topRight = np.squeeze(corners[i])[1]  # array([430., 124.], dtype=float32)
        # Extract the bottom-right marker
        i = np.squeeze(np.where(ids == 241))  # 1
        bottomRight = np.squeeze(corners[i])[2]  # array([427., 516.], dtype=float32)
        # Extract the bottom left marker
        i = np.squeeze(np.where(ids == 1007))  # 0
        bottomLeft = np.squeeze(corners[i])[3]  # array([121., 520.], dtype=float32)
    # The color correction card could not be found, so gracefully return
    except:
        return None
    # Build the list of reference points and apply a perspective transform to obtain a top-down,
    # birds-eye-view of the color matching card
    cardCoords = np.array([topLeft, topRight, bottomRight, bottomLeft])
    """ for reference
    array([[111., 123.],
       [430., 124.],
       [427., 516.],
       [121., 520.]], dtype=float32)
    """
    card = four_point_transform(image, cardCoords)
    # Return the color matching card to the calling function
    return card


if __name__ == "__main__":
    # colors for corners
    colors = [
        [0, 0, 255],
        [0, 125, 255],
        [0, 255, 255],
        [0, 255, 0]
    ]

    # Load the reference image and input images from disk
    print("[INFO] Loading images...")
    ref = cv2.imread("./reference.jpg")  # (4032, 3024, 3)
    image = cv2.imread("./examples/03.jpg")  # (4032, 3024, 3)

    # Resize the reference and input images
    ref = imutils.resize(ref, width=600)  # (800, 600, 3)
    image = imutils.resize(image, width=600)  # (800, 600, 3)

    # Display the reference and input images to the screen
    cv2.imshow("Reference", ref)
    cv2.imshow("Input", image)

    # Find the color matching card in each image
    print("[INFO] Finding color matching cards...")
    refCard = find_color_card(ref, colors, "refCardPlot.jpg")  # (397, 319, 3)
    imageCard = find_color_card(image, colors, "imageCardPlot.jpg")  # (385, 306, 3)

    # If the color matching card is not found in either the reference or the input image, gracefully exit the program
    if refCard is None or imageCard is None:
        print("[INFO] Could not find color matching cards in both images! Exiting...")
        sys.exit(0)

    # Show the color matching card in the reference image and the in the input image respectively
    cv2.imshow("Reference Color Card", refCard)
    cv2.imshow("Input Color Card", imageCard)

    # cv2.imwrite("reference_color_card.jpg", refCard)
    # cv2.imwrite("input_color_card.jpg", imageCard)

    # Apply histogram matching from the color matching card in the reference image
    # to the color matching card in the input image
    print("[INFO] Matching images...")
    # imageCard = exposure.match_histograms(imageCard, refCard, multichannel=True)
    imageCard = exposure.match_histograms(imageCard, refCard, channel_axis=-1)

    # Show the input color matching card after histogram matching
    cv2.imshow("Input Color Card After Matching", imageCard)
    # cv2.imwrite("input_color_card_after_matching.jpg", imageCard)
    cv2.waitKey(0)
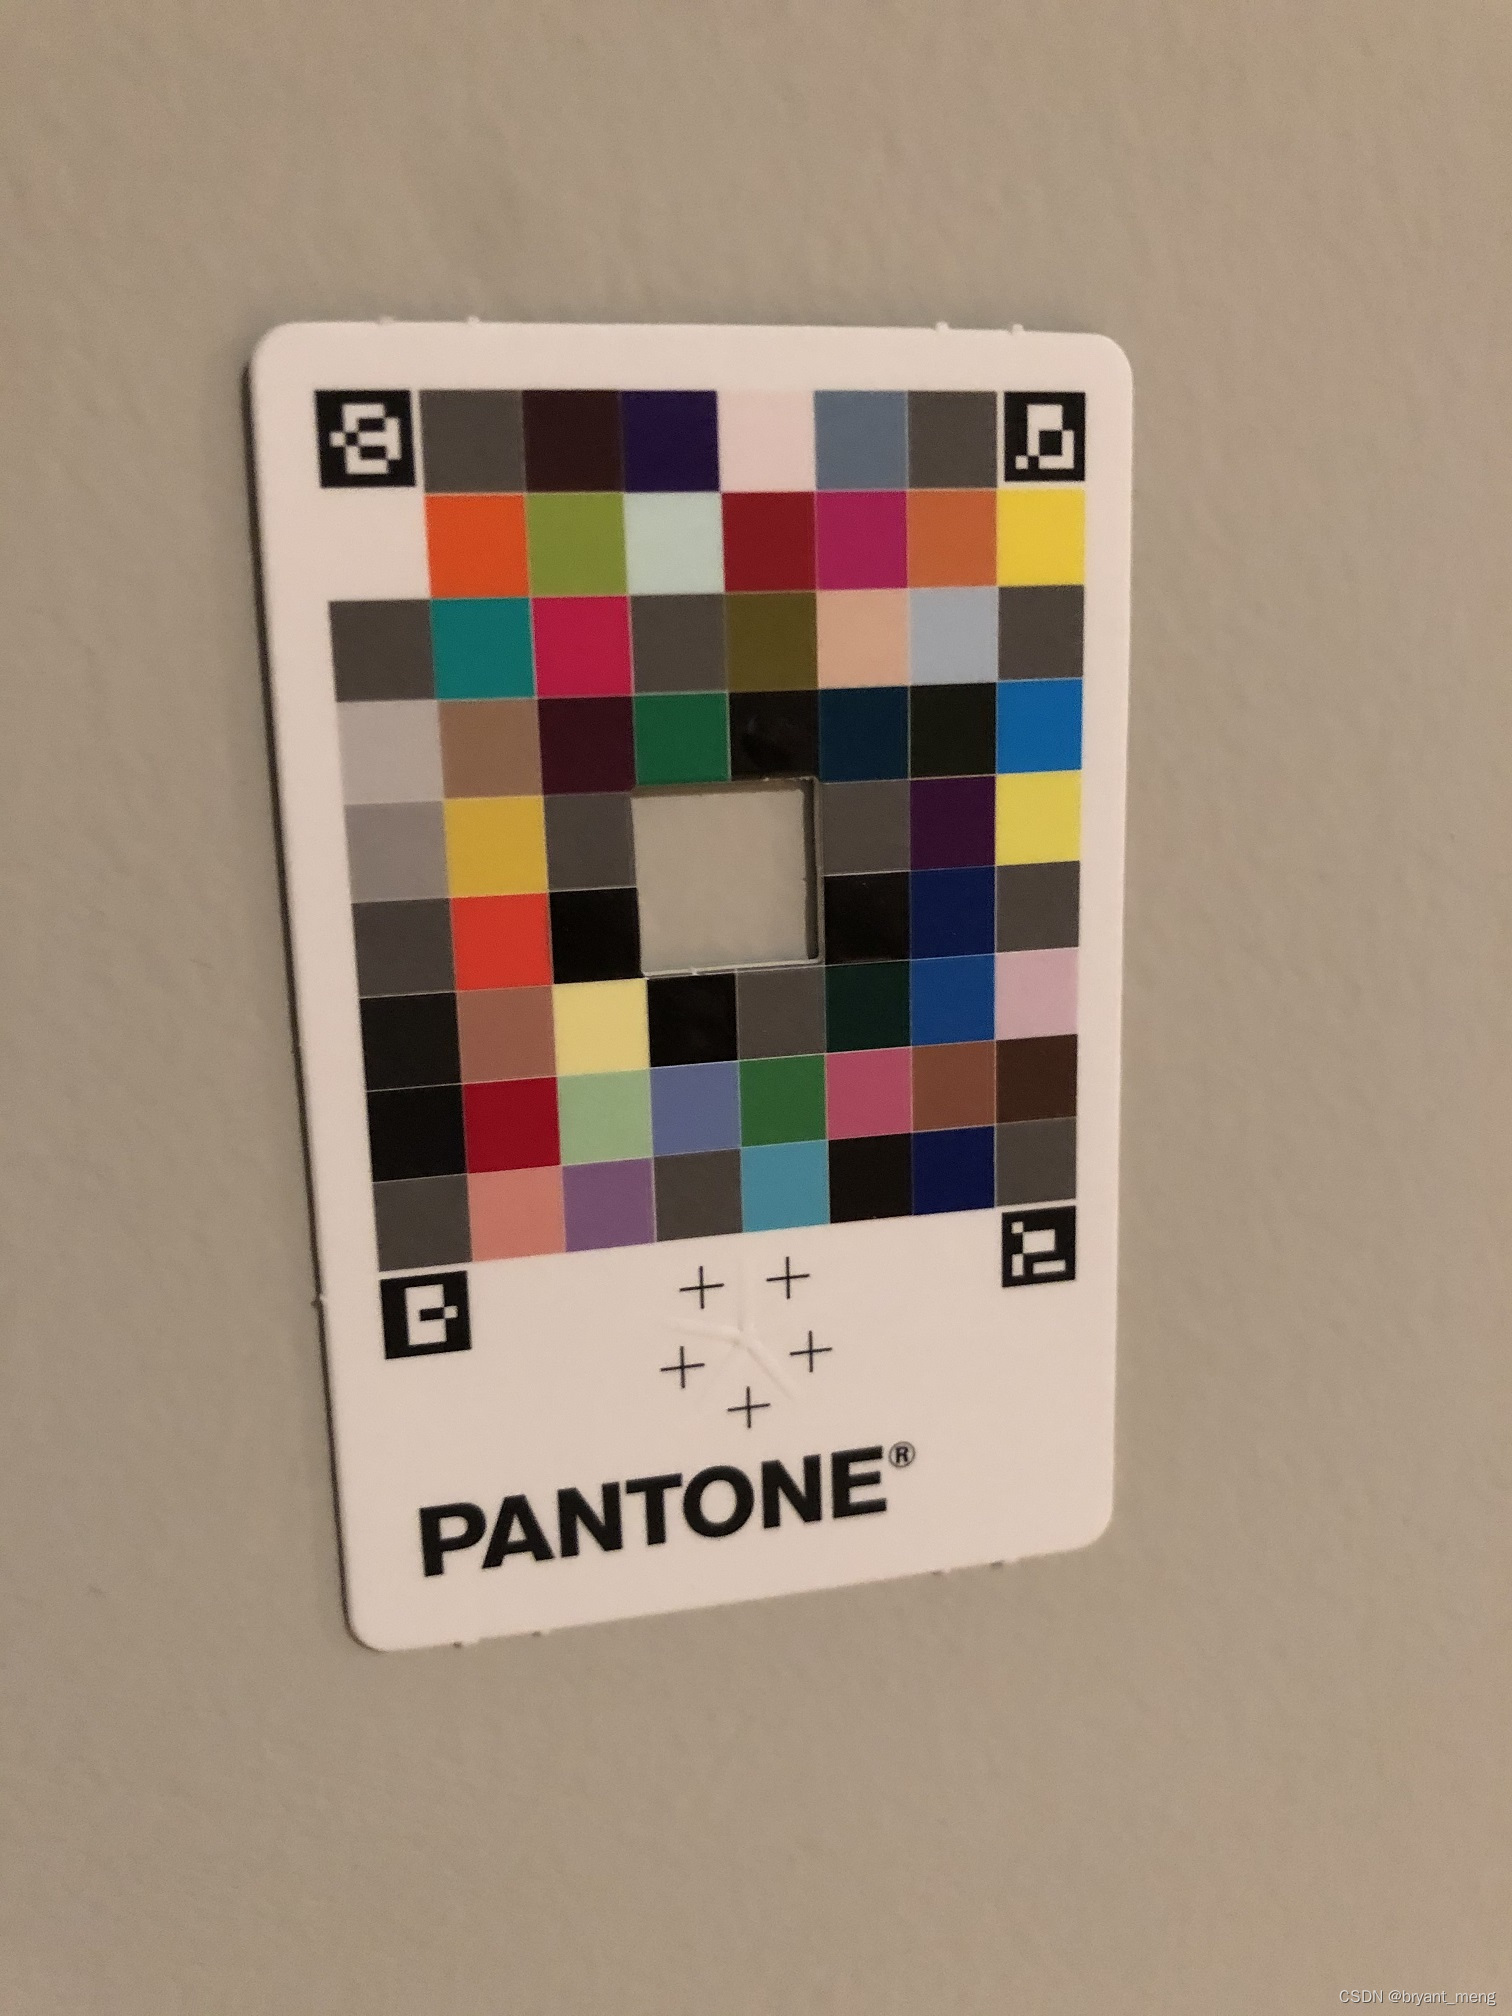
reference.jpg
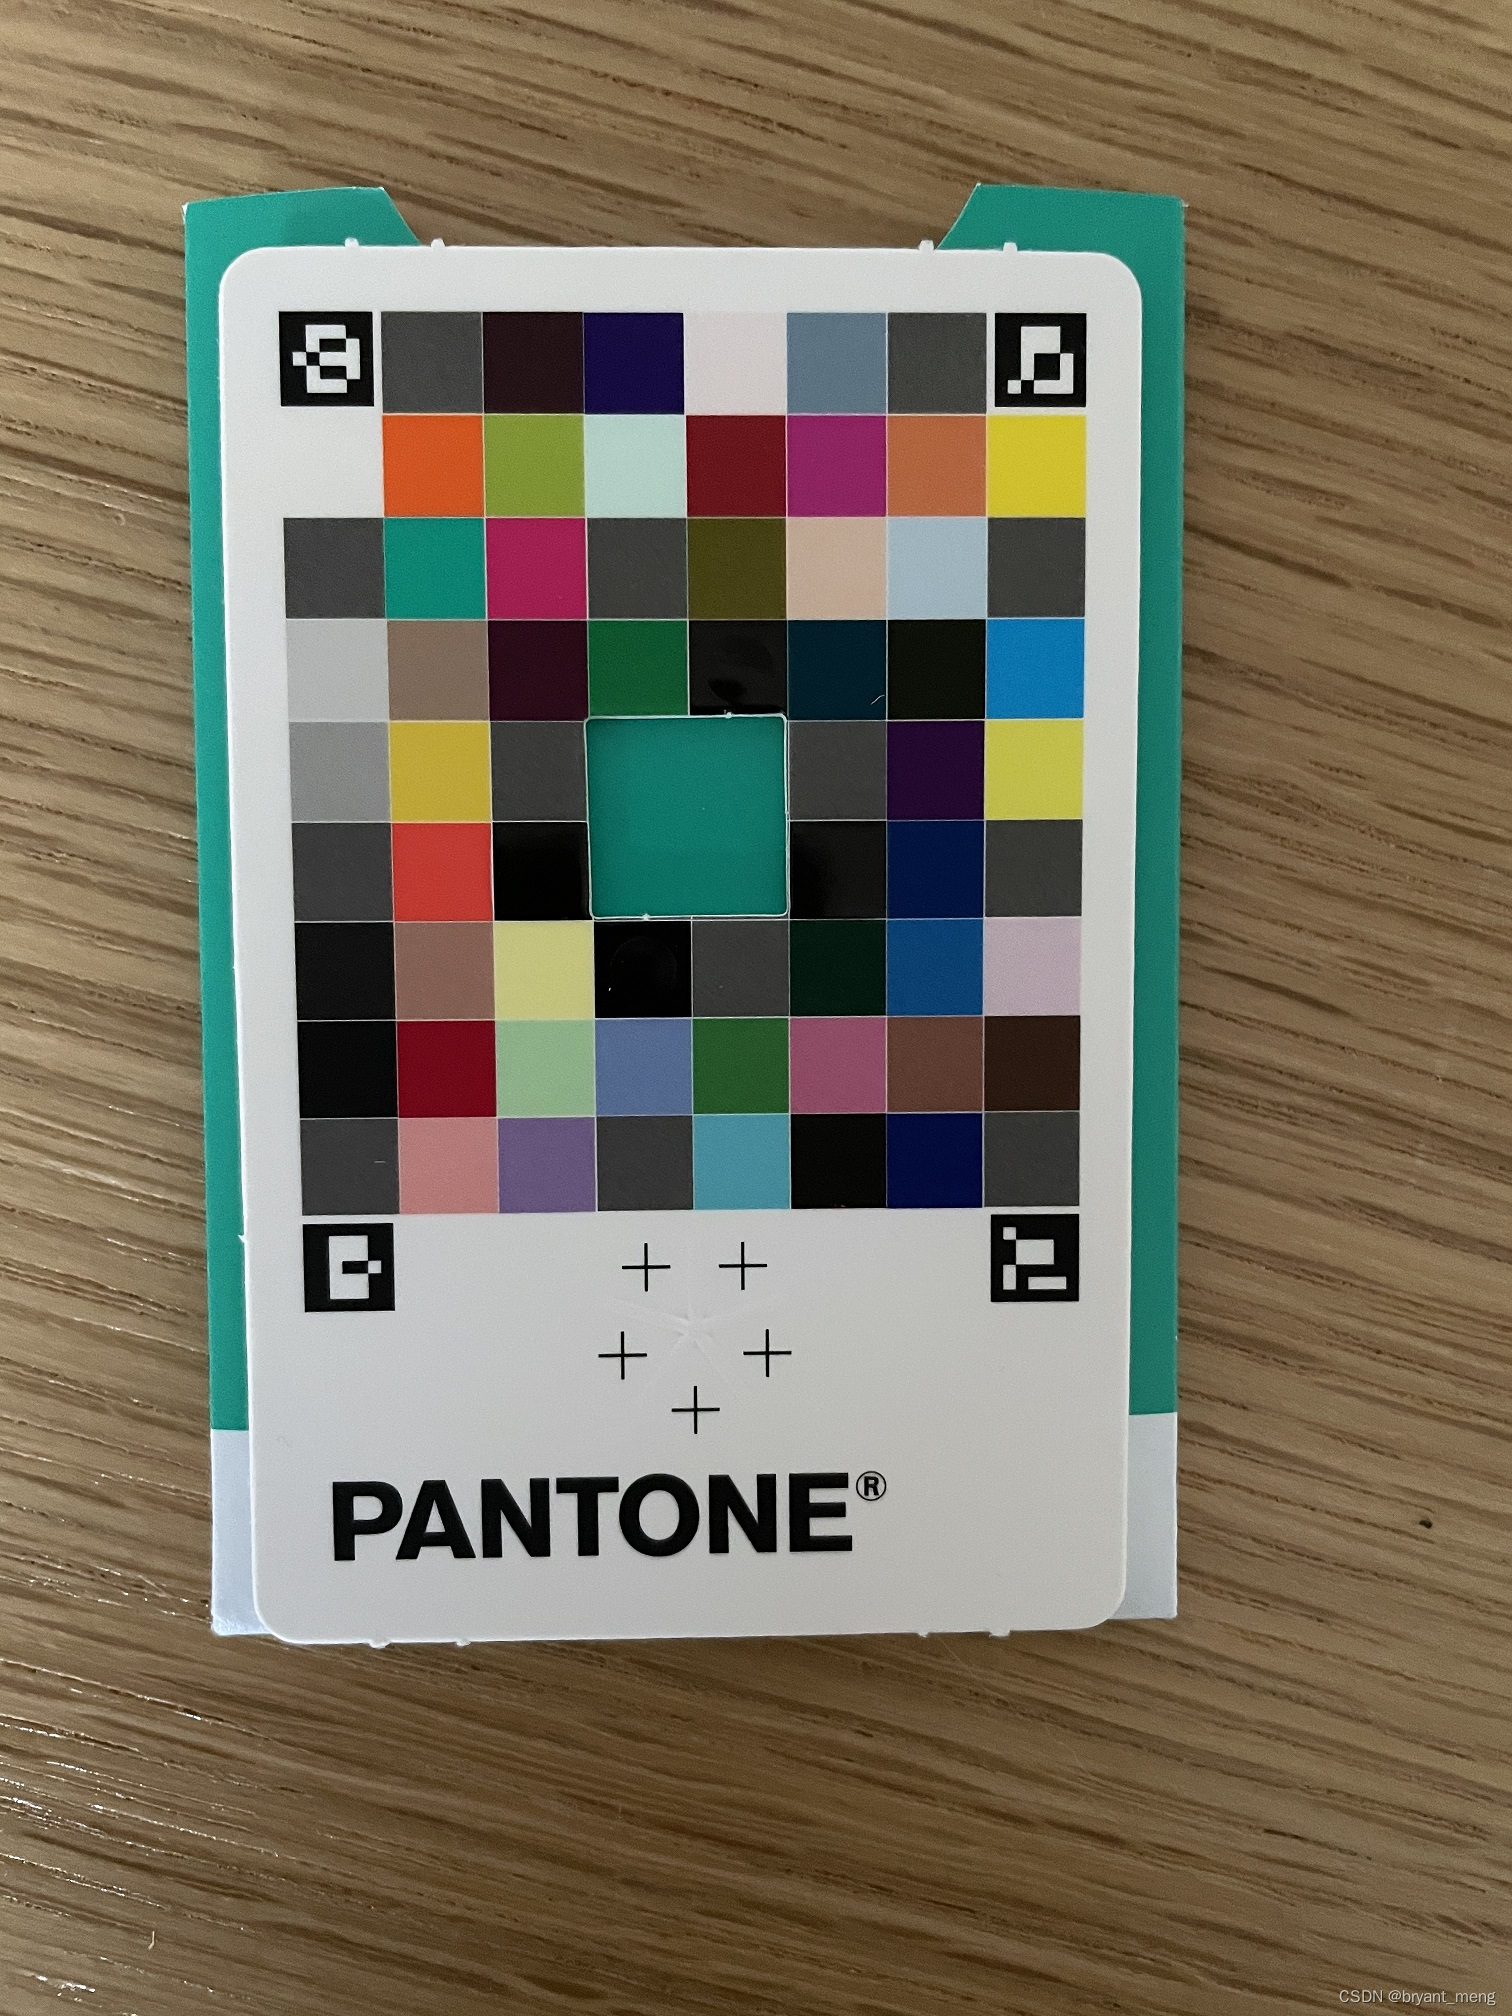
03.jpg
refCardPlot.jpg
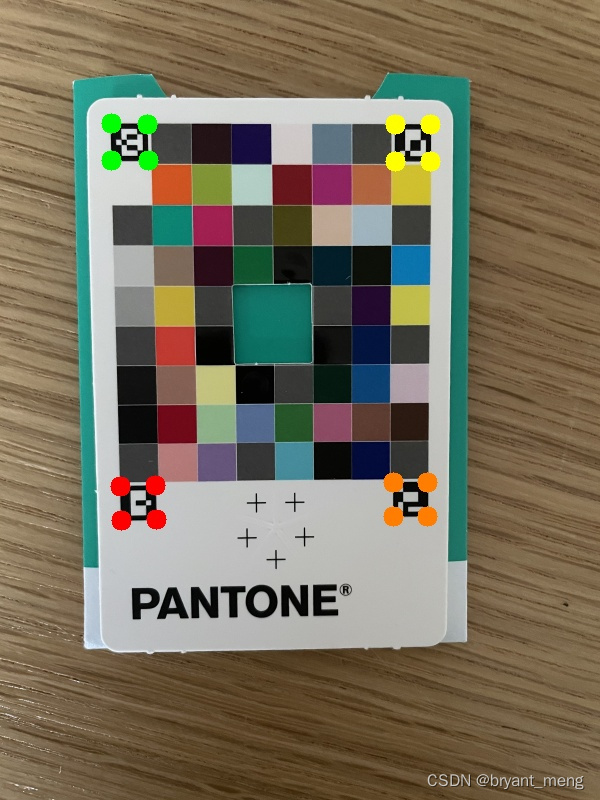
reference 的 corners
python
(array([[[120., 486.],
        [155., 485.],
        [156., 519.],
        [121., 520.]]], dtype=float32),
array([[[393., 482.],
        [427., 482.],
        [427., 516.],
        [393., 516.]]], dtype=float32),
array([[[395., 124.],
        [430., 124.],
        [430., 161.],
        [395., 161.]]], dtype=float32),
array([[[111., 123.],
        [147., 124.],
        [148., 160.],
        [111., 160.]]], dtype=float32))
reference 的 ids
python
array([[1007],
       [ 241],
       [1001],
       [ 923]], dtype=int32)
reference 的 rejected
python
len(rejected)
76
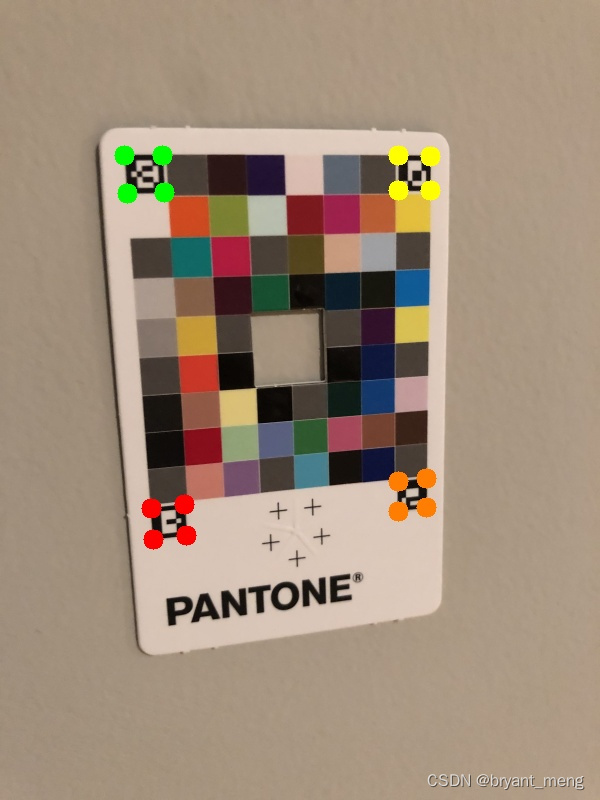
1007 左下角,红色
241 右下角,橙色
1001 右上角,黄色
923 右下角,绿色
imageCardPlot.jpg
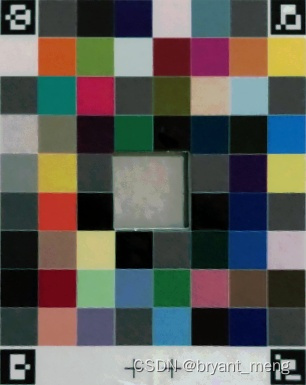
透视变换 four_point_transform 后
reference_color_card.jpg
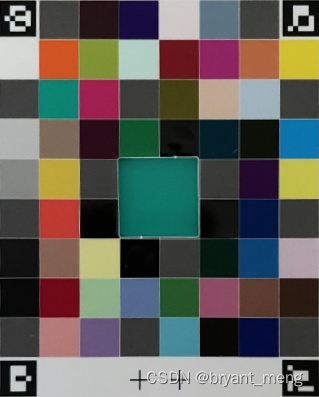
input_color_card.jpg
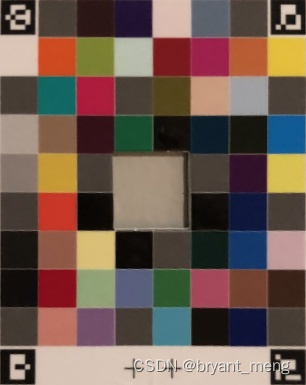
input_color_card_after_matching.jpg
遇到的问题
问题1:AttributeError: module 'cv2.aruco' has no attribute 'Dictionary_get'
解决办法:pip install opencv-contrib-python==4.6.0.66
问题2:TypeError: rescale() got an unexpected keyword argument 'multichannel'
解决方法:TypeError: rescale() got an unexpected keyword argument 'multichannel'