主界面
主界面和商店详情界面参考如下设计图(灵感严重匮乏)
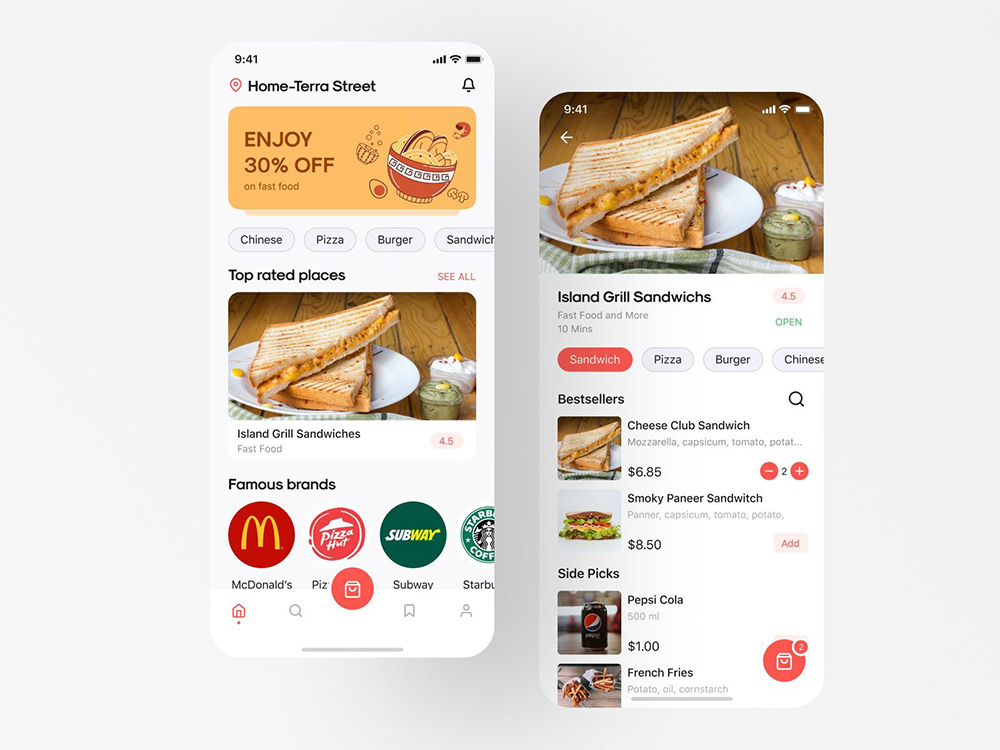
简单起见,将整个app分为4个布局,分别是主界面、搜索界面、购物车界面,以及个人界面。
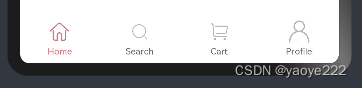
所以在app中也需要使用tab组件进行分割,且需要通过tabBar方法设置底部导航栏
TypeScript
Tabs({
barPosition: BarPosition.End,
controller: this.tabsController,
}) {
TabContent() {
HomeView()
}
.tabBar(this.TabBuilder(
'Home',
CommentConstant.HOME_TAB_INDEX,
CommentConstant.HomeIconActive,
CommentConstant.HomeIconNormal
))
TabContent() {
SearchView()
}
.tabBar(this.TabBuilder(
'Search',
CommentConstant.SEARCH_TAB_INDEX,
CommentConstant.SearchIconActive,
CommentConstant.SearchIconNormal
))
TabContent() {
CartView()
}
.tabBar(this.TabBuilder(
'Cart',
CommentConstant.CART_TAB_INDEX,
CommentConstant.CartIconActive,
CommentConstant.CartIconNormal
))
TabContent() {
ProfileView()
}
.tabBar(this.TabBuilder(
'Profile',
CommentConstant.PROFILE_TAB_INDEX,
CommentConstant.ProfileIconActive,
CommentConstant.ProfileIconNormal
))
}导航栏样式的设置:
TypeScript
@State currentIndex: number = CommentConstant.HOME_TAB_INDEX;
private tabsController: TabsController = new TabsController();
@Builder
TabBuilder(title: string, index: number, selectIcon: ResourceStr, normalIcon: ResourceStr) {
Column() {
Image(this.currentIndex === index ? selectIcon : normalIcon)
.width('25vp')
.height('25vp')
Text(title)
.margin({ top: '4vp' })
.fontSize('10fp')
.fontColor(this.currentIndex === index ? '#e76b7a' : '#6b6b6b')
}
.justifyContent(FlexAlign.Center)
.height('56vp')
.width('100%')
.onClick(() => {
this.currentIndex = index;
this.tabsController.changeIndex(index)
})
}即可实现如下效果
随后开始编写四个页面组件
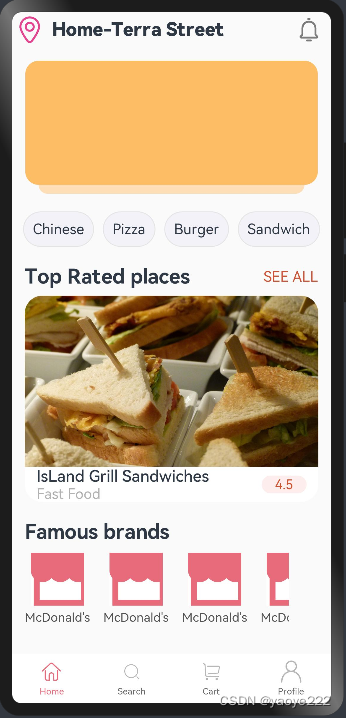
根据页面图,整个页面分为五个部分,分别为头部位置信息和通知选项、广告栏、热门标签栏、今日推荐栏、著名品牌栏,由于五个组件仅会在主页面中使用,所以可以使用@Builder创建组件函数在主页面组件中函数式声明,简单快捷且不需要额外import,灰常好用~
由于主页面需要放下的内容过多导致一页不能放下,考虑使用Scroll滚动布局,当子节点高度超过时自动加滚动条,同时需要设置
TypeScript
.align(Alignment.TopStart)保证子节点从顶部开始排列
其中在实现下面这个卡片的样式时,可以看到卡片是有四个方向的圆角的,但是如果直接放图片,图片会将上方的两个圆角覆盖住,这个时候可以使用.clip(true) 属性,意为沿边缘裁剪,即可达到下面这种效果。
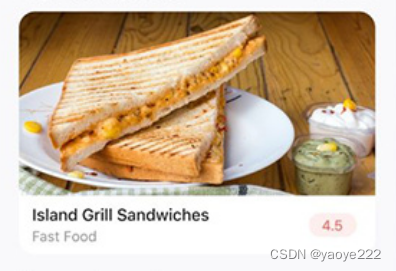
实现效果如下:
Web服务器搭建和数据持久化
到目前位置,本项目的所有数据都是保存在内存中的,仅作外观测试使用,而没有实际作用。
那么如何实现数据持久化呢?
鸿蒙提供了数据库接口,其可以方便地通过一系列配置和方法读取或修改数据库中的数据。然而,使用这种方法却存在一个问题,数据库文件保存在用户本地,既无数据来源,也无法实时更新。所以更好的解决方法应当是建立服务器,客户端通过调用 api 的方式从服务器的数据库中获取数据。
所以现在项目迫切需要搭建一个javaweb服务器。
根据点餐app需求分析,可以大致抽象出如下几个数据表(使用mysql数据库)。
用户表 user
| 属性列 | 描述 |
|---|---|
| 邮箱 | |
| phone | 电话 |
| id | 编号 |
| username | 用户名 |
| password | 密码 |
商店表 store
| 属性列 | 描述 |
|---|---|
| id | 编号 |
| storeName | 商店名 |
| address | 地址 |
| phone | 电话 |
| intro | 介绍 |
| score | 评分 |
| open | 目前是否营业 |
| cover | 店铺封面 |
| logo | 店铺logo |
| special | 特殊性 0-无 1-著名 2-TopRated |
菜品表 dish
| 属性列 | 描述 |
|---|---|
| id | 编号 |
| sid | 所属商铺编号 |
| dishName | 菜名 |
| intro | 介绍 |
| price | 价格 |
| discount | 折扣 |
| catalog | 所属分类 |
标签表 tags
| 属性列 | 描述 |
|---|---|
| id | 编号 |
| tagName | 标签名 |
菜品-标签表 dt
| 属性列 | 描述 |
|---|---|
| Did | 菜品编号 |
| Tid | 标签标号 |
订单表 orders
| 属性列 | 描述 |
|---|---|
| id | 订单号 |
| time | 付款时间 |
| uid | 用户 |
| price | 总额 |
| state | 订单状态 0-待支付 1-送餐中 2-已取消 3-已完成 4-已过期 |
| sid | 消费商店 |
订单-菜表 od
| 属性列 | 描述 |
|---|---|
| oid | 订单号 |
| Did | 菜号 |
| number | 选菜数量 |
使用sql建表
sql
use pigdelivery;
create table user (
email varchar(2048) not null,
id int auto_increment primary key ,
username varchar(30) not null,
password double not null
);
create table store(
id int auto_increment primary key ,
storeName varchar(50) not null,
intro varchar(100) not null,
score double not null,
open bit not null,
cover varchar(2048) not null,
logo varchar(2048) default 'defaultLogo.jpg',
special int default 0 not null
);
create table dish(
id int auto_increment primary key ,
sid int not null,
dishName varchar(50) not null,
intro varchar(100) not null,
price double not null,
discount double not null,
catalog varchar(30) not null,
foreign key (sid) references store(id)
);
create table tags(
id int auto_increment primary key ,
tagName varchar(30) not null
);
create table dt(
Did int not null,
Tid int not null,
foreign key (Did) references dish(id),
foreign key (Tid) references tags(id)
);
create table orders(
id int auto_increment primary key ,
time varchar(30),
uid int not null,
price double not null,
state int not null,
sid int not null,
foreign key (uid) references user(id),
foreign key (sid) references store(id)
);
create table od(
Oid int not null,
Did int not null,
number int not null,
foreign key (Oid) references orders(id),
foreign key (Did) references dish(id)
);建表完成后,填入一些商店数据用于测试。
数据库建立完成后,接下来开始写Javaweb,javaweb就很好写了,按照流程一步一步来就好,这里仅仅简单地概述一下步骤:
使用Tomcat10.1.24构建服务器,通过JavaWeb编写Servlet,并使用mybatis框架连接数据库。
首先新建一个Jakarta EE项目
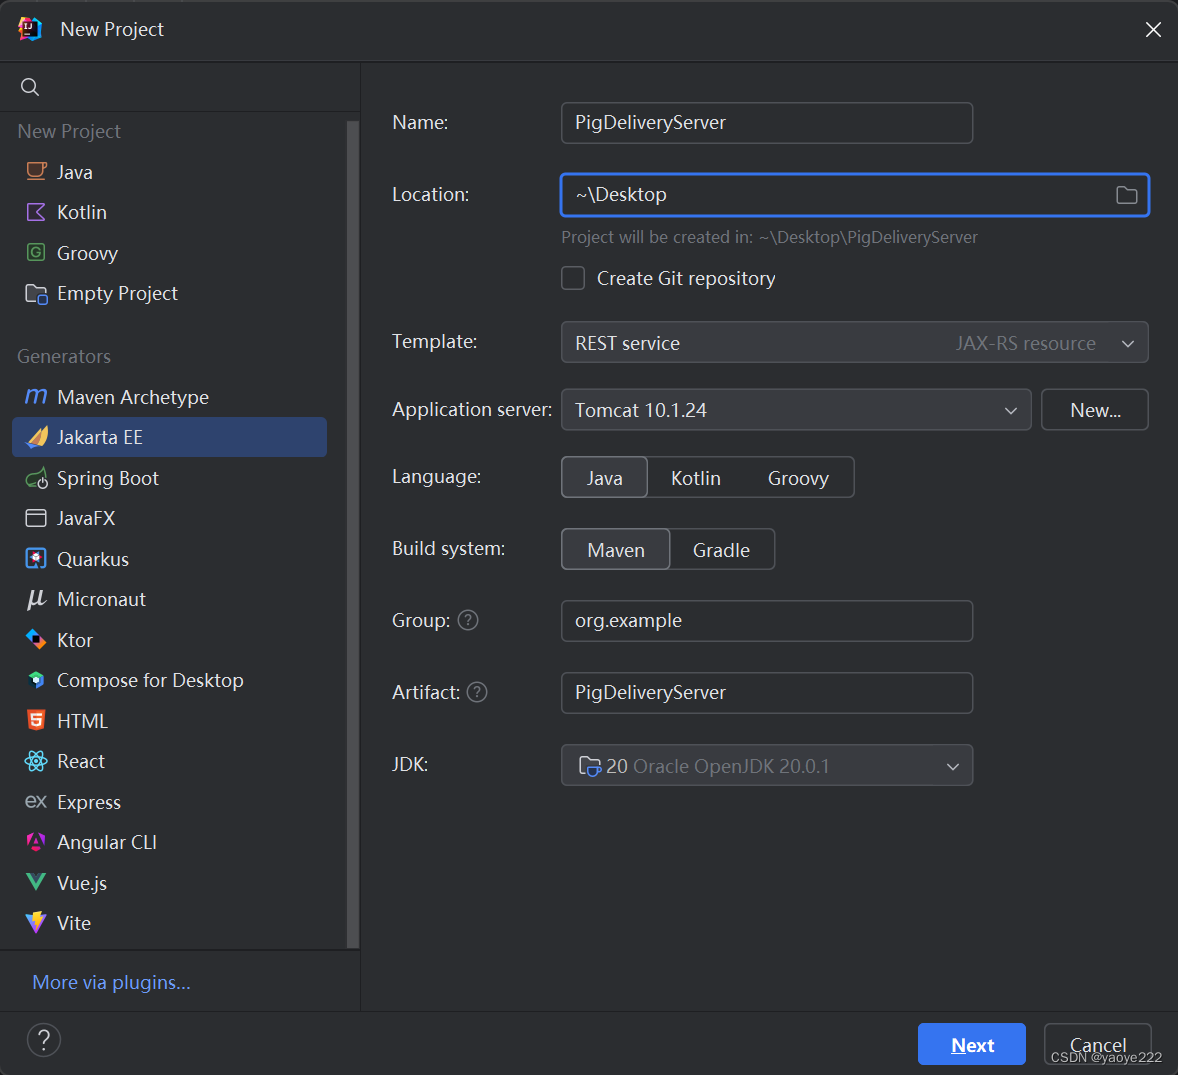
通过maven导入依赖的jar包,在资源目录下新建 mybatis-config.xml 用作mybatis配置文件,并按照mybatis配置文件格式填写该xml
随后写相应的Mapper接口和实体类(省略)
以登入接口为例,写一个doPost
java
@Override
protected void doPost(HttpServletRequest req, HttpServletResponse resp) throws ServletException, IOException {
EvalTran.evalJSON(req, resp);
if(req.getParameter("email") != null && req.getParameter("password") != null) {
try {
double password = Double.parseDouble(req.getParameter("password"));
String email = req.getParameter("email");
User user = UserLoader.selectUser(email, password);
if(user != null) {
resp.getWriter().write(gson.toJson(Response.success("success")));
} else {
resp.getWriter().write(gson.toJson(Response.success("user not exist")));
}
} catch (NumberFormatException e) {
resp.getWriter().write(gson.toJson(Response.badRequest("参数不合法")));
}
} else {
resp.getWriter().write(gson.toJson(Response.badRequest("表单数据不完整")));
}
}javaWeb程序写好之后,回到DevEco Studio中尝试调用该url
在DevEco Studio中打开Terminal终端执行指令 npm install axios 安装axios
在model目录下编写LoginModel类
TypeScript
import axios from '@ohos/axios';
class LoginModel {
readonly baseUrl = 'http://localhost:8080/PigDeliveryServer_war_exploded'
// 当返回 0 表示登入失败, 否则返回一个数字代表登入成功后的用户id
async verifyAccount(email: string, password: string): Promise<number> {
return await axios.post(
this.baseUrl + '/login',
{
email: email,
password: password,
}
)
.then((resp) => {
console.log(resp.data.message + '');
// 下面使用双等号的原因是json传输是数字类型可能会被转成字符串类型
if(resp.data.code == 200 && resp.data.message == 'success') {
return parseInt(resp.data.code);
} else {
return 0;
}
})
.catch((error) => {
console.log("error: " + error);
return 0;
})
}
}
export default new LoginModel() as LoginModel;回到之前编写的登入界面,当时为了测试登入界面,将登入按钮设计成点击就可以登入,现在,我们尝试将点击事件改成真实有效的验证方式:
TypeScript
Button('LogIn')
    .regButton()
    .onClick(() => {
    loginModel.verifyAccount(this.emailInput, this.passwordInput)
        .then((data) => {
        if(data === 0) {
            AlertDialog.show({
                message: '用户不存在或密码错误',
            })
        } else {
            CommentConstant.userId = data;
            router.replaceUrl({
                url: 'pages/MainPage',
            })
        }
    })
})
当点击登入按钮中,期望中进入主界面的效果并没有实现,而是出现了密码错误的提示,将服务器返回值输出后,控制台输出:

success表示服务器收到了请求,但是参数没有传递过去。
在服务器端doPost方法中编写如下代码:
TypeScript
BufferedReader reader = new BufferedReader(req.getReader());
StringBuilder stringBuilder = new StringBuilder();
while (reader.ready()) {
stringBuilder.append(reader.readLine());
}
String json = stringBuilder.toString();
System.out.println(json);再次请求,结果如下

ArkTs 中的 axios 直接将data中的数据以 json 字符串的形式发给了服务器,所以在服务器中还要对json的情况做处理
TypeScript
BufferedReader reader = new BufferedReader(req.getReader());
StringBuilder stringBuilder = new StringBuilder();
while (reader.ready()) {
    stringBuilder.append(reader.readLine());
}

String json = stringBuilder.toString();
UserTemp userTemp = gson.fromJson(json, UserTemp.class);

if(userTemp == null || userTemp.getEmail() == null || userTemp.getPassword() == null) {
    resp.getWriter().write(gson.toJson(Response.badRequest("表单数据不完整")));
} else {
    User user = UserLoader.verifyUser(userTemp.getEmail(), userTemp.getPassword());
    if(user != null) {
        resp.getWriter().write(gson.toJson(Response.success("success", String.valueOf(user.getId()))));
    } else {
        resp.getWriter().write(gson.toJson(Response.success("userNotExist")));
    }
}
改变之后,鸿蒙端测试登入成功。