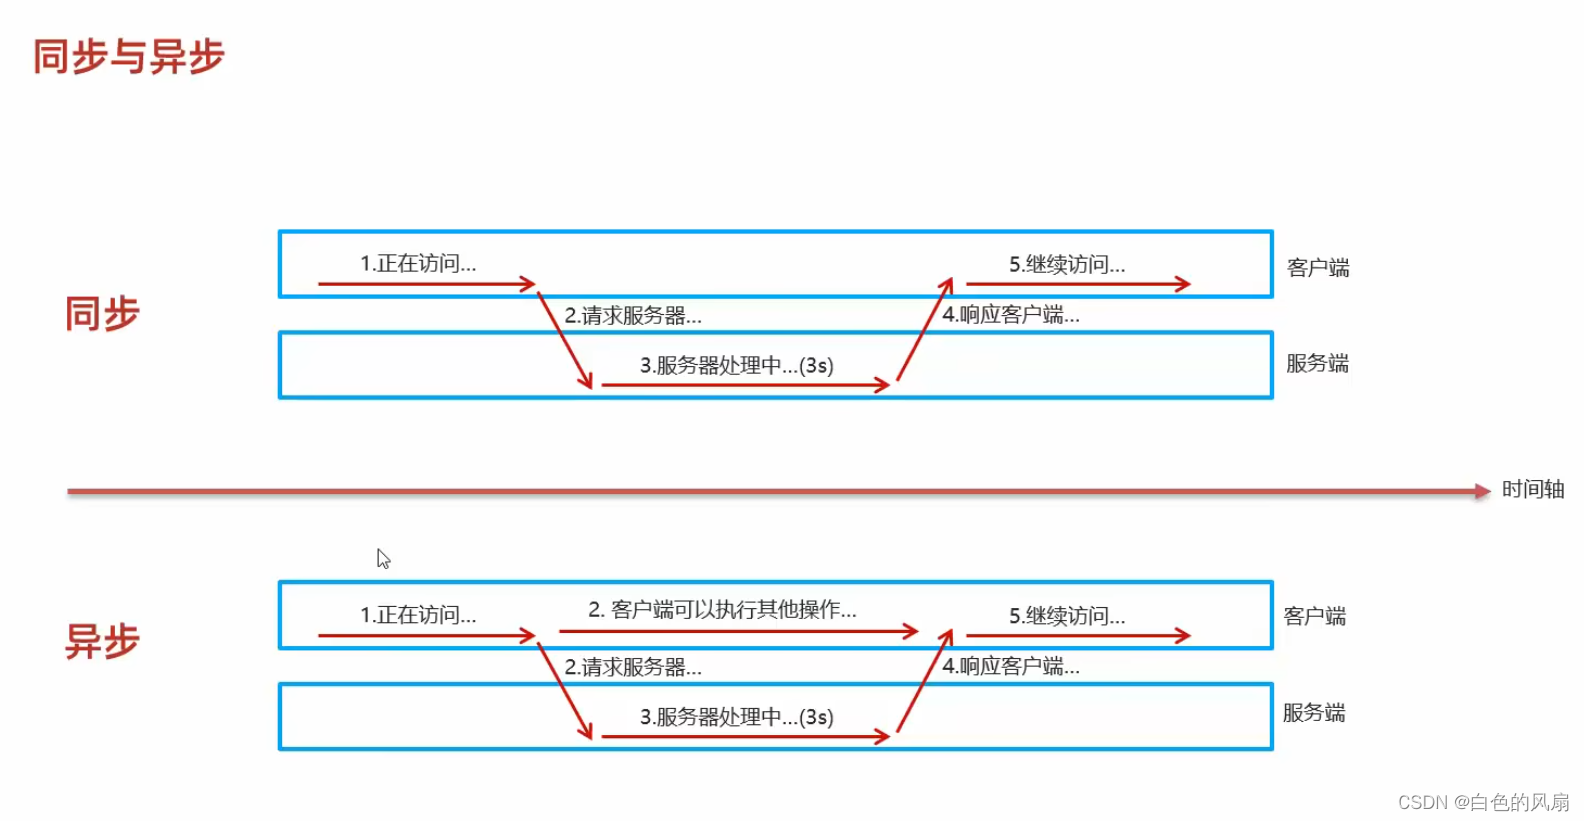
这个使同步和异步的区别
今天主要就是学了一些前端,搞了一些前端的页面,之后准备学一下后端。
我写的这个项目使百度贴吧,还没有写er图。
先看一下主界面是什么样子的。
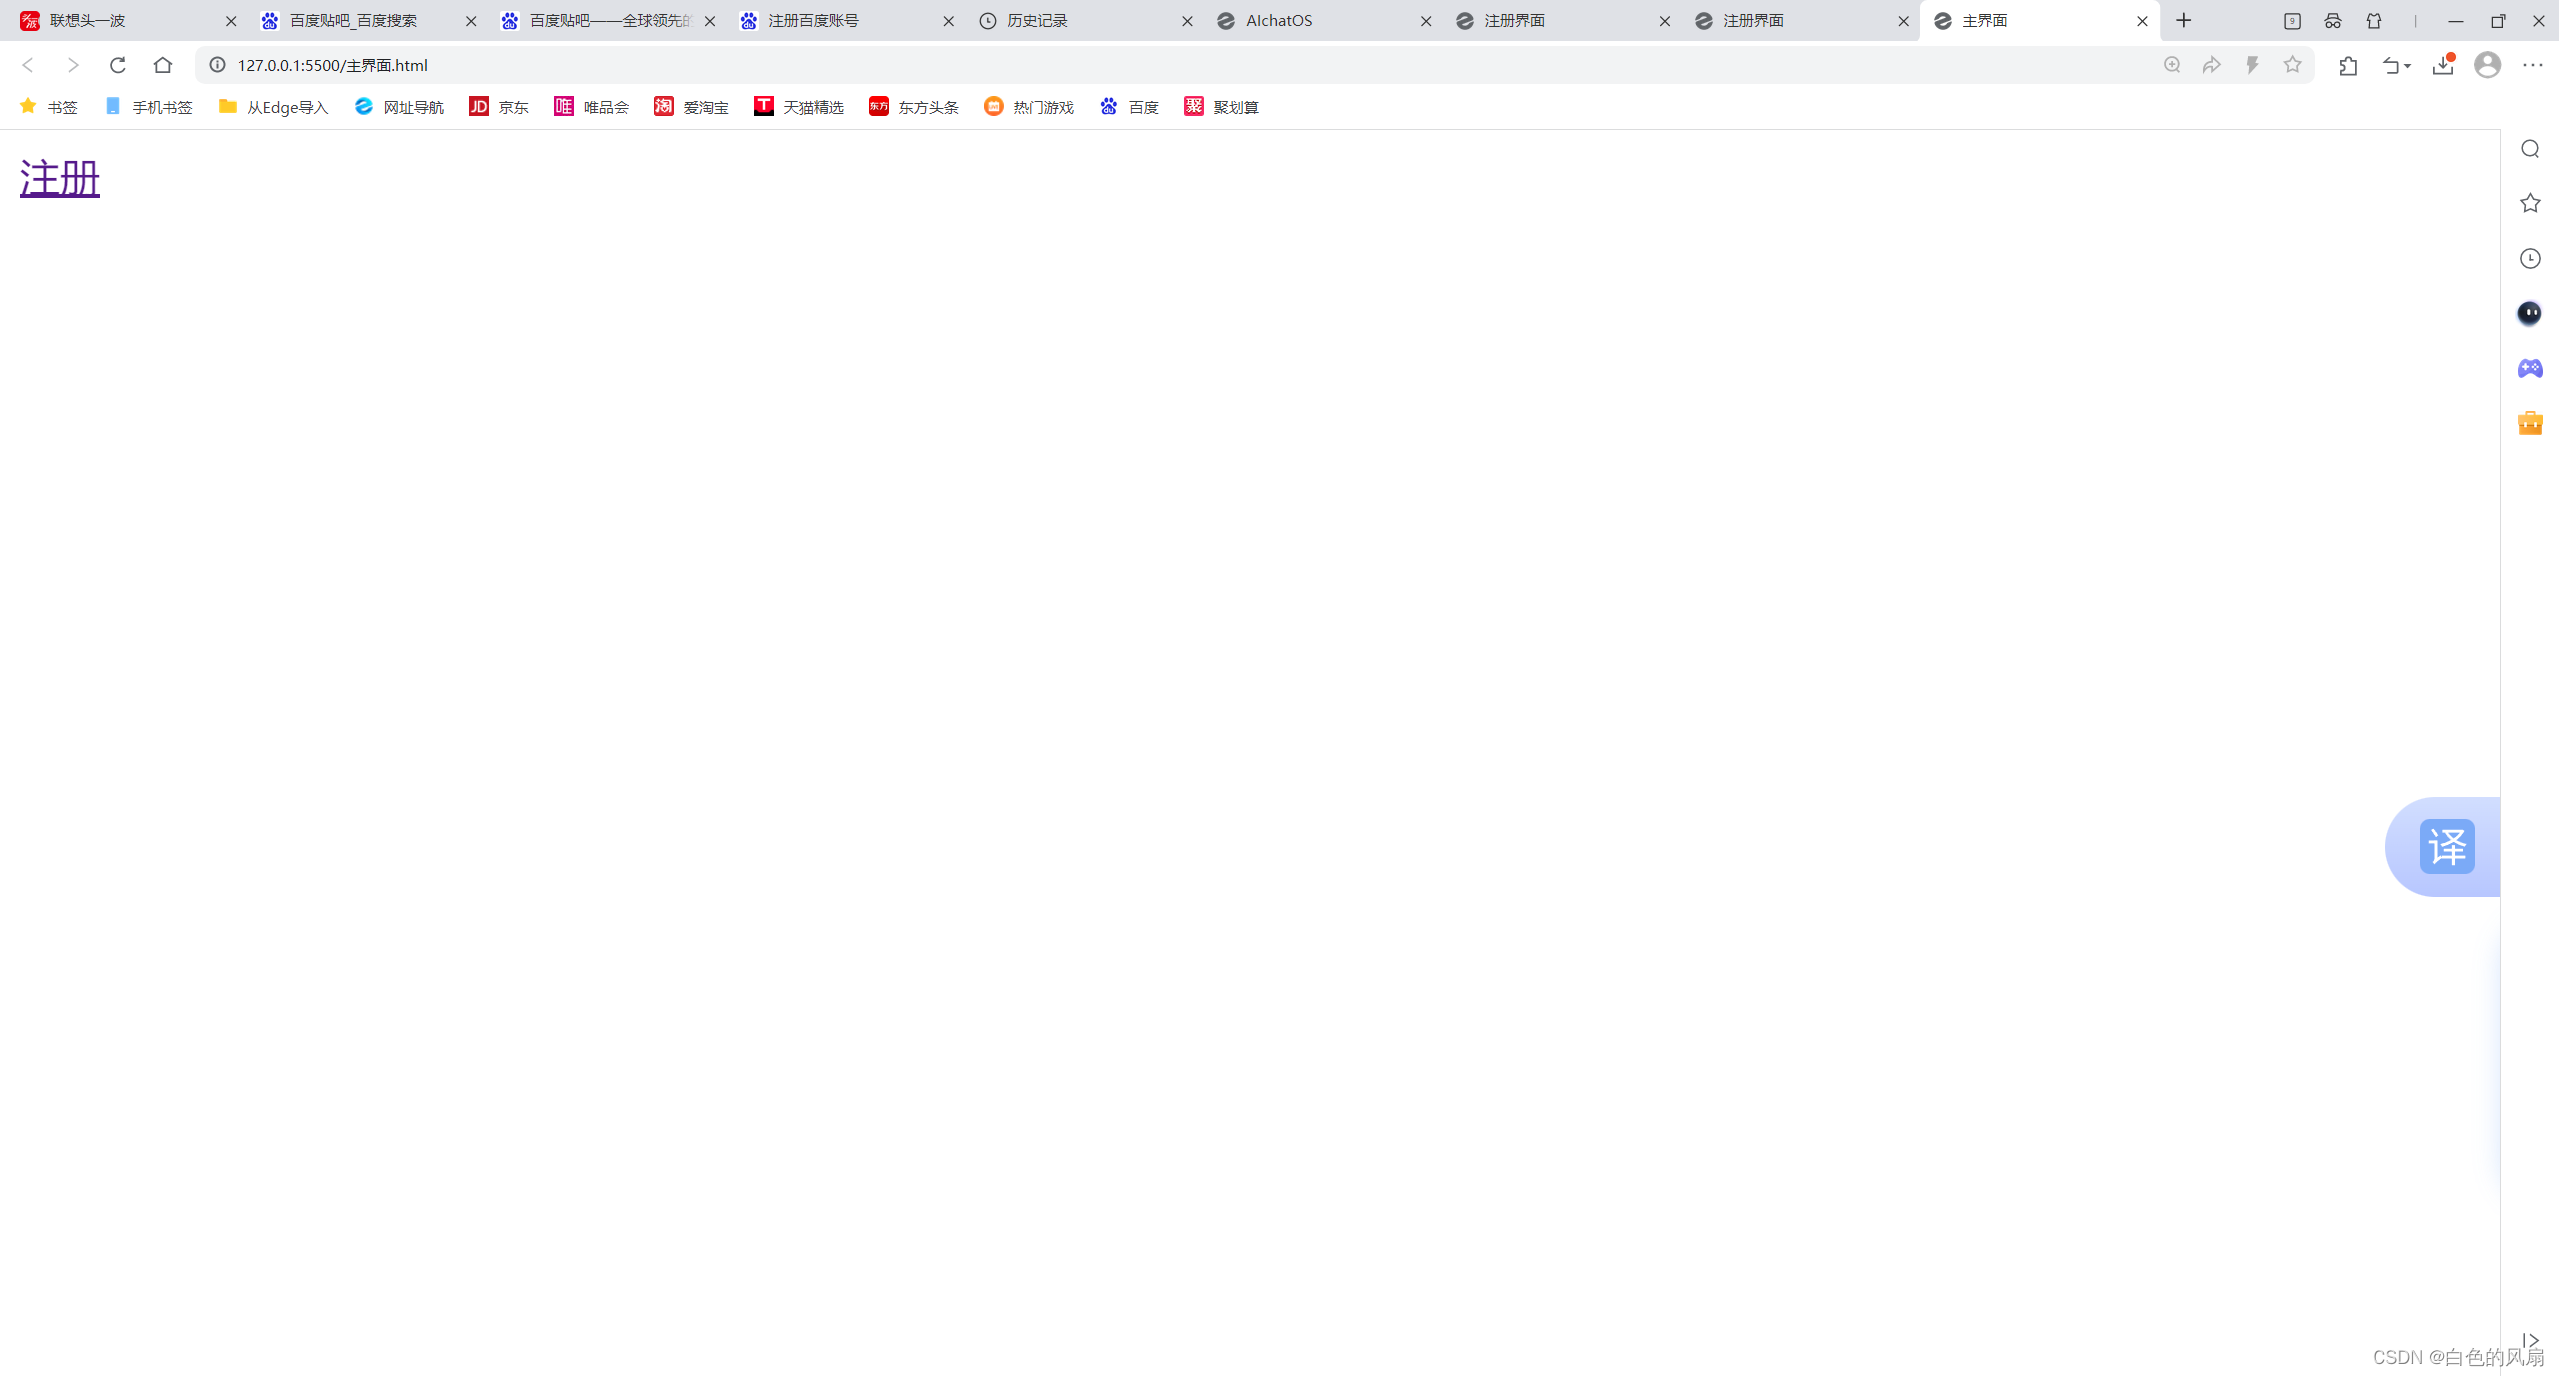
这个是主界面,将来后面的主要功能点基本上全部是放在这个上面,如热推信息,还一些很火的贴吧信息全部写在这个上面。
上面这个注册是一个超链接,当我点击这个超链接的时候就会转跳到注册界面。
超链接在html中的标签是
<a href="注册.html" target="_blank">注册</a>
先解释一下这个_blank就是重新创建一个页面然后转跳到这个页面。然后这个"注册.html"就是新创建的注册的界面
跳转到注册界面是这样的

这个注册还没有搞正则表达式,也没有搞前后端交互。感觉前后端交互现在还不是很清楚,希望之后可以早点吧这个前后端的交互搞明白。
这个搞了我比较久就是这个"用科技让复杂的世界变简单",刚开始我以为这两端文字两个div和在一起的,后面当时在原来的界面使用这个画面放缩的时候发现这两行是一个div。一致想不明白怎么实现让一大一小的文字一起进行放缩,后面才知道那个大一点其实就是h3一个标题的标签,那个较小的文字是p换行的文字,然后对这两段文字进行css修饰(将这两端文字染色呈白色,然后将这个文字,将这两段文字的间距进行加宽)。
代码如下
html
<!DOCTYPE html>
<html lang="en">
<head>
<meta charset="UTF-8">
<meta name="viewport" content="width=device-width, initial-scale=1.0">
<title>注册界面</title>
<style>
body {
margin: 0;
display: flex;
height: 100vh;
background-image: url('./reg_bg_min.jpg');
background-size: cover;
background-position: center;
background-repeat: no-repeat;
background-attachment: fixed; /* 让背景固定,不随页面滚动 */
}
.container {
position: relative;
width: 100%;
margin: 0 auto;
}
.mod-new-reg-logo {
position: relative;
}
.mod-new-reg-logo h3{
position: absolute;
top: 170px;
left: 12%;
color: white;
z-index: 101;
margin: 0; /* 去除默认的 margin */
font-size: 35px; /* 增加字体大小 */
}
.mod-new-reg-logo p {
position: absolute;
top: 215px;
left: 12%;
color: white;
z-index: 101;
margin: 0; /* 去除默认的 margin */
font-size: 19px; /* 增加字体大小 */
line-height: 2; /* 设置行间距为字体大小的1.5倍,可以根据需要调整 */
}
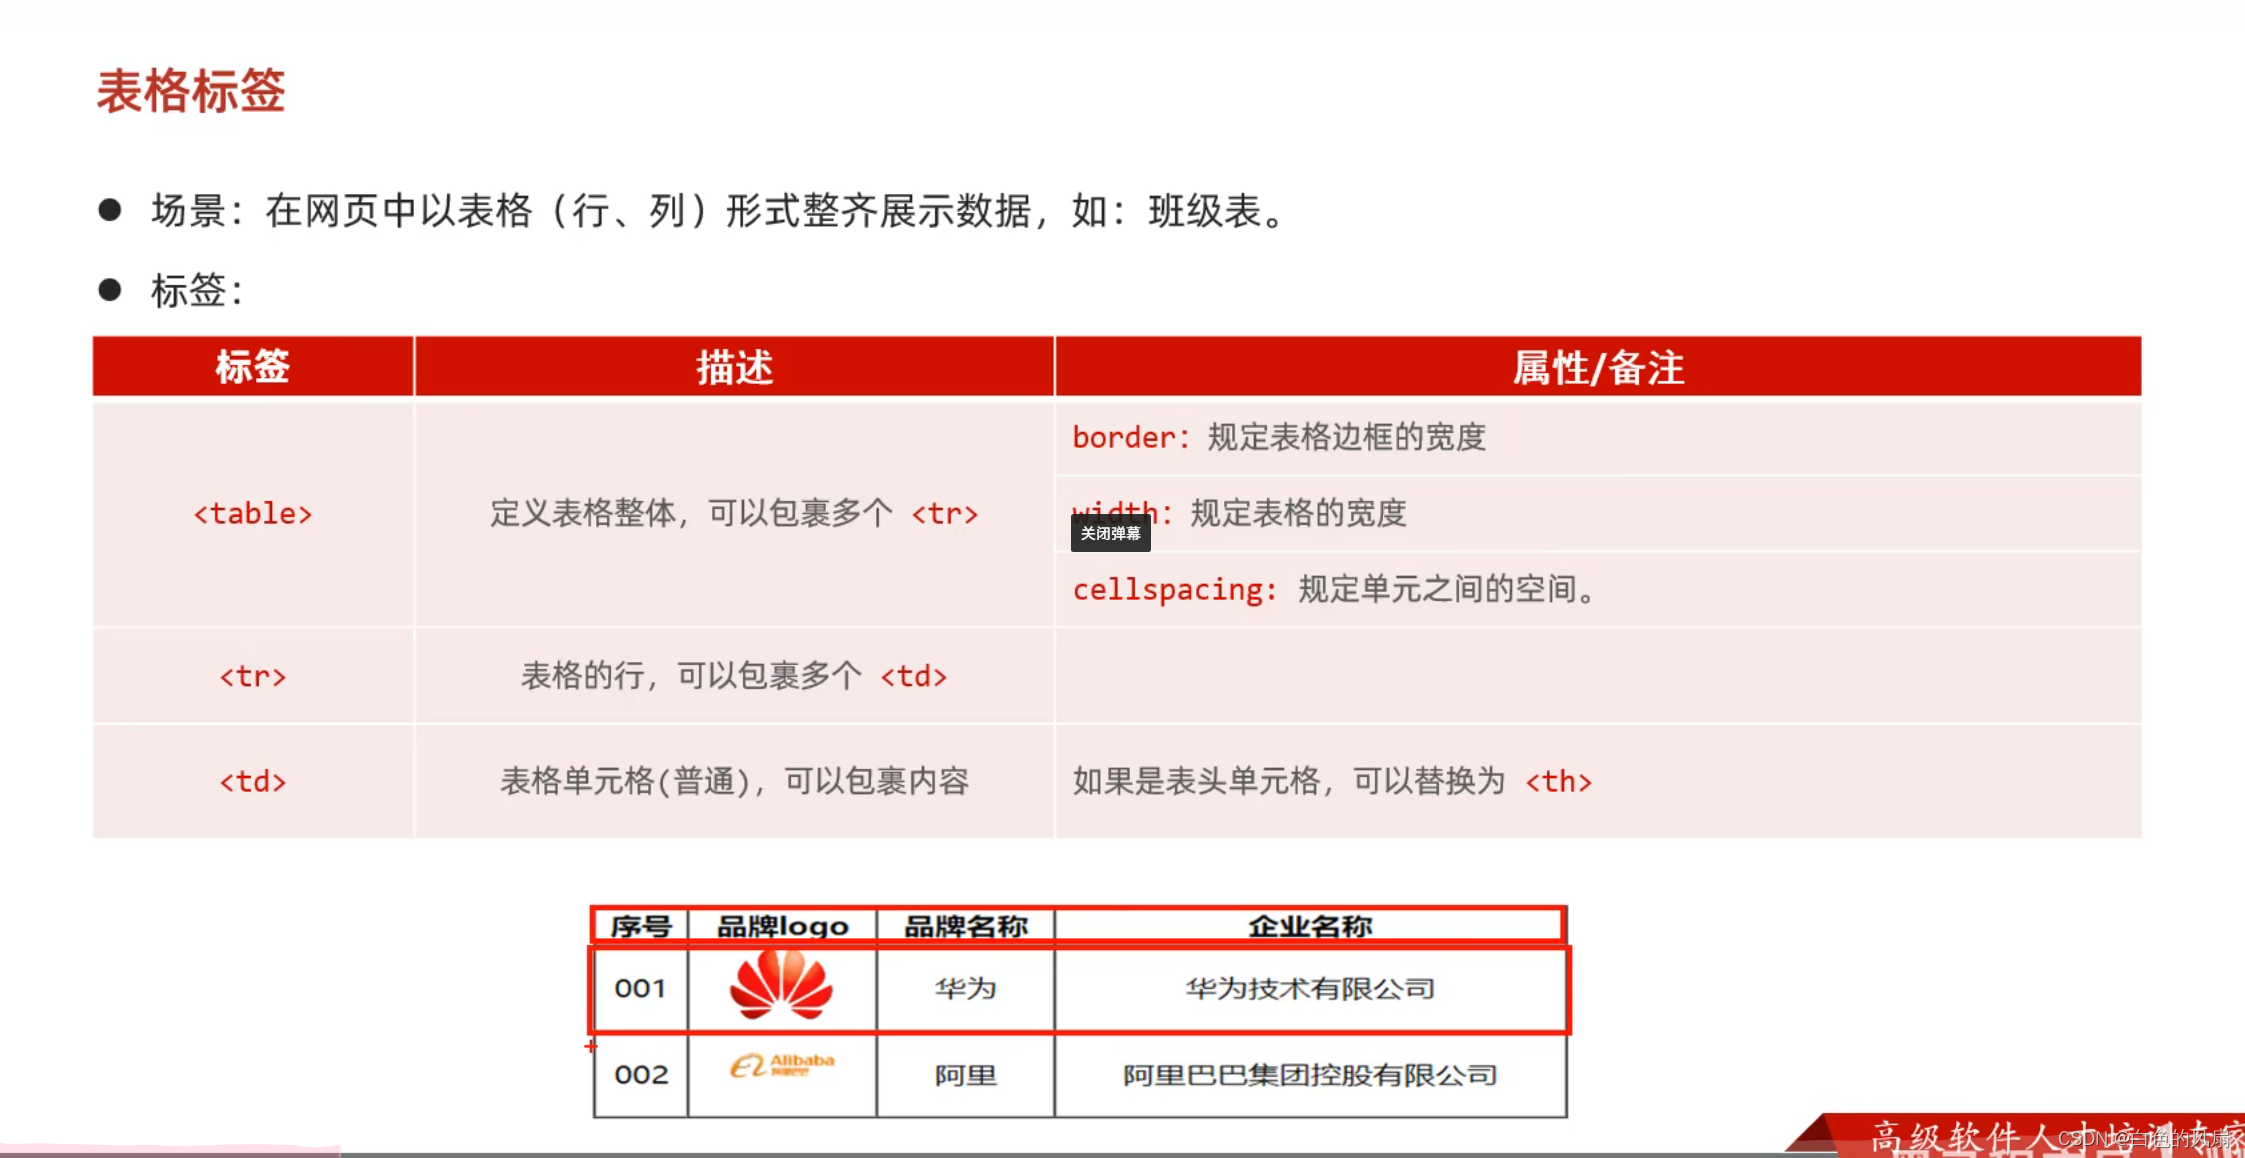
/* 下面就是登录注册的表格形式,说句实话我没想到,背景直接就是表格 */
table {
position: absolute;
top: 15%; /* 使表格顶部位于父元素的50%位置 */
left: 70%; /* 使表格左侧位于父元素的50%位置 */
background-color: rgba(255, 255, 255, 0.8); /* 使用 RGBA 值设置背景色,最后一个参数为透明度 */
border-collapse: collapse;
width: 270px;
box-shadow: 0 0 10px rgba(0,0,0,0.1);
border-radius: 30px; /* 设置边框的圆角半径为10px */
}
th, td {
padding: 10px;
text-align: left;
}
th {
background-color: #f2f2f2;
}
input[type="text"], input[type="password"], input[type="email"] {
width: calc(100% - 20px); /* 让输入框宽度占据表格的剩余空间 */
padding: 8px;
margin: 5px;
border: 1px solid #ccc;
border-radius: 3px;
box-sizing: border-box;
}
input[type="submit"] {
background-color: #4CAF50;
color: white;
border: none;
padding: 10px 20px;
text-align: center;
text-decoration: none;
display: inline-block;
font-size: 16px;
border-radius: 5px;
cursor: pointer;
}
input[type="submit"]:hover {
background-color: #45a049;
}
#lableRegister{
background-color: rgba(255, 255, 255, 0.7); /* 使用 RGBA 值设置背景色,最后一个参数为透明度 */
}
</style>
</head>
<body>
<div class="container">
<div class="mod-new-reg-logo">
<h3>用科技</h3>
<p>让复杂的世界更简单</p>
</div>
<table>
<tr>
<th colspan="2" ><h2 id = "lableRegister">用户注册</h2></th>
</tr>
<tr>
<td><label for="username">用户名:</label></td>
<td><input type="text" id="username" name="username" required></td>
</tr>
<tr>
<td><label for="email">邮箱:</label></td>
<td><input type="email" id="email" name="email" required></td>
</tr>
<tr>
<td><label for="password">密码:</label></td>
<td><input type="password" id="password" name="password" required></td>
</tr>
<tr>
<td><label for="confirm-password">确认密码:</label></td>
<td><input type="password" id="confirm-password" name="confirm-password" required></td>
</tr>
<tr>
<td colspan="2" style="text-align:center;"><input type="submit" value="注册"></td>
</tr>
</table>
</div>
</body>
</html>