GitLab保姆级教程
文章目录
- GitLab保姆级教程
-
- 一、GitLab安装
- 二、添加组和用户
- 三、新增项目
- 四、Git上传项目说明
- [五、命令行指引 根据以下说明从计算机中上传现有文件:](#五、命令行指引 根据以下说明从计算机中上传现有文件:)
- 六、创建与合并分支
- 七、GitLab回滚到特定版本
- 八、数据备份与恢复
- 九、docker中创建gitlab
- [GIT 常用命令](#GIT 常用命令)
一、GitLab安装
-
远程下载GitLab包
wget --content-disposition https://packages.gitlab.com/gitlab/gitlabce/packages/ubuntu/xenial/gitlab-ce_12.1.4-ce.0_amd64.deb/download.deb -
本地安装GitLab
dpkg -i gitlab-ce_12.1.4-ce.0_amd64.deb -
修改GitLab配置文件
vim /etc/gitlab/gitlab.rb -
修改GitLab URL
## GitLab URL ##! URL on which GitLab will be reachable. ##! For more details on configuring external_url see: ##! https://docs.gitlab.com/omnibus/settings/configuration.html#configuring-the-external-url-for-gitlab external_url 'http://192.168.1.1:8000' -
输入外部URL
-
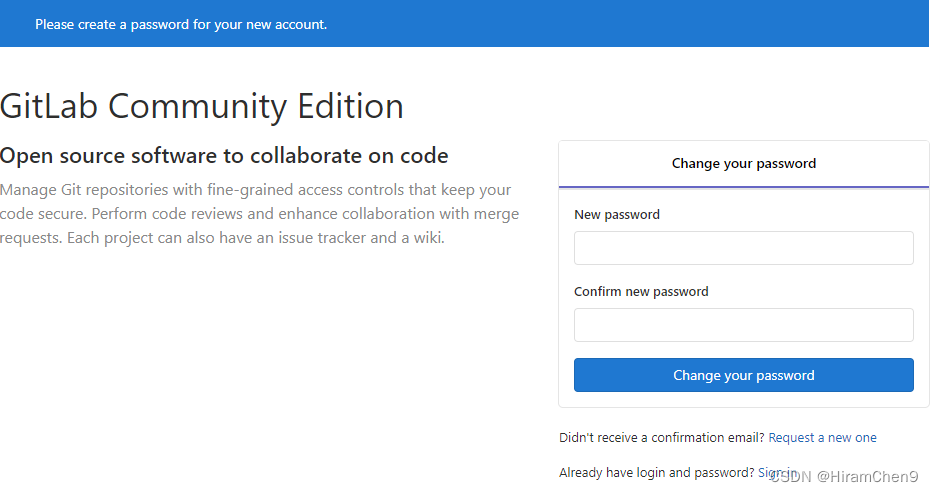
登录并设置新密码
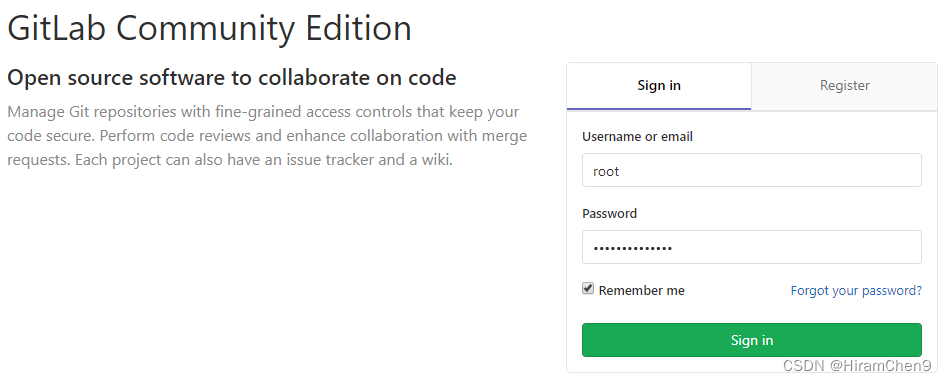
-
完成安装
二、添加组和用户
-
创建私有组

-
添加组成员
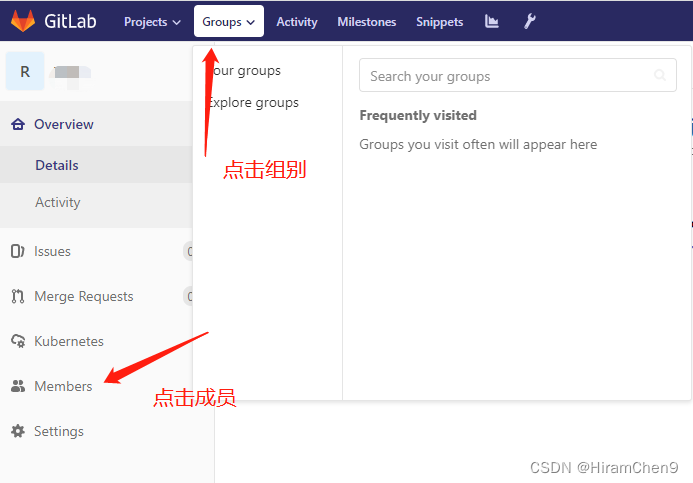
-
添加用户界面和设置用户权限
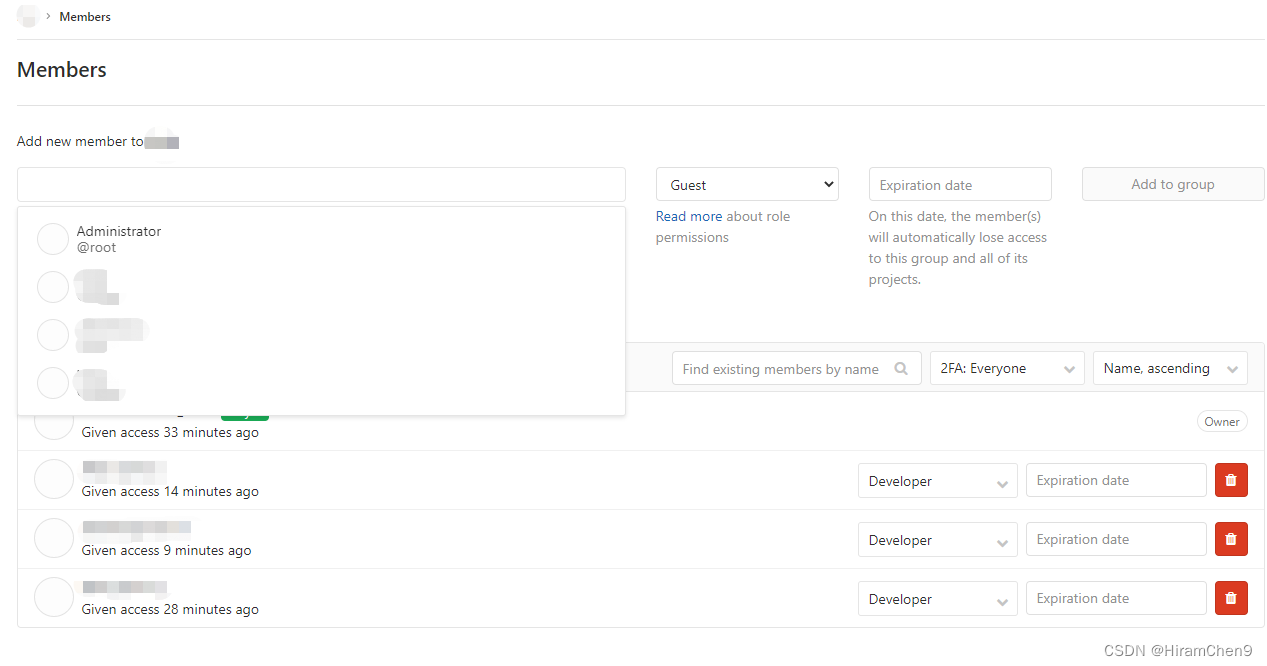
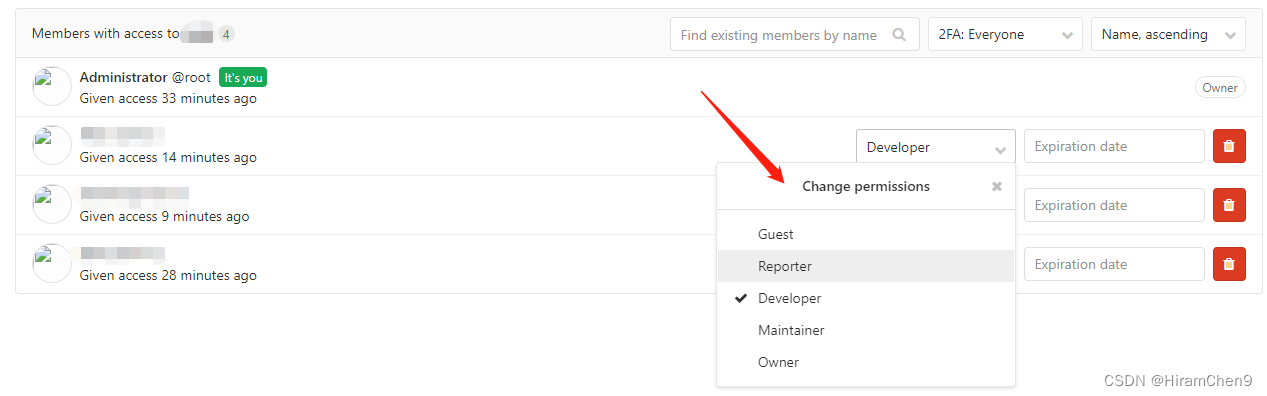
权限说明:
Guest:可以创建issue,发表评论,不能读写版本库
Reporter:可以克隆代码,不能提交,QA、PM可以赋予这个权限
Developer:可以克隆代码,开发,提交,push,普通开发可以授予该权限
Maintainer:可以创建项目,添加tag,保护分支,添加项目成员,编辑项目,核心开发可以授予该权限
Owner:可以设置值项目访问权限,Visibility Level,删除项目,迁移项目,管理组成员,开发组组长可以授予该权限
| 常用命令 | 说明 |
|---|---|
| sudo gitlab-ctl reconfigure | 重新加载配置,每次修改/etc/gitlab/gitlab.rb文件之后执行 |
| sudo gitlab-ctl status | 查看 GitLab 状态 |
| sudo gitlab-ctl start | 启动 GitLab |
| sudo gitlab-ctl stop | 停止 GitLab |
| sudo gitlab-ctl restart | 重启 GitLab |
| sudo gitlab-ctl tail | 查看所有日志 |
| sudo gitlab-ctl tail nginx/gitlab_acces.log | 查看 nginx 访问日志 |
| sudo gitlab-ctl tail postgresql | 查看 postgresql 日志 |
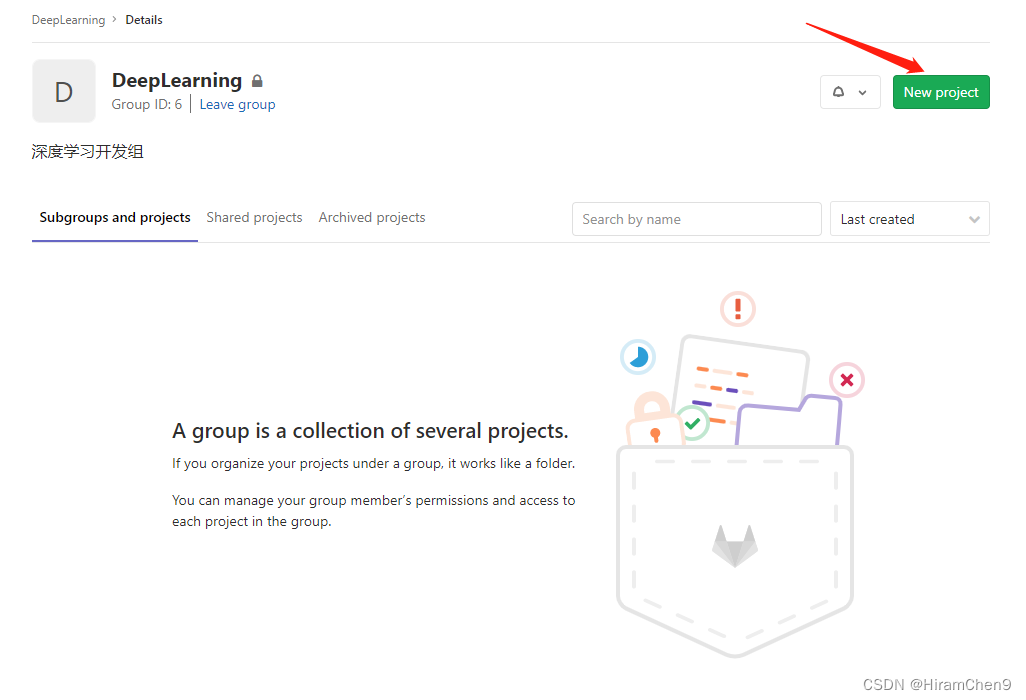
三、新增项目
-
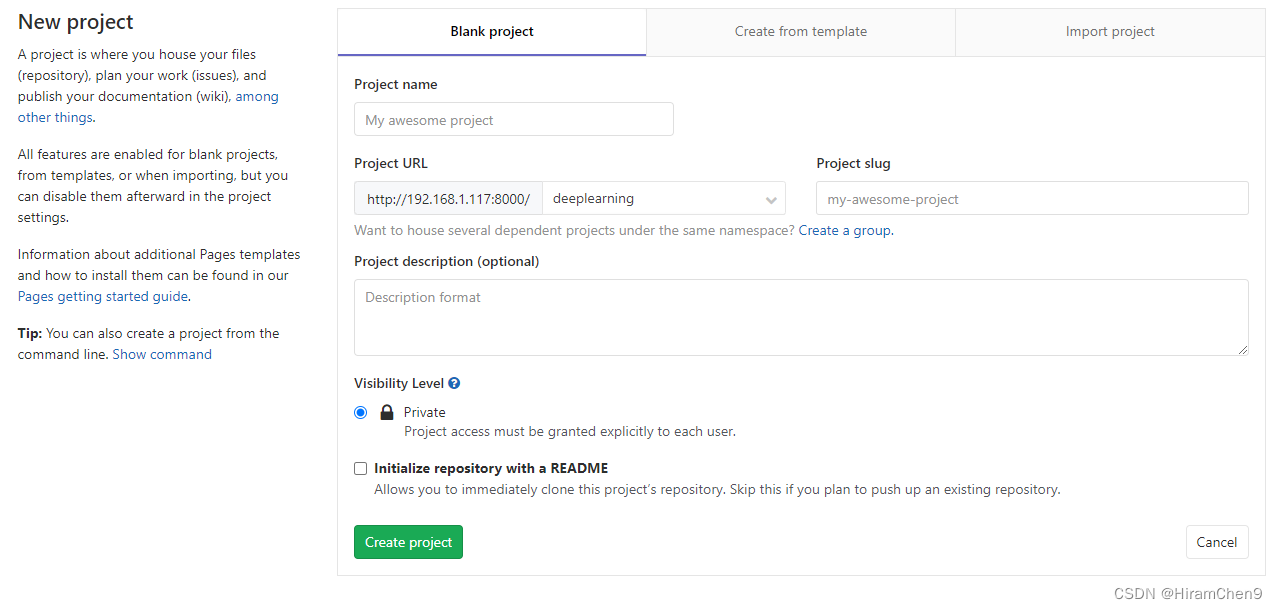
创建新项目
-
添加项目属性
-
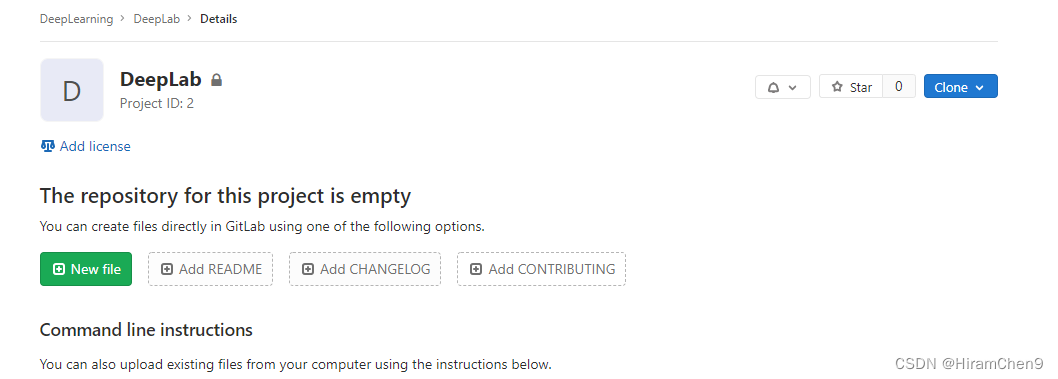
成功创建项目仓库
四、Git上传项目说明
-
下载Git并进入项目文件夹
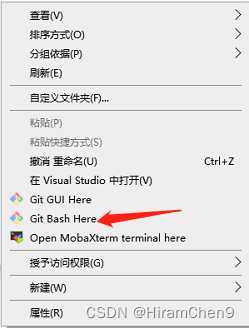
-
在命令行中输入Git命令
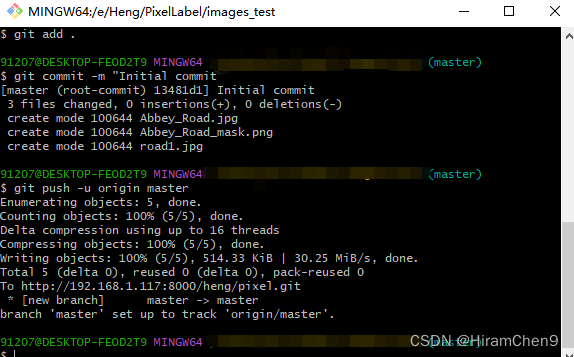
五、命令行指引 根据以下说明从计算机中上传现有文件:
-
设置Git全局配置
git config --global user.name "XX" git config --global user.email "XXX@163.com" -
创建新仓库并推送文件
git clone http://192.168.1.117:8000/deeplearning/deeplab.git cd deeplab touch README.md git add README.md git commit -m "add README" git push -u origin master -
推送现有文件夹
cd existing_folder git init git remote add origin [http://192.168.1.117:8000/deeplearning/deeplab.git](http://192.168.1.117:8000/deeplearning/deeplab.git) git add . git commit -m "Initial commit" git push -u origin master -
推送现有Git仓库
cd existing_repo
git remote rename origin old-origin
git remote add origin http://192.168.1.117:8000/deeplearning/deeplab.git
git push -u origin --all
git push -u origin --tags
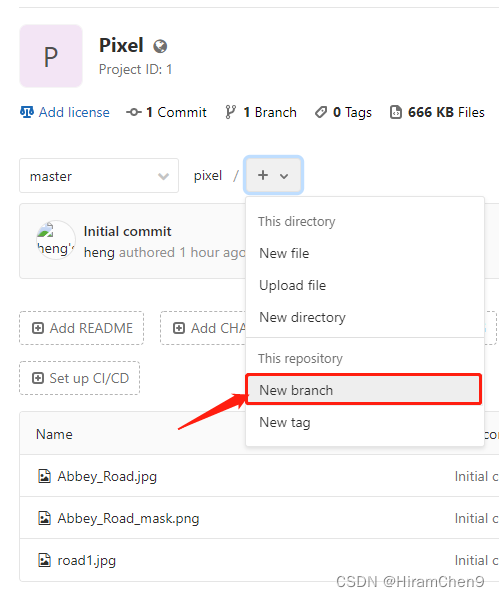
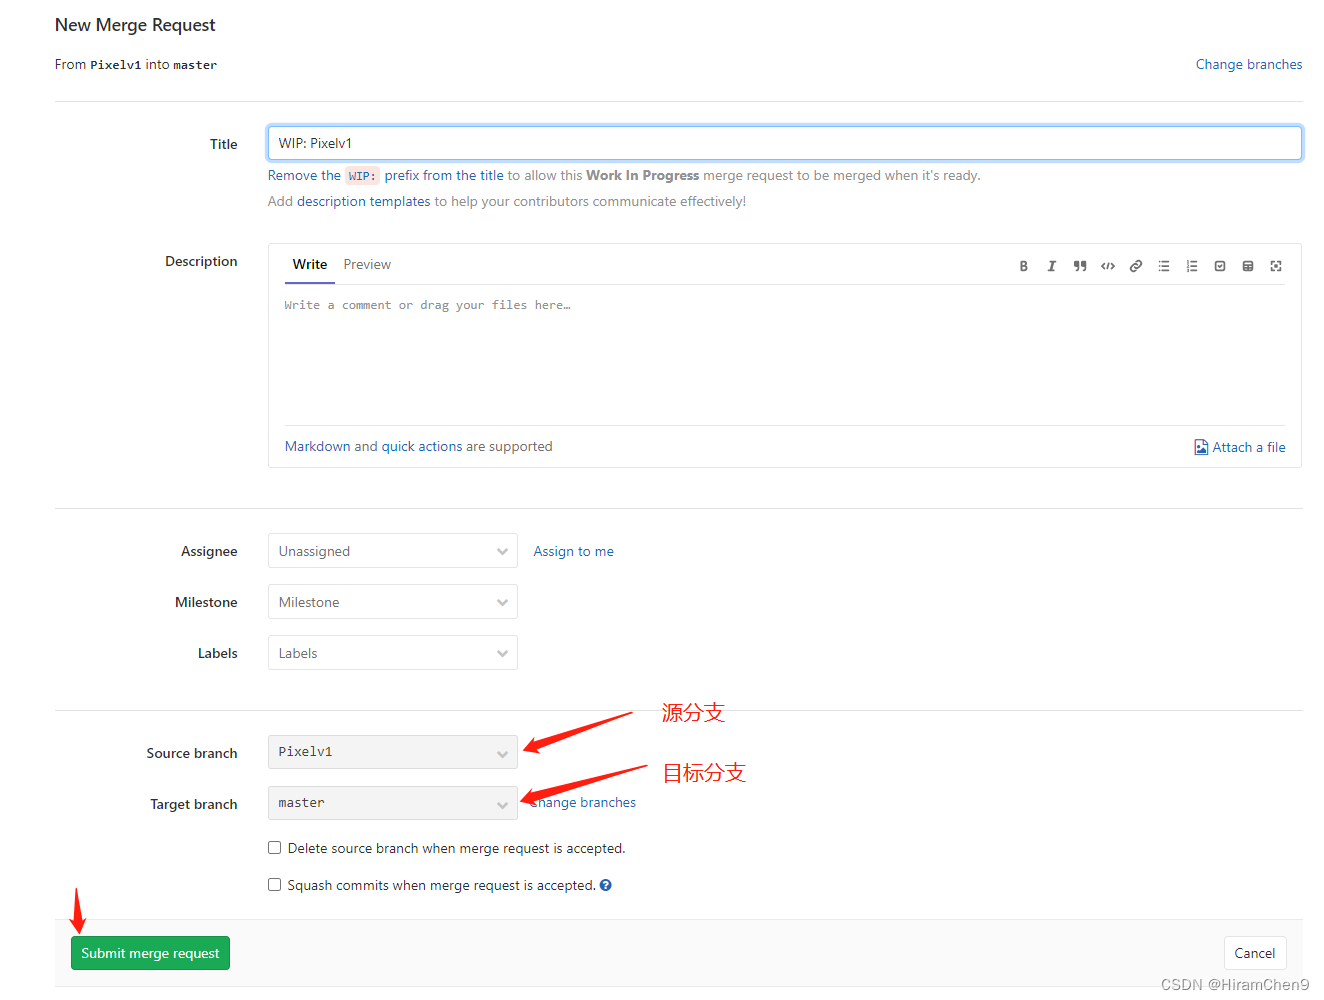
六、创建与合并分支
-
在主分支上创建新分支
-
合并分支
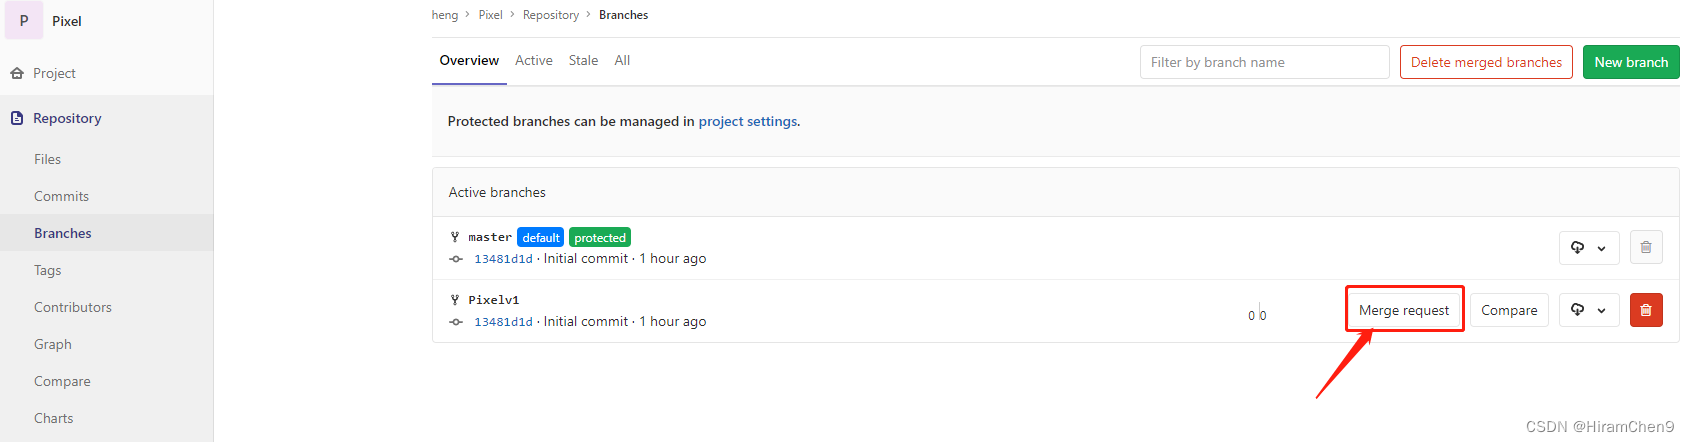
-
源分支为当前分支,目标分支默认为master,确认无误,点击提交
七、GitLab回滚到特定版本
-
在GitLab上查看并复制需要回滚的版本序列号

-
本地文件回滚
$ git reset --hard 5a572cb964f1713d4cc24b8dd86e0e70e7eb9e18 -
服务器代码回滚
$ git push -f
八、数据备份与恢复
-
更改备份数据生成目录
默认会在/var/opt/gitlab/backups目录下创建tar压缩包
修改 /etc/gitlab/gitlab.rb里的Backup Settings

然后重载一下配置文件
gitlab-ctl reconfigure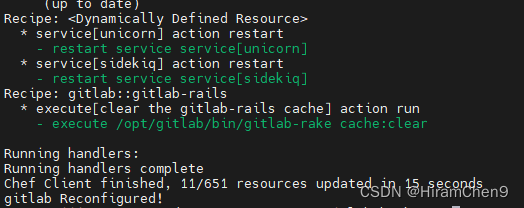
-
创建备份文件
gitlab-rake gitlab:backup:create切换到backups目录查看生成的tar包

-
数据恢复
(1)将备份文件权限修改为777,进行文件解压
chmod 777 1659009687_2022_07_28_12.1.4_gitlab_backup.tar(2)停止数据连接服务
gitlab-ctl stop unicorn
gitlab-ctl stop sidekiq
(3)进行数据恢复
gitlab-rake gitlab:backup:restore BACKUP=1659009687_2022_07_28_12.1.4
九、docker中创建gitlab
-
搜索gitlab镜像
docker search gitlab -
创建容器
docker run -d -p 443:443 -p 8000:80 \ --name gitlab \ --restart always \ --privileged=true \ -v /srv/gitlab/config:/etc/gitlab \ -v /srv/gitlab/logs:/var/log/gitlab \ -v /srv/gitlab/data:/var/opt/gitlab \ -v /etc/localtime:/etc/localtime:ro \ gitlab/gitlab-ce -
访问gitlab
http://主机IP:8000
GIT 常用命令
一、git安装后-指定名称和邮箱
xml
$ git config --global user.name "Your Name"

$ git config --global user.email "email@example.com"
二、创建版本库
xml
$ mkdir learngit	//创建
$ cd learngit	//使用
$ pwd	//查看当前目录
$ git init	//初始化,生成.git文件(若该文件隐藏,则使用ls -ah)
三、把文件添加add和提交commit到版本库
$ git add test.txt	//添加
$ git commit -m "wrote a test file"	//提交
$ git commit -m "add 3 files."		//一次性提交多个文件
注意:必须在当前版本库和当前目录下
四、版本控制
$ git log	//查看提交历史记录,从最近到最远,可以看到3次
$ git log --pretty=oneline	//加参,简洁查看
$ git reflog	//查看每一次修改历史
$ cat test.txt	//查看文件内容
$ git status	//查看工作区中文件当前状态
$ git reset --hard HEAD^(HEAD~100)(commit id)	//回退版本
$ git checkout -- test.txt	//丢弃工作区的修改,即撤销修改
$ git reset HEAD test.txt	//丢弃暂存区的修改(若已提交,则回退)
五、删除文件
$ rm test.txt
//直接删除
$ git rm test.txt
$ git commit -m "remove test.txt"
//删错了,恢复
$ git checkout -- test.txt
六、远程仓库
$ ssh-keygen -t rsa -C "youremail@example.com"	//创建SSH Key
$ git remote add origin git@github.com:Daisy/AKgit.git	//关联
$ git push -u origin master	//将本地内容推送到远程仓库(第一次)
$ git push origin master	//将本地内容推送到远程仓库(之后)
$ git remote -v        //查看远程仓库信息
$ git remote rm origin	//删除远程仓库(解绑)
$ git clone git@github.com: Daisy/AKgit.git	//克隆远程仓库
//克隆之后使用和查看
$ cd gitskills
$ ls
$ git remote	//查看远程库的信息
$ git remote -v	//查看远程库的详细信息
七、多人协作
$ git checkout -b dev	//创建并切换到分支dev
//创建并切换到分支dev,同上
$ git branch dev	//创建
$ git checkout dev	//切换
//新版本
$ git switch -c dev	//创建并切换到分支dev
$ git switch master	//直接切换分支
$ git branch		//查看当前分支
$ git merge dev	(--no-ff)(-m)//合并,把dev分支的工作成果合并到master分支上
$ git branch -d dev	//删除dev分支
$ git stash	//将现场储藏起来
$ git stash list	//查看储存的工作现场
//恢复和删除
$ git stash apply
$ git stash drop
//恢复并删除
$ git stash pop
$ git cherry-pick 4c805e2	//复制修改
$ git push origin master(dev)	//推送分支
$ git checkout -b dev origin/dev	//创建远程origin的dev分支到本地
$ git pull	//抓取分支(解决冲突)
$ git branch --set-upstream-to=origin/dev dev//指定本地与远程dev的链接
$ git rebase	//把本地未push的分叉提交历史整理成直线
八、标签管理
$ git tag v1.0	//打标签
$ git tag -a v0.1 -m "version 0.1 released" 1094adb //指定标签名和说明文字
$ git tag	//查看所有标签
//若是忘记打,则查找历史提交commit id ,再打上
$ git log --pretty=oneline --abbrev-commit
$ git tag v0.9 f52c633
$ git show v0.9		//查看标签详细信息
$ git tag -d v0.1	//删除标签
$ git push origin v1.0	//推送标签到远程
$ git push origin --tags	//一次性推送全部本地标签
//删除标签,(若已推送到远程,先从本地删除,从远程删除)
$ git tag -d v0.9
$ git push origin :refs/tags/v0.9
九、自定义git
$ git config --global color.ui true	//让git显示颜色

//忽略特殊文件
//.gitignore文件
# Windows:
Thumbs.db
ehthumbs.db
Desktop.ini
# Python:
*.py[cod]
*.so
*.egg
*.egg-info
dist
build
# My configurations:
db.ini
deploy_key_rsa
//把该文件也提交到git
$ git add -f App.class		//强制添加被忽略的特殊文件
$ git check-ignore -v App.class	//检查哪个规则出错
# 排除所有.开头的隐藏文件:
.*
# 排除所有.class文件:
*.class
# 不排除.gitignore和App.class:
!.gitignore
!App.class

$ git config --global alias.st status	//配置别名
$ git config --global alias.unstage 'reset HEAD'  //配置操作别名
$ git config --global alias.last 'log -1'	//显示最后一次提交信息
$ git last	//显示最近一次的提交
$git config --global alias.lg "log --color --graph --pretty=format:'%Cred%h%Creset -%C(yellow)%d%Creset %s %Cgreen(%cr) %C(bold blue)<%an>%Creset' --abbrev-commit"  //颜色
$ cat .git/config //查看每个仓库的git配置文件
$ cat .gitconfig  //查看当前用户的git配置文件
!App.class
$ git config --global alias.st status //配置别名
$ git config --global alias.unstage 'reset HEAD' //配置操作别名
$ git config --global alias.last 'log -1' //显示最后一次提交信息
$ git last //显示最近一次的提交
$git config --global alias.lg "log --color --graph --pretty=format:'%Cred%h%Creset -%C(yellow)%d%Creset %s %Cgreen(%cr) %C(bold blue)<%an>%Creset' --abbrev-commit" //颜色
$ cat .git/config //查看每个仓库的git配置文件
$ cat .gitconfig //查看当前用户的git配置文件