1 前言
- MongoDB 是为快速开发互联网应用而设计的数据库系统。
- MongoDB 的设计目标是极简、灵活、作为 Web 应用栈的一部分。
- MongoDB 的数据模型是面向文档的,所谓文档是一种类似于json的结构。
官网教程:https://www.mongodb.com/docs/manual/
2 安装部署
- MongoDB 的版本偶数版本为稳定版,奇数版本为开发版。
- MongoDB 对为 32 位系统支持不佳,所以3.2版本疑惑没有再对32位系统的支持。
- 在6.0版本以后,MongoDB 将客户端与服务端进行了分离需要进行单独下载。
本次安装环境如下:
| 程序 | 版本 |
|---|---|
| MongoDB | 7.0.6 |
| Mongosh | 2.1.4 |
2.1 windows 安装
2.1.1 windows (Server端)
下载
https://www.mongodb.com/try/download/community
配置环境变量:
C:\Program Files\MongoDB\Server\7.0\bin
创建数据库存放目录:
C:\data\db
2.1.2 windows (客户端)
下载方式一:
在服务端版本中,自带powershell下载脚本: InstallCompass.ps1
2.2 cents7 安装
2.2.1 server 下载安装
https://www.mongodb.com/download-center/community/releases
下载方式二:
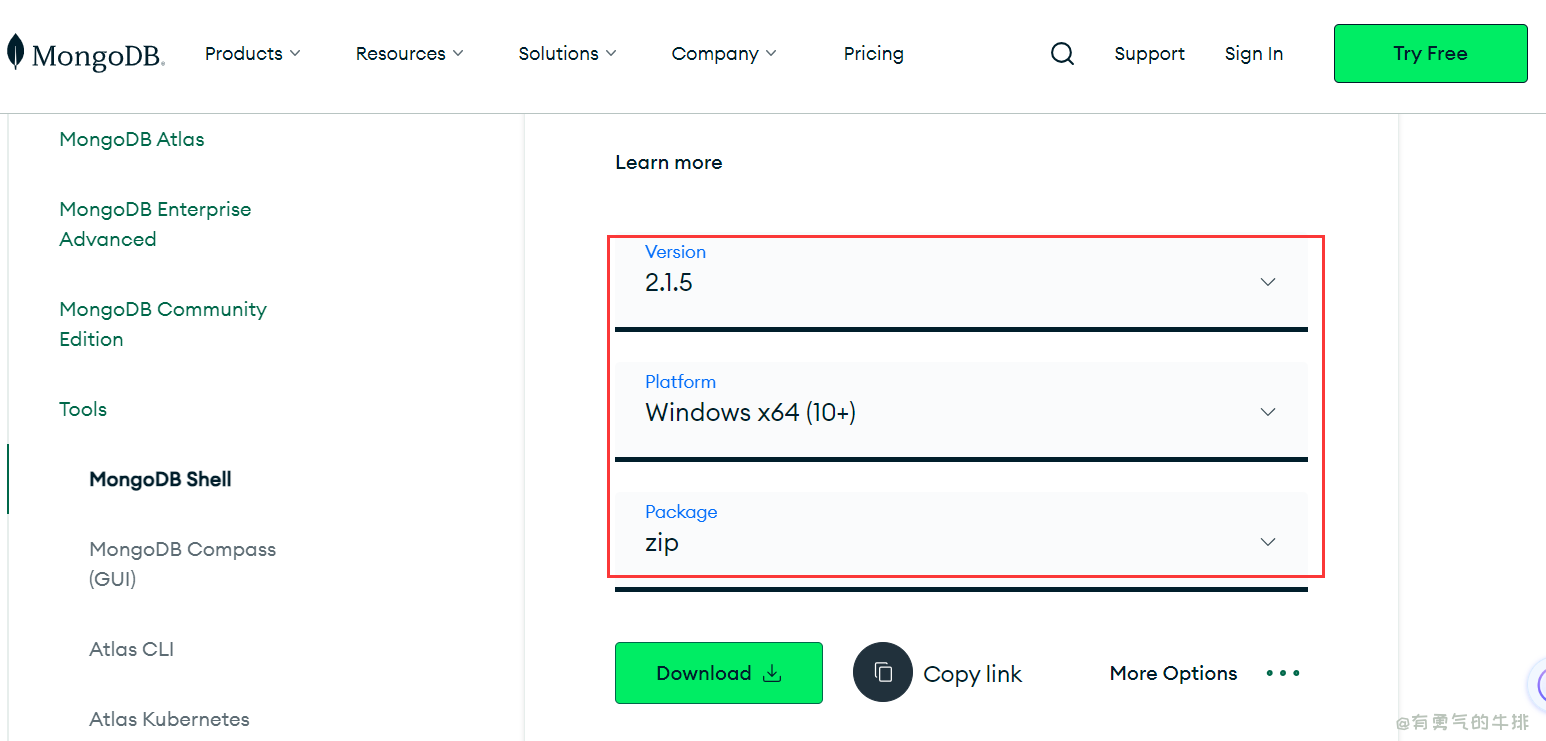
https://www.mongodb.com/try/download/shell

shell
wget https://fastdl.mongodb.org/osx/mongodb-macos-x86_64-7.0.6.tgz
shell
tar -zxvf mongodb-linux-x86_64-rhel70-7.0.6.tgz
mv mongodb-linux-x86_64-rhel70-7.0.6 mongodb
cd mongodb
将MongoDB服务添加到 service 启动
2.2.2 客户端
https://github.com/mongodb-js/mongosh/releases
shell
tar -zxvf mongosh-2.1.4-linux-x64.tgz
mv mongosh-2.1.4-linux-x64 mongosh
2.2.3 环境变量
shell
vim /etc/profile
shell
export PATH=/usr/local/mongodb/mongodb/bin:$PATH
export PATH=/usr/local/mongodb/mongosh/bin:$PATH
shell
source /etc/profile2.3 Docker容器安装
3 服务端启动
原创:有勇氣的牛排
https://www.couragesteak.com/article/458
2.3 配置服务端 mongodb.conf
shell
mkdir -p /usr/local/mongodb/{db, log}
chmod 777 /usr/local/mongodb/*
shell
vim /usr/local/mongodb/mongodb.confsystemLog:
destination: file
logAppend: true
path: "/usr/local/mongodb/log/mongod.log"
storage:
dbPath: "/usr/local/mongodb/db"
processManagement:
fork: true
pidFilePath: "/usr/local/mongodb/mongod.pid"
timeZoneInfo: "/usr/share/zoneinfo"
net:
port: 27017
bindIp: 0.0.0.0
security:
authorization: enabled3.1 配置文件启动/关闭
启动
shell
mongod --config /usr/local/mongodb/mongodb.conf关闭
shell
mongod -f /usr/local/mongodb/mongodb.conf --shutdown3.2 查看是否启动
查看进程
shell
ps -ef | grep mongodb
检查端口
shell
netstat -tunlp | grep mongo
3.4 停止服务
kill进程(不推荐)
shell
kill -9 进程号MongoDB 内置命令
shell
db.shutdownServer()3.5 安全优化
3.5.1 不推荐root启动
创建普通用户mongo(禁用登录),运行mogod服务端
shell
# 创建一个名为 "mongo" 的用户组,-g 777 指定组标识符(GID)为 777
groupadd mongo -g 777

# 创建一个属于 "mongo" 用户组的用户 "mongo"
# -g 777 指定主组为 "mongo",-M 表示不创建用户的主目录
# -s /sbin/nologin 指定用户登录时使用的Shell为 /sbin/nologin,通常用于服务账号
useradd mongo -g 777 -M -s /sbin/nologin

# 查看用户 "mongo" 的详细信息,包括用户标识符(UID)、组标识符(GID)等
id mongo
3.5.2 启动脚本 systemd.service 脚本
shell
vim /etc/systemd/system/mongodb.service
conf
[Unit]
Description=mongodb
After=network.target remote-fs.target nss-lookup.target

[Service]
Type=simple
ExecStart=/usr/local/mongodb/mongodb/bin/mongod --config /usr/local/mongodb/mongodb.conf
ExecReload=/bin/kill -s HUP $MAINPID
ExecStop=/usr/local/mongodb/mongodb/bin/mongod --config /usr/local/mongodb/mongodb.conf --shutdown
PrivateTmp=true

[Install]
WantedBy=multi-user.target
目录授权
shell
sudo chown -R mongo:mongo /usr/local/mongodb/*重载配置文件
shell
systemctl daemon-reload启动并且设置开机启动
shell
systemctl start mongodb关闭
shell
systemctl stop mongodb查看启动状态
shell
systemctl status mongodb设置永久开机自启
shell
systemctl enable mongodb3.5.3 大内存页 关闭 hugepage
必须永久生效
shell
vim /etc/rc.d/rc.local
shell
echo "never" > /sys/kernel/mm/transparent_hugepage/enabled
echo "never" > /sys/kernel/mm/transparent_hugepage/defrag
添加执行权限
shell
chmod +x /etc/rc.d/rc.local4 客户端连接
4.1 基本连接
规则如下:
shell
mongo ip:port/数据库 -u 用户名 -p 密码案例
shell
# 无用户验证
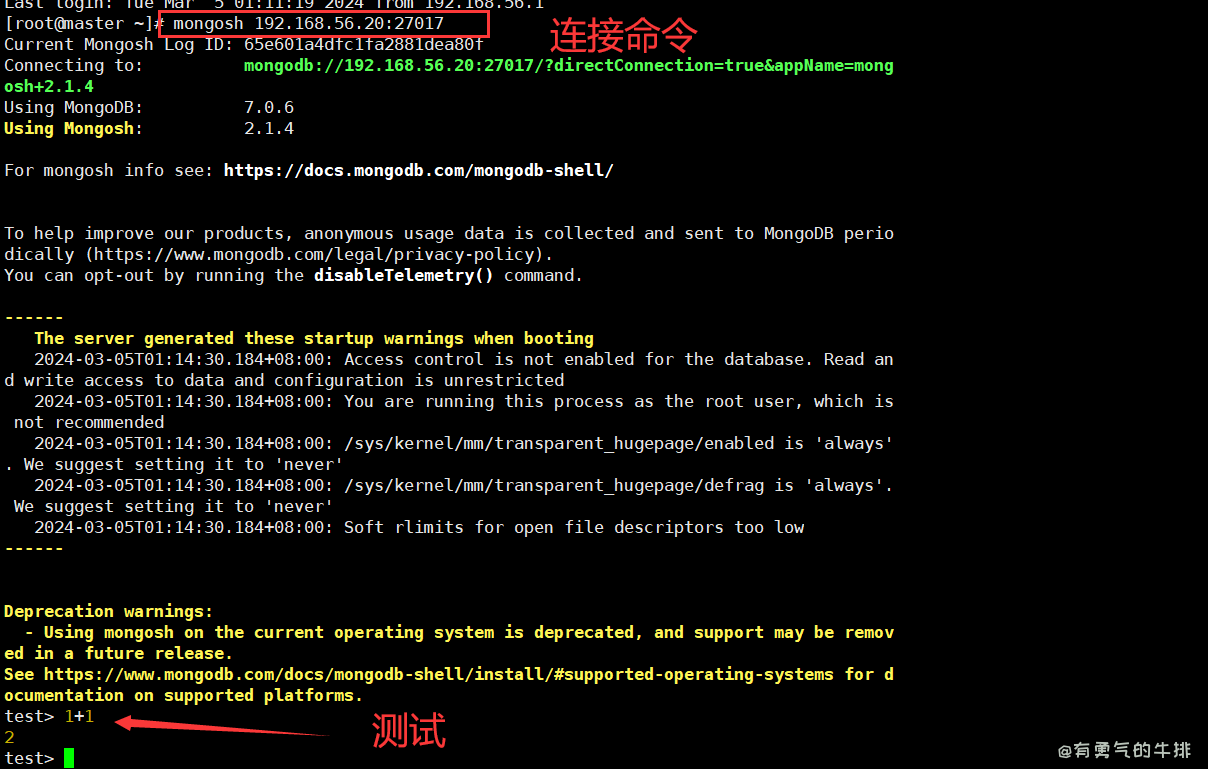
mongosh 192.168.56.20:27017

# 用户验证
mongosh 192.168.56.20:27017 -u cs_admin -p 123456
程序连接
shell
mongodb://<username>:<password>@node1:27017,node2:27017,node3:27017/?replicaSet=myReplicaSet4.2 初始化管理员用户
然后,在 MongoDB shell 中执行以下命令创建一个管理员用户(确保替换 <admin_username> 和 <admin_password> 为实际的用户名和密码):
shell
use admin
shell
db.createUser({
      user: "cs_admin",
      pwd: "123456",
      roles: [{ role: "userAdminAnyDatabase", db: "admin" }]
})
启动
shell
mongod --config /usr/local/mongodb/mongodb.conf关闭
shell
mongod -f /usr/local/mongodb/mongodb.conf --shutdown5 mongo-express 可视化管理
shell
vim docker-compose.yml
shell
version: '3'
services:
  mongo-express:
    image: mongo-express
    environment:
      - ME_CONFIG_MONGODB_SERVER=mongo  # 指定 MongoDB 服务器的主机名(这是 MongoDB 容器的服务名称)
    ports:
      - "8081:8081"
    depends_on:
      - mongo
  mongo:
    image: mongo
    ports:
      - "27017:27017"
yaml
version: '3'
services:
  mongo-express:
    image: mongo-express
    environment:
      - ME_CONFIG_MONGODB_SERVER=mongo  # 指定 MongoDB 服务器的主机名(这是 MongoDB 容器的服务名称)
    ports:
      - "8081:8081"
启动
shell
docker-compose up -d6 数据库操作
授权用户数据库
创建超级用户
shell
db.createUser({user:"admin",pwd:"123456",roles:[{role:"userAdminAnyDatabase",db:"admin"},{role:"readWriteAnyDatabase",db:"admin"}]})


// readWriteAnyDatabase:只在admin数据库中可用,赋予对应用户所有数据库的读写权限
// userAdminAnyDatabase:只在admin数据库中可用,赋予对应用户所有数据库的userAdmin权限
shell
db.auth("admin","123456")创建新数据库
shell
use cs_tool
db.test.insert({})
切换到数据库 cs_tool,创建一个读写用户
shell
db.createUser({user:"user_B",pwd:"123456",roles:[{role:"readWrite",db:"cs_tool"}]})6.1 创建/切换数据库
shell
use 数据库名
创建数据库后,只有有数据库后,库才会生成
6.2 查询
6.2.1 查询所有数据库
shell
show dbs
shell
test> show dbs
test				# 登录时默认的库
admin   132.00 KiB	# 系统预留库,Mongodb的系统管理库,如停止数据库进程,需进到这里
config  108.00 KiB	# 本地预留库,存储关键日志
local   256.00 KiB	# 配置信息库,保存如分片的信息
6.2.2 查询库中的集合
相当于:show tables;
shell
show collections6.2 删除数据库
shell
db.dropDatabse()5.2 创建集合、插入数据
shell
db.user.insertOne({name: "cs", age: "20", id: 1})报错、警告
open file too low
**Soft rlimits for open file descriptors too low**
shell
vim /etc/security/limits.conf
c
*         soft    nofile    64000
*         hard    nofile    64000
vm.max_map_count is too low
shell
sudo sysctl -w vm.max_map_count=262144为了使这个更改永久生效,您可以将其添加到 /etc/sysctl.conf 或 /etc/sysctl.d/ 下的一个文件中。
shell
echo "vm.max_map_count=262144" | sudo tee -a /etc/sysctl.conf