一、安装taro-cli
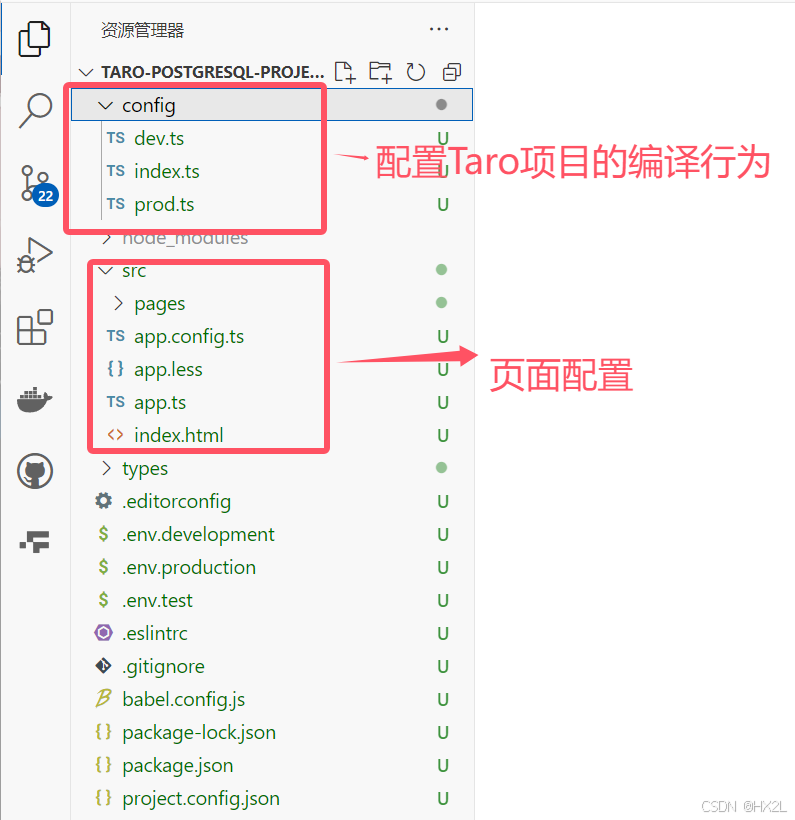
二、项目文件

三、项目搭建
1、Eslint配置
在项目生成的 .eslintrc 中进行配置
TypeScript
{
  "extends": ["taro/react"],          //一个配置文件,可以被基础配置中的已启用的规则继承
  "parser": "@babel/eslint-parser",  //指定ESLint解析器
  "rules": {
    "react/jsx-uses-react": "off",
    "react/react-in-jsx-scope": "off",
    "no-unused-vars": ["error", {"varsIgnorePattern":"Taro|wx"}],
    "no-mixed-spaces-and-tabs": 2,                //禁止混用tab和空格
    "no-debugger": 2,                             //禁用debugger
    "space-infix-ops": 2,                         //操作符周围要有空格
    "space-before-blocks": 2,                     //语句块之前要有空格
    "indent": [ "error", 2, {"SwitchCase": 1}],   //缩进风格,2个空格,switch语句的case后面也要有空格
    "jsx-quotes": [ "error", "prefer-double" ],   //jsx属性使用单引号
    "import/first":0                              //import语句放在文件开头
  }
}
2、工具
husky:git hook工具,用来配置npm脚本
lint-staged:检查本地代码的改动,只校验改动过的文件,大大提高校验效率
下载husky、lint-staged工具包
TypeScript
cnpm i -D husky lint-staged下载工具包之后,在package.json中进行配置
3、项目的全局配置(app.config.ts)
1、配置页面路由
用于指定小程序由哪些页面组成,每一项都对应一个页面的 路径 + 文件名 信息。文件名不需要写文件后缀,框架会自动去寻找对应位置的文件进行处理。
数组的第一项代表小程序的初始页面(首页)。小程序中新增/减少页面,都需要对 pages 数组进行修改
2、window
用于设置小程序的状态栏、导航条、标题、窗口背景色
3、tabBar
如果小程序是一个多 tab 应用(客户端窗口的底部或顶部有 tab 栏可以切换页面),可以通过 tabBar 配置项指定 tab 栏的表现,以及 tab 切换时显示的对应页面。
list 接受一个数组,只能配置最少 2 个、最多 5 个 tab。tab 按数组的顺序排序,每个项都是一个对象
具体配置代码如下:
TypeScript
export default defineAppConfig({
  pages: [                                                        // 页面
    'pages/index/index',
    'pages/order/order',
  ],
  window: {                                                       // 窗口
    backgroundTextStyle: 'light',
    navigationBarBackgroundColor: '#fff',
    navigationBarTitleText: 'WeChat',
    navigationBarTextStyle: 'black'
  },
  tabBar: {                                                       // 底部导航栏
    color: '#999',
    selectedColor: '#333',
    backgroundColor: '#fff',
    borderStyle: 'white',
    list: [
      {
        pagePath: 'pages/index/index',                             // 页面路径
        text: '首页',                                              // 文字
        iconPath: 'assets/images/index-unselected.png',            // 未选中图标
        selectedIconPath: 'assets/images/index-selected.png'       // 选中图标
      },
      {
        pagePath: 'pages/order/order',
        text: '订单',
        iconPath: 'assets/images/order-unselected.png',
        selectedIconPath: 'assets/images/order-selected.png'
      }
    ]
  }
})
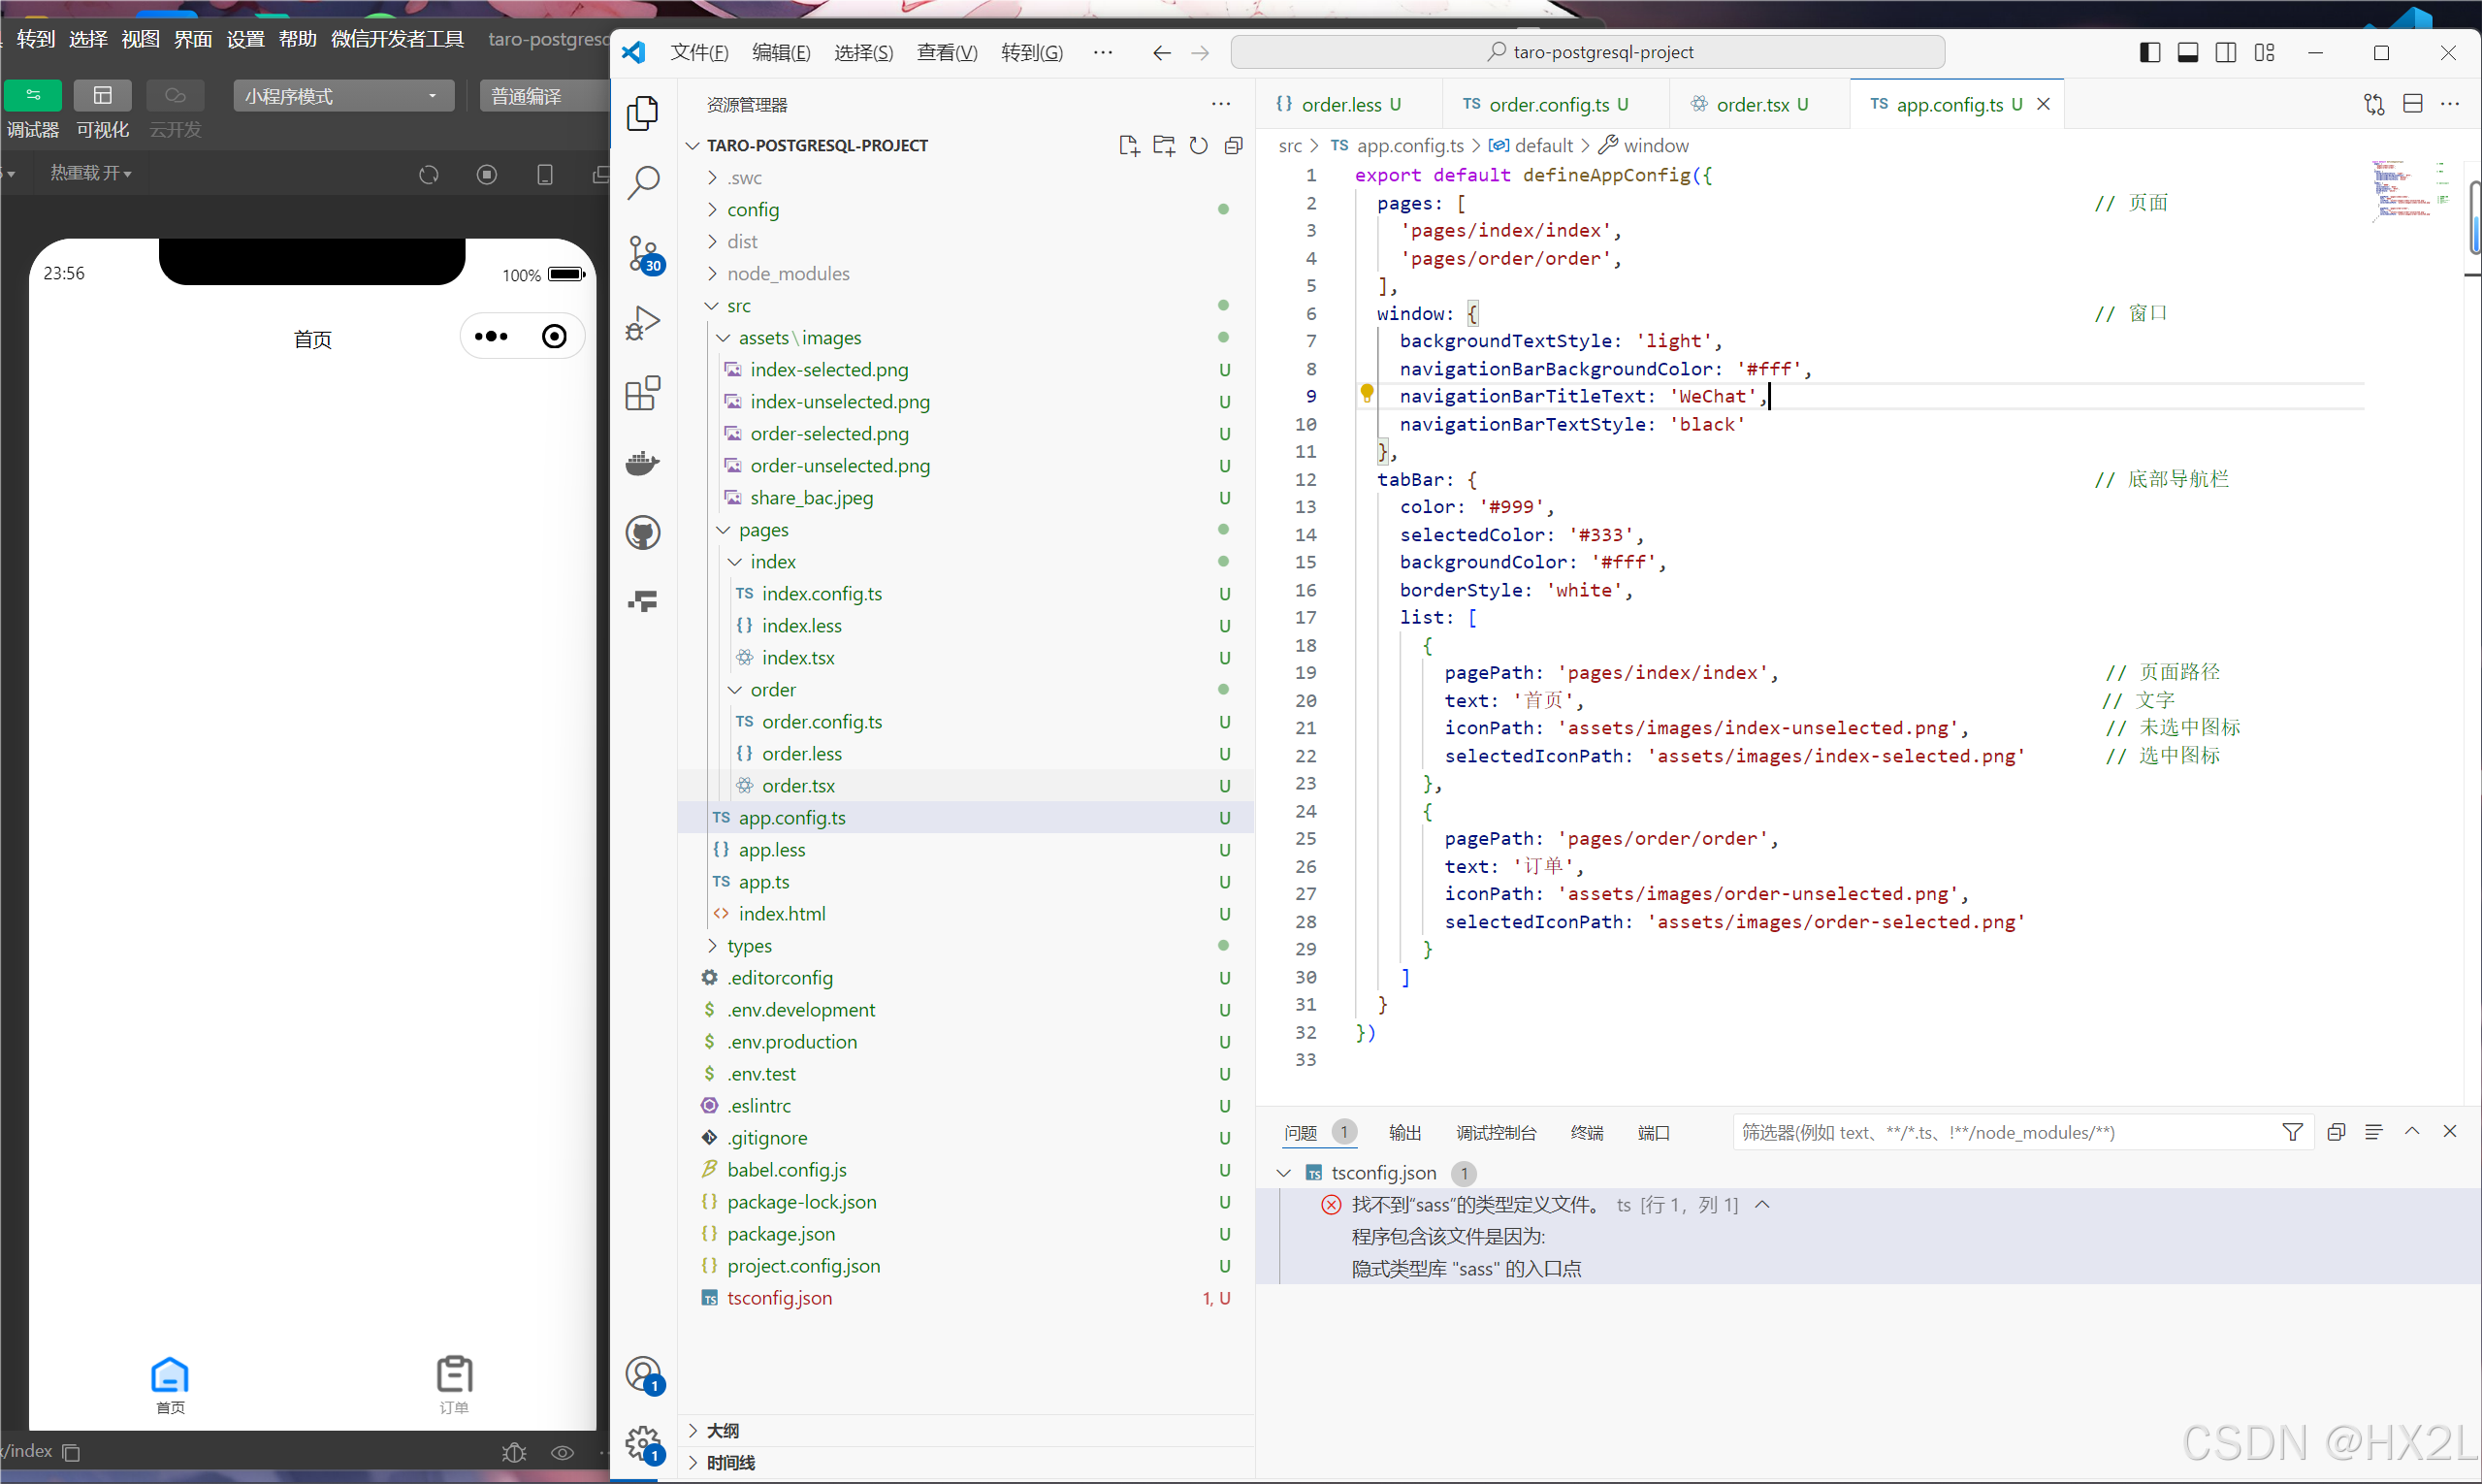
4、在微信开发者工具中展示小程序页面
执行编译命令
npm run dev:weapp执行命令后,会出现一个dist文件夹,使用微信开发者工具打开该文件夹即可查看小程序页面
运行展示页面:

四、具体页面编写
1、配置页面设置
配置【index.config.ts】文件
2、使用Taro中的组件库写页面
写首页顶部Tab【index.tsx】
TypeScript
import { View } from '@tarojs/components'         //从components中导出组件
import {  } from '@tarojs/taro'
import './index.less'
import { Component } from 'react'

//定义接口
class State {
  tabIndex: number;
  constructor () {
    this.tabIndex = 0;
  }
}


//获取tab的数据
const DEFAULT_TAB_LIST = [
  { title:'机票', tab:'flight', index: 0 },
  { title:'火车票', tab:'train', index: 1 },
  { title:'汽车票', tab:'car', index: 2 },
  { title:'酒店', tab:'boat', index: 3 },
]


export default class Index extends Component<{}, State> {

  //当前选中的tab
  constructor(props){
    super(props)
    this.state = {
      tabIndex: 0,       //默认选中第一个tab
    }
  }


  //点击事件切换tab
  switchTab = (index)=> {
    this.setState({
      tabIndex: index,
    })
  }

  render() {
    //接收tabIndex的最新值
    const { tabIndex } = this.state

    //动态计算行内样式
    const innerstyle = {
      width: `${100 / DEFAULT_TAB_LIST.length}%`,
      transform: `translateX(${tabIndex * 100 })`
    }


    return (
      <View className='index'>
        <View className='top'>
          <View className='index-tab'>
            {
              DEFAULT_TAB_LIST.map(item => (
                <view key={item.tab} className={`index_tab_item  ${item.tab}  ${tabIndex === item.index ? 'current' : ''}`} onClick={() => this.switchTab(item.index)}>
                  {item.title}
                </view>
              ))
            }
          </View>
          <View className='scrollbar' style={ innerstyle }></View>
        </View>
        {
          DEFAULT_TAB_LIST[tabIndex]['tab'] === "flight" ? (
            <View className='content'>flight</View>
          ) : <View className='content'>占位</View>
        }
      </View>
    )
  }
}
样式【index.less】
css
待补充自定义Tab组件
(以机票页为例)
在pages中新建文件夹【flight】->【新建文件夹index】->【新建index.tsx、index.less】
页面级的目录不需要index.config.tsx文件
导入依赖【index.tsx】