一、springboot整合mybatis
1.注解版
1.1 导入坐标
java
<dependencies>
        <!--mybatis坐标-->
        <dependency>
            <groupId>org.mybatis.spring.boot</groupId>
            <artifactId>mybatis-spring-boot-starter</artifactId>
            <version>2.2.2</version>
        </dependency>
        <!--mysql-->
        <dependency>
            <groupId>mysql</groupId>
            <artifactId>mysql-connector-java</artifactId>
            <version>8.0.29</version>
        </dependency>

        <dependency>
            <groupId>org.springframework.boot</groupId>
            <artifactId>spring-boot-starter-web</artifactId>
        </dependency>

        <dependency>
            <groupId>org.springframework.boot</groupId>
            <artifactId>spring-boot-starter-test</artifactId>
            <scope>test</scope>
        </dependency>
    </dependencies>
1.2 编写配置文件application.yml
java
#数据源
spring:
  datasource:
    username: root
    password: 123456
    url:  jdbc:mysql://localhost:3307/testdb?serverTimezone=GMT
    driver-class-name: com.mysql.cj.jdbc.Driver
1.3 准备实体类Account ,省略了有参无参 setter getter toString方法
java
public class Account {
    private int aid;
    private String aname;
    private int amoney;
}
1.4 编写mapper映射器接口
@Mapper//注册注入一个mapper
@MapperScan(basePackages ="com.ztt.mybatis_springboot.mapper")//注册注入多个mapper(以包为单位) )
注意:两者只能写一个
java
//@Mapper//注册注入一个mapper
public interface AccountMapper {
    @Select("select * from account")
    public List<Account> findAll();
}
1.5 编写测试类
java
@SpringBootTest
class MybatisSpringbootApplicationTests {
@Autowired(required = false)
AccountMapper accountMapper;
@Test
void contextLoads() {
List<Account> all=accountMapper.findAll();
for (int i = 0; i <all.size() ; i++) {
Account account=all.get(i);
System.out.println(account);
}
}
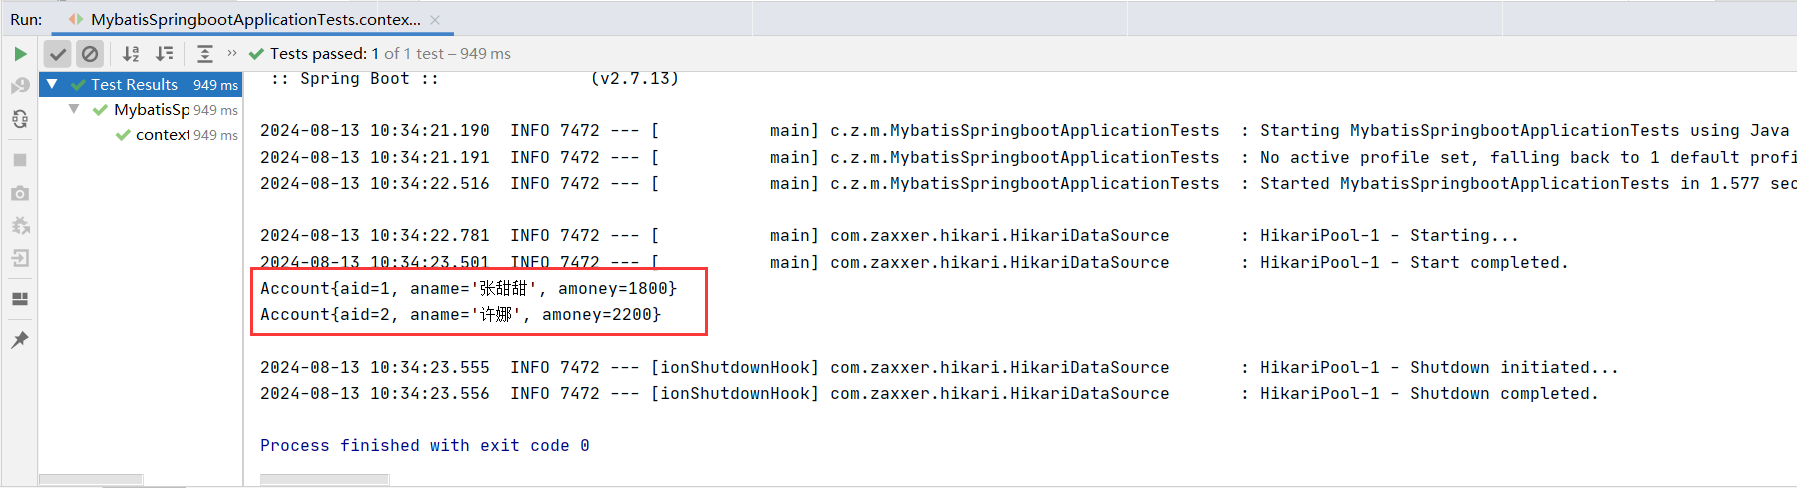
}1.6 输出结果
2.xml版
2.1 在接口中定义一个方法
java
public List<Account> find();2.2 编写xml文件,在resources目录下新建一个mapper包,在mapper包里面新建一个AccountMapper.xml文件
java
<?xml version="1.0" encoding="UTF-8"?>
<!DOCTYPE mapper PUBLIC "-//mybatis.org//DTD Mapper 3.0//EN" "http://mybatis.org/dtd/mybatis-3-mapper.dtd">


<mapper namespace="com.ztt.mybatis_springboot.mapper.AccountMapper">
    <select id="find" resultType="com.ztt.mybatis_springboot.pojo.Account">
        select * from account;
    </select>
</mapper>
2.3 在主配置文件中添加mybatis的配置
java
mybatis:
  mapper-locations: mappers/*.xml
2.4 编写测试类
java
@Test
void contextLoads1() {
List<Account> all=accountMapper.find();
for (int i = 0; i <all.size() ; i++) {
Account account=all.get(i);
System.out.println(account);
}
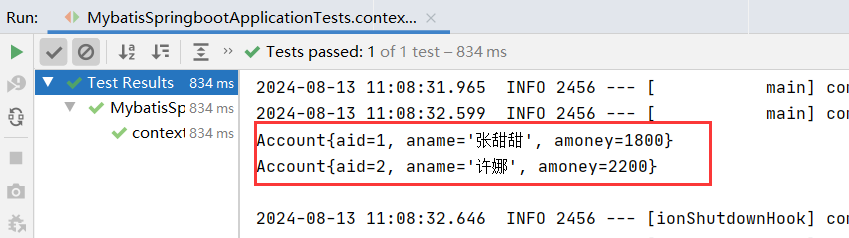
}2.5 输出结果
二、MyBatis-Plus
1.MyBatis-Plus介绍
MyBatis最佳搭档,只做增强不做改变,为简化开发、提高效率而生。
详细信息请看官方文档MyBatis-Plus 🚀 为简化开发而生
2.MyBatis-Plus使用步骤:
2.1.坐标
java
<dependency>
<groupId>com.baomidou</groupId>
<artifactId>mybatis-plus-boot-starter</artifactId>
<version>3.1.1</version>
</dependency>注意:mp坐标添加后,mybatis坐标移除
2.2 编写注解配置实体类与关系表映射关系(truncate清空表以及主键)
@TableName(value = "关联表名称")=========================》修饰在类
@TableField(value = "关联字段名称")======================》修饰在属性
exist = "忽略字段"
@TableId(type="指定主键生成策略,默认雪花算法")=============》修饰在属性
AUTO(0),
NONE(1),
INPUT(2),
ASSIGN_ID(3),
ASSIGN_UUID(4);
java
@TableName("account")
public class Account {
    @TableId(value = "aid",type = IdType.AUTO)
    private int aid;
    @TableField("aname")
    private String aname;
    @TableField("amoney")
    private int amoney;
}
2.3 使用
BaseMapper===========》公共的数据访问层
IService/ServiceImp==》公共的业务层
java
//@Mapper//注册注入一个mapper
public interface AccountMapper extends BaseMapper<Account> {

    @Select("select * from account")
    public List<Account> findAll();

    public List<Account> find();
}
2.4 配置yml文件
java
mybatis-plus:
  configuration:
    log-impl: org.apache.ibatis.logging.stdout.StdOutImpl
2.5 测试代码使用
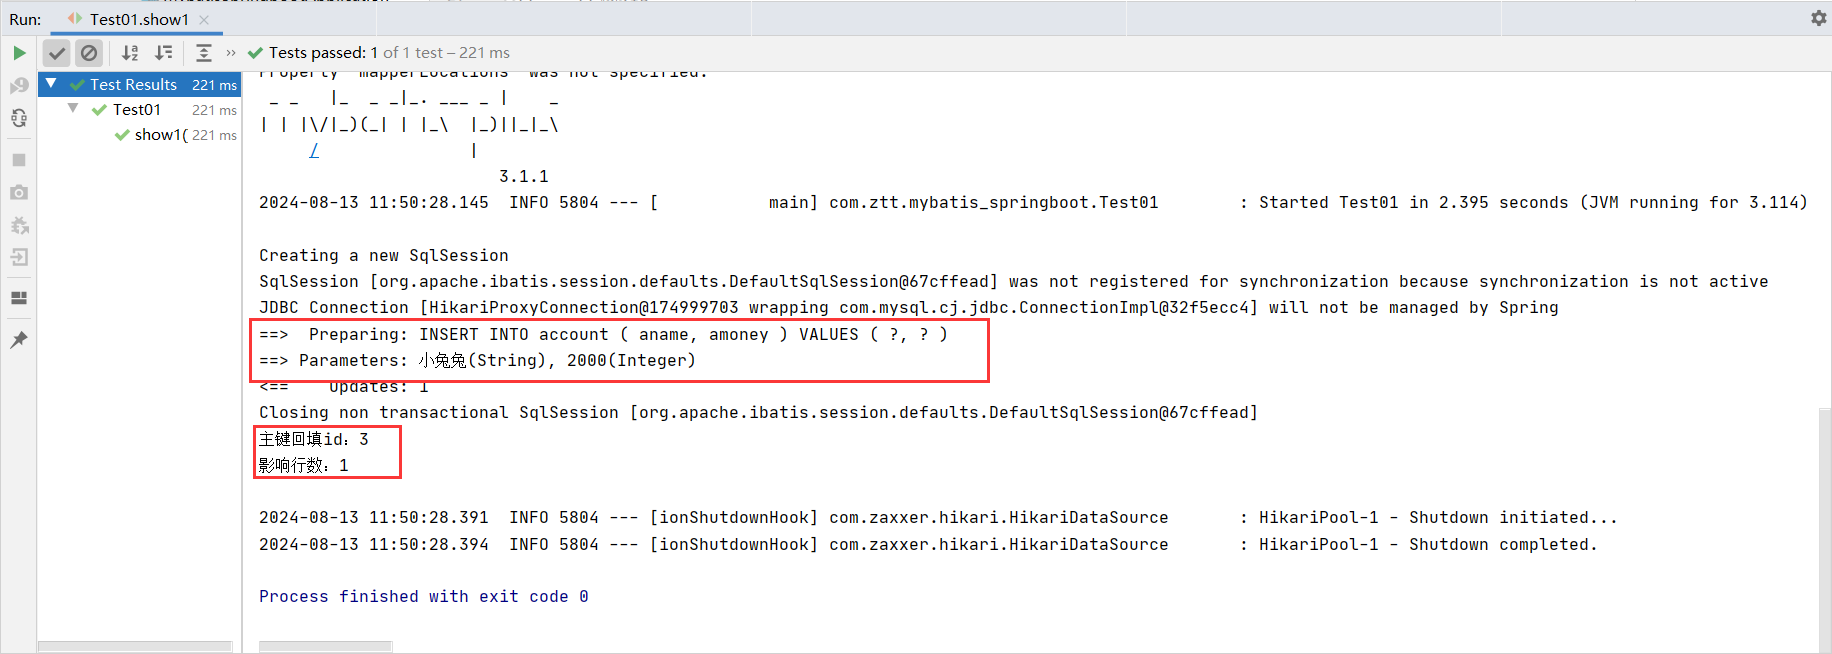
2.5.1 新增insert()
java
@SpringBootTest
public class Test01 {
@Autowired(required = false)
AccountMapper mapper;
//新增
@Test
public void show1(){
Account account = new Account("小兔兔", 2000);
int row = mapper.insert(account);
System.out.println("主键回填id:"+account.getAid());
System.out.println("影响行数:"+row);
}
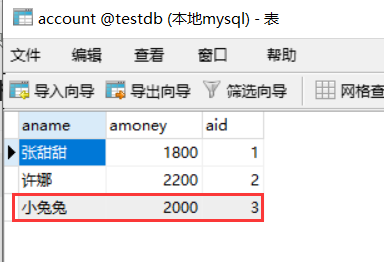
}输出结果:
查看数据库表,发现小兔兔添加成功
2.5.2 修改IDupdateById()
java
//修改ID
@Test
public void test02()throws Exception{
Account account = new Account(3,"小小兔",3000);
int row = mapper.updateById(account);
System.out.println("影响行数:"+row);
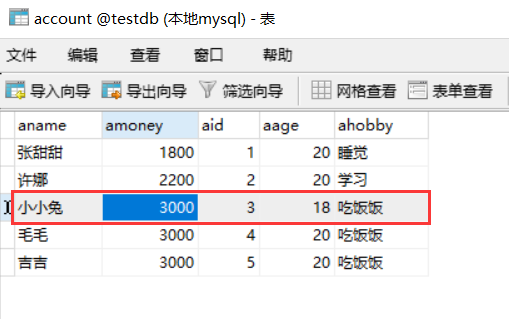
}输出结果:
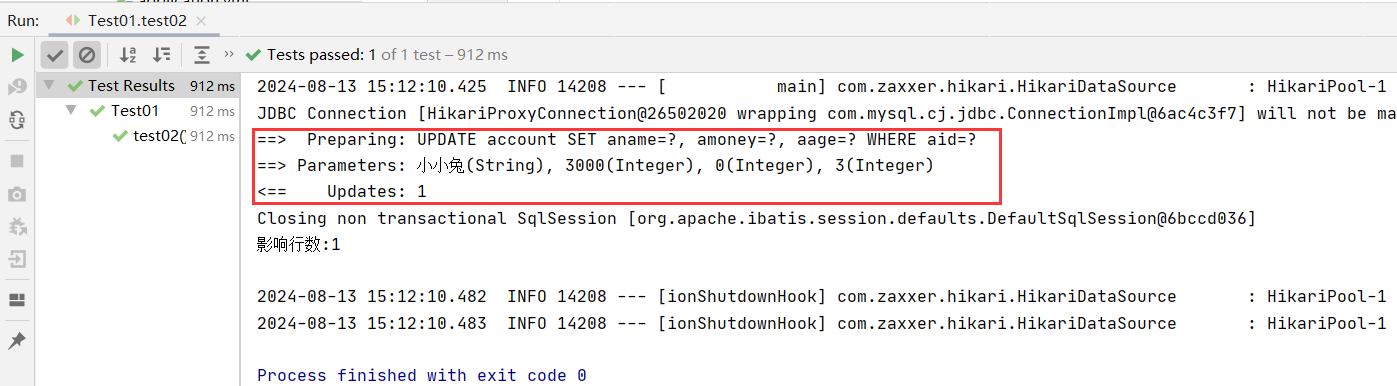
查看数据库表表中的小兔兔被改为小小兔,工资改为3000
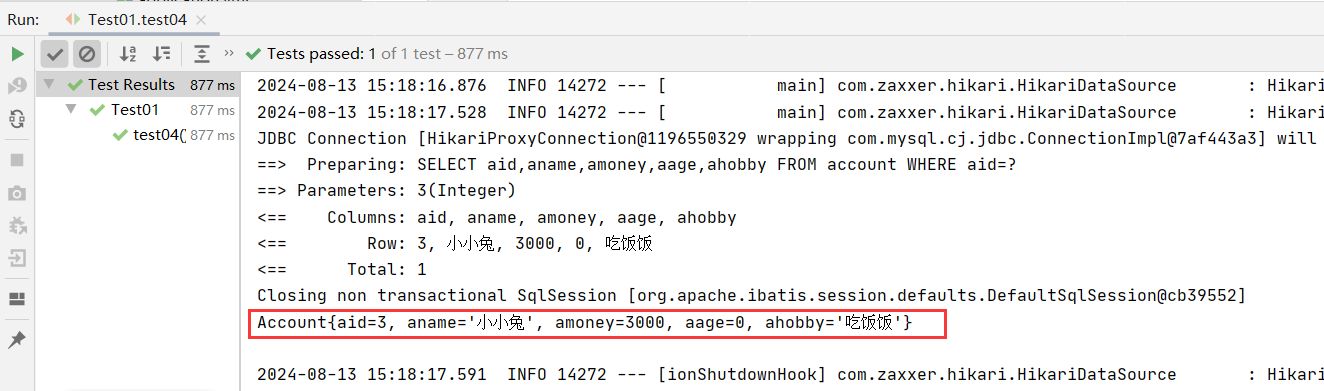
2.5.3 查询ID selectById()
java
 //查询ID
    @Test
    public void test04()throws Exception{
        Account account = mapper.selectById(3);
        System.out.println(account);
    }
输出结果:
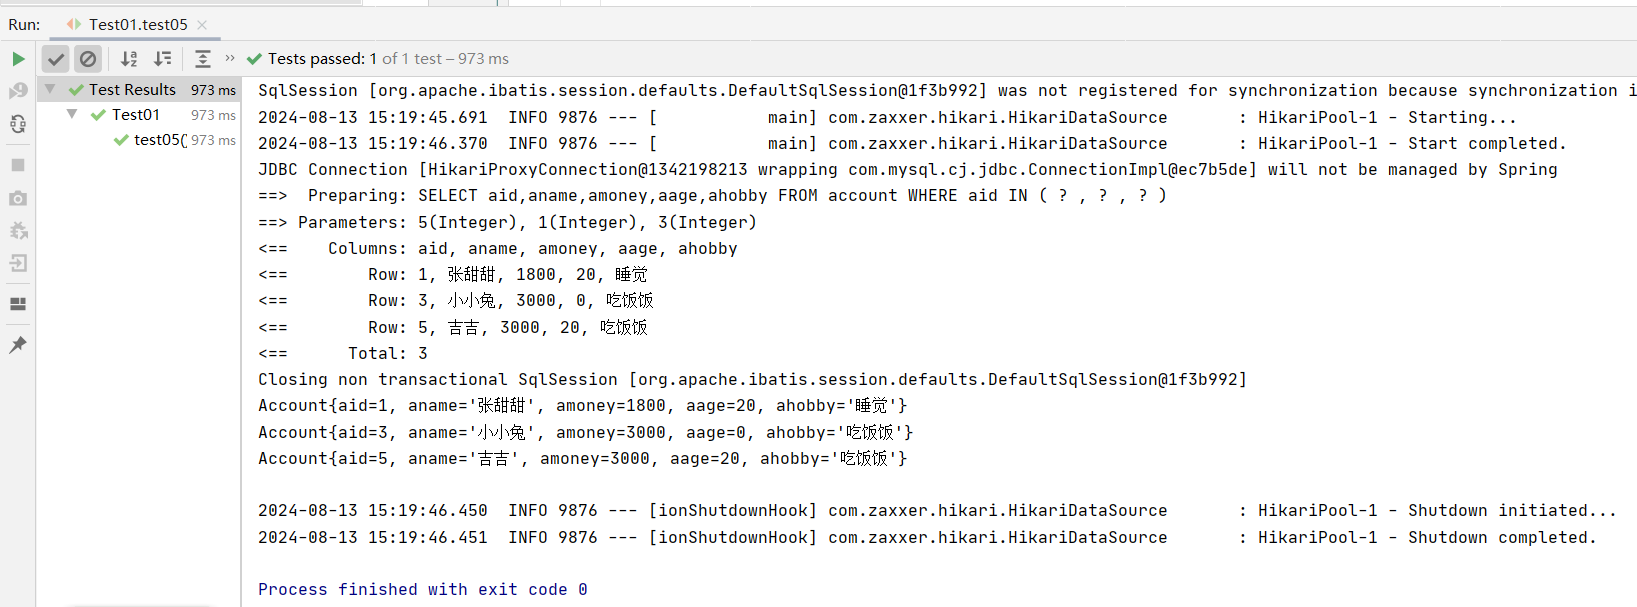
2.5.4 查询IDS selectBatchIds(Arrays.asList(5,1,3))
java
//查询IDS
    @Test
    public void test05()throws Exception{
        List<Account> list = mapper.selectBatchIds(Arrays.asList(5,1,3));
        for (int i = 0; i < list.size(); i++) {
            Account account =  list.get(i);
            System.out.println(account);
        }
    }
输出结果:
2.5.5 查询count selectCount(null)
java
//查询count
    @Test
    public void test06()throws Exception{
        int count = mapper.selectCount(null);
        System.out.println(count);
    }
输出结果:

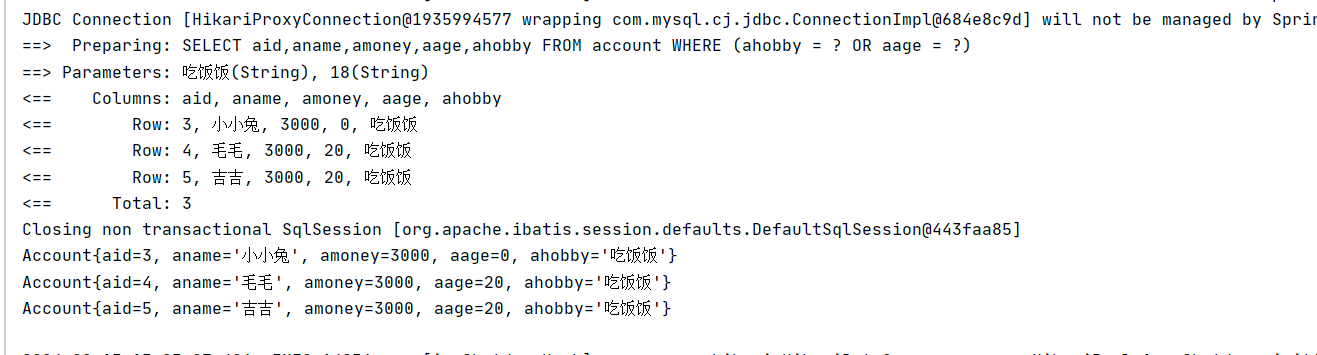
2.5.6 查询list selectList(queryWrapper)
java
//查询list
    @Test
    public void test07()throws Exception{
        QueryWrapper<Account> queryWrapper = new QueryWrapper();
//        queryWrapper.eq("ahobby","吃饭饭");
//        queryWrapper.eq("aage","18");
        queryWrapper.eq("ahobby","吃饭饭").or().eq("aage","18");

        List<Account> list = mapper.selectList(queryWrapper);
        for (int i = 0; i < list.size(); i++) {
            Account account =  list.get(i);
            System.out.println(account);
        }
    }
输出结果:
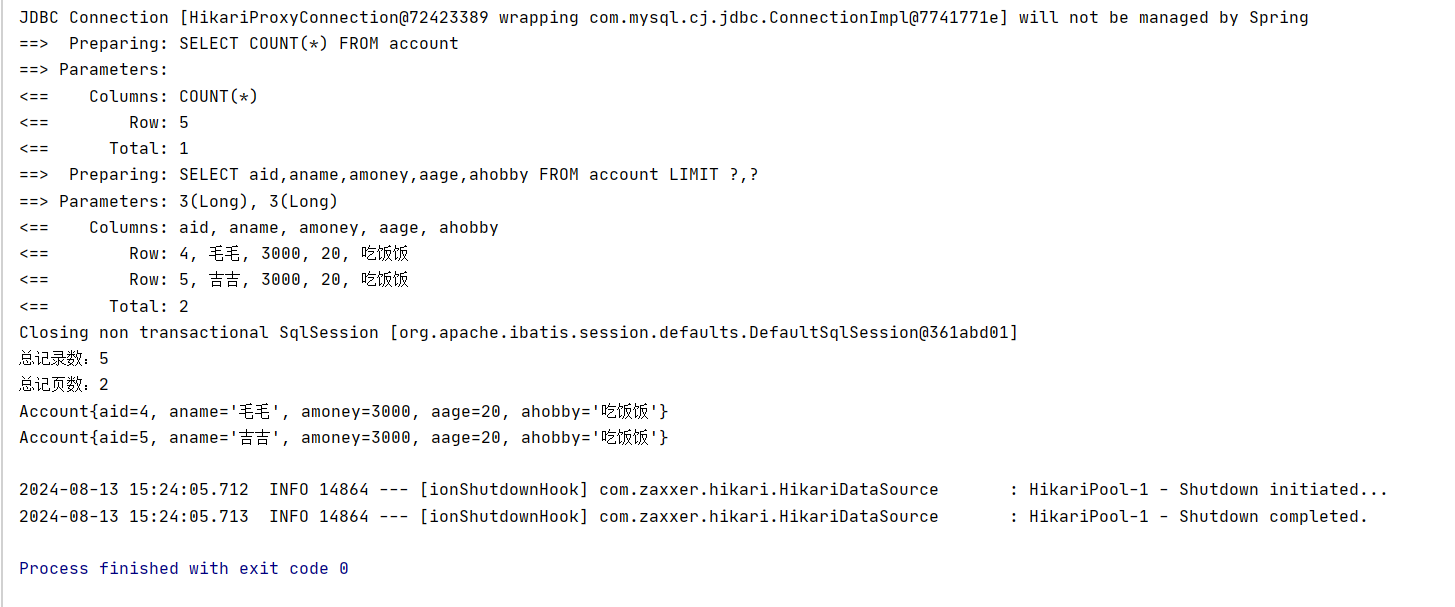
2.5.7 分页
mp分页使用:
注意:
1.page.setCurrent(2);当前页码从1开始
2.分页需要配置插件
java
@Test
    public void test08()throws Exception{

        //1.定义分页规则
        Page<Account> page = new Page<Account>();
        page.setSize(3);//每页记录数
        page.setCurrent(2);//当前页码

        //2.查询条件(可选)
        QueryWrapper queryWrapper = new QueryWrapper();

        IPage<Account> iPage = mapper.selectPage(page,null);

        List<Account> list = iPage.getRecords();//分页结果
        System.out.println("总记录数:"+iPage.getTotal());
        System.out.println("总记页数:"+iPage.getPages());

        for (int i = 0; i < list.size(); i++) {
            Account account =  list.get(i);
            System.out.println(account);
        }
    }
输出结果:
2.5.8 按照ID删除
java
//查询delete
    @Test
    public void test09()throws Exception{
        mapper.deleteById(4);
    }
输出结果:

LambdaQueryWrapper
1.按照条件查询
java
@SpringBootTest
public class Test02 {
@Autowired(required = false)
AccountMapper mapper;
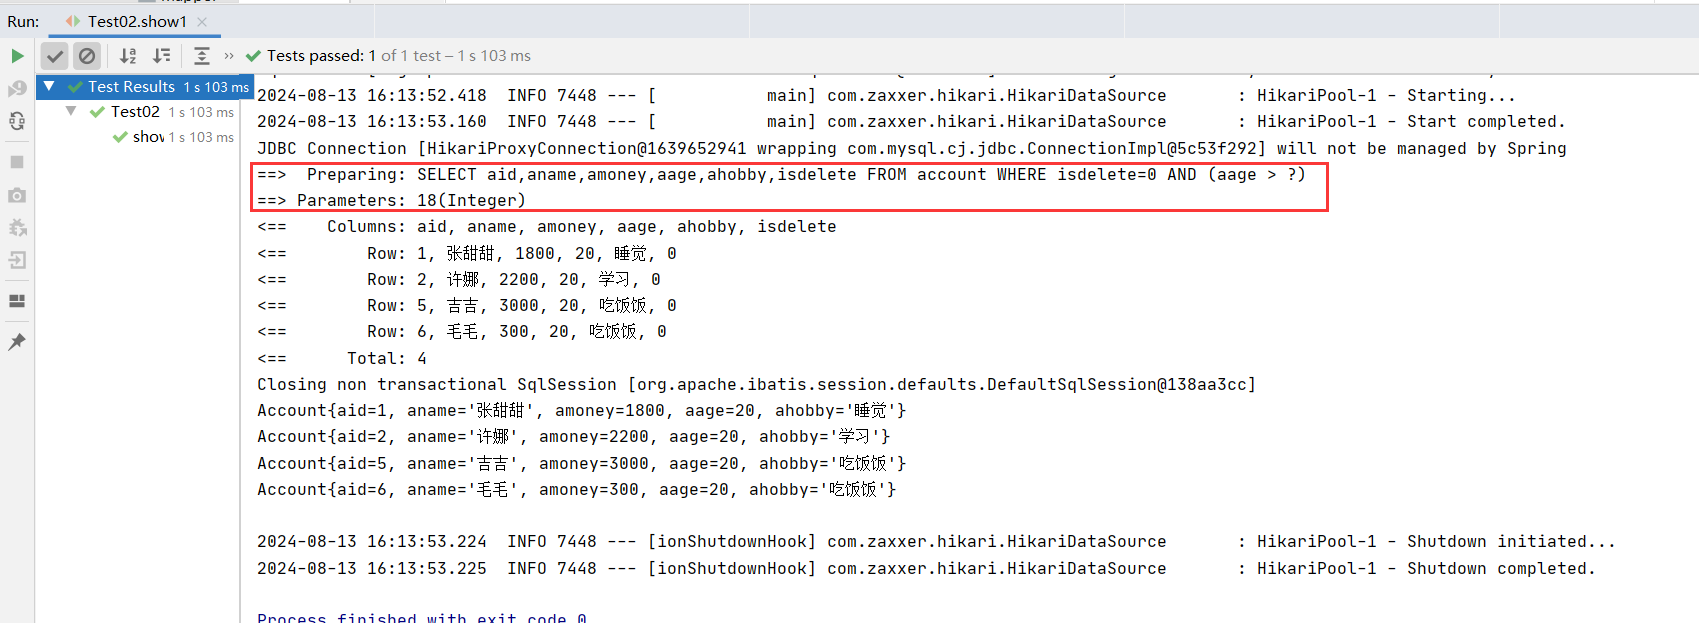
@Test
public void show1(){
//1.查询条件
LambdaQueryWrapper<Account> lambdaQueryWrapper=new LambdaQueryWrapper<Account>();
lambdaQueryWrapper.gt(Account::getAage,18);
//2.查询
List<Account> list=mapper.selectList(lambdaQueryWrapper);
for (int i = 0; i <list.size() ; i++) {
Account account=list.get(i);
System.out.println(account);
}
}输出结果:
2.模拟动态查询1
java
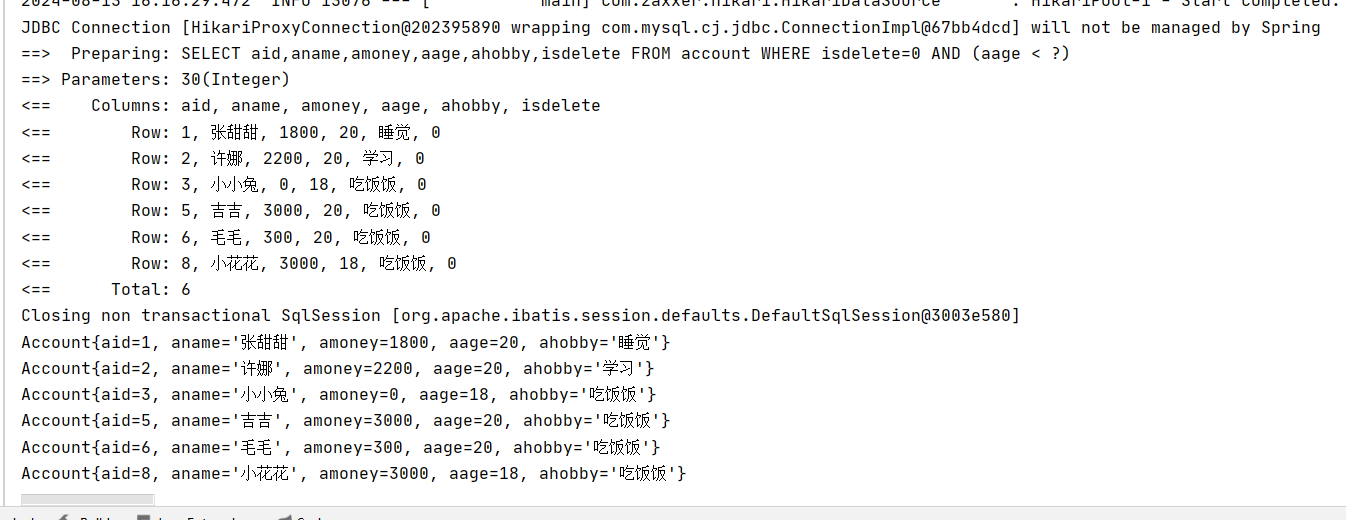
 //模拟动态查询1
    @Test
    public void show2(){
        //1.前端发送来的数据
        Integer num1 = null;
        Integer num2 = 30;

        //1.查询条件
        LambdaQueryWrapper<Account> lambdaQueryWrapper =  new LambdaQueryWrapper<Account>();
        //2.判断
        if(null != num2){
            lambdaQueryWrapper.lt(Account::getAage,num2);
        }
        if(null != num1){
            lambdaQueryWrapper.gt(Account::getAage,num1);
        }
        //3.查询
        List<Account> list =  mapper.selectList(lambdaQueryWrapper);
        for (int i = 0; i < list.size(); i++) {
            Account account =  list.get(i);
            System.out.println(account);
        }
    }
输出结果:
3.模拟动态查询2
java
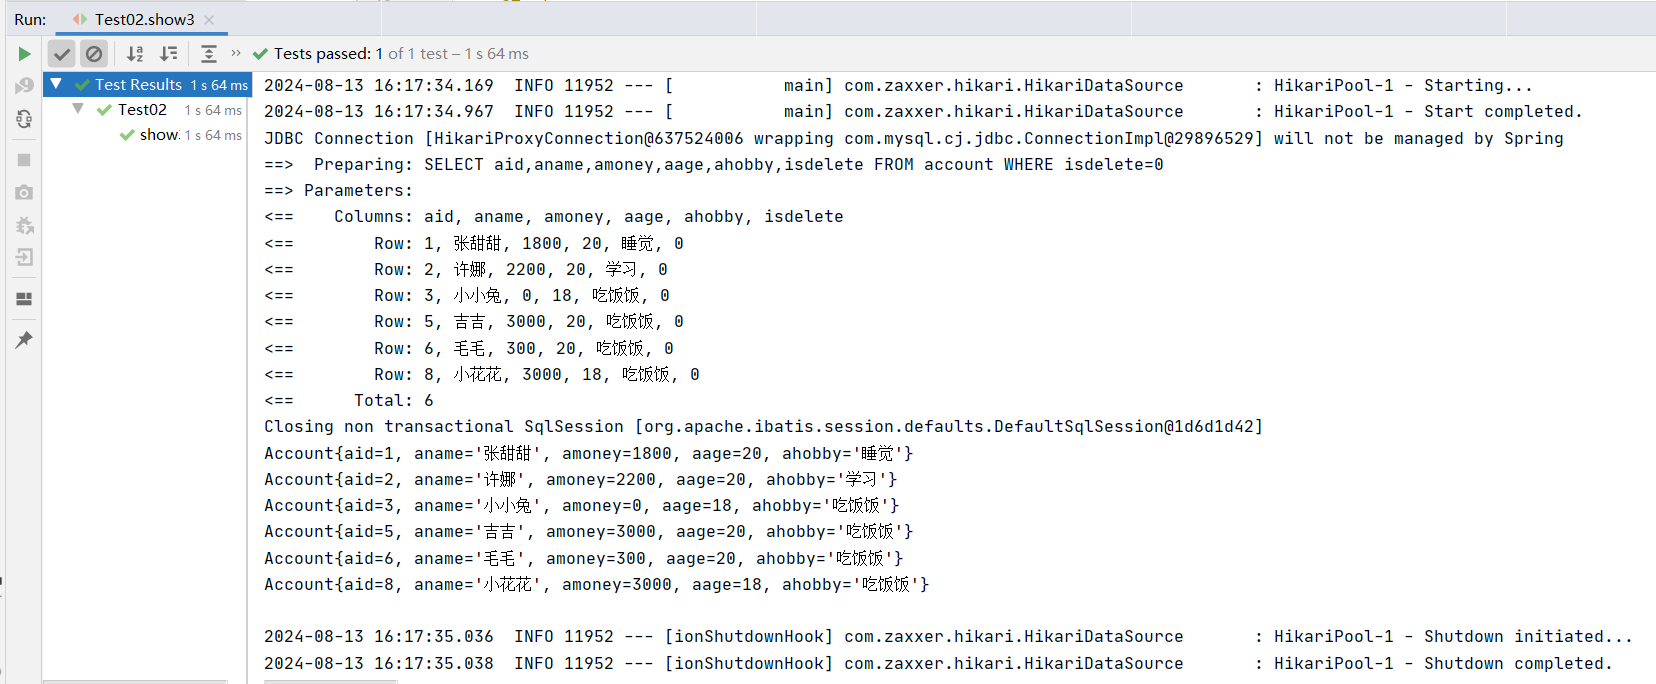
//模拟动态查询2
    @Test
    public void show3(){
        //1.前端发送来的数据
        Integer num1 = null;
        Integer num2 = 30;

        //1.查询条件
        LambdaQueryWrapper<Account> lambdaQueryWrapper =  new LambdaQueryWrapper<Account>();
        //2.判断
        lambdaQueryWrapper.lt(null != num2,Account::getAage,num2);
        lambdaQueryWrapper.gt(null != num1,Account::getAage,num1);
        //3.查询
        List<Account> list =  mapper.selectList(null);
        for (int i = 0; i < list.size(); i++) {
            Account account =  list.get(i);
            System.out.println(account);
        }
    }
输出结果:
4.投影查询-字段查询
java
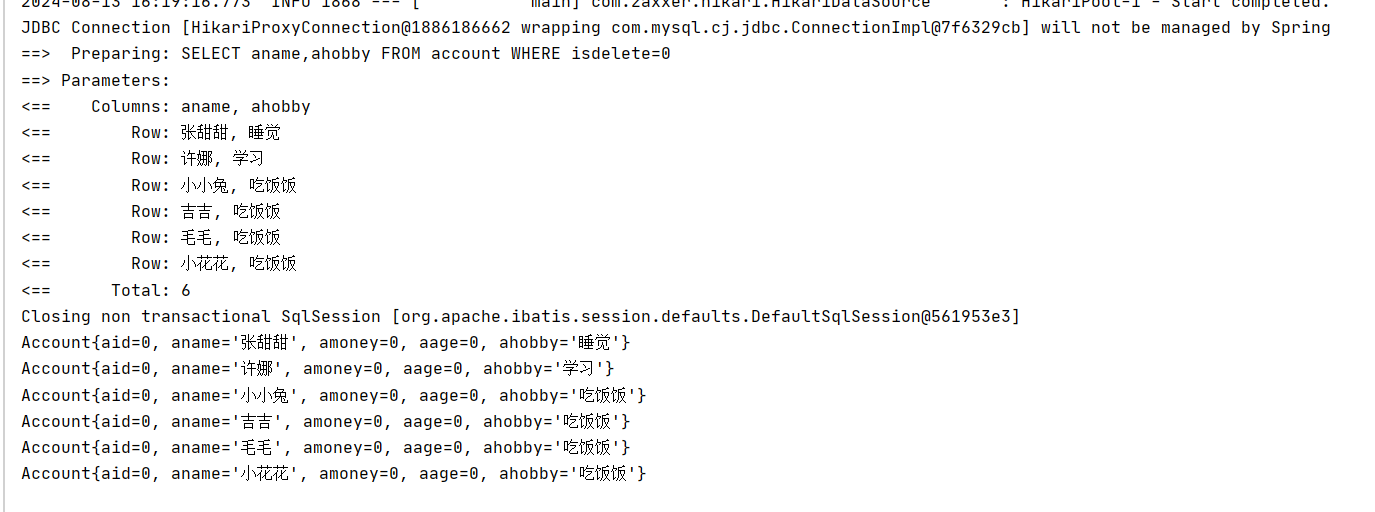
//投影查询-字段查询
    @Test
    public void show4() {
        //1.条件
        LambdaQueryWrapper<Account> lambdaQueryWrapper  = new LambdaQueryWrapper<Account>();
        lambdaQueryWrapper.select(Account::getAname,Account::getAhobby);
        //2.查询
        List<Account> list =  mapper.selectList(lambdaQueryWrapper);
        //4.遍历
        for (int i = 0; i < list.size(); i++) {
            Account account =  list.get(i);
            System.out.println(account);
        }
    }
输出结果:
物理删除:业务数据从数据库中丢弃,执行的是delete操作
逻辑删除:为数据设置是否可用状态字段,删除时设置状态字段为不可用状态,数据保留在数据库中,执行的是update操作
实现步骤:
步骤1:修改数据库表添加deleted列,比如0代表正常,1代表删除,可以在添加列的同时设置其默认值为0正常。
步骤2:实体类添加属性以及注解
@TableLogic(value="0",delval="1")
private Integer deleted;
value为正常数据的值,delval为删除数据的值
5.逻辑删除:
java
@TableLogic(value = "0",delval = "1")
@TableField("isdelete")
private int isdelete;
java
@Test
public void show5() {
    mapper.deleteById(7);
}
输出结果:

查看数据库表中的数据,我们会发现id为7的小熊并没有没删除只是将表中的isdelete改为了1,再次查询表中的数据会发现小熊会被自动屏蔽掉,不会在控制台输出。