1.xxl-job基本介绍
1.官方文档
https://www.xuxueli.com/xxl-job/
2.gitee
https://gitee.com/xuxueli0323/xxl-job
2.本地集成xxl-job
1.下载源码包
https://gitee.com/xuxueli0323/xxl-job/tree/6effc8b98f0fd5b5af3a7b6a8995bdcf30de69fc/
2.导入到项目中
1.作为模块导入
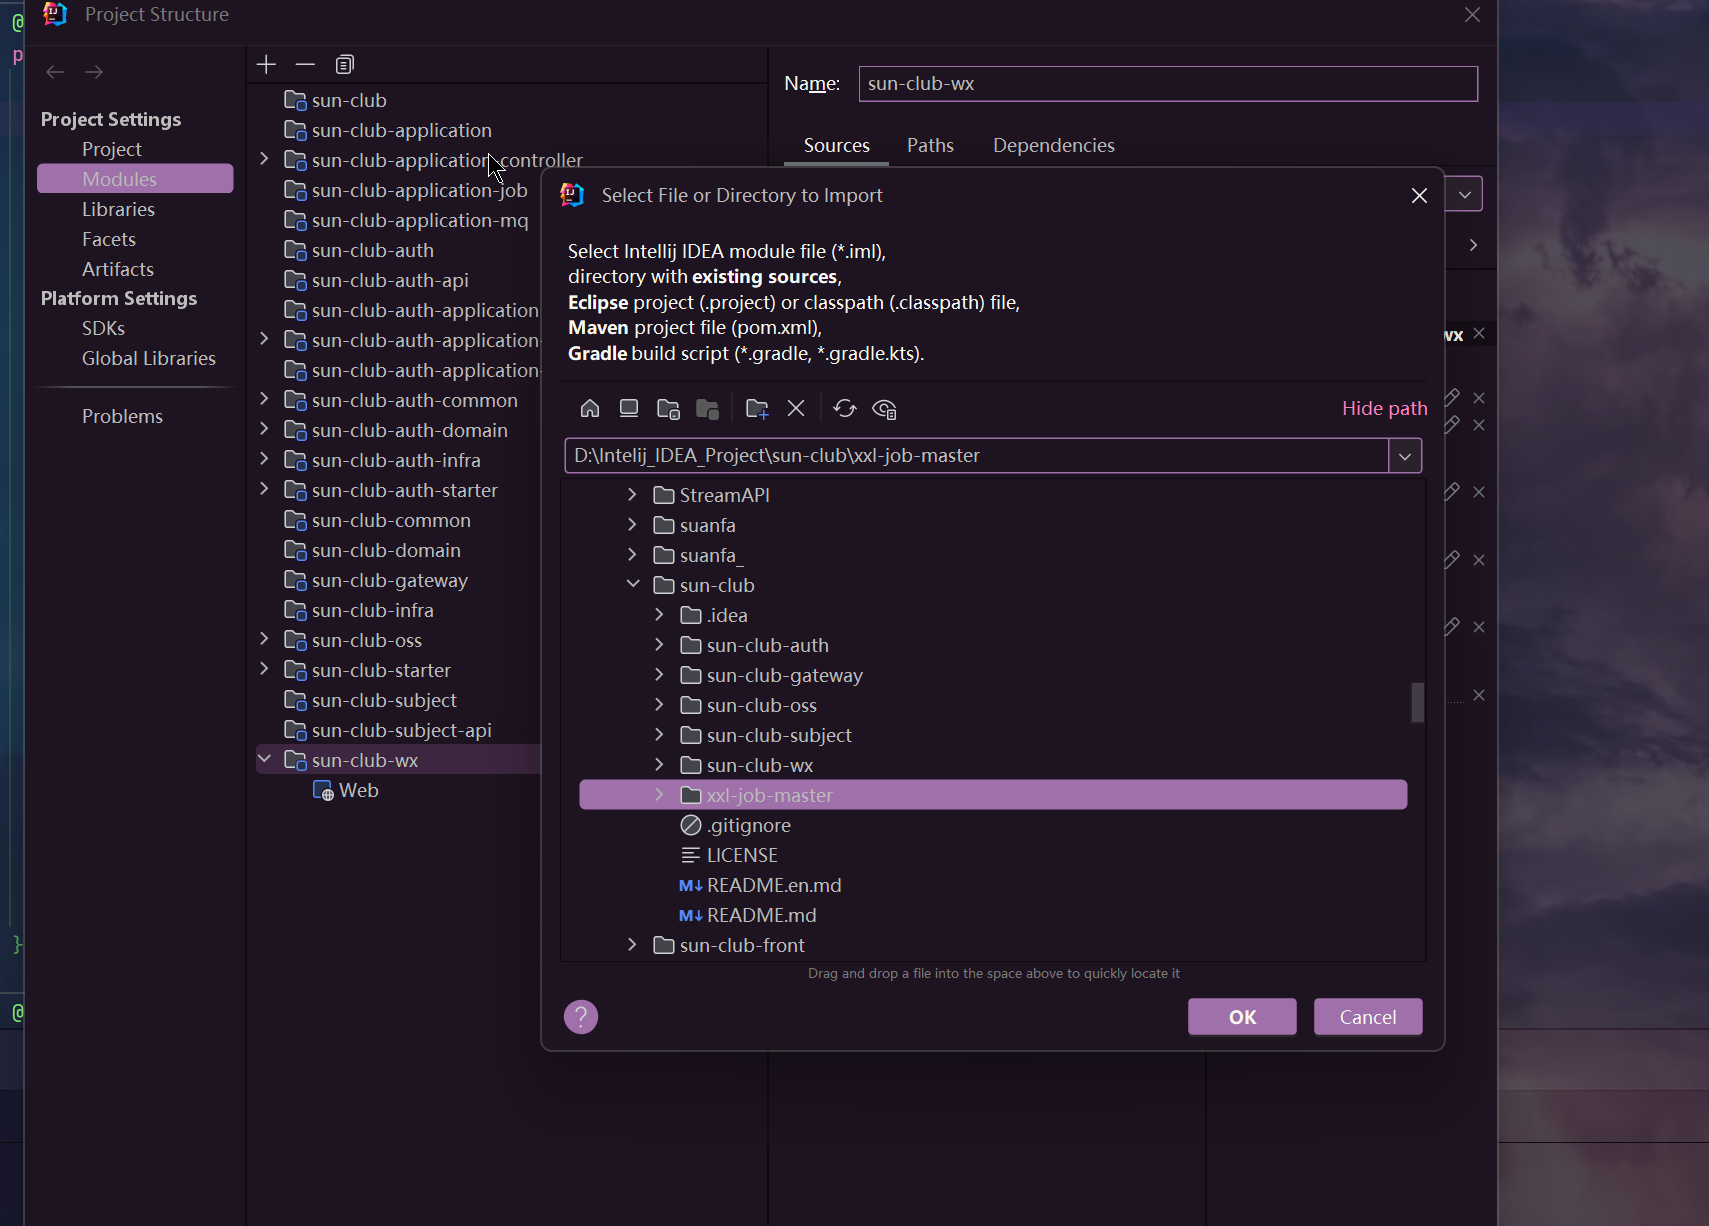
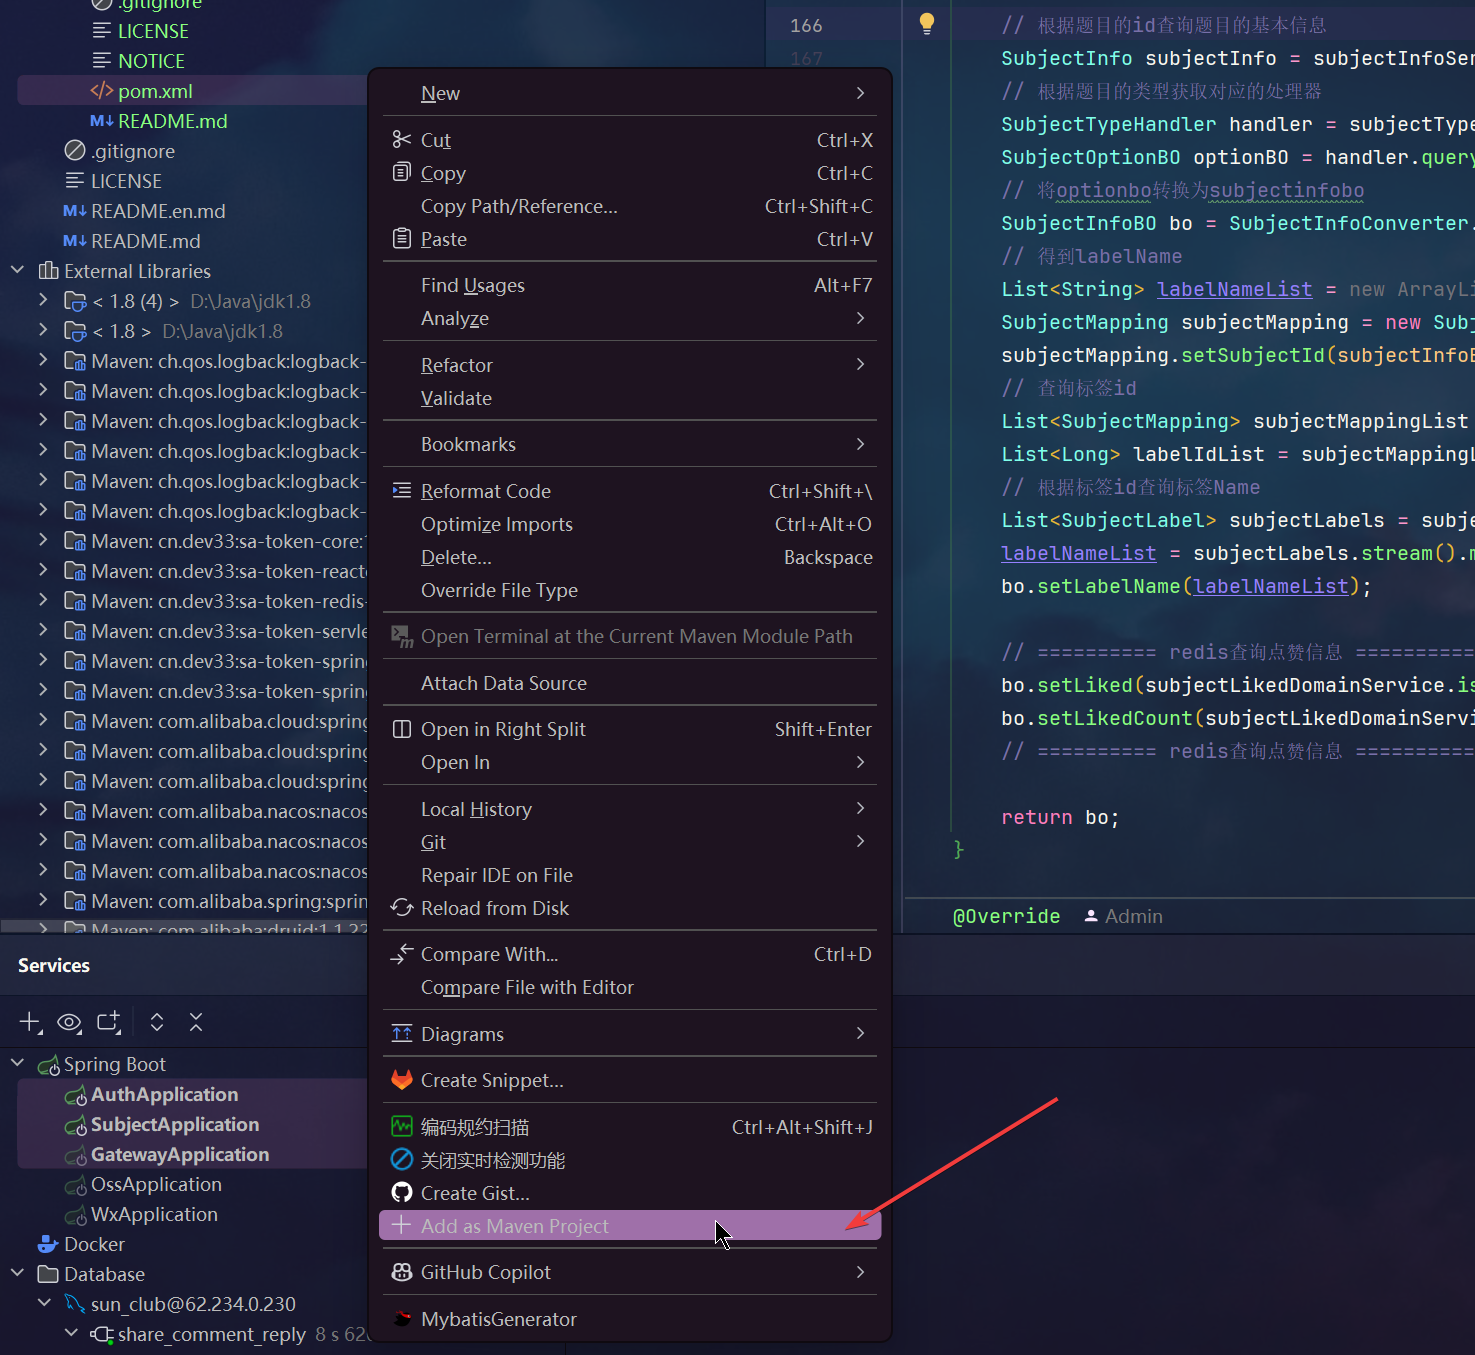
2.使其成为maven项目
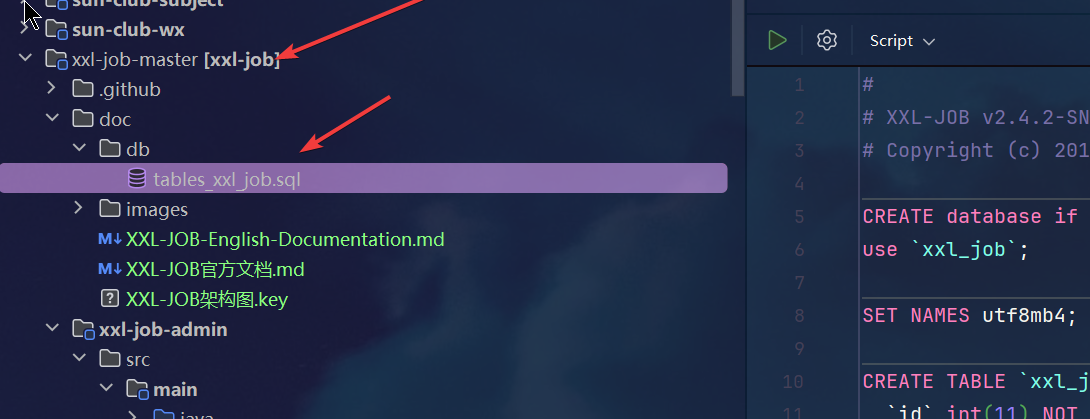
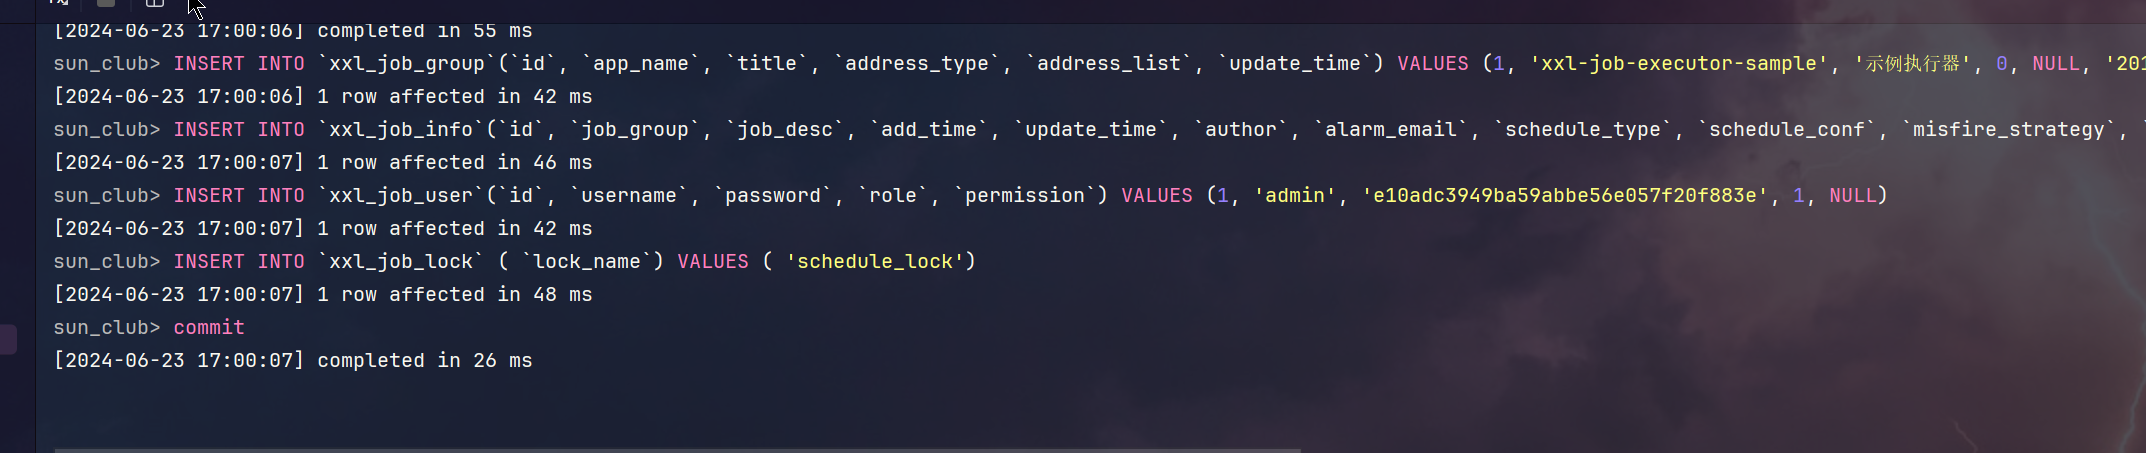
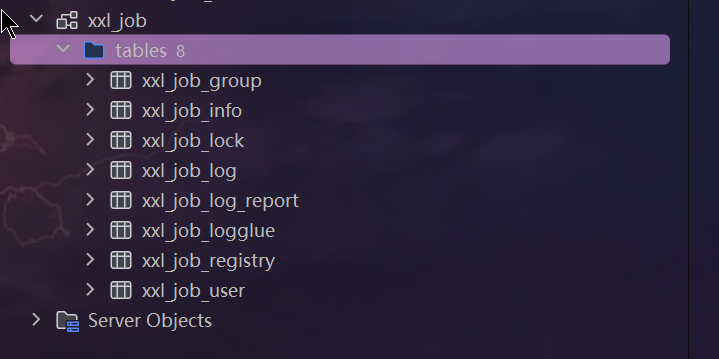
3.创建数据库
1.打开xxl-job-admin的配置文件,查看要创建的数据库

2.打开tables_xxl_job.sql
3.执行sql脚本,创建数据库表
4.修改application.properties的数据库ip和端口为自己的
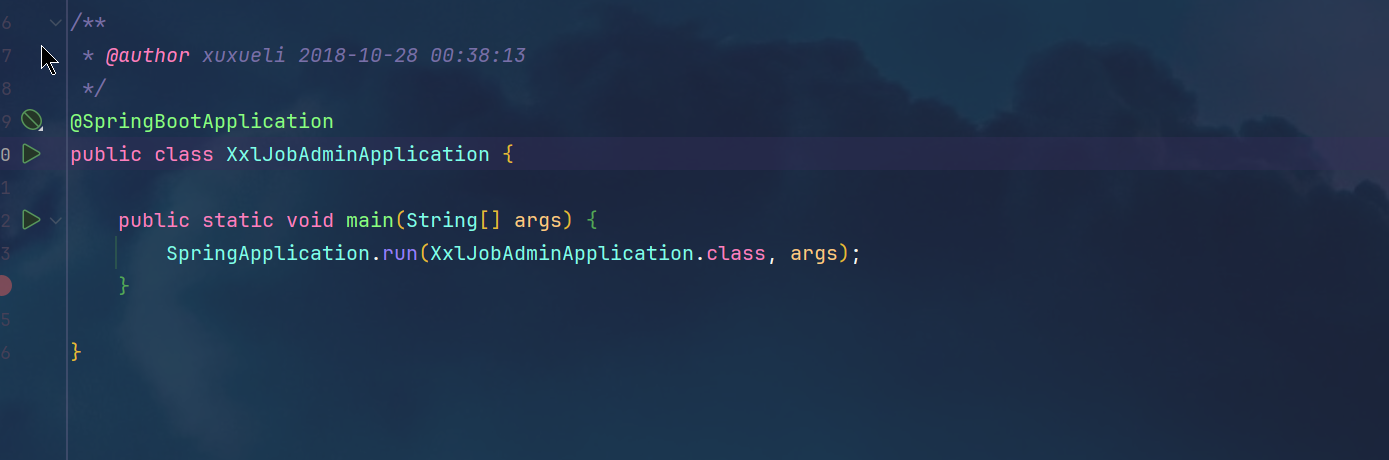
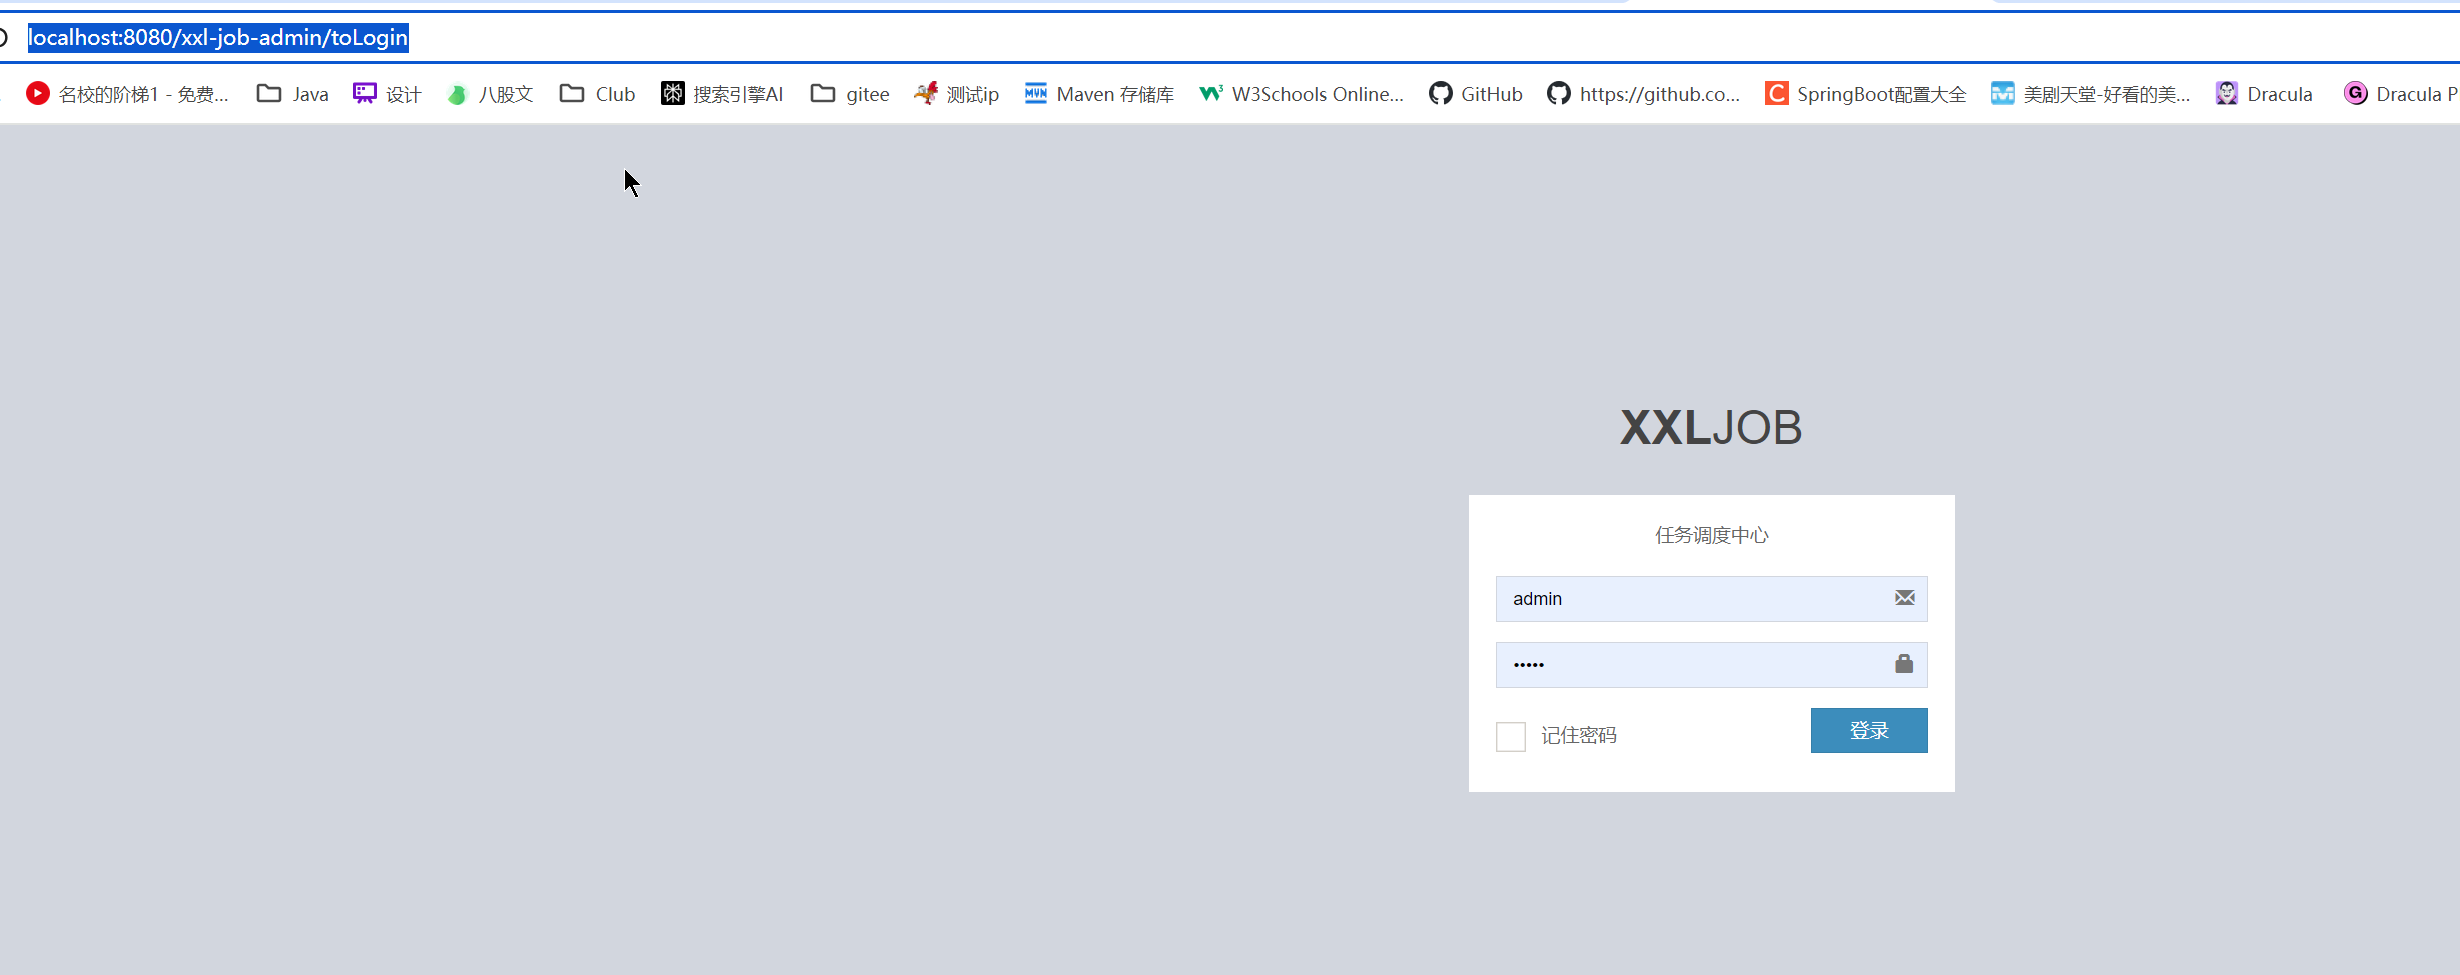
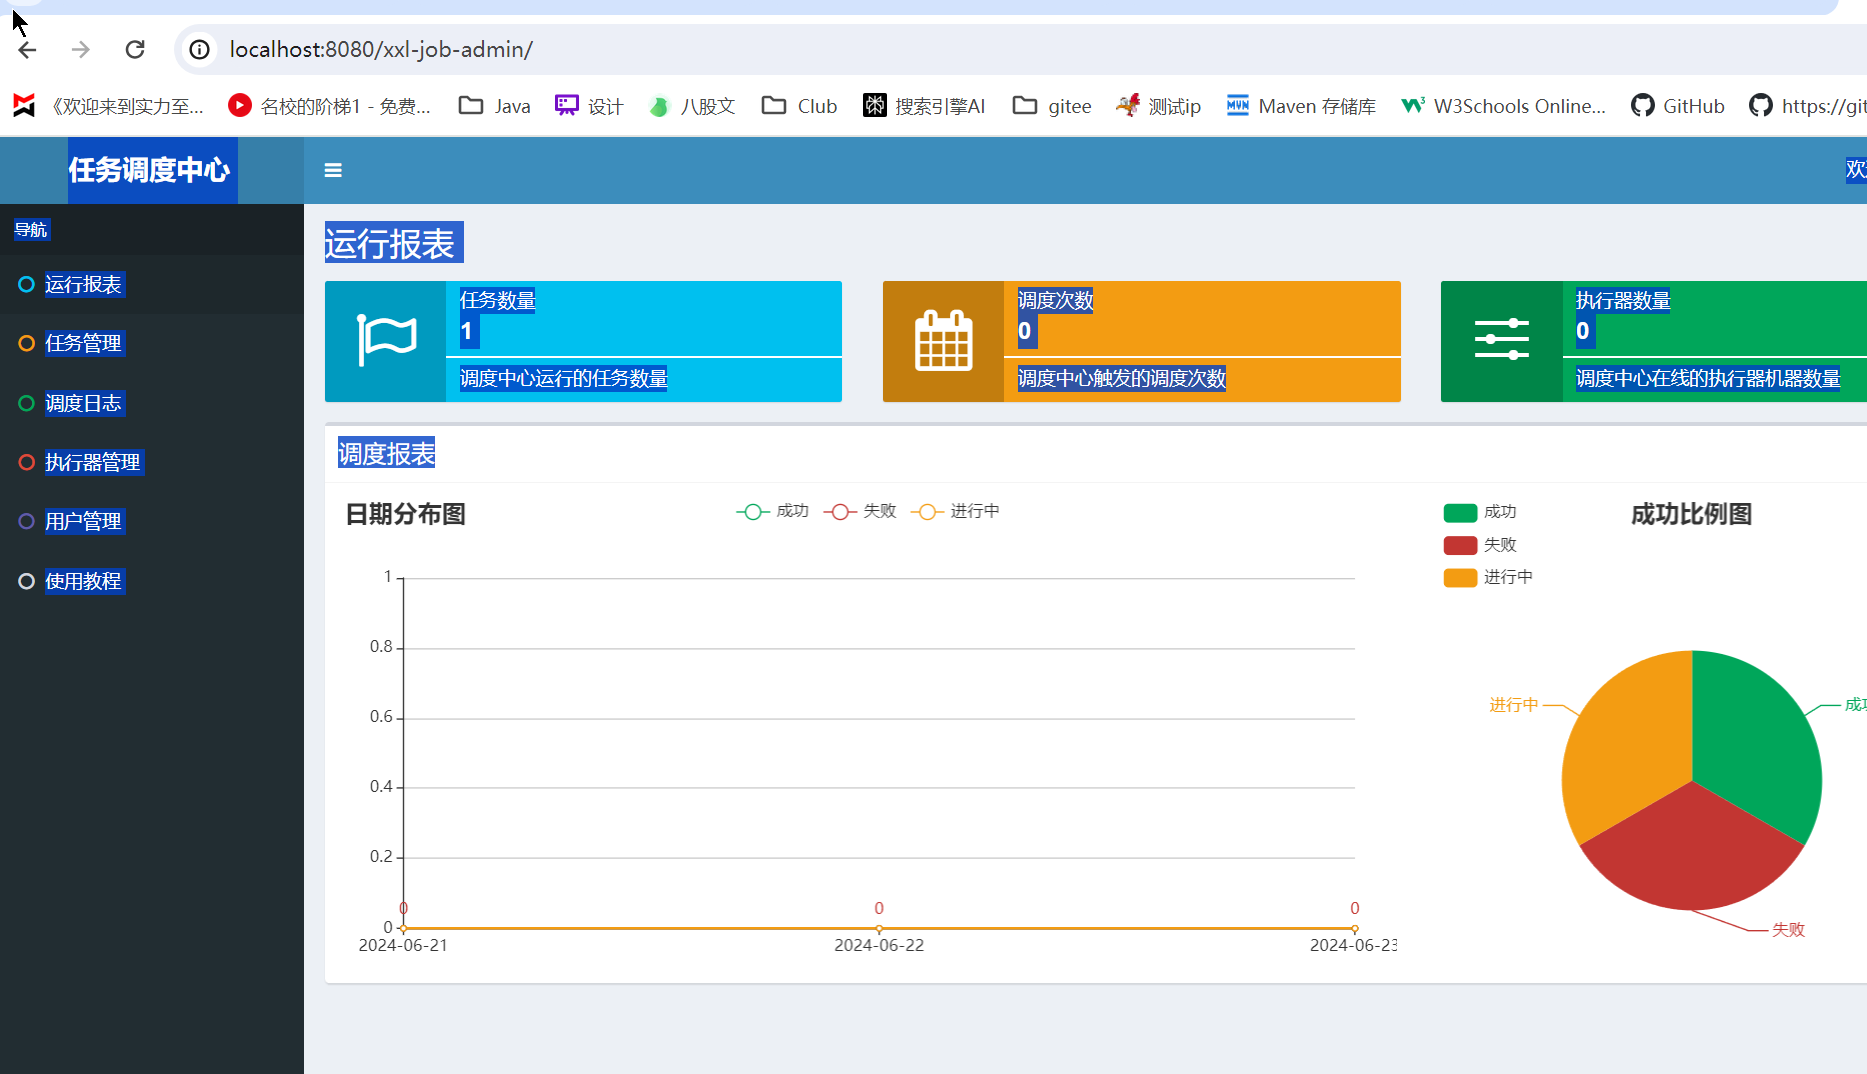
4.启动访问
1.启动
2.本地访问
http://localhost:8080/xxl-job-admin/toLogin
账号密码 admin 123456
5.sun-club-subject配置xxl-job
1. application.yml
yaml
# xxl-job配置
xxl:
job:
admin:
addresses: http://127.0.0.1:8080/xxl-job-admin # xxl-job-admin地址
accessToken: default_token
executor:
appname: sun-club-subjcet # 执行器名称
address:
ip: 127.0.0.1 # 执行器ip
port: 9999 # 执行器端口
logpath: /data/applogs/xxl-job/jobhandler
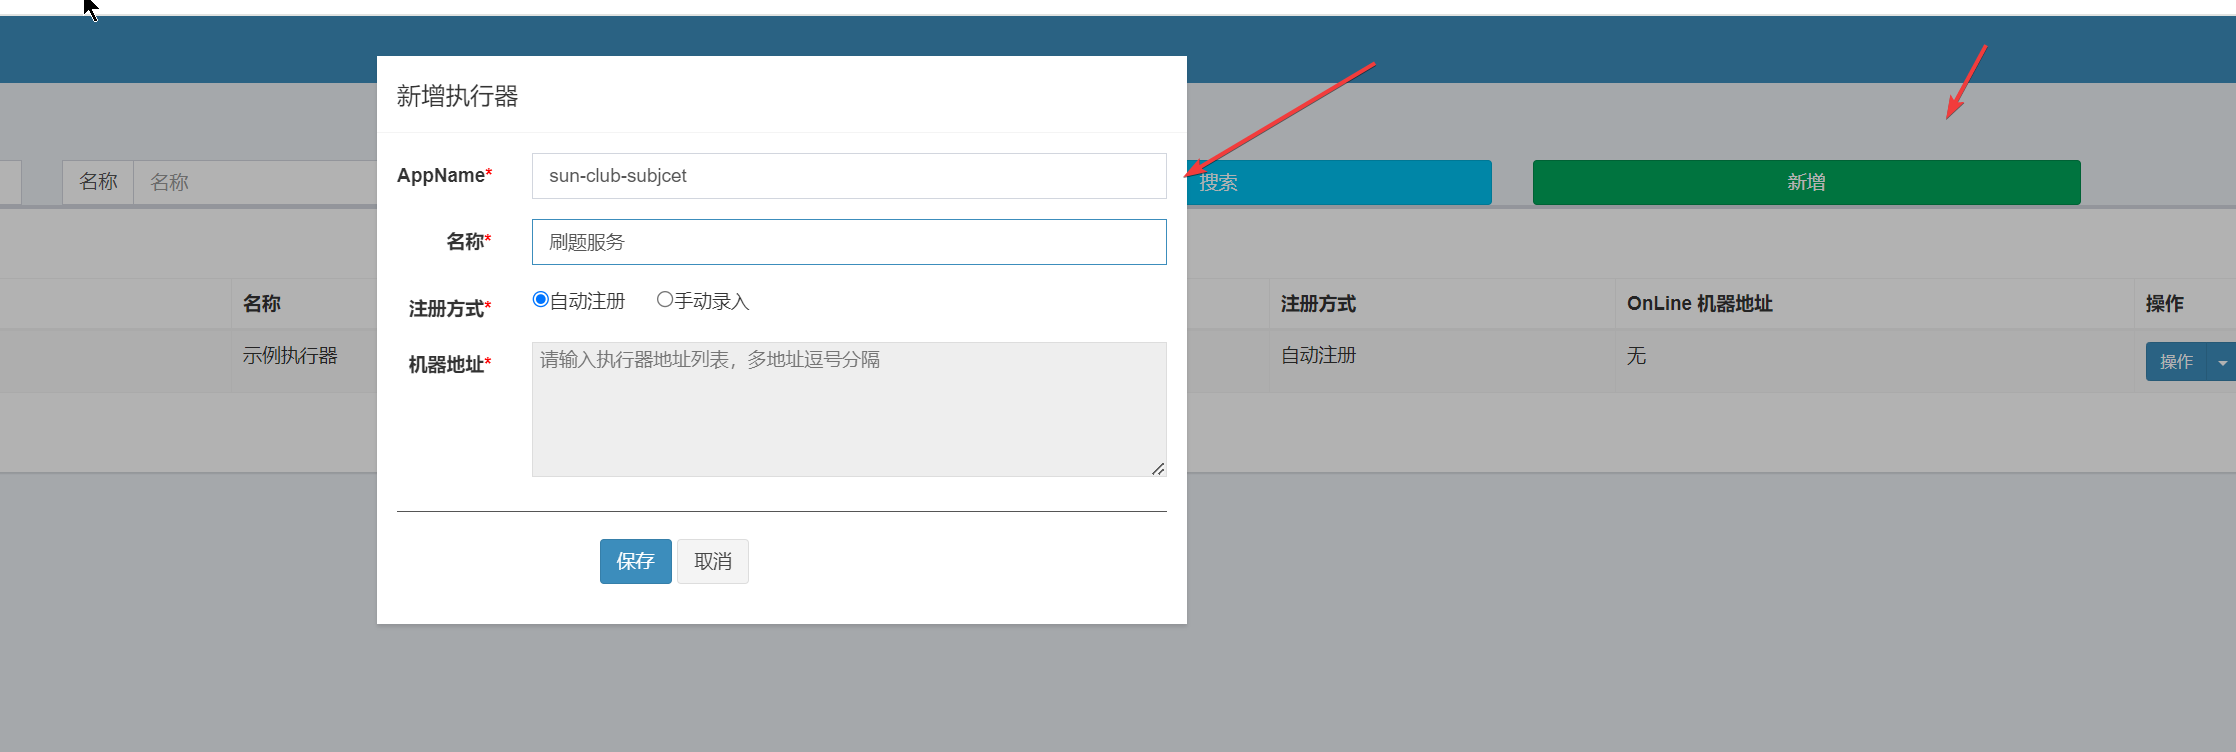
logretentiondays: 302.创建跟配置文件执行器相同名字的执行器 sun-club-subjcet
3.sun-club-domain引入依赖
xml
<!-- xxl-job -->
<dependency>
<groupId>com.xuxueli</groupId>
<artifactId>xxl-job-core</artifactId>
<version>2.3.1</version>
</dependency>
<!-- 这里因为是domain层,没有引入springboot-context,所以才引入了一下 -->
<dependency>
<groupId>org.springframework</groupId>
<artifactId>spring-context</artifactId>
<version>5.3.27</version>
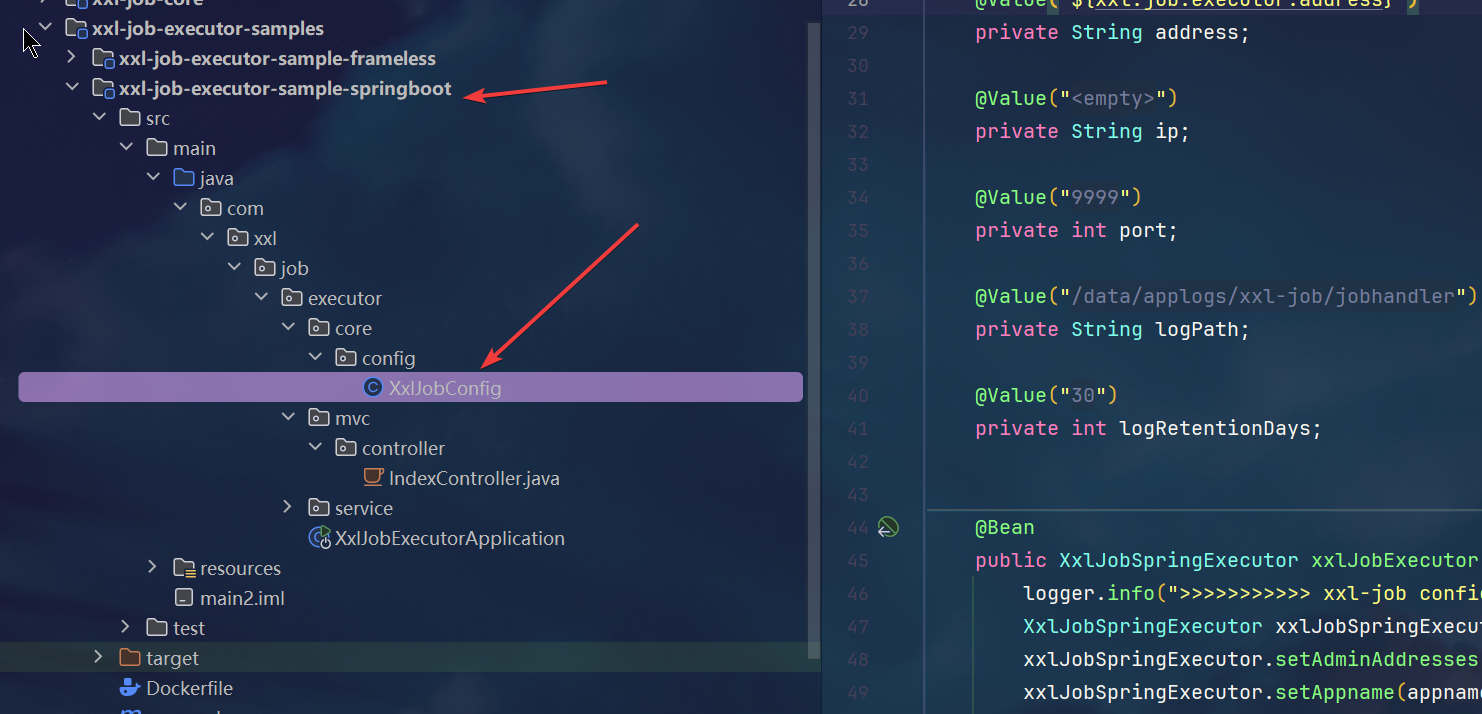
</dependency>4.将配置类粘贴到sun-club-domain的配置包中
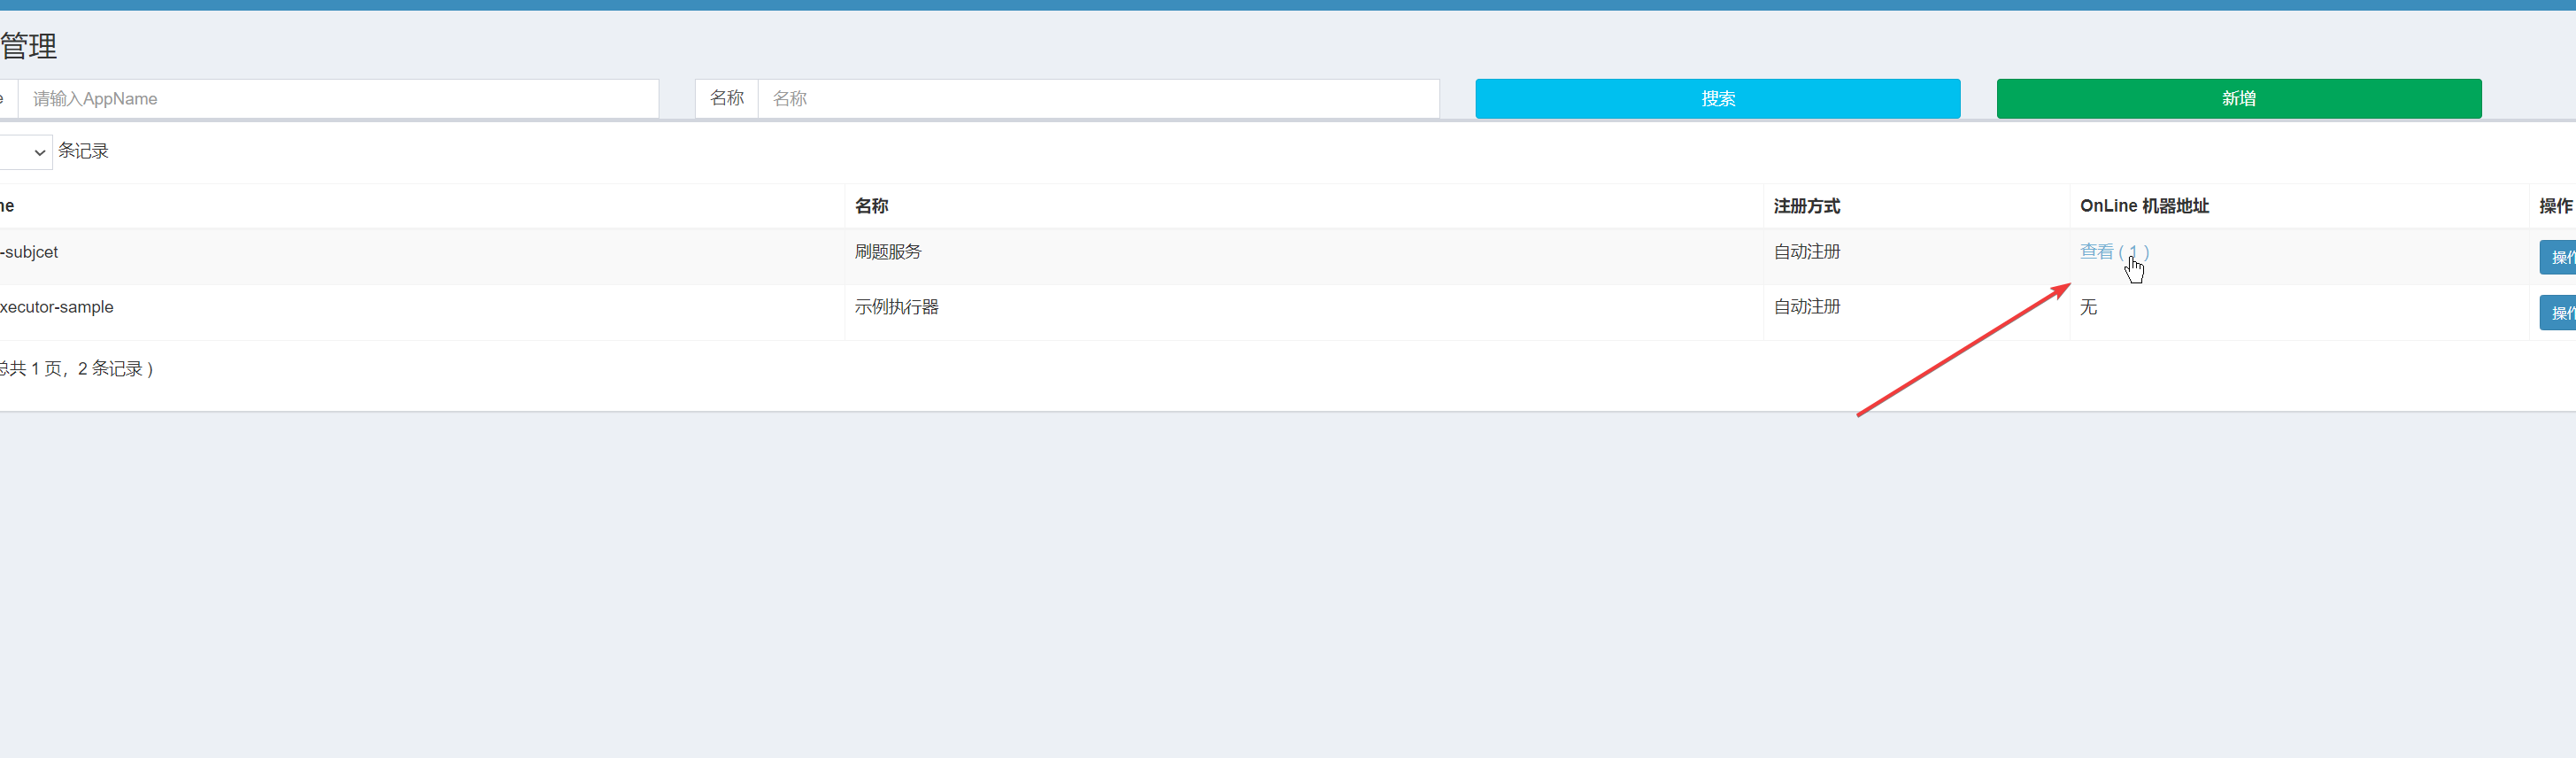
5.重启xxl-job和sun-club-subject,发现节点可以注册成功!
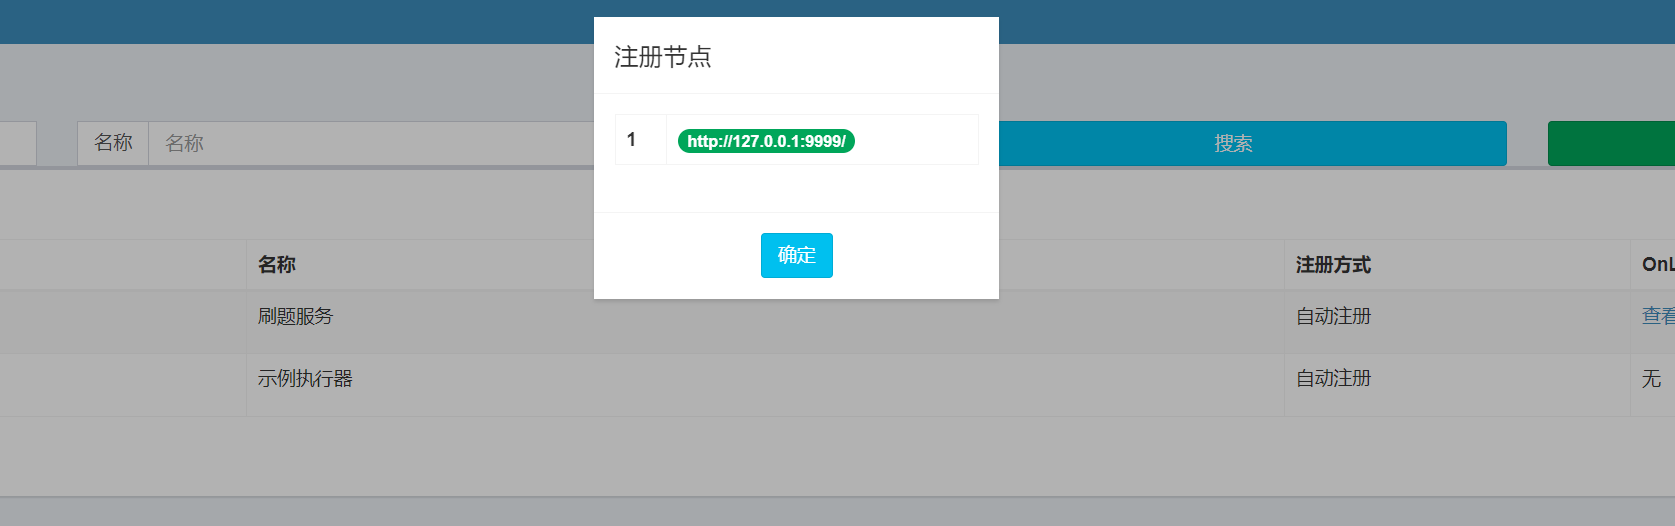
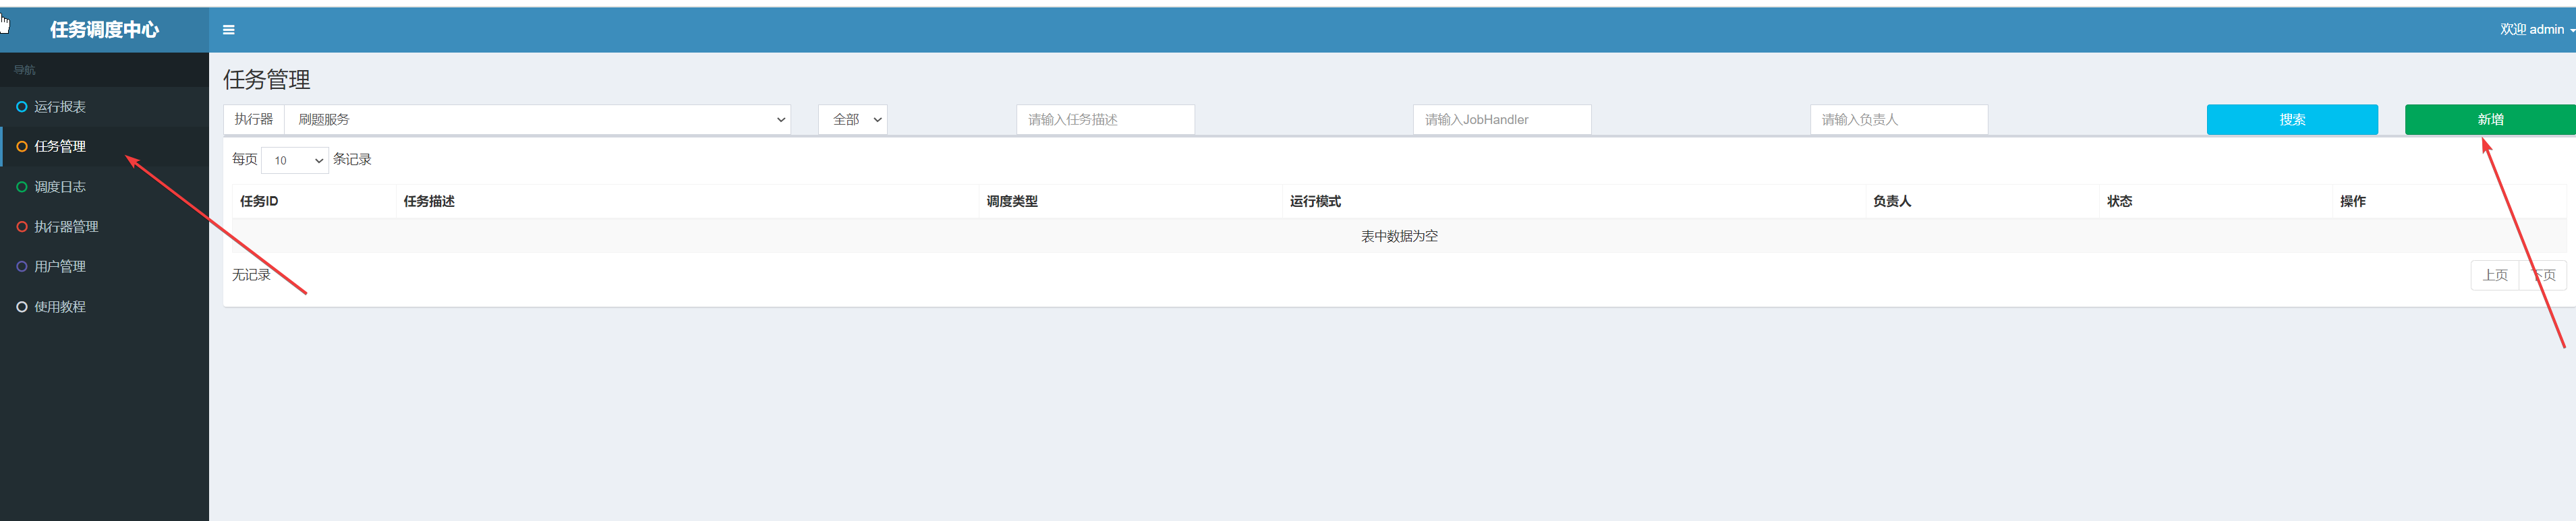
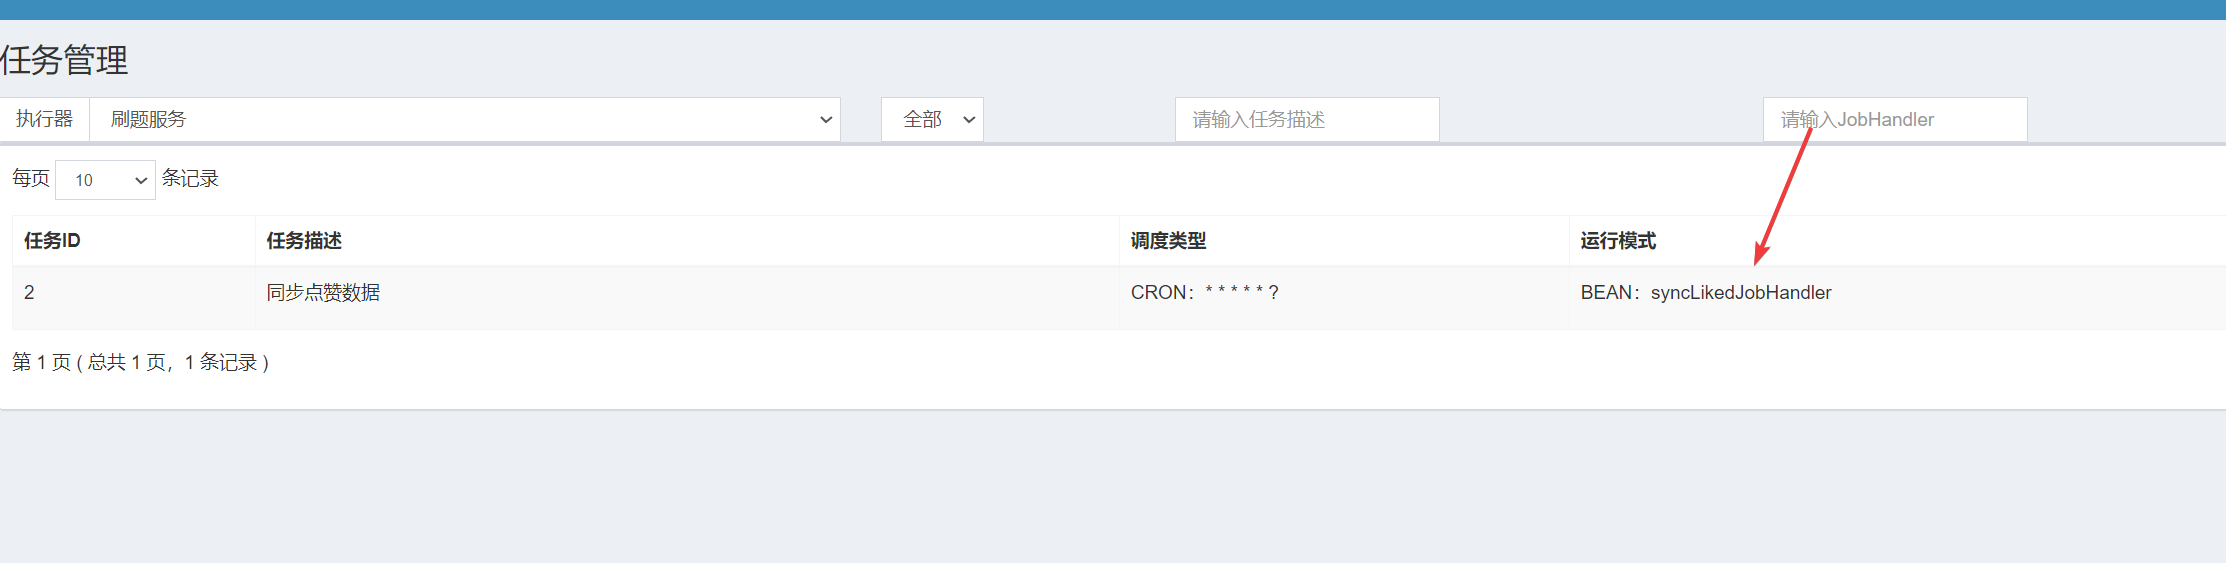
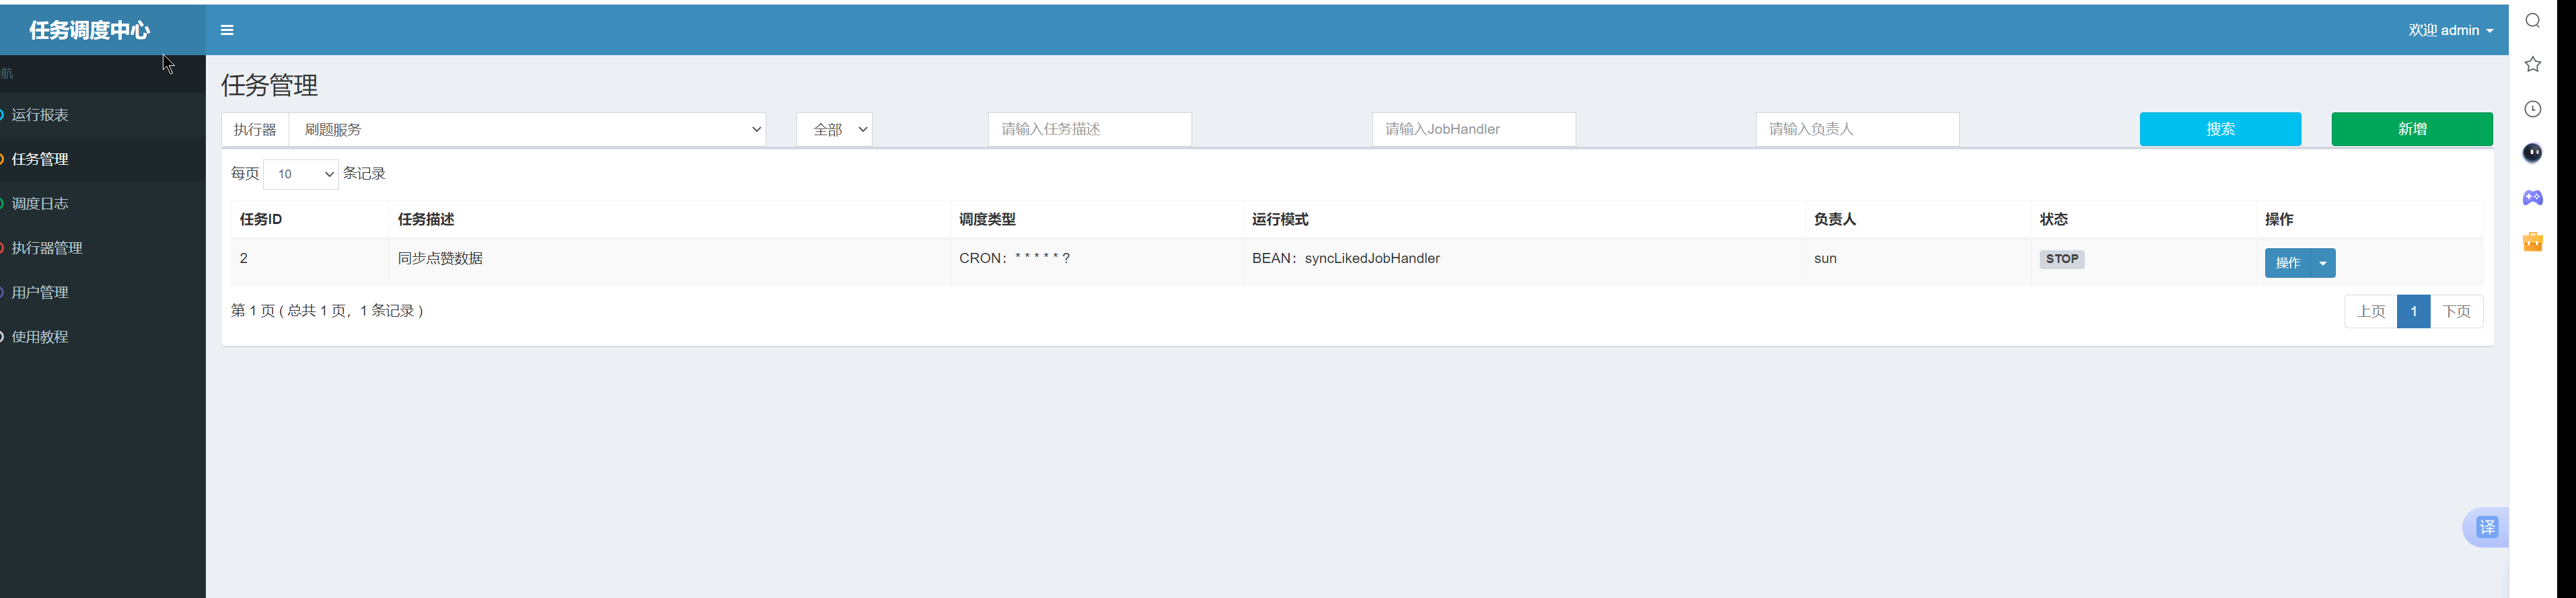
6.新增定时任务
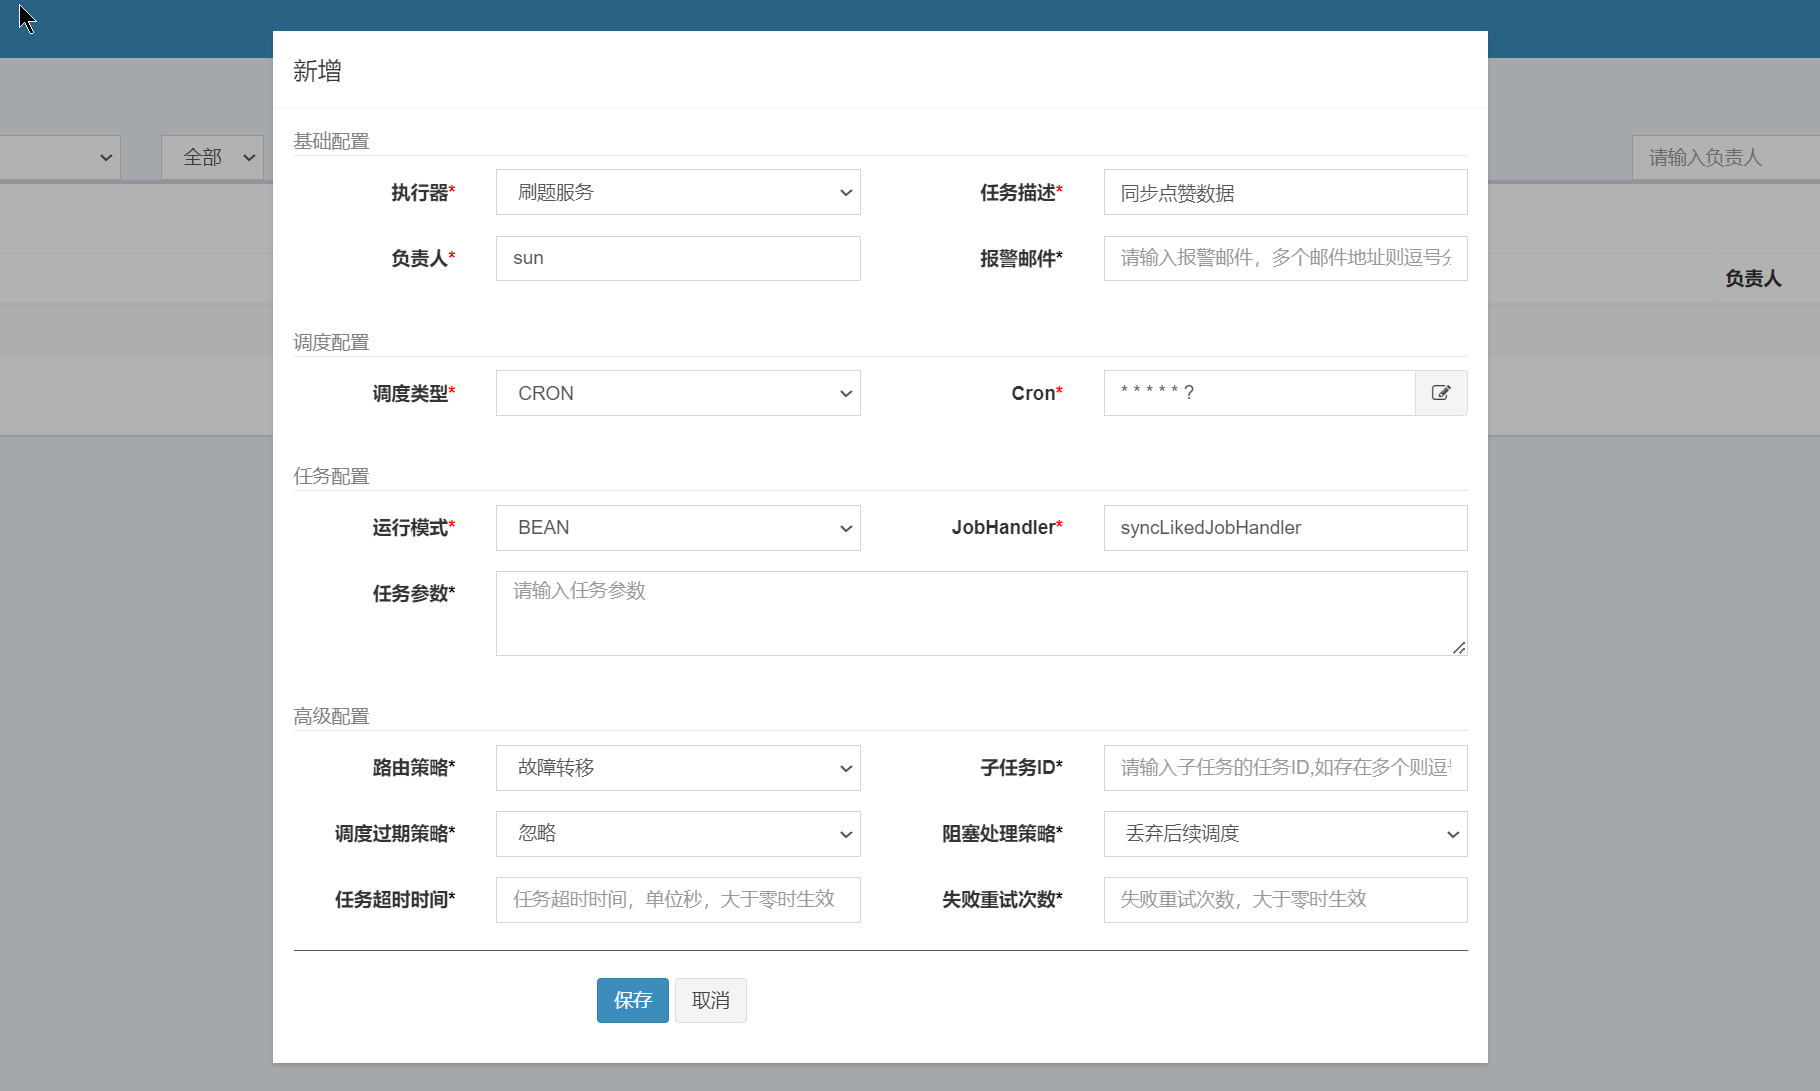
1.任务管理->新增
2.配置
3.com/sunxiansheng/subject/domain/job/SyncLikedJob.java
1.代码
java
package com.sunxiansheng.subject.domain.job;

import com.xxl.job.core.context.XxlJobHelper;
import com.xxl.job.core.handler.annotation.XxlJob;
import lombok.extern.slf4j.Slf4j;
import org.springframework.stereotype.Component;

/**
 * 同步点赞数任务
 */
@Component
@Slf4j
public class SyncLikedJob {

    /**
     * 同步点赞数任务
     */
    @XxlJob("syncLikedJobHandler") // 这个注解是xxl-job的注解,用于标记这个方法是一个定时任务,必须跟执行器的运行模式一致
    public void demoJobHandler() throws Exception {
        XxlJobHelper.log("syncLikedJobHandler start");
        try {
            // todo
            log.info("123456");
        } catch (Exception e) {
            XxlJobHelper.log("syncLikedJobHandler error" + e.getMessage());
        }

    }
}
2.注意:@XxlJob中的内容必须跟新增定时任务的Handler一致
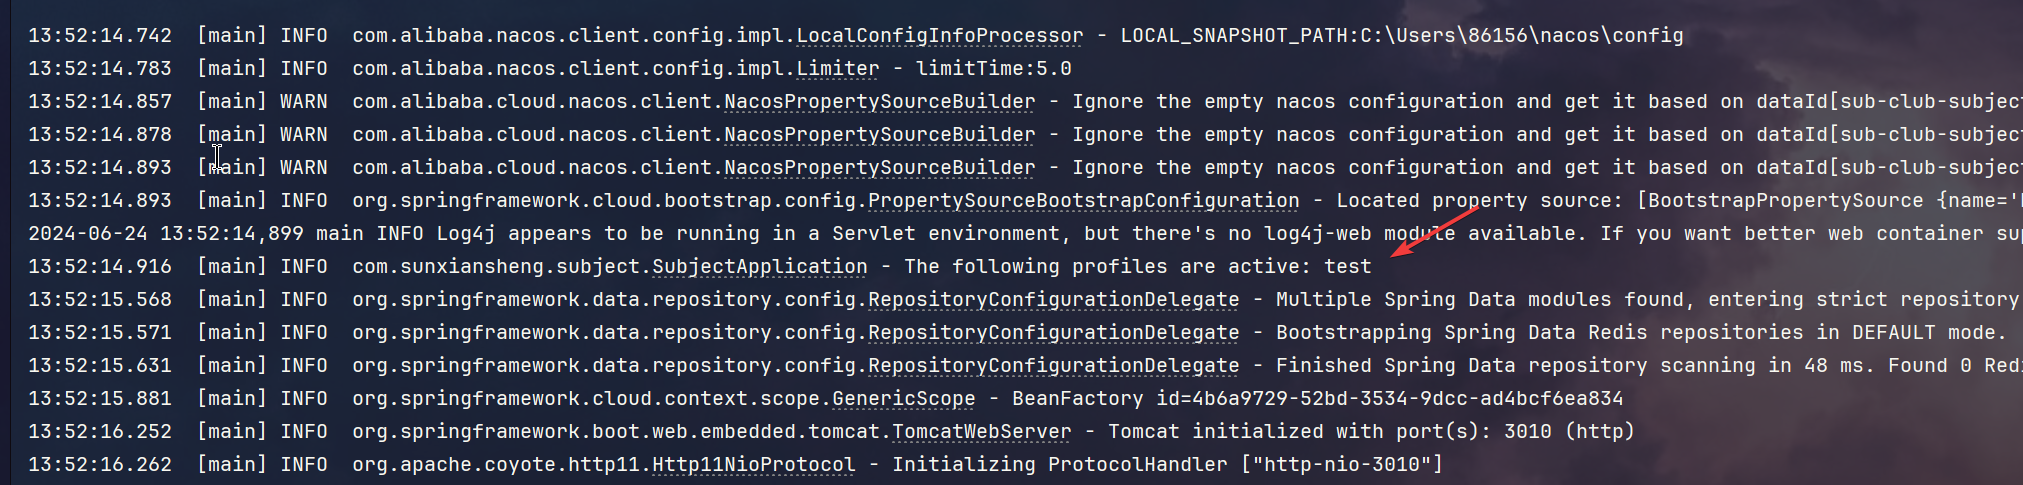
3.重启subject模块
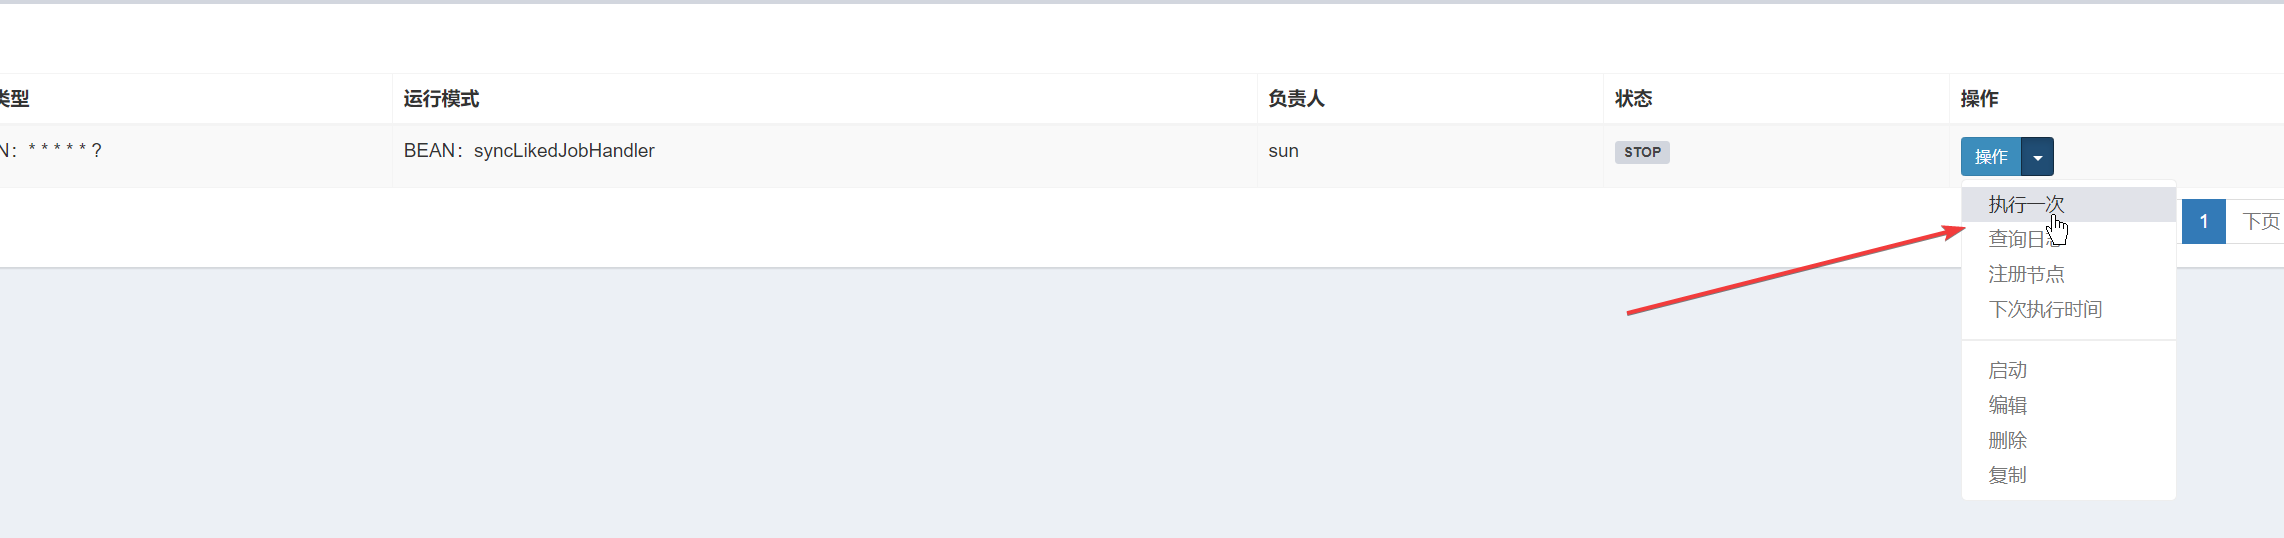
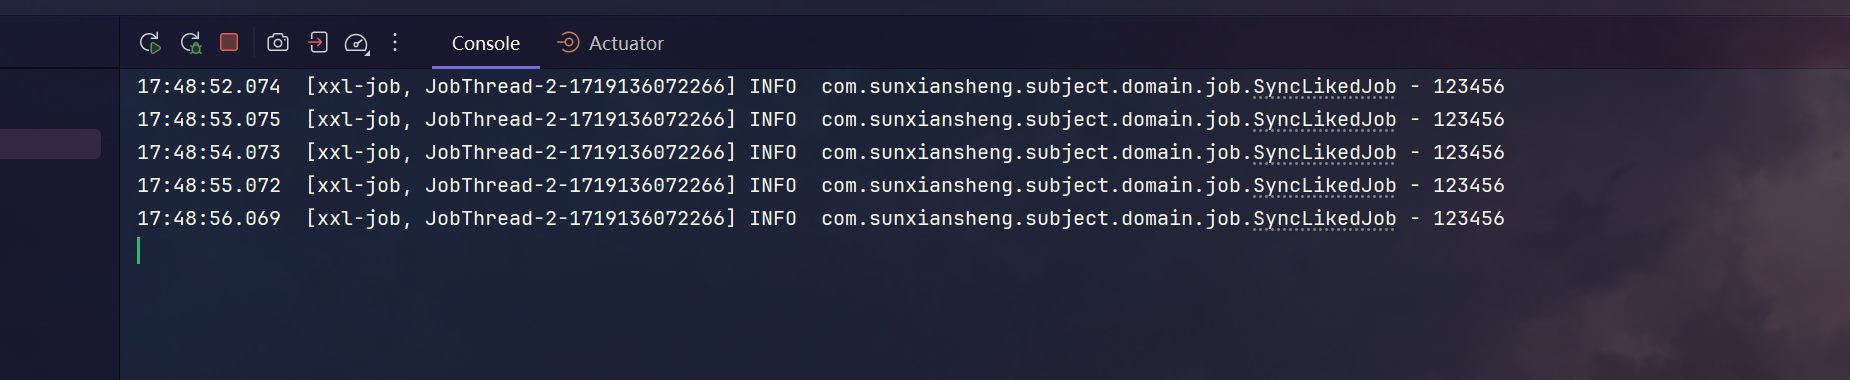
4.执行一次,查看控制台

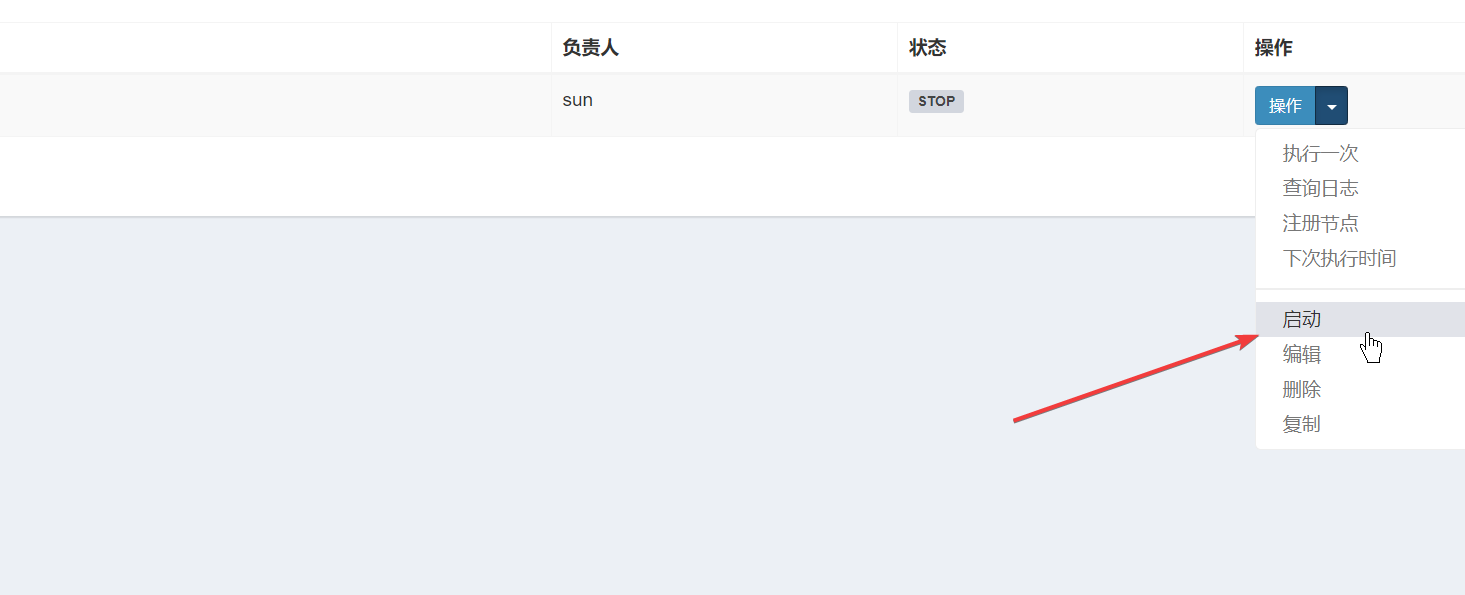
5.启动定时任务,查看控制台
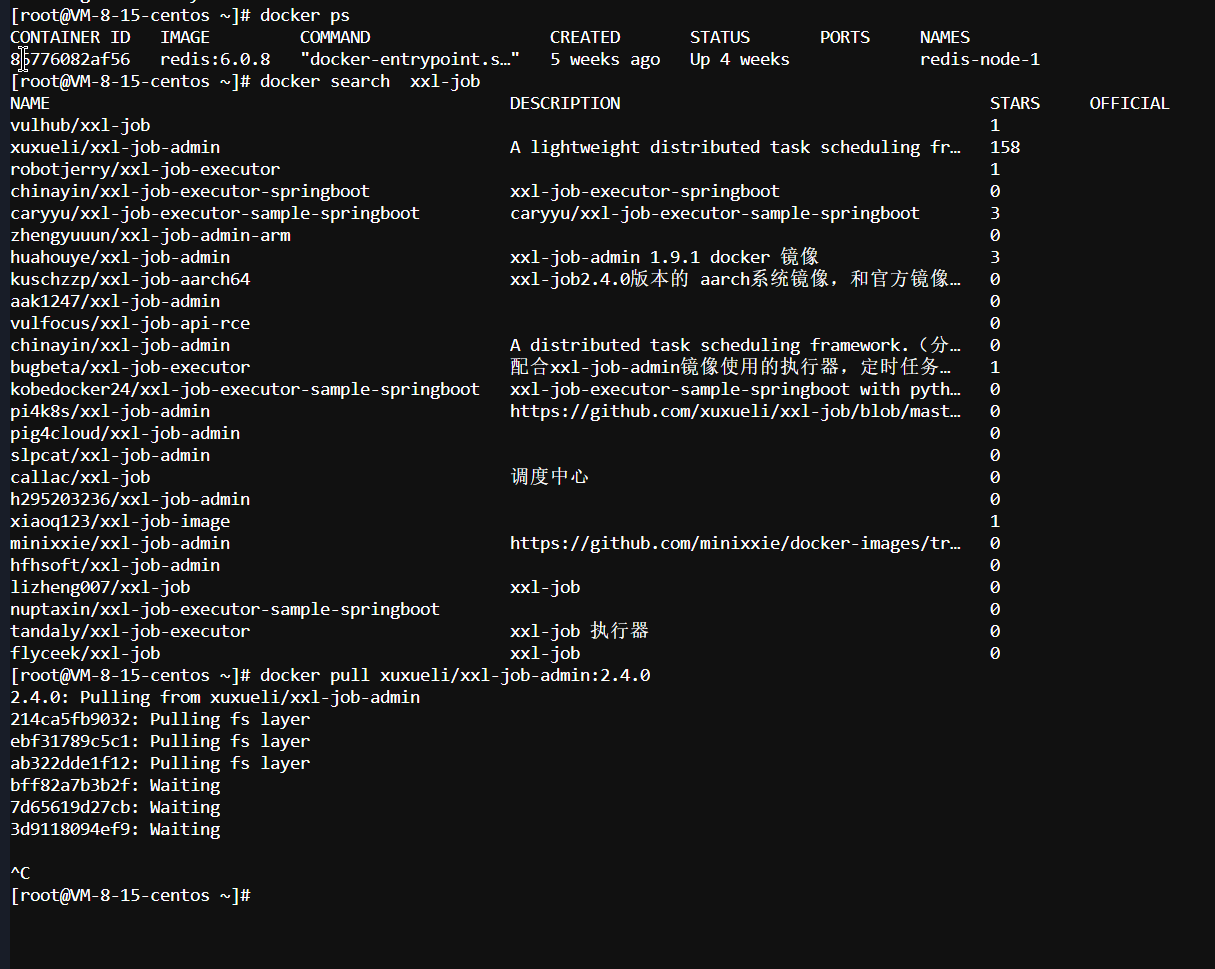
3.docker安装xxl-job
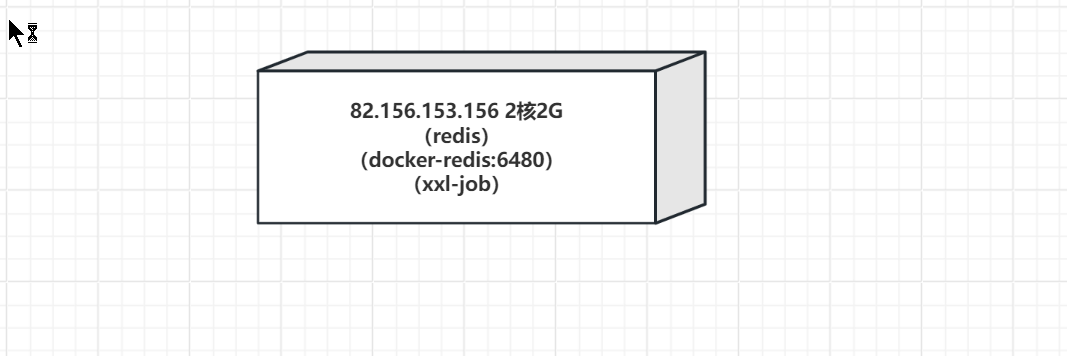
1.选定服务器
2.拉取镜像
1.应该是镜像的问题
2.配置一下镜像
1.首先找到daemon.json的位置
sh
sudo find / -name "daemon.json" 2>/dev/null
2.将其删除
sh
rm -rf /etc/docker/daemon.json3.编辑镜像源文件
sh
vim /etc/docker/daemon.json4.填写代理镜像仓库地址,将以下内容粘贴到daemon.json中
sh
{
  "registry-mirrors": [
    "https://9cpn8tt6.mirror.aliyuncs.com",
    "https://registry.docker-cn.com",
    "https://hub-mirror.c.163.com",
    "https://mirror.ccs.tencentyun.com",
    "https://reg-mirror.qiniu.com",
    "https://mirror.baidubce.com",
    "https://docker.mirrors.ustc.edu.cn",
    "https://mirrors.huaweicloud.com"
  ]
}5.重启docker引擎
sh
systemctl restart docker && systemctl status docker3.重新拉取镜像
sh
docker pull xuxueli/xxl-job-admin:2.4.0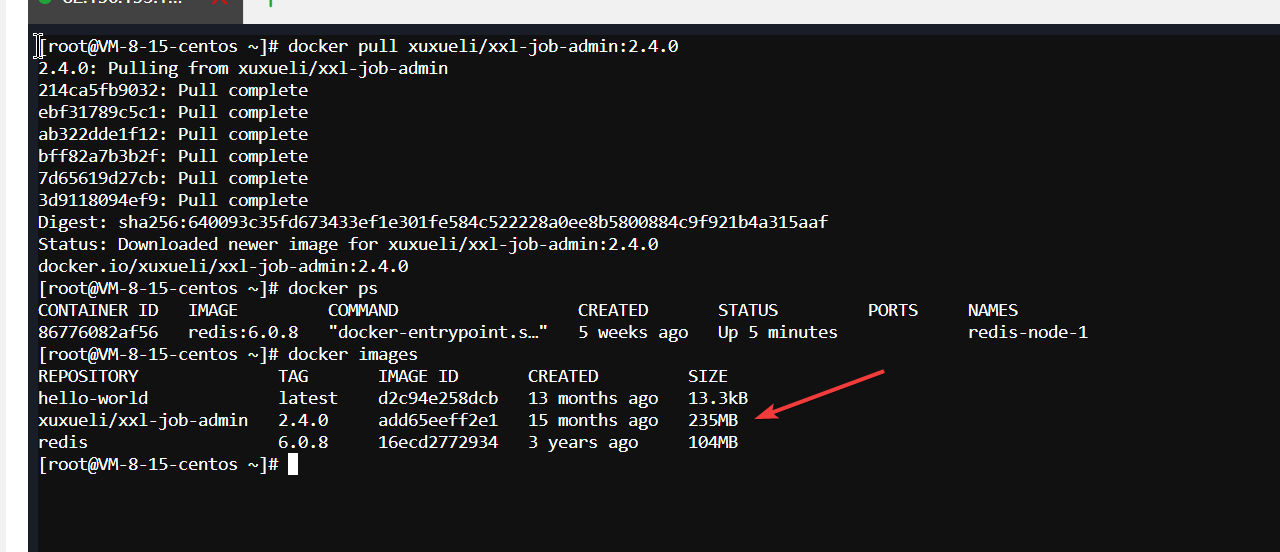
3.启动容器
-p 8088:8088:将容器的8088端口映射到主机的8088端口。-
- 左侧的
8088是主机上的端口。 - 右侧的
8088是容器内的端口。
- 左侧的
-v /tool/xxl-job/logs:/data/applogs:将主机目录/tool/xxl-job/logs挂载到容器的/data/applogs目录。-v /tool/xxl-job/application.properties:/xxl-job/xxl-job-admin/src/main/resources/application.properties:将主机上的配置文件挂载到容器内指定路径。-e PARAMS="...":使用环境变量PARAMS来传递启动参数。--server.port=8088:设置服务的端口为8088。--spring.datasource.url=jdbc:mysql://ip:3306/xxl_job?useUnicode=true&characterEncoding=UTF-8&autoReconnect=true&serverTimezone=Asia/Shanghai:设置数据库连接URL。--spring.datasource.username=root:设置数据库用户名为root。--spring.datasource.password=88888:设置数据库密码为88888。--name xxl-job-admin:为容器指定一个名字xxl-job-admin。xuxueli/xxl-job-admin:2.4.0:指定使用的镜像和标签(版本)。这里使用的是xuxueli/xxl-job-admin镜像的2.4.0版本。
sh
docker run -d \
    -p 8088:8088 \
    -v /tool/xxl-job/logs:/data/applogs \
    -v /tool/xxl-job/application.properties:/xxl-job/xxl-job-admin/src/main/resources/application.properties \
    -e PARAMS="--server.port=8088 \
    --spring.datasource.url=jdbc:mysql://ip:3306/xxl_job?useUnicode=true&characterEncoding=UTF-8&autoReconnect=true&serverTimezone=Asia/Shanghai \
    --spring.datasource.username=root \
    --spring.datasource.password=88888 \
    --name xxl-job-admin \
    xuxueli/xxl-job-admin:2.4.0
4.开启端口8088
1.宝塔开启
sh
systemctl start firewalld && firewall-cmd --permanent --add-port=8088/tcp && firewall-cmd --reload && firewall-cmd --query-port=8088/tcp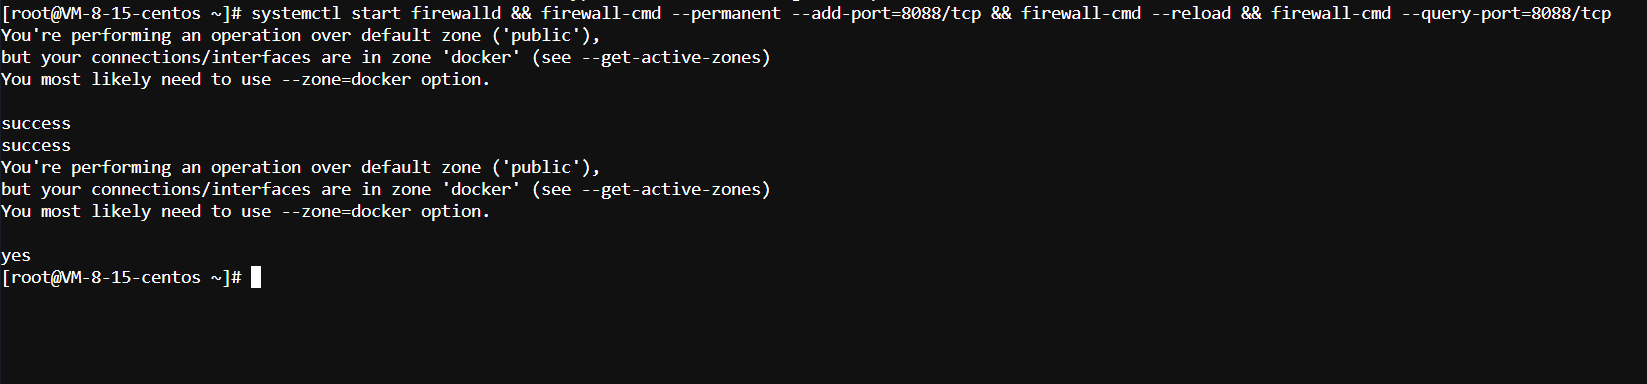
2.腾讯云开启

5.测试访问
http://ip:8088/xxl-job-admin/toLogin 账号密码 admin 123456

6.修改sun-club-subject的application.yml
1.修改addresses为xxl-job的ip端口
2.执行器的ip和端口为sun-club-subject服务部署的地方,记得要开启9999端口的防火墙!!!!!!
4.redis的hash扫描同步点赞数据
1.sun-club-domain
1.RedisUtil.java 根据key来将每一个hashKey和hashValue转换为Map类型
java
/**
 * Redis中的hash类型,根据key来将每一个hashKey和hashValue转换为Map类型
 * @param key
 * @return
 */
public Map<Object, Object> getHashAndDelete(String key) {
    Map<Object, Object> map = new HashMap<>();
    // 扫描hash,指定每一个Entry的类型,这里返回的就是Map的游标,可以进行遍历
    Cursor<Map.Entry<Object, Object>> cursor = redisTemplate.opsForHash().scan(key, ScanOptions.NONE);
    // 遍历每一条数据,放到map中
    while (cursor.hasNext()) {
        Map.Entry<Object, Object> next = cursor.next();
        Object hashKey = next.getKey();
        Object hashValue = next.getValue();
        map.put(hashKey, hashValue);
        // 每遍历一条就删除
        redisTemplate.opsForHash().delete(key, hashKey);
    }
    return map;
}
2.SyncLikedJob.java
java
package com.sunxiansheng.subject.domain.job;

import com.sunxiansheng.subject.domain.service.SubjectLikedDomainService;
import com.xxl.job.core.context.XxlJobHelper;
import com.xxl.job.core.handler.annotation.XxlJob;
import lombok.extern.slf4j.Slf4j;
import org.springframework.stereotype.Component;

import javax.annotation.Resource;

/**
 * 同步点赞数任务
 */
@Component
@Slf4j
public class SyncLikedJob {

    @Resource
    private SubjectLikedDomainService subjectLikedDomainService;

    /**
     * 同步点赞数任务
     */
    @XxlJob("syncLikedJobHandler") // 这个注解是xxl-job的注解,用于标记这个方法是一个定时任务,必须跟执行器的运行模式一致
    public void demoJobHandler() throws Exception {
        XxlJobHelper.log("syncLikedJobHandler start");
        try {
            // 同步点赞数据到db
            subjectLikedDomainService.syncLiked();
        } catch (Exception e) {
            XxlJobHelper.log("syncLikedJobHandler error" + e.getMessage());
        }

    }
}
3.SubjectLikedDomainServiceImpl.java 将从redis中拿到的点赞数据同步到数据库
java
@Override
public void syncLiked() {
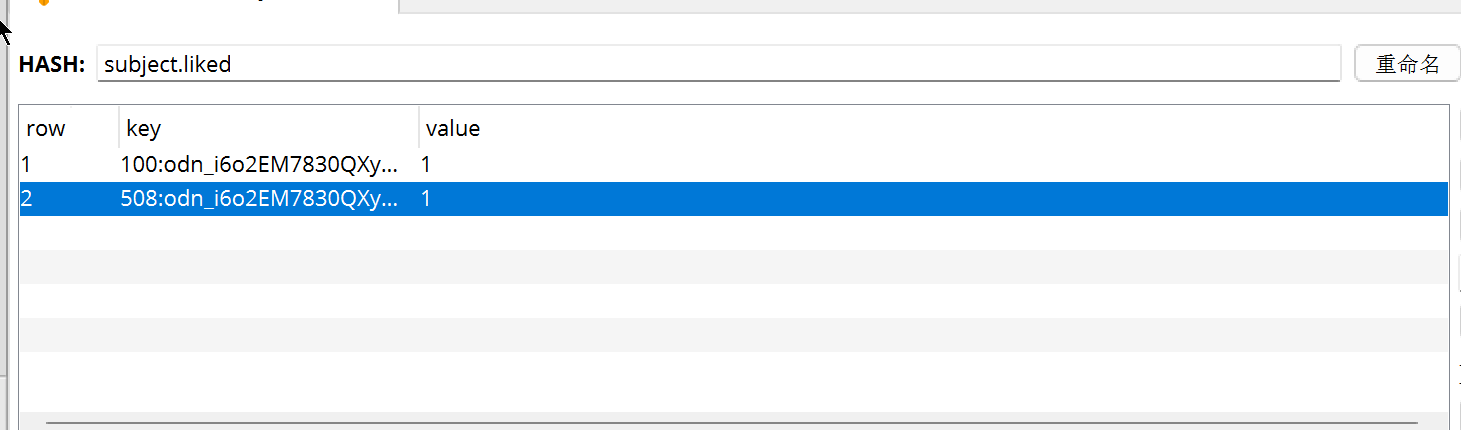
Map<Object, Object> subjectLiked = redisUtil.getHashAndDelete(SUBJECT_LIKE_KEY);
// 打日志,输出map
if (log.isInfoEnabled()) {
log.info("syncLiked:{}", JSON.toJSONString(subjectLiked));
}
// 判空
if (subjectLiked.isEmpty()) {
return;
}
// 声明一个list
List<SubjectLiked> subjectLikedList = new ArrayList<>();
// 将map中的数据转换为实体类并添加到list中
subjectLiked.forEach((k, v) -> {
String[] keys = k.toString().split(":");
SubjectLiked subjectLiked1 = new SubjectLiked();
subjectLiked1.setSubjectId(Long.valueOf(keys[0]));
subjectLiked1.setLikeUserId(keys[1]);
subjectLiked1.setStatus(Integer.valueOf(v.toString()));
subjectLikedList.add(subjectLiked1);
});
// 调用service的批量插入方法
subjectLikedService.batchInsert(subjectLikedList);
}5.内网穿透natapp测试定时任务
1.内网穿透使用指南
https://natapp.cn/article/natapp_newbie
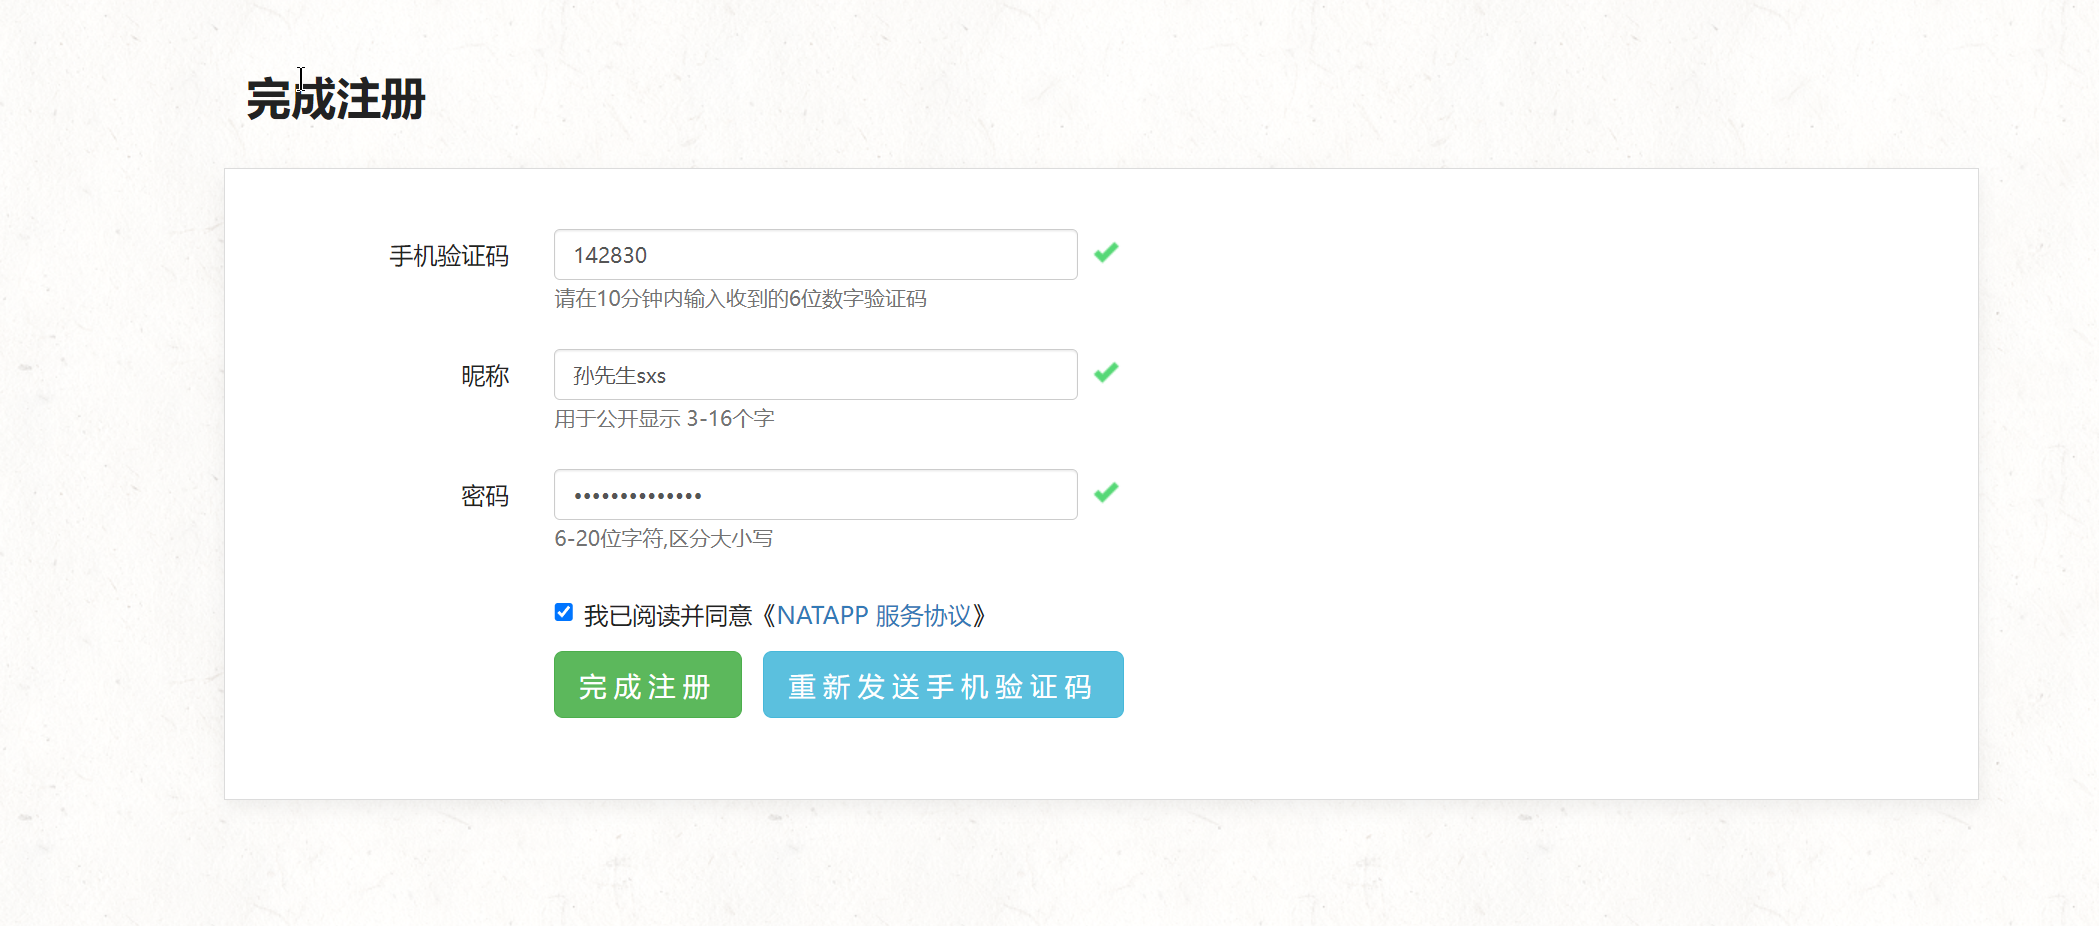
2.注册
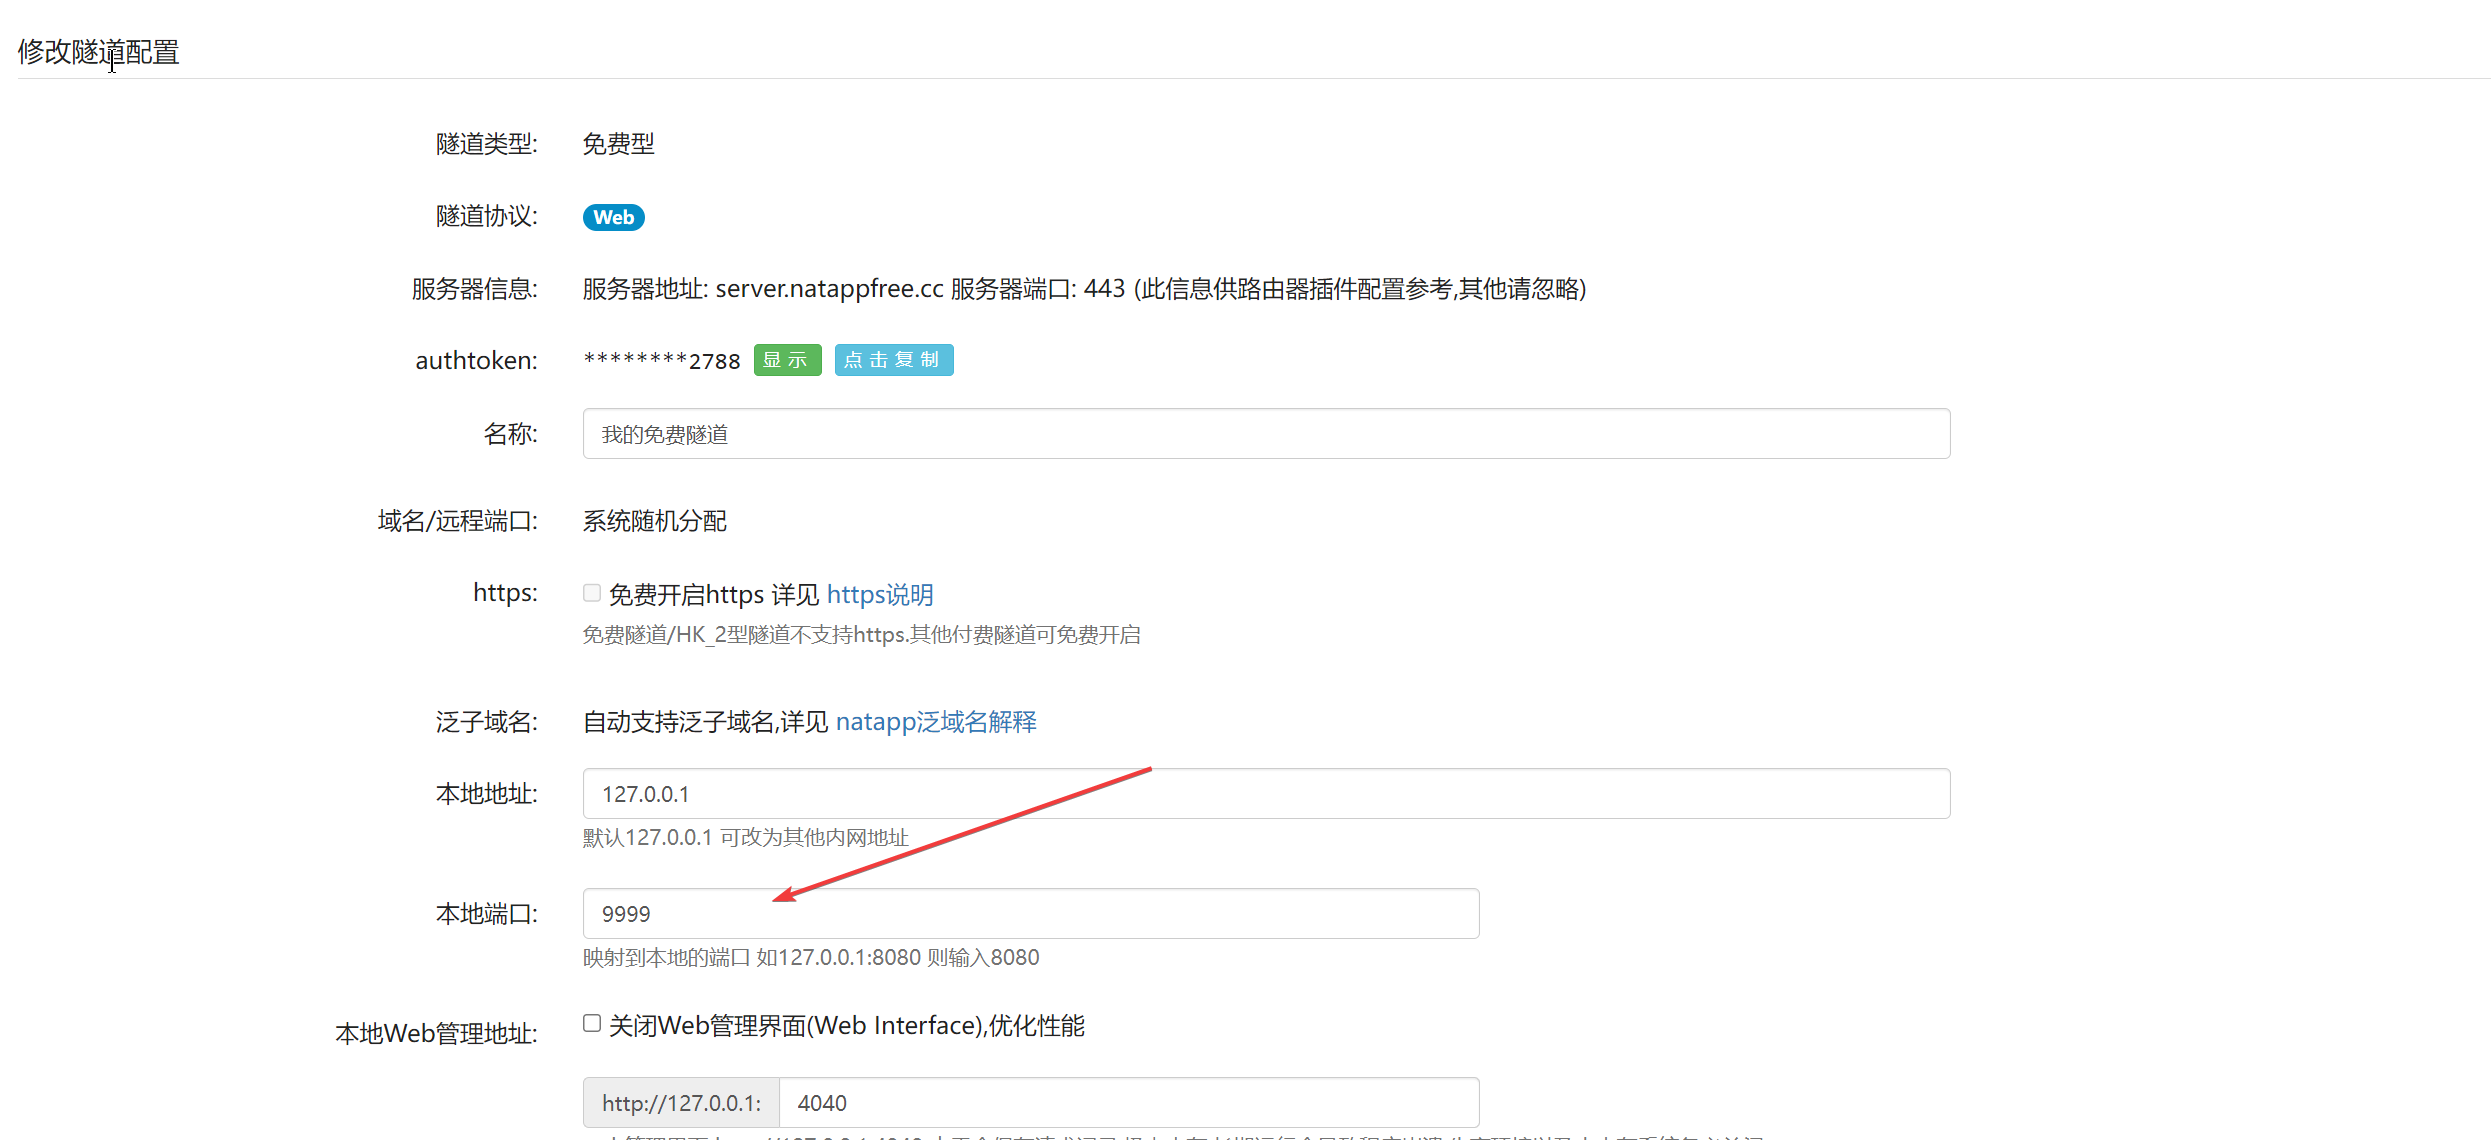
3.配置
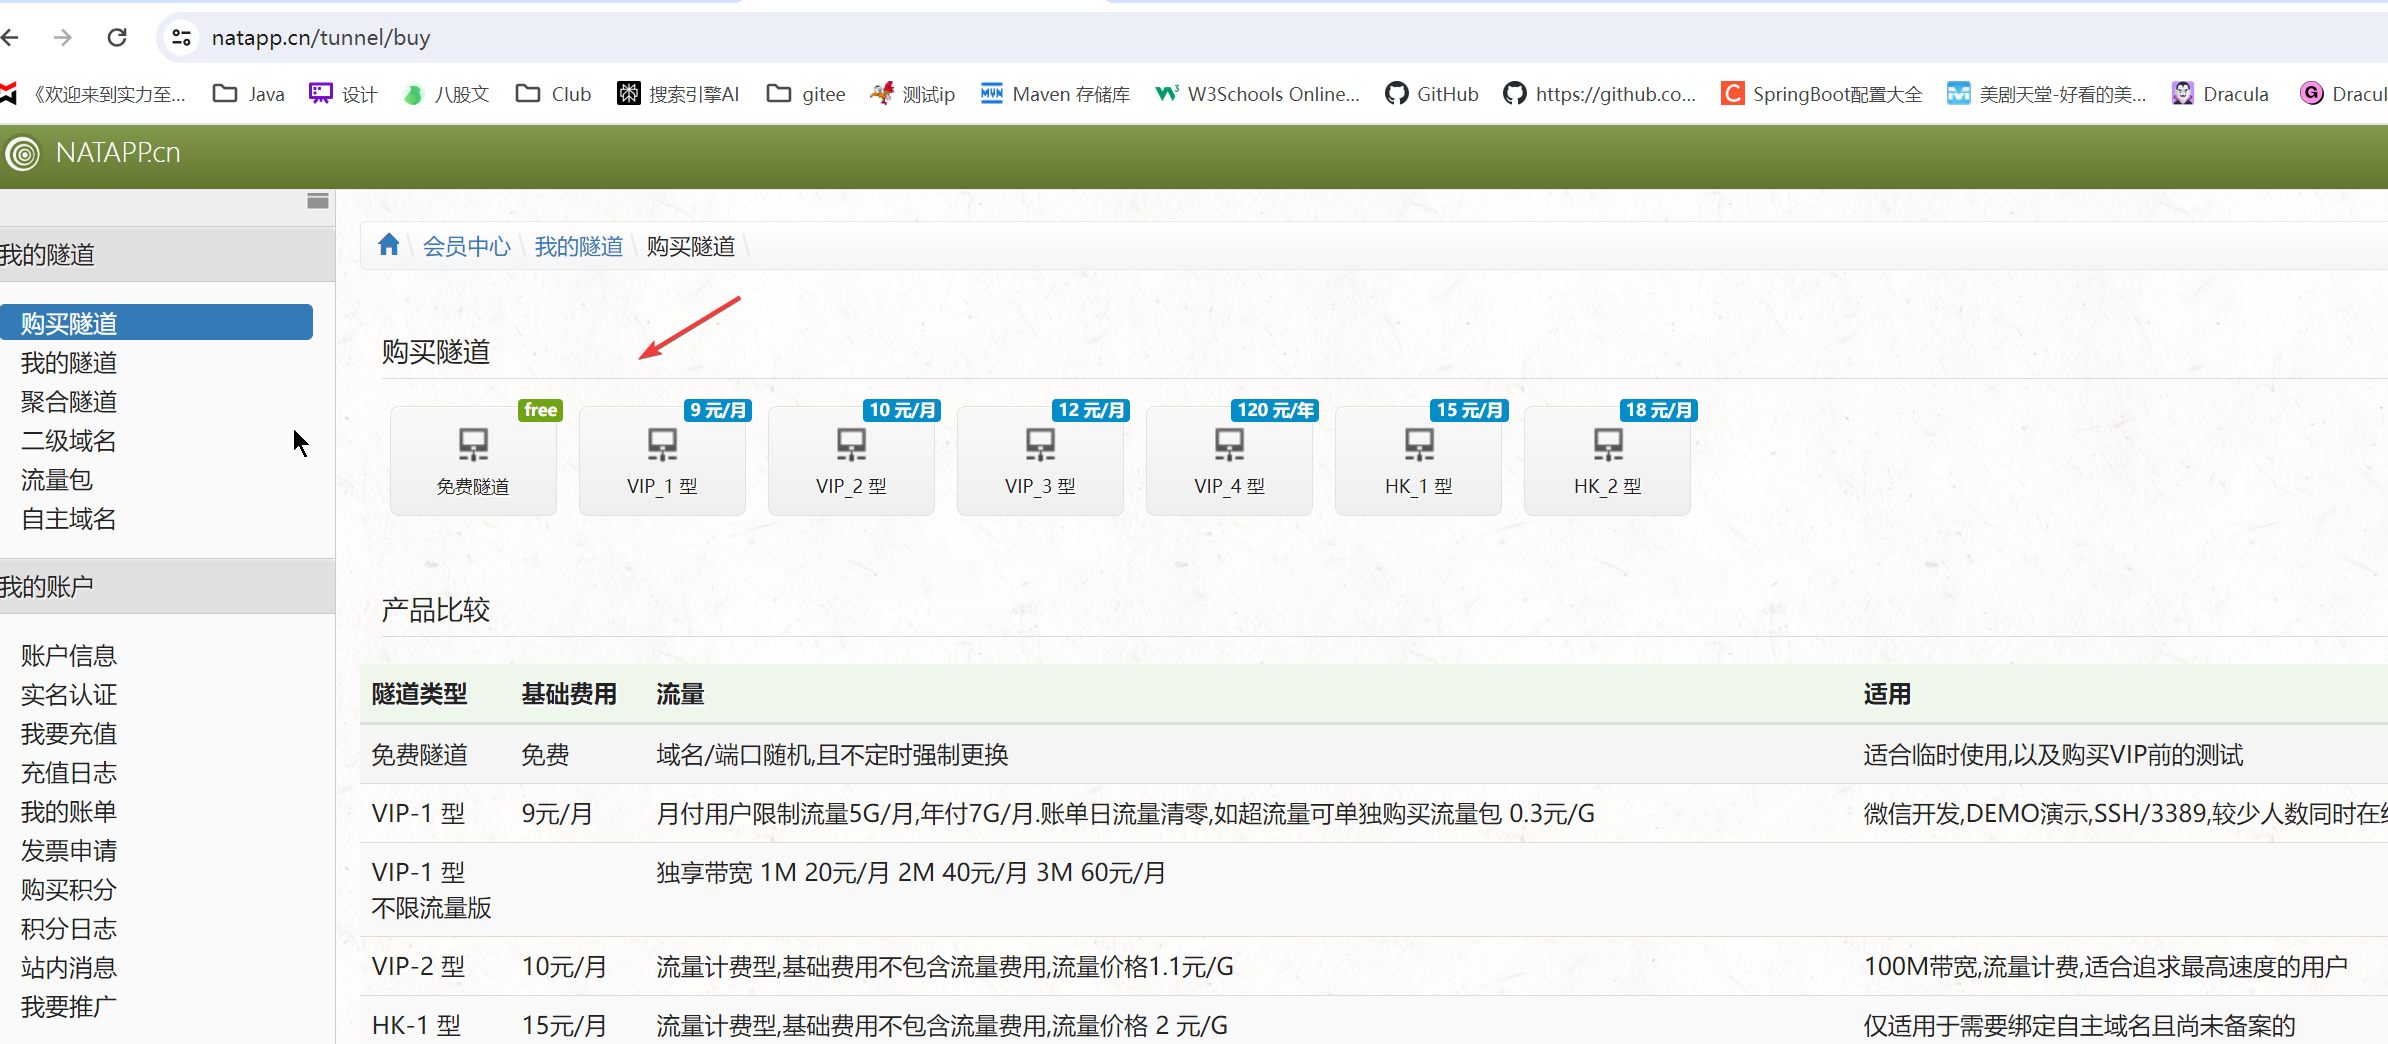
1.购买免费隧道
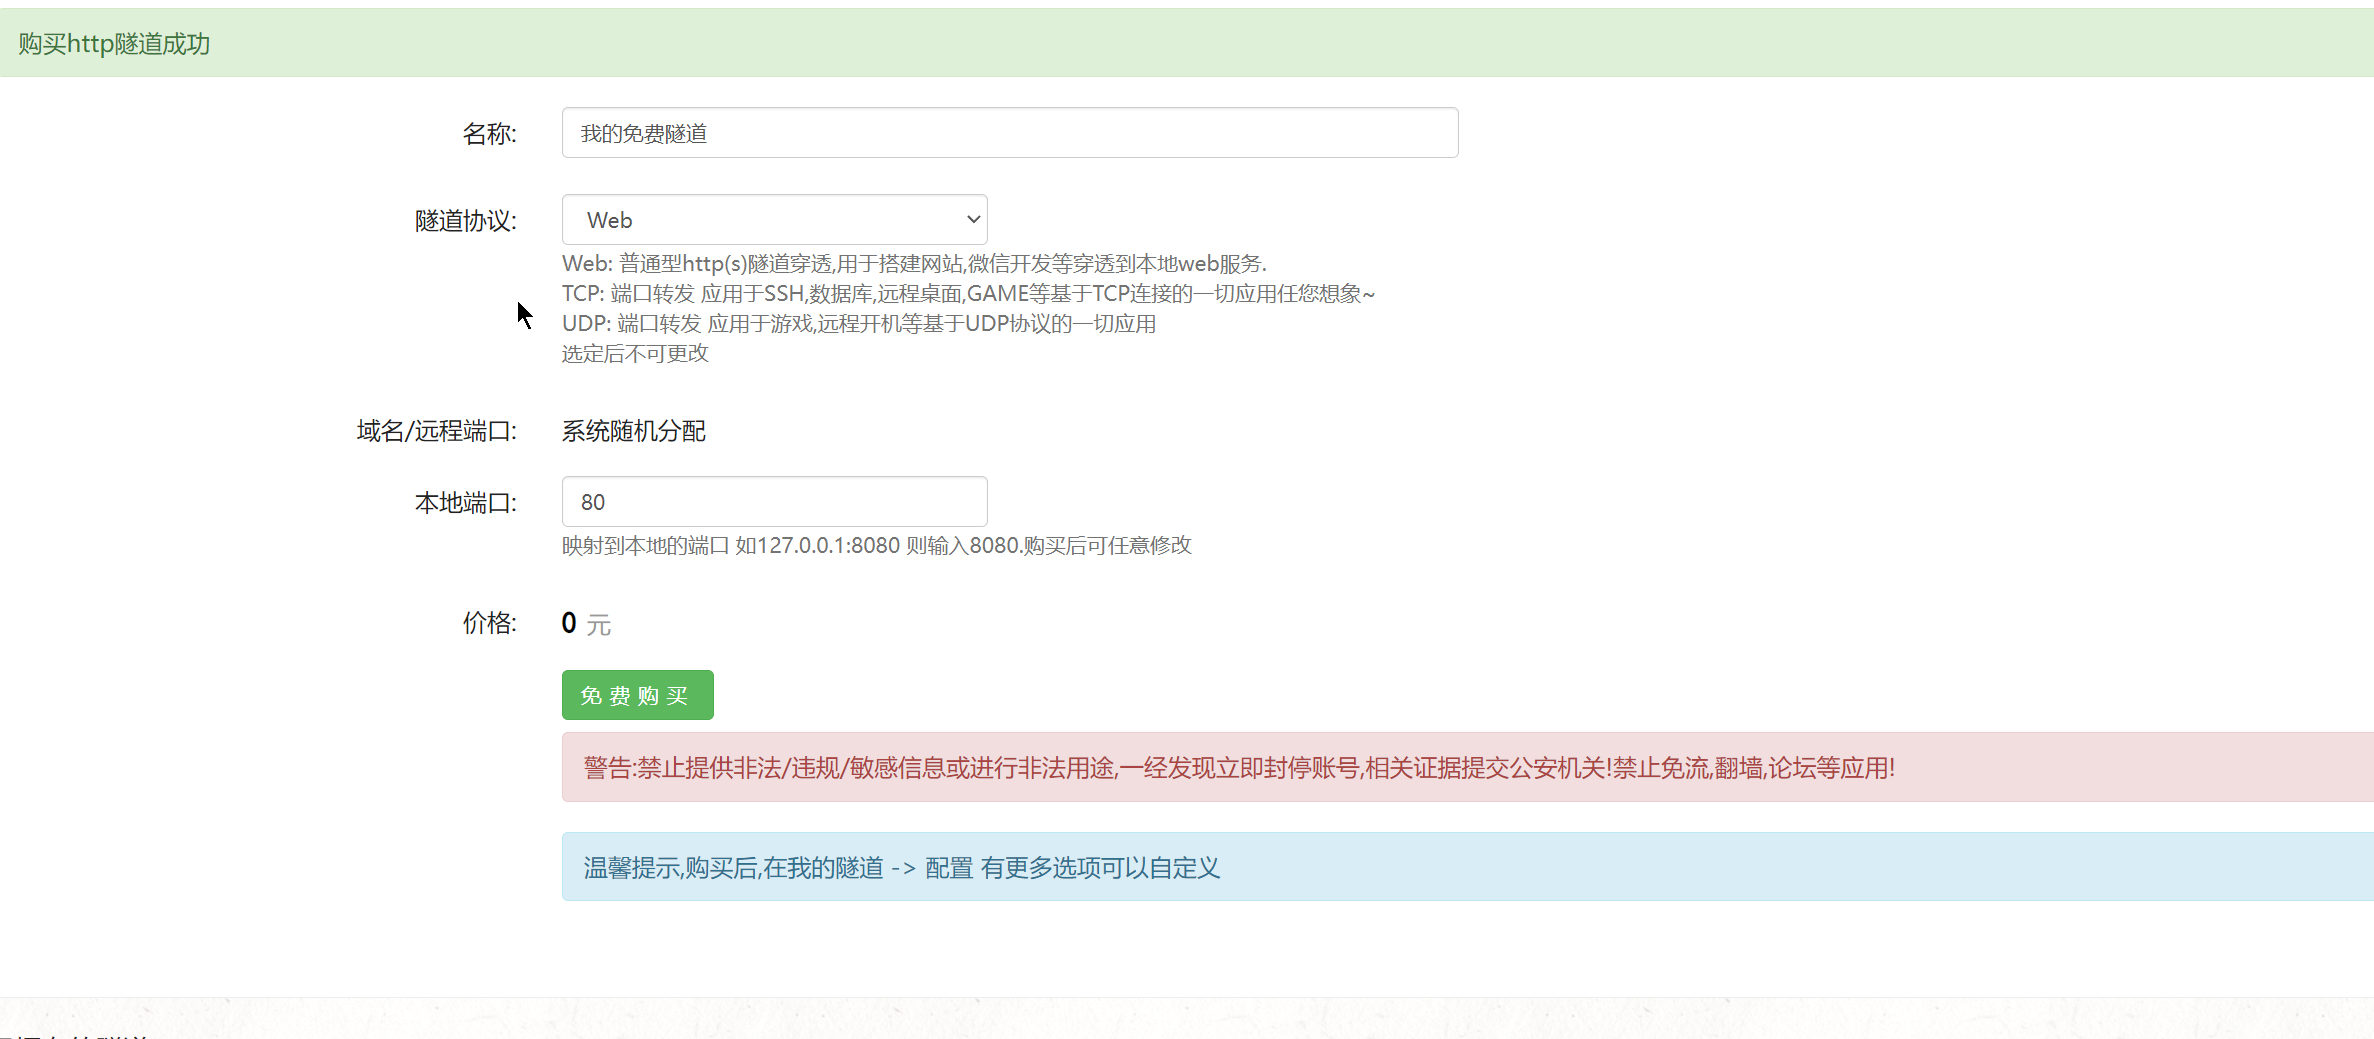
2.进入隧道
3.配置端口为定时任务执行器的端口9999
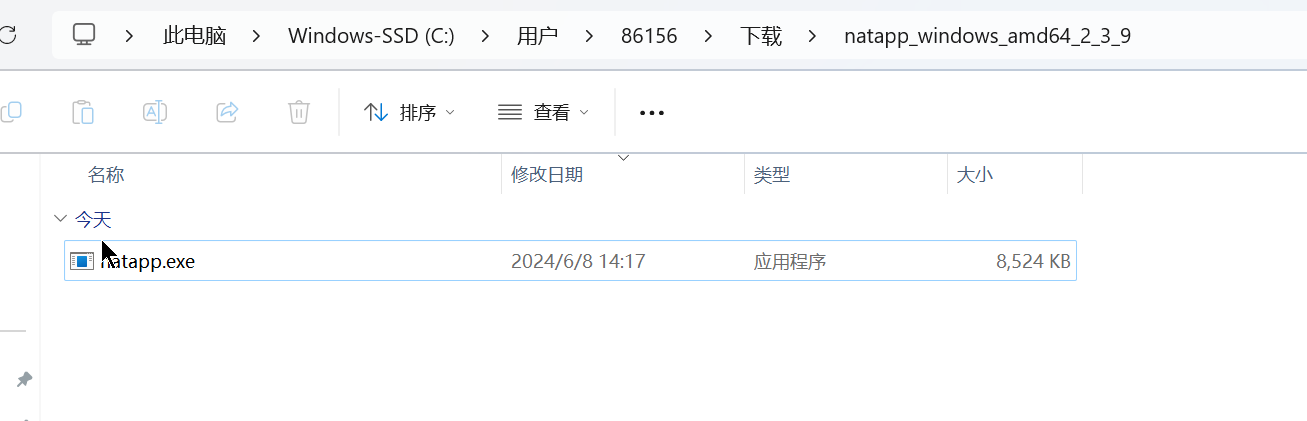
4.下载客户端
5.启动
1.进入客户端exe文件的cmd
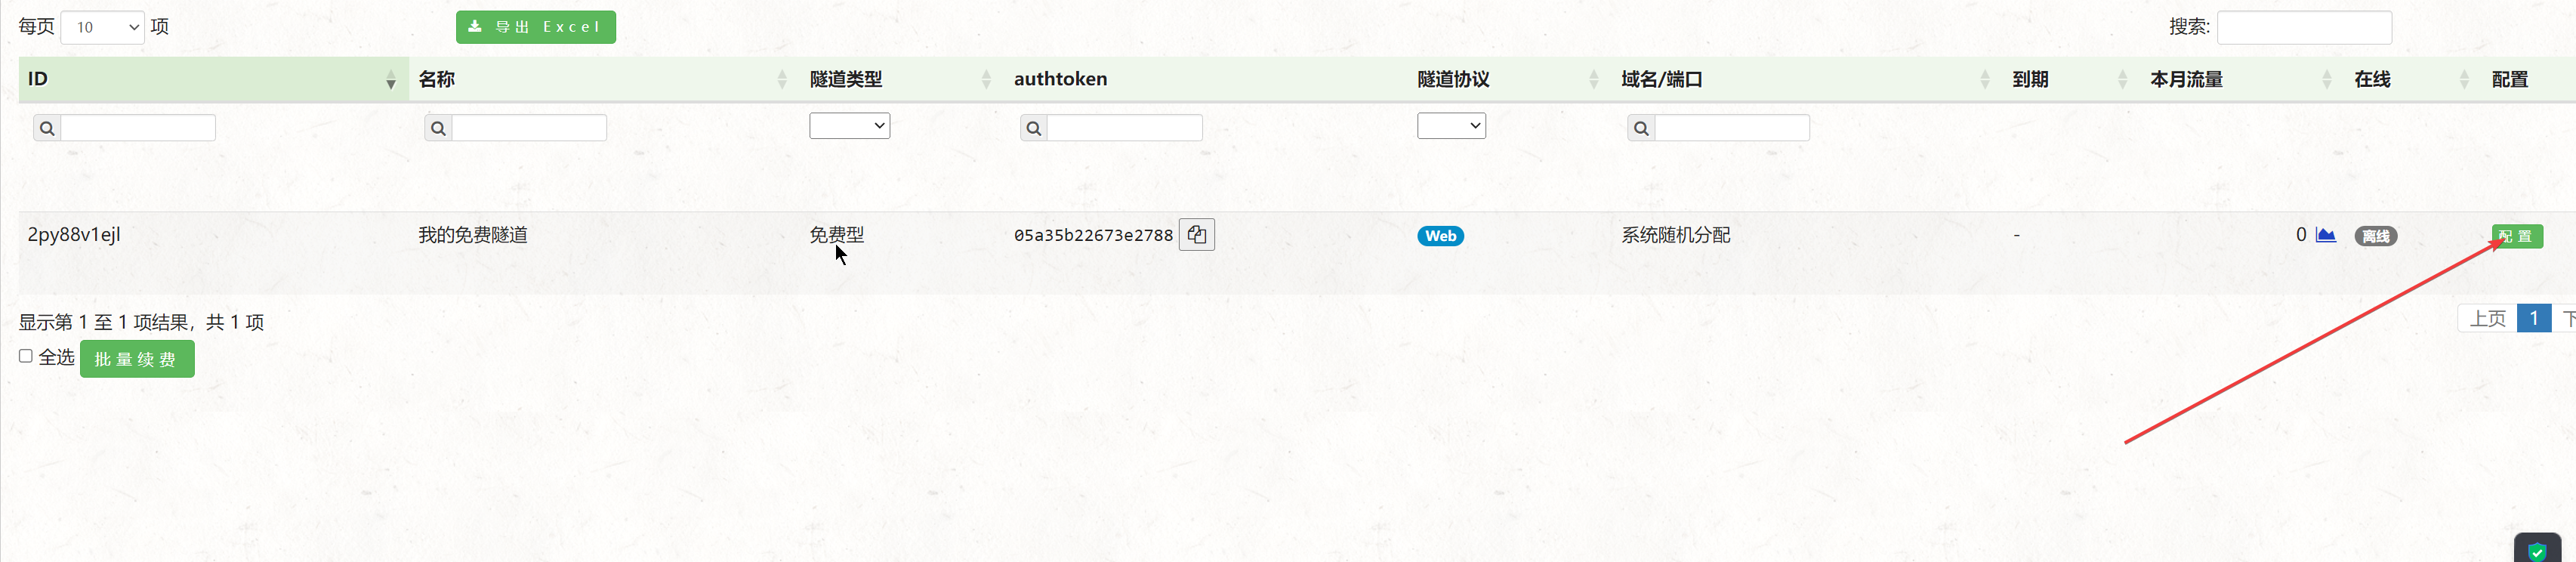
2.找到自己的authtoken,输入命令启动
sh
start natapp -authtoken 05a35b22673e2788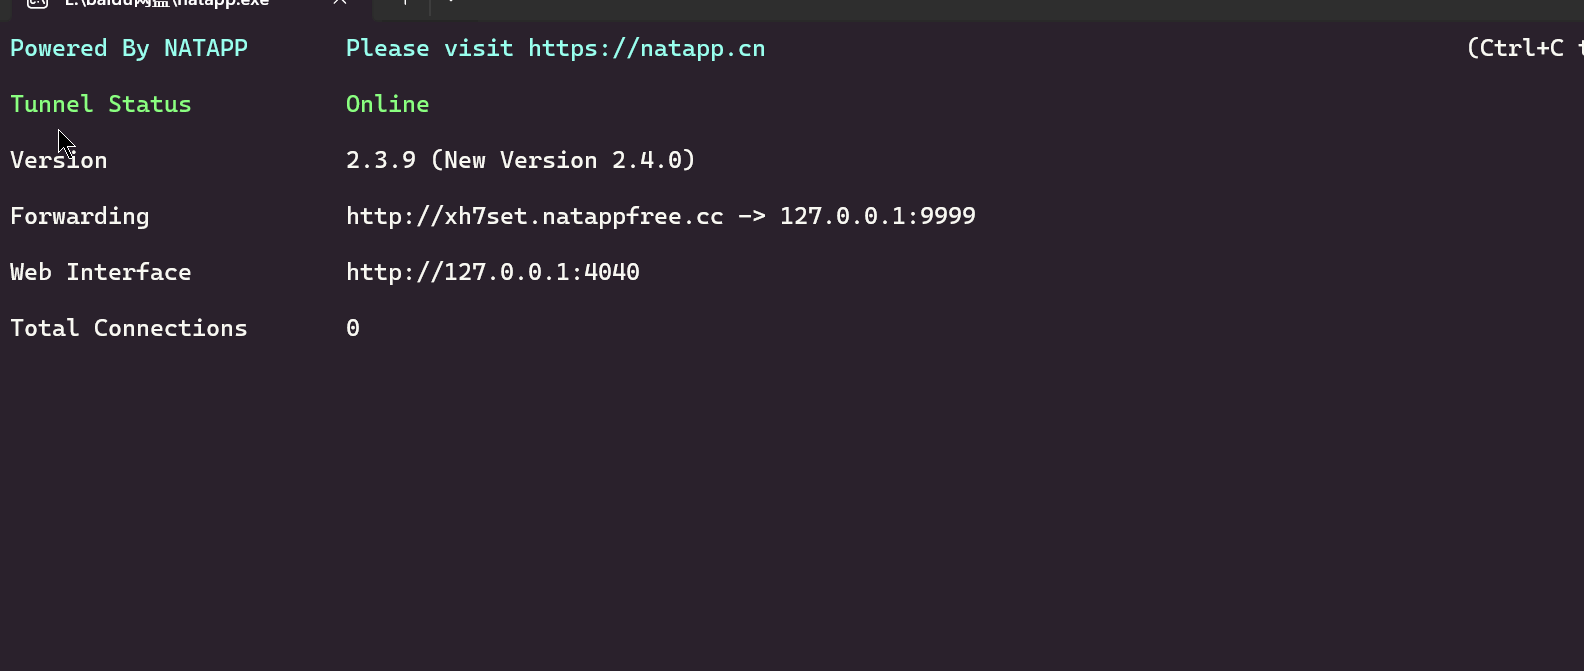
6.application-test.yml 配置执行器的ip和端口
yaml
# xxl-job配置
xxl:
job:
executor:
appname: sun-club-subjcet # 执行器名称
address:
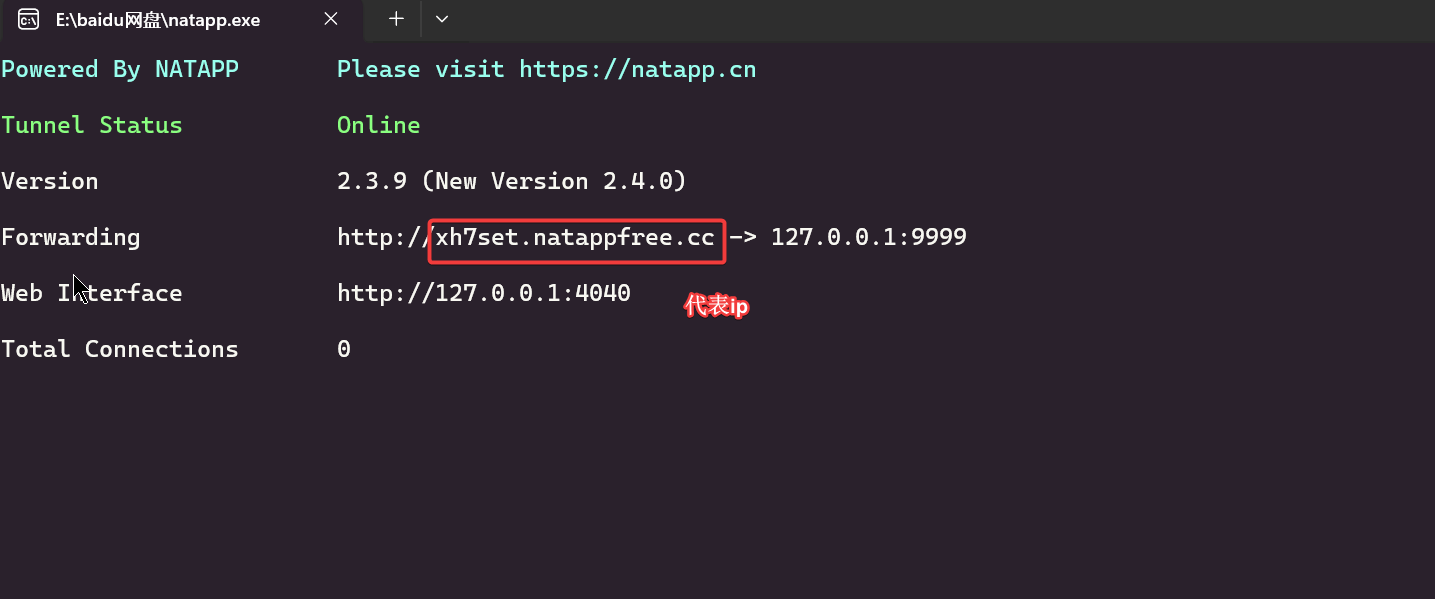
ip: xh7set.natappfree.cc # 执行器ip,该模块的部署ip,这里是内网穿透的ip
port: 9999 # 执行器端口,记得要开防火墙
logpath: /data/applogs/xxl-job/jobhandler
logretentiondays: 307.进行同步测试
1.以测试环境启动项目
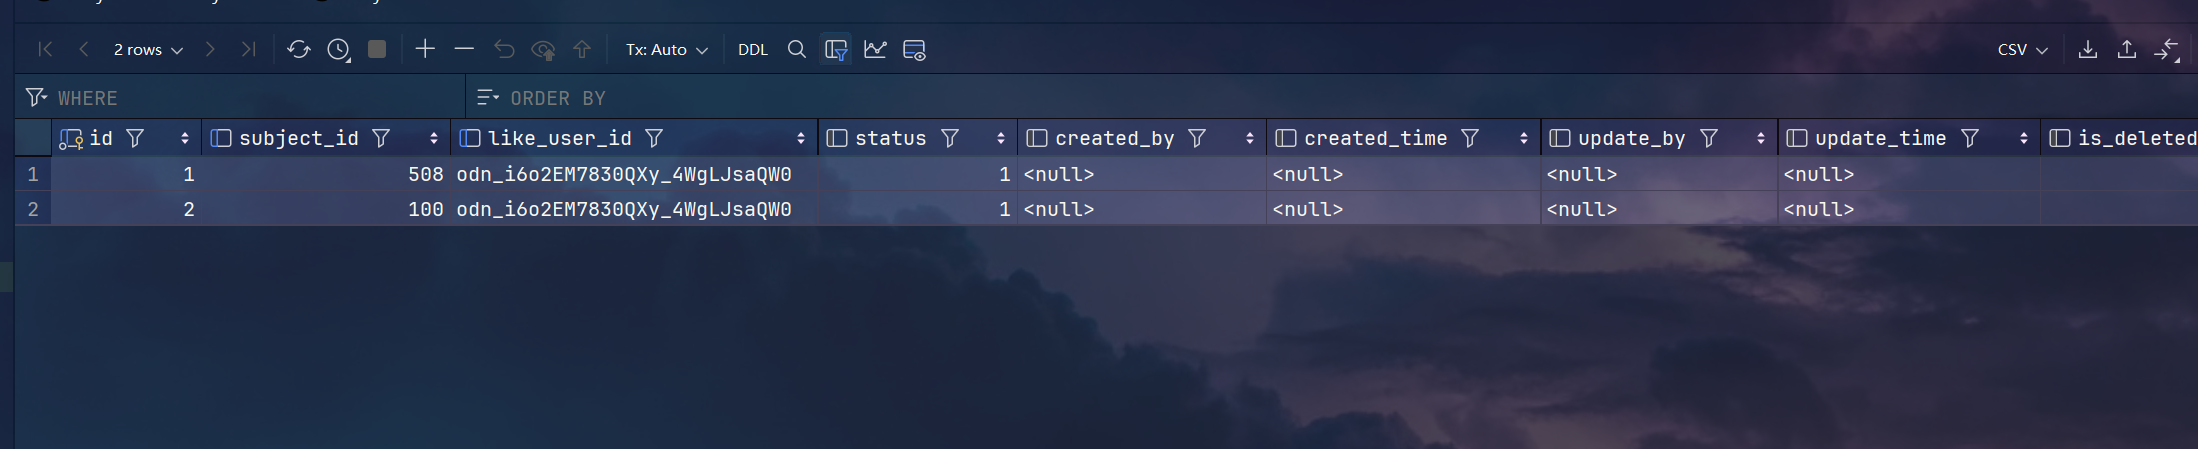
2.查看redis的点赞数据
3.进入xxl-job,执行一次任务
http://ip:8088/xxl-job-admin/toLogin 账号密码 admin 123456
4.发现连接被拒绝了
1.调度日志
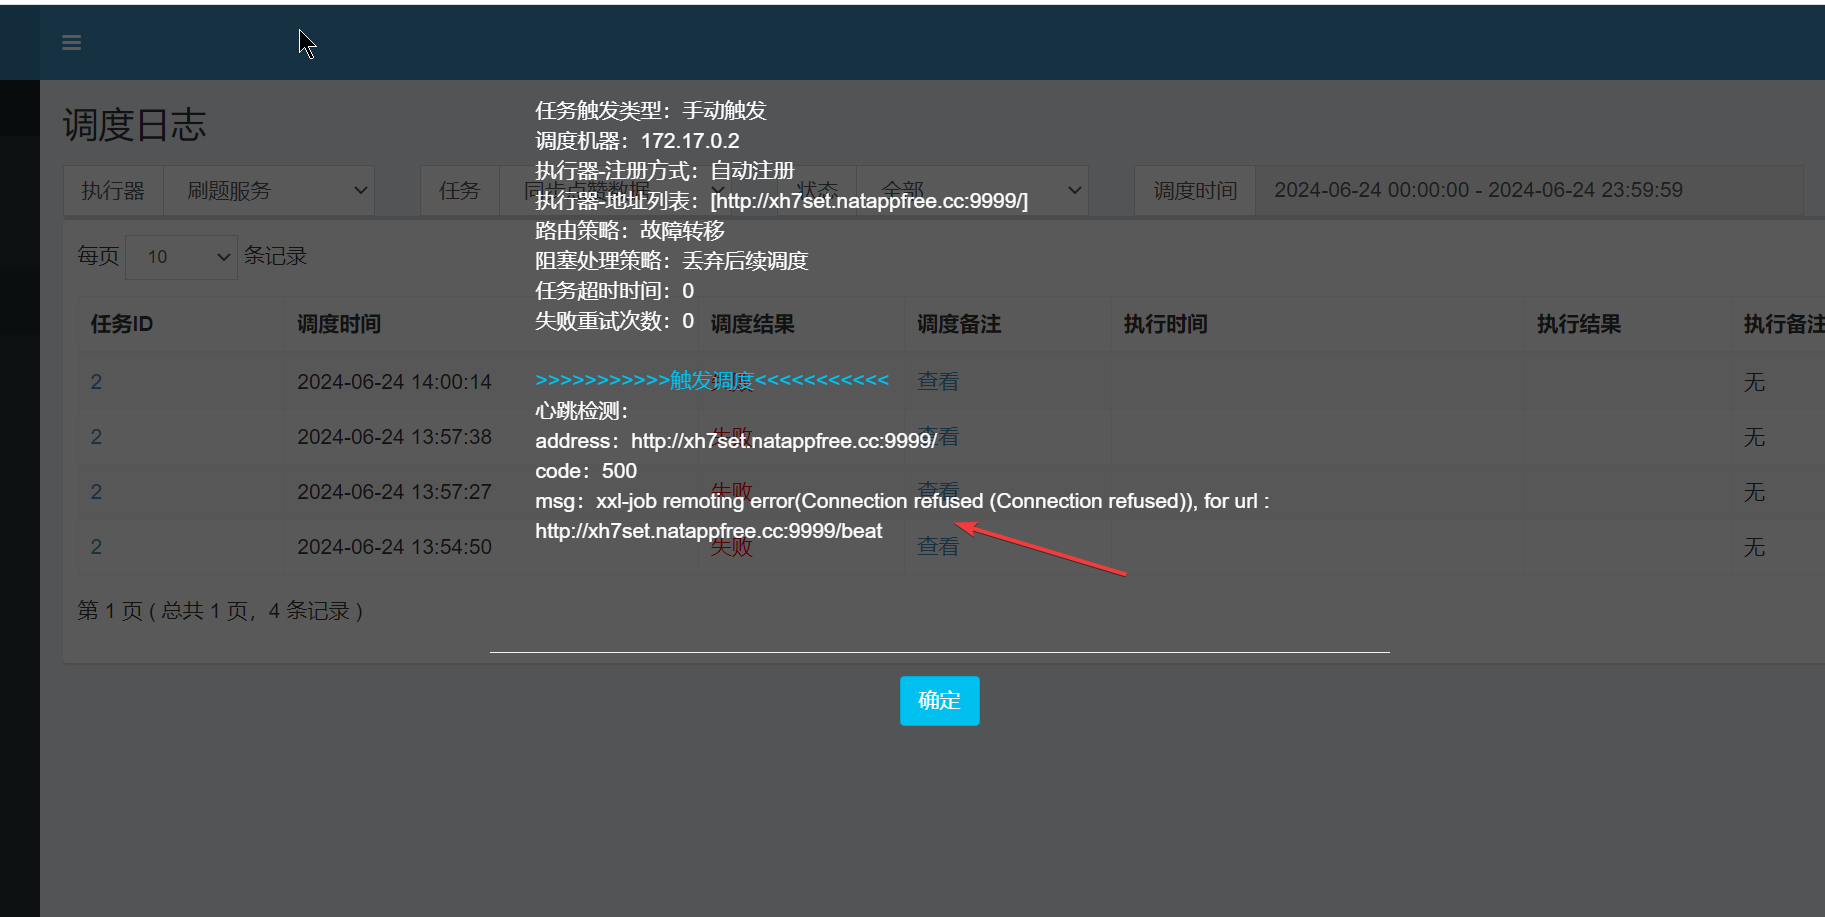
2.关闭本机防火墙
3.发现还是不行,原因是内网穿透需要手动录入内网穿透的ip,则直接会映射ip+端口,如果自动映射还会在后面加9999端口,这样就不对了
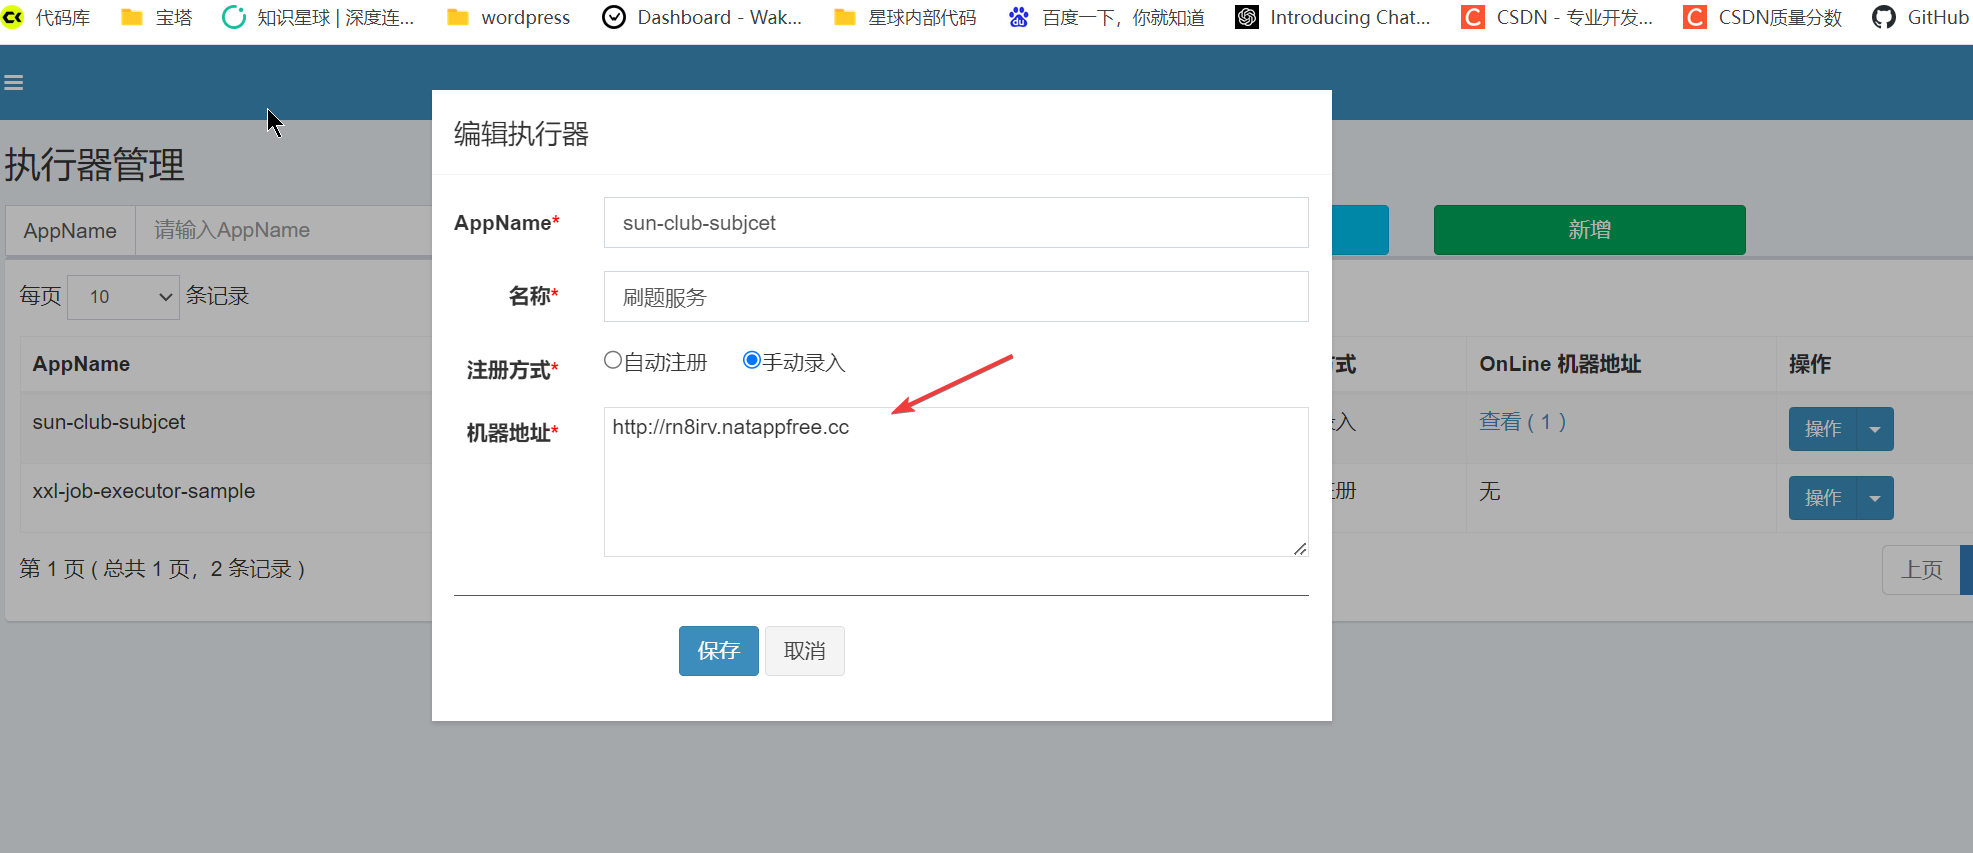
4.内网穿透再说明
1.内网穿透在配置ip和端口的时候正常配置
2.但是如果访问的话,直接访问内网穿透的ip即可,这个就包含了端口,不要再加端口!!!
5.定时任务执行成功!