原文:https://last9.io/blog/convert-opentelemetry-traces-to-metrics-using-spanconnector/
如果您已经实施了跟踪但缺乏强大的指标功能怎么办? SpanConnector 是一个通过将跟踪数据转换为可操作指标来弥补这一差距的工具。这篇文章详细介绍了 SpanConnector 的工作原理,提供了有关其配置和实现的指南。
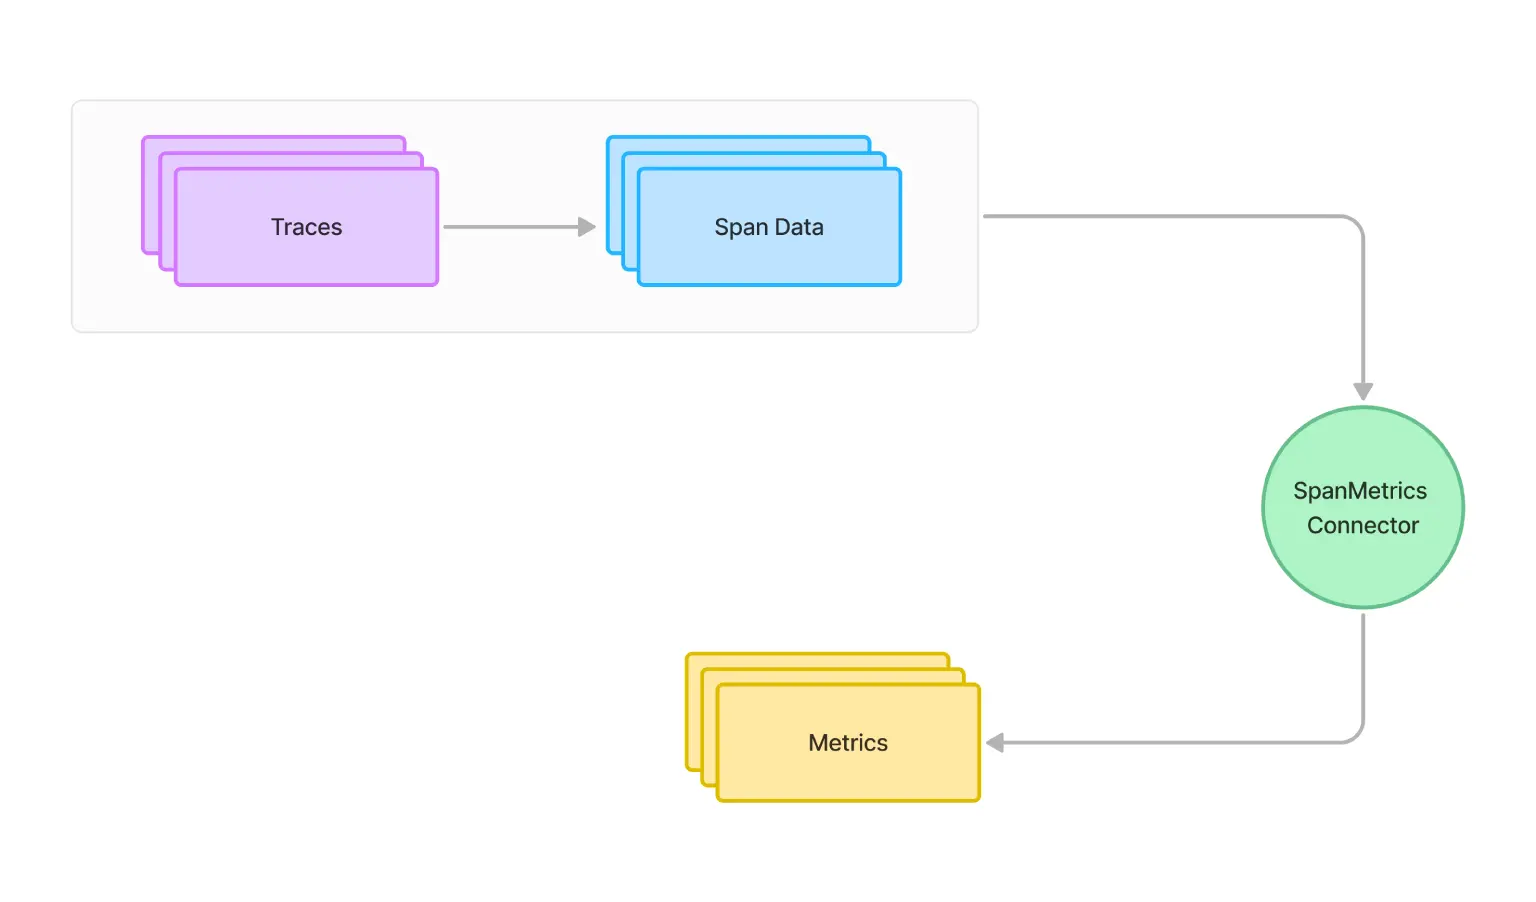
OpenTelemetry 的一个常见问题是语言支持跟踪检测(Trace埋点),但指标方面正在进行中或尚不可用。在这种情况下,您可以使用 SpanConnector 将跟踪生成的跨度(Span)转换为指标。
什么是 Connector?
SpanConnector 是 OpenTelemetry Collector 中的一个组件,允许您从跨度(Span)数据中获取指标。当您拥有强大的跟踪功能但您的语言或框架缺乏原生指标支持时,这尤其有用。
将跟踪(Trace)转换为指标可以提供有关系统性能和运行状况的宝贵见解,而无需单独的插桩埋点。这种统一的方法创建了更全面的可观测性视野,并减少了管理两个不同埋点系统的开销。

SpanMetrics 相关配置
聚合跨度(Span)数据中的请求(Request)、错误(Error)和持续时间(Duration) (R.E.D) OpenTelemetry 指标。
yaml
connectors:
  spanmetrics:
    histogram:
      explicit:
        buckets: [100us, 1ms, 2ms, 6ms, 10ms, 100ms, 250ms]
    dimensions:
      - name: http.method
        default: GET
      - name: http.status_code
      - name: host.name
    exemplars:
      enabled: true
    dimensions_cache_size: 1000
    aggregation_temporality: "AGGREGATION_TEMPORALITY_CUMULATIVE"
    metrics_flush_interval: 15s
    metrics_expiration: 5m
    events:
      enabled: true
      dimensions:
        - name: exception.type
        - name: exception.message
    resource_metrics_key_attributes:
      - service.name
      - telemetry.sdk.language
      - telemetry.sdk.name
了解 SpanMetrics 配置
让我们分解一下此配置的关键部分:
- Histogram Buckets:
histogram.explicit.buckets字段定义指标的延迟桶。这使您可以查看请求持续时间的分布。 - Dimensions:这些是 Span 中的属性,将用于为指标创建标签。在此示例中,我们使用
http.method、http.status_code和host.name。 - Exemplars:启用后,您可以将指标链接回特定的跟踪示例,从而为您的指标提供更多上下文。
- Dimensions Cache:设置要存储的"维度组合"的最大数量。它有助于管理内存使用情况。
- Aggregation Temporality:这决定了指标如何随时间聚合。 "CUMULATIVE" 意味着指标从流程开始就累积。
- Metrics Flush Interval:从连接器生成指标的频率。
- Metrics Expiration:这定义了指标在未更新时被丢弃之前在内存中保留的时间。
- Events:启用后,您可以从跨度事件(例如异常)创建指标。
- Resource Metrics Key Attributes:与跨度(Span)关联的资源中的这些属性将作为标签添加到所有生成的指标中。
使用 SpanMetrics 连接器的好处
- 统一的可观察性:将跟踪转换为指标可以让您更全面地了解系统的性能,而无需单独的指标检测。
- 一致性:确保您的指标与来自同一来源的跟踪完美一致。
- 减少开销:消除了应用程序代码中双重检测(跟踪和指标)的需要。
- 灵活性:您可以根据您的需求和跨度属性生成自定义指标。
实施 SpanMetrics 的指南
1. 设置 OpenTelemetry 跟踪:首先,确保您的应用程序已正确检测以进行跟踪。
下面是一个使用 Python 的简单示例:
python
from opentelemetry import trace
from opentelemetry.sdk.trace import TracerProvider
from opentelemetry.sdk.trace.export import (
    ConsoleSpanExporter,
    BatchSpanProcessor,
)
from opentelemetry.exporter.otlp.proto.grpc.trace_exporter import OTLPSpanExporter

# Set up the tracer provider
trace.set_tracer_provider(TracerProvider())

# Create an OTLP exporter
otlp_exporter = OTLPSpanExporter(endpoint="http://localhost:4317", insecure=True)

# Create a BatchSpanProcessor and add the exporter to it
span_processor = BatchSpanProcessor(otlp_exporter)

# Add the span processor to the tracer provider
trace.get_tracer_provider().add_span_processor(span_processor)

# Get a tracer
tracer = trace.get_tracer(__name__)

# Use the tracer to create spans in your code
with tracer.start_as_current_span("main"):
    # Your application code here
    pass
2. 安装和配置 OpenTelemetry Collector
a. 下载 OpenTelemetry 收集器:
bash
curl -OL https://github.com/open-telemetry/opentelemetry-collector-releases/releases/download/v0.81.0/otelcol-contrib_0.81.0_linux_amd64.tar.gz
tar xzf otelcol-contrib_0.81.0_linux_amd64.tar.gz
b. 创建名为otel-collector-config.yaml的配置文件
yaml
receivers:
  otlp:
    protocols:
      grpc:
      http:

processors:
  batch:

connectors:
  spanmetrics:
    histogram:
      explicit:
        buckets: [100us, 1ms, 2ms, 6ms, 10ms, 100ms, 250ms]
    dimensions:
      - name: http.method
        default: GET
      - name: http.status_code
      - name: host.name
    exemplars:
      enabled: true
    dimensions_cache_size: 1000
    aggregation_temporality: "AGGREGATION_TEMPORALITY_CUMULATIVE"
    metrics_flush_interval: 15s
    metrics_expiration: 5m
    events:
      enabled: true
      dimensions:
        - name: exception.type
        - name: exception.message
    resource_metrics_key_attributes:
      - service.name
      - telemetry.sdk.language
      - telemetry.sdk.name

exporters:
  prometheus:
    endpoint: "0.0.0.0:8889"
  logging:
    verbosity: detailed

service:
  pipelines:
    traces:
      receivers: [otlp]
      processors: [batch]
      exporters: [logging, spanmetrics]
    metrics:
      receivers: [spanmetrics]
      exporters: [logging, prometheus]
3. 启动 OpenTelemetry 收集器
使用您的配置运行收集器:
bash
./otelcol-contrib --config otel-collector-config.yaml4. 将跟踪发送到收集器
修改您的应用程序以将跟踪发送到收集器。如果您使用步骤1中的 Python 示例,则您已设置为将跟踪发送到 http://localhost:4317。
5. 查看生成的指标
Otel Collector 会在 http://localhost:8889/metrics 公开指标,您可以通过 curl 查看原始指标:
bash
curl http://localhost:8889/metrics为了获得更用户友好的视图,您可以设置 Prometheus 来抓取这些指标,创建 prometheus.yml 文件:
yaml
global:
  scrape_interval: 15s

scrape_configs:
  - job_name: 'otel-collector'
    static_configs:
      - targets: ['localhost:8889']
启动 Prometheus(假设您已经下载了它):
bash
./prometheus --config.file=prometheus.yml您现在可以通过 http://localhost:9090 访问 Prometheus UI 来查询和可视化您的指标。
小结
SpanConnector 是 OpenTelemetry 生态系统中的一个强大工具,它弥合了跟踪和指标之间的 gap。通过利用现有跟踪数据生成有意义的指标,您可以增强可观察性策略,而无需额外的埋点开销。这种方法对于过渡到 OpenTelemetry 特别有价值,对于那些指标埋点不太完备的语言,也很有价值。