目录
[4.2、Bootstrap col-md栅栏](#4.2、Bootstrap col-md栅栏)
[4.3、BootStrap Table表格加载](#4.3、BootStrap Table表格加载)
[4.4、Layui select下拉项加载](#4.4、Layui select下拉项加载)
[4.5、Layui radio 单选项加载](#4.5、Layui radio 单选项加载)
[4.6、Ajax Post请求](#4.6、Ajax Post请求)
以下代码基于Spring boot + Thymeleaf框架,
前端采用BootstrapV3.3.7 LayUIV2.9.13 版本
1、项目结构
html文件存放 resources/templates 目录
静态资源存放 resources/static 目录

2、pom依赖导入
<shiro.version>1.13.0</shiro.version>
        <spring-boot.version>2.5.13</spring-boot.version>
        <thymeleaf.extras.shiro.version>2.1.0</thymeleaf.extras.shiro.version>


<!-- 对外服务必须引入 boot-starter、web -->
        <dependency>
            <groupId>org.springframework.boot</groupId>
            <artifactId>spring-boot-starter</artifactId>
        </dependency>
        <!-- SpringBoot Web容器 -->
        <dependency>
            <groupId>org.springframework.boot</groupId>
            <artifactId>spring-boot-starter-web</artifactId>
        </dependency>
        <!-- SpringBoot 拦截器 -->
        <dependency>
            <groupId>org.springframework.boot</groupId>
            <artifactId>spring-boot-starter-aop</artifactId>
        </dependency>
        <dependency>
            <groupId>org.springframework.boot</groupId>
            <artifactId>spring-boot-configuration-processor</artifactId>
        </dependency>
 <!--模板引擎-->
        <dependency>
            <groupId>org.springframework.boot</groupId>
            <artifactId>spring-boot-starter-thymeleaf</artifactId>
        </dependency>

<!-- Shiro核心框架 -->
        <dependency>
            <groupId>org.apache.shiro</groupId>
            <artifactId>shiro-core</artifactId>
            <version>${shiro.version}</version>
        </dependency>

        <!-- Shiro使用Spring框架 -->
        <dependency>
            <groupId>org.apache.shiro</groupId>
            <artifactId>shiro-spring</artifactId>
            <version>${shiro.version}</version>
        </dependency>

        <!-- Shiro使用EhCache缓存框架 -->
        <dependency>
            <groupId>org.apache.shiro</groupId>
            <artifactId>shiro-ehcache</artifactId>
            <version>${shiro.version}</version>
        </dependency>

  <!-- thymeleaf模板引擎和shiro框架的整合 -->
        <dependency>
            <groupId>com.github.theborakompanioni</groupId>
            <artifactId>thymeleaf-extras-shiro</artifactId>
            <version>${thymeleaf.extras.shiro.version}</version>
        </dependency>
3、页面加载机制
由于使用Thymeleaf框架,需要将html页面代码,经过服务端进行模板渲染
页面访问需要与后端交互。
访问需要通过HTTP.GET请求,后端返回html页面相对地址【字符串类型】
针对如下代码示例中,请求的地址最终为 /test/add
返回页面路径为 resources/templates/test/add.html
@Controller
@RequestMapping("/test")
public class TestController {

   private String prefix = "test";

   @GetMapping("/add")
   public String add() {
        return prefix + "/add";
   }


}
4、前端案例
4.1、加载公共页面及静态文件
1)th**:**include 表示加载 /template/include.html 页面内容,并替换内容,不是以iframe内容加载。
**::**header 表示加载内部中的指定子模块
2)th**:** href 表示加载指定路径下文件,避免多层级下的文件,减少 **../**方式查找的复杂度
<head>
    <th:block th:include="include :: header('我的标题')" />
    <link type="text/css" rel="stylesheet" th:href="@{/ajax/libs/layui/css/layui.css}"/>
    <link type="text/css" rel="stylesheet" th:href="@{/ajax/libs/ckplayer/css/ckplayer.css}"/>
</head>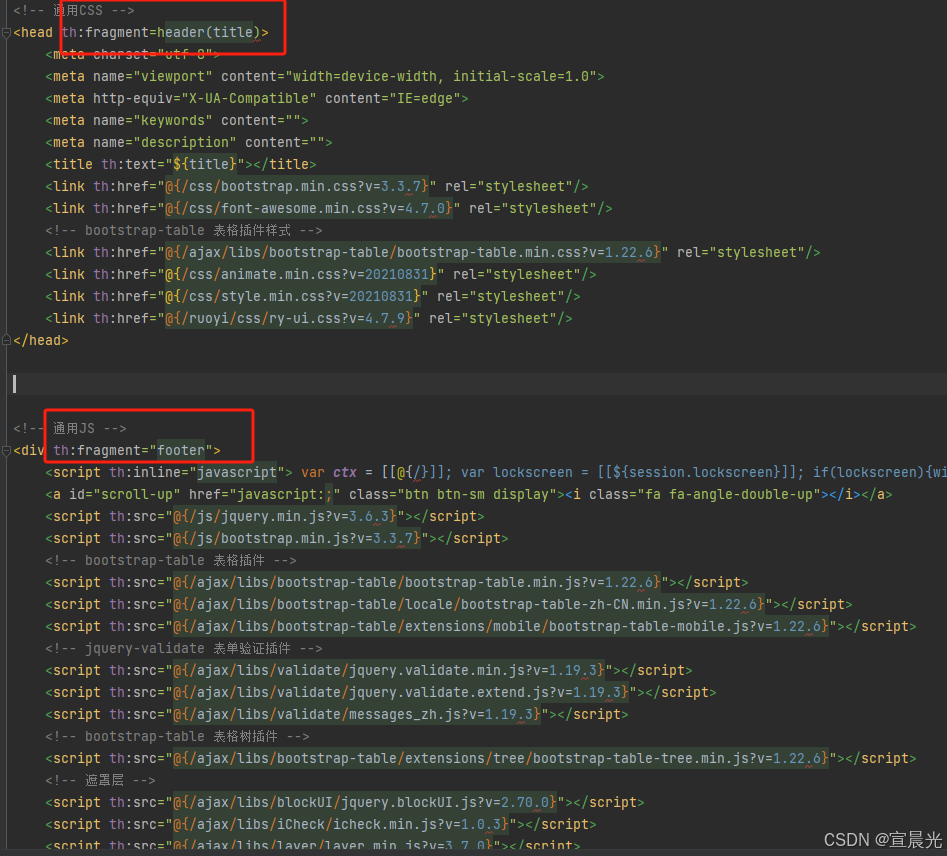
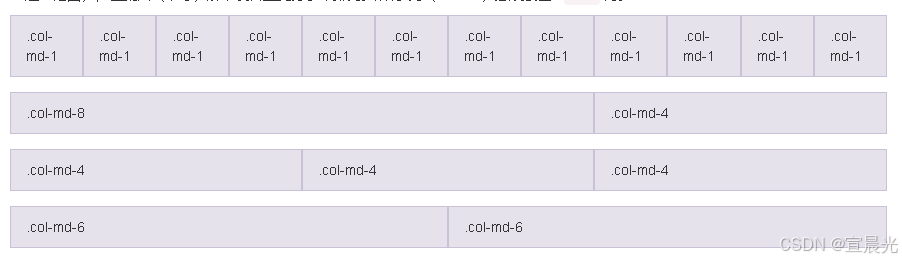
4.2、Bootstrap col-md栅栏
参考 全局 CSS 样式 · Bootstrap v3 中文文档 | Bootstrap 中文网
<div class="layui-container" style="width: 98%;padding-top: 20px">
    <div class="layui-row">
        <div class="layui-col-md2">
             ....
        </div>
        <div class="layui-col-md10">
             ....
        </div>
    </div>
</div>
总单位12栏 使用单一的一组 .col-md-* 栅格类,就可以创建一个基本的栅格系统
4.3、Bootstrap Table表格加载
依赖 ry-ui.js 文件【若依框架】
必须使用div 包裹 table、 且定义class="select-table"
以下代码中 $.table 为ry-ui.js 框架对bootstrap的封装
<div class="select-table" >
    <table id="anno-table"></table>
</div>

function initAnnoTable(){
        var options = {
            id: "anno-table",
            elem: '#anno-table',
            // 禁止右上方按钮栏
            showSearch: false,
            showPageGo: false,
            showRefresh: false,
            showColumns: false,
            showToggle: false,
            // 禁止分页
            pagination: false,
            columns: [
                {
                    title: '序号',
                    width: 100,
                    formatter: function (text, record, index) {
                        return (index + 1);
                    }
                },
                {field: 'startTime',title: '开始时间',},
                {field: 'endTime',title: '结束时间',},
                {field: 'emoDesc',title: '标签结果',},
                {align: 'center',title: '操作',
                    formatter: function(value, row, index) {
                        var actions = [];
                        actions.push('<a class="btn btn-success btn-xs" href="javascript:void(0)" onclick="editAnno(\'' + index + '\')"><i class="fa fa-edit"></i>编辑</a> ');
                        return actions.join('');
                    }},
            ],
            data: [],
        };
        $.table.init(options);
    }
表格数据动态刷新
$.table.refreshOptions({
    id: 'anno-table',
    data: annoList
})
4.4、Layui select下拉项加载
<div class="layui-form layui-row">
                    <select lay-filter="task-select-filter" id="taskSelect">

                    </select>
                </div>

var form = layui.form;

// select 事件
    form.on('select(task-select-filter)', function(data){
        var value = data.value; // 获得被选中的值
        selectTask = {
            taskId: value,
            taskName: this.innerHTML
        }

    });

// 动态加载下拉选项
 $.get(prefix + '/list', function(result) {
            var list = result.data;

            let _html = '';
            _html += '<option  value="">--请选择--</option>';
            for(var item of list){
                _html += '<option  value="'+item.taskId+'" >' + item.taskName + '</option>';
            }
            console.log(_html)
            $('#taskSelect').append(_html)
            form.render()
        });
4.5、Layui radio 单选项加载

<div class="layui-form" >
	<div class="layui-form-item">
		<input type="radio" name="emotion" value="anger"   lay-filter="emotion-radio-filter" title="愤怒">
		<input type="radio" name="emotion" value="disgust"  lay-filter="emotion-radio-filter" title="恐惧">
		<input type="radio" name="emotion" value="hate"  lay-filter="emotion-radio-filter" title="害怕">
		<input type="radio" name="emotion" value="happy"  lay-filter="emotion-radio-filter" title="高兴">
		<input type="radio" name="emotion" value="neutral"  lay-filter="emotion-radio-filter" title="平静" checked>
		<input type="radio" name="emotion" value="sad"  lay-filter="emotion-radio-filter" title="悲伤">
		<input type="radio" name="emotion" value="surprised"  lay-filter="emotion-radio-filter" title="惊讶">
		<button class="layui-btn" lay-submit lay-filter="emotion-radio-submit" >添加</button>
	</div>
</div>
选中事件
// radio 事件
    form.on('radio(emotion-radio-filter)', function(data){
        console.log(data.value);
    });
动态切换选中
var myValue = 'sad';
if ($(item).val() == myValue) {
//更改选中value值
$(item).prop('checked', true);
//重新渲染
layui.use('form', function () {
var form = layui.form;
form.render();
});
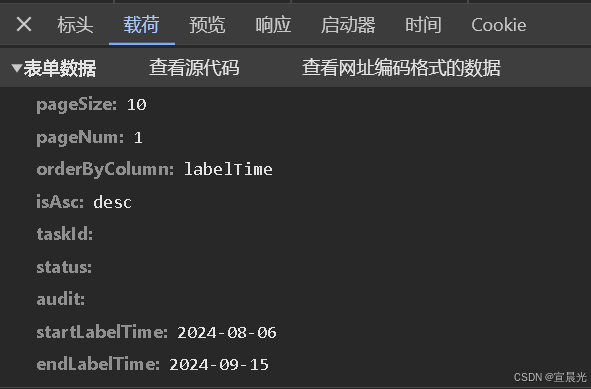
}4.6、Layui 日期选择加载
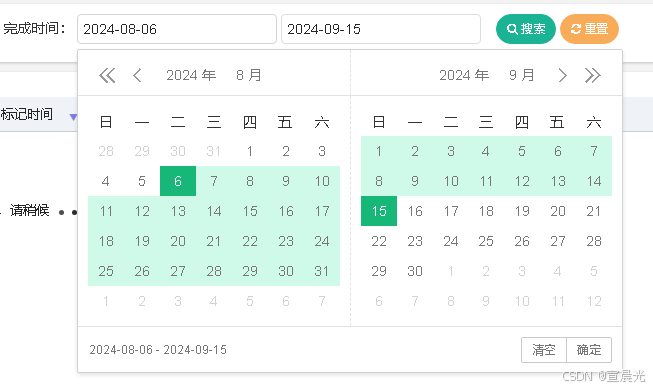
<div class="layui-inline" id="rangeDate">
	<div class="layui-input-inline">
		<input type="text" id="startLabelTime" name="startLabelTime" class="layui-input"  placeholder="开始日期">
	</div>
	<div class="layui-input-inline">
		<input type="text" id="endLabelTime" name="endLabelTime" class="layui-input"   placeholder="结束日期">
	</div>
</div>
通过 id 属性关联
// 暂存 时间范围
dateRange = {}

layui.use(function() {
		var laydate = layui.laydate;

		// 日期范围 - 左右面板联动选择模式
		laydate.render({
			elem: '#rangeDate',
			range: ['#startLabelTime', '#endLabelTime'],
			rangeLinked: true,
			done: function(value, date, endDate){
				var start = value.split(' - ')[0];
				var end = value.split(' - ')[1];
				dateRange = {
					startTime: start,
					endTime:  end
				}
			}
		});
	})
通过在<form>表单中,将子元素添加name 属性,在表单提交时,自动参数携带
4.14、Jquery 设置 div 宽高
使用jQuery设置div的宽度和高度有以下几种实现方法:
1、使用css()方法:
允许设置百分比值,并且要求属性名 width、height,必须使用引号
$("#myDiv").css({

"width": "100%",

"height": "100px"

});
2、使用width()和height()方法:
这里只能设置整数值,用于具体的px
$("#myDiv").width(200).height(100);3、使用attr()方法:
$("#myDiv").attr({

"width": "200px",

"height": "100px"

});
4、使用addClass()方法:
$("#myDiv").addClass("custom-class");然后在CSS文件中定义.custom-class的样式:
.custom-class {

width: 200px;

height: 100px;

}
在layui、bootstrap中使用 栅栏预先定义class样式分割区域
$('#rightDiv').removeClass('layui-col-md10')
$('#rightDiv').addClass('layui-col-md12')
5、使用animate()方法(动画效果):
$("#myDiv").animate({

"width": "200px",

"height": "100px"

}, 500); // 可以设置动画效果的持续时间,单位为毫秒
4.15、Ajax Post请求
使用contentType + JSON.stringify 将传输 json格式的请求
如果不声明使用,则传入 form 表单数据
$.ajax({
  url: 'your-api-url',
  type: 'POST',
  dataType: 'json',
  contentType: 'application/json',
  data: JSON.stringify({ key1: 'value1', key2: 'value2' }),
  success: function(response) {
    console.log(response);
  },
  error: function(err) {
    console.error(err);
  }
});
参考文章: