背景
5 月份的时候,我实践并整理了一篇博客:SpringBoot搭建OAuth2,该博客完成之后,很长一段时间里我都有种意犹未尽的感觉。诚然,我把OAuth2搭起来了,各种场景的用例也跑通了,甚至源码也看了,但我还是觉得自己的了解不够透彻。
我们公司也使用OAuth认证服务,企业微服务中是怎么应用OAuth2的?我搭建的认证服务离公司的成熟框架还有多远?这是我在学习OAuth时一直想弄明白的问题。幸运的是,在经历重重困难后,我终于把它们都梳理清楚了。我的学习成果会在本次及后面的几篇博客中体现。今天,咱们先迈出第一步:OAuth自定义登陆和授权页面。
在企业内使用OAuth2时,研发人员最先做的就是重新设计登陆和授权页面了。诚然,OAuth里有默认的登陆和授权页面,但那是最原生的页面,既不美观,也和其他服务的页面风格不搭,所以基本没有人会用原生页面。在这里,我就先实践下怎么自定义登陆和授权页面吧。
代码实践
纵观网上的各种资料,我发现OAuth2自定义登陆页面有两种方式,一种是利用thymeleaf的方式,通过Controller跳转到html,另一种是直接跳转到html的方式。这两种方式我都会演示下。为了方便测试,下文中的实践均采用InMemory的配置方式。另外建议下,在实践时不要在服务上加上下文根(如http://127.0.0.1:8080/leixi/oauth/...里的/leixi),非常影响测试。
一、通过thymeleaf跳转自定义页面
1、首先,引入Jar包
XML
        <dependency>
            <groupId>org.springframework.boot</groupId>
            <artifactId>spring-boot-starter-web</artifactId>
        </dependency>

        <dependency>
            <groupId>org.springframework.boot</groupId>
            <artifactId>spring-boot-starter-security</artifactId>
        </dependency>

        <!--  OAuth2.0依赖  -->
        <dependency>
            <groupId>org.springframework.cloud</groupId>
            <artifactId>spring-cloud-starter-oauth2</artifactId>
            <version>2.2.5.RELEASE</version>
        </dependency>
        <!--页面要用到的框架-->
        <dependency>
            <groupId>org.springframework.boot</groupId>
            <artifactId>spring-boot-starter-thymeleaf</artifactId>
        </dependency>
2、配置@Config
java
package com.leixi.auth2.config;

import org.springframework.context.annotation.Bean;
import org.springframework.context.annotation.Configuration;
import org.springframework.core.annotation.Order;
import org.springframework.security.authentication.AuthenticationManager;
import org.springframework.security.config.annotation.authentication.builders.AuthenticationManagerBuilder;
import org.springframework.security.config.annotation.web.builders.HttpSecurity;
import org.springframework.security.config.annotation.web.configuration.WebSecurityConfigurerAdapter;
import org.springframework.security.core.userdetails.UserDetailsService;
import org.springframework.security.crypto.bcrypt.BCryptPasswordEncoder;
import org.springframework.security.oauth2.provider.token.TokenStore;
import org.springframework.security.oauth2.provider.token.store.InMemoryTokenStore;

/**
 *
 * @author leixiyueqi
 * @since 2024/9/4 22:00
 */
// security 安全相关的配置类
@Configuration
@Order(1)
public class SecurityMemoryConfiguration extends WebSecurityConfigurerAdapter {

    private static final String loginUrl = "/login";
    private static final String loginPage = "/authcation/login";

    @Override
    protected void configure(HttpSecurity http) throws Exception {
        http
                // http security 要拦截的url,这里这拦截,oauth2相关和登录登录相关的url,其他的交给资源服务处理
                .requestMatchers()
                .antMatchers( "/oauth/**",loginUrl,loginPage)
                .and()
                .authorizeRequests()
                // 自定义页面或处理url是,如果不配置全局允许,浏览器会提示服务器将页面转发多次
                .antMatchers(loginUrl,loginPage)
                .permitAll()
                .anyRequest()
                .authenticated();

        // 表单登录
        http.formLogin()
                // 登录页面
                .loginPage(loginPage)
                // 登录处理url
                .loginProcessingUrl(loginUrl);
        http.httpBasic().disable();
    }

    @Override
    protected void configure(AuthenticationManagerBuilder auth) throws Exception {
        BCryptPasswordEncoder encoder = new BCryptPasswordEncoder();
        auth.inMemoryAuthentication()   //直接创建一个静态用户
                .passwordEncoder(encoder)
                .withUser("leixi").password(encoder.encode("123456")).roles("USER");
    }


    @Bean   //这里需要将AuthenticationManager注册为Bean,在OAuth配置中使用
    @Override
    public AuthenticationManager authenticationManagerBean() throws Exception {
        return super.authenticationManagerBean();
    }

    @Bean
    @Override
    public UserDetailsService userDetailsServiceBean() throws Exception {
        return super.userDetailsServiceBean();
    }

    @Bean
    public TokenStore tokenStore() {
        return new InMemoryTokenStore();
    }
}


package com.leixi.auth2.config;

import org.springframework.context.annotation.Configuration;
import org.springframework.security.authentication.AuthenticationManager;
import org.springframework.security.core.userdetails.UserDetailsService;
import org.springframework.security.crypto.bcrypt.BCryptPasswordEncoder;
import org.springframework.security.oauth2.config.annotation.configurers.ClientDetailsServiceConfigurer;
import org.springframework.security.oauth2.config.annotation.web.configuration.AuthorizationServerConfigurerAdapter;
import org.springframework.security.oauth2.config.annotation.web.configuration.EnableAuthorizationServer;
import org.springframework.security.oauth2.config.annotation.web.configurers.AuthorizationServerEndpointsConfigurer;
import org.springframework.security.oauth2.config.annotation.web.configurers.AuthorizationServerSecurityConfigurer;

import javax.annotation.Resource;

/**
 * 基于内存的设置方式,所有的客户端,用户信息都在内存里
 *
 * @author leixiyueqi
 * @since 2024/9/4 22:00
 */
@EnableAuthorizationServer   //开启验证服务器
@Configuration
public class OAuth2MemoryConfiguration extends AuthorizationServerConfigurerAdapter {

    @Resource
    private AuthenticationManager manager;

    private final BCryptPasswordEncoder encoder = new BCryptPasswordEncoder();

    @Resource
    UserDetailsService service;

    /**
     * 这个方法是对客户端进行配置,
     * 之后这些指定的客户端就可以按照下面指定的方式进行验证
     * @param clients 客户端配置工具
     */
    @Override
    public void configure(ClientDetailsServiceConfigurer clients) throws Exception {
        clients
                .inMemory()   //这里我们直接硬编码创建,当然也可以像Security那样自定义或是使用JDBC从数据库读取
                .withClient("client")   //客户端名称,随便起就行
                .secret(encoder.encode("654321"))      //只与客户端分享的secret,随便写,但是注意要加密
                .autoApprove(false)    //自动审批,这里关闭,要的就是一会体验那种感觉
                .scopes("book", "user", "borrow")     //授权范围,这里我们使用全部all
                .autoApprove(false)
                .redirectUris("http://127.0.0.1:19210/leixi/demo")
                .authorizedGrantTypes("client_credentials", "password", "implicit", "authorization_code", "refresh_token");
        //授权模式,一共支持5种,除了之前我们介绍的四种之外,还有一个刷新Token的模式
    }

    @Override
    public void configure(AuthorizationServerSecurityConfigurer security) {
        security
                .passwordEncoder(encoder)    //编码器设定为BCryptPasswordEncoder
                .allowFormAuthenticationForClients()  //允许客户端使用表单验证,一会我们POST请求中会携带表单信息
                .checkTokenAccess("permitAll()");   //允许所有的Token查询请求,没有这一行,check_token就会报401

    }

    @Override
    public void configure(AuthorizationServerEndpointsConfigurer endpoints) {
        endpoints
                .userDetailsService(service)
                .authenticationManager(manager);
        //这个是用于在登陆成功后,将授权请求Action替换自定义的Action,以便进入自定义授权页面
        endpoints.pathMapping("/oauth/confirm_access","/custom/confirm_access");
    }
}
3、编写跳转的Controller
java
package com.leixi.auth2.controller;

import org.springframework.security.oauth2.provider.AuthorizationRequest;
import org.springframework.stereotype.Controller;
import org.springframework.ui.Model;
import org.springframework.web.bind.annotation.RequestMapping;
import org.springframework.web.bind.annotation.SessionAttributes;

import javax.servlet.http.HttpServletRequest;
import java.util.HashMap;
import java.util.Map;
/**
 *
 * @author leixiyueqi
 * @since 2024/9/4 22:00
 */
@Controller
@SessionAttributes("authorizationRequest")
public class BootGrantController {

    @RequestMapping("/authcation/login")
    public String loginPage(Model model, HttpServletRequest request) {
        //跳转到登陆页
        return "login-page";
    }

    @RequestMapping("/custom/confirm_access")
    public String getAccessConfirmation(Map<String, Object> param, HttpServletRequest request, Model model) throws Exception {
        AuthorizationRequest authorizationRequest = (AuthorizationRequest) param.get("authorizationRequest");
        if (authorizationRequest==null){
            return "redirect:"+"login-page";
        }
        String clientId = authorizationRequest.getClientId();
        model.addAttribute("scopes",authorizationRequest.getScope());
        Map<String, Object> client = new HashMap<>();
        client.put("clientId",clientId);
        client.put("name","leixi");  // 这里应该是用户名
        model.addAttribute("client",client);
        return "oauth-check";
    }
}
4、在resources/static文件夹下编写登陆页login-page.html,授权页oauth-check.html。注意一定要在resources/static下,且文件取名要和Controller里配置的一样。
html
<!--这是登陆页login-page.html -->
<!DOCTYPE html>
<html lang="en" xmlns:th="http://www.thymeleaf.org">
<head>
    <meta charset="UTF-8"/>
    <title>登录</title>
</head>
<body>
<h2>自定义登录页面</h2>
<!--spring security 默认处理用户名密码就是/login,可以自定义,需要loginProcessingUrl()-->
<p style="color: red" th:if="${param.error}">用户名或密码错误</p>
<form th:action="'/login'" method="post">
    <table>
        <tr>
            <td>用户名:</td>
            <td>
                <label><input type="text" name="username"/></label>
            </td>
        </tr>
        <tr>
            <td>密码:</td>
            <td>
                <label><input type="password" name="password"/></label>
            </td>
        </tr>

        <tr>
            <td colspan="2">
                <button type="submit">登录</button>
            </td>
        </tr>
    </table>
</form>
</body>
</html>


<!--这是授权页oauth-check.html -->
<!DOCTYPE html>
<html lang="en" xmlns:th="http://www.thymeleaf.org">
<head>
    <meta charset="UTF-8"/>
    <title>确认授权页面</title>
    <meta name="viewport" content="initial-scale=1, maximum-scale=1, user-scalable=no"/>
    <link rel="stylesheet" href="//i.gtimg.cn/vipstyle/frozenui/2.0.0/css/frozen.css"/>

    <style>
        .block{
            position: relative;
        }
        .ui-notice{
            position: relative;
            padding:20px 15px;
            box-sizing: border-box;
        }
        .ui-notice p{
            color:#333;
            font-weight: 600;
        }
        .ui-btn-primary{
            background-color: #02cd93;
            border-color:#02cd93;;
        }
        .ui-notice-btn{
            padding:50px 0px 15px;
        }
    </style>
</head>
<body>
<div class="block">
    <section class="ui-notice">
        <i class="icon icon-notice"></i>
        <p>是否授权:<span th:text="${session.authorizationRequest.clientId}">clientId</span></p>
        <div class="ui-notice-btn">
            <form id='confirmationForm' name='confirmationForm' th:action="'/oauth/authorize'" method='post'>
                <input name='user_oauth_approval' value='true' type='hidden'/>
                <!--写好授权访问领域-->
                <div th:each="item:${scopes}">
                    <input type="radio" th:name="'scope.'+${item}" value="true" hidden="hidden" checked="checked"/>
                </div>
                <input class="ui-btn-primary ui-btn-lg ui-btn-primary" name='authorize' value='授权' type='submit'/>
            </form>
        </div>
    </section>
</div>
</body>
</html>
5、yml中添加配置
XML
spring:
  # 模板引擎配置
  thymeleaf:
    prefix: classpath:/static/
    suffix: .html
    cache: false
  mvc:
    throw-exception-if-no-handler-found: true
6、启动项目,输入地址
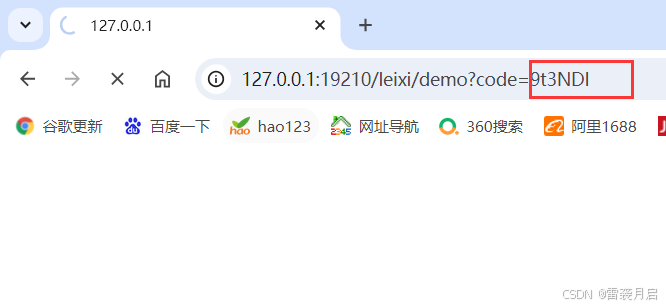
http://127.0.0.1:19200/oauth/authorize?client_id=client&response_type=code
进行测试,效果如下:
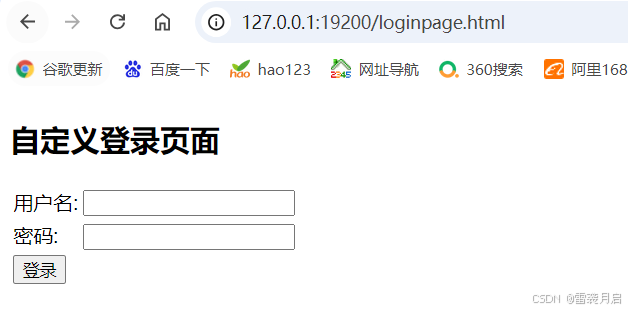
自定义登陆页面:

自定义授权页面:
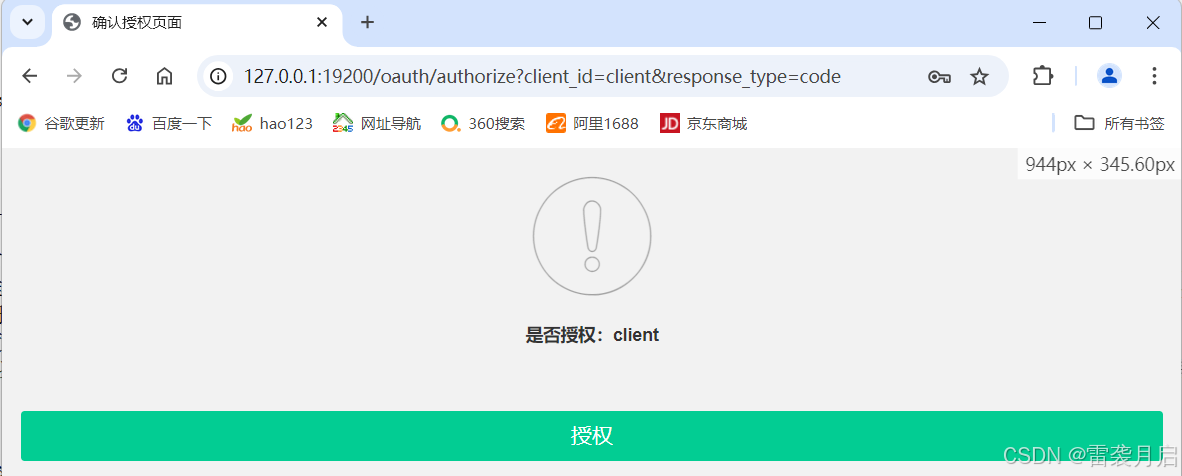
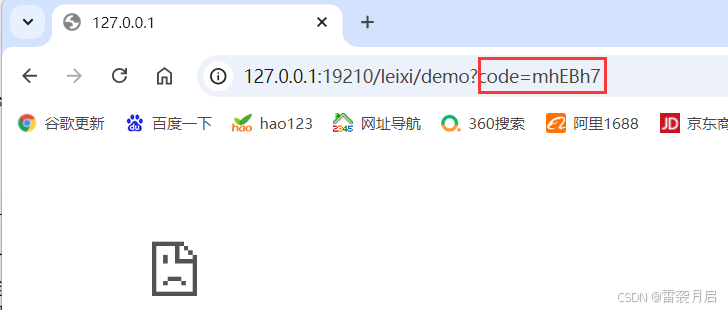
授权成功,可以得到code
这么一看,怎么页面还没有原生的漂亮?
嘞个......我只是为了演示怎么设置自定义页面,用的是最精减的代码,没有做相关样式的设计,所以丑点是正常的。
二、直接跳转登陆页
第二种实现方法是参考公司OAuth Server中的实现,直接在Config里配置登陆页,而不再通过Controller和thymeleaf实现页面的跳转,相比于第一种方式,它的实现更加简单,缺点是我目前还没有找到怎么跳转到自定义授权页面的方法,但是一般在企业应用中,都会直接配置自动授权,很少有需要进入授权页面的,这个缺陷并不重要。下面是相比于5月份的那个版本的代码变动。
1、修改SecurityMemoryConfiguration中的configure(HttpSecurity http),如下
java
    private static final String loginUrl = "/loginpage.html";

    @Override
    protected void configure(HttpSecurity http) throws Exception {
        http
                // http security 要拦截的url,这里这拦截,oauth2相关和登录登录相关的url,其他的交给资源服务处理
                .authorizeRequests()
                .antMatchers( "/oauth/**","/**/*.css", "/**/*.ico", "/**/*.png", "/**/*.jpg", "/**/*.svg", "/login",
                        "/**/*.js", "/**/*.map",loginUrl, "/base-grant.html")
                .permitAll()
                .anyRequest()
                .authenticated();
        // post请求要设置允许跨域,然后会报401
        http.csrf().ignoringAntMatchers("/login", "/logout", "/unlock/apply");

        // 表单登录
        http.formLogin()
                // 登录页面
                .loginPage(loginUrl)
                // 登录处理url
                .loginProcessingUrl("/login");
        http.httpBasic();
    }
2、在/resources/static下添加loginpage.html,如下:
html
<!DOCTYPE html>
<html lang="en" xmlns:th="http://www.thymeleaf.org">
<head>
<meta charset="UTF-8"/>
<title>登录</title>
</head>
<body>
<h2>自定义登录页面</h2>
<!--spring security 默认处理用户名密码就是/login,可以自定义,需要loginProcessingUrl()-->
<p style="color: red" th:if="${param.error}">用户名或密码错误</p>
<form th:action="'/login'" method="post">
<table>
<tr>
<td>用户名:</td>
<td>
<label><input type="text" name="username"/></label>
</td>
</tr>
<tr>
<td>密码:</td>
<td>
<label><input type="password" name="password"/></label>
</td>
</tr>
<tr>
<td colspan="2">
<button type="submit">登录</button>
</td>
</tr>
</table>
</form>
</body>
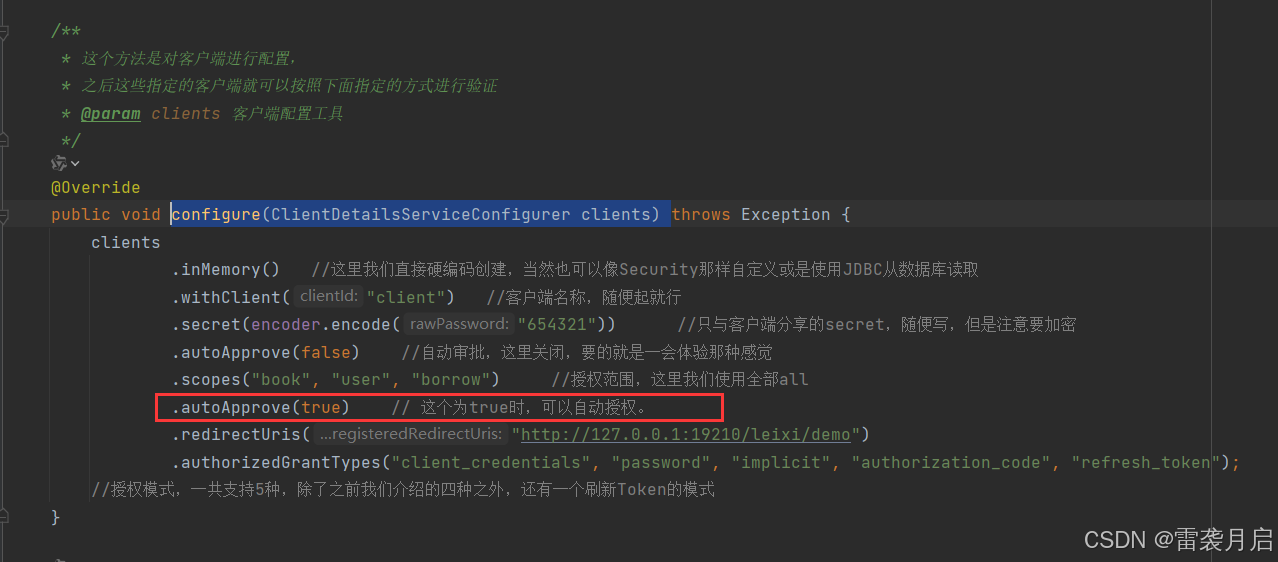
</html>3、如果不需要手动授权,可以修改OAuth2MemoryConfiguration中的client配置,这样就会自动略过授权页面了。
4、功能测试,依然是那个链接,那个密码,结果如下:
后记与致谢
之前参考的资料里,大多都只写了thymeleaf的实现方法,这里之所以把两种方法都写出来,主要原因是第二种实现方法很简洁,被惊艳到了,另一个原因是我在实践的过程中,因为这两种方法吃了太多的亏。我总是以一种质疑的方式去模仿,为什么网上的方法和公司的实现不一样?非要按网上的来吗?公司好像没引入依赖包啊,这部分可以看网上,那部分公司写的很精练......结果抄来抄去,把两种实现方案抄混了,都没能达到效果。这是一种很低效的学习方法,无论学习什么技术,在有参考的情况下,至少先沿着前人的路走通一条,再去想着优化,革新,这是我得到的最宝贵的教训。
在实践这篇博客的过程中,雷袭也参考学习了很多大佬的博客,以下这篇:Spring boot+Security OAuth2 自定义登录和授权页面是对我启发最大,最有帮助的,博主还在文中贴心的放上了源码链接,非常值得学习和尊重,拜谢大佬!
最后再提一嘴,在网上搜索相关资料时,发现很多资料都很老,有的都是17,18年的老博客了。这也让我在研究这OAuth时有着浓浓的挫败感,毕竟技术是日新月异,不断迭代的,最新的博客很少,说明世面上肯定有很多新的技术取代旧技术了。侧面也说明了,我现在研究的东西,在七八年之前,已经有人成体系的研究出方案了,想想都感觉好落伍啊!