【iOS】push和present的区别
文章目录
前言
在iOS开发中,我们经常性的会用到界面的一个切换的问题,这里我们需要理清有关视图控制器的push和present的相关方法的区别,以及两种切换方式所对应的视图控制器的形式。
push
这里先给出一个push的简单代码。
objc
ViewController4* vc2 = [[ViewController4 alloc] init];
[self.navigationController pushViewController:vc2 animated:YES];
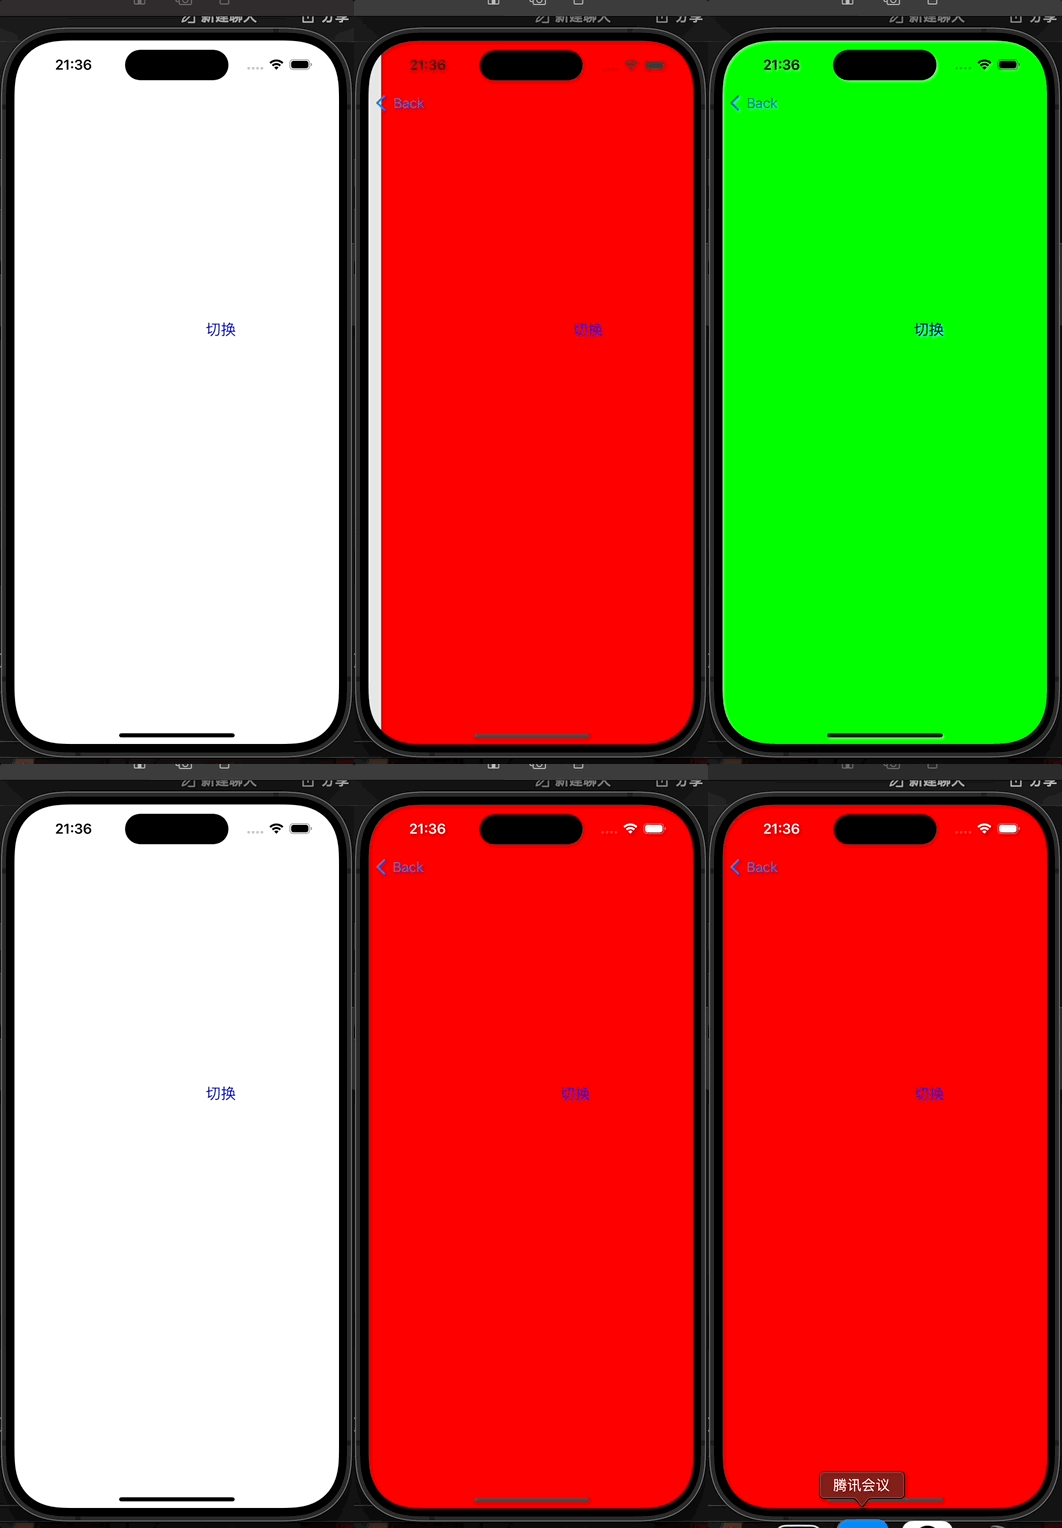
我们通过这两个语句就可以实现一个push出一个视图控制器的效果,这里讲一下push的原理。
pushViewController:animated: 方法用于将新的视图控制器推入导航栈。这意味着新控制器将显示在当前控制器的上方,同时当前控制器仍然在堆栈中。
pop
push方法对应pop,pop有主要分成两个类别:
- 第一个类别就是返回到上一层
objc
[self.navigationController popViewControllerAnimated:YES];- 第二个类别就是返回到某一层
objc
[self.navigationController popToRootViewControllerAnimated:YES];//这个是返回到根视图
[self.navigationController popToViewController:viewController animated:YES];//返回指定的某一层视图控制器这里我们返回某一层的视图控制器可以通过这种方式来返回self.navigationController.viewControllers[i]这里的i是你需要的viewController的层级也可以采用for循环通过判断我们的一个view是否符合isKindeOfClass这个方法来找到对应的UIView,来实现返回某一层的ViewController。
这个给出一个样例:
objc
#import "ViewController3.h"
#import "ViewController4.h"
@interface ViewController3 ()

@end

@implementation ViewController3

- (void)viewDidLoad {
    [super viewDidLoad];
    self.view.backgroundColor = UIColor.greenColor;
    UIButton* button = [UIButton buttonWithType:UIButtonTypeCustom];
    button.frame = CGRectMake(200, 300, 100, 100);
    [button addTarget:self action:@selector(press) forControlEvents:UIControlEventTouchUpInside];
    [button setTitle:@"切换" forState:UIControlStateNormal];
    [button setTitleColor:UIColor.blueColor forState:UIControlStateNormal];
    [self.view addSubview:button];
    // Do any additional setup after loading the view.
}
-(void)press {
    ViewController4* vc2 = [[ViewController4 alloc] init];
    [self.navigationController pushViewController:vc2 animated:YES];
}
-(void)touchesBegan:(NSSet<UITouch *> *)touches withEvent:(UIEvent *)event {
    [self.navigationController popToViewController:self.navigationController.viewControllers[0] animated:YES];
}
/*
#pragma mark - Navigation

// In a storyboard-based application, you will often want to do a little preparation before navigation
- (void)prepareForSegue:(UIStoryboardSegue *)segue sender:(id)sender {
    // Get the new view controller using [segue destinationViewController].
    // Pass the selected object to the new view controller.
}
*/

@end
#import "ViewController1.h"
#import "ViewController2.h"
@interface ViewController1 ()

@end

@implementation ViewController1

- (void)viewDidLoad {
    [super viewDidLoad];
    self.view.backgroundColor = UIColor.whiteColor;
    UIButton* button = [UIButton buttonWithType:UIButtonTypeCustom];
    button.frame = CGRectMake(200, 300, 100, 100);
    [button addTarget:self action:@selector(press) forControlEvents:UIControlEventTouchUpInside];
    [button setTitle:@"切换" forState:UIControlStateNormal];
    [button setTitleColor:UIColor.blueColor forState:UIControlStateNormal];
    [self.view addSubview:button];
    // Do any additional setup after loading the view.
}
-(void)press {
    ViewController2* vc2 = [[ViewController2 alloc] init];
    [self.navigationController pushViewController:vc2 animated:YES];
}
/*
#pragma mark - Navigation

// In a storyboard-based application, you will often want to do a little preparation before navigation
- (void)prepareForSegue:(UIStoryboardSegue *)segue sender:(id)sender {
    // Get the new view controller using [segue destinationViewController].
    // Pass the selected object to the new view controller.
}
*/

@end

#import "ViewController2.h"
#import "ViewController3.h"
@interface ViewController2 ()

@end

@implementation ViewController2

- (void)viewDidLoad {
    [super viewDidLoad];
    self.view.backgroundColor = UIColor.redColor;
    UIButton* button = [UIButton buttonWithType:UIButtonTypeCustom];
    button.frame = CGRectMake(200, 300, 100, 100);

    [button addTarget:self action:@selector(press) forControlEvents:UIControlEventTouchUpInside];
    [button setTitle:@"切换" forState:UIControlStateNormal];
    [button setTitleColor:UIColor.blueColor forState:UIControlStateNormal];
    [self.view addSubview:button];
    // Do any additional setup after loading the view.
}
-(void)press {
    ViewController3* vc2 = [[ViewController3 alloc] init];
    [self.navigationController pushViewController:vc2 animated:YES];
}

/*
#pragma mark - Navigation

// In a storyboard-based application, you will often want to do a little preparation before navigation
- (void)prepareForSegue:(UIStoryboardSegue *)segue sender:(id)sender {
    // Get the new view controller using [segue destinationViewController].
    // Pass the selected object to the new view controller.
}
*/

@end
这里我是将设计第三层视图控制器如果点击就会返回第一层视图控制器。
present
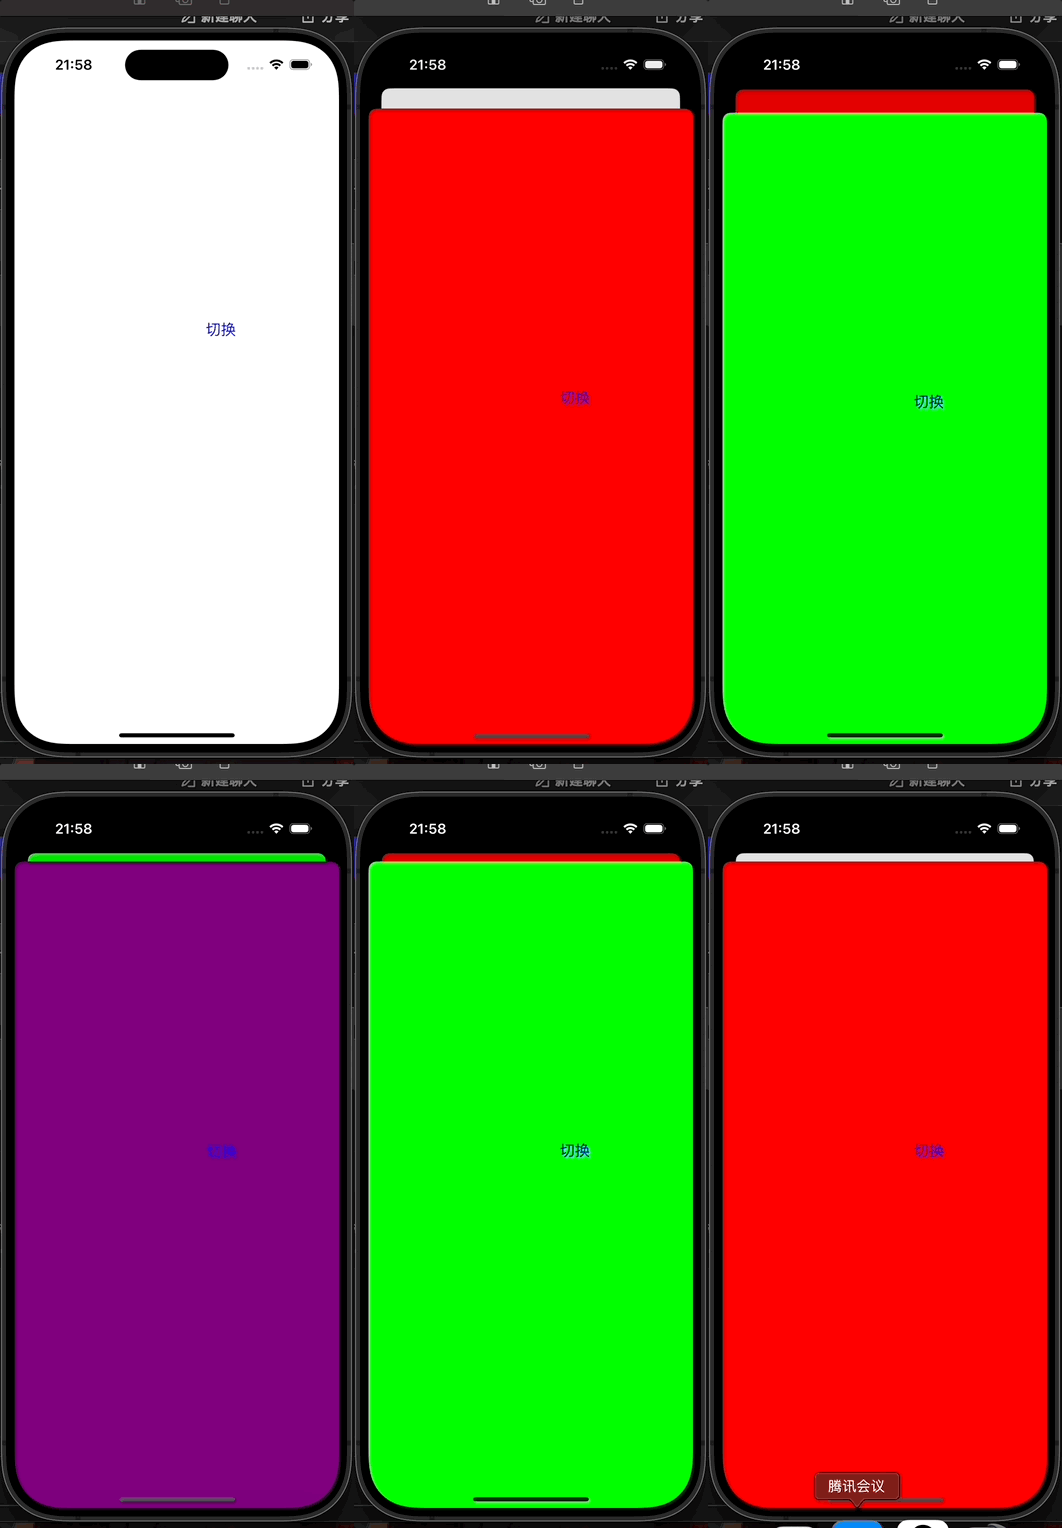
下面先给出有关于present的简单代码:
objc
ViewController3* vc2 = [[ViewController3 alloc] init];
[self presentViewController:vc2 animated:YES completion:nil];
dismiss
present方法对应dismiss
objc
[self dismissViewControllerAnimated:YES completion:nil];在我们的认知中的dismiss应该是一层一层逐级返回的,正如下面这个小demo一样。
简单小demo来展示dismiss和present
objc
#import "ViewController1.h"
#import "ViewController2.h"
@interface ViewController1 ()

@end

@implementation ViewController1

- (void)viewDidLoad {
    [super viewDidLoad];
    self.view.backgroundColor = UIColor.whiteColor;
    UIButton* button = [UIButton buttonWithType:UIButtonTypeCustom];
    button.frame = CGRectMake(200, 300, 100, 100);
    [button addTarget:self action:@selector(press) forControlEvents:UIControlEventTouchUpInside];
    [button setTitle:@"切换" forState:UIControlStateNormal];
    [button setTitleColor:UIColor.blueColor forState:UIControlStateNormal];
    [self.view addSubview:button];
    // Do any additional setup after loading the view.
}
-(void)press {
    ViewController2* vc2 = [[ViewController2 alloc] init];
    [self presentViewController:vc2 animated:YES completion:nil];
}
/*
#pragma mark - Navigation

// In a storyboard-based application, you will often want to do a little preparation before navigation
- (void)prepareForSegue:(UIStoryboardSegue *)segue sender:(id)sender {
    // Get the new view controller using [segue destinationViewController].
    // Pass the selected object to the new view controller.
}
*/

@end

#import "ViewController2.h"
#import "ViewController3.h"
@interface ViewController2 ()

@end

@implementation ViewController2

- (void)viewDidLoad {
    [super viewDidLoad];
    self.view.backgroundColor = UIColor.redColor;
    UIButton* button = [UIButton buttonWithType:UIButtonTypeCustom];
    button.frame = CGRectMake(200, 300, 100, 100);

    [button addTarget:self action:@selector(press) forControlEvents:UIControlEventTouchUpInside];
    [button setTitle:@"切换" forState:UIControlStateNormal];
    [button setTitleColor:UIColor.blueColor forState:UIControlStateNormal];
    [self.view addSubview:button];
    // Do any additional setup after loading the view.
}
-(void)press {
    ViewController3* vc2 = [[ViewController3 alloc] init];
    [self presentViewController:vc2 animated:YES completion:nil];
}
-(void)touchesBegan:(NSSet<UITouch *> *)touches withEvent:(UIEvent *)event {
    [self dismissViewControllerAnimated:YES completion:nil];
}
/*
#pragma mark - Navigation

// In a storyboard-based application, you will often want to do a little preparation before navigation
- (void)prepareForSegue:(UIStoryboardSegue *)segue sender:(id)sender {
    // Get the new view controller using [segue destinationViewController].
    // Pass the selected object to the new view controller.
}
*/

@end
这里代码部分只展示两个视图控制器,因为四个视图控制器大致相同。

dismiss多级
但是present还有两个方法可以让我们实现一个跨级返回的效果。presentingViewController 和presentedViewController这两个方法分别是什么呢?这里简单解释一下返回两个的对应视图控制器。
当从1中弹出2后:
- self.presentingViewController 在1中,就是nil;在2中,就是1
- self.presentedViewController在1中,就是2;在2中,就是nil
这里先给出一个通过dismiss和presentingViewController这两个方法来实现多级返回的例子。
我们在原先的第四个视图控制器中设置多级返回的函数
objc
-(void)touchesBegan:(NSSet<UITouch *> *)touches withEvent:(UIEvent *)event {//如果触碰屏幕就实现一个层级返回
    UIViewController* vc = [self presentingViewController];//设置一个vc来寻找他的viewcontroller
    while (vc.presentingViewController) {//如果他的前一个视图控制器不是nil就继续寻找,说白了也就是寻找第一个视图控制器
        vc =  [vc presentingViewController];//不断向前寻找对应的present过的视图控制器。
    }
    [vc dismissViewControllerAnimated:YES completion:nil];
}
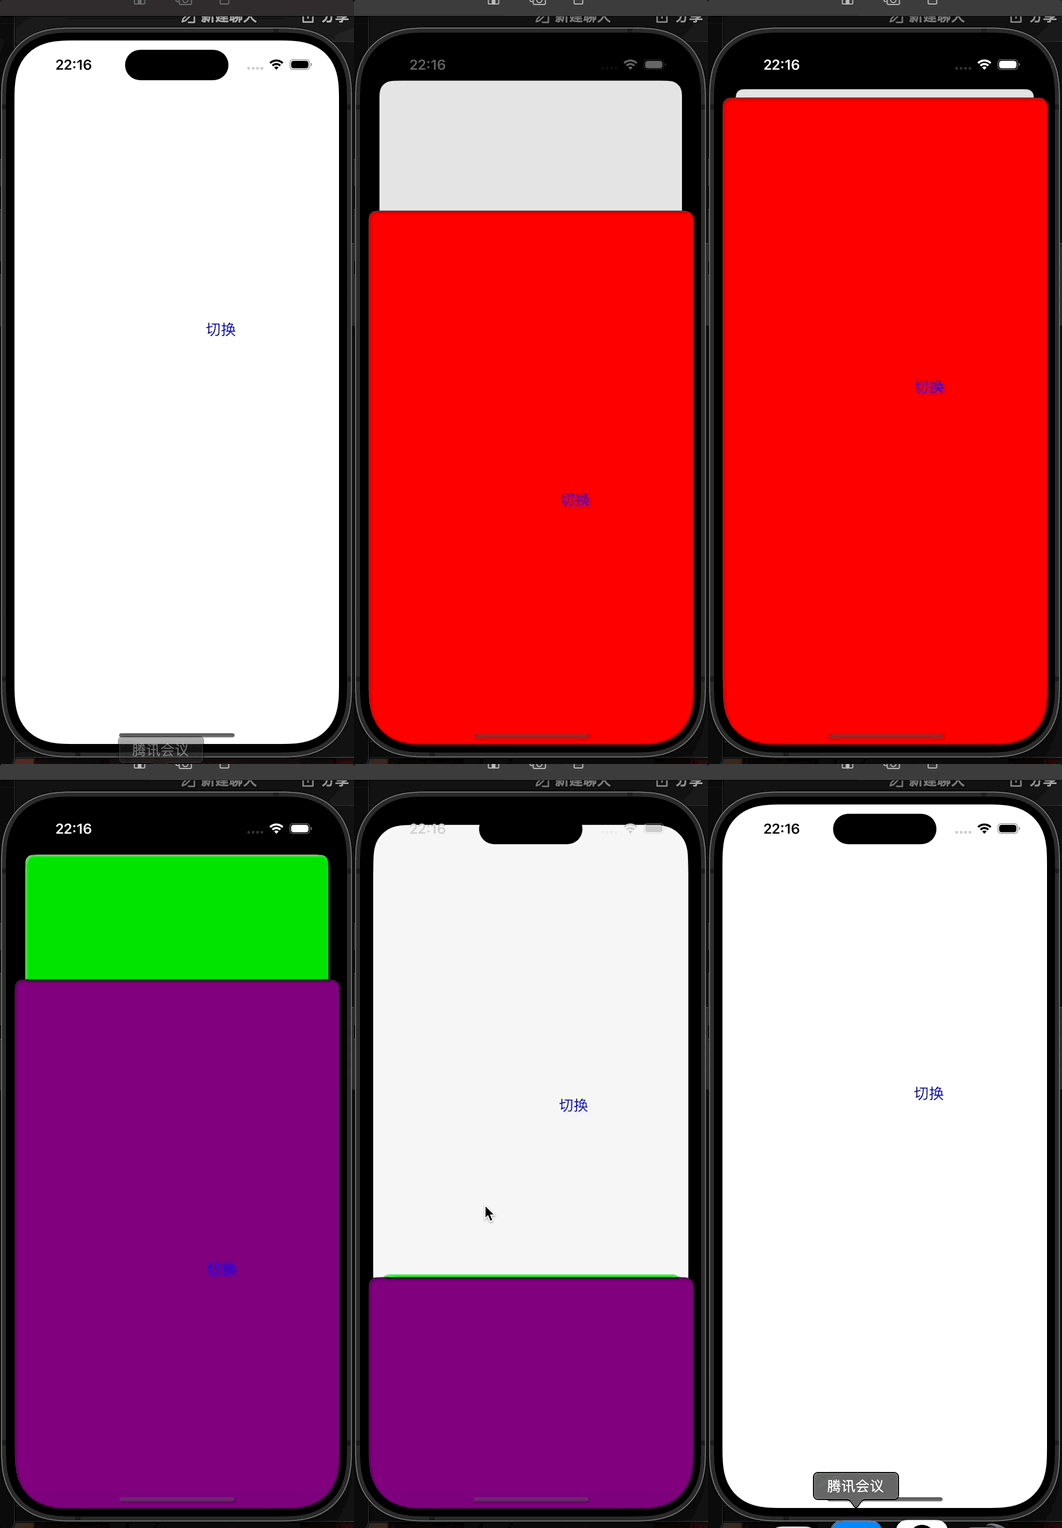
可以看到这里最后我们明明处于第一层视图控制器,却可以实现返回第一个视图控制器的效果,这里与我之前对于dismiss的理解有所不同,我一直认为是在后一层的视图控制器可以实现一个返回前一层的效果,但是实际上并非如此,这里我重新学习了一下dismiss这个函数的作用,附一段大佬的博客:你真的了解iOS中控制器的present和dismiss吗?
我们对于dismiss的调用一贯以来都是一个在2视图控制器这个位置调用,但是实际上这个方式是错误的,我们应该返回到他的上一层视图控制器也就是我们原先的1视图控制器:
实际上,dismiss方法系统会自动优化,当B视图控制器调用dismiss时,它并没有打开任何界面,就将dismissViewController方法会自动交给B的presentingViewController执行,也就是A来执行。
同时dismiss的真正意义在苹果官方文档里面是这样写的
如果你连续呈现多个视图控制器,从而构建一个呈现的视图控制器堆栈,那么在堆栈中较低的视图控制器上调用此方法将消除其直接的子视图控制器和堆栈上该子视图上方的所有视图控制器。发生这种情况时,只有最顶层的视图会以动画方式关闭;任何中间视图控制器都只是从堆栈中删除。最顶层的视图使用其模态过渡样式关闭,该样式可能与堆栈中较低的其他视图控制器使用的样式不同。苹果官方文档
所以这里如果我们按照上述的方法的正确的方式就是用第一个视图控制器调用dismiss方法,只有最上层的视图控制器会以动画方式关闭,其他仅仅是从代码层面上进行一个删除,然后就可以实现我们的这里的一个返回根视图控制器。
objc
-(void)touchesBegan:(NSSet<UITouch *> *)touches withEvent:(UIEvent *)event {
    UIViewController* vc = [self presentingViewController];
    vc =  [vc presentingViewController];
    [vc dismissViewControllerAnimated:YES completion:nil];
}
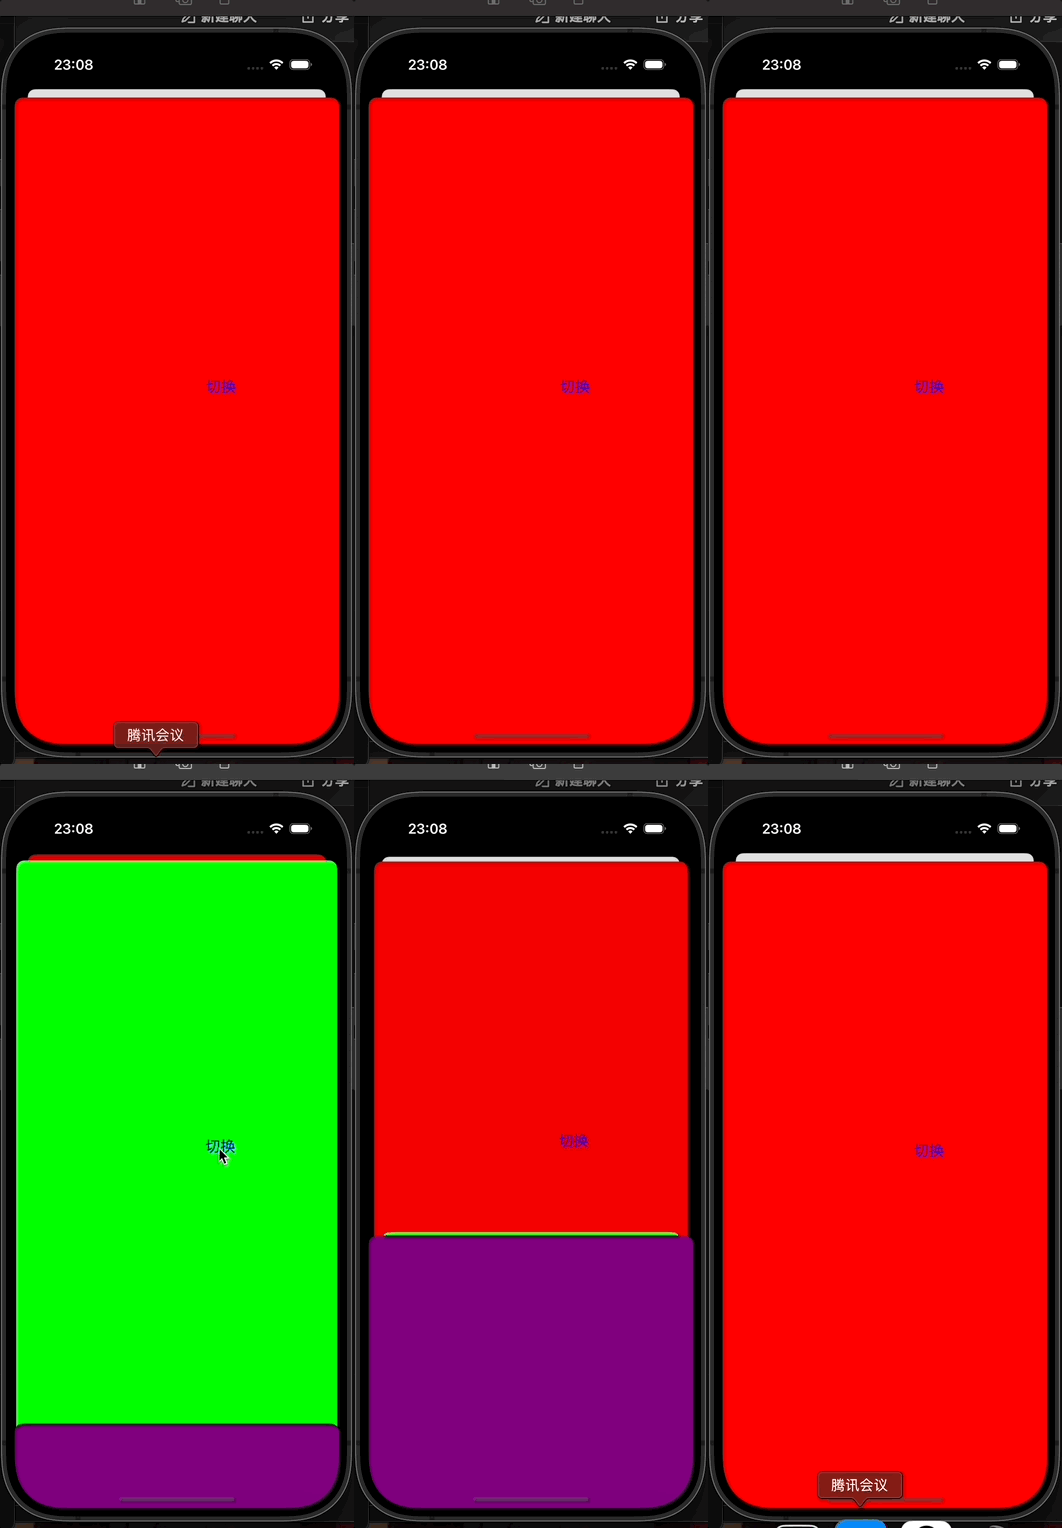
我们可以选择连续返回两层,只要修改这个函数成下面就可以实现这样的效果。
objc
-(void)touchesBegan:(NSSet<UITouch *> *)touches withEvent:(UIEvent *)event {
    UIViewController* vc = [self presentingViewController];
    vc =  [vc presentingViewController];
    [vc dismissViewControllerAnimated:YES completion:nil];
}
我们也可以通过判断视图控制器的类型来返回我们指定的视图控制器
这里我们的目标是返回推出的第二个视图控制器,其实内容差不多,只不过判断我们要返回那一个视图控制器,用判断类的方法来判断我们要返回的类。
objc
-(void)touchesBegan:(NSSet<UITouch *> *)touches withEvent:(UIEvent *)event {
    UIViewController* vc = [self presentingViewController];
    while (![vc isKindOfClass:[ViewController2 class]]) {
        vc = [vc presentingViewController];
    }
    [vc dismissViewControllerAnimated:YES completion:nil];
}
push和present的区别
区别
- push:
- push 方法是通过 UINavigationController 进行导航,新的视图控制器会被压入导航栈中,可以跨级返回,push是由UINavigationController管理的视图控制器堆栈,在window下同时只能显示一个ViewController。 push一般用于同一业务不同界面间的切换。
- present:
- present 方法是通过模态展示的方式推出新的视图控制器,present是由UIViewController管理的视图控制器堆栈,在window下可以以叠加的方式展示,当顶层的view透明时可以看到底层的view,但只有顶层的view可用户交互,而且只能逐级返回(一般情况)。present一般用于不同业务界面的切换。
相同点
- 两者都是用于切换界面的,只不过适用的业务逻辑不一样。
笔者这里简单学习了一下有关与push和present的区别,以及present的一些相关内容来实现一个多级跳转的功能,其实有关于视图控制器的内容很多,笔者简单总结了一部分。