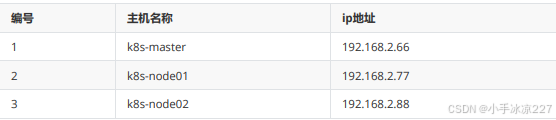
一、安装环境
二、前期准备
1.设置免密登录
root@k8s-master \~# ssh-keygen
root@k8s-master \~# ssh-copy-id root@192.168.2.77
root@k8s-master \~# ssh-copy-id root@192.168.2.88
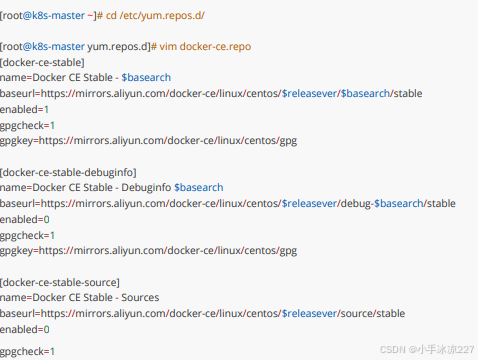
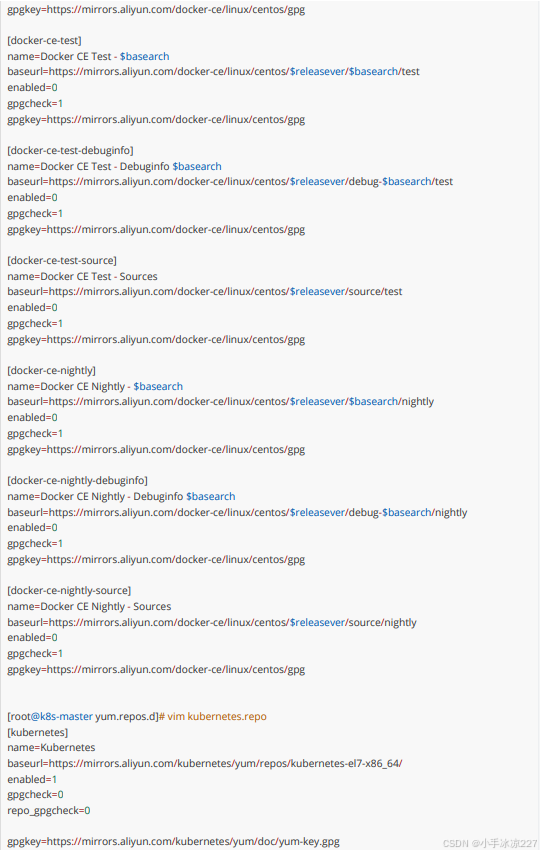
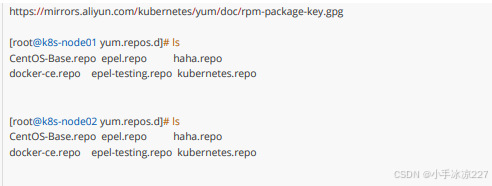
2.yum源配置
3.清空创建缓存

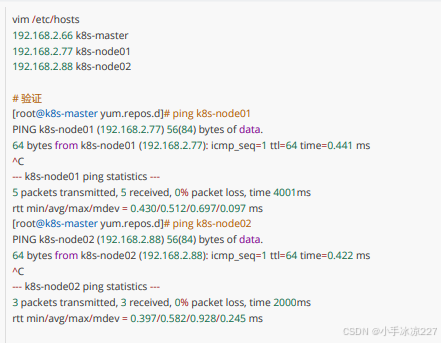
4.主机映射(三台主机都要设置)
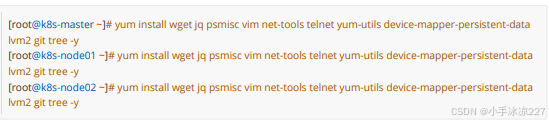
5.安装常用工具
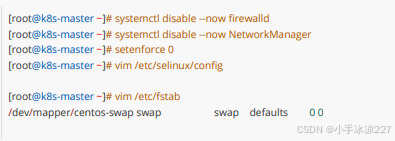
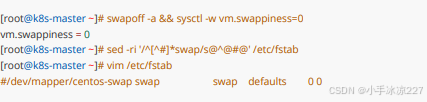
6.关闭firewalld NetworkManager selinux swap虚拟分区
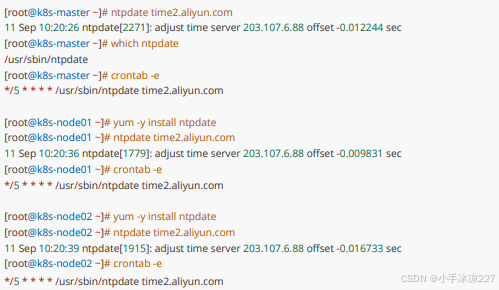
7.同步时间
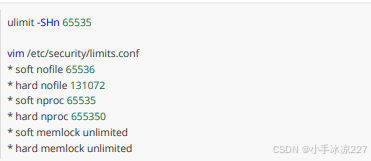
8.配置limit
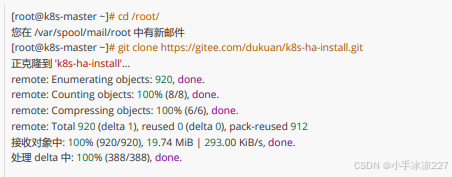
9.下载yaml文件从gitee上下载
配置pod的yaml文件和docker-compose.uaml文件相似
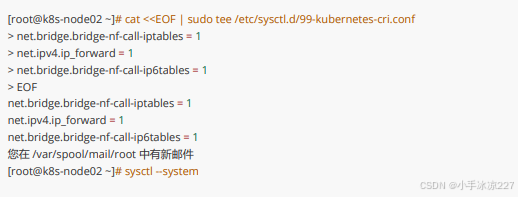
三、配置内核模块
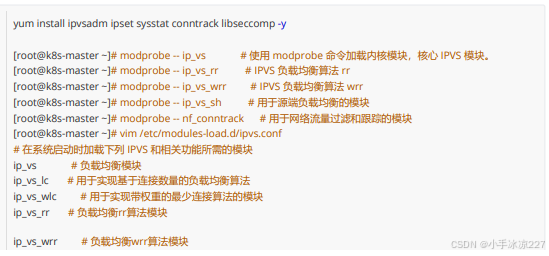
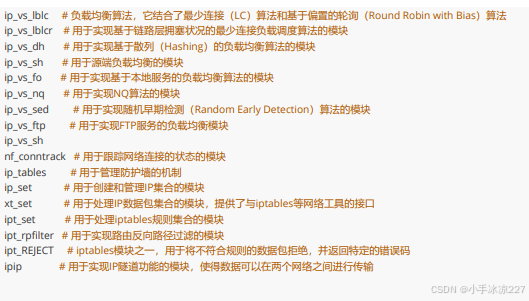
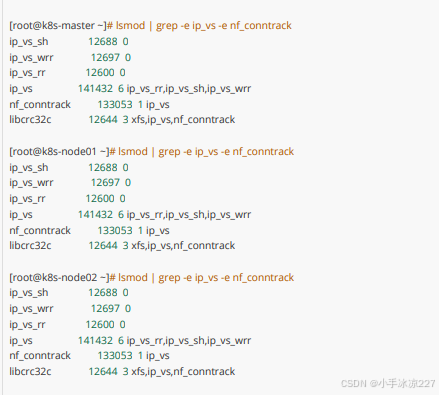
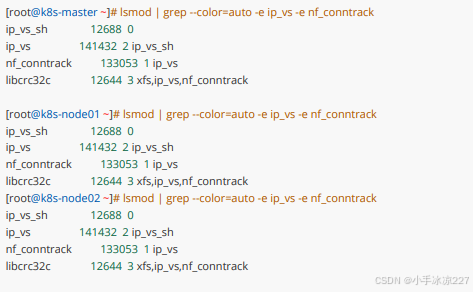
1.ipvs的配置(三个节点)
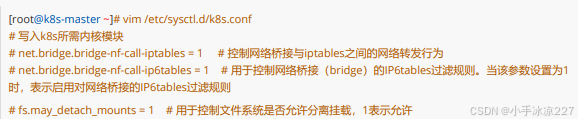
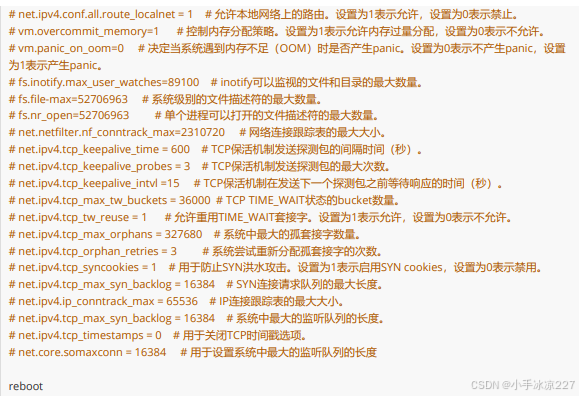
2.k8s的内核加载(三个)
四、基本组件安装
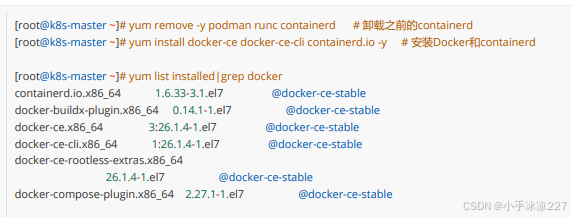
1.三个节点安装docker-ce docker-ce-cli containerd.io(三个)
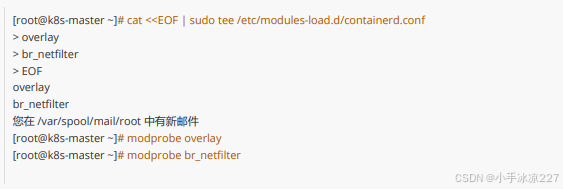
2.配置containerd所需模块(三个)
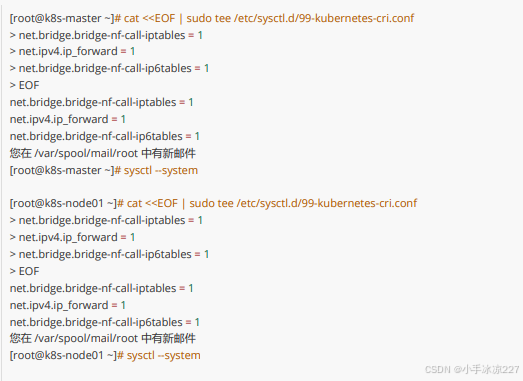
3.配置containerd所需内核(三个)
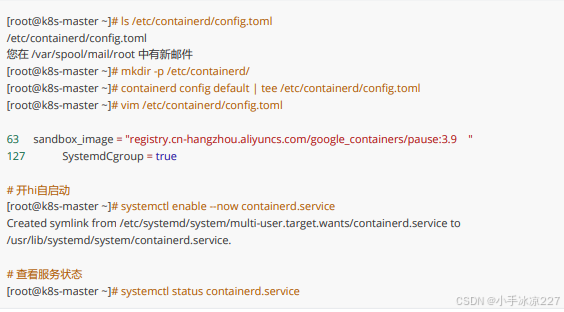
4.containerd配置文件(三个)
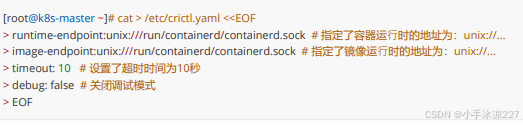
5.配置 crictl 客户端连接的运⾏位置 (三个)
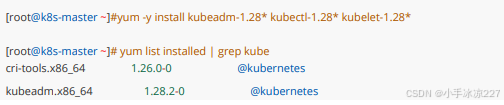
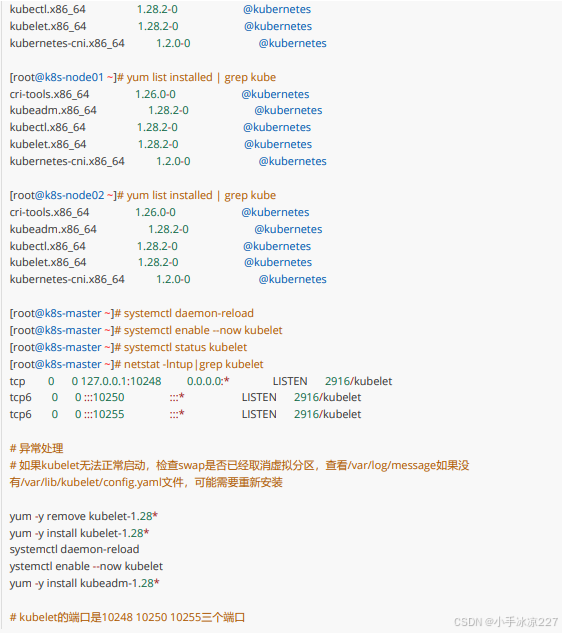
6.安装kubernetes组件(三个节点)
五、kubernetes集群初始化
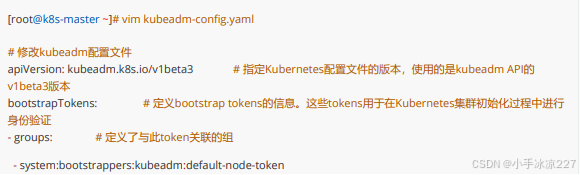
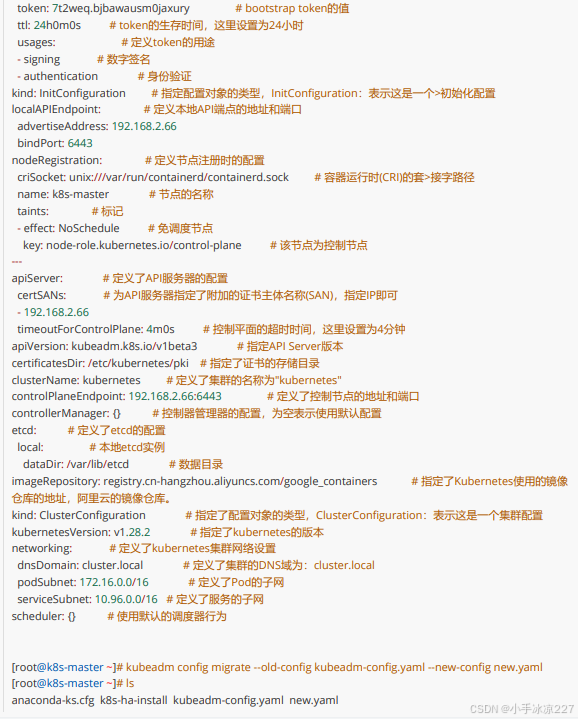
1.kubeadm配置文件
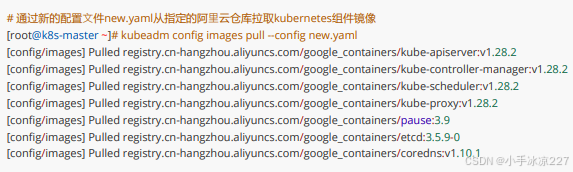
2.下载组件镜像
3.集群初始化
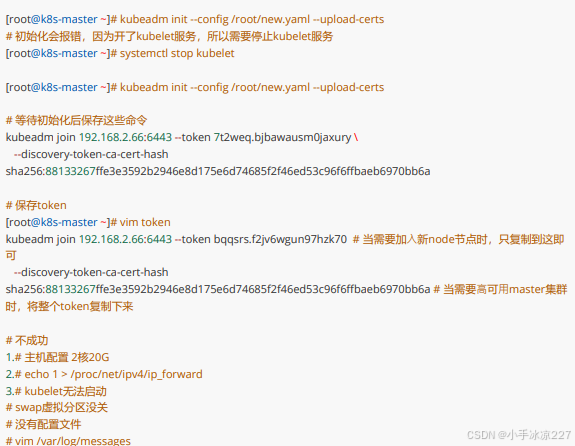
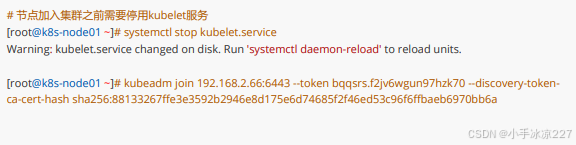
4.node加入集群
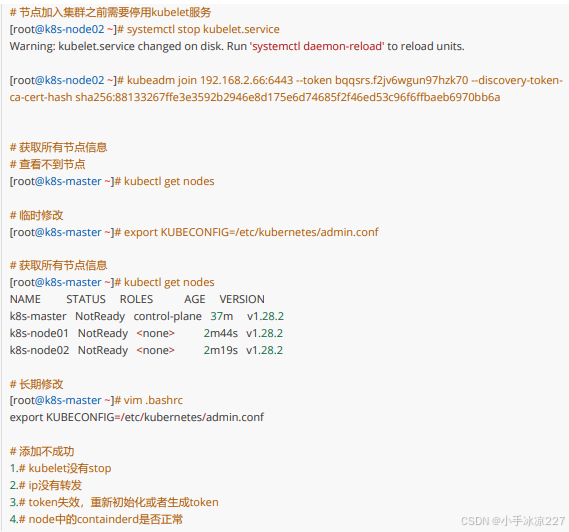
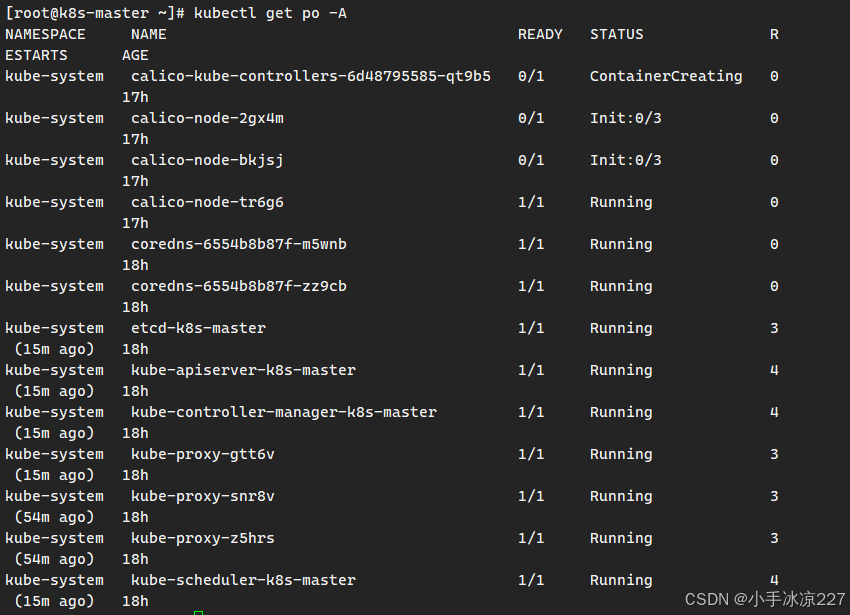
5.查看组件容器状态
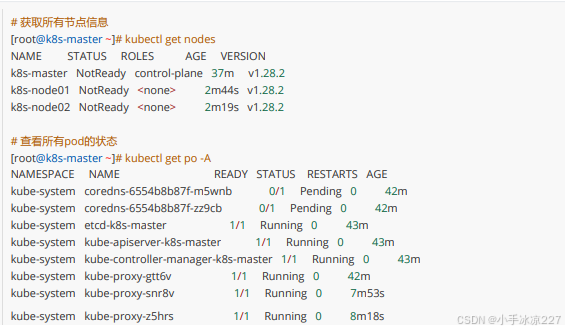
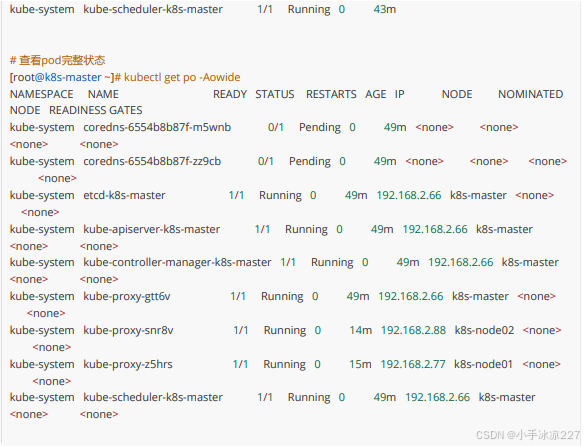
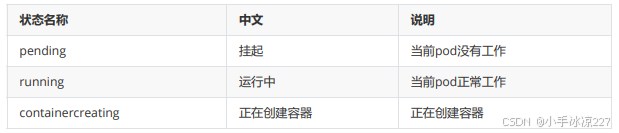
status:
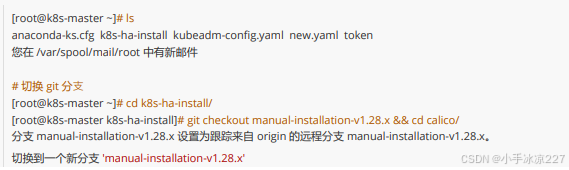
六、部署calico
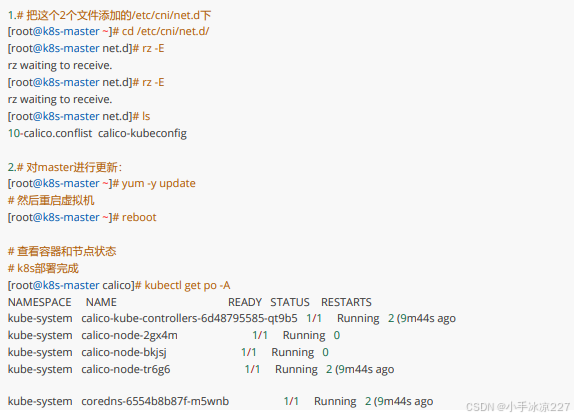
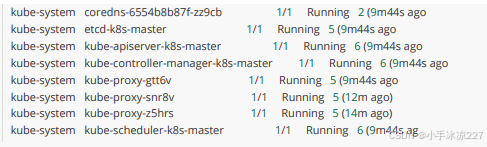
1.calico的部署
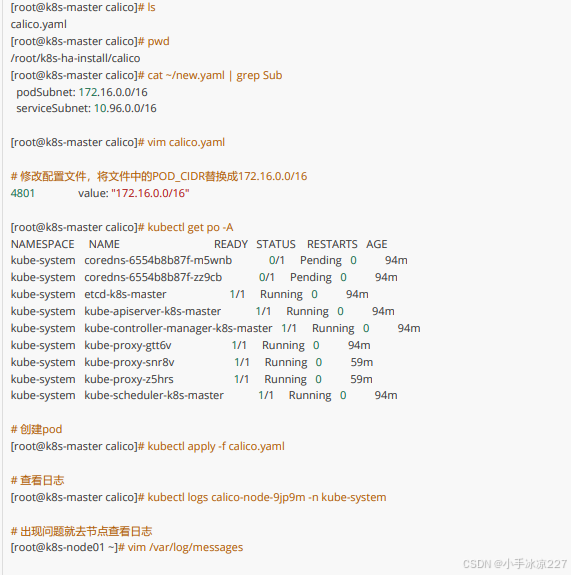
2 . 补 充 :
(1)如果出现这种错误

(2)解决办法:
3.测试
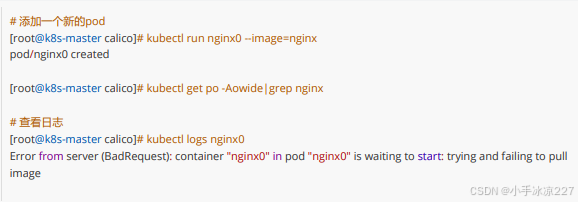
(1)创建节点
(2)删除节点

七、Metrics部署
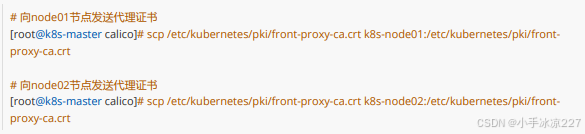
1.复制证书到所有节点
2.安装metrics server
root@k8s-master \~# ls components.yaml
components.yaml
root@k8s-master \~# mkdir pods
root@k8s-master \~# mv components.yaml pods/
root@k8s-master \~# cd pods/
root@k8s-master pods# ls
components.yaml
root@k8s-master pods# cat components.yaml | wc -l
202
添加metric server的pod资源
root@k8s-master pods# kubectl create -f components.yaml
在kube-system命名空间下查看metrics server的pod运⾏状态
root@k8s-master pods# kubectl get po -A|grep metrics
kube-system metrics-server-79776b6d54-dmwk6 1/1 Running 0 2m26s
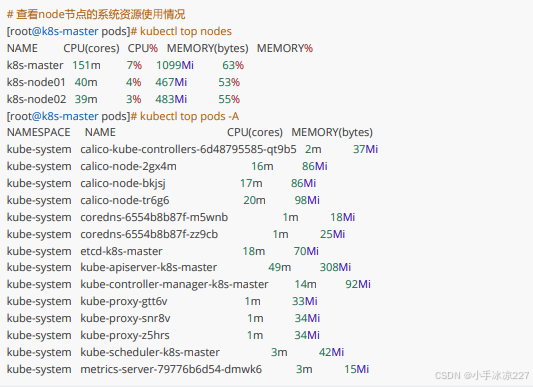
3.查看节点监控资源
4.dashboard部署
root@k8s-master pods# cd ~/k8s-ha-install/
root@k8s-master k8s-ha-install# ls
bootstrap CoreDNS dashboard metrics-server README.md
calico csi-hostpath kubeadm-metrics-server pki snapshotter
root@k8s-master k8s-ha-install# cd dashboard/
root@k8s-master dashboard# ls
dashboard-user.yaml dashboard.yaml
简历dashboard的pod资源
root@k8s-master dashboard# kubectl create -f .
root@k8s-master dashboard# kubectl get po -A|grep dashboard
kubernetes-dashboard dashboard-metrics-scraper-7b554c884f-7489m 1/1 Running 0 58s
kubernetes-dashboard kubernetes-dashboard-54b699784c-fsjrw 0/1 ContainerCreating 0 58s
root@k8s-master dashboard# kubectl edit svc kubernetes-dashboard -n kubernetes-dashboard
32 type: NodePort
Edit cancelled, no changes made.
edit:进⼊kubernetes的⽂本编辑器
svc:指定某个服务项,这⾥指定的是kubernetes-dashboard
-n:指定命名空间,kubernetes-dashboard
命令执⾏后相当于进⼊vim⽂本编辑器,不要⽤⿏标滚轮,会输出乱码的!可以使⽤"/"搜索,输⼊"/type"找到⽬
标,如果已经为NodePort忽略此步骤
查看访问端口号
获取kubernetes-dashboard状态信息,包含端⼝,服务IP等
root@k8s-master dashboard# kubectl get svc kubernetes-dashboard -n kubernetes-dashboard
NAME TYPE CLUSTER-IP EXTERNAL-IP PORT(S) AGE
kubernetes-dashboard NodePort 10.96.242.161 <none> 443:30754/TCP 4m7s
5.浏览器访问:192.168.2.66:30754
找到端⼝号后,通过 master 的 IP+端⼝即可访问 dashboard(端⼝为终端查询到的端⼝,要⽤ https 协议访问)

6.获得登录的token

7.将获得的token粘贴到浏览器中
1)在"输⼊ token "内输⼊终端⽣成的 token

2)就可以进行登录了

8.使用nginx镜像创建一个节点

9.访问页面上就会显示出来

10.在访问页面中也可以查看日志

11.在访问页面中创建节点


12.在Linux中可以查到

八、kube-proxy
1.改为ipvs模式

2.更新kube-proxy的pod

3.访问测试

4.查看服务的网段

5.验证是否可正常创建参数

6.进到创建的节点中


7.访问dns的443端口和53端口

九、kubernetes自动补齐
1.安装自动补齐

2.kubernetes基础命令

3.编写yaml文件-创建节点


4.编辑json文件
