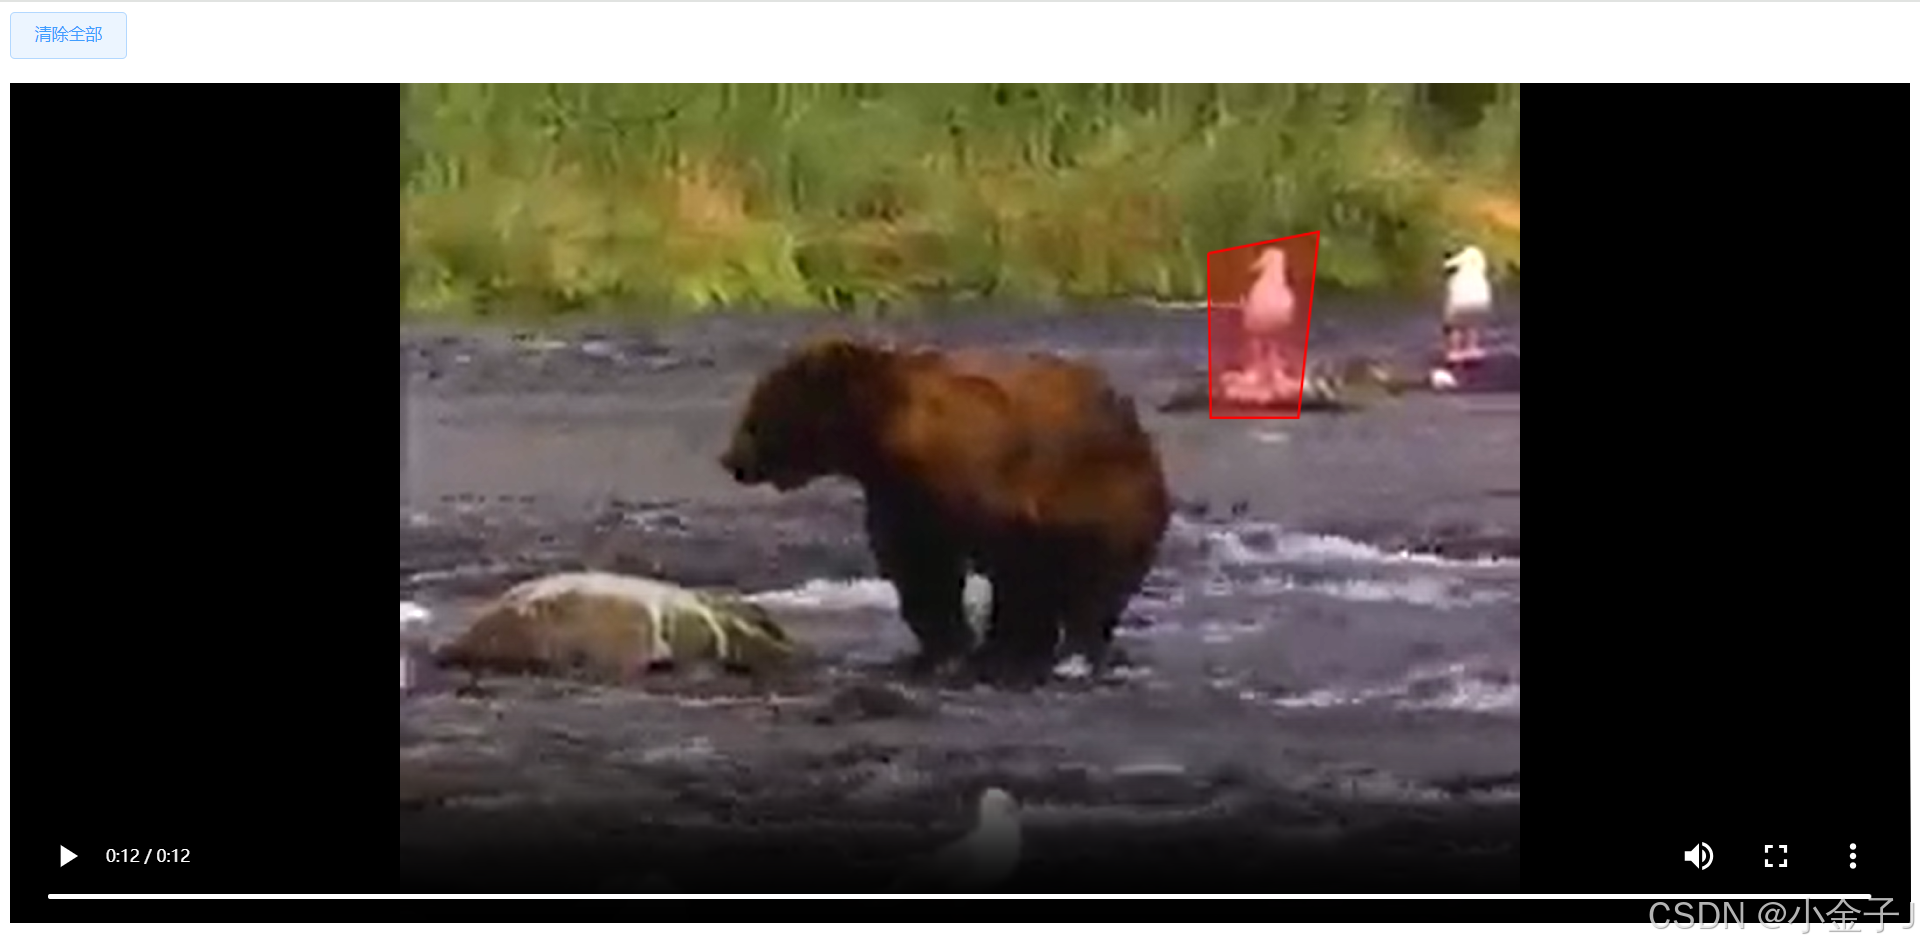
在数字时代,交互式媒体内容的创建和消费变得越来越普遍。特别是视频内容,它不仅提供了视觉信息,还允许用户与之互动,从而增强了用户体验。本文将介绍如何使用Vue.js框架和JavaScript创建一个交互式组件,该组件允许用户在视频上绘制区域。

技术栈简介
为了实现这一功能,我们将使用以下技术:
- Vue.js:一个渐进式的JavaScript框架,用于构建用户界面。
- HTML5 Canvas:HTML5提供的一个元素,允许通过JavaScript在网页上绘制图形。
- JavaScript:用于实现交互逻辑和处理用户输入。
实现步骤
1. 创建Vue组件
首先,我们需要创建一个Vue组件,它将包含视频播放器和用于绘制的画布。
html
<template>
  <div>
    <div class="btn">
      <el-button
        type="primary"
        plain
        @click="initDraw"
        v-if="isDisabled"
        >开始绘制</el-button
      >
      <el-button type="primary" plain @click="closeDialogCanvas" v-else>
        清除全部</el-button
      >
    </div>
    <div class="videoContainer">
      <video ref="videoPlayer" class="video" :src="videoUrl" controls autoplay></video>
      <div ref="drawArea" class="draw-area">
        <!-- Canvas将被useDraw函数动态创建并添加到DOM中 -->
      </div>
    </div>
  </div>
</template>
2. 引入绘制逻辑
我们将使用一个自定义的JavaScript模块useDraw.js,它封装了绘制逻辑。这个模块提供了初始化画布、绘制图形、清除画布等功能,可去资源库下载完整文件。
javascript
import useDraw from './useDraw.js';3. 初始化和控制绘制
在Vue组件的methods中,我们定义了initDraw和clearCanvas方法来初始化画布和清除绘制。
javascript
data() {
  return {
    graphCoordinateList: [], // 视频区域数据
    drawInstance: null, // 保存useDraw的实例
    videoUrl: 'https://www.w3schools.com/html/movie.mp4', // 替换为你的视频URL
    isDisabled:true,
  };
},
methods: {
  // 加载画布
  initDraw() {
    this.isDisabled = false;
    const drawArea = this.$refs.drawArea;
    const options = {
      canvasStyle: {
        lineWidth: 2,
        strokeStyle: "red",
        fillStyle: "rgba(255, 0, 0, 0.3)",
      },
      initPoints: this.graphCoordinateList,
      onComplete: (points) => {
        console.log("绘图完成,坐标点:", points);
        this.graphCoordinateList = points;
      },
      onClear: () => {
        console.log("画布已清空");
      },
    };
    // 初始化useDraw,并保存实例引用
    this.drawInstance = useDraw();
    this.drawInstance.init(drawArea, options);
  },
  // 清除画布
  clearCanvas() {
    console.log("清除画布");
    if (this.drawInstance) {
      // 清除画布并重新初始化
      this.drawInstance.onClear(); // 调用useDraw的destroy方法
      this.drawInstance = null; // 重置实例引用
      // this.initDraw(); // 可以重新初始化绘图环境
    }
  },
  // 清除画布-关闭弹窗
  closeDialogCanvas() {
    console.log("清除画布-关闭弹窗");
    this.graphCoordinateList = [];
    if (this.drawInstance) {
      // 清除画布并重新初始化
      this.drawInstance.onClear(); // 调用useDraw的destroy方法
      this.drawInstance = null; // 重置实例引用
      this.initDraw(); // 可以重新初始化绘图环境
    }
  },
  // 父组件调用方法,例: this.$refs.fenceVideoRef.initVideo()
  initVideo() {
    this.$nextTick(res=>{
      console.log(this.graphCoordinateList,this.isDisabled,'视频区域数据');
      if(this.graphCoordinateList.length > 0){
        // 如果有值则渲染区域出来
        this.initDraw();
        this.isDisabled = false
      }else{
        this.isDisabled = true
      }
    })
  },
},
4. 清理资源
在组件销毁前,我们需要清理画布资源,以避免内存泄漏。
javascript
// 在组件销毁前清理资源
beforeDestroy() {
  if (this.drawInstance) {
      this.drawInstance.destroy();
  }
},
5. 样式设置
最后,我们需要为视频容器和画布设置样式,以确保它们正确显示。
css
<style lang="scss" scoped>
.btn {
  display: flex;
  justify-content: space-between;
  margin-bottom: 20px;
  white-space: nowrap;
}

.videoContainer {
  position: relative;
  width: 100%;
  max-width: 100%; /* 根据视频尺寸调整 */
  height: 700px;
  .video {
    width: 100%;
    height: 100%;
    background-color: #000; /* 视频加载前背景色 */
  }

  .draw-area {
    width: 100%;
    height: 90%;
    position: absolute;
    top: 0;
    left: 0;
  }
}
</style>
结论
通过上述步骤,我们成功地在Vue.js应用中实现了一个交互式的视频绘制组件。用户可以在视频上自由绘制区域,这为视频内容的交互提供了新的可能性。这种技术可以应用于教育、游戏、视频编辑等多个领域,为用户提供更加丰富和个性化的体验。