一、centos下载
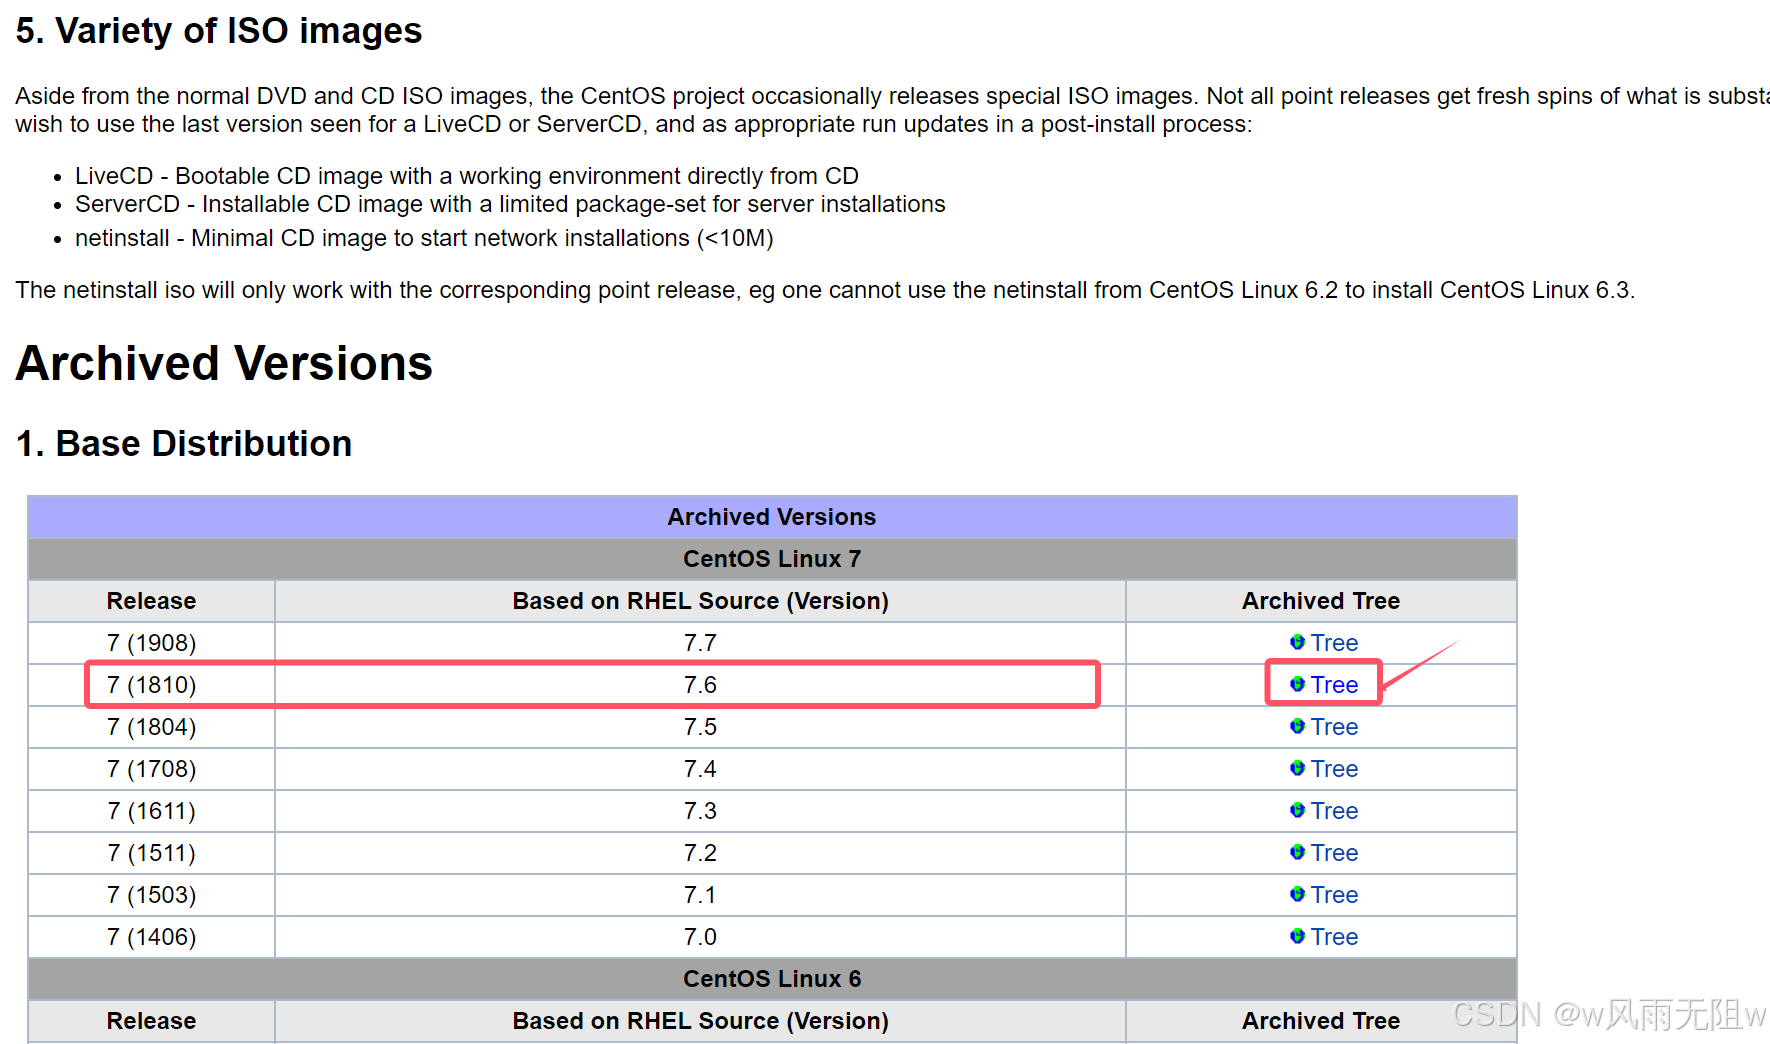
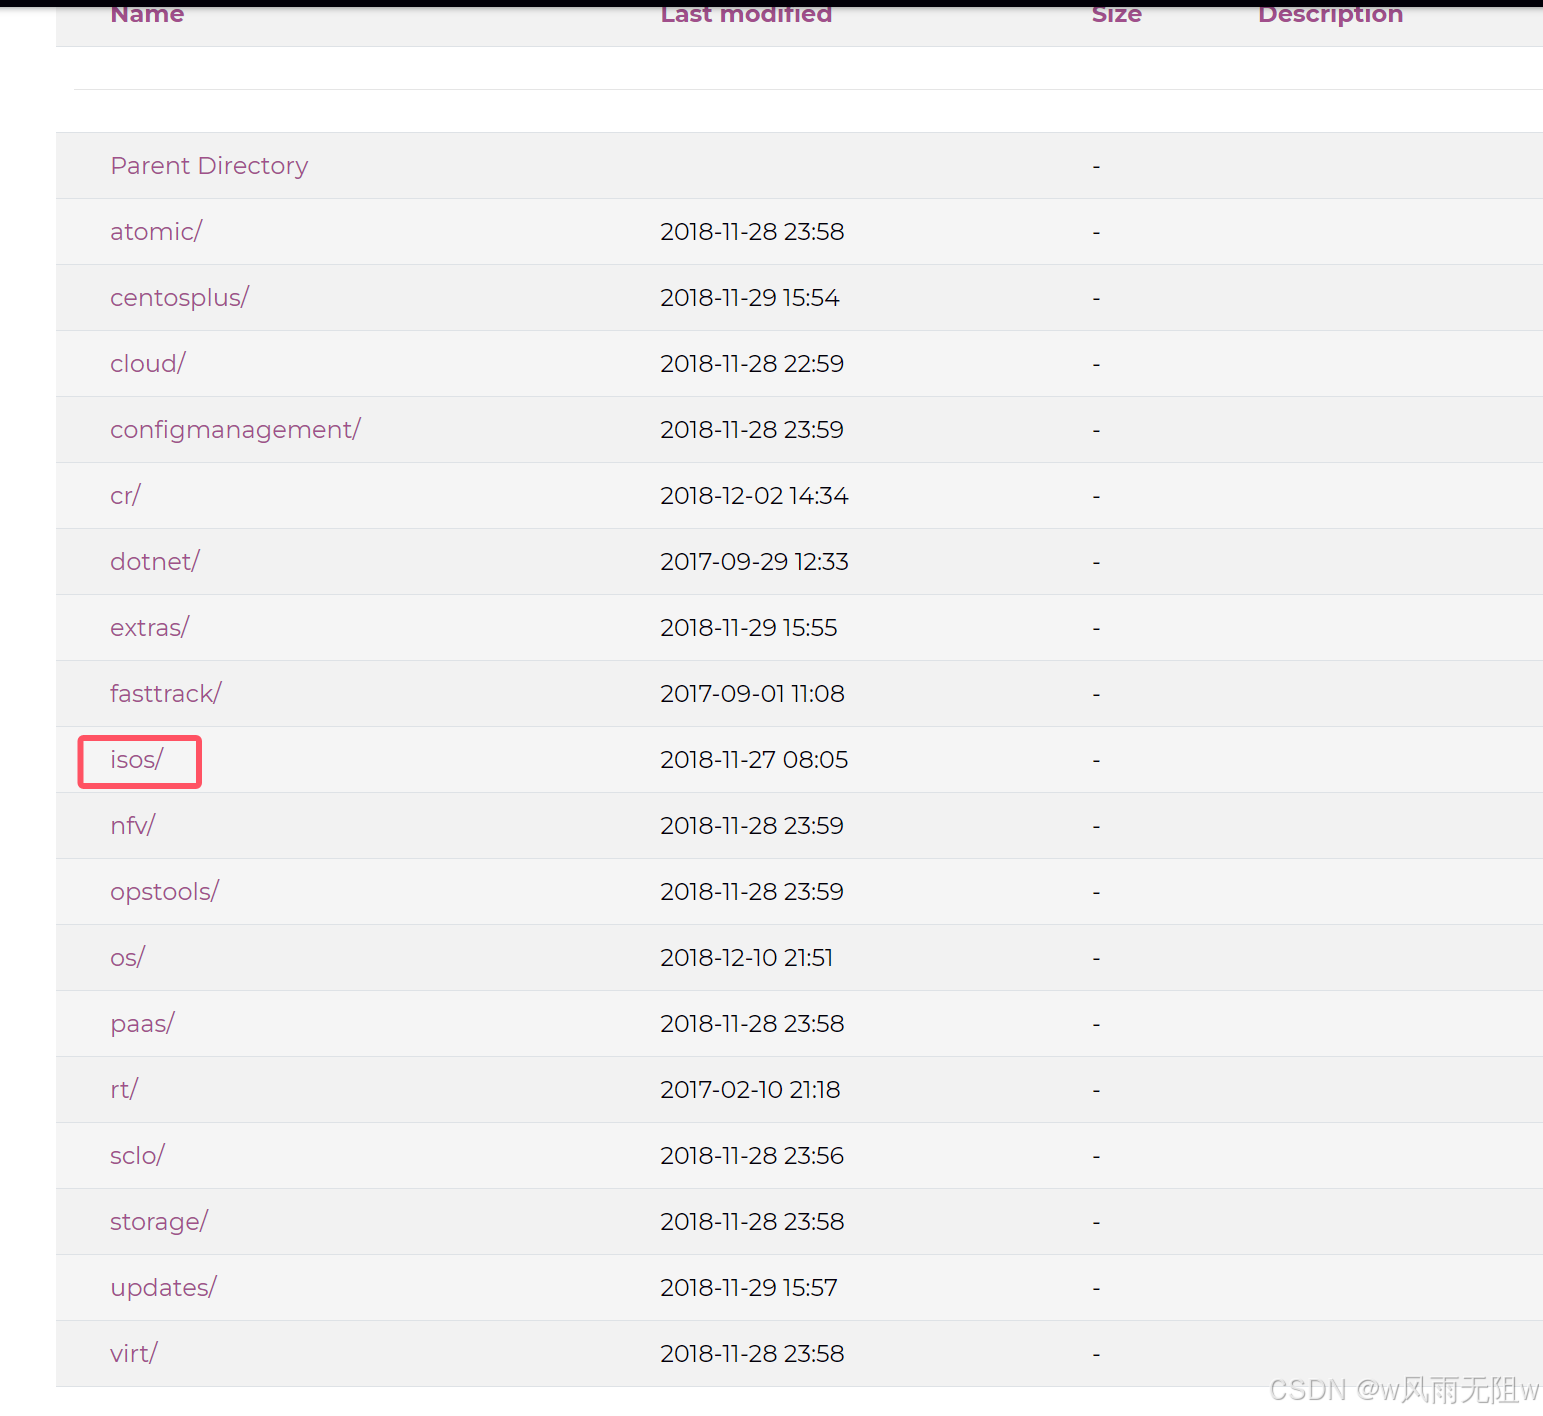
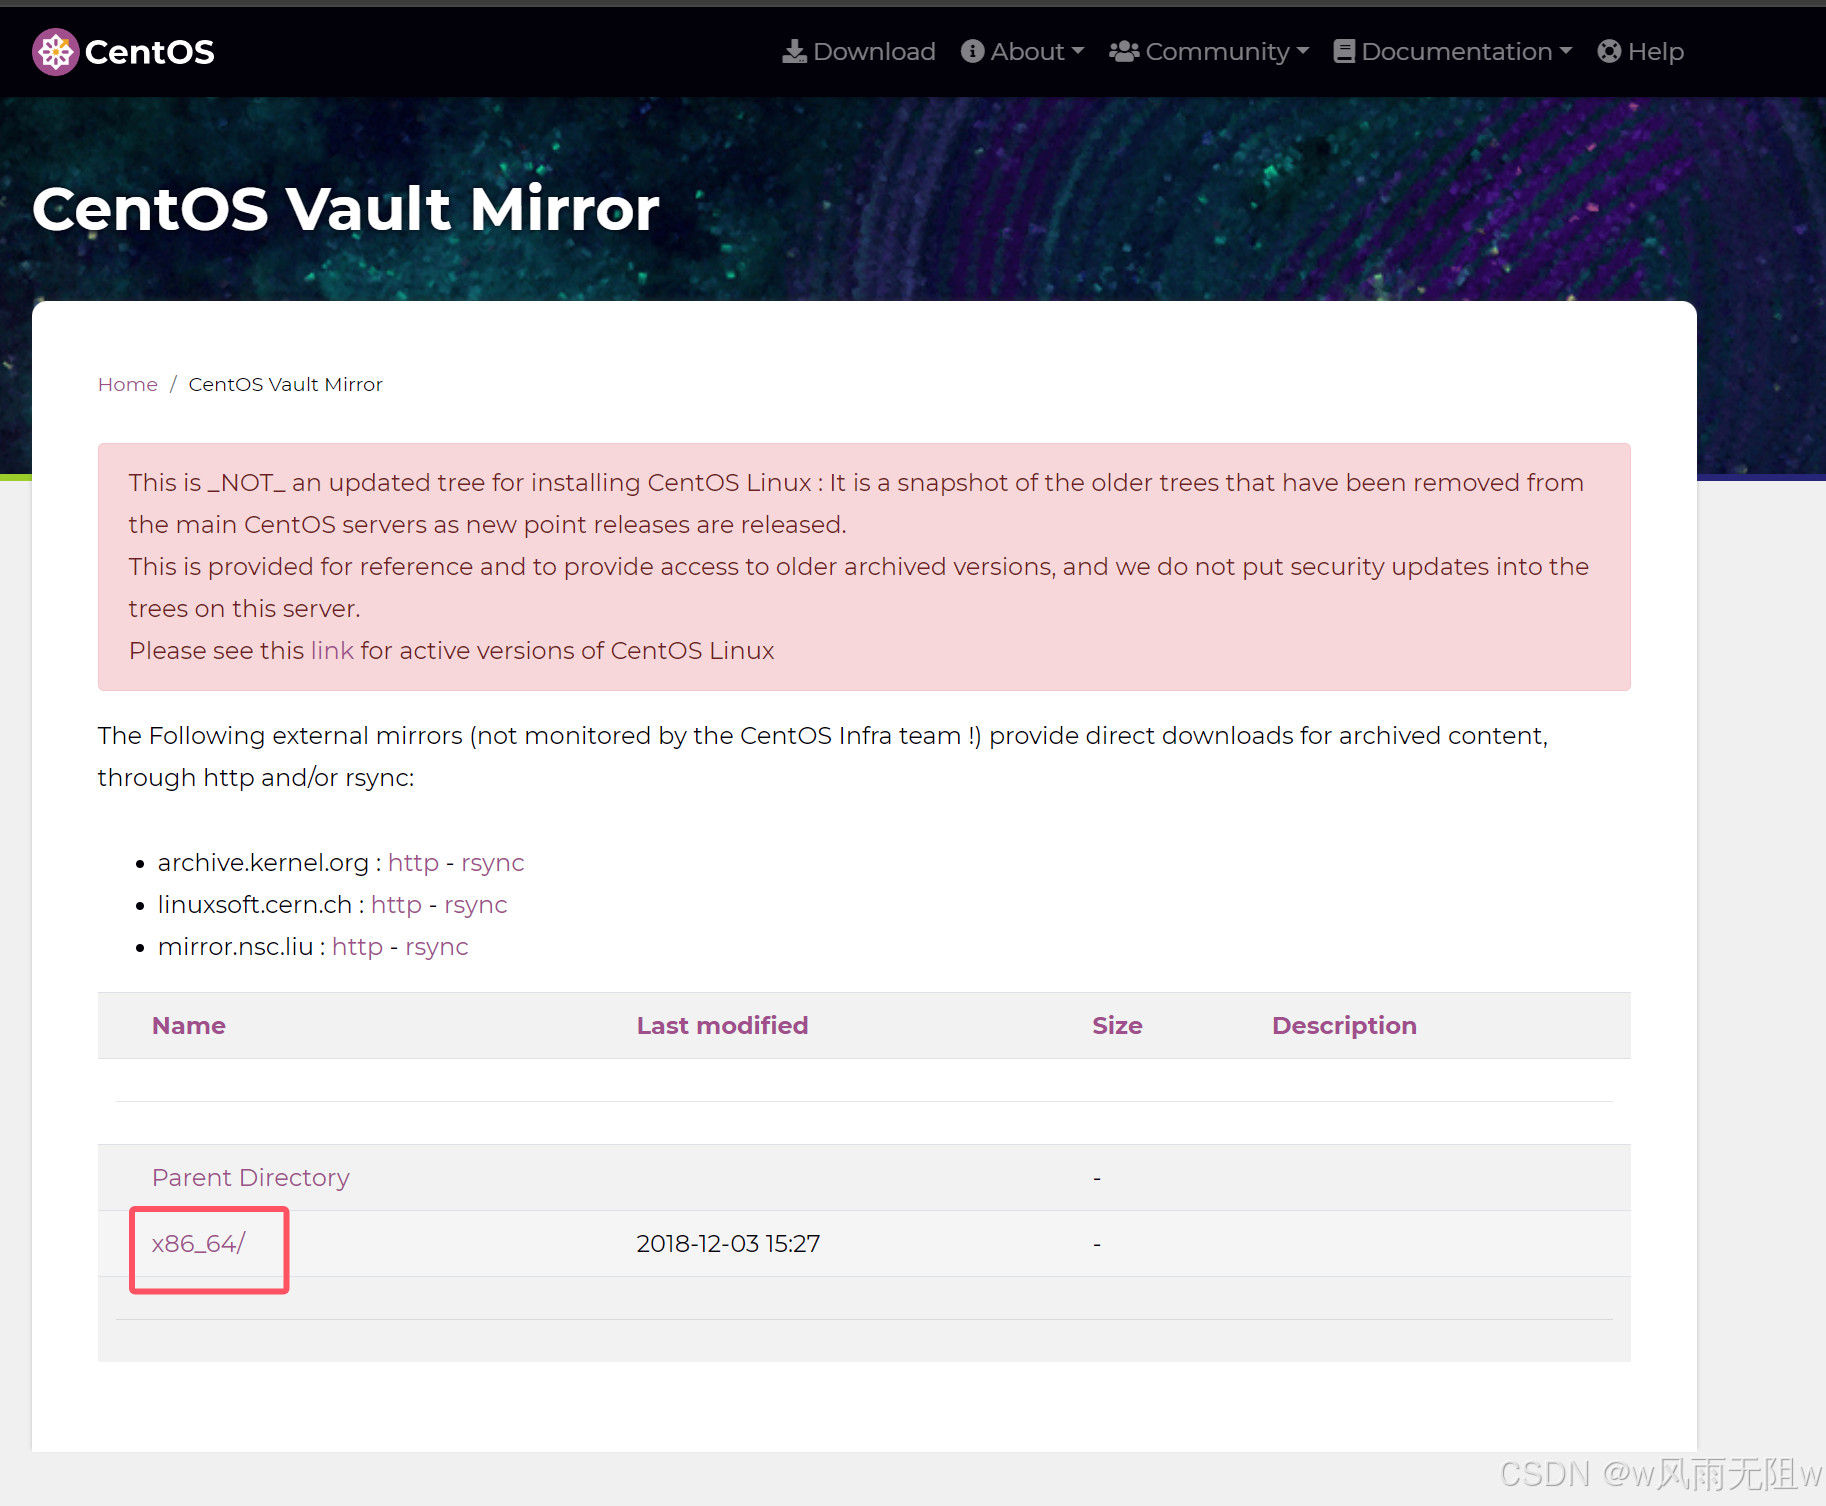
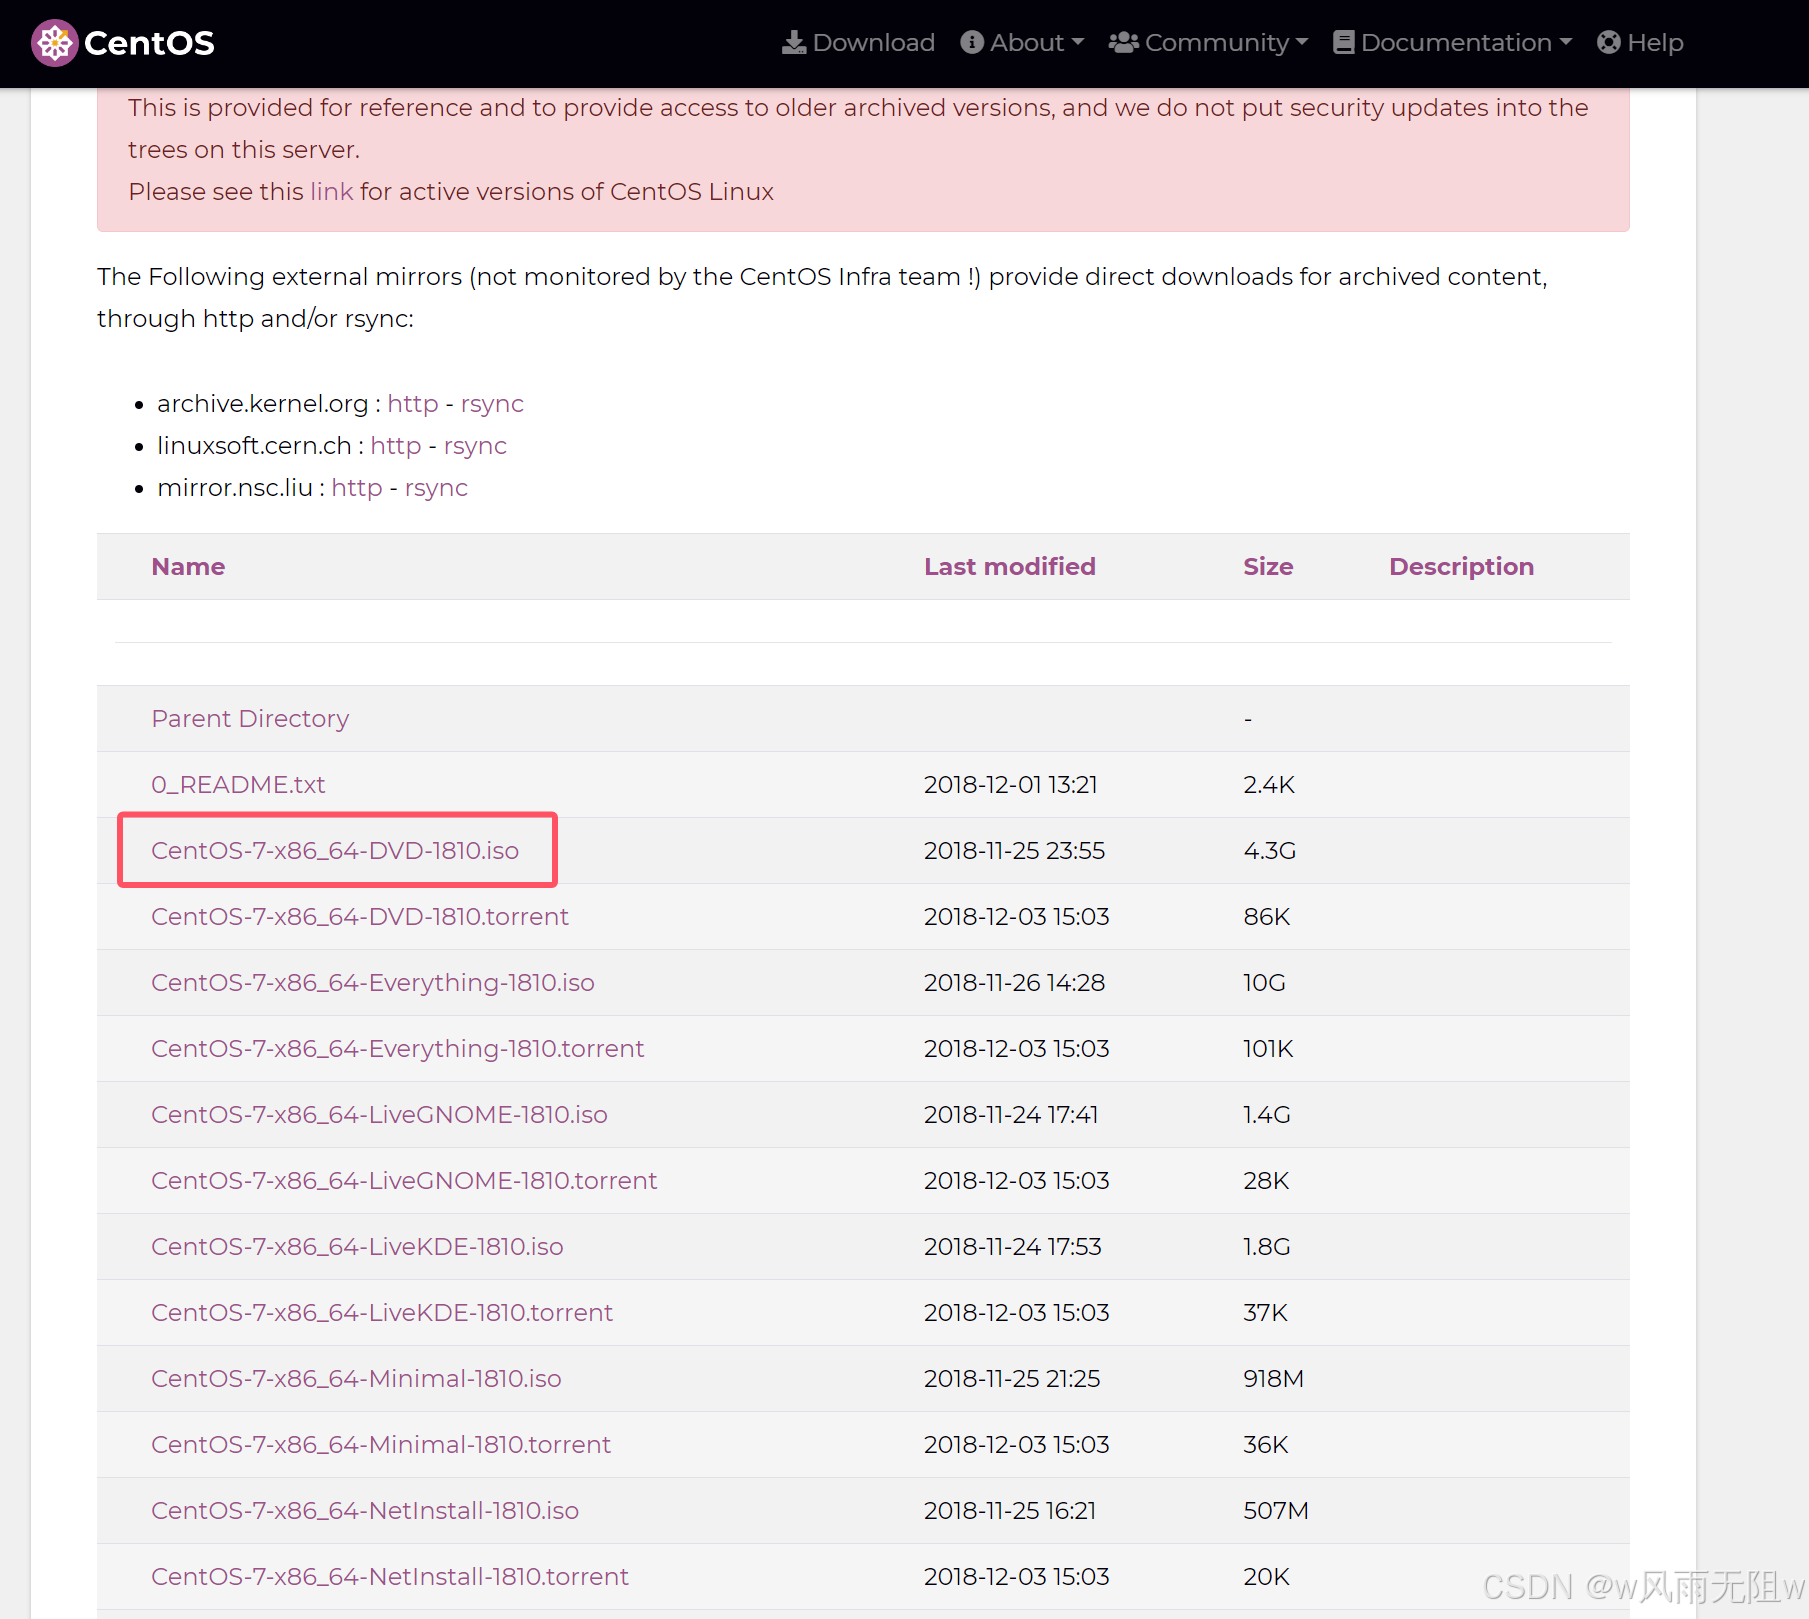
进入centos官网下载页面,选择7.6版本,依次点击 tree-》isos-》x86_64/-》CentOS-7-x86_64-DVD-1810.iso 进行下载。
centos官网下载页面:
https://wiki.centos.org/Download.html1、打开下载页面
二、配置CentOS 7的网络
1、在终端中输入以下命令,查看安装在本机的网卡
nmcli d显示信息如下:
DEVICE      TYPE      STATE      CONNECTION
ens33       ethernet  connected  ens33
virbr0      bridge    connected  virbr0
lo          loopback  unmanaged  --
virbr0-nic  tun       unmanaged  --
2、切换到/etc/sysconfig/network-scripts/目录下
cd /etc/sysconfig/network-scripts/

[root@localhost ~]# cd /etc/sysconfig/network-scripts/
[root@localhost network-scripts]# ls
ifcfg-ens33  ifdown-ib    ifdown-ppp       ifdown-tunnel  ifup-ib    ifup-plusb   ifup-Team         network-functions
ifcfg-lo     ifdown-ippp  ifdown-routes    ifup           ifup-ippp  ifup-post    ifup-TeamPort     network-functions-ipv6
ifdown       ifdown-ipv6  ifdown-sit       ifup-aliases   ifup-ipv6  ifup-ppp     ifup-tunnel
ifdown-bnep  ifdown-isdn  ifdown-Team      ifup-bnep      ifup-isdn  ifup-routes  ifup-wireless
ifdown-eth   ifdown-post  ifdown-TeamPort  ifup-eth       ifup-plip  ifup-sit     init.ipv6-global
[root@localhost network-scripts]#
3、打开 ifcfg-ens33 文件
vim ifcfg-ens33打开后内容如下:
TYPE="Ethernet"
PROXY_METHOD="none"
BROWSER_ONLY="no"
BOOTPROTO="dhcp"
DEFROUTE="yes"
IPV4_FAILURE_FATAL="no"
IPV6INIT="yes"
IPV6_AUTOCONF="yes"
IPV6_DEFROUTE="yes"
IPV6_FAILURE_FATAL="no"
IPV6_ADDR_GEN_MODE="stable-privacy"
NAME="ens33"
UUID="db61f3ee-c8dc-43a8-8c41-df1f6147ffb0"
DEVICE="ens33"
ONBOOT="yes"
~
修改为以下内容
BOOTPROTO=dhcp

ONBOOT=yes
保存 ,并重启网络
systemctl restart network 4、打开DNS 配置
cd /etc/打开 resolv.conf
vim resolv.conf修改nameserver 改为 8.8.8.8 或者 114.114.114.114
# Generated by NetworkManager
search localdomain
nameserver  8.8.8.8
nameserver  114.114.114.114
重启网卡:
systemctl
systemctl restart network三、安装宝塔
1、执行命令安装宝塔
yum install -y wget && wget -O install.sh http://download.bt.cn/install/install_6.0.sh && sh install.sh2、错误提示 :
Could not retrieve mirrorlist http://mirrorlist.centos.org/?release=7&arch=x86_64&repo=os&infra=stock error was
14: curl#6 - "Could not resolve host: mirrorlist.centos.org; Unknown error"


 One of the configured repositories failed (Unknown),
 and yum doesn't have enough cached data to continue. At this point the only
 safe thing yum can do is fail. There are a few ways to work "fix" this:

     1. Contact the upstream for the repository and get them to fix the problem.

     2. Reconfigure the baseurl/etc. for the repository, to point to a working
        upstream. This is most often useful if you are using a newer
        distribution release than is supported by the repository (and the
        packages for the previous distribution release still work).

     3. Run the command with the repository temporarily disabled
            yum --disablerepo=<repoid> ...

     4. Disable the repository permanently, so yum won't use it by default. Yum
        will then just ignore the repository until you permanently enable it
        again or use --enablerepo for temporary usage:

            yum-config-manager --disable <repoid>
        or
            subscription-manager repos --disable=<repoid>

     5. Configure the failing repository to be skipped, if it is unavailable.
        Note that yum will try to contact the repo. when it runs most commands,
        so will have to try and fail each time (and thus. yum will be be much
        slower). If it is a very temporary problem though, this is often a nice
        compromise:

            yum-config-manager --save --setopt=<repoid>.skip_if_unavailable=true

Cannot find a valid baseurl for repo: base/7/x86_64
解决方法:
3 、yum更换源
(1)、先备份,yum源目录为 /etc/yum.repos.d/
 cd /etc/yum.repos.d/

mv CentOS-Base.repo CentOS-Base.repo.backup
(2)、下载阿里云的yum源
wget -O /etc/yum.repos.d/CentOS-Base.repo http://mirrors.aliyun.com/repo/Centos-7.repo

[root@localhost yum.repos.d]# wget -O /etc/yum.repos.d/CentOS-Base.repo http://mirrors.aliyun.com/repo/Centos-7.repo
--2024-10-01 00:52:36--  http://mirrors.aliyun.com/repo/Centos-7.repo
Resolving mirrors.aliyun.com (mirrors.aliyun.com)... 61.174.8.44, 61.174.8.39, 61.174.8.43, ...
Connecting to mirrors.aliyun.com (mirrors.aliyun.com)|61.174.8.44|:80... connected.
HTTP request sent, awaiting response... 200 OK
Length: 2523 (2.5K) [application/octet-stream]
Saving to: '/etc/yum.repos.d/CentOS-Base.repo'

100%[==================================================================================>] 2,523       --.-K/s   in 0.001s

2024-10-01 00:52:38 (4.26 MB/s) - '/etc/yum.repos.d/CentOS-Base.repo' saved [2523/2523]
(3)、生成缓存
yum
yum makecache[root@localhost yum.repos.d]# yum makecache
Loaded plugins: fastestmirror, langpacks
Loading mirror speeds from cached hostfile
* base: mirrors.aliyun.com
* extras: mirrors.aliyun.com
* updates: mirrors.aliyun.com
base | 3.6 kB 00:00:00
extras | 2.9 kB 00:00:00
updates | 2.9 kB 00:00:00
(1/10): base/7/x86_64/group_gz | 153 kB 00:00:02
(2/10): base/7/x86_64/other_db | 2.6 MB 00:00:02
(3/10): extras/7/x86_64/other_db | 154 kB 00:00:00
(4/10): extras/7/x86_64/filelists_db | 305 kB 00:00:02
(5/10): updates/7/x86_64/filelists_db | 15 MB 00:00:00
(6/10): updates/7/x86_64/other_db | 1.6 MB 00:00:00
(7/10): updates/7/x86_64/primary_db | 27 MB 00:00:00
base/7/x86_64/primary_db FAILED
http://mirrors.cloud.aliyuncs.com/centos/7/os/x86_64/repodata/6d0c3a488c282fe537794b5946b01e28c7f44db79097bb06826e1c0c88bad5ef-primary.sqlite.bz2: [Errno 14] curl#7 - "Failed connect to mirrors.cloud.aliyuncs.com:80; Connection refused"
Trying other mirror.
base/7/x86_64/filelists_db FAILED
http://mirrors.aliyuncs.com/centos/7/os/x86_64/repodata/d6d94c7d406fe7ad4902a97104b39a0d8299451832a97f31d71653ba982c955b-filelists.sqlite.bz2: [Errno 14] curl#7 - "Failed connect to mirrors.aliyuncs.com:80; Connection refused"
Trying other mirror.
(8/10): base/7/x86_64/primary_db | 6.1 MB 00:00:00
extras/7/x86_64/primary_db FAILED ====== ] 482 kB/s | 53 MB 00:00:15 ETA
http://mirrors.aliyuncs.com/centos/7/extras/x86_64/repodata/e12dbf10e94bc2b33b1f45e026559bc8685728b139dddae0654d96bc624c5602-primary.sqlite.bz2: [Errno 14] curl#7 - "Failed connect to mirrors.aliyuncs.com:80; Connection refused"
Trying other mirror.
(9/10): extras/7/x86_64/primary_db | 253 kB 00:00:00
(10/10): base/7/x86_64/filelists_db | 7.2 MB 00:00:02
Metadata Cache Created(4)、更新系统
yum -y update等待更新完成
(5)、运行安装rpel源命令
yum install epel-release

Total download size: 15 k
Installed size: 24 k
Is this ok [y/d/N]: y
Downloading packages:
epel-release-7-11.noarch.rpm                                                                         |  15 kB  00:00:02
Running transaction check
Running transaction test
Transaction test succeeded
Running transaction
  Installing : epel-release-7-11.noarch                                                                                 1/1
  Verifying  : epel-release-7-11.noarch                                                                                 1/1

Installed:
  epel-release.noarch 0:7-11

Complete!
安装完成之后就可以直接使用yum来安装额外的软件包即可:
yum install -y wget && wget -O install.sh http://download.bt.cn/install/install_6.0.sh && sh install.sh