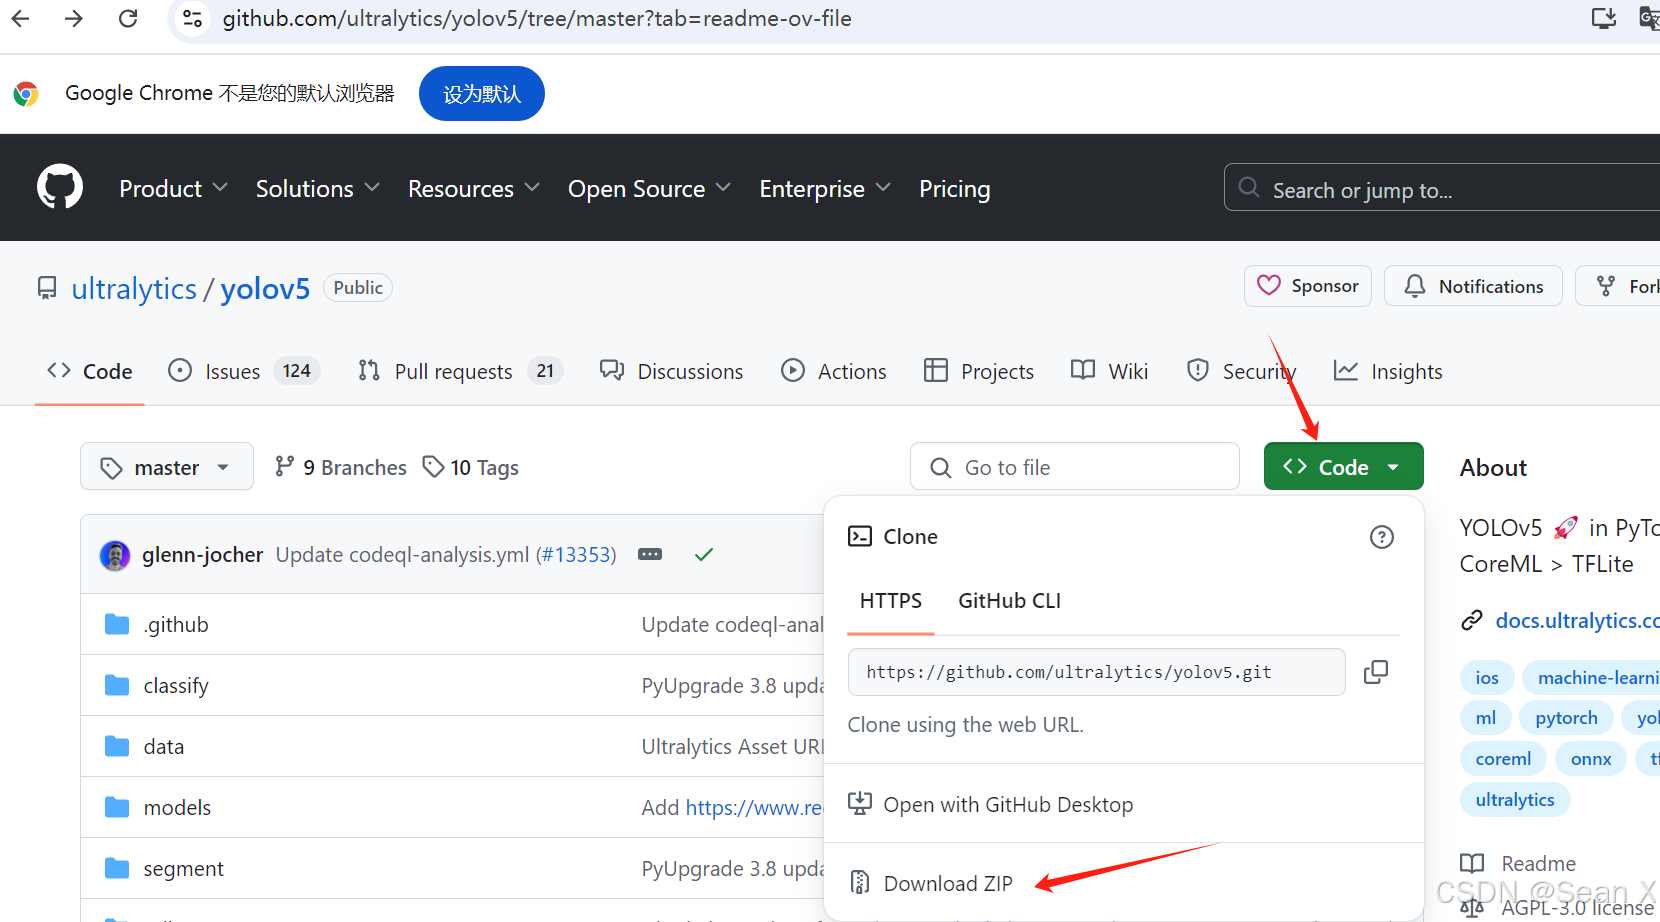
yolov5已经出了很多版本了,这里我以目前最新的版本为例,先在官网下载源码:GitHub - ultralytics/yolov5: YOLOv5 🚀 in PyTorch > ONNX > CoreML > TFLite
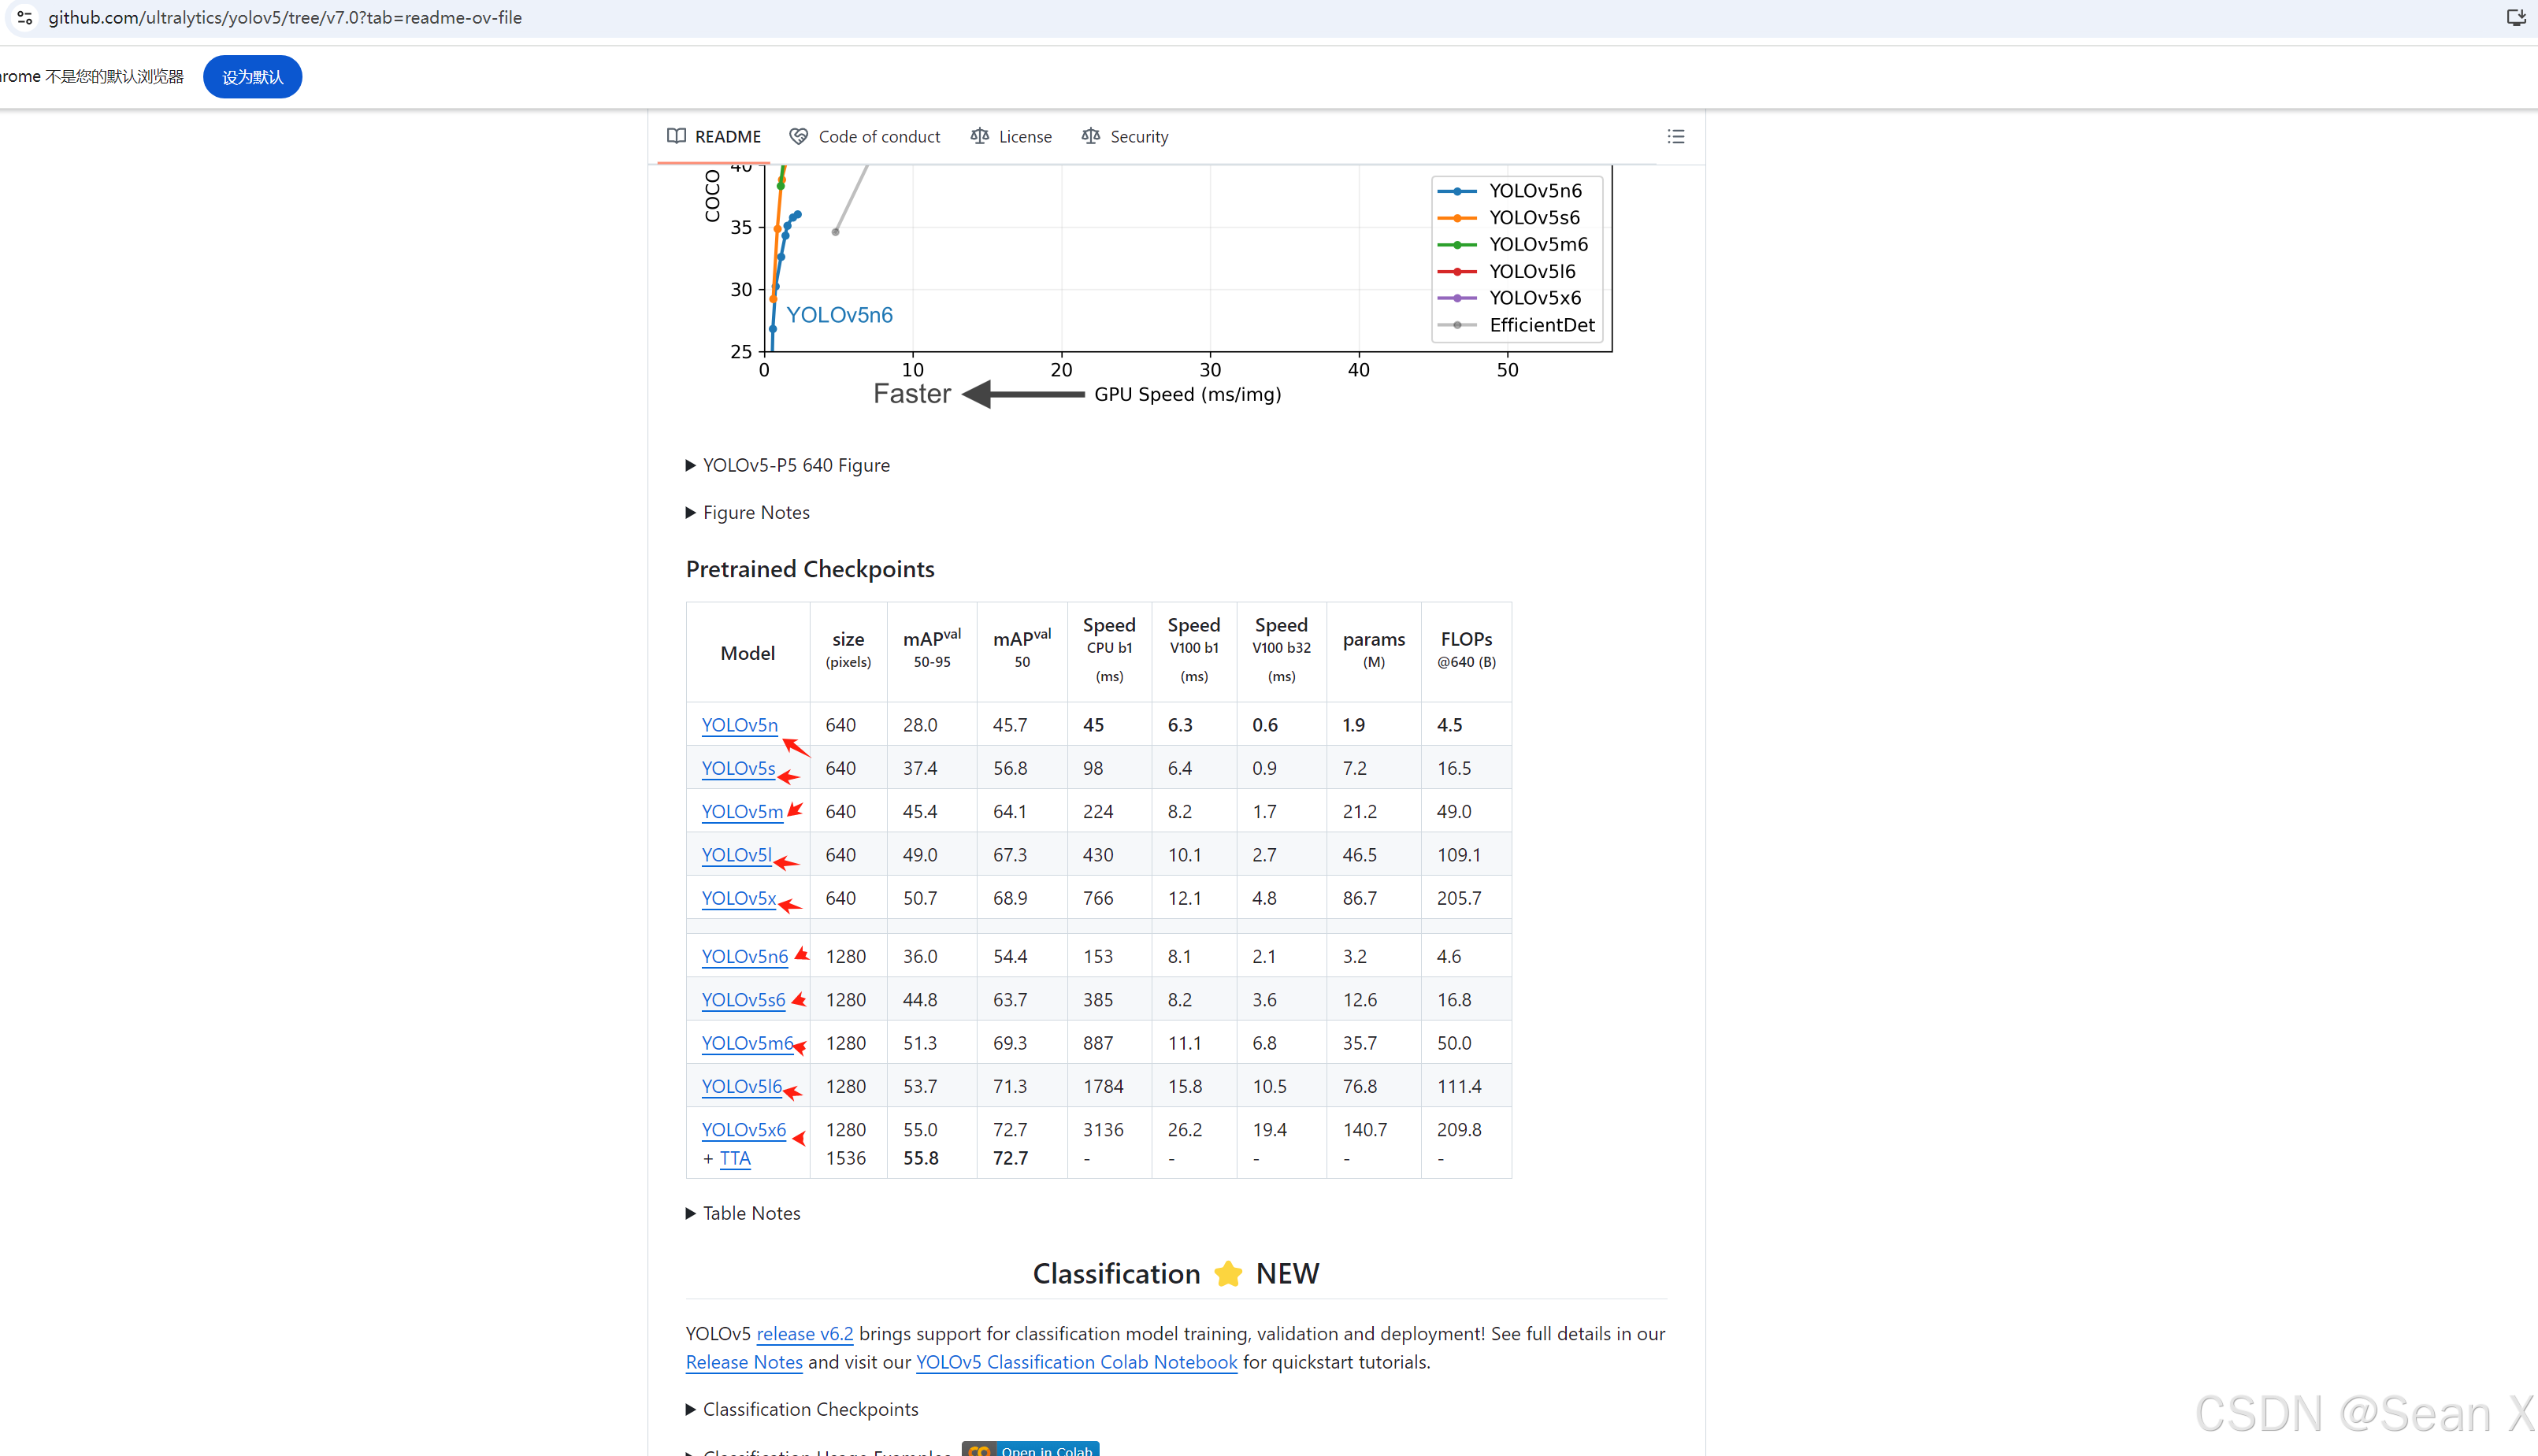
然后下载预训练模型,需要哪个就点击哪个模型就行,在yolov5-master目录下建一个文件夹存放预训练模型
1、准备数据集
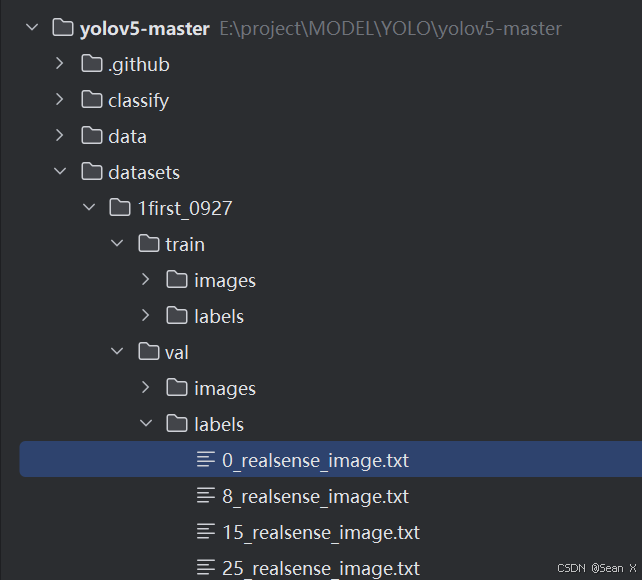
1.用labelimg标注要训练的图片,标注的格式是yolo格式,labels的后缀是txt,然后分好训练集和验证集
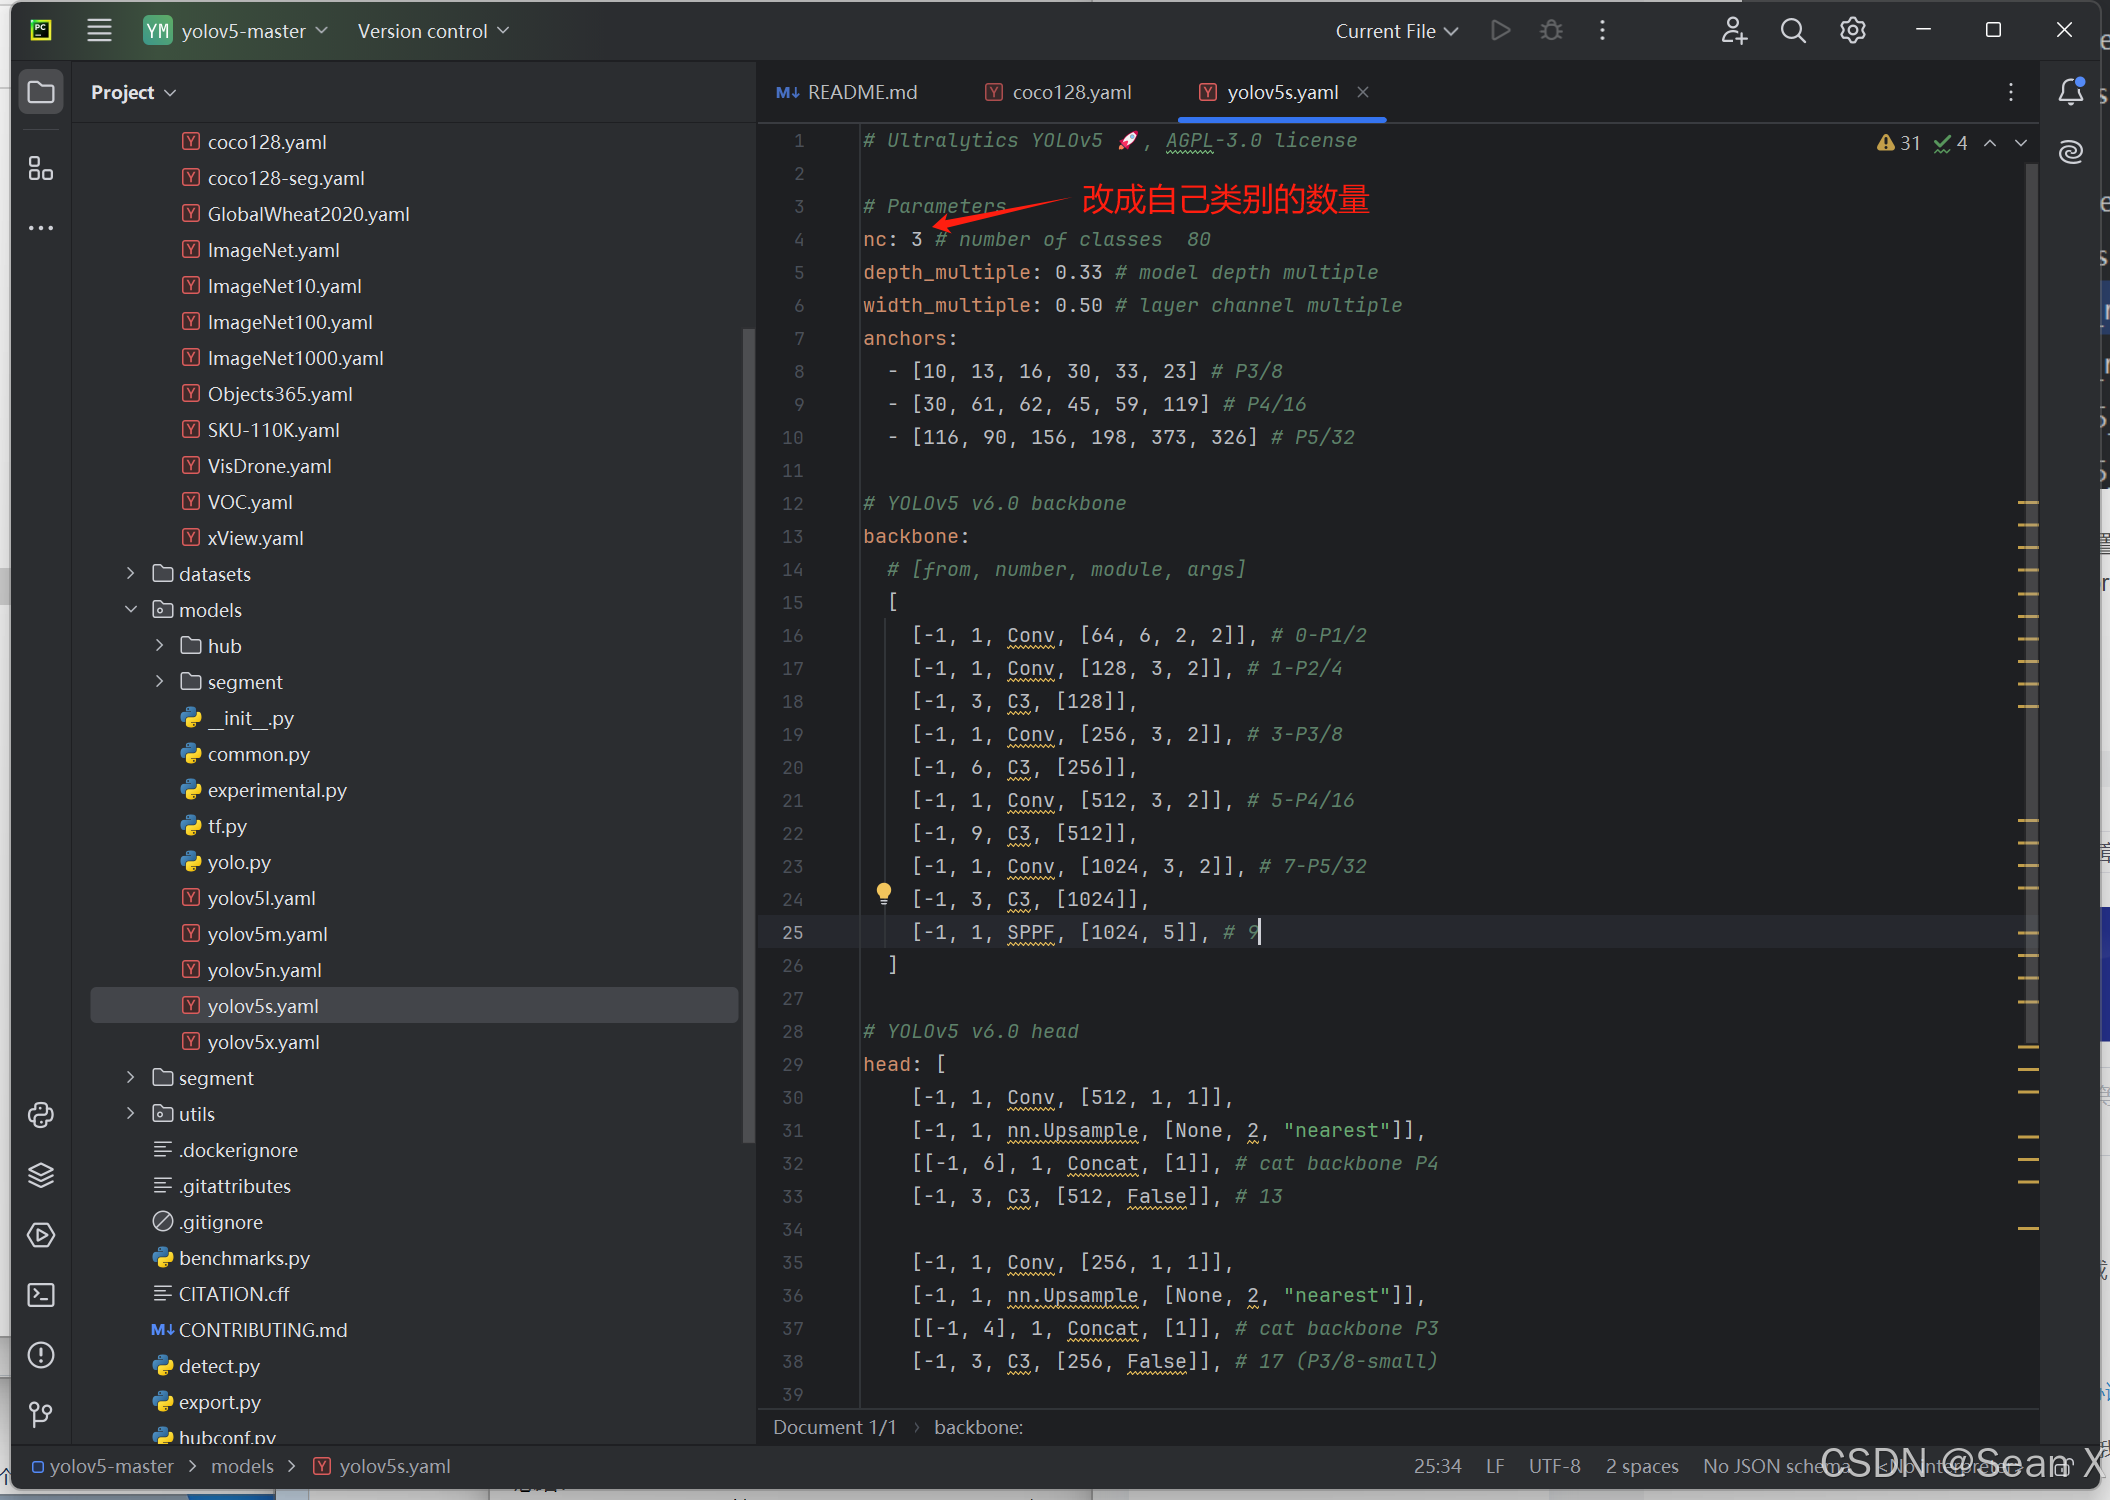
2.改好模型配置文件和数据加载配置文件,分别在E:\project\MODEL\YOLO\yolov5-master\modelsyolov5s.yaml和E:\project\MODEL\YOLO\yolov5-master\data\coco128.yaml
 2、创建虚拟环境
conda create -n yolov5-master python=3.9
然后激活进入该虚拟环境:conda activate yolov5-master,pycharm就直接在设置里把该虚拟环境加进来就行

接着安装该项目所需的包,可看requirements.txt
pip install numpy;pip install tqdm; pip install opencv-python; pip install pandas;
然后安装torch:结合自己显卡的版本选择合适的torch版本
conda install pytorch torchvision torchaudio pytorch-cuda=12.1 -c pytorch -c nvidia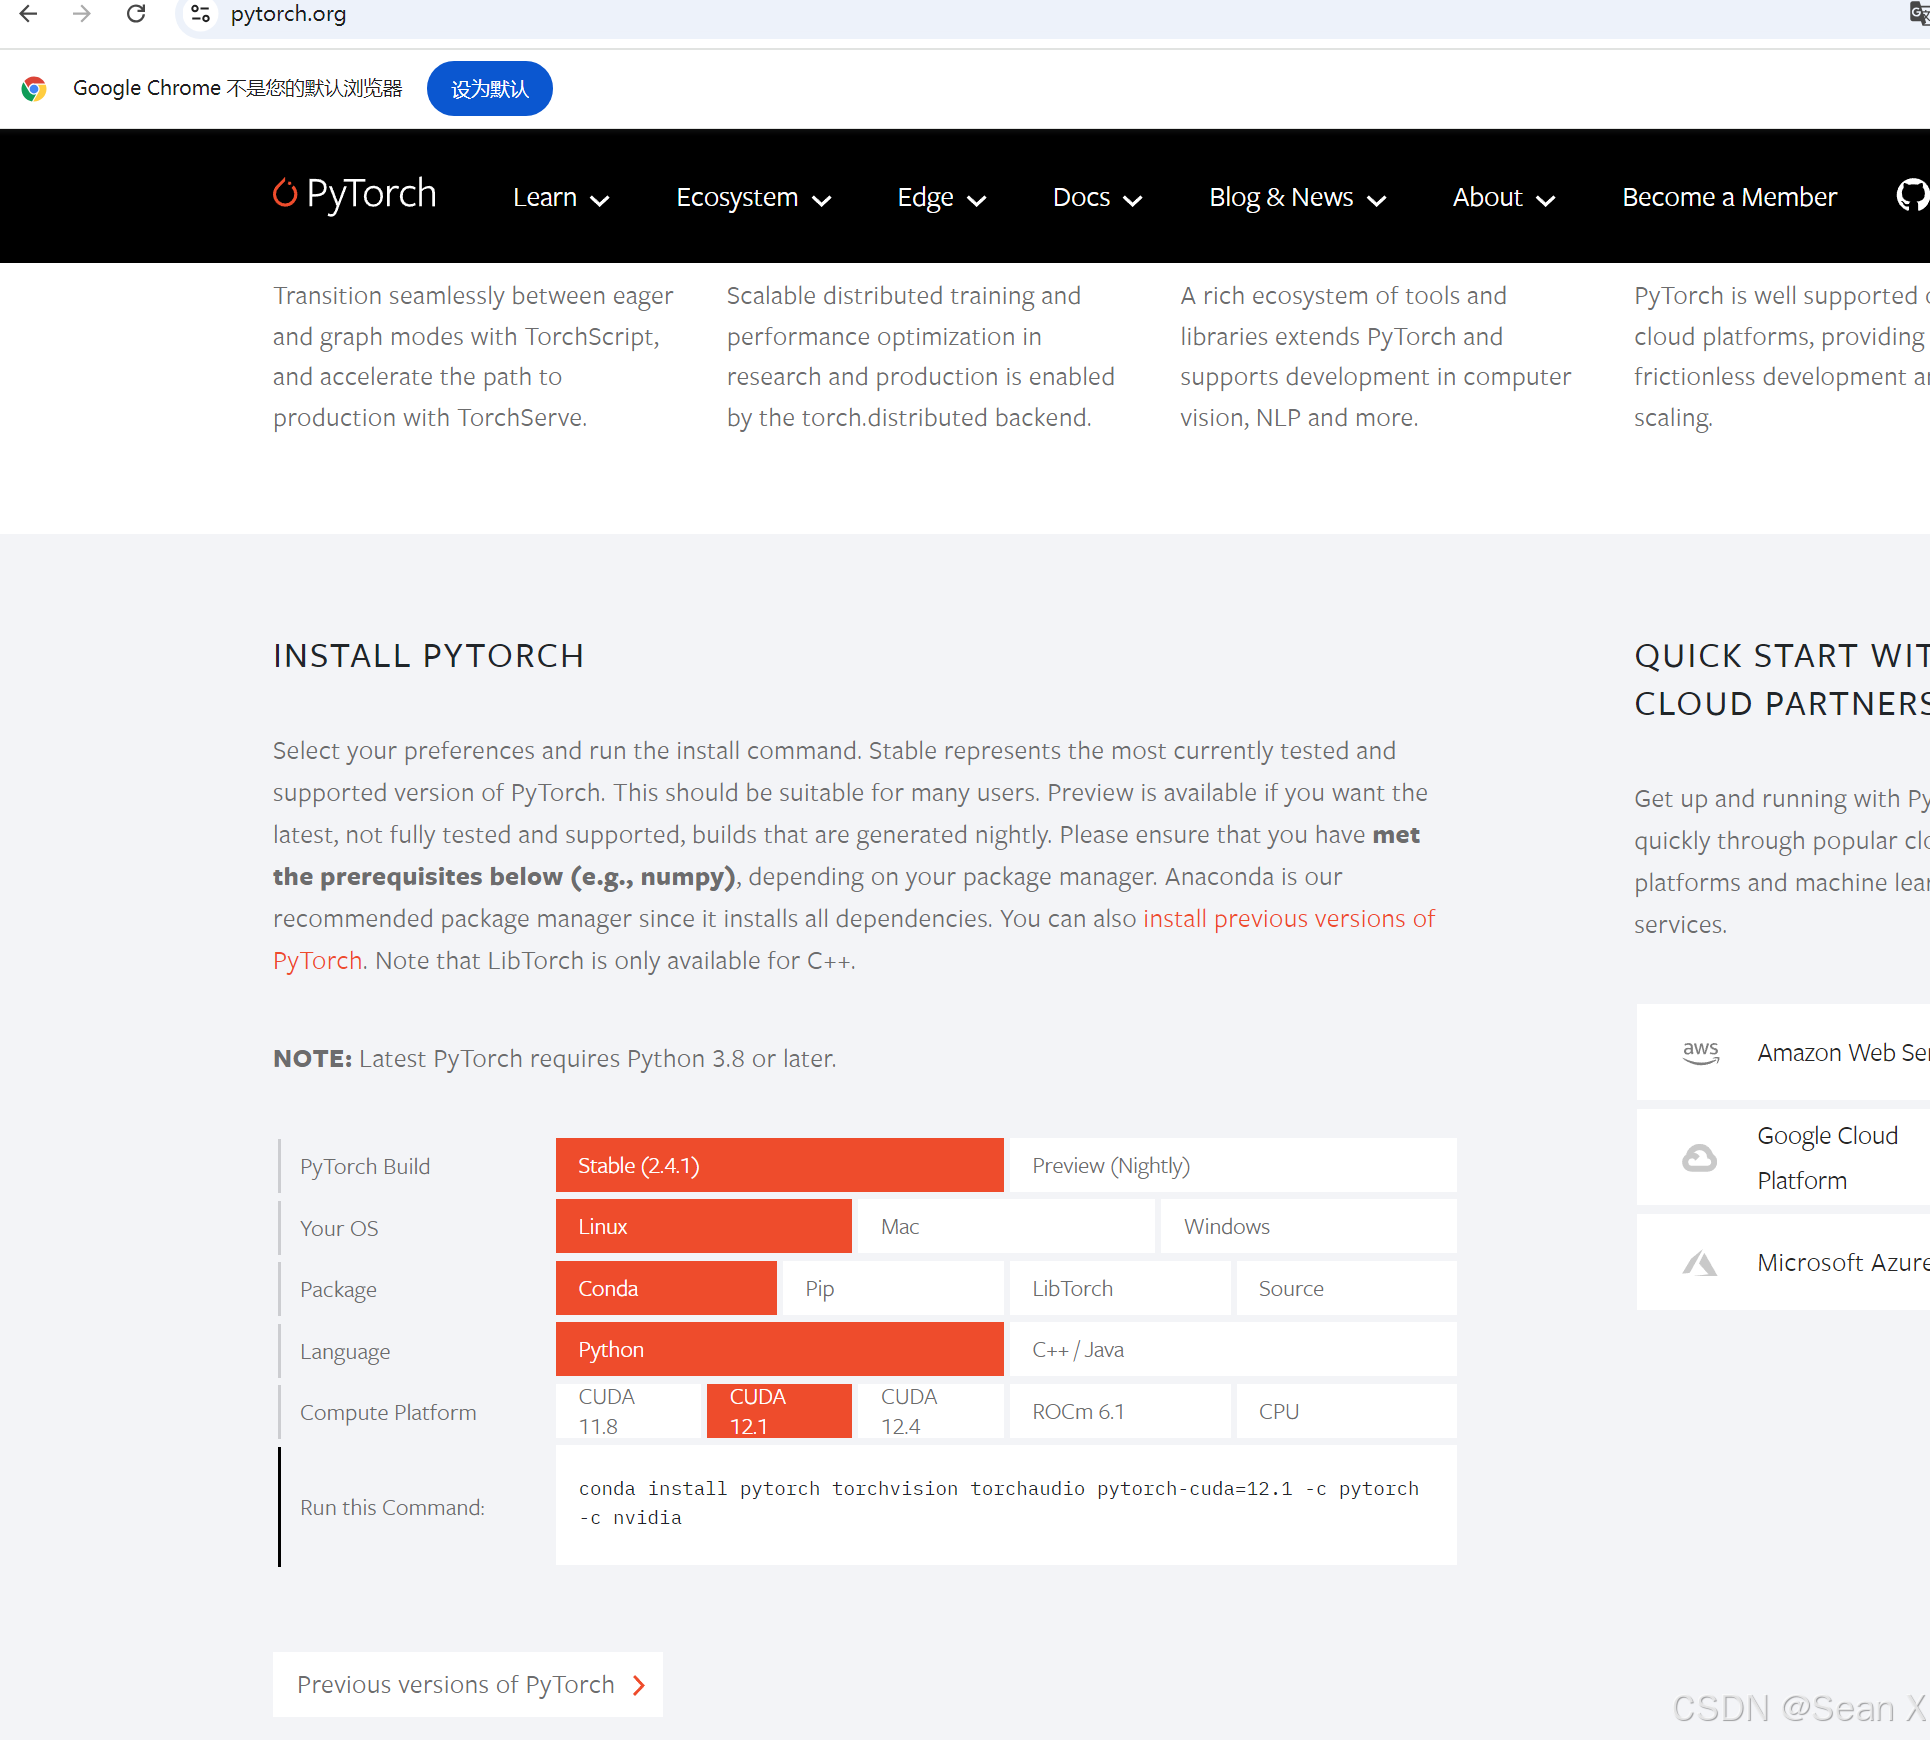
3、训练
改E:\project\MODEL\YOLO\yolov5-master\train.py路径下的箭头指出的内容,这里是用预训练模型,没用到模型配置文件,如果数据集很多,重新训练的话可以使用模型配置文件yolov5s.yaml
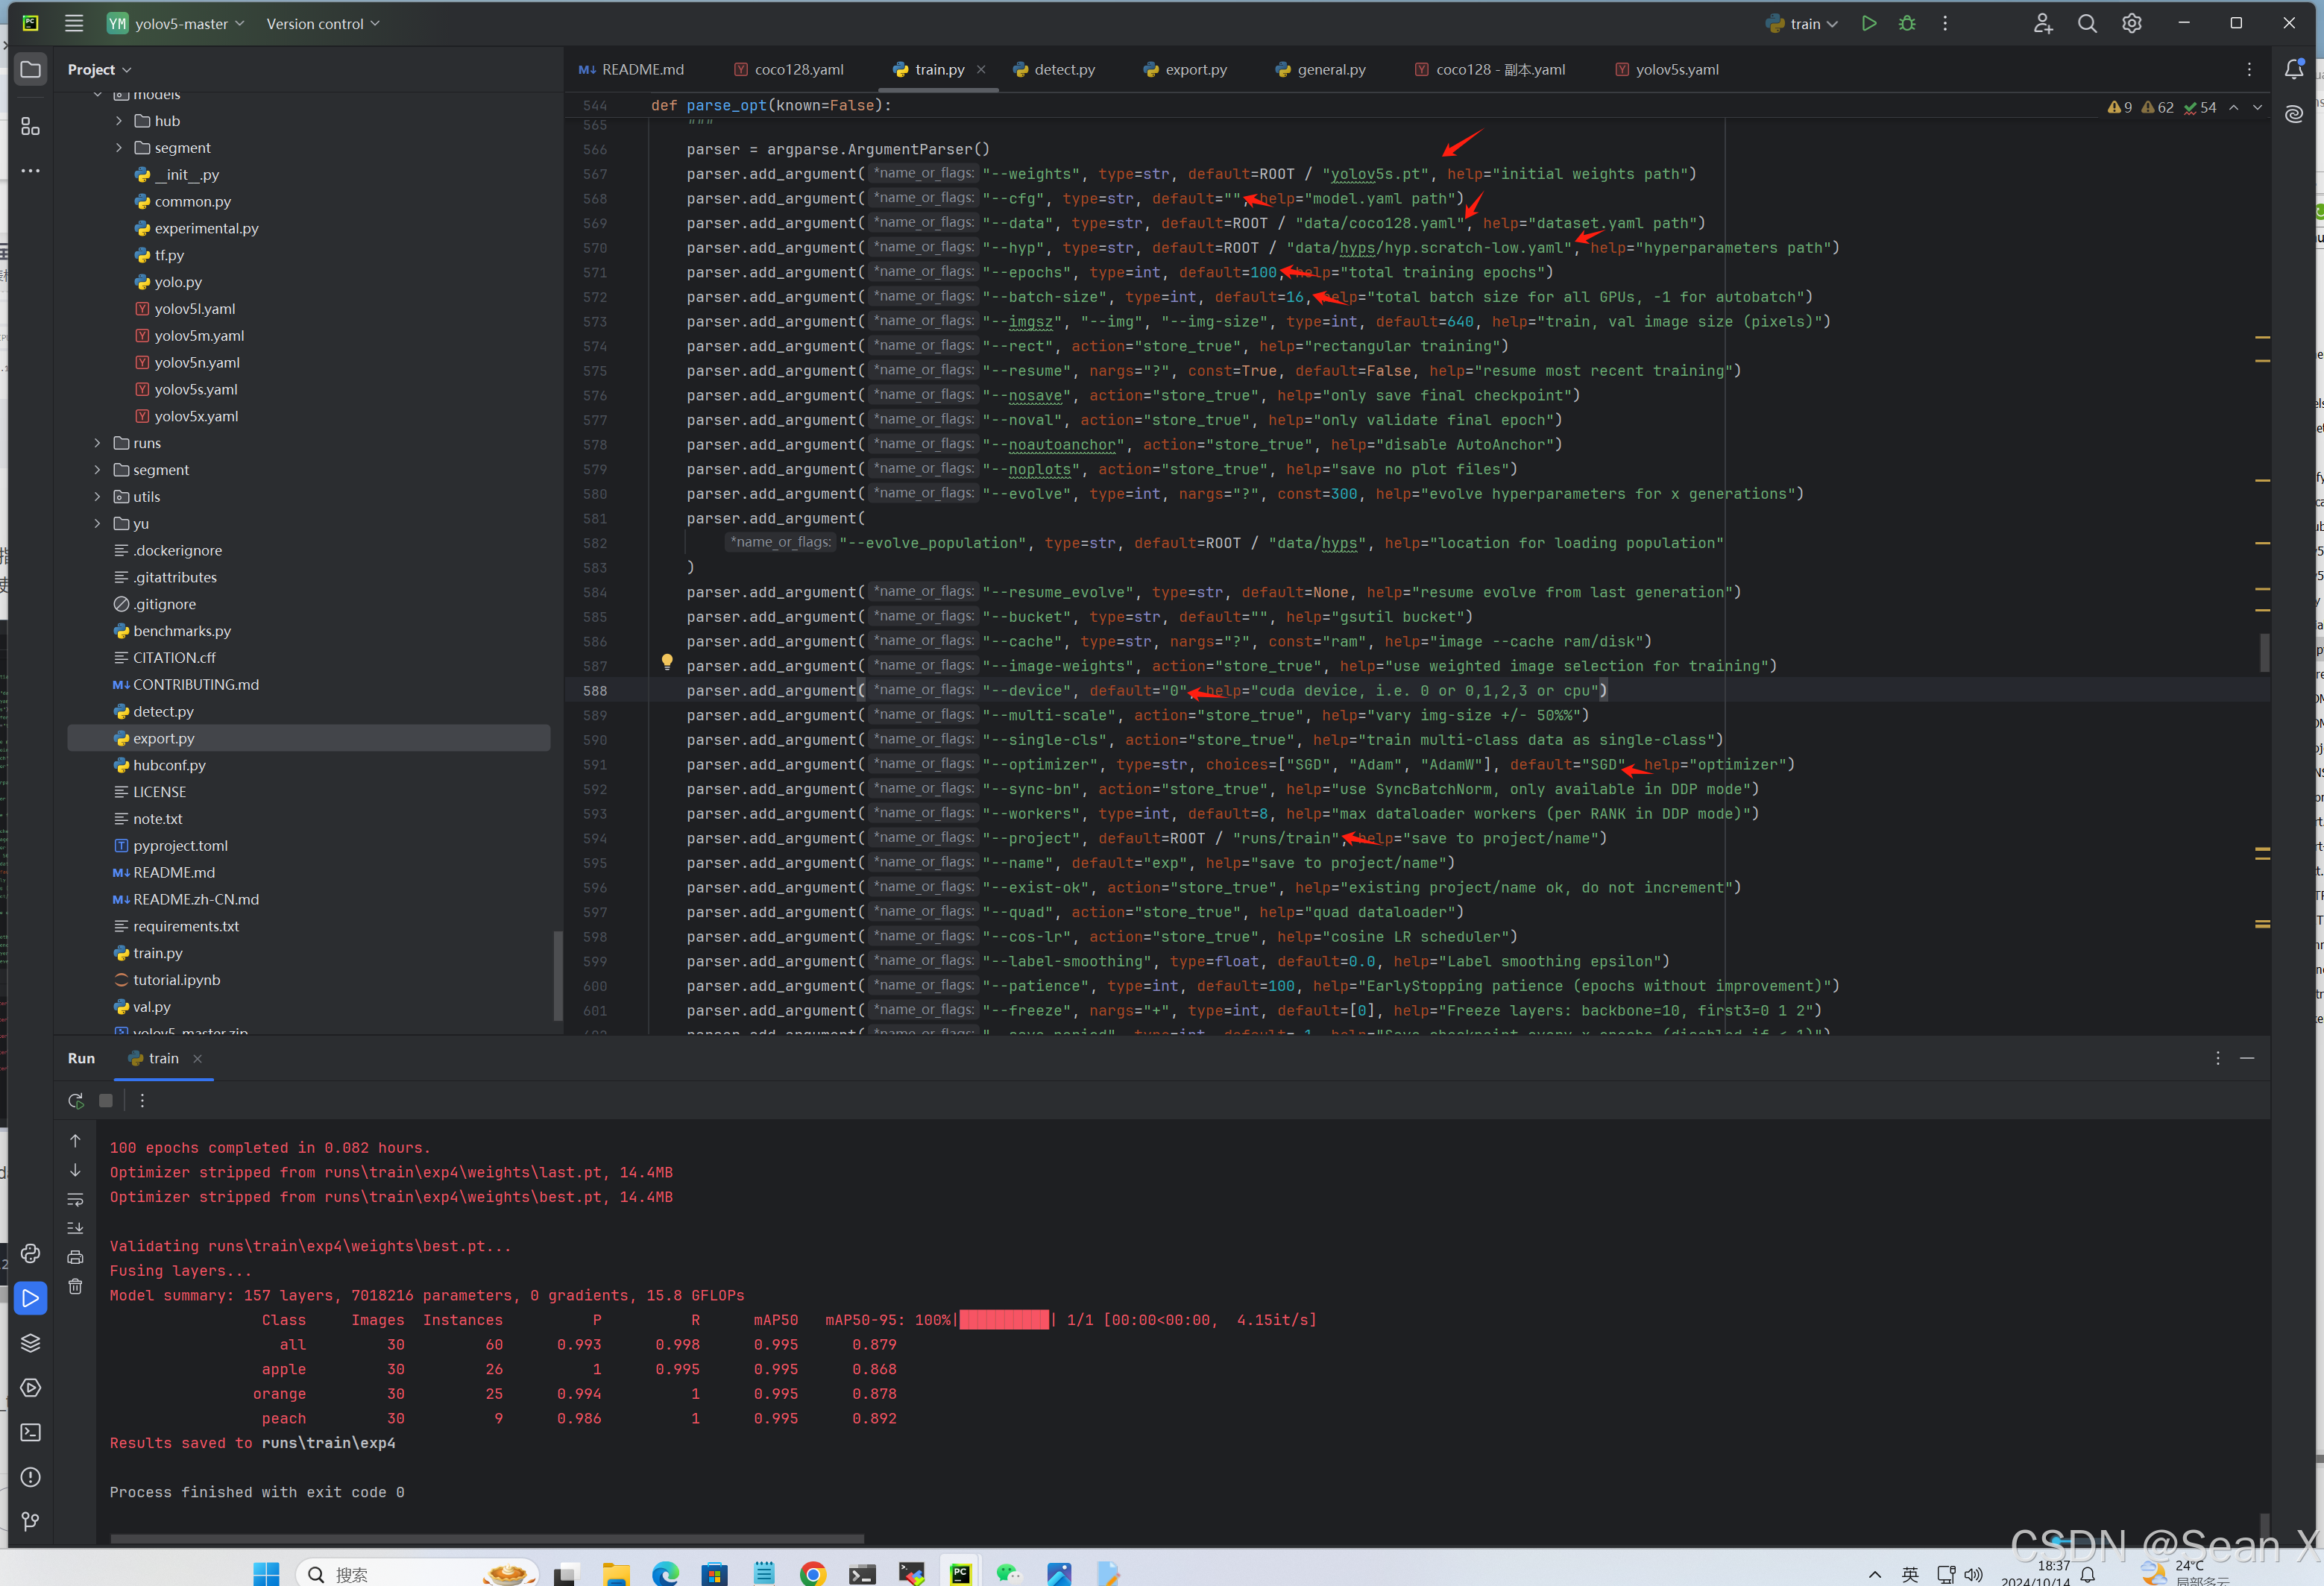
也可用指令训练:python train.py --weights yu/yolov5s.pt --data data/coco128.yaml --epochs 300 --batch-size 16
python
python train.py --weights yu/yolov5s.pt --data data/coco128.yaml --epochs 300 --batch-size 16 4、测试
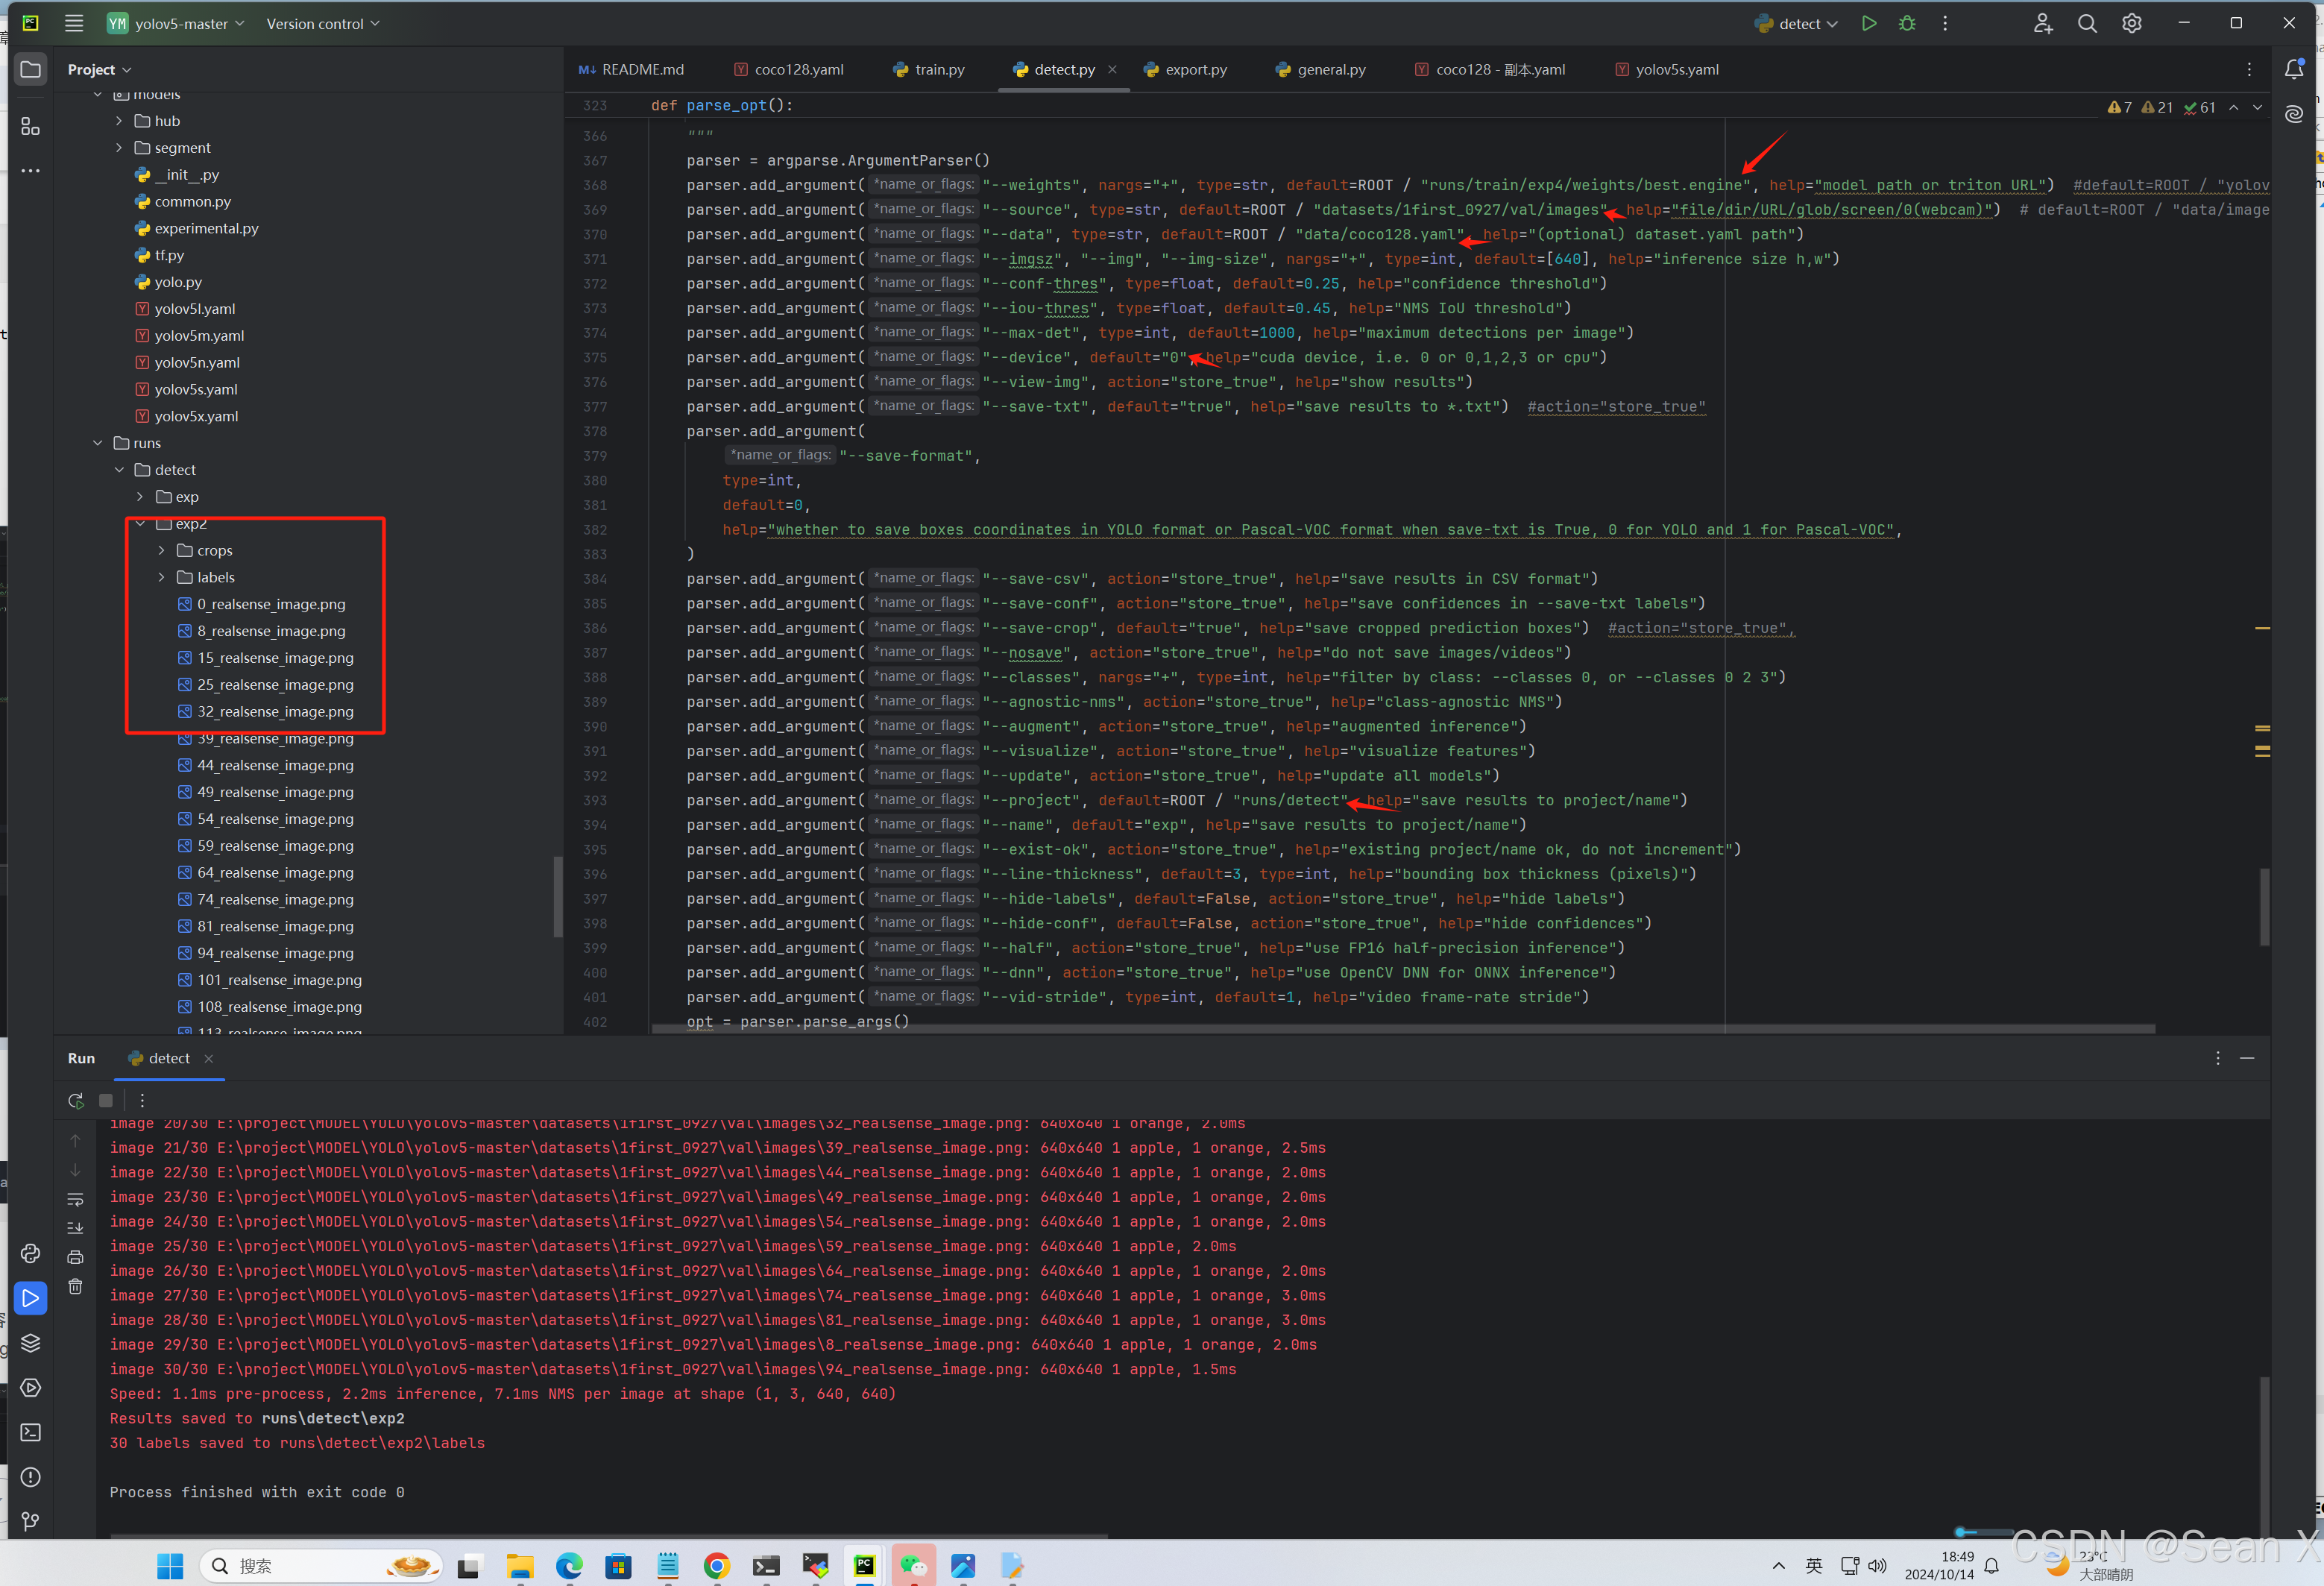
改E:\project\MODEL\YOLO\yolov5-master\detect.py里面的save_txt和save_crop,然后改一些模型路径和测试的图片,显卡等就可以测试了
parser.add_argument("--save-txt", default="true", help="save results to *.txt")parser.add_argument("--save-crop", default="true", help="save cropped prediction boxes")这两行改好就可以在测试结果里看到txt文件保存下来和小图
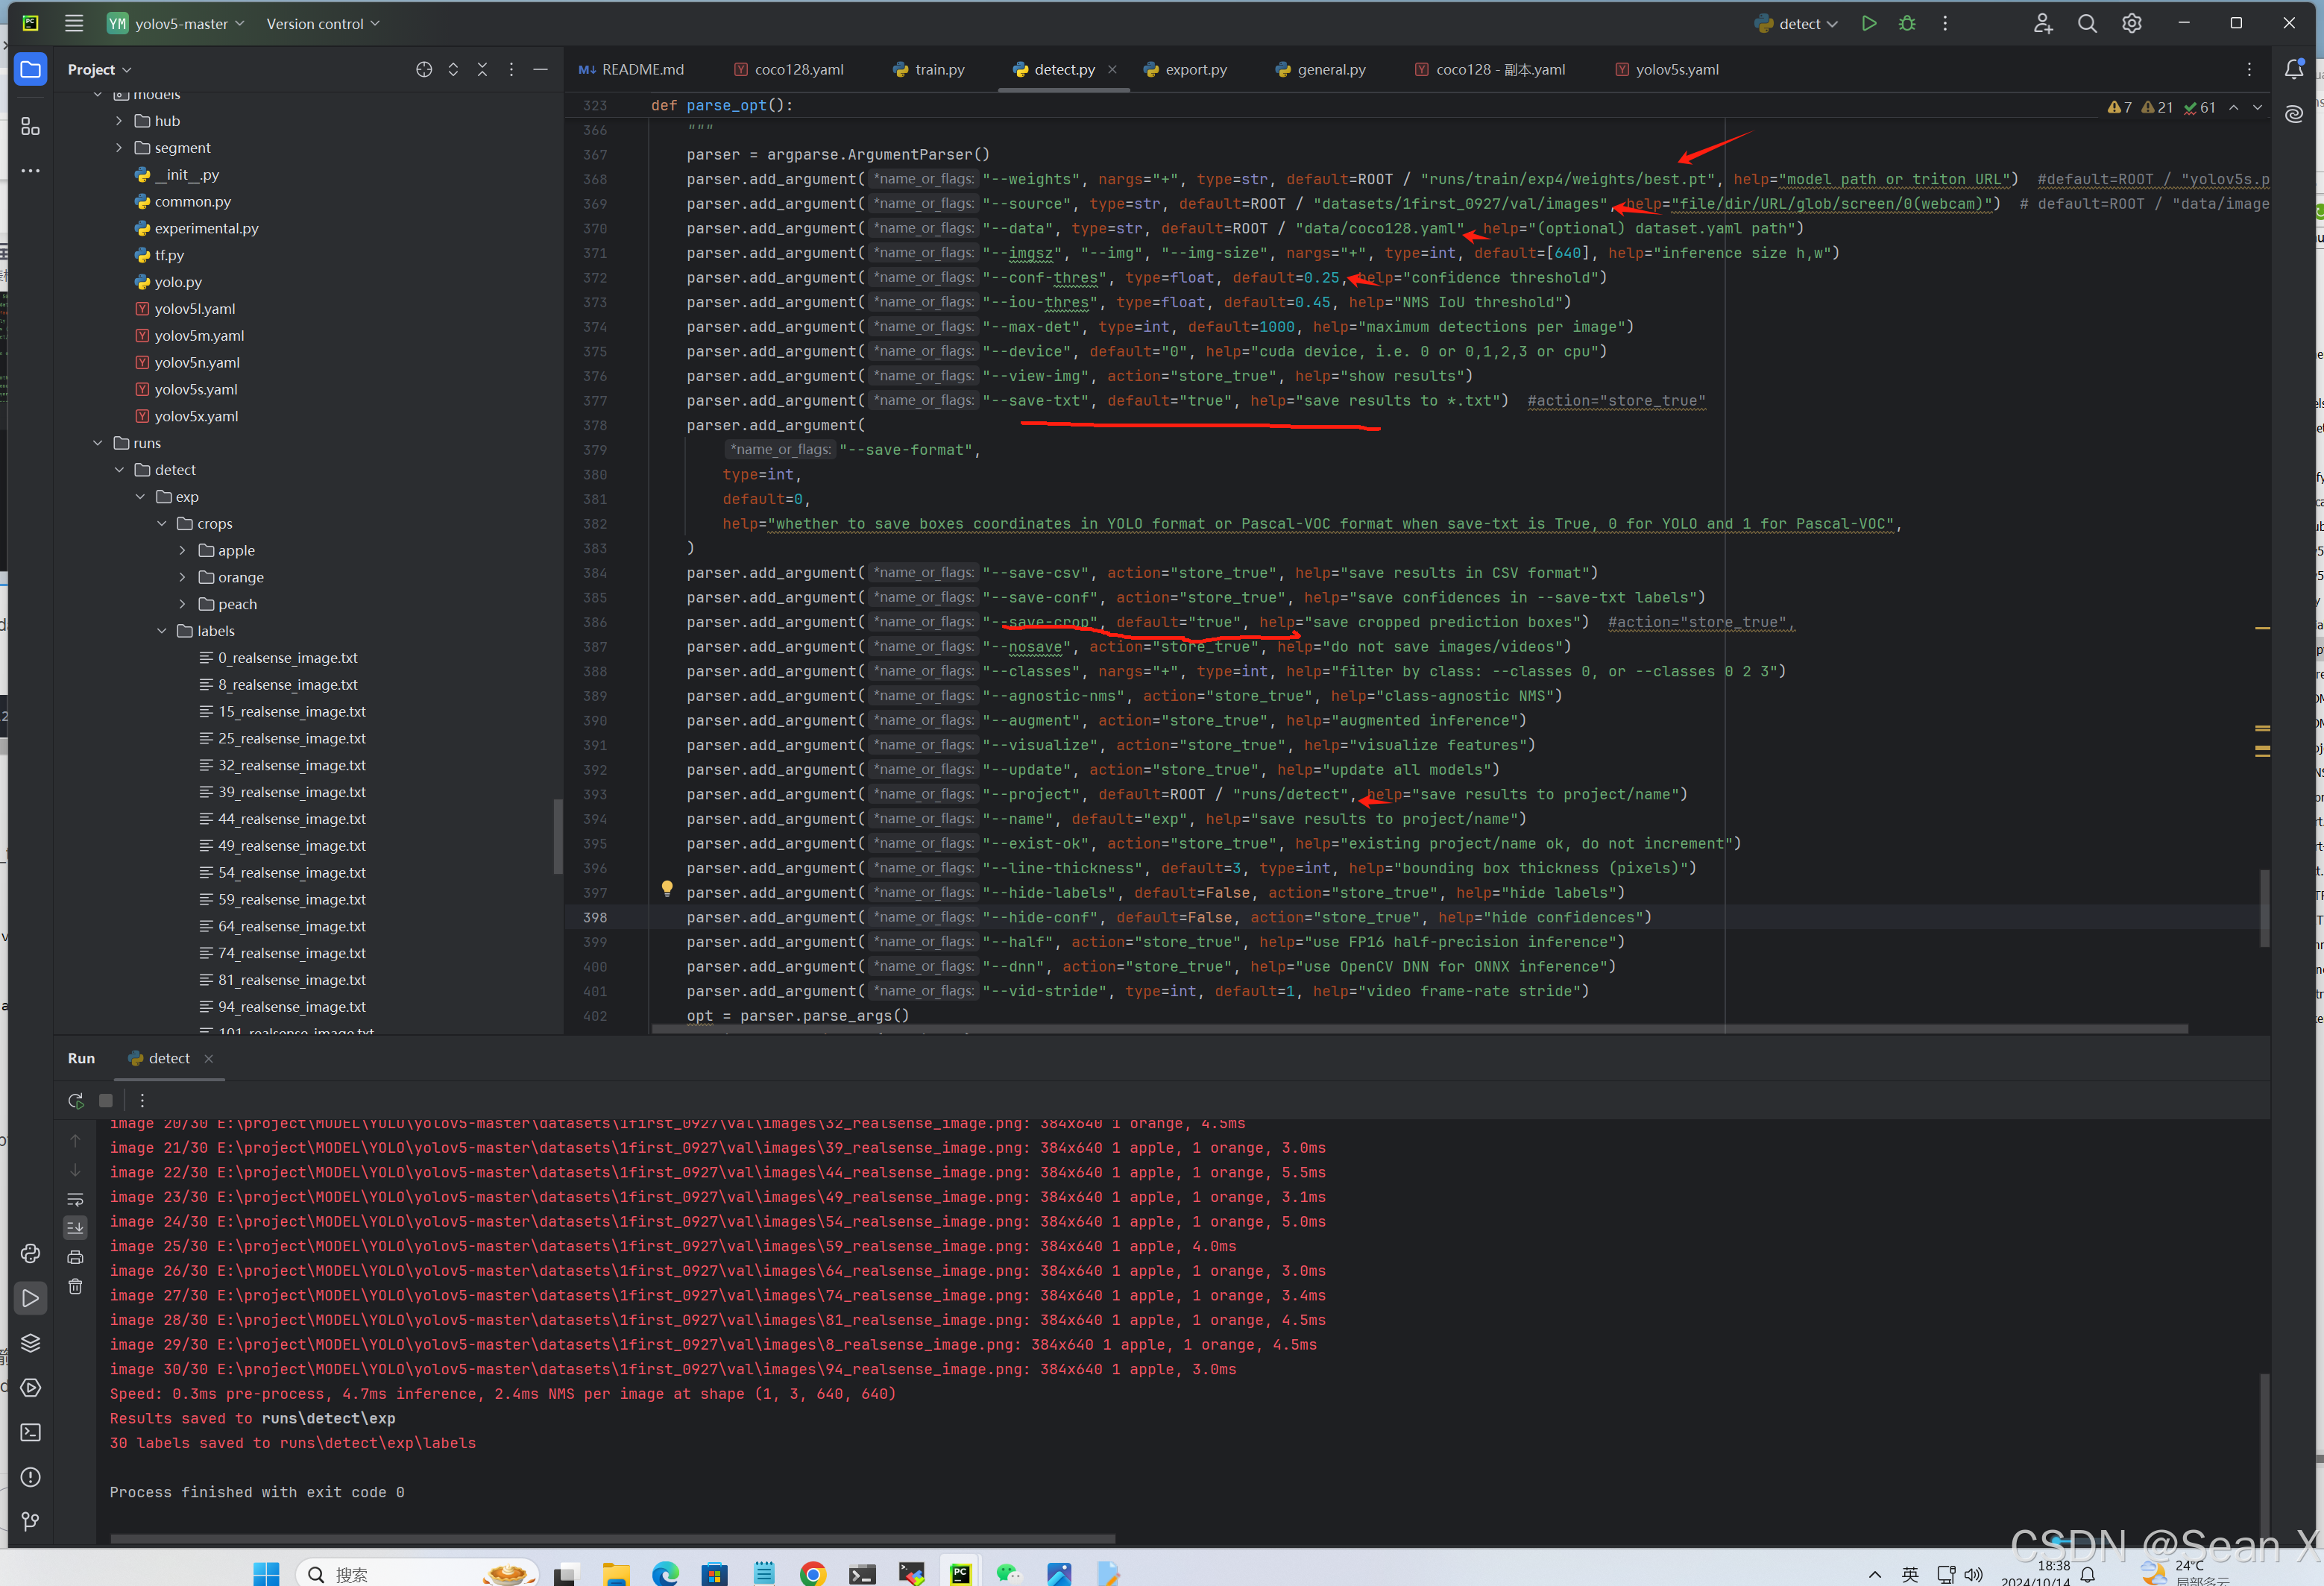
也可用指令测试:python detect.py --weights runstrain/exp/best.pt --source datasets/1first_0927/val/images --data data/coco128.yaml
python
python detect.py --weights runs/train/exp/weights/best.pt --source datasets/1first_0927/val/images --data data/coco128.yaml 5、导出
改E:\project\MODEL\YOLO\yolov5-master\export.py路径下的箭头指出的内容,如果要导出的是tensorrt格式的就把--include default="torchscript",改成--include default="engine"
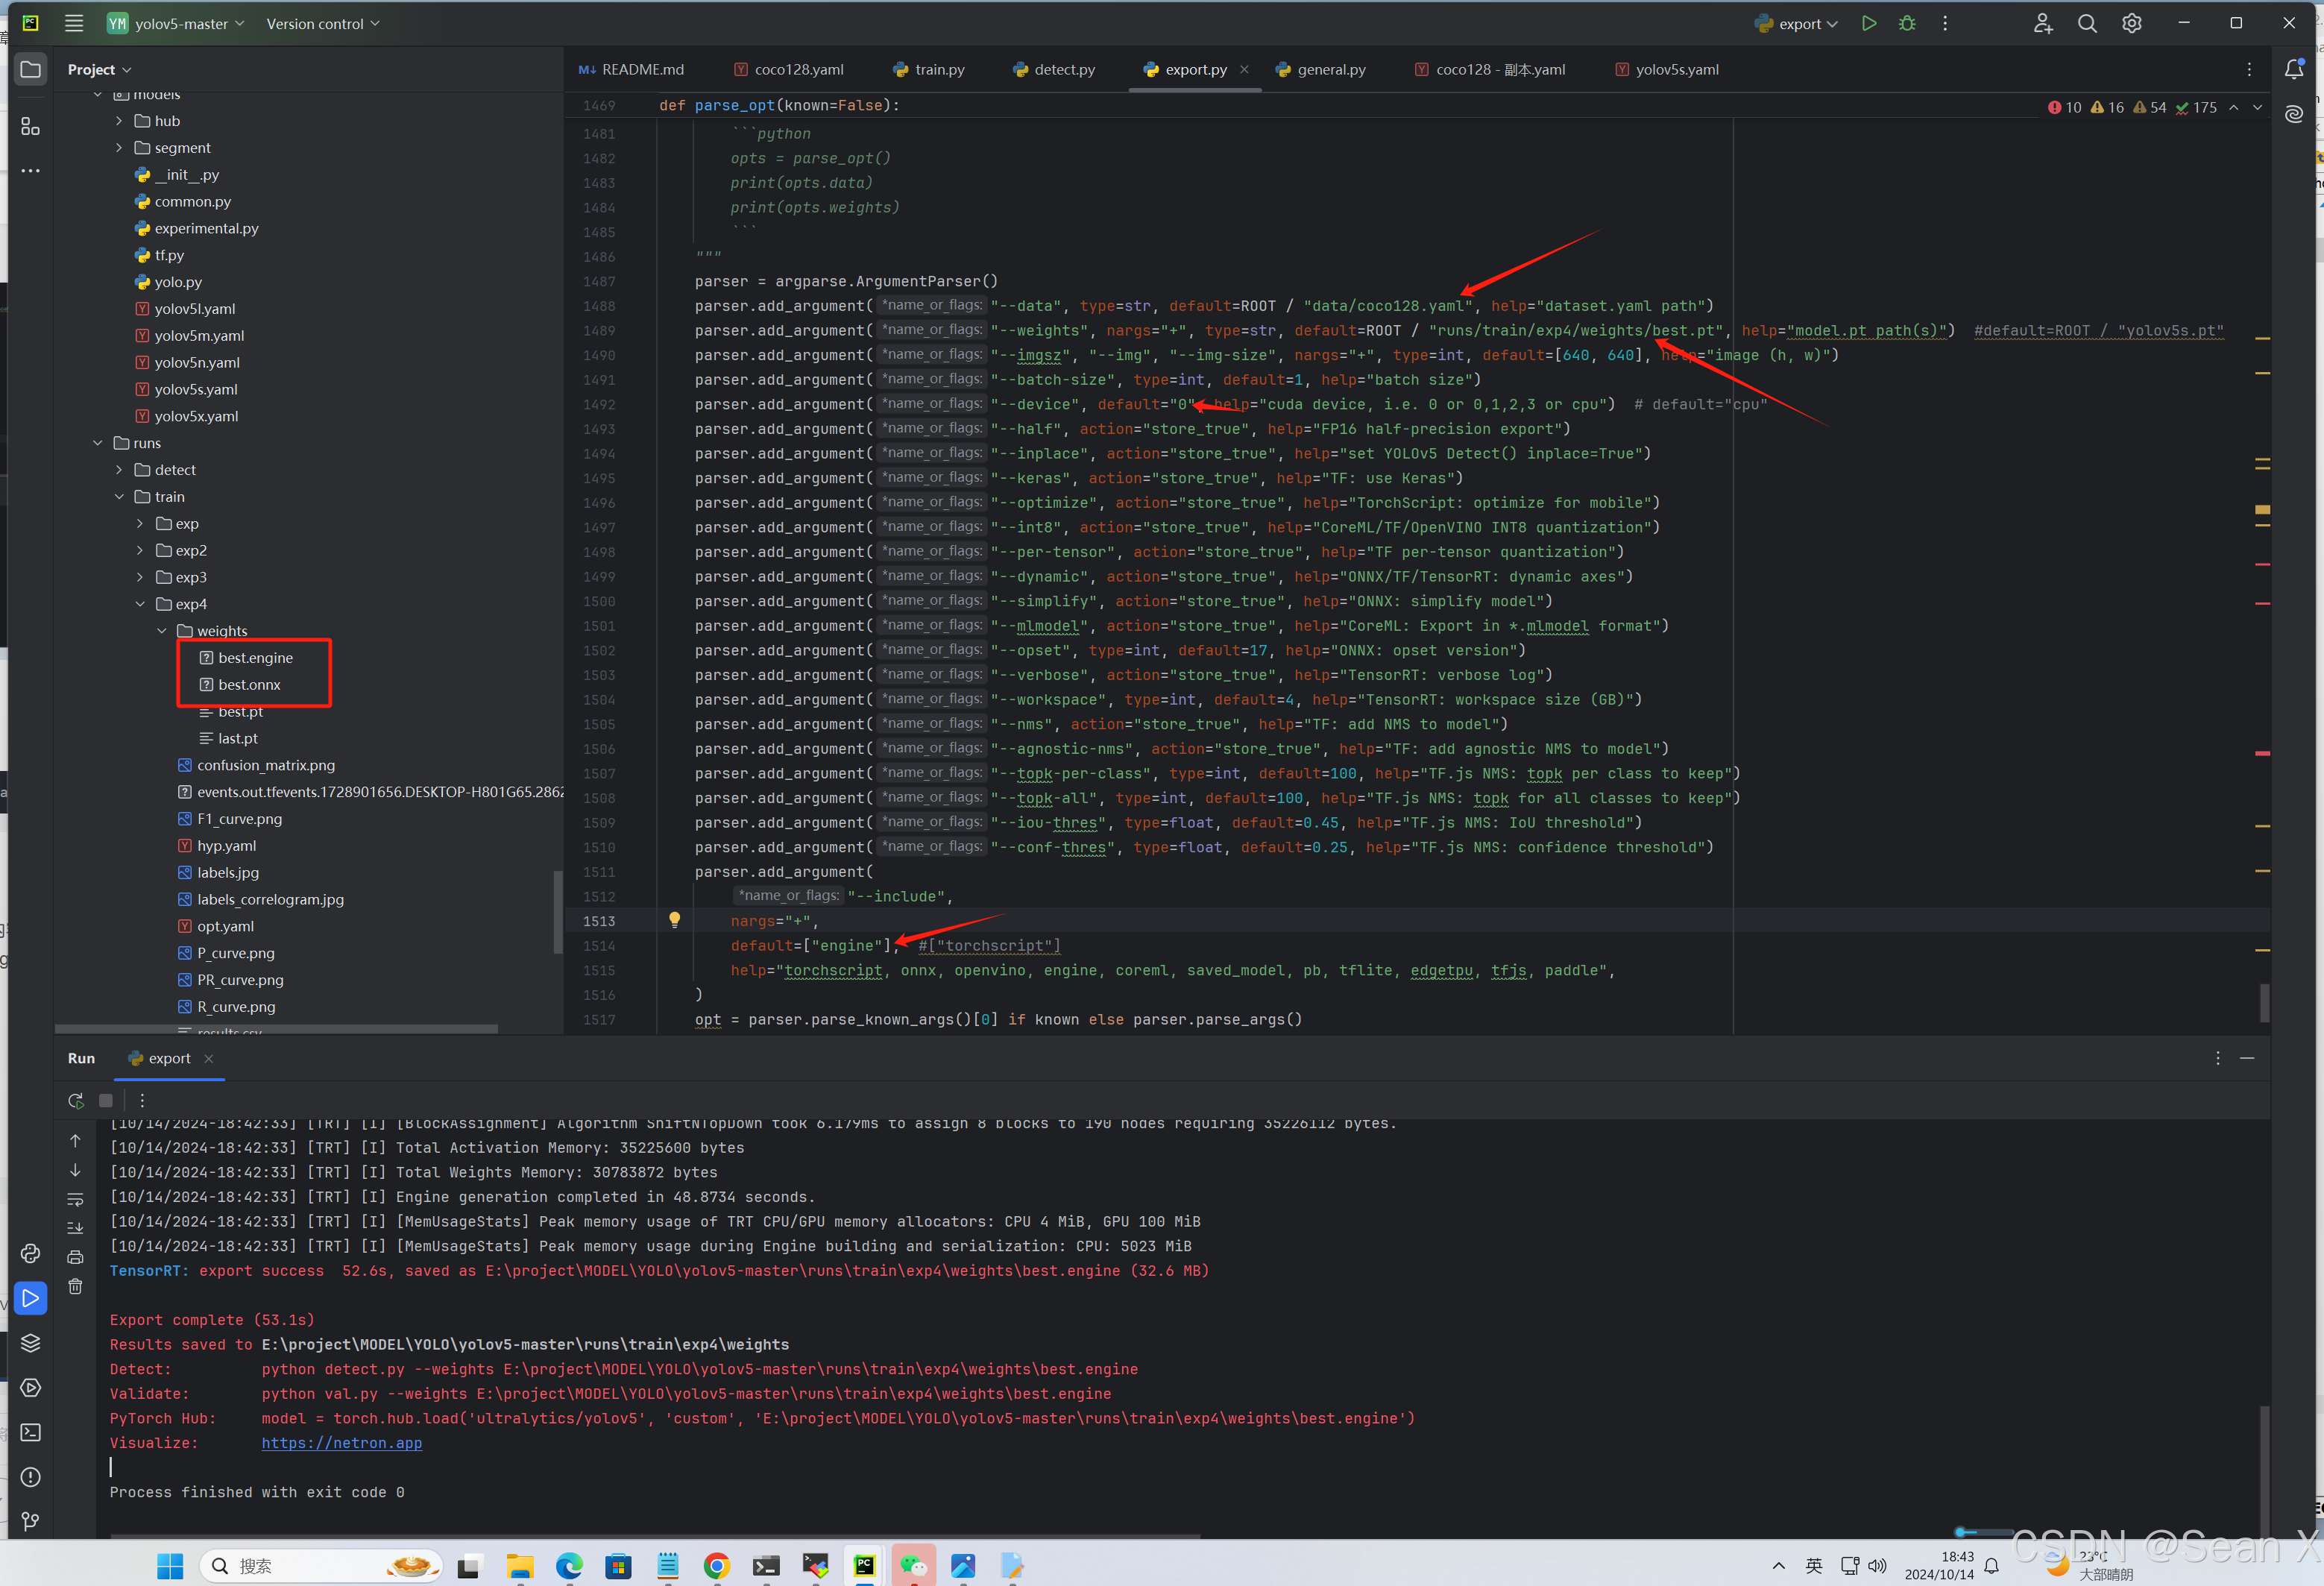
也可用指令导出:python export.py --weights runs/train/exp/weights/best.pt --data data/coco128.yaml --include engine
python
python export.py --weights runs/train/exp/weights/best.pt --data data/coco128.yaml --include engine --device 06、测试导出的tensorrt模型,就像测试best.pt一样
改E:\project\MODEL\YOLO\yolov5-master\detect.py路径下的箭头指出的内容
也可用指令测试:python detect.py --weights runstrain/exp/best.engine --source datasets/1first_0927/val/images --data data/coco128.yaml
python
python detect.py --weights runstrain/exp/best.engine --source datasets/1first_0927/val/images --data data/coco128.yaml