图像分割与人脸识别
众所周知图像是由若干有意义的像素组成的,图像分割作为计算机视觉的基础,对具有现有目标和较精确边界的图像进行分割,实现在图像像素级别上的分类任务。图像分割可分为语义分割和实例分割两类,区别如下:
-
语义分割:将图像中每个像素赋予一个类别标签,用不同的颜色来表示。例如能够区分人脸与头发、能够区分人与动物等
-
实例分割:无需对每个像素进行标记,只需要找到感兴趣物体的边缘轮廓。
图像分割通常应用如下所示:
-
专业检测:应用于专业场景的图像分析,比如在卫星图像中识别建筑、道路、森林,或在医学图像中定位病灶、测量面积等;
-
智能交通:识别道路信息,包括车道标记、交通标志等。
我们使用pixellib库来进行图像分割。
import time
from pixellib.instance import instance_segmentation
from pixellib.semantic import semantic_segmentationdef semantic_seg(inputfile, outputfile):
"""
对图像进行语义分割(semantic segmentation)Args: inputfile (string): 输入文件 outputfile (string): 输出文件 """ segment_image = semantic_segmentation() segment_image.load_pascalvoc_model(r"D:\test\deeplabv3_xception_tf_dim_ordering_tf_kernels.h5") start = time.time() segment_image.segmentAsPascalvoc(inputfile, output_image_name=outputfile,overlay = True) end = time.time() print(f"Inference Time: {end-start:.2f}seconds")def instance_seg(inputfile, outputfile):
"""
对图像进行实体分割Args: inputfile (string): 输入文件 outputfile (string): 输出文件 """ segment_image = instance_segmentation() segment_image.load_model(r"D:\test\mask_rcnn_coco.h5") start = time.time() segment_image.segmentImage(inputfile, output_image_name=outputfile,show_bboxes = True) end = time.time() print(f"Inference Time: {end-start:.2f}seconds")def test_semantic():
targetimage = r'd:\test\horseandman.png'
outimage = r'd:\test\semantic.png'
semantic_seg(targetimage,outimage)def test_instance():
targetimage = r'd:\test\food.jpg'
outputfile = r'd:\test\box.png'
instance_seg(targetimage,outputfile)test_semantic()
test_instance()
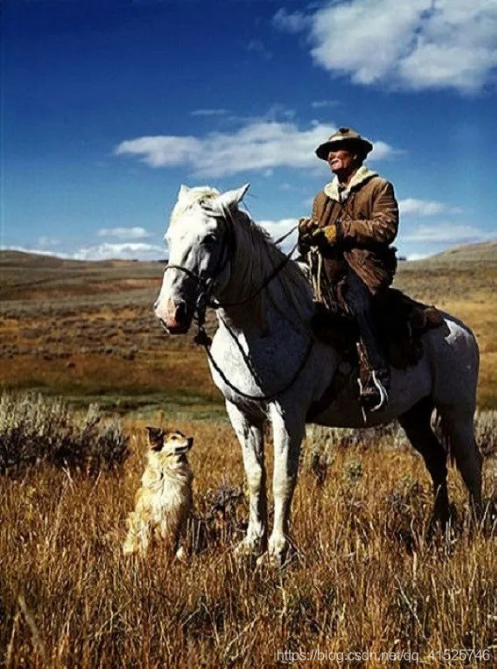
代码中,test_semantic函数进行语义分割的演示。其中horseandman.png如下图所示,是人、马、狗组合在一起的风景图,人类是可以理解的。
经过人工智能训练后的代码,进行语义分割后,形成的图像如下所示。
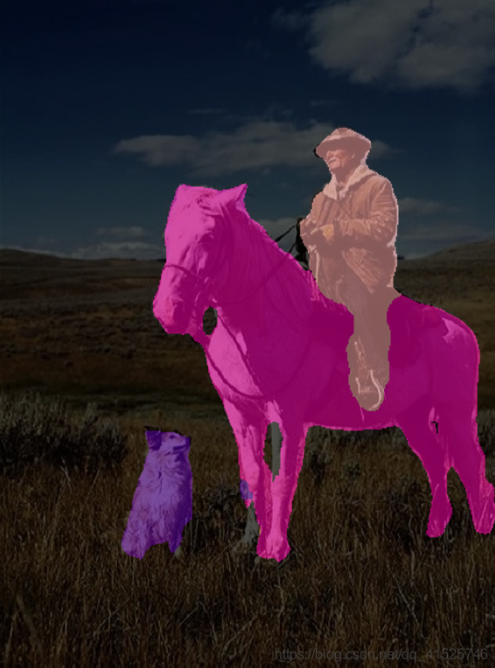
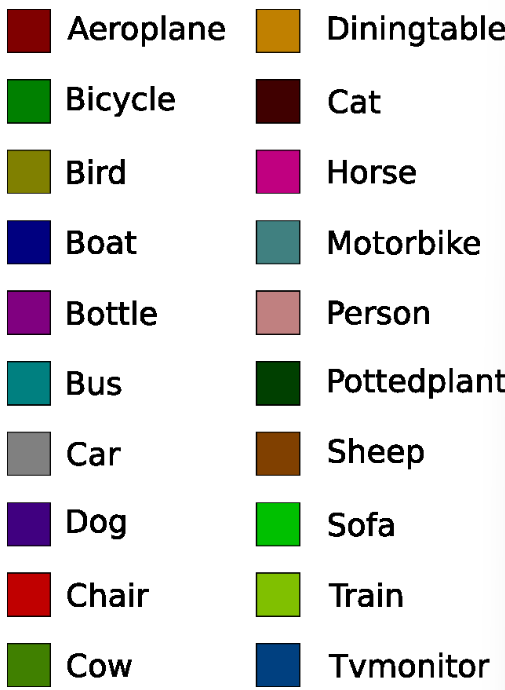
上图表明计算机也能够理解。因为输出结果中不同物体的颜色表明了模型识别出的类型。颜色示意如下图所示。
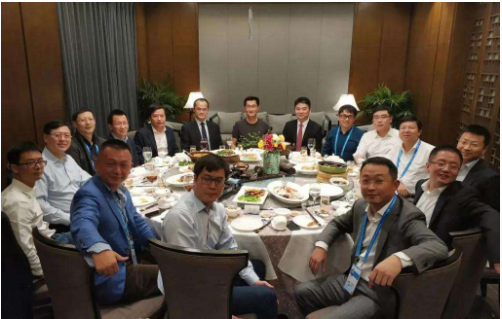
其中棕色代表人、鲜红代表马、紫色代表狗,形成了非常准确的判断。此外,函数test_instance使用模型能够对目标进行识别,并且使用矩形进行标注。下图是有名的互联网大佬聚餐图。
使用上述代码进行实体分割后的效果如下图所示。
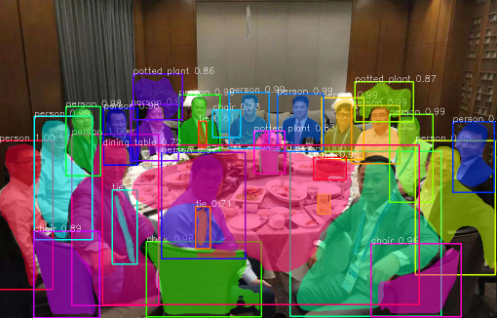
效果还差强人意,勉强可用。在上面的代码中,我们加载了在load_pascalvoc_model上训练的用于分割对象的xception模型以及Mask RCNN模型。由于以上模型较大,建议下载后本地化保存与部署。
在实际应用中,还存在着人脸识别的需求。以下代码借助第三方库face_recognition轻松实现了人脸识别的基本能力。
import face_recognition
import cv2
targetimage = r'd:\test\food.jpg'
# 加载待识别图片
image = face_recognition.load_image_file(targetimage)
face_location = face_recognition.face_locations(image,number_of_times_to_upsample=5, model='hog')
for location in face_location:
top, right, bottom, left = location
print("已检测到人脸部位,像素区域为:top:{}, right:{}. bottom:{}, left:{}".format(top, right, bottom, left))
start = (left, top)
end = (right, bottom)
cv2.rectangle(image, start, end, (0, 0, 255), thickness=2)
cv2.imshow("window", image)
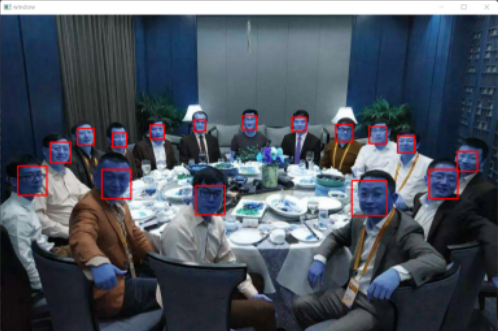
cv2.waitKey(0)依然使用前面的大佬聚餐图,通过上述代码可以很轻松地完成人脸识别,效果如下所示。
在face_locations函数中,可以选择'hog'与'cnn'两种模型。hog模型更快,cnn更精确。此外,number_of_times_to_upsample缺省为1,如果识别时效果不好,增加这个值。最后,将第三方库的安装过程列举如下。
pip install tensorflow==2.2.0
pip install pixellib
pip install face_recognition
tensorflow推荐安装2.2.0版本,否则上述代码可能跑不下来。