作者:CSDN-PleaSure乐事
欢迎大家阅读我的博客 希望大家喜欢
使用环境:AndroidStudio
目录
3.新建类ResultActivity并继承AppCompatActivity
5.修改MainActivity和ResultActivity代码
1.新建活动
新建一个工程LabActivityDataTransfer(也可以是你自己创建的活动),允许AndroidStudio帮我们自动创建活动,创建的活动名布局名为默认值(MainActivity和activity_main.xml)。
2.修改页面布局
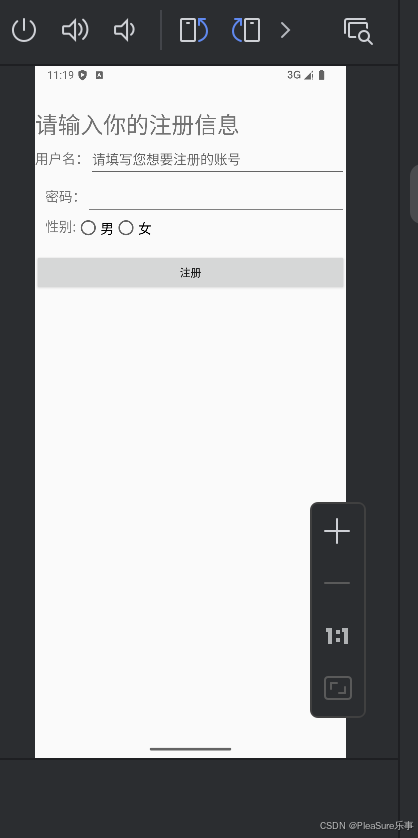
在activity_main.xml中我们可以修改页面布局,例如我们按照如下方法,就可以写出一个最基本的手机用户信息的界面:
代码:
java
<?xml version="1.0" encoding="utf-8"?>
<LinearLayout xmlns:android="http://schemas.android.com/apk/res/android"
    xmlns:app="http://schemas.android.com/apk/res-auto"
    xmlns:tools="http://schemas.android.com/tools"
    android:id="@+id/main"
    android:layout_width="match_parent"
    android:layout_height="match_parent"
    android:orientation="vertical"
    tools:context=".MainActivity"
    android:layout_marginTop="30dp">
    <TextView
        android:id="@+id/tx_1"
        android:layout_width="wrap_content"
        android:layout_height="wrap_content"
        android:text="请输入你的注册信息"
        android:textSize="30dp"
        />
    <LinearLayout
        android:layout_width="match_parent"
        android:layout_height="wrap_content"
        >
        <TextView
            android:id="@+id/tv2"
            android:layout_width="wrap_content"
            android:layout_height="50dp"
            android:text="用户名:"
            android:textSize="18sp"
            />

        <EditText
            android:id="@+id/name"
            android:layout_width="match_parent"
            android:layout_height="50dp"
            android:hint="请填写您想要注册的账号"
            android:textSize="18sp"
            />
    </LinearLayout>
    <LinearLayout
        android:layout_width="match_parent"
        android:layout_height="wrap_content"
        >
        <TextView
            android:id="@+id/tv1"
            android:layout_width="wrap_content"
            android:layout_height="50dp"
            android:text="   密码:"
            android:textSize="18sp"
            />

        <EditText
            android:id="@+id/password"
            android:layout_width="match_parent"
            android:layout_height="50dp"
            android:inputType="number"
            />
    </LinearLayout>
    <LinearLayout
        android:layout_width="wrap_content"
        android:layout_height="wrap_content"
        android:orientation="horizontal">
        <TextView
            android:id="@+id/tx_4"
            android:layout_width="match_parent"
            android:layout_height="50dp"
            android:text="   性别:"
            android:textSize="18sp"
            />
        <RadioGroup
            android:layout_width="match_parent"
            android:layout_height="wrap_content"
            android:orientation="horizontal"
            >
            <RadioButton
                android:id="@+id/male"
                android:layout_width="wrap_content"
                android:layout_height="wrap_content"
                android:text="男"
                android:textSize="18sp" />
            <RadioButton
                android:id="@+id/female"
                android:layout_width="wrap_content"
                android:layout_height="wrap_content"
                android:text="女"
                android:textSize="18sp" />
        </RadioGroup>
    </LinearLayout>
    <Button
        android:id="@+id/register"
        android:layout_width="match_parent"
        android:layout_height="50dp"
        android:text="注册" />
</LinearLayout>
效果:
3.新建类ResultActivity并继承AppCompatActivity
在ResultActivity当中,我们需要重写onCreate()方法,在其中加载布局activity_result。
4.新建布局文件activity_result.xml
新建布局文件activity_result.xml的目的是用来接收传来的数据,用TextView显示接收到的注册信息。
代码:
java
<?xml version="1.0" encoding="utf-8"?>
<LinearLayout xmlns:android="http://schemas.android.com/apk/res/android"
    android:layout_width="match_parent"
    android:layout_height="match_parent"
    android:orientation="vertical">
    <TextView
        android:id="@+id/textName"
        android:layout_width="wrap_content"
        android:layout_height="wrap_content"
        />
    <TextView
        android:id="@+id/textPasswd"
        android:layout_width="wrap_content"
        android:layout_height="wrap_content"
        />
    <TextView
    android:id="@+id/textGender"
    android:layout_width="wrap_content"
    android:layout_height="wrap_content"
        />
</LinearLayout>
随后在mainfest文件当中注册ResultActivity:
java
<activity android:name=".ResultActivity"></activity>5.修改MainActivity和ResultActivity代码
修改MainActivity中的代码,获取注册数据并保存到Bundle对象,将其放入Intent传递给下一个活动ResultActivity。
java
@Override
    protected void onCreate(Bundle savedInstanceState) {
        super.onCreate(savedInstanceState);
        EdgeToEdge.enable(this);
        setContentView(R.layout.activity_main);
        Button btn_reg=(Button)findViewById(R.id.register);
        btn_reg.setOnClickListener(new View.OnClickListener () {
            @Override
            public void onClick(View view) {
                EditText name =(EditText)findViewById(R.id.name);
                EditText passwd = (EditText)findViewById(R.id.password);
                RadioButton male = (RadioButton) findViewById(R.id.male);
                String gender = male.isChecked()?"男":"女";
                // 创建 Bundle 对象并添加数据
                Bundle bundle = new Bundle();
                bundle.putString("name", name.getText().toString());
                bundle.putString("password", passwd.getText().toString());
                bundle.putString("gender", gender);

                // 创建 Intent 并设置目标活动
                Intent intent = new Intent(MainActivity.this, ResultActivity.class);
                intent.putExtras(bundle); // 将 Bundle 放入 Intent

                // 启动 ResultActivity
                startActivity(intent);
            }
        });
        ViewCompat.setOnApplyWindowInsetsListener(findViewById(R.id.main), (v, insets) -> {
            Insets systemBars = insets.getInsets(WindowInsetsCompat.Type.systemBars());
            v.setPadding(systemBars.left, systemBars.top, systemBars.right, systemBars.bottom);
            return insets;
        });
    }
随后ResultActivity代码,在onCreate()方法中获取注册数据并显示。
java
@Override
protected void onCreate(@Nullable Bundle savedInstanceState) {
super.onCreate(savedInstanceState);
setContentView(R.layout.activity_result);
Bundle bundle = getIntent().getExtras();
if (bundle != null) {
// 从 Bundle 中获取数据
String name = bundle.getString("name");
String password = bundle.getString("password");
String gender = bundle.getString("gender");
// 找到布局中的 TextView
TextView textName = findViewById(R.id.textName);
TextView textPassword = findViewById(R.id.textPasswd);
TextView textGender = findViewById(R.id.textGender);
// 设置数据到 TextView
if (textName != null) {
textName.setText(name);
}
if (textPassword != null) {
textPassword.setText(password);
}
if (textGender != null) {
textGender.setText(gender);
}
}
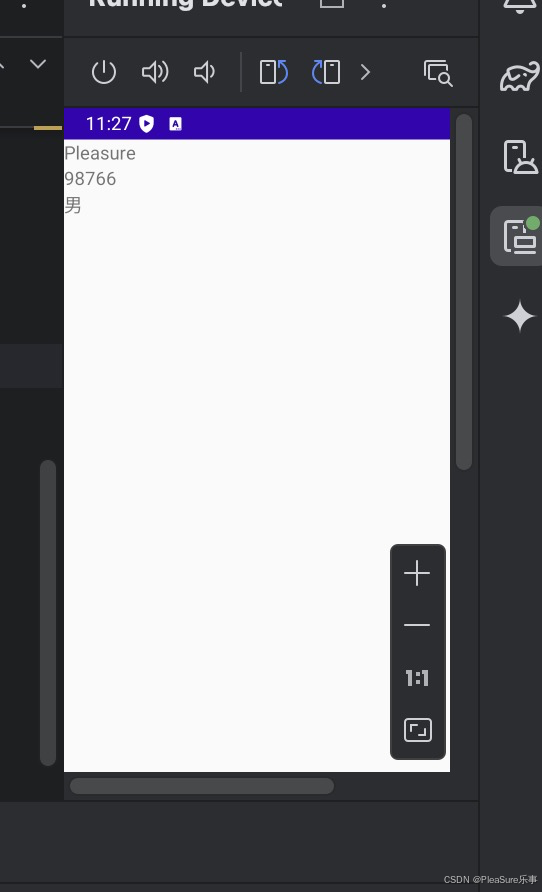
}这样也就完成了数据传递。
6.最终效果展示
7.注意点
我们在本次试验中一定要注意数据的接收等,同时要保证对各个ID的设置,避免混淆等情况的出现。最开始博主就是ID各种设错导致数据没有正常传递。
同时我们使用liner线性布局的时候要注意横向和纵向的区别。最开始博主不小心把纵向的设置为横向了,导致最后数据显示已经有了,当时被挤到屏幕外了,一度非常尴尬。
作者:CSDN-PleaSure乐事
希望我的博客对您有帮助,也希望在对您有帮助时您可以为我留下点赞收藏与关注,这对我真的很重要,谢谢!